For this assignment, our task was to create a musical instrument using Arduino (involving at least one digital and one analog sensor).
Inspiration
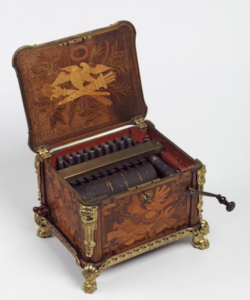
While initially brainstorming ideas for this project I thought a lot about conventional musical instruments (like the piano and guitar) and about recreating them in some way. But in the end, I decided that I wanted to do something more personal and unique. I suddenly remembered how I’ve always loved music boxes (since I was a kid) and found them really cute. If you don’t know what a music box is, it’s basically a small, nicely decorated box that plays music when you open it. Many of them also involve twisting a handle multiple times in order to get the music to play. Also, the resulting music is usually just a soft and soothing instrumental song.
So, for this project, we decided to make a simple version of a music box!
Concept
The basic concept of this project is that the music box will play music when exposed to light and pause when it’s dark. To achieve this, we used a photoresistor as the analog sensor to detect light and a button as the digital sensor to be able to switch between songs. For simplicity, we used three tracks that keep rotating among each other every time the button is pressed.
Implementation
Components and Setup
To bring this vision to life, we used:
- Adafruit Arduino Music Maker Shield: This allows us to play music files from an SD card, controlled via the Arduino. By downloading the corresponding library and integrating the shield on the Arduino, we ensured smooth playback of direct mp3 files.
- Speaker Attachment: We initially thought we could use a buzzer, but we realized it produced a harsh, mechanical sound that didn’t match our desired soothing effect. We then switched to a consumable speaker from the IM lab, which provided a richer and more pleasant sound. We connected the speaker to the Music Maker Shield for optimal sound quality.
- Circuit with Photoresistor: We programmed the photoresistor to detect light levels, pausing music playback when it’s dark and resuming when light is detected.
- Push Button: We added a push button to switch between multiple music files, allowing users to vary their listening experience.
- Prototyping Shield and Battery: To make the setup compact enough to fit inside the box, we transitioned from a breadboard to a prototyping shield. Adding a battery also made the setup portable, enhancing usability.
Crafting the Wooden Box
Since traditional music boxes are often crafted from wood, we decided to make an elegant wooden enclosure for the circuit. We sourced templates for the box online and used a laser cutter (with the help of lab assistants of course) to neatly cut the different pieces of the box, which could then be glued together to create a polished exterior.
After a few rounds of trial and error with different templates, we arrived at a design that worked well for housing the components. To personalize it further, we designed a music-themed engraving for the top using Adobe Illustrator and laser-cut the design, adding a refined aesthetic touch.
Code
Here’s some of the code that’s responsible for switching between songs:
// Check if button was pressed
  int buttonState = digitalRead(buttonPin);
  Serial.println(buttonState); // Prints the button state for debugging
  Serial.println(songs[songIndex]);

  if (buttonState == 1 && lastButtonState == 0) {  // Button press detected
    // musicPlayer.pausePlaying(true);
    musicPlayer.stopPlaying();
    delay(50);  // Debounce delay
    songIndex = (songIndex + 1) % 3;  // Move to the next song in the array
    musicPlayer.startPlayingFile(songs[songIndex]);  // Play the next song
    // Serial.println(songs[songIndex]);

  }
  lastButtonState = buttonState;

  // File is playing in the background
  if (musicPlayer.stopped()) {
    musicPlayer.startPlayingFile(songs[songIndex]);
  }
Challenges
One major challenge was achieving the desired sound quality. As tested in class, the initial buzzer didn’t deliver the calm, melodic experience we wanted, so switching to a consumable speaker improved the overall audio quality. We occasionally encountered malfunctions, likely due to wiring or compatibility issues with the speaker, and are continuing to troubleshoot these.
Final Assembly
After laser-cutting the box and engraving the design, we assembled all the components inside. The transition from breadboard to prototyping shield and the compact battery setup allowed everything to fit neatly within the box.
Reflections and Further Improvements
In the end, we were pretty happy with the modernized feel of the music box that combines traditional charm with interactive technology. By responding to light, the music box offers a unique, customizable listening experience that blends classic design with new-age tech.
Further improvements could include adding more sound files and testing different speakers to improve sound quality. We could even attempt to make it like a traditional music box with a rotating handle on the side and maybe even some visual rotating elements.

