
Concept:
For my first Arduino assignment, I had to create an LED light switch that worked without any direct contact with the hands. I got the idea of creating one that does not need direct contact with any part of the body, so no contact at all. I was interested in the sensor function when we were introduced to the kit, so I chose to experiment with it and see if I could create a switch using a motion sensor.
My switch almost works like a distance-check system: when any motion is detected close to the sensor, 10 cm or less, the green light turns on, almost as if it is in the perfect position. When motion is detected farther from the sensor, more than 10 cm, the red light turns on, signaling that it is too far away from the sensor. Although there is no physical contact, the ultrasonic sensor acts as a switch by detecting distance and controlling whether the circuit behaves as open or closed.
This idea brings to mind different real-world applications, such as mall parking lots, where you see a red light on top if a space is occupied and green if the parking spot is empty.
Link to Code:
Demonstration:
Setup:
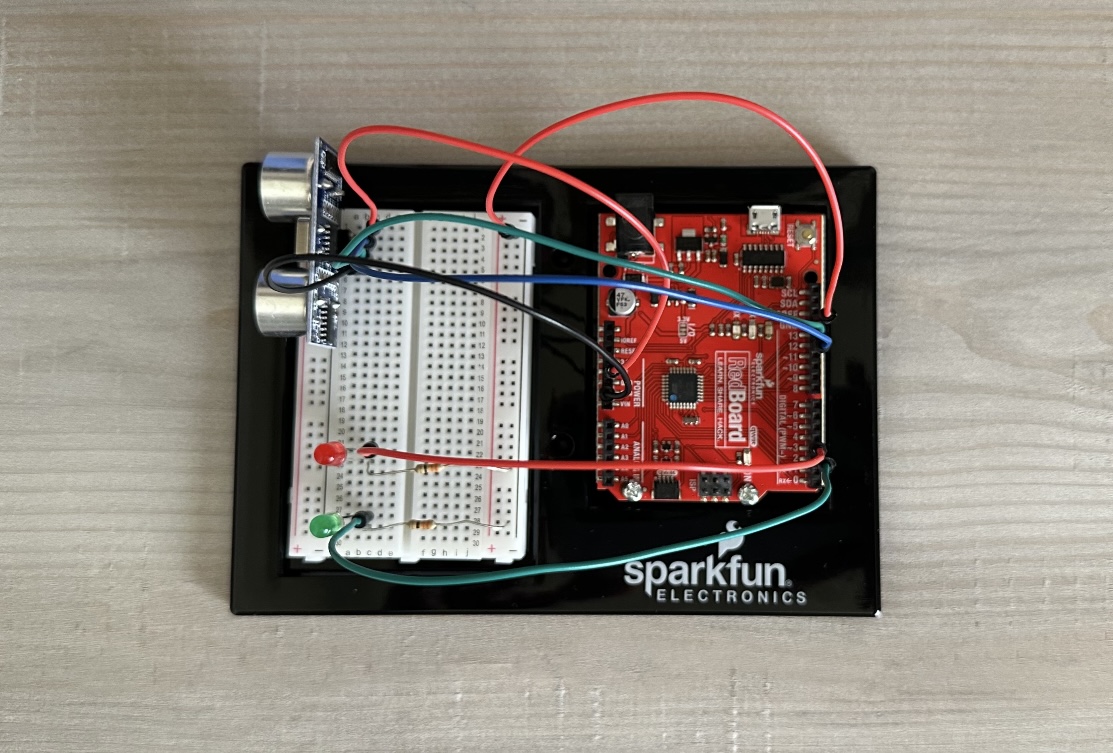
For the Arduino setup, I started by placing the sensor and connecting four wires, each aligned with one of its pins. The red wire connects to 5 volts, the black to ground, and the blue and green wires are assigned to numbers to trigger and receive the echo pulse for the lights. Then I placed the two LEDs, with a wire of the same color aligned with one pin, which connects to an assigned Arduino pin, and a 330 ohm resistor aligned with the other pin. I then added a red wire that connects the negative side to the ground, and on that same row, I placed one side of both resistors.
Code:
My code, in general, is straightforward. I assign variables, and the code is designed to know when to accept and receive inputs and outputs. All explanations are included directly in the code itself.
One part of the code I found particularly important is using digitalWrite with LOW to ensure that the lights turn off when they are not called by the commands. Without this, the lights would stay on the whole time, no matter where I placed my hand, since the program wasn’t being instructed to turn them off again.
digitalWrite(trigPin,HIGH); // Send pulse to trigger sensor
delay(1000); // One second delay to trigger sensor
digitalWrite(trigPin,LOW); // End trigger pulse

digitalWrite(led1,LOW); // Return green light to initial state before going into if else condition
digitalWrite(led2,LOW); // Return red light to initial state before going into if else condition
Additionally, the if-else statement is the most crucial part, as it tells the lights when to turn on and off based on the distance. I can also adjust it to suit whatever distances and measurements I want.
if (distance<=10){
  digitalWrite(led1, HIGH); // If distance from sensor is equal or less than 10 cm, green light on
}
else if (distance>10){
  digitalWrite(led2, HIGH); // If distance is more than 10 cm, light up led 2, red light on
}
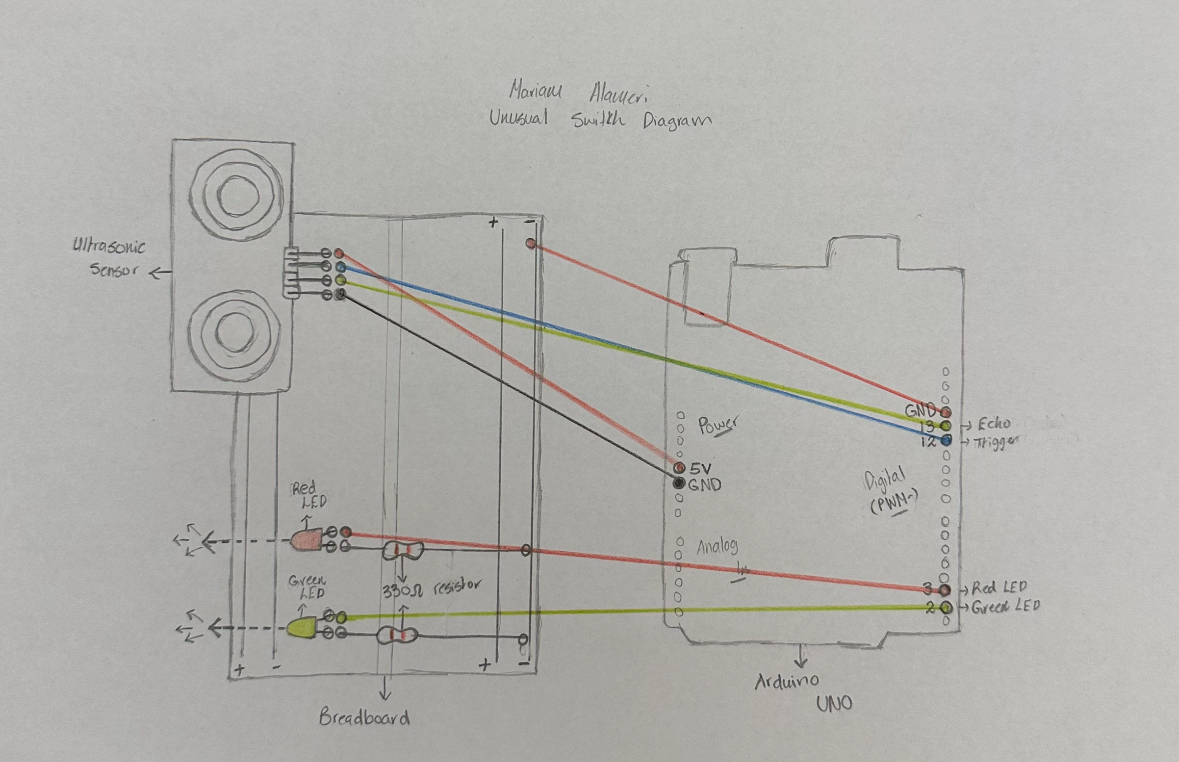
Diagram:
Reflection:
Overall, I am satisfied with my work on this first assignment. Before starting, I was really overwhelmed and thought I would struggle a lot to make it work. However, as soon as I began understanding what each wire and piece of code does, I started to actually enjoy it and had fun experimenting with different colors.
I did get a little confused during the wiring process because of all the colors of the wires. The sensor and LEDs were placed on opposite sides from their wires, so I moved them, and everything made more sense, both on the board and in the code.
For future improvements, I feel like I could add more LEDs at different distances, or even make it more advanced. For example, instead of sensing simple hand waves, it could sense a specific area of walking.
References:
I first went over the class slides to recap what we learned, and I also reviewed parts of the Zoom recording for guidance on plugging in and uploading code.
I found a tutorial on using a motion sensor, which I followed along with, making sure I understood every step and the code needed to make it work:
https://youtu.be/7zPbEEPAwQA?si=mkxxcjrJ8M2CU19C
I also used links to specific code references on the official Arduino website to recap what each function does:
https://docs.arduino.cc/language-reference/en/functions/digital-io/pinMode/
https://docs.arduino.cc/language-reference/en/functions/digital-io/pinMode/
https://docs.arduino.cc/language-reference/en/functions/advanced-io/pulseIn/