
Concept:
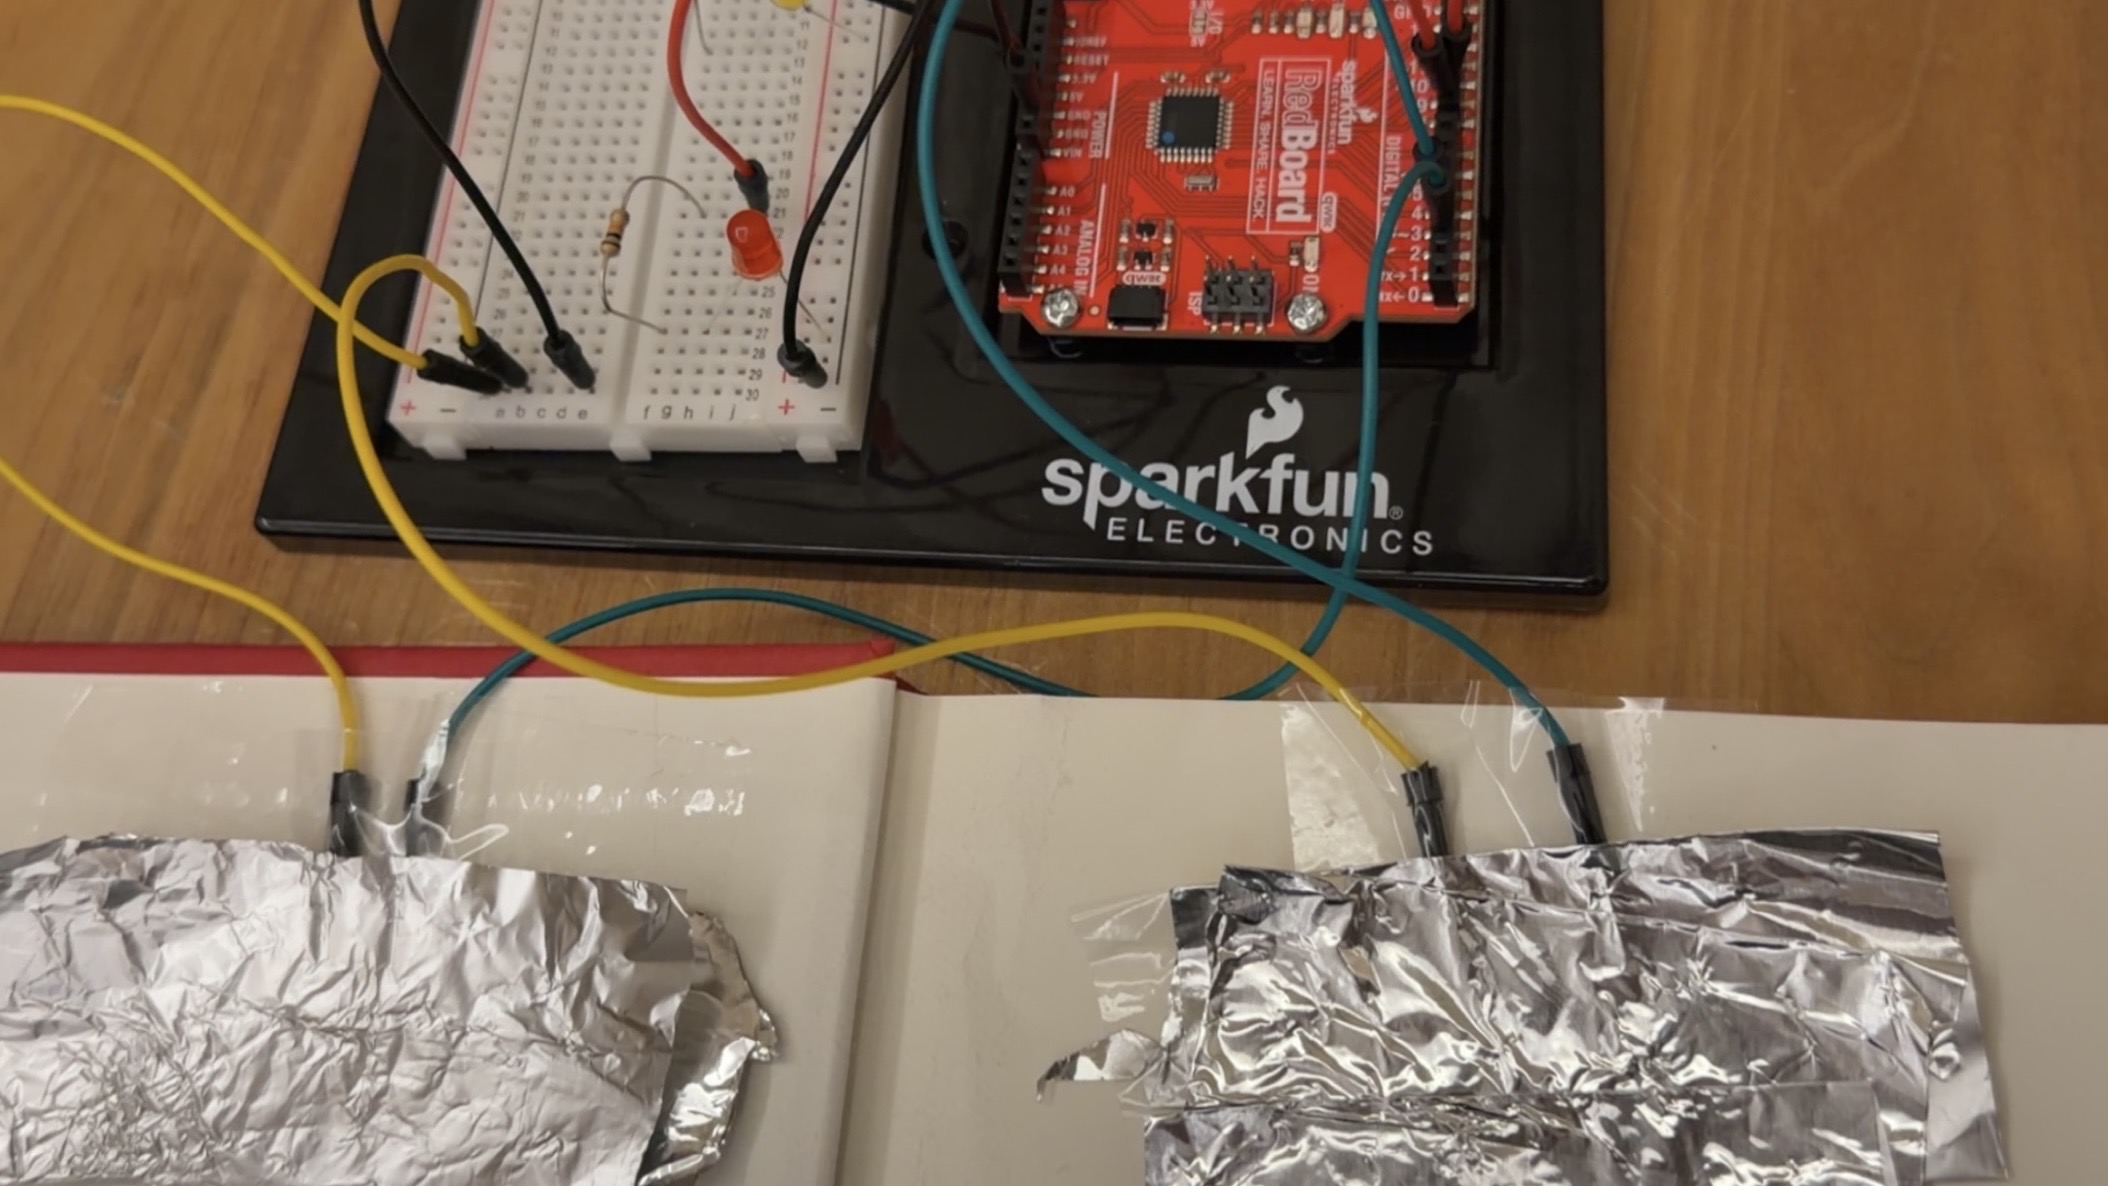
For this project, I designed a hands free switch instead of using hands, the interaction is activated by stepping on conductive foil placed inside a spare book I had. I used two separate foil areas to create two independent switches. Stepping on the left side triggers the red LED, while stepping on the right side triggers the yellow LED. Each LED has a different blinking pattern, with the red LED blinking faster and the yellow LED blinking slower. This creates a clear distinction between the two inputs. I was able to open and close a circuit without traditional interaction methods. By shifting control from hands to feet, the switch becomes more unusual and interactive.
How is works:
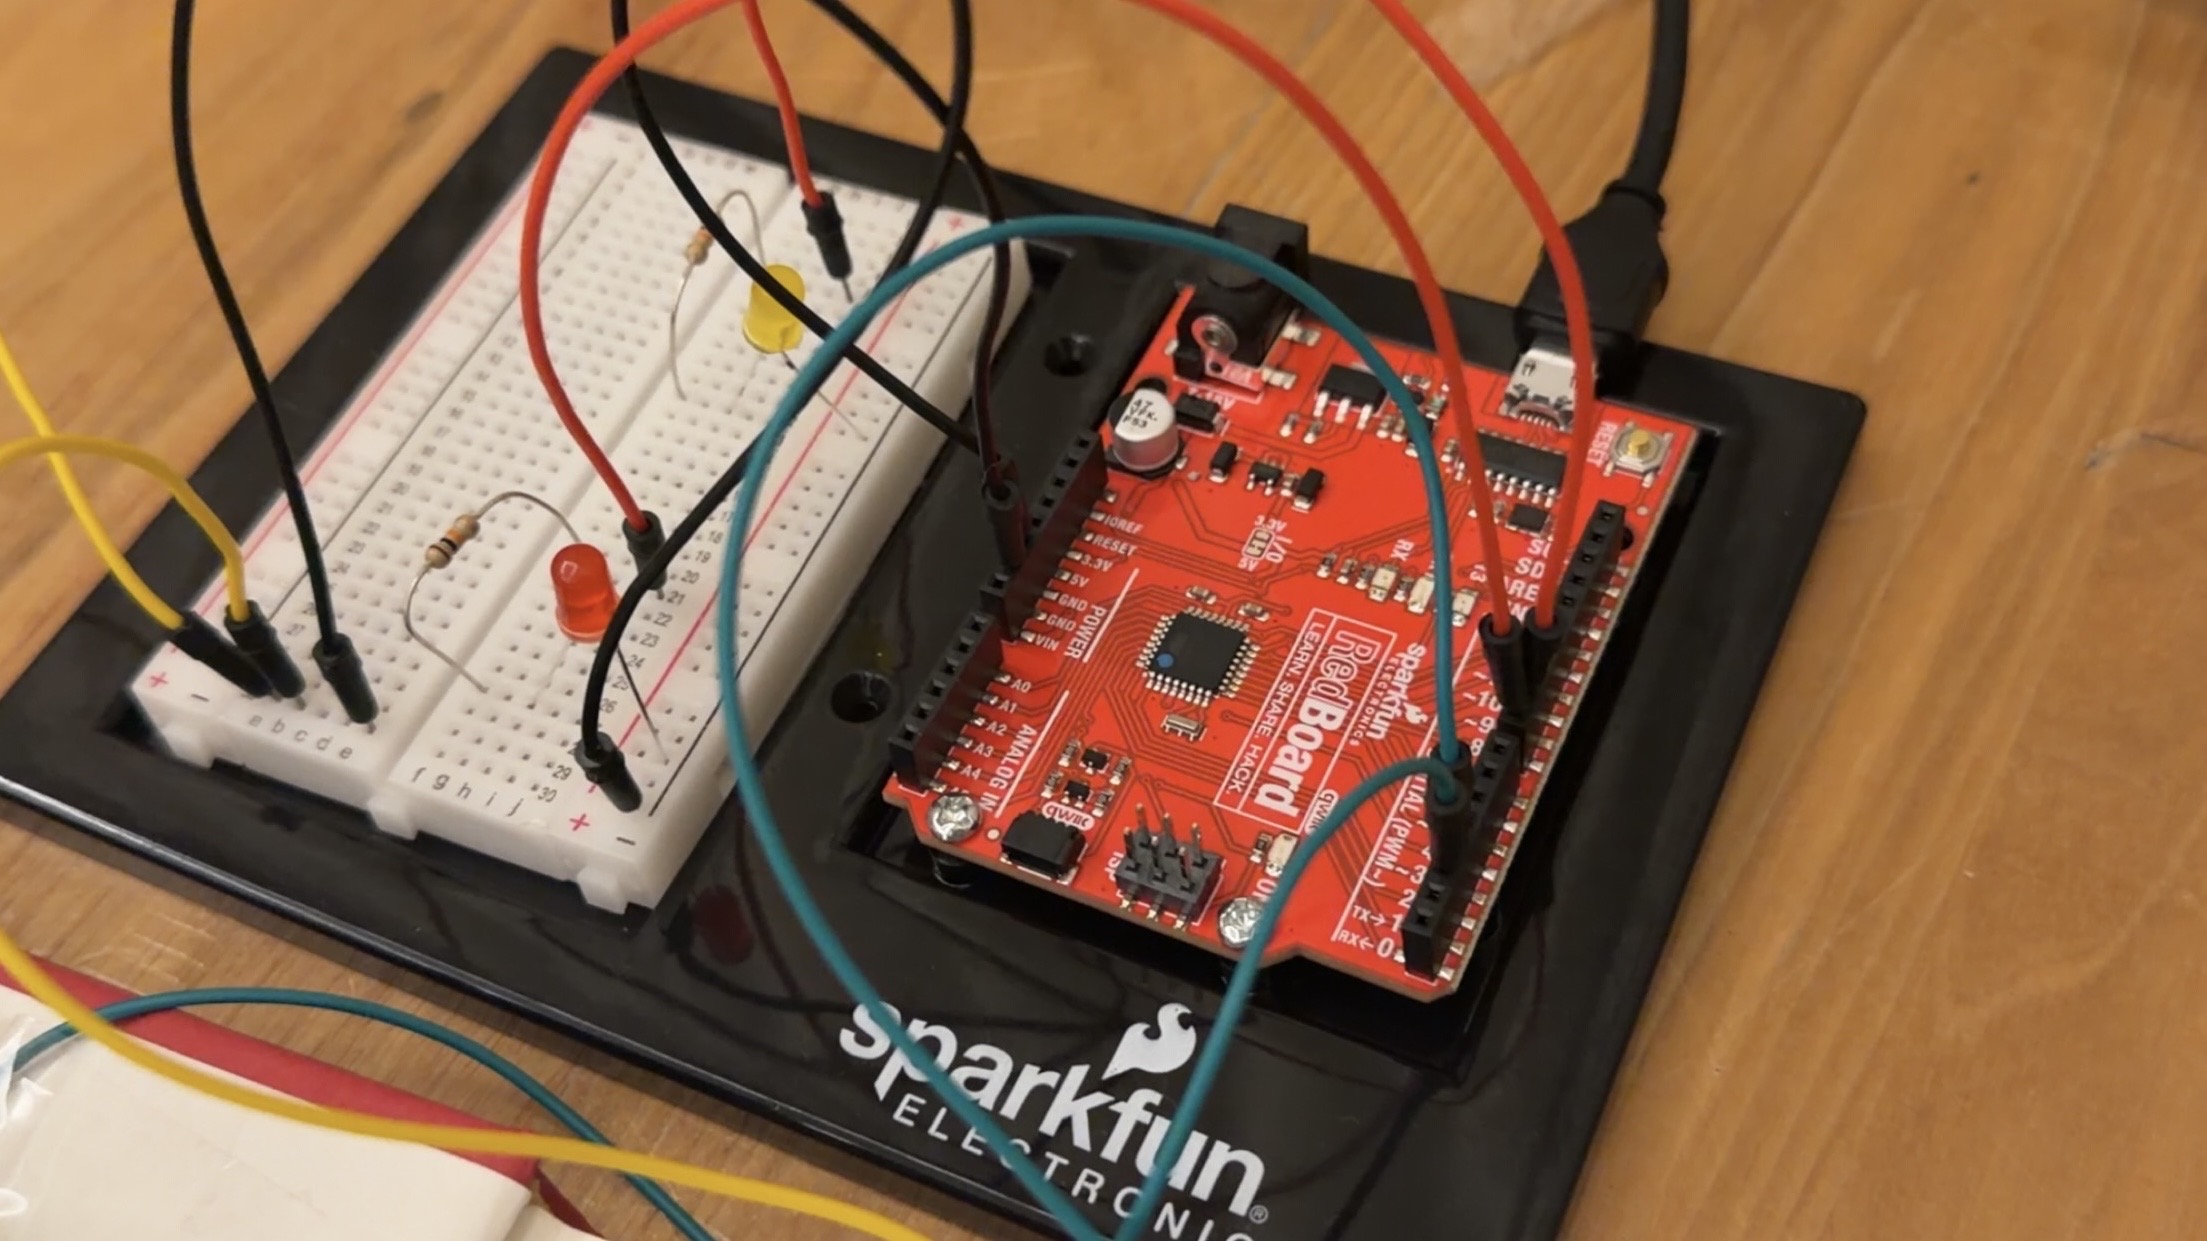
Each foil is connected to a digital input pin and configured with INPUT_PULLUP, which means the default state is HIGH. When the foil is not being touched, the circuit remains open and the input reads HIGH. When a person steps on the foil, their body helps complete the circuit by connecting the foil to ground (GND). This changes the input from HIGH to LOW. The Arduino detects this change and uses it to control the LEDs.
Each foil controls a different LED.Stepping on the left foil triggers the red LED connected to pin 8 Stepping on the right foil triggers the yellow
LED connected to pin 9. The LEDs are programmed with different blinking patterns using delay (). The red LED uses a shorter delay, causing it to blink faster, while the yellow LED uses a longer delay, making it blink slower. These different delay values create distinct visual responses for each input. Overall, the Arduino continuously reads the state of each foil switch and updates the LEDs in real time based on whether the input is HIGH (off) or LOW (activated).
Code Snippet:
Code I’m proud of:
  // LED 1 blinking pattern
  if (state1 == LOW) { // touching foil 1
    digitalWrite(led1, HIGH);// LED on
    delay(300);   //faster blink
    digitalWrite(led1, LOW); //LED off
    delay(300);
  } else {
    digitalWrite(led1, LOW);// Keep off when not touched
  }

  // LED 2 different blinking pattern
  if (state2 == LOW) { // touching foil 2
    digitalWrite(led2, HIGH); // on when touched
    delay(1000);  // slower blink
    digitalWrite(led2, LOW); //LED off
    delay(2000);
  } else {
    digitalWrite(led2, LOW); // :LED off
  }
}
The part of the code I am most proud of is the if statement that controls each LED. Initially, I programmed both LEDs to behave the same way, but I wanted to experiment more and make the interaction more interesting. I adjusted the delay times so that each LED has a different blinking pattern, with one blinking faster and the other slower. Through this process, I was able to better understand how if statements work in Arduino. I learned how the program checks the input state and decides whether to turn each LED on or off. This helped me see how simple logic can control different outputs and create variation in behavior.
Photos:
Video: IMG_9764
Arduino Setup:
Reflection:
This was my first time working with Arduino for a project independently, so it was really interesting to learn how digital pins function and how they can be used to control different parts of a circuit. One thing I found especially interesting was realizing that I could create two separate circuits within the same setup, where each foil input controlled a different LED. I also learned how the physical components and the code are connected. The foil acts as an input, which is read by the Arduino, and then the code determines how the LEDs respond through the breadboard. Seeing how a physical action, like stepping on the foil, could travel through the circuit and be translated into a digital response helped me better understand how hardware and software work together. Overall, this project helped me build confidence in using Arduino and understand how combing hardware and software can help create interactive elements.
References:
For INPUTPULLUP and genral code concept to understand more:
https://docs.arduino.cc/tutorials/generic/digital-input-pullup/
Tin foil and how to connect it to setup:
Materials used:
Old book, Tape, Tin Foil, Materials from Kit.