
Arduino Set-up:

Arduino Illustration:
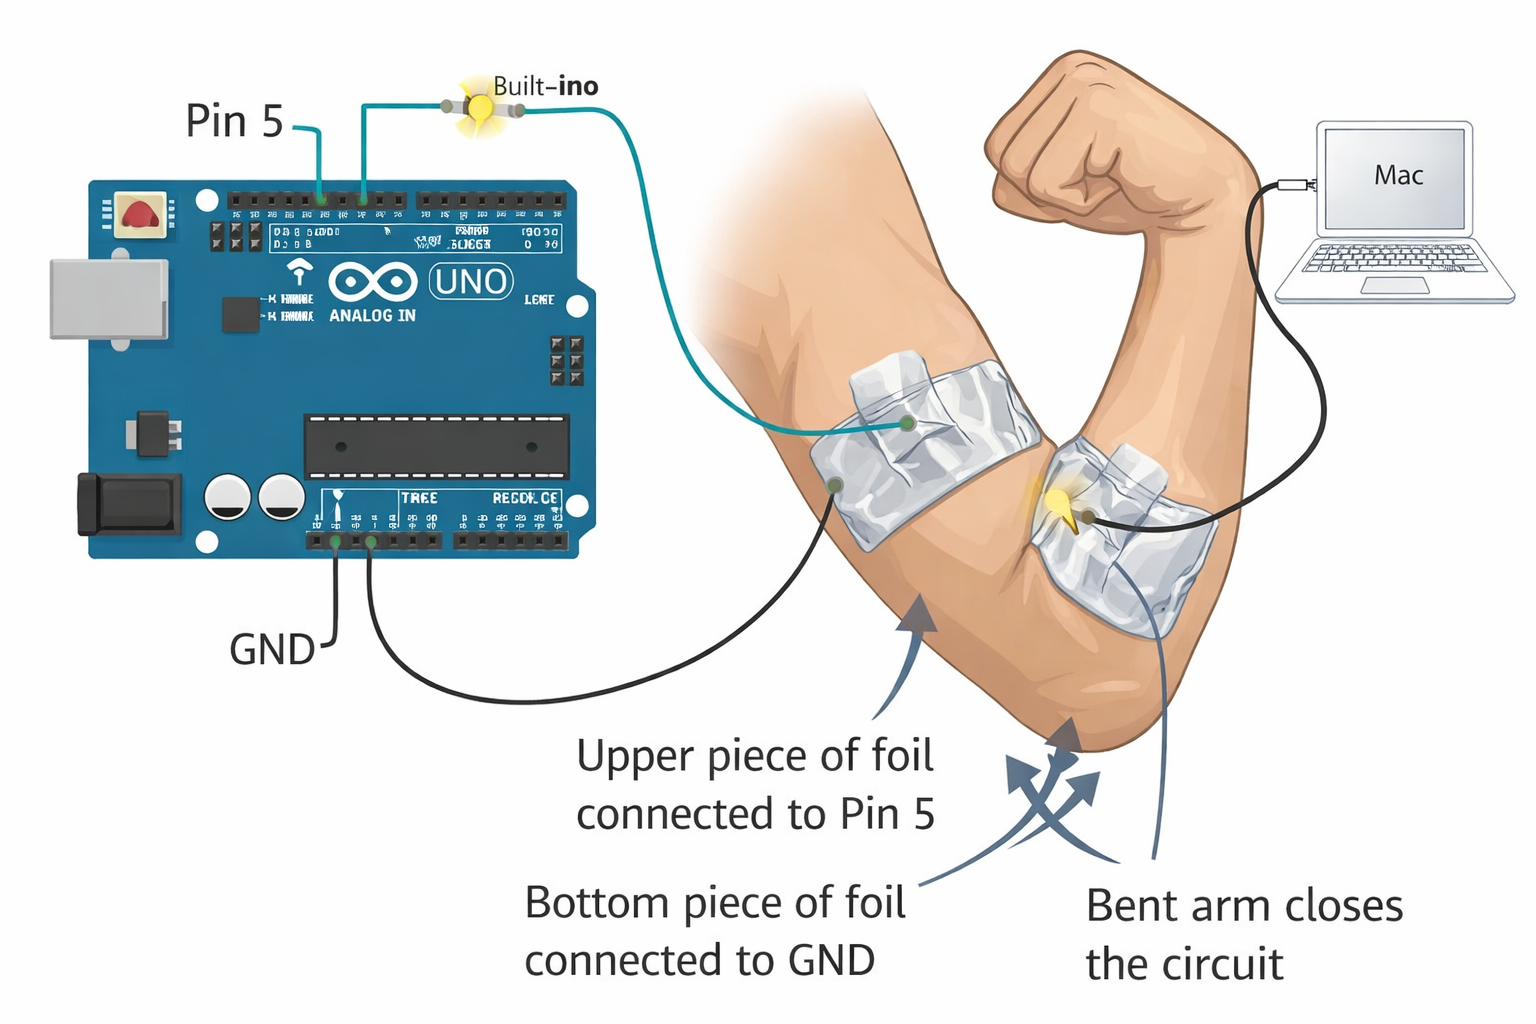
Project Demo:
Concept
For this project, I wanted to create a switch that isn’t like a traditional button. Instead of pressing something with my fingers, I used my body as the interaction. I ended up designing a switch using my elbow.
The idea is simple. I placed two pieces of aluminum foil on both sides of my inner elbow. One piece is connected to pin 5, and the other is connected to ground. When my arm is straight, the two pieces of foil don’t touch, so the circuit is open and the LED stays off. When I bend my arm, the skin folds slightly and the two pieces of foil press together, turning the LED on.
Code Snippet I’m Proud Of
const int switchPin = 5;

void setup() {
  pinMode(switchPin, INPUT_PULLUP);
  pinMode(LED_BUILTIN, OUTPUT);
}

void loop() {
  int state = digitalRead(switchPin);

  if (state == LOW) {
    digitalWrite(LED_BUILTIN, HIGH);
  } else {
    digitalWrite(LED_BUILTIN, LOW);
  }
}
This part looks simple, but it took me a while to understand why it works. Using INPUT_PULLUP was the key because it keeps the input stable when nothing is touching it and flips to LOW when the foil is touched, connecting the pin to ground. Once I understood that LOW actually means pressed, everything started to make sense to me.
Problems Encountered
The biggest issue I had was that the LED kept blinking randomly, even when I wasn’t touching anything. At first, I thought my wiring was wrong, but the problem was actually the input pin floating. Without INPUT_PULLUP, the Arduino couldn’t decide whether the input was HIGH or LOW, so it kept switching between them.
Another problem was the foil itself. I initially wrapped the foil around the wires, which caused constant and unstable connections. This made the LED either stay on or flicker all the time. I had to learn to keep the foil flat and only tape the wire at one edge.
I also got confused by the lights on the board. I kept looking at the green power light instead of the LED connected to pin 13, which made debugging way harder than it needed to be.
Reflection
This project was definitely frustrating at first, but it helped me understand how circuits actually work. Before this, I didn’t fully understand how important small details are, like which row you use on a breadboard or how stable a connection needs to be.
If I were to improve this project, I would make the foil setup more durable, neater, and less sensitive to unintentional contact. It works now, but it can definitely be cleaner and more organized.
Overall, I feel like I for sure moved from just following instructions to actually understanding what I’m building, and I’m really proud of myself.