
Embedded Sketch
Concept
Have you ever wanted to take a picture with a celebrity, but without the impossible chances of actually meeting one?That is basically the fantasy world Madame Digital captures!
My midterm project is basically inspired by the whole wax museum experience, but I wanted to turn it into something more personal and interactive instead of just something you look at. Instead of walking around and seeing celebrity figures from a distance, the user actually gets to choose a celebrity and then step into a digital photobooth with them. Once you pick who you want, the webcam turns on and you see yourself on screen next to the celebrity, almost like you’re actually standing there together. You can adjust yourself in the frame, see a live mirrored preview, and then take a photo that combines both of you into one image. The final result is like a little souvenir picture you can save, which was important to me because I wanted it to feel like you’re taking something away from the experience, not just clicking through it. I really liked the idea of taking something that normally exists in a physical place and turning it into something accessible on your screen, but still keeping that same excitement.
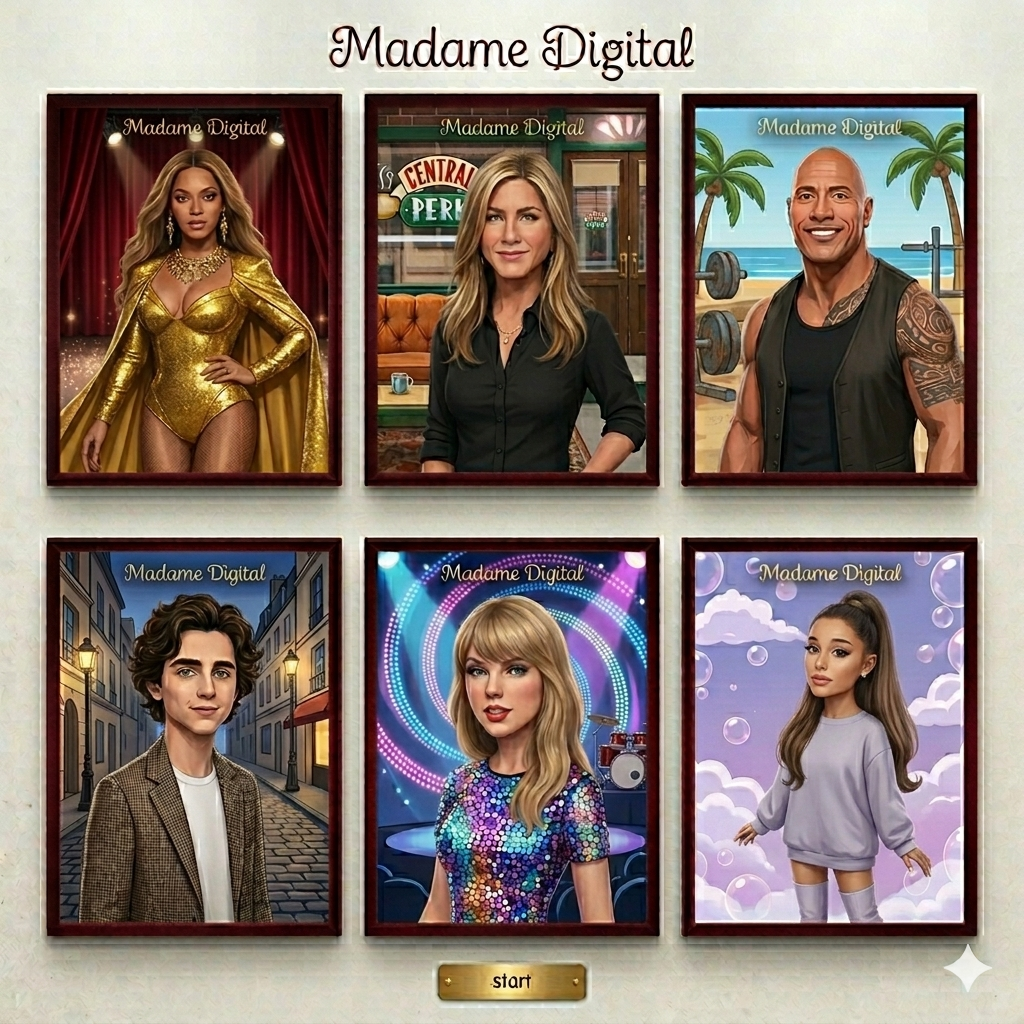
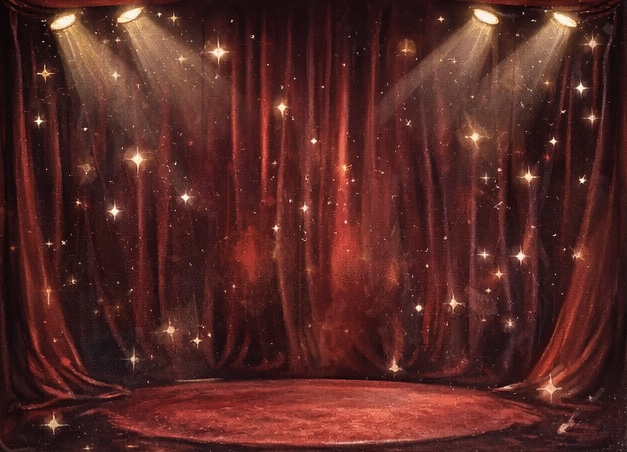
At the same time, I did not want it to feel like just another random app with buttons. I wanted it to feel like entering a space. Something a little theatrical, and a little staged in the best way possible. That is why I leaned into the red curtain background, gold touches, framed celebrity cards, and a series of screens that slowly guide the user through the experience, really giving them the museum vibe. The point of my project was not to try to be realistic. If anything, its charm comes from how intentionally artificial it is, just like a wax museum. Even though the whole thing is obviously digital and staged, the user still gets to walk away with a “memory.” That is what made the concept feel fun to me from the start, and that is what I wanted to preserve throughout the project.
How the Project Works
My project works as an interactive experience that guides the user through a digital version of a wax museum. When the user opens the project, they begin on a title screen and are led through instructions, a celebrity selection gallery, a live photobooth, and finally a souvenir screen. At each stage, the user interacts with the screen by clicking buttons or selecting options, which moves them forward in the experience. Once a celebrity is chosen, the webcam is activated and places the user next to their selected celebrity in a shared frame. The user can then take a photo, which combines both images into a single souvenir-style picture that they can view and also save at the end.
To make my project flow between the different stages, I used the state-based system we learned in class, where a variable called screenMode (also known as gameState from class) controls which screen is being displayed to the user. This was honestly one of the most important parts of the project because it keeps everything organized and prevents it from feeling messy and chaotic. Depending on the value of screenMode a different function runs which draws that specific screen.
if (screenMode === "start") {
  drawStart();
} else if (screenMode === "how") {
  drawHow();
} else if (screenMode === "gallery") {
  drawGallery();
} else if (screenMode === "booth") {
  drawBooth();
} else if (screenMode === "souvenir") {
  drawSouvenir();
}
I feel like this gameState system really shaped how my project came together. It really helped a lot with debugging, because if something wasn’t working, I could immediately tell which screen the problem was in.
Another part I am really proud of is how I built the gallery using arrays and loops instead of placing everything manually. Each celebrity is stored as an object, which made the whole system more flexible and easier for me to expand.
let celebrityList = [
  { name: "Taylor Swift", portraitFileName: "taylor.jpg" },
  { name: "Beyoncé", portraitFileName: "beyonce.jpg" },
  { name: "Timothée Chalamet", portraitFileName: "timothee.jpg" }
];
for (let i = 0; i < celebrityList.length; i++) {
  let x = 150 + i * 140;
  let y = 250;
  image(celebrityList[i].portraitImage, x, y, 120, 160);
}
I liked this part because it made the project feel more thought out technically. If I wanted to add more celebrities later, I wouldn’t have to redesign anything, I could just add more information, and it would work.
The part I am most proud of though, is the photobooth and souvenir feature because that is where the whole idea really comes together. Once the user selects a celebrity, the webcam turns on and places them in the same frame. I mirrored the webcam so it works like a normal selfie camera, which makes it feel more natural and less confusing. When the user clicks the snap button, the code creates a new image that combines both the webcam photo and the celebrity photo into one final photo.
souvenirPicture = createGraphics(photoWidth * 2 + 40, photoHeight + 40);

souvenirPicture.push();
souvenirPicture.translate(photoWidth, 20);
souvenirPicture.scale(-1, 1);
souvenirPicture.image(webcam, 0, 0, photoWidth, photoHeight);
souvenirPicture.pop();

souvenirPicture.image(
  chosenCelebrity.portraitImage,
  photoWidth + 20,
  20,
  photoWidth,
  photoHeight
);
This is my favorite part because it turns the interaction into something personal that the user can actually keep. It’s not just clicking through screens, instead you end up with a photo that feels like a souvenir from the experience. I also think the overall flow is something I am proud of. Even though the project is playful, the user is always being guided from one step to the next. Even small choices, like adding a music toggle (on and off button) and using the same museum-ish background style across screens helped make everything feel connected.
Challenges and Areas for Improvement
One of the biggest challenges I ran into was with the webcam. At first, it showed up twice, once as a default video element and once on the canvas. That was confusing because it looked like something was wrong with my drawing code, but it was actually just how p5 handles video by default. Hiding the original video element and manually drawing it solved the problem, but it definitely took some time to figure out.
Another challenge I ran into was with the proportions and measurements. I had to deal with a lot of them at once, so it definitely got confusing at times. With coding in general, many challenges come up, so there were minor challenges throughout the code. However, with trial and error, I was able to fix them thankfully.
If I were to improve the project further, one thing I would really want to add is celebrity specific music. Right now the experience already has sound, but I think it would be way more immersive if each celebrity had their own audio choice attached to them. For example, if the user chooses Beyoncé, the background sound could shift into one of her songs, or when choosing Timothée Chalamet or Jennifer Aniston, a different sound could play that matches their overall vibe. I think this would make the gallery feel much more alive overall and more like each choice leads to a slightly different experience.
I would also like to add more customization to the final souvenir, like filters, or decorative frames, or maybe even different photobooth themes. The current version showcases the concept really well, but I can definitely imagine advancing it to make the experience feel even more personalized in a way.
References
Throughout this project, I used a mix of p5 examples, class slides, YouTube videos, and a previous student project to help me understand and implement different features.
These helped me figure out how to display the webcam inside the canvas and structure the photobooth layout.
- https://editor.p5js.org/jeffThompson/sketches/ael8Y4YMB
- https://editor.p5js.org/maliap/sketches/V9lLVQIjP4
- https://editor.p5js.org/rinnesy/sketches/3KvKqDZqj
- https://editor.p5js.org/Aya_Riad/sketches/T5_8vSJh5
I used these to understand different variables in order to flip the webcam so it works like a mirror.
- https://editor.p5js.org/js6450/sketches/7UrAl0ISj
- https://editor.p5js.org/codingtrain/sketches/HbW7TMPZM
- https://editor.p5js.org/enickles/sketches/BXOH0Rr2F
These were important for learning how to use createGraphics and combine multiple elements into one image, and other just other image related code.
- https://editor.p5js.org/Aya_Riad/sketches/qDfSKKmWY
- https://editor.p5js.org/Aya_Riad/sketches/h1DlwZwph
- https://editor.p5js.org/Aya_Riad/sketches/n9HYRBnNr
- https://editor.p5js.org/Aya_Riad/sketches/6adt_LKUl
- https://editor.p5js.org/Aya_Riad/sketches/E90YoQGOp
- https://editor.p5js.org/Aya_Riad/sketches/MB4-59IEm
- https://editor.p5js.org/shiffman/sketches/HJUA4RQR
- https://editor.p5js.org/p5/sketches/Structure:_Create_Graphics
I also referenced a previous Intro to Interactive Media student project for this part. This helped me with the final image saving process.
These helped me understand how to create interactive buttons that respond to hover and clicks.
- https://editor.p5js.org/aferriss/sketches/Hy-mtKhdM
- https://editor.p5js.org/kjhollen/sketches/S1Jxxt-HW
- https://editor.p5js.org/SGilles2/sketches/_dq_QM1ey
- https://editor.p5js.org/Aya_Riad/sketches/bSPV3s-UD
This example helped me structure the overall flow of my project and handle the different screens. I used a variable (screenMode) that works just like the in-class (gameState).
These helped me implement background music and button click sounds.
- https://editor.p5js.org/Aya_Riad/sketches/kjU1y1fRk
- https://editor.p5js.org/p5/sketches/Sound:_Load_and_Play_Sound
- https://editor.p5js.org/Ruyi_Chen/sketches/S1fIxzCn7
- https://editor.p5js.org/kjhollen/sketches/SkUGLNEo7
links that helped with general concepts and overall Object-oriented programming.
- https://thecodingtrain.com/tracks/code-programming-with-p5-js/code/7-arrays/4-mouse-interaction
- https://thecodingtrain.com/tracks/code-programming-with-p5-js/code/7-arrays/6-object-communication-1
- https://thecodingtrain.com/tracks/code-programming-with-p5-js/code/7-arrays/7-object-communication-2
- https://happycoding.io/tutorials/p5js/
These helped me implement full-screen and understand the responsive canvas.
- https://editor.p5js.org/Aya_Riad/sketches/vgp-dlvea
- https://editor.p5js.org/kjhollen/sketches/ziBj4vzyX
- https://editor.p5js.org/aferriss/sketches/rJD31Zu0W
font
Background Music
In addition to these references, I relied a lot on the class slides to understand the key concepts.
Usage of AI
I used ChatGPT mainly for the hardest parts of my project, especially when multiple things were happening at once and I couldn’t tell what exactly was going wrong.
The most difficult part for me was the souvenir photo system. That part is not just simply “taking a picture,” it’s actually creating a completely new image, bringing the webcam photo, flipping it so it works like a mirror, placing it next to the celebrity image, and then saving everything together as one final frame. At first, I didn’t fully understand how that worked because it’s not the same as just drawing things on the screen. ChatGPT helped me understand that I was basically drawing on a separate hidden canvas and then displaying the result later. It also helped me understand how transformations work together, because if I flipped the webcam without positioning it correctly, it would either disappear or show up in the wrong place. That was one of the hardest parts because it required me to think about how everything is layered and combined, not just displayed.
Another difficult part was the celebrity gallery. I didn’t want to just place images randomly, I wanted it to feel like an actual selection screen with evenly spaced cards that respond to the mouse and adjust to different screen sizes. That meant I had to think about layout and proportions and spacing all at the same time. This part was actually more complicated than i thought because everything in my code is based on proportions like width 0.25 or height 0.16, so even small changes (like decimals) would completely change the layout in ways I didn’t expect. ChatGPT helped me understand how to think about these proportions more intentionally instead of just guessing numbers.
I also used ChatGPT to help me understand code that I was getting and adapting from references and other projects. Sometimes I would find an example that did something similar to what I wanted, but I didn’t fully understand how or why it worked. Instead of just copying it, I used ChatGPT to break it down and explain it to me, which helped me actually learn from it and adjust it to fit my own project.
Another thing I used AI for was generating some of my visuals. I used Gemini to create the celebrity images as well as the red curtain background, since I wanted a very specific “Madame Tussauds” style aesthetic and it was faster to generate and then refine them.
Overall, I used AI more as a tool to understand and debug difficult parts of my project, and to generate some visuals, rather than to build the project itself obviously.