
Concept:
Lately, on my TikTok feed, I keep seeing these square profile pictures which look really cute. I tried to generate my own version of it online, but then the website required me to use Flash… which I do not have. Oops. So, when I was coming up for an idea for my self-portrait during lab on Thursday last week, I thought I could probably just make this by myself, right?
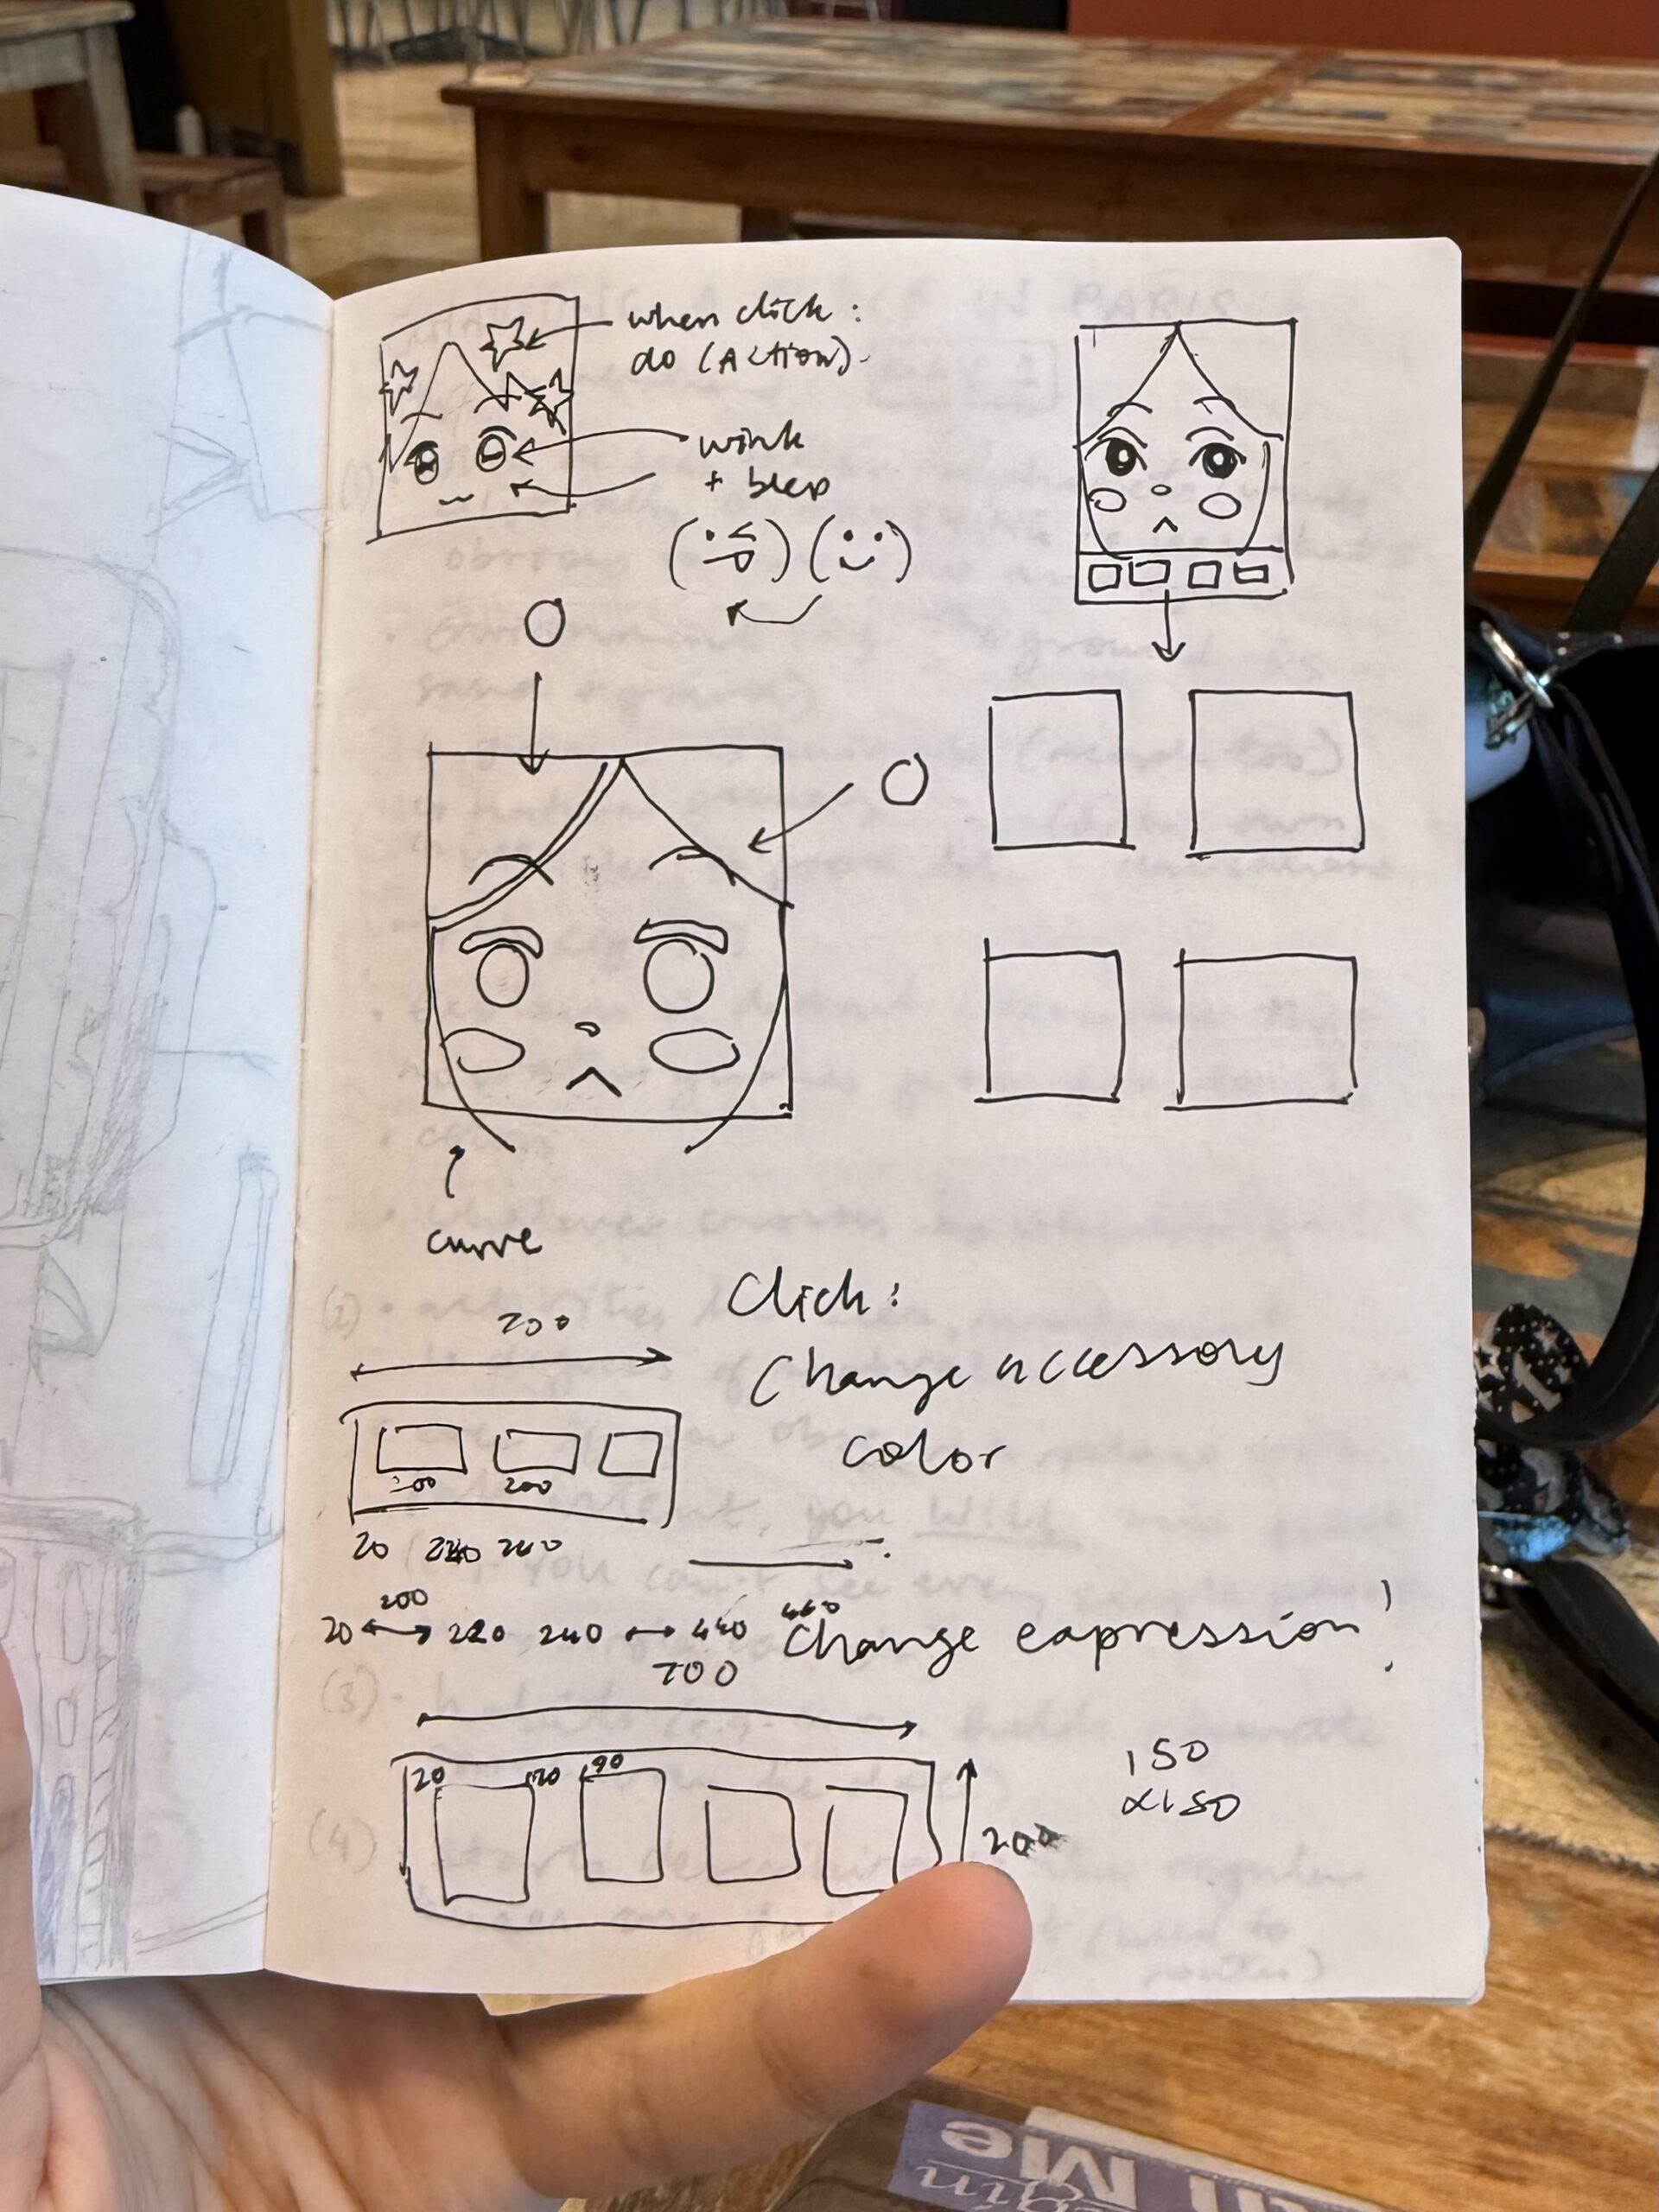 I wanted to make three different versions of the profile picture: one that (somewhat) resembled me normally, one that resembled me when I am tired (me 70% of the time) and one that was fun and colorful. I would use the same base code, so that I wouldn’t need to make completely different faces, but would change some aspects so that the faces would still have some clear changes (e.g. closed vs. open eyes, different color schemes, accessories etc.).
To switch between the three different faces, I would make buttons at the bottom of a screen as a panel. I wanted to make each face more interactive, but I was worried that it would interfere with the faces and the buttons programming, so I’ll work on it once I learn the language better.
Process:
Firstly, before actually deciding on the panels and buttons, I had to figure out how I was even going to code the face. I started with the hair as the background color, making a long ellipse for the face and then adding circles for the bangs. After, I created the eyebrows and eyelids with even more ellipses (I think I may have abused the ellipse() tool…), and the eyes on top (for layering purposes). I used the ellipse with noFill() to create the glasses, and then to make the mouth, I used triangles. Most of the face was just trying and testing out shapes and coordinates, which took me around two hours. However, once I figured out the first face, it didn’t take me that long (only an hour or so) to edit and modify the other faces.
To make it easier, I also coded a line to make sure I could navigate the coordinate system better rather than trial and error-ing again and again.
For the third face, I used this code for the star hair clip. I struggled quite a bit, but I asked one of my friends for help, and we came up with this:
function star(x, y, radius1, radius2, npoints) {
  let angle = TWO_PI / npoints;
  let halfAngle = angle / 2.0;
  beginShape();
  for (let a = 0; a < TWO_PI; a += angle) {
    let sx = x + cos(a) * radius2;
    let sy = y + sin(a) * radius2;
    vertex(sx, sy);
    sx = x + cos(a + halfAngle) * radius1;
    sy = y + sin(a + halfAngle) * radius1;
    vertex(sx, sy);
  }
  endShape(CLOSE);
}
    strokeWeight(3);
    fill(255, 247, 161);
    star(200, 220, 70, 150, 5);
After, I had to create the buttons. I created a new file (so I could just copy and paste the face codes into the file after I programmed the buttons), and I used this as the code:
let currentScene = 1;

let btnSize1 = 200;
let btnSize2 = 150;
let btn1X = 20,btn1Y = 725;
let btn2X = 240,btn2Y = 725;
let btn3X = 460,btn3Y = 725;

 function setup() {
  createCanvas(700,900);
 }

 function draw() {
  background(220);

//state

  if (currentScene === 1){
    drawImage1();
  } else if (currentScene === 2){
    drawImage2();
  } else if (currentScene === 3){
    drawImage3();
  }

// panel

  fill(251,251,251);
   noStroke();
  //x y w h
  rect(0, 700, 700, 200);

// buttons

   //1
  fill(217, 93, 83);
  rect(btn1X, btn1Y, btnSize1, btnSize2);
  fill(0);

   //2
  fill(161, 126, 140);
  rect(btn2X, btn2Y, btnSize1, btnSize2);
  fill(0);

   //3
  fill(66, 164, 255);
  rect(btn3X, btn3Y, btnSize1, btnSize2);
  fill(255);

 }
  function mousePressed(){

  //button 1

  if (mouseX > btn1X && mouseX < btn1X + btnSize1 && mouseY > btn1Y && mouseY < btn1Y + btnSize2) {
    currentScene = 1;
  }

  //button 2

    if (mouseX > btn2X && mouseX < btn2X + btnSize1 && mouseY > btn2Y && mouseY < btn2Y + btnSize2) {
    currentScene = 2;
  }

  //button 3

    if (mouseX > btn3X && mouseX < btn3X + btnSize1 && mouseY > btn3Y && mouseY < btn3Y + btnSize2) {
    currentScene = 3;
  }

}

function drawImage1(){
  // code for first expression;

}

function drawImage2(){

// code for second expression;

}

function drawImage3(){

// code for third expression;

}
note: I realized I put the wrong coordinates for the buttons, so now there's more space on the right than the left. I'll fix it soon.
note2: I used the resources from p5.js tutorials, references and examples for most of the code.
Reflection and Possible Improvements:
I had been pushing this off for a while because I was scared it would take too long and I would not be able to create something I would be satisfied with. However, I think this turned out better than I expected! I’m happy with the button interaction and the facial expressions.
I really do want to work with adding more interactivity in the future and maybe also coding an animation (such as spinning the star and flower hair clips in the ‘happy’ expression or waking my picture up for the ‘tired’ expression). I would really like to experiment with adding more features once I become more confident with loops and putting commands within commands, since the many lines of code for each face threw me off and made it hard for me to navigate where one command started and ended. (Oops.)