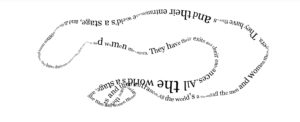
Final Project Proposal: Interactive Murder Mystery

For my final project, I want to work on an interactive murder mystery game.  The piece would let the player interact with it to get a sense of the setting of the story and the characters within it and then the player can proceed to search for clues, take interviews and finalize the suspect. The goal of the game is to find the killer. 

On a side note, as I finalize the storyline, I want to explore non-murder mystery storylines too, focusing on plots with mystery and thrill. Right now, I’m thinking of doing a storyline with Christie’s Crooked House. 

I want to create a soundscape for the game with eerie sounds, where the narrator invites the player to the story, talks about the place, and let them choose different characters and learn about them. For this part, I was thinking of implementing a potentiometer and a button or a switch that will let the user choose the character  – as opposed to clicking on the screen itself. 

After learning about the setting and the characters, the player can now look at the objects provided to them – these are things acquired from the murder scene. In this section, the user can interact with these objects to find some clues. I’m taking inspiration from the reading, “Brief Rant on the Future of Interaction Design”, by incorporating ways of interaction beyond buttons and slides. With the objects, I’m thinking of hiding some switches. What I’m envisioning is having all the objects connected via wires to make it look like they are secured to the table. As the player interacts with the object, I’m thinking of having a particular part of the material have some conductive material which when the user touches that part, it completes the circuit to reveal the clue. I was thinking of adding in some sounds for feedback as soon as this is done so that the player knows that they’ve found a clue and continues to press the hidden switch. 

The clues on their own could be simple puzzles like cracking codes, trying to find the missing pattern, riddles, etc. This way the player is engaged with the piece. 

Finally, when the time is up, they can choose the character who they think is the culprit and the screen will reveal whether they’ve won or lost. 

Processing would show the story, the clues, the stories of the character, and the final result. Arduino would take input from the user on which menu setting they’d like to choose, which character they’ve chosen, and input puzzle answers. 

Final Project Ideas

We are supposed to make a final project which combines Processing and Arduino, and as always, I have multiple ideas with a huge dose of indecisiveness.

Idea 1: DDR

I remember one of our readings mentioning this as an example of interactivity, but the idea of recreating a Dance Dance Revolution mat using force sensors sounds really fun to me. The Processing sketch would play the songs and also display which arrow you are supposed to step on when, and a score tally could be kept depending on whether the correct sensor was pressed on or not.

Idea 2: Piano Tiles

Because the musical instrument Jade and I made was a keyboard, I got reminded of the popular mobile application game Piano Tiles, which I used to play too. It would be a similar concept to DDR, the screen would show which note you should play and points could be accumulated based on correctness. There could be different levels of difficulty to choose from, to determine how fast the notes are to be played. The problem is that the keyboard circuit was really delicate and might be disturbed during the gameplay, but the Professor had mentioned soldering and a different kind of board which might fix this.

Idea 3: Some sort of Game Console

My other idea was to make some sort of game controller, which could be used to control a character on screen, and maybe use my midterm project or something else for this. Using the breadboard and buttons might be able to achieve this.

These are the only sort-of-concrete ones for now, in general I have a lot of thoughts swirling in my head and I’ll see what I end up leaning the most towards.

Final Project proposal: mini-Tesla

Idea:

For my final project, I am planning to build a mini Tesla car that will feature both autopilot mode and manual mode. When the autopilot mode is enabled, the car will be able to move around and avoid all obstacles. Whereas for the manual mode, the user will be able to control the car through processing using the arrows/buttons.

Processing:

The processing display window will feature two options (autopilot mode and manual mode) that the user can switch between, in addition to arrows/buttons that will enable the user to control the car’s movement.

Arduino:

For the technical part, I will be using four wheels, an ultrasonic sensor, a servo, an L298N driver, an LDR, and a couple of LEDs.

Final Project Proposal: Music Music

Description

Refine your final project proposal, including a finalized concept for the project, a description of what your Arduino program will do with each input and output and what it will send to and/or receive from Processing, and a description of what the processing program will do and what it will send to and/or receive from Arduino

Idea

For the final project, I want to simulate a music concert. I want to make a music rhythm visualizer both on screen and with LEDs such that a change in the music playing will change how the music is visualized.

Arduino

On the Arduino, I’m going to use a sensor to sense the rhythm of the music being played by a user.  I am also going to add multiple LEDs that will take the rhythm as input and dance to it. Depending on how this turns out, I am going to add a switch or sensor to send info to processing for a change in Music.

Processing

The processing at the same time receives the rhythm signals from the Arduino and shows a screen of the music visualization indicating the rise and fall of the beats.

The next step is to receive info from an Arduino sensor or switch to change the music being played as opposed to a user manually changing the music on a phone or device.


Final Project Idea: Generative Drawing

Description:

My idea is to make a drawing machine on Processing and to use Arduino-controlled Joy Sticks to control the mouse position on the screen.

The user would get to control the colors and save the image if desired.

If the user decides to save their generative art drawing, the 5 last saved drawings will show on the screen in a polaroid-like look.

Processing Inspiration:

I chose to make a generative art piece on processing because I feel that a drawing using a joystick can only get you so far without much practice, so I decided that a generative art algorithm would work better for this case.

These are some sources that I feel inspire my goal for the processing part of my project.

First design this is a randomly generated piece, but it is really close to what I thought of when I first thought of generative.

Second design This is a drawing piece where the letters are drawn instead of ink at the position of the mouse and the size is decided by the speed of the movement of the mouse.

Third design In this one the cursor is followed by randomly changing shape instead of a normal brush.

Fourth design This, like the first, does not follow the mouse, it is just random instead-but follows a random path and is not completely random.

I think this might be nice to add behind any of the other designs with a lower opacity to give a smoky look behind the drawing.

Arduino:

My plan is to have 2 joysticks, one to control the mouse location and one to change the color of the drawing at a certain point.

I also plan to add push buttons to toggle values that will reset/save/show prev saved images.

This is the arrangement I have in mind at the moment

Final Project Proposal – Jade

IDEA

For my final project, I plan to simulate a Claw Toy Grabber Machine.  A window showing the claw and toys should be displayed on Processing. On Arduino, there will be a joystick to control the movement of the claw, and a button which makes the claw go down to grab. If possible, I also want to make a coin pusher where player should first toss a coin into the box to start the game.


Arduino

I plan to make a box with a joystick on it, and leave a space to hold the coins. I am thinking about using a piezo for the coin pusher to check if something heavy has fallen on it. I will make some coins and also probably add some LED lights. When you win the game, toss a coin or press the button, the LED lights should light up in various patterns.


Processing

I will add physical collision to the toys, and try to simulate the difficulty of the real Claw Machine. So it won’t be easy to grab the toys. After pressing the button on Arduino, the claw will move automatically to the drop point, and the toy might fall down any time during the process. The goal is to successfully drop the toy into the box, and you can always play the game again by tossing a coin.

The difficulty is the physical collision between the claw and the toys, and how to judge if the claw has grabbed the toy or not. I think it would be better if the toy are composed of several parts, so that the claw could grab a toy by different angles/parts.


Serial Communication

Arduino should send data on the movement of the joystick, button status and coin pusher status to Processing. Processing will send signals of the game status to control the LEDs.


Final Project Proposal

For the final project, I would like to make some interactive processing sketch that emulates a personal diary and is controlled by arduino.

Idea: 

The interface will be in first person. The player will see diary notes being written automatically in slow speed similar to the writing speed of an actual person. This will simulate the act of a person writing their own diary. The text of the diary will be loaded and defined in the code itself. There will be various parameters changing that will affect the first person display the user will be viewing. These parameters could include level of consciousness and hunger. The goal of the user is to keep the levels of those parameters in check. If those parameters pass a certain threshold, the text being written will start turning into gibberish. Finally, if the levels of the parameters max out, the writer passes out and the screen blacks out.

My goal is to make this a story-driven experience, where the player needs to ensure the game does not end in order to complete reading the diary notes. I plan to source the diary notes from actual diaries that could be considered interesting for some reason.

Arduino: 

I plan to use digital switches and analog switches (such as the potentiometer) to give the player a way to control the changing parameters in the game. Depending on my final implementation, I could have some elements on the display which receive feedback from the switches and change somehow.

Processing: 

One way to implement alterations in the display environment is to simulate a desk on which the diary notes and other objects lie. The user’s interaction with different switches could alter different objects on the desk in some way.

Week 11: Trio of Exercises

This week, we had to complete these three exercises:

  1. make something that uses only one sensor  on arduino and makes the ellipse in processing move on the horizontal axis, in the middle of the screen, and nothing on arduino is controlled by processing
  2. make something that controls the LED brightness from processing
  3. take the gravity wind example (https://github.com/aaronsherwood/introduction_interactive_media/blob/master/processingExamples/gravityExamples/gravityWind/gravityWind.pde) and make it so every time the ball bounces one led lights up and then turns off, and you can control the wind from one analog sensor

I was able to complete 2 of these in class, and the third one required some figuring out. The Arduino and Processing codes will be inserted for each in order here. I had to attach 2 videos at the end for exercise 3 because my phone memory was acting up and not letting me record long videos. This was the best I could manage.

Exercise 1

This exercise still has the code to take inputs from both sensors, in case we wanted to change it up.

Processing

import processing.serial.*;
Serial myPort;
int xPos=0;
int yPos=0;
boolean onOff=false;
boolean onOff2=false;

void setup(){
  size(960,720);
  printArray(Serial.list());
  String portname=Serial.list()[2]; 
  println(portname);
  myPort = new Serial(this,portname,9600);
  myPort.clear();
  myPort.bufferUntil('\n');
}

void draw(){
  background(255);
  ellipse(xPos,height/2,30,30); 
  
}

void serialEvent(Serial myPort){
  String s=myPort.readStringUntil('\n');
  s=trim(s);
  if (s!=null){
    println(s);
    int values[]=int(split(s,','));
    if (values.length==2){
      xPos=(int)map(values[0],0,1023,0, width);
      yPos=(int)map(values[1],0,1023,0, height);
    }
  }
  myPort.write(int(onOff)+","+int(onOff2)+"\n");
}

Arduino

int left = 0;
int right = 0;

void setup() {
  Serial.begin(9600);
  Serial.println("0,0");
  pinMode(2, OUTPUT);
  pinMode(5, OUTPUT);
}

void loop() {
  while (Serial.available()) {
    right = Serial.parseInt();
    left = Serial.parseInt();
    if (Serial.read() == '\n') {
      digitalWrite(2, right);
      digitalWrite(5, left);
      int sensor = analogRead(A0);
      delay(1);
      int sensor2 = analogRead(A1);
      delay(1);
      Serial.print(sensor);
      Serial.print(',');
      Serial.println(sensor2);
    }
  }
}

Exercise 2

Processing

import processing.serial.*;
Serial myPort;
int xPos=0;
int yPos=0;
boolean onOff=false;
boolean onOff2=false;

void setup(){
  size(960,720);
  printArray(Serial.list());
  String portname=Serial.list()[2]; 
  println(portname);
  myPort = new Serial(this,portname,9600);
  myPort.clear();
  myPort.bufferUntil('\n');
}

void draw(){
  background(255);
  ellipse(mouseX,mouseY,30,30); 
  
}

void serialEvent(Serial myPort){
  String s=myPort.readStringUntil('\n');
  myPort.write((int)map(mouseY, height, 0, 0, 255)+"\n");
}

Arduino

int brightness;

void setup() {
  Serial.begin(9600);
  Serial.println("0,0");
  pinMode(2, OUTPUT);
  pinMode(5, OUTPUT);
}

void loop() {
  while (Serial.available()) {
    brightness = Serial.parseInt();
   
    if (Serial.read() == '\n') {
      analogWrite(5, brightness);
     Serial.println("0");
      
    }
  }
}

Exercise 3

Processing

PVector velocity;
PVector gravity;
PVector position;
PVector acceleration;
PVector wind;
float drag = 0.99;
float mass = 50;
float hDampening;
int sensor = 0;
int sensor_prev = 0;
float pos_prev = 0;

import processing.serial.*;
Serial myPort;
int xPos=0;
int yPos=0;
boolean onOff=false;
boolean onOff2=false;
int bounce = 0;

void setup() {
  size(640,360);
  noFill();
  position = new PVector(width/2, 0);
  velocity = new PVector(0,0);
  acceleration = new PVector(0,0);
  gravity = new PVector(0, 0.5*mass);
  wind = new PVector(0,0);
  hDampening=map(mass,15,80,.98,.96);
  printArray(Serial.list());
  String portname=Serial.list()[2]; 
  println(portname);
  myPort = new Serial(this,portname,9600);
  myPort.clear();
  myPort.bufferUntil('\n');
}

void draw() {
  background(255);
  bounce = 0;
  if (sensor==0){
    wind.x=0;
    velocity.x*=hDampening;
  }
  applyForce(wind);
  applyForce(gravity);
  velocity.add(acceleration);
  velocity.mult(drag);
  position.add(velocity);
  acceleration.mult(0);
  ellipse(position.x,position.y,mass,mass);
  if((int)position.y >= height-mass/2 && (int)position.y != pos_prev){
    bounce = 1;
  }
  
  if (position.y > height-mass/2) {
      pos_prev = (int)position.y;
      velocity.y *= -0.9;  // A little dampening when hitting the bottom
      position.y = height-mass/2;
    }
}
  
void applyForce(PVector force){
  // Newton's 2nd law: F = M * A
  // or A = F / M
  PVector f = PVector.div(force, mass);
  acceleration.add(f);
}

void keyPressed(){
  if (key==' '){
    mass=random(15,80);
    position.y=-mass;
    velocity.mult(0);
  }
}

void serialEvent(Serial myPort){
  String s=myPort.readStringUntil('\n');
  s=trim(s);
  if (s!=null){
    int i = int(s);
    sensor = (int)map(i, 0, 1023, 0, width);
    if(sensor>sensor_prev){
      wind.x=1;
    }
    else if(sensor<sensor_prev){
      wind.x=-1;
    }
    sensor_prev = sensor;
  }
  myPort.write(bounce+"\n");
  
}

Arduino

int onOff;

void setup() {
  Serial.begin(9600);
  Serial.println("0,0");
  pinMode(2, OUTPUT);
  pinMode(5, OUTPUT);
}

void loop() {
  while (Serial.available()) {
    onOff = Serial.parseInt();
    if (Serial.read() == '\n') {
      int sensor = analogRead(A0);
     digitalWrite(5, onOff);
     Serial.println(sensor);
      
    }
  }
}

I used the value of the sensor compared to its previous value to move the wind left and right, instead of the left and right keys. I was initially going to leave the LED on at the end after updating bounce in the existing if block, but then I thought the same logic could be applied to the y position of the ball too and I added another if block to accommodate that.

Note: I’m not able to transfer the longer video for now, I’ll try to get it up as soon as I can.

That’s it for now, no long rambling post this time!

Serial Communication Examples

 Exercises 1

Make something that uses only one sensor on Arduino and makes the ellipse in processing move on the horizontal axis, in the middle of the screen, and nothing on Arduino is controlled by processing

– Arduino

int left = 0;
int right = 0;
void setup() {
  Serial.begin(9600);
  Serial.println("0,0");
  pinMode(2, OUTPUT);
  pinMode(5, OUTPUT);
}
void loop() {
  // while the serial is available
  while (Serial.available()) {
    // info that we parse and send to processor 
    right = Serial.parseInt();
    left = Serial.parseInt();
    if (Serial.read() == '\n') {
      digitalWrite(2, right);
      digitalWrite(5, left);
      int sensor = analogRead(A0);
      delay(1);
      Serial.print(sensor);
    }
  }
}

– Processing

import processing.serial.*;
Serial myPort;
int xPos=0;
int yPos=0;
boolean onOff=false;
boolean onOff2=false;
void setup(){
  size(960,720);
  // print list of ports
  printArray(Serial.list());
  // find the arduino port in the list and choose the right index/port
  String portname=Serial.list()[3];
  println(portname);
  myPort = new Serial(this,portname,9600);
  myPort.clear();
  myPort.bufferUntil('\n');
}
void draw(){
  background(255);
  // when mouse pressed, we change the onoff
  // if mouse is on right , turn on the light
  ellipse(xPos,height/2,30,30);
  
  if (mousePressed){
    if(mouseX<=width/2)
      onOff2=false;
    else
      onOff=false;
  }else{
    onOff=onOff2=true;
  }
  
}
void serialEvent(Serial myPort){
  String s=myPort.readStringUntil('\n');
  s=trim(s);
  if (s!=null){
    println(s);
    int values[]=int(split(s,','));
    if (values.length==2){
      xPos=(int)map(values[0],0,1023,0, width);
    }
  }
  
 
  myPort.write(int(onOff)+","+int(onOff2)+"\n");
 
}

 Exercises 2

Make something that controls the LED brightness from processing
-Arduino
float brightness_led;
void setup() {
  Serial.begin(9600);
  Serial.println("0");
  pinMode(5, OUTPUT);
}
void loop() {
  while (Serial.available()) {
    
    brightness_led = Serial.parseFloat();
    
    if (Serial.read() == '\n') {
    
      analogWrite(5, brightness_led);
      Serial.println(brightness_led);
    }
  }
}

– Processing

import processing.serial.*;
Serial myPort;
int pos_x = 0;
int pos_y;
float brightness_led;
void setup() {
  size(960, 720);
  printArray(Serial.list());
  String portname=Serial.list()[5];
  println(portname);
  myPort = new Serial(this, portname, 9600);
  myPort.clear();
  myPort.bufferUntil('\n');
}
void draw() {
  background(255);
  brightness_led = int(map(mouseX, 0, width, 0, 255));
  
  pos_y = height/2;
  ellipse(mouseX, pos_y, 30, 30);
}
void serialEvent(Serial myPort) {
  String s=myPort.readStringUntil('\n');
  s=trim(s);
  myPort.write(brightness_led+ "\n");
}

 Exercises 3

Take the gravity wind example and make it so every time the ball bounces one led lights up and then turns off, and you can control the wind from one analog sensor

-Processing

PVector velocity;
PVector gravity;
PVector position;
PVector acceleration;
PVector wind;
float drag = 0.99;
float mass = 50;
float hDampening;
int Mover = 0;
import processing.serial.*;
Serial myPort;
int speedWind;
int xPos=0;
int yPos=0;
boolean onOff=false;
void setup() {
  size(640,360);
  printArray(Serial.list());
  String portname=Serial.list()[5];
  println(portname);
  myPort = new Serial(this,portname,9600);
  myPort.clear();
  myPort.bufferUntil('\n');
  
  noFill();
  position = new PVector(width/2, 0);
  velocity = new PVector(0,0);
  acceleration = new PVector(0,0);
  gravity = new PVector(0, 0.5*mass);
  wind = new PVector(0,0);
  hDampening=map(mass,15,80,.98,.96);
}
void draw() {
  background(255);
  if (!keyPressed){
    wind.x= speedWind;
    velocity.x*=hDampening;
  }
  applyForce(wind);
  applyForce(gravity);
  velocity.add(acceleration);
  velocity.mult(drag);
  position.add(velocity);
  acceleration.mult(0);
  ellipse(position.x,position.y,mass,mass);
  if (position.y > height-mass/2) {
      velocity.y *= -0.9;  // A little dampening when hitting the bottom
      position.y = height-mass/2;
    }


  println(velocity.y);
}
  
void applyForce(PVector force){
  // Newton's 2nd law: F = M * A
  // or A = F / M
  PVector f = PVector.div(force, mass);
  acceleration.add(f);
}
void serialEvent(Serial myPort){
  String s=myPort.readStringUntil('\n');
  s=trim(s);
  if (s!=null){
    
    int values[] = int(split(s,','));
    
    
    if (values.length == 2){
      if (values[0] > values[1]){
        speedWind = 10;
      }
      else if (values[0] < values[1]){
        speedWind = -10;
      }
      else if (values[1] == values[1]){
        speedWind = 0;
      }
    }
    
  }
    if (round(position.y + mass) > height && round(velocity.y)  != 0){
    onOff = true;
    }
    else{
      onOff = false;
    }
  
    myPort.write(int(onOff) + "\n");
  
}
void keyPressed(){
  if (keyCode==LEFT){
    wind.x=-1;
  }
  if (keyCode==RIGHT){
    wind.x=1;
  }
  if (key==' '){
    mass= random(15,80);
    position.y=-mass;
    velocity.mult(0);
  }
}

– Arduino

int brightness = 0;
int previousValue = 0;
int moving = 0;
int onOff = 0;
void setup() {
  Serial.begin(9600);
  Serial.println("0");
  pinMode(2, OUTPUT);
  
}
 
void loop() {
  while (Serial.available()) {
    onOff = Serial.parseInt();
    if (Serial.read() == '\n') {
      int sensor = analogRead(A0);
      delay(1);
      
      
      Serial.print(sensor);
      Serial.print(",");
      Serial.println(previousValue);
      previousValue = sensor;
      
      if (onOff == 1){
        analogWrite(2, 255);
      }
      else{
        analogWrite(2, 0);
      }
    }
  }
}

Serial Communication Examples

 Exercises 1

Make something that uses only one sensor on Arduino and makes the ellipse in processing move on the horizontal axis, in the middle of the screen, and nothing on Arduino is controlled by processing

– Arduino

int left = 0;
int right = 0;

void setup() {
  Serial.begin(9600);
  Serial.println("0,0");
  pinMode(2, OUTPUT);
  pinMode(5, OUTPUT);
}

void loop() {
  // while the serial is available
  while (Serial.available()) {
    // info that we parse and send to processor 
    right = Serial.parseInt();
    left = Serial.parseInt();

    if (Serial.read() == '\n') {
      digitalWrite(2, right);
      digitalWrite(5, left);
      int sensor = analogRead(A0);
      delay(1);
      Serial.print(sensor);

    }
  }
}


– Processing

import processing.serial.*;
Serial myPort;
int xPos=0;
int yPos=0;
boolean onOff=false;
boolean onOff2=false;

void setup(){
  size(960,720);
  // print list of ports
  printArray(Serial.list());
  // find the arduino port in the list and choose the right index/port
  String portname=Serial.list()[3];
  println(portname);
  myPort = new Serial(this,portname,9600);
  myPort.clear();
  myPort.bufferUntil('\n');
}

void draw(){
  background(255);
  // when mouse pressed, we change the onoff
  // if mouse is on right , turn on the light
  ellipse(xPos,height/2,30,30);
  
  if (mousePressed){
    if(mouseX<=width/2)
      onOff2=false;
    else
      onOff=false;
  }else{
    onOff=onOff2=true;
  }
  
}

void serialEvent(Serial myPort){
  String s=myPort.readStringUntil('\n');
  s=trim(s);
  if (s!=null){
    println(s);
    int values[]=int(split(s,','));
    if (values.length==2){
      xPos=(int)map(values[0],0,1023,0, width);
    }
  }
  
 
  myPort.write(int(onOff)+","+int(onOff2)+"\n");
 
}


 Exercises 2

Make something that controls the LED brightness from processing
-Arduino
float brightness_led;

void setup() {
  Serial.begin(9600);
  Serial.println("0");
  pinMode(5, OUTPUT);
}

void loop() {
  while (Serial.available()) {
    
    brightness_led = Serial.parseFloat();
    
    if (Serial.read() == '\n') {
    
      analogWrite(5, brightness_led);
      Serial.println(brightness_led);
    }
  }
}


– Processing
import processing.serial.*;
Serial myPort;
int pos_x = 0;
int pos_y;

float brightness_led;

void setup() {
  size(960, 720);
  printArray(Serial.list());
  String portname=Serial.list()[5];
  println(portname);
  myPort = new Serial(this, portname, 9600);
  myPort.clear();
  myPort.bufferUntil('\n');
}

void draw() {
  background(255);
  brightness_led = int(map(mouseX, 0, width, 0, 255));
  
  pos_y = height/2;
  ellipse(mouseX, pos_y, 30, 30);
}

void serialEvent(Serial myPort) {
  String s=myPort.readStringUntil('\n');
  s=trim(s);

  myPort.write(brightness_led+ "\n");
}

 Exercises 3

Take the gravity wind example and make it so every time the ball bounces one led lights up and then turns off, and you can control the wind from one analog sensor

-Processing

PVector velocity;
PVector gravity;
PVector position;
PVector acceleration;
PVector wind;
float drag = 0.99;
float mass = 50;
float hDampening;
int Mover = 0;

import processing.serial.*;
Serial myPort;
int speedWind;

int xPos=0;
int yPos=0;
boolean onOff=false;


void setup() {
  size(640,360);
  printArray(Serial.list());
  String portname=Serial.list()[5];
  println(portname);
  myPort = new Serial(this,portname,9600);
  myPort.clear();
  myPort.bufferUntil('\n');
  
  noFill();
  position = new PVector(width/2, 0);
  velocity = new PVector(0,0);
  acceleration = new PVector(0,0);
  gravity = new PVector(0, 0.5*mass);
  wind = new PVector(0,0);
  hDampening=map(mass,15,80,.98,.96);
}

void draw() {
  background(255);
  if (!keyPressed){
    wind.x= speedWind;
    velocity.x*=hDampening;
  }
  applyForce(wind);
  applyForce(gravity);
  velocity.add(acceleration);
  velocity.mult(drag);
  position.add(velocity);
  acceleration.mult(0);
  ellipse(position.x,position.y,mass,mass);
  if (position.y > height-mass/2) {
      velocity.y *= -0.9;  // A little dampening when hitting the bottom
      position.y = height-mass/2;
    }


  println(velocity.y);
}


void applyForce(PVector force){
  // Newton's 2nd law: F = M * A
  // or A = F / M
  PVector f = PVector.div(force, mass);
  acceleration.add(f);
}

void serialEvent(Serial myPort){
  String s=myPort.readStringUntil('\n');
  s=trim(s);
  if (s!=null){
    
    int values[] = int(split(s,','));
    
    
    if (values.length == 2){
      if (values[0] > values[1]){
        speedWind = 10;
      }
      else if (values[0] < values[1]){
        speedWind = -10;
      }
      else if (values[1] == values[1]){
        speedWind = 0;
      }
    }
    
  }
    if (round(position.y + mass) > height && round(velocity.y)  != 0){
    onOff = true;
    }
    else{
      onOff = false;
    }
  
    myPort.write(int(onOff) + "\n");
  
}

void keyPressed(){
  if (keyCode==LEFT){
    wind.x=-1;
  }
  if (keyCode==RIGHT){
    wind.x=1;
  }
  if (key==' '){
    mass= random(15,80);
    position.y=-mass;
    velocity.mult(0);
  }
}


– Arduino

int brightness = 0;
int previousValue = 0;
int moving = 0;
int onOff = 0;

void setup() {
  Serial.begin(9600);
  Serial.println("0");
  pinMode(2, OUTPUT);
  
}
 
void loop() {
  while (Serial.available()) {
    onOff = Serial.parseInt();
    if (Serial.read() == '\n') {


      int sensor = analogRead(A0);
      delay(1);
      
      
      Serial.print(sensor);
      Serial.print(",");
      Serial.println(previousValue);

      previousValue = sensor;

      
      if (onOff == 1){
        analogWrite(2, 255);
      }
      else{
        analogWrite(2, 0);
      }
    }
  }
}

 Video