[Assignment 2] Glitchy Dragon Curves

Concept

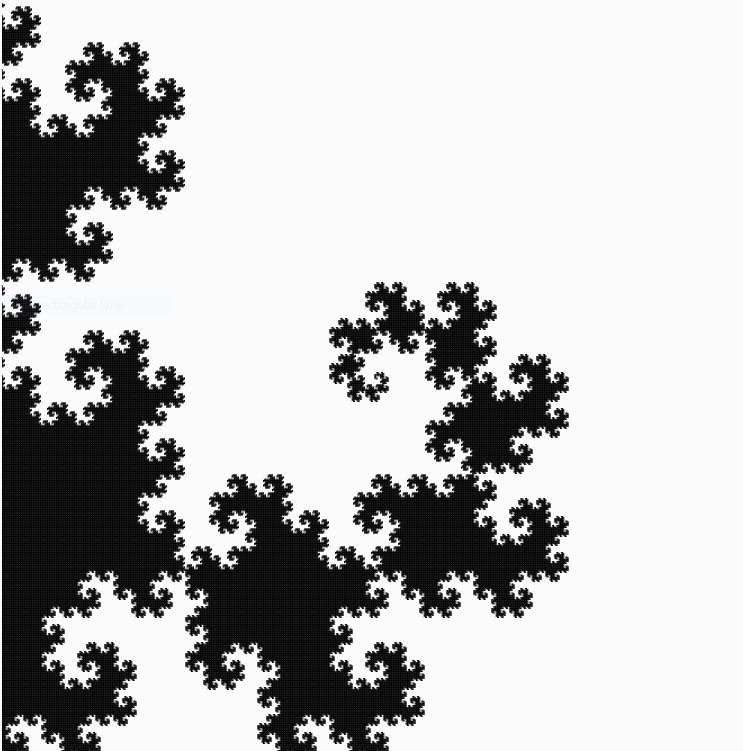
For this assignment, I have created multiple “glitchy” dragon curves, rotated with respect to the canvas center. The dragon curve is a widely known space-filling curve, meaning multiple of these curves can cover the entire 2D plane without overlapping. Not to mention, the curve is a fractal!  I first encountered this curve in my freshman year in high school, and the experience was mesmerizing. For this reason, I decided to draw dragon curves as soon as I read the assignment description.  Although the curve alone is indeed awe-inspiring, I added a glitchy appearance to the curves to make them look more interesting. The picture below is a single dragon curve without a glitchy appearance.

Code

I spent most of the time finding and coding an algorithm to create dragon curves. Fortunately, the algorithm was very intuitive because dragon curves are formed by “folding” a line segment 90° in left or right directions. I first declared an array (dirArr) that stores these directional data, which describes how line segments will be folded.

let dirArr = []; //Direciton Array storing Left or Right turn for each line segments

A function was created to fill this array using a recursive algorithm I have coded (1 indicates a right turn and -1 indicates a left turn). The default size of dirArr is 1, and it contains 1, meaning a right turn. As iteration number increases, dirArr will store more directional data, making curve more complex. The algorithm fills dirArr in this way:

[1] -> [1, 1,-1] -> [1,1,-1,1,1,-1,-1] -> [1,1,-1,1,1,-1,-1,1,1,1,-1,-1,1,-1,-1]

Each array represents directional data stored in dirArr of different iterations.

  1. For each iteration, the algorithm adds 1 at the end.
  2. Then, directional data that were in the previous iteration’s dirArr (red) are copied into a temporary array.
  3. Copied data in the temporary array are reversed (1 to -1 and -1 to 1). This data will then be added to dirArr in reverse order (blue).
  4. Steps 1,2, and 3 will be done until given iteration of dirArr is achieved (recursion).
function fillDirArr(iteration, myArr) {
  //Store Left or Right turns into dirArr. 1 = Right turn, -1 = Left
  count++;
  let tempArr = myArr.slice(); //tempary array to store dirArr
  myArr.push(1);
  let tempArrLength = tempArr.length;
  for (let i = 0; i < tempArrLength; i++) {
    let currDir = tempArr.pop(); //Read tempArr from the end
    myArr.push(-1 * currDir); //Reverse direction and push to currDir
  }
  if (iteration == count) {
    count = 0;
    dirArr = myArr;    
    return;
  } else fillDirArr(iteration, myArr); //recursion until given iteration
}

Based on dirArr, lines will be drawn using a function. This function simply draws multiple line segments with a given length. One challenging part of drawing curves was letting the code know which direction is left or right. For example, when a line segment is heading upward, making a right turn and drawing another segment can be done by line(X,Y, X+length,Y). On the other hand, when a segment is heading leftward, making a right turn and drawing another segment can be done by line(X,Y,X, Y-length). As shown above, rotating a segment left or right turn must also consider a segment’s current direction. I solved this problem by using 1s and -1s as weights. Keeping track of the sum of 1s or -1s whenever a line segment turns allowed me to calculate the current direction of a segment. Simply draw lines in random directions and add up 1s or -1s depending on the direction of the turn. In the end, you will see the result to be:

  • 0, when a segment is going up
  • 1 or -3, when a segment is going right
  • -1 or 3, when a segment is going left
  • 2 or -2, when a segment is going down

round(random(0,8*L)) was used to give the curve a glitchy look by slightly changing the ending coordinates of the lines.

function drawDragonCurve(X, Y, L) {
  let dirSum = 0; //1 or -1 act as "weights".
  for (let i = 0; i < dirArr.length; i++) {
    let currDir = dirArr[i];
    dirSum = (dirSum + currDir) % 4;
    if (dirSum == 0) {
      //UP
      //line(X, Y, X + L * currDir, Y);
      line(X, Y, X + round(random(0,5*L)) * currDir, Y);
      X += L * currDir;
    } else if (dirSum == 1 || dirSum == -3) {
      //RIGHT
      //line(X, Y, X, Y + L * currDir);
      line(X, Y, X, Y + round(random(0,8*L)) * currDir);
      Y += L * currDir;
    } else if (dirSum == -1 || dirSum == 3) {
      //LEFT
      //line(X, Y, X, Y - L * currDir);
      line(X, Y, X, Y - round(random(0,5*L)) * currDir);
      Y -= L * currDir;
    } else if (dirSum == 2 || dirSum == -2) {
      //DOWN
      //line(X, Y, X - L * currDir, Y);
      line(X, Y, X - round(random(0,5*L)) * currDir, Y);
      X -= L * currDir;
    }
  }
}

Reflection / Future Improvements

This assignment was very entertaining to work on because I have always wanted to make a dragon curve. Although the code required tons of logical thinking and calculations, I have managed to create a very satisfying digital art. When I finished the code, I was very happy to see my dragon curves filling my canvas without overlapping (when there is no glitchy effect).

My program seems to operate without any errors, but it needs optimization. Due to the complexity of the calculation using an array, the code is slow. For this reason, I removed the interactive aspect of the code. In the future, I would like to find a faster and more efficient way to draw dragon curves. When my code is finally fast, I would be able to make dragon curves to be interactive.

Aaryan’s Self-Portrait: Touch-and-Go

I am bad at drawing. I once tried drawing a reindeer in school for Christmas, and what I drew looked more like a Martian cow. I’m also relatively new to coding. So, I wasn’t sure where to start my self-portrait, I didn’t even know if my head would be an ellipse or a rectangle. So, I decided to just start drawing and try capturing some of the identifiable features of my face as best I could, and take it from there. This was not too difficult, as it just needed the basic shapes we learned in class. The only challenge was figuring out where to locate each shape and how big to make it. I had to do this manually for each shape, and there were quite a few elements, so it took a while. But I was quite happy with the disembodied face I produced at the end.

Disembodied Face:

This face seemed like a passable self-portrait that captured some features such as the roundness of my head. But it very clearly didn’t look like me (not that I had expected it too). So, I decided to incorporate something that was easy to associate with me as a person, to make the drawing more representative of me. Currently, the one thing outside academics that I give the most time and energy is Touch Rugby. So, I thought I would put a touch rugby ball into my portrait.

It was easy enough to draw the ball (it’s quite similarly shaped to my head, actually). I thought it would be fun to have the ball bouncing against my head, so I decided to add that simple animation based on the bouncing ball activity we had done in class. I could get the ball to bounce between my fixed head and the border of the canvas. I had gotten more comfortable with drawing shapes, so I drew the rest of a body and added a few details, a well as a background.

At this point, I was quite happy with the self-portrait, save for one element. My head being rigidly fixed while the ball bounced against it looked unnatural, and I wanted to create some response from my head. But this seemed tough and I couldn’t think of how to do that, especially while keeping the rest of the body still and consistent. But then I glanced through the examples from past classes and felt inspired. So, I decided to try it. It was a conceptual challenge, but I realized, if I made a reference variable to demarcate the head position, I could make the ball interact with that variable. So, I decided to set the x value of the face as a variable and made the other facial features relative to this position. I created a velocity variable for the face that would become non-zero when the ball hit the face; it would then change direction after some motion, and then become zero again when the face reached its initial position. To keep the rest of the body still, I made top of the neck relative to the face, but the bottom fixed with the rest of the body. It worked, and I was quite pleased with having overcome that hurdle and added this element of interaction between my head and the ball.

The Final Result:

Reflection

Looking back, I would have made my life a lot easier if I had created this reference variable earlier as it would have been a lot simpler to position the other elements on the face. It would have also given me more flexibility, such as being able to move many features at once, rather than having to change coordinates individually. One feature that helped with some shapes, especially the arms and legs, was this function called quad() which I looked up to make custom quadrilaterals. It helped but required manual input of all vertices. I did this because I couldn’t figure out how to use rotate(), which is something I should certainly get the hang of so that I can make diagonal shapes. My approach to this assignment was to try a few things and build the idea as I went along, without a coherent idea to begin with. It would definitely help to start with an overall concept and work towards it next time, but I think that will also come with greater skills and confidence in being able to execute an idea.

Self-portrait

Concept:

My idea is based on my hometown, Ohrid, a beautiful small town in Macedonia. For most of the year its cold and rainy, but when it snows for me its the most magical time of the year.

Reflections and improvements:

I would like to focus on improving interactive features on my projects and learning new skills to incorporate in p5js.

Assignment 1: Self Portrait

Following our first class, I fiddled around with the code and got a feel for what I might be capable of drawing. With the ability to generate simple shapes, my mind immediately went to my Animal Crossing avatar. Booting up my game, I took a picture of my avatar to serve as my reference image:

Picture taken from personal copy of Animal Crossing: New Leaf.

While I initially struggled a bit with the arc() function—an essential tool for drawing hair and eyelids—I was soon able to get the hang of it. With the power of the arc at my fingertips, I was able to draw myself a rough draft of what my portrait might look like.

Rough sketch in hand, I now wanted to add a layer of interactivity to the portrait. Following our second class, I sought out to implement the if() function that we learned in class together with the (mouseIsPressed) variable to realize this next step.

//Top Half
if (mouseIsPressed && mouseY < 200){//effect1}
//Bottom Half
if (mouseIsPressed && mouseY > 200){//effect2}

Using these if statements, clicking on the top half and bottom half would yield different effects—a top half click would make my avatar happy, while a bottom half click would make him sad. As the effect would only change the eyes and the mouth of the avatar, I decided to move the rest of the drawing into its own function of face():

//Function for Drawing Base of Face
function face() {
  //Halfline
  line(0, 200, 400, 200);
  strokeWeight(3);
  //Ears
  fill(240, 184, 160);
  strokeWeight(1.7);
  ellipse(110, 210, 40, 50);
  ellipse(290, 210, 40, 50);
  //Face
  ellipse(200, 200, 180, 200);
  //Hair
  fill(60, 19, 33);
  arc(200, 165, 185, 160, 3.14, 0);
  arc(107.5, 165, 110, 61.6, 0, 1.57);
  arc(162.5, 165, 100, 61.6, 0, 1.57);
  arc(292.5, 165, 160, 61.6, 1.57, 3.20);
  line(107.6, 166, 107.6, 196);
  line(292.4, 166, 292.4, 196);
  //Nose
  fill(215, 107, 0);
  triangle(190, 240, 200, 220, 210, 240);
}

I also edited the if statements to become a set of if, else if, and else statements to respectively accommodate the three statuses of 1) top half is clicked 2) bottom half is clicked 3) nothing is clicked (the neutral state).

//Top Half
if (mouseIsPressed && mouseY < 200){//effect1}
//Bottom Half
else if (mouseIsPressed && mouseY > 200){//effect2}
//Neutral
else {//effect 3}

With everything in place, all I needed to do was code in the different shapes of the eyes and mouth for the two expressions. I also added in changing background colors, indicative lines, and some text bespeaking my avatar’s mood.

The final touch I decided to employ was scrolling text encouraging the user to click the portrait; I got this to work by setting up the variables first:

//Variable Setup for Scrolling Text
let scrollSpd = 3;
let textX = -260;

Then I used said variables in the following block of code, which continually executes in the draw() function and moves the text along, with the if() statement resetting its position when it moves out of the screen.

//Scrolling Text
strokeWeight(0);
textSize(20);
textStyle(BOLD);
fill(0);
textX = textX + scrollSpd;
if (textX > 400){
textX = -250;
}
print (textX);
text('Try Clicking & Holding!', textX, 335);

All the parts were now in place! The final version of my self portrait:

Try clicking and holding the upper and lower halves of the portrait!

There it is! This was my first time using Javascript, and I’m very satisfied what I was able to achieve. One feature I wanted to include but could not was  falling stars, but I soon realized that drawing one—let alone animating one—would be quite the task (perhaps one that I may tackle later on). As I feel that I’ve now gotten a preliminary grip of p5.js, I look forward to what more I may be able to make in the future!

Assignment 1 Self-Portrait

Concept

For my self-portrait I decided to attempt to draw myself doing something that I love: going on walks to distract myself from the real world and think about life. I was pretty ambitious at first considering this is my first time learning this type of material and my first time coding. At first, I imagined my drawing to be very complex. I wanted to try and incorporate a lot of movement to capture the act of walking, detail in terms of shapes and the setting, and a lot of color. I imagined incorporating nature, interaction, and even aspects of Chicago such as the skyline since that’s where I am from and walking around Chicago is one of my favorite things to do. Sadly, all of that gradually changed as I began to work on the drawing, and the drawing became much more simpler than I imagined.

Code Highlight

Using the p5.js references I was able to create my code and I was also able to learn how to use rotation and translation for a “moving” arm which is shown here.

//arm
  
  fill(210, 180, 140);
  rotate(radians(20));
  translate(90, -50);
  rect(110, 290, 50, 10,10);


Embedded Sketch

Reflection & Future Directions

Though I like the outcome of my drawing, I think it could have used more movement considering my goal was to capture the act of walking. Even though it does look like a simple drawing, it was still rather difficult for me and it took me a lot of time to grasp the basics of the principles that we have learned so far.  I definitely learned of at least one approach that I should not take to complete these assignments. In the future, I want to play around with more functions and find a way to make things easier for myself, possible take more time to watch tutorials and try different codes for the same outcome to find what best works for me. Overall, I did enjoy the challenge and I am excited to continue learning as well as challenging myself. I would possibly like to in the end, try and recreate this assignment with the initial image that I had for it.

Self-portrait

This assignment was a great start for me to get introduced to p5.js. Since I had never worked with p5.js before, I spent a lot of time understanding and “playing” with the functions and their application. To create a self-portrait, I decided to take one of my photos as a basis. The reference page of p5.js helped me a lot in this work. I also watched tutorials recommended by other students. All this helped me take the first step in working with the assignment.

In fact, I really enjoyed picking the right coordinates, even though it’s a tedious task. For instance, I wanted to add an eyeliner to my self-portrait and do it in the same way as I created my eyebrows, bangs and eyes before. Also, I really wanted to try to create some kind of animation/interactivity in my work. In the process, I tried several options that I saw in some tutorials. I liked the works with painting over the background, they had a vibe that reminded me of many “anti-stress” coloring videos.

Since this is my first work, the result is pretty simple. However, I believe there is still a lot that can be done with this assignment. Going forward, as we go through the new features and functionality that p5.js provides to the user, I hope to improve my skills and apply them to fix past mistakes. I would like to learn how to use more shapes, because even with the triangle I had to learn a lot of new information. Moreover, next time I’d like to make sure that my interactive background remains just a background without interfering with the portrait itself. Also, so that when user clicks, the portrait itself does not disappear, but remains on the screen. To conclude, assignment 1 was very helpful to me in terms of practice. I really enjoyed trying out new features and seeing the results of my work and I hope it only gets better with more improvements.

Aisha – Self Portrait

Before starting this assignment, I tried to experiment with different shapes and colors to familiarize myself with p5 as I have never used it before and have little experience in coding. After I got the gist of it I attempted to produce a photo of me with a simple background of nature.  I thought it would be a fun idea to include the background as it enabled me to practice more coding and begin my coding artistic abilities.

I used the mouse and mousey to help me identify where I would have to put different features in my portrait. I used an ellipse to draw a simple head and eyes hijab adding details such as eyelashes by using the lines function. I used both the line and arc functions to sketch my mouth, nose, and hair. For the background, I used arc functions to sketch the ground and rectangles and ellipses to sketch a tree. Finally, I used ellipses to sketch a few clouds.

The most challenging part for me in this assignment was the majority of the arc shapes as well as figuring out the exact position to place different features of my sketch.

I think the feature that I’m most proud of is the mouth. Although it isn’t great, I liked how I included the upper lip and outlined the whole mouth as red rather than just leaving it as a white smile.  This is the code I used for it:

//Mouth
  
  fill(255,0,0);
  arc(200,232,50,8,radians(180),0);
  fill(255);
  stroke(255,0,0);
  arc(200, 230, 50, 50, radians(0),radians(180));
  stroke('#222222');
  line(200,231,200,255);
  line(185,231,185,250);
  line(215,231,215,248);
  line(178,241,222,241);


This is the final result:

As I mentioned earlier this was a fun task to get familiar with the program however there are some improvements I’d like to apply if I were to do this assignment again.

  1. As my code is too long I would like to use variables to simplify it a bit.
  2. Utilize different/new shapes such as a curvey line and a tilted ellipse to represent the leaves on the tree.
  3. I would also like to make my portrait more realistic. For example, I could go more into detail in terms of color and I could perhaps make it look 3D.
  4. Lastly, I could make my portrait more complex and challenging by adding an animation (such as birds flying).

Assignment 1: Self-Portrait

I am very bad at drawing and almost never draw, but I like tracing, coloring, and putting geometric shapes together. So for this assignment, instead of drawing the portrait on paper, I decided to recreate this picture of me that my brother took of me:

I like this picture because it’s possible to recreate almost all the facial features using arcs, rectangles, triangles, and circles. Initially, I struggled a lot with arcs and went on a mission to learn it so well that I will get every arc right on the first try. But it got frustrating at one point and I decided to go with other shapes and minimalize the use of arcs.

I tried to think of and try out different ways to add a bit of user interaction to the portrait and decided to go with a button at the end that puts on/takes off my glasses. Having limited drawing skills, I could not create shadows or play with the lighting, etc. but I really like the end result. It’s simple but it’s what I was going for; drawing with geometrical shapes and keeping things minimalistic. 

self portrait

I defined my self-portrait as my identity and what I do and imagine my future to be. It was interesting to navigate through p5.js for the first time and trying to get around the different shapes and functions it has. Before trying to use the shapes, I made a rough sketch of what I imagined the portrait to look like.

I started experimenting with rectangles, lines, arcs and ellipses to sketch the buildings. It was a little tricky figuring out where to add in the stroke, fill, and stroke weight for the different elements in the sketch.

The buildings were easy to construct compared to the human face and body structure which contained more ellipses and arcs. In general, it was fun playing around it and I would love to work on more face features in the future.

https://editor.p5js.org/hessaala/sketches/QXn4IFHO1


not my self portrait

I started by experimenting with the shapes and trying out what I could do with them. I went along with what I thought looked good and came up with this:

I then looked at the previous self-portraits done by students in this course and in the p5js website. I made a list of things I found cool and wanted to incorporate or explore. This is my list:

  • try automating something
  • add a thing that interacts with mouse movements
  • try an interesting style
  • pick visually pleasing colors
  • Rounded edges

I first tried to see if I can generate hair within a certain range automatically. I used a for loop that creates arcs and used the random function to generate numbers within a certain X and Y range, I also used the random number to pick an index from a list of colors so that the hair is in different colors. I tried a few strips of hair to see what changing different things would do.

In class when we were playing with moving ellipses I used that for loop and while experimenting with generating many circles at random places this happened and thought it looked similar to worn-out old pictures where the corners have changed color/faded like this:


I didn’t like the way the hair looked so I didn’t end up using that, and started sketching characters in different styles and noted things I liked about each one. I picked a color palette that felt vintage and faded.

I implemented the sketch in p5js and experimented with hair/no hair and decided without hair (I might try to implement a similar one with hair, but I didn’t like it here).


I wanted to add some animation/mouse interaction so I thought I might let it close its eyes if the mouse passes over them, but after adding the background (the for loop generated ellipses) the mode felt eerie so I decided to let it open its eyes when the mouse passes over its eyes, the background darkens, and the mouth opens.

reflection:
I really enjoyed working on this project and exploring p5js.
I think it would be interesting to explore allowing the user to alter the character (add hair? change eye size? color?)
it would also be interesting to experiment with other styles.