Final Project Progress – Arcane Dash

I finally decided on a theme and decided to go with an Arcane themed game. I realised that most of my work will revolve around the game design on p5.js with timing the music to the obstacles so I will have to do a lot of trial and error to make sure that is working. I managed to get the jumping function working for the character but right now I’m mainly focusing on the level design and art as that is what will take me the most time. I also selected all the songs that I will include for the levels which are from the Arcane soundtrack.

Here is some pictures of how the levels are looking so far. I took inspiration from pictures of the bridges in the tv show:

Arcane: League of Legends

The square will be replaced later with designs of the 3 main characters that the player will be able to choose from as well as select the level they want to play.

Everything is still a work in progress and theres a lot to do but I am really passionate about Arcane so I think that will motivate me a lot in order to finish the game and make it look like how I imagine it.

Final Project Progress

My final project is about creating a Visual Generative Art. I plan to use pressure sensors or 8 input touch sensors to generate art. I am going to experiment with both these sensors to decide which one to use.

For now, I have worked on the design or the art that would be generated. I am torn between two ideas: 1. Have multiple art pieces generated based on sensors OR 2. Manipulate one art piece using the sensor.

Idea 1
I have this p5.js code, which generates circles on mouse press. Circles are just a placeholder for the art, where I would put the art code, and instead of mouse press, it would be connected by Arduino.

This is an example of the art that I generated using p5js. I kinda want it to be like fireworks. The color scheme is not finalized yet.
Screen Recording 2022-04-27 at 10.16.12 PM

Idea 2
This is the code I wrote for the generative art.

And here’s a video of how it would be manipulated:
Screen Recording 2022-04-27 at 10.19.15 PM


Please note: Some things might get different as mentioned here as I will be working on these files.

Final project (initial) progress

I want to build off of this code that was on ml5js. I need to train the program to recognize the different hand gestures (rock, paper, scissors).

I started with the Arduino part of the ‘rock, paper, scissors’ game, by trying to build a reward system. When the project is complete, the green LED should light up whenever the user wins a round, and the red LED should light up whenever the user loses a round. And if the user wins the game (eg. wins 5 rounds before the computer) he/she receives  candy that is hidden under the box (video link below).

#include <Servo.h>

Servo servo;
int servoPos = 100;
int gameOver = 1 ;

int gledPin = 2;
int rledPin = 4;
int winloss = 1;

void setup() {
  servo.attach(9);  
  pinMode(gledPin, OUTPUT);
  pinMode(rledPin, OUTPUT);
  Serial.begin(9600);
}

void loop() {
  if (gameOver == 1){
    servoPos = 20;
    servo.write(servoPos);
    }
   servoPos = 100;
   servo.write(servoPos);

  if (winloss == 0){
    digitalWrite(rledPin, HIGH);
    }
   else{
    digitalWrite(gledPin, HIGH);}

  delay(2000);
  
}

https://youtube.com/shorts/Zce_tFlzj7E?feature=share

final project progress: not 90%

So, according to the ambitions that I had in the previous post, I wanted to create a 3d interface controller to play a snake game in 3d format. I built a box, it worked, when I placed a hand inside of it. Also, apparently, the project, which I wanted to implement in my project, was created 10 years ago and it is not relevant anymore (oops). At least, I learned soldering and could do a 220k resistor, so if you need one, I have it…

However, the given values were inaccurate and I could not check if the p5js/or any 3d processing code would work with it. Had some trouble planning the project accordingly.

After talking to Professor Aaron, he suggested using a ZX distance and gesture sensor instead. I might use two sensors to provide a 3d effect, but it does not work anyways. So I hope that even one sensor could work for now.

In my p5js code, I just re-created a simple snake game, which is controlled by the keys for now.

Sorry, my project has not progressed much, since my idea was changing the whole week.

Nicholas and Shama Final Project Progress

The project has been moving along well, with progress being done on all fronts. The simple Node backend has been complete with the Alpaca trading API, and looks as follows:

import express from 'express'
import cors from 'cors'
const Alpaca = require('@alpacahq/alpaca-trade-api')
const fs = require('fs')
require('dotenv').config()
const app = express()
const port = 8000

const stocklist = [];
let alpaca;
let startval;
if(process.env.ENV==='DEVELOPMENT'){
    alpaca = new Alpaca({
        keyId: process.env.TEST_ALPACA_KEY_ID,
        secretKey: process.env.TEST_ALPACA_SECRET_KEY,
        paper: true,
    })
    startval = 100000;
}else if(process.env.ENV==='PRODUCTION'){
    alpaca = new Alpaca({
        keyId: process.env.ALPACA_KEY_ID,
        secretKey: process.env.ALPACA_SECRET_KEY,
        paper: false,
    })
}else{
    throw new Error("Error: Environment Not Properly Selected")
}

//read stocklist 
fs.readFile('stocklist.txt', function(err, data) {
    if(err) throw err;
    var array = data.toString().split("\n");
    for(const stock of array) {
        const [symbol, name] = stock.split(' ')
        if(symbol&&name){
            let currstock ={
                symbol,
                name:name.replace("\"","")
            }
            stocklist.push(currstock)
        }
    }
});

app.use(express.json())
app.use(cors())


app.post('/buy_order', async(req, res)=>{
    try{
        const {ticker} = req.body;
        const order = await alpaca.createOrder({
            symbol:ticker,
            qty:1,
            side: 'buy',
            type:'market',
            time_in_force:'day'
        })
        res.json({order})
    }catch(e){
        console.log(e)
        res.status(400).send('err')
    }
})


app.post('/sell_all', async(req, res)=>{
    try{
        await alpaca.closeAllPositions();
        res.json({'success':'success'})
    }catch(e){
        console.log(e)
    }
})

app.get('/timeline', async(req, res)=>{
    try{
        const history = await alpaca.getPortfolioHistory({
            period: '1D',
            timeframe:'1Min'
          })
        const last_elem = await history.equity.findIndex(e=>e===null);
        const cut_history = {
            equity:history.equity.slice(0,last_elem),
            profit_loss: history.profit_loss[last_elem-1],
            profit_loss_pct: history.profit_loss_pct[last_elem-1]
        };
        res.json({...cut_history})
    }catch(e){
        console.log(e)
        res.send('err')
    }
})

app.get('/positions', async(req, res)=>{
    try{
        const positions = await alpaca.getPositions();
        res.json(positions)
    }catch(e){
        res.send('err')
    }
})

app.get('/randtickers', async(req,res)=>{
    try{
        const rand1 = Math.floor(stocklist.length * Math.random());
        let rand2 = Math.floor(stocklist.length * Math.random());
        while(rand2===rand1){
            rand2 = Math.floor(stocklist.length * Math.random());
        }
        res.json({tickers: [stocklist[rand1],stocklist[rand2]]})
    }catch(e){
        res.status(400).send('err')
    }
})


app.listen(port, () => {
  console.log(`Example app listening on port ${port}`)
})

The data for the stocks is manipulated and returned from the server between 5:30pm-12:00am GST.

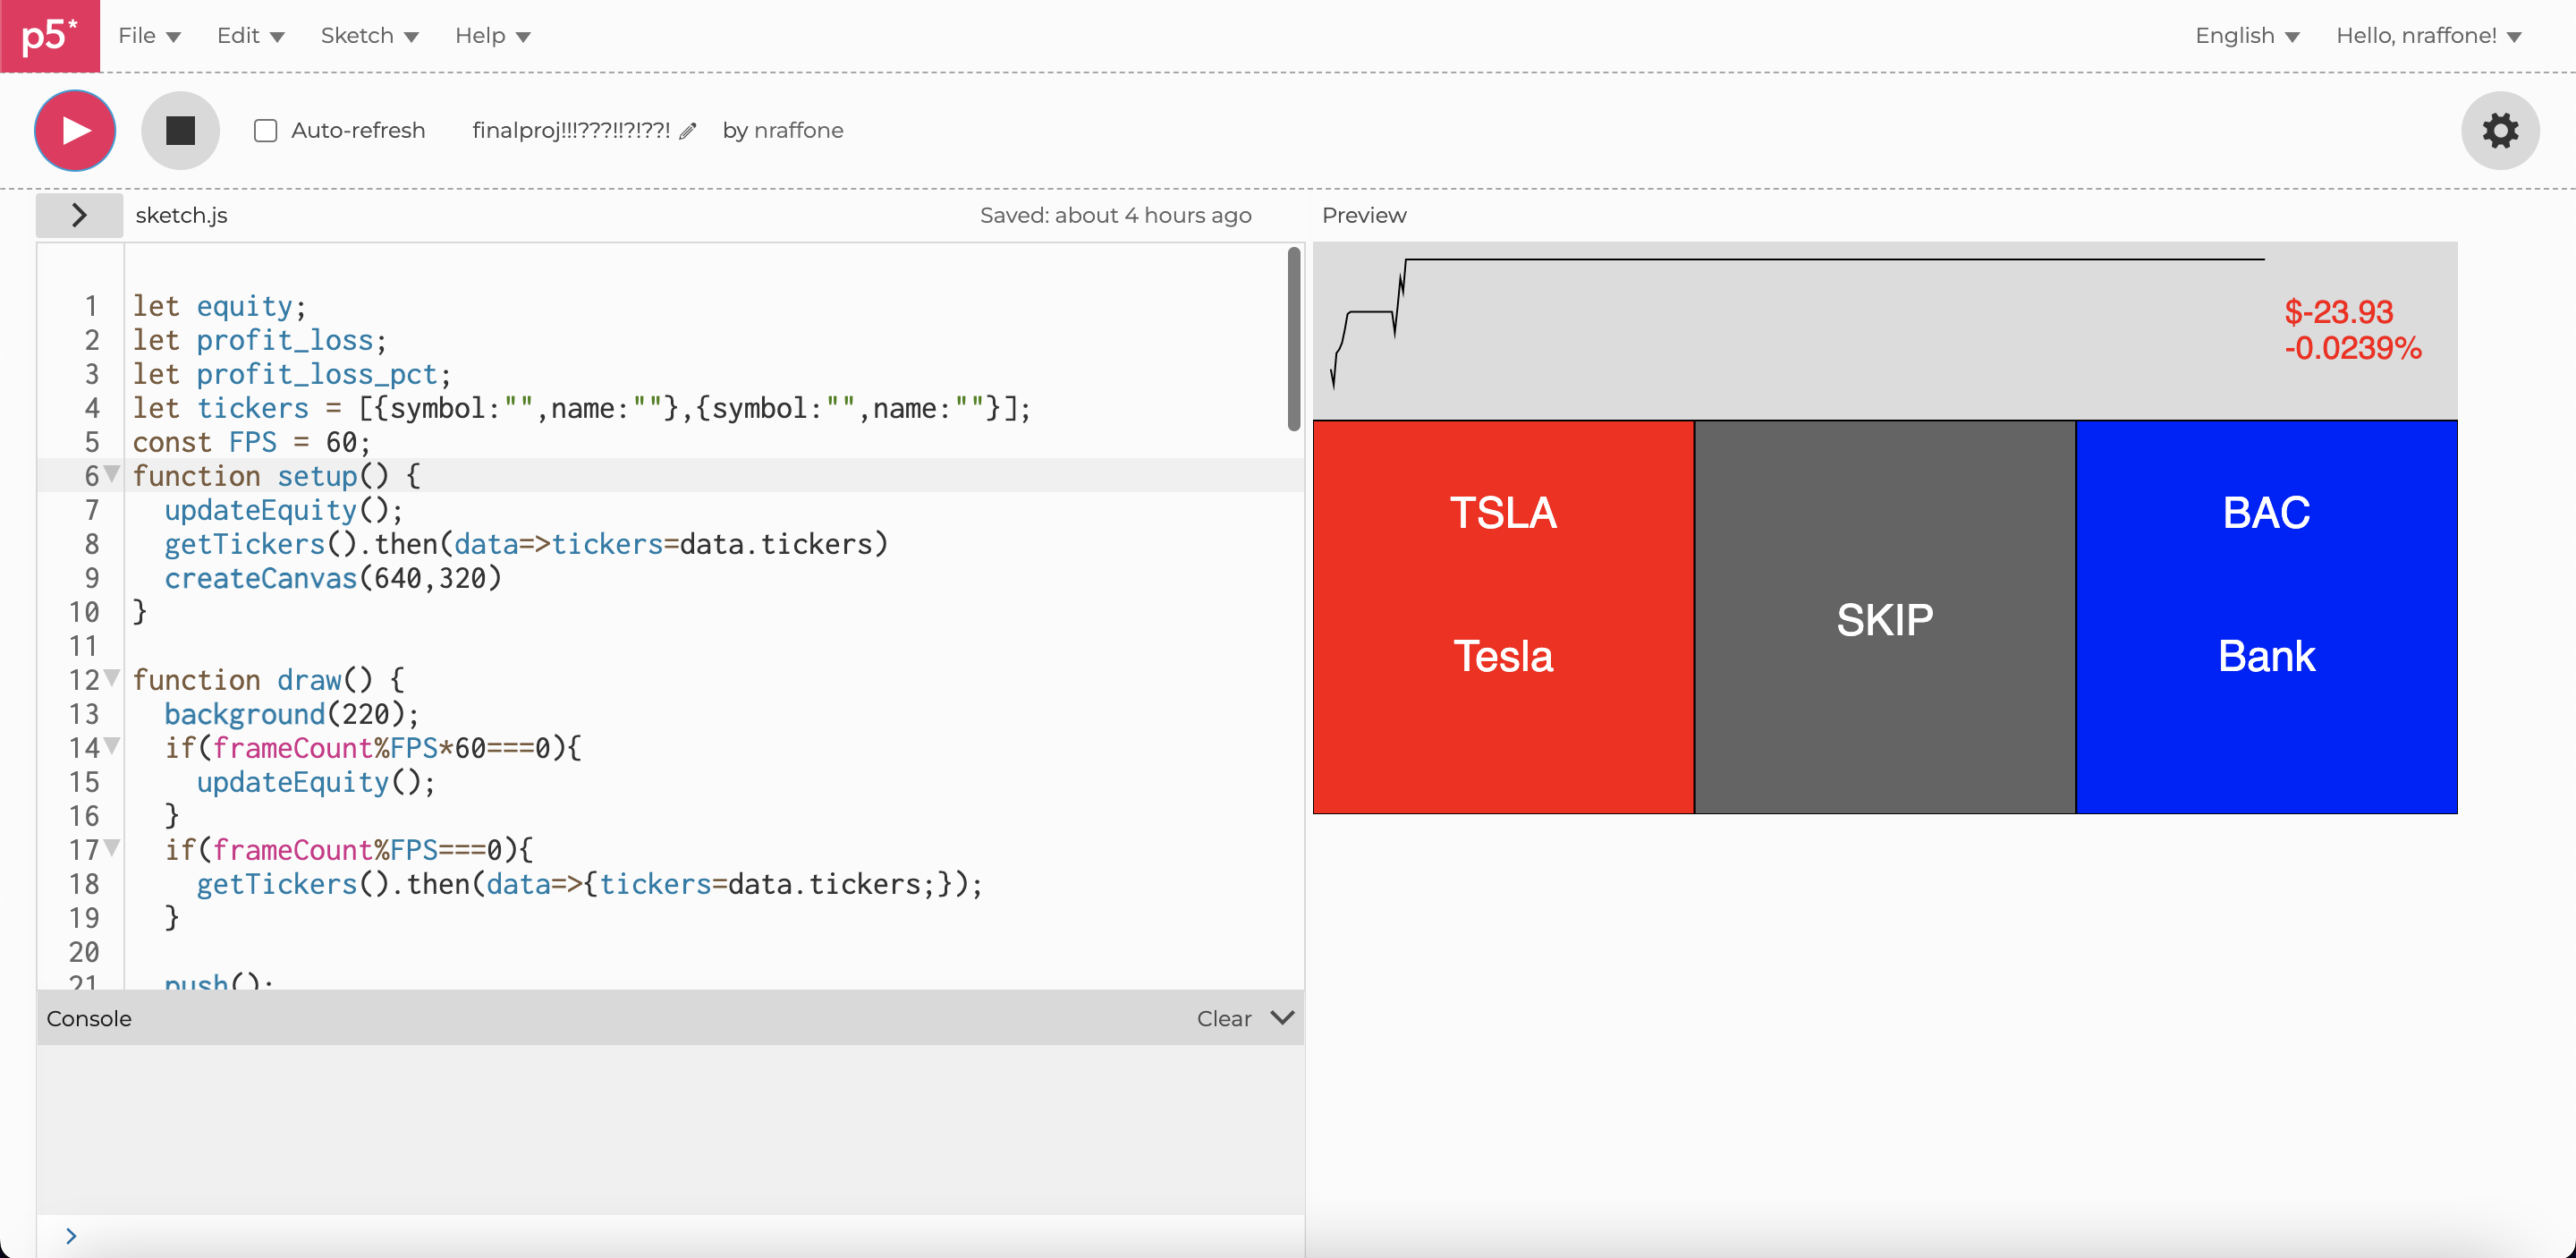
On the p5js end, we have created the functions to get, post, and display data. It looks like this when the stock market is open:

let equity;
let profit_loss;
let profit_loss_pct;
let tickers = [{symbol:"",name:""},{symbol:"",name:""}];
const FPS = 60;
function setup() {
  updateEquity()
     .then(()=>getTickers())
     .then(data=>tickers=data.tickers)
  createCanvas(640,320)
}

function draw() {
  background(220);
  if(frameCount%FPS*60===0){
    updateEquity();
  }
  if(frameCount%FPS===0){
    getTickers().then(data=>{tickers=data.tickers;});
  }
  
  push();
  fill(255,0,0)
  rect(0,20+height/4,1*width/3,3*height/4-20)
  fill(100,100,100)
  rect(width/3,20+height/4,1*width/3,3*height/4-20)
  fill(0,0,255)
  rect(2*width/3,20+height/4,1*width/3,3*height/4-20)
  pop();
  
  push();
  fill(255)
  noStroke();
  textSize(24)
  textAlign(CENTER)
  text(tickers[0].symbol, width/6, 2*height/4)
  text(tickers[0].name, width/6, 3*height/4)
  text("SKIP", 2*width/4, 11*height/16)
  fill(255)
  text(tickers[1].symbol, 5*width/6, 2*height/4)
  text(tickers[1].name, 5*width/6, 3*height/4)
  pop();
  plotTimeline(equity);
  
  push();
  textSize(18);
  fill(profit_loss<0?255:0,profit_loss>0?255:0,0)
  text(`${profit_loss?'$'+profit_loss.toString():""}`, 5*width/6+10, height/7)
  text(`${profit_loss_pct?(profit_loss_pct*100).toString().slice(0,7)+"%":""}`, 5*width/6+10, height/7+20)
  pop();
  
}

async function makeOrder(ticker){
  try{
    const data = await fetch('http://localhost:8000/buy_order',{
      method:"POST",
      headers : { 
        'Content-Type': 'application/json',
        'Accept': 'application/json'
       },
      body:JSON.stringify({ticker})
    })
    jsonData = await data.json();
    return jsonData;
  }catch(e){
    console.log(e)
  }
}

async function sellAll(){
  try{
    await fetch('http://localhost:8000/sell_all',{
        method:"POST",
        headers : { 
          'Content-Type': 'application/json',
          'Accept': 'application/json'
         },
    })
    return 'success'
  }catch(e){
    console.log(e)
  }
}

async function getTimeline(){
  try{
    const data = await fetch('http://localhost:8000/timeline')
    const jsonData = await data.json()
    return jsonData;
  }catch(e){
    console.log(e)
  }
}

async function getTickers(){
  try{
    const data = await fetch('http://localhost:8000/randtickers')
    return data.json()
  }catch(e){
    console.log(e)
  }
}

function plotTimeline(equity){
  if(!equity){
    return;
  }
  const Emin = Math.min(...equity);
  const Emax = Math.max(...equity);
  const maxGraphHeight = height/4;
  const plotEquity = [];
  push();
  noFill();
  stroke(0)
  beginShape();
  for(let i =0; i<equity.length; i++){
    vertex(map(i,0,equity.length, 10, 5*width/6),map(equity[i], Emin, Emax, 10, maxGraphHeight))
  }
  endShape();
  pop();
}

function updateEquity(){
  getTimeline().then(resp=>{
      equity = resp.equity;
      profit_loss = resp.profit_loss
      profit_loss_pct = resp.profit_loss_pct
    })
}


The graph at the top shows the progress made, and the numbers on the right show current profits. The 3 bars in the middle display the current options.

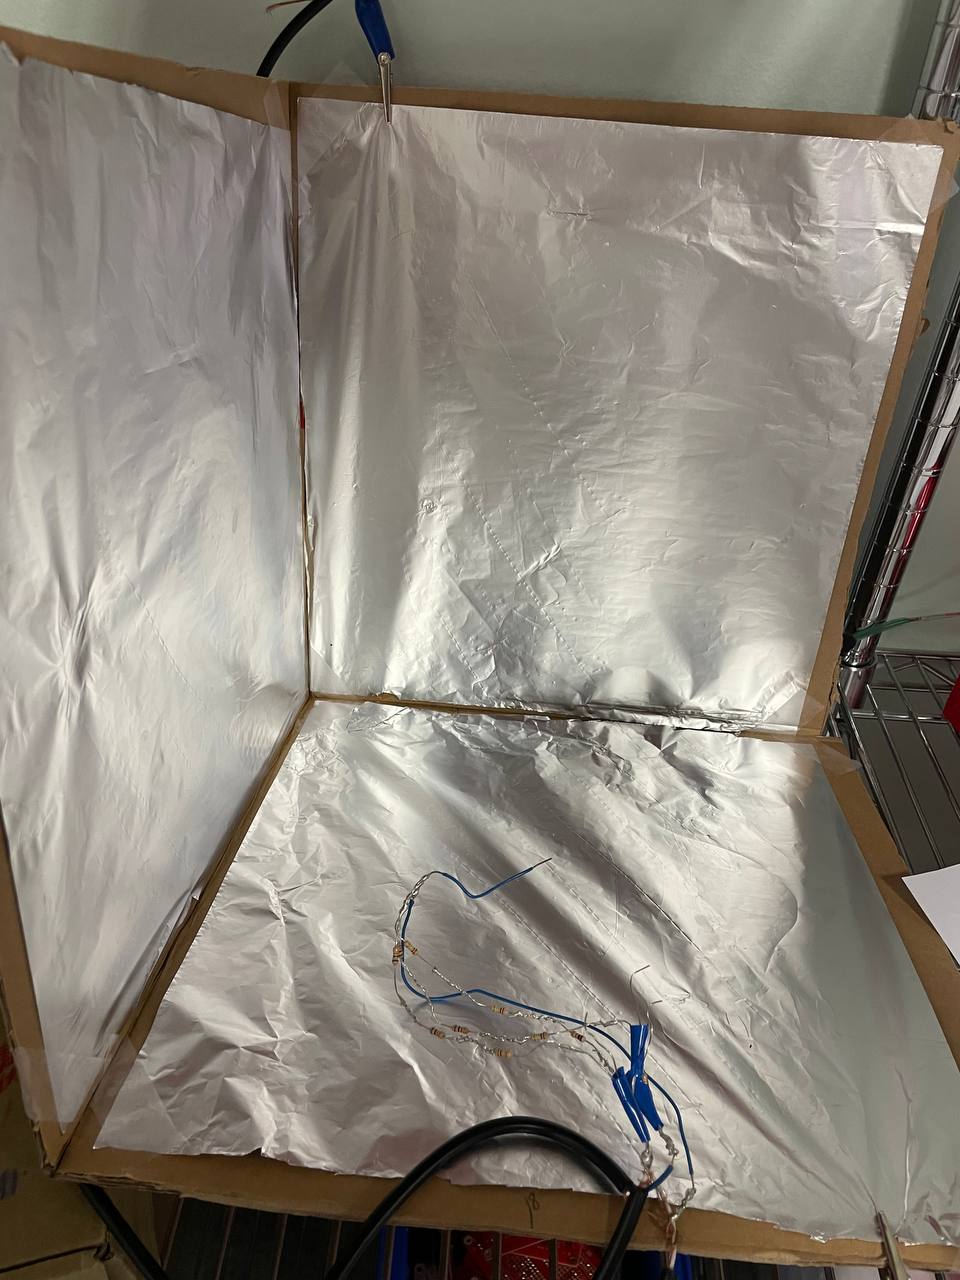
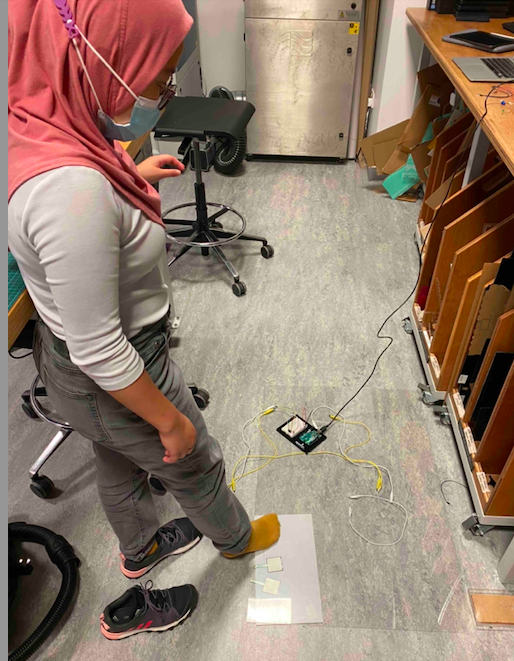
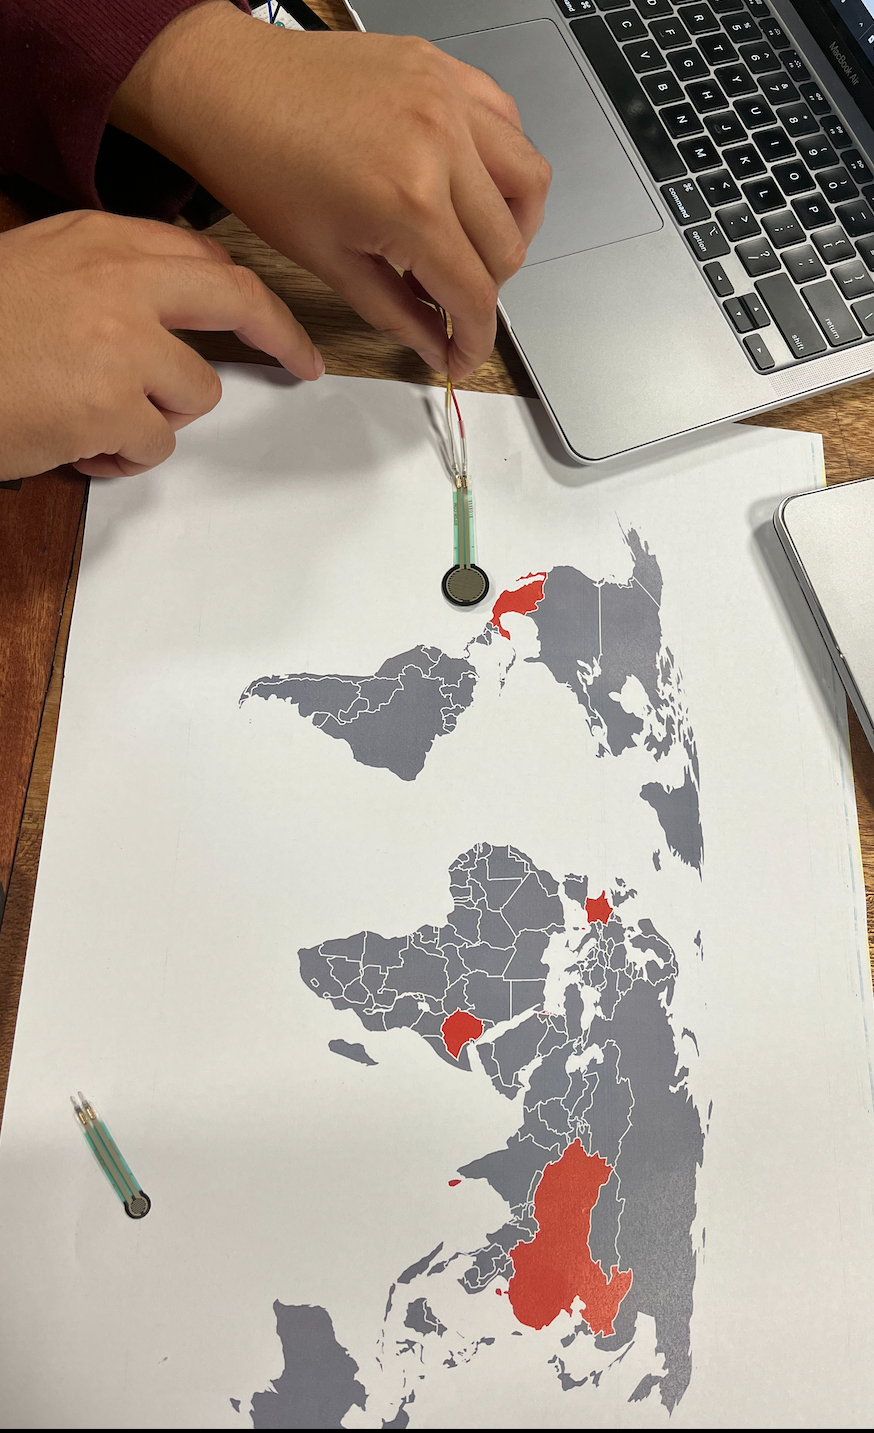
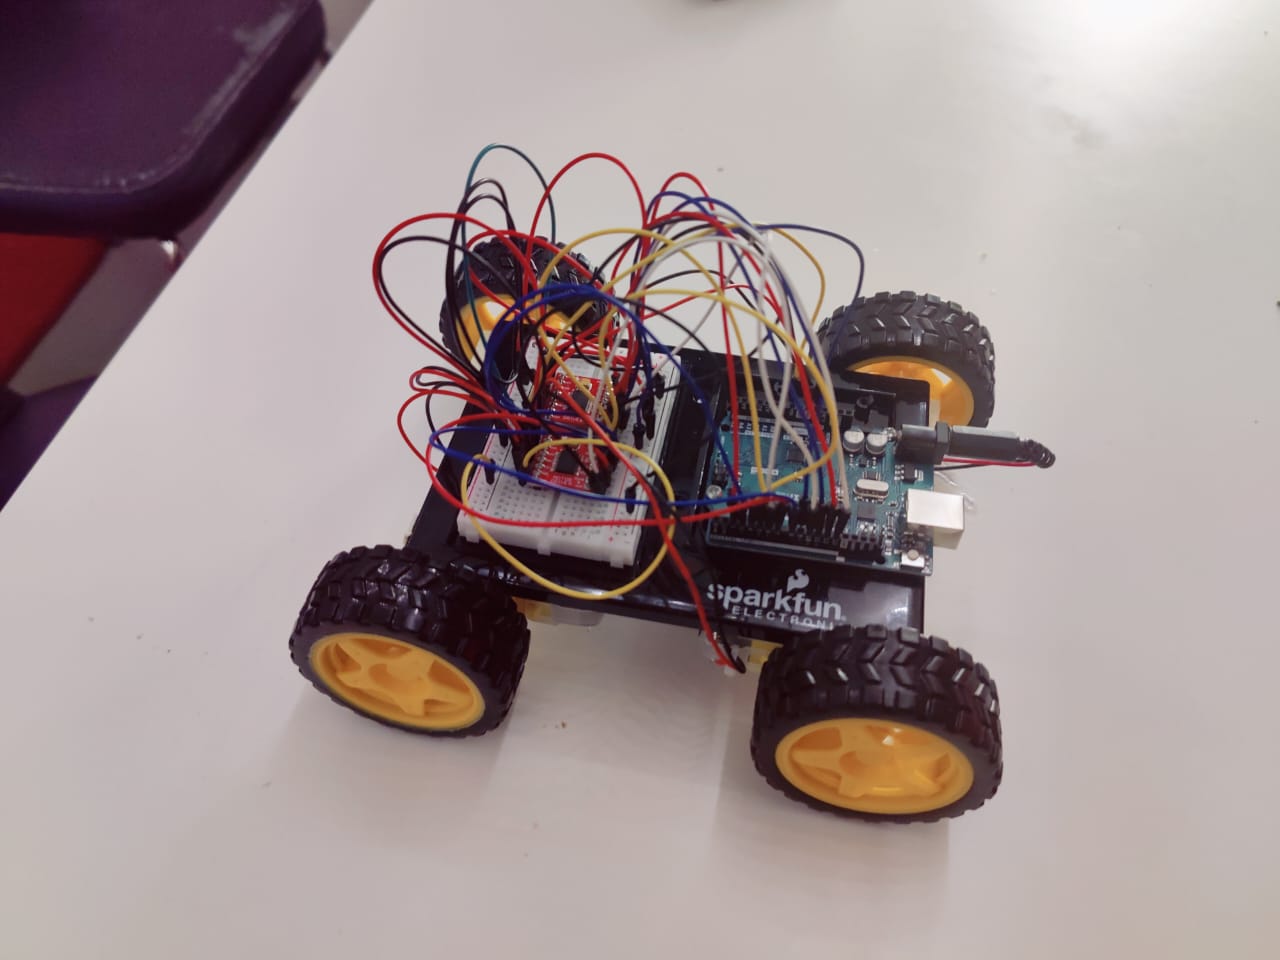
We have been also working on the physical computing end, where we’re testing implementations for our beloved airhorn.

To wrap up our project, we have to hook up the hardware and software end, which is the “hardest” 10%, as the professor mentioned in class

Final Project Progress

Before starting the Arduino side of things, I wanted to finish the p5js side of my project. So far, I’ve finished all the main parts of the game like the transitions and different buttons. I’ve managed to make the game go full screen when the user clicks the starting screen.

All that is left for me to add in the p5js code is the part that is related to Arduino and small parts like the sounds and other small visual effects which I haven’t decided on yet.

Sounds

I will add the following sounds:

  • Background music for the entire duration of the game including menu and score screen
  • Crowd sounds to play during the main part of the game
  • Excited crowd sounds when the user scores

P5js sketch

Arduino

As for the Arduino side of my project, I have decided that I will use an infrared emitter and receiver under the hoop on either side so that when the ball falls through the hoop, it will disrupt the signal.

I will also build a boxy frame in which I will have my hoop on a slanted surface so that the ball rolls down to the user after they shoot it.

Dance Breaker: The Beginning 💃🏼 🤸

Planning Stage


Before we began to work, we needed to sort out a grand variety of details. Which materials were we going use?  How would we use them? When would we meet and build our project? Given that Lily is a senior and has her capstone paper due in less than 2 days, and her presentation a few days before the final submission, our team needed to make sure we were properly managing our time and planning realistic deadlines according to our schedule. We wrote a detailed outline with parts of our project and internal deadlines that we plan to keep in order to make our project the best final project. During this initial planning meeting, we also gave our project the name Dance Breaker. It is an ode to breakdancing AND hints to how the game will work: the music will stop (break) and you need to press the sensors to un-break it. Get it?

SEE OUR PLAN HERE

We also created our internal deadline system into google calendar and set working hours. Once we had our work cut out for us, we began the execution of our plan.

Building Progress

Game Mechanics:

      •  We worked mostly on the P5.js code for the songs and serial connection. To do this he constructed a board with smaller sensors and pieces from a previous project that would allow for testing on a smaller scale. He also began to work with computer vision. The current p5.js sketch loads pixels and has a light threshold akin to previous class exercises. It took a long time to figure out how to mirror the image in order to have a comprehensive experience. Furthermore, he built conditional statements so that all sensors need to be pressed in order for a song to play. The arduino code should not require any changes after today except for the addition of the reward system.
      • Next steps for the game mechanics are:
          • Implement a functioning random timer (which was already created but not aligned with the music) to stop the song randomly and resume the game.
          • Randomize the sensors that need to be pressed in order for the music to continue.
          • Add a design to the computer vision beyond a threshold.


void setup() {
  Serial.begin(9600);
 
}
void loop() {
  int oneValue = analogRead(A0);
   
  int twoValue = analogRead(A1);

  int threeValue = analogRead(A2);
 
  int fourValue = analogRead(A3);
   
  int fiveValue = analogRead(A4);


    int sensorValue = oneValue;
    Serial.print(sensorValue);
    Serial.print(",");
    sensorValue = twoValue;
    Serial.print(sensorValue);
    Serial.print(",");
    sensorValue = threeValue;
    Serial.print(sensorValue);
    Serial.print(",");
    sensorValue = fourValue;
    Serial.print(sensorValue);
    Serial.print(",");
    sensorValue = fiveValue;
    Serial.print(sensorValue);
    Serial.println();
    delay(1);     

  }

Physical Component: Dance Mat and Projector

      • We booked the necessary materials (a vertical projector, a camera) through the portal.
      • We also picked up the necessary sensors and acrylic to build our dance mats. We ran some simple tests with the materials in order to make sure that they work as imagined, and have begun to build the illustrator sketches for the laser cutting.
      • Next steps for the physical components are:
        • Finish the illustrator design and laser cut the materials
        • Print Stickers and Logo
        • Cut and assemble the base.

Final Project – Progress

p5JS game

I have started working on the p5js game. This game will involve a view similar to that of temple run or subway surfers, and obstacles will be on your path and the player/skater will have to move side to side (and eventually) jump over them. This week, I have managed to set up the basic stage design as well as some scaling properties for the background to make it appear like the player is moving.

I have not yet been able to create the sprites for the player so a placeholder circle is being used.

Arduino

I managed to also set up the serial communication from the accelerometer to the p5js and get some basic movement going. When I have the prototype for the game ready to go, I will attach the Arduino with the sensor to my penny board and calibrate it for the controls.

Todos

  1. Create/find sprites for the player
  2. Finish the game logic
  3. Finish the game design (sound/score/restart)
  4. Pressure pad for jump control
  5. Figure out how to block wheels on the penny board

Progress video

MY6 (final project progress)

For our final project, we have decided to take this opportunity to showcase 6 different current events around the world, that we believe should have more exposure in the media. Through this, we would like the people affected by these issues to be the focus of how these events are presented in the media.  To do this we will use p5js to display a world map with the 6 countries these issues are happening in highlighted, which will be projected onto a surface that will use Arduino to trigger videos and images in p5js. We have selected the counties, and the events, along with the videos and images. We hope that through these videos the lives of the people affected by these issues are the focus, followed by the images which are headlines of these events in the news articles.

Example of Video:

Example of Image:


Technical Difficulties:

So far, we have a map that has the six countries highlighted, we are able to make an image appear of the news article, however, our first issue is embedding a video into p5js, either through a link or downloaded and uploaded as a media file. Next, we have set up a sensor in Arduino, which we know works and is able to read values, however, when tried to make the sensor trigger the image (as we don’t know how to use a video) it does not read the values. We have used “webSerial_handshake_simpler” example provided by the professor, to test the sensor as well as log the rVal (reading of the sensor) which works, however, in trying to get it to do the same to the background with our map it does not work and does not trigger the image either.

Here are two videos demonstrating the two issues.

Our fail:


working example:

Finally, we would like along with the force sensor to trigger p5js to zoom into the map and then play the videos and present the headlines (this will be triggered by matching the cut out of the country onto the country on the map which will be projected onto a paper surface that the sensors are under [image of the model included]) which is our third and final major issue.

p5js Code:

arduino:

#define FORCE_SENSOR_PIN A0 // the FSR and 10K pulldown are connected to A0

int sensor = analogRead(A0); 

void setup() {
  Serial.begin(9600);
  // start the handshake
  while (Serial.available() <= 0) {
//    Serial.println("0,0"); // send a starting message
    delay(300);            // wait 1/3 second
  }
}

void loop() {
  // wait for data from p5 before doing something
  while (Serial.available()) {
    int left = Serial.parseInt();
    int right = Serial.parseInt();
    if (Serial.read() == '\n') {
 
      delay(1);
      Serial.print(sensor);
    }
 int sensor = analogRead(FORCE_SENSOR_PIN);
  Serial.print(sensor); // print the raw analog reading
   
  }
}


credit for p5js world map: https://editor.p5js.org/Kumu-Paul/sketches/wq3Uh5dBp


Final Project Progress (Dev and Zaeem)

SAGA-GT Car Game

We are building a remotely controlled car that will feature both autopilot mode and manual driving mode. The user will have the choice to decide which mode they want to choose to drive the car.

User-controlled: using arrows keys through p5js, we will make a mini-game in p5js or a real obstacle course if we have time after completion of this mode.
Follow a track or the user: using infrared sensors, we want to make the car move independent of input from the user by following a line on the track.

Arduino Components 

  • Arduino Uno (we are going to move it to the MEGA board)
  • 2 IR Range Sensor
  • 4 Wheels
  • 4 Motors
  • 1 ultrasonic sensor
  • 1 LDR
  • 2 Motor drivers
  • Battery DC
  • Acrylic Sheet
  • Battery Holder

Implementation

We started by taping the motors using double sided tape and sticking it to the acrylic sheet. Then we connected the wheels to the motor and wired it to the motor driver. We manage to fit all the pins on the Arduino Uno and after couple hours of figuring out the wiring we got both the motor driver on the breadboard. Then came the challenging part of getting the pins defined correctly in the code and using the example code to build up on our car driving code.

We made the car so that it can move in all directions, using two motor drivers and four motors (4 Wheel Drive). This allows the user to control the car’s movement direction using arrow keys on P5.js through Serial Communication with the Arduino connected to the car. We have the manual driving mode working now and the car can be controlled manually from the p5.js interface with the arrow keys.

The p5.js is serially transmitting a direction flag (integer) that is indicating the driving direction and the Arduino is reading this flag and using switch statements to make the car move. These switch statements control the motors’ speeds and rotation directions.

We decided to manually control the movement of the car – without the IR controller – because this is the most functionally important part of this project. We spent the weekend understanding how the motors work and what possibilities there are coding features for motors in Arduino. We are now confident enough in our basic understanding of motors to start finalizing the project.

Here is a video of the car driving:

Manual car driving Demo


Here is the p5js sketch we made:

let dir = 0;
let direction = 0;

function setup() {
  createCanvas(640, 480);
  
  textSize(18);
}

function draw() {

  if (!serialActive) {
    text("Press Space Bar to select Serial Port", 20, 30);
  } else {
    text("Connected", 20, 70);
  }
  switch(direction) {
  case 0:
    dir = 0;
    break;
  case 1:
    dir = 1;
    break;
  case 2:
    dir = 2;
    break;
  case 3:
    dir = 3;
    break;
  default:
    // code block
  }
  
  print(dir);
}

function keyPressed() {
  if (key == " ") {
    // important to have in order to start the serial connection!!
    setUpSerial();
  }
  else if (keyCode == UP_ARROW) {
    direction = 0;
  }
  else if (keyCode == LEFT_ARROW) {
    direction = 1;
  }  
  else if (keyCode == RIGHT_ARROW) {
    direction = 2;
  }  
  else if (keyCode == DOWN_ARROW) {
    direction = 3;
  }
}

function readSerial(data) {
  ////////////////////////////////////
  //READ FROM ARDUINO HERE
  ////////////////////////////////////

  if (data != null) {
    //////////////////////////////////
    //SEND TO ARDUINO HERE (handshake)
    //////////////////////////////////
    let sendToArduino = dir + "\n";
    console.log(sendToArduino)
    writeSerial(sendToArduino);
  }
}


Here is the Arduino code:

//Motor controls
const int ain1Pin = 3;
const int ain2Pin = 4;
const int pwmAPin = 5;

const int ain1Pin_2 = 13;
const int ain2Pin_2 = 12;
const int pwmAPin_2 = 11;

const int bin1Pin = 8;
const int bin2Pin = 7;
const int pwmBPin = 6;

const int bin1Pin_2 = 9;
const int bin2Pin_2 = 2;
const int pwmBPin_2 = 10;

int dir = 0; //0 - forward, 1 - right, 2 - left, 3 - reverse
bool reverse = false;

void setup() {

  //setting all motor controls to output
  pinMode(ain1Pin, OUTPUT);
  pinMode(ain2Pin, OUTPUT);
  pinMode(pwmAPin, OUTPUT); 

  pinMode(ain1Pin_2, OUTPUT);
  pinMode(ain2Pin_2, OUTPUT);
  pinMode(pwmAPin_2, OUTPUT); 

  pinMode(bin1Pin, OUTPUT);
  pinMode(bin2Pin, OUTPUT);
  pinMode(pwmBPin, OUTPUT);

  pinMode(bin1Pin_2, OUTPUT);
  pinMode(bin2Pin_2, OUTPUT);
  pinMode(pwmBPin_2, OUTPUT);

  Serial.begin(9600);

  // start the handshake
  while (Serial.available() <= 0) {
    Serial.println("0,0"); // send a starting message
    delay(300);            // wait 1/3 second
  }
}

void loop() {

  while (Serial.available()) {

      if (!reverse){
          digitalWrite(ain1Pin, LOW);
          digitalWrite(ain1Pin_2,HIGH);
        
          digitalWrite(ain2Pin, HIGH);
          digitalWrite(ain2Pin_2,LOW);
        
          digitalWrite(bin1Pin, HIGH);
          digitalWrite(bin1Pin_2,LOW);
        
          digitalWrite(bin2Pin,LOW);
          digitalWrite(bin2Pin_2,HIGH);
      }

      else {
          digitalWrite(ain1Pin, HIGH);
          digitalWrite(ain1Pin_2,LOW);
        
          digitalWrite(ain2Pin, LOW);
          digitalWrite(ain2Pin_2,HIGH);
        
          digitalWrite(bin1Pin, LOW);
          digitalWrite(bin1Pin_2,HIGH);
        
          digitalWrite(bin2Pin,HIGH);
          digitalWrite(bin2Pin_2,LOW);
      }
    
      
      dir = Serial.parseInt();

      //completing the "handshake"!!!!!!!!!!!!!!!!!!!!!
      Serial.println(dir);
       
      if (Serial.read() == '\n') {
          switch(dir) {
          case 0:  
            reverse = false;
            analogWrite(pwmAPin, 255);
            analogWrite(pwmAPin_2, 255);
          
            analogWrite(pwmBPin, 255);
            analogWrite(pwmBPin_2,255);
            break;
          case 1:
            analogWrite(pwmAPin, 255);
            analogWrite(pwmAPin_2, 0);
          
            analogWrite(pwmBPin, 255);
            analogWrite(pwmBPin_2,255);
            break;
          case 2:
            analogWrite(pwmAPin, 255);
            analogWrite(pwmAPin_2, 255);
          
            analogWrite(pwmBPin, 255);
            analogWrite(pwmBPin_2, 0);
            break;
          case 3:
            reverse = true;
            analogWrite(pwmAPin, 255);
            analogWrite(pwmAPin_2, 255);
          
            analogWrite(pwmBPin, 255);
            analogWrite(pwmBPin_2,255);
            break;
          }
      }
  }

  //GO THROUGH THE KEYPRESSED IN DRAW LOOP OF P5JS

}

Plans

At first, the P5js sketch will have an initial menu screen with the two modes for the user to choose from. If the user chooses the autopilot mode, the car will be able to move around and avoid obstacles (obstacle detections) and also be able to drive automatically on a predefined course/ path (by following a black tape on the course using IR sensors). We plan to build a driving course to accompany our car for this project. The user use this course for “test-drives”.

We plan to add wireless transmission using the XBEE shield and chip we checked out as per the Professor’s suggestion. The Arduino connected  with the computer will be in Serial Communication with p5js and will send out signals to the Arduino connected with the car to maintain the p5js to car communication. We also plan on adding motion sensors to the car to gauge braking distance – we will add a simply braking functionality too.

In summary:
  • Add wireless Transmission feature
  • Line follower (Auto driving feature): Add 2 infrared sensors
  • Glue the motors to the board and and align the wheels properly
  • Screw the Arduino firmly to the board
  • Create the driving course
  • Work on the P5.js interface