All Posts

Final Project – PixelPals

Concept:

This project follows my initial idea of making a digital petting zoo. The name of this zoo is PixelPals. In this petting zoo, you are able to approach different animals and make different interactions with them based on their needs and personalities. The theme and design is quite adorable, aiming to create an atmosphere of comfort and fun. The soundtrack of the background music is from the Nintendo Game, Animal Crossing, something very similar to this project. This project also includes a dedicated control box.

https://editor.p5js.org/Yupuuu/full/2L2O-pC8e

Challenges and Highlights:

The most difficult challenge I had was the serial communication. It took me sometime understand how the serial communication truly works so that I could send more complicated codes. Designing levels of the experience is also hard: it’s important to decide which levels one animal uses, and how to differentiate among all these animals, etc. This is especially difficult because I had to deal with two ends of the communication at the same time. Therefore, it took me a lot of time to figure these things out. And also, sometimes the circuit itself did not work and I had to try some methods such as resetting the Arduino or rewiring things to make it work.

Another problem I ran into the wiring the wires and making the control panel. The control panel is smaller than I thought when I was using the laser cutter to make it. This gave me a hard time putting everything into this enclosed box. In fact, I am still not able to put all wires into it. But one advantage of keeping things outside is that I can easily spot the problem if anything happens. However, this is still a lesson learnt: always make the box bigger than I think.

I am especially proud of using many different features in this single project, including state machine, spritesheet, colliders, etc. All these parts work smoothly with each other to make this project possible. And I am also glad how I used fours buttons to complete several different tasks. Allocating these buttons is also important for the implementation of this project.

Arduino code: https://drive.google.com/drive/folders/1tKOEiyYHFteIk_WYt9-tBES8K4-c9bhL?usp=sharing

VIDEO: IMG_1755

Control Panel: Arduino  Mega,  LCD  Display,  Buttons,  Light  Sensor

User Testing

The current control panel is a result of user testing. Originally, there were no instructions at all. Especially when it came to the light sensor, people who did not know what it was had no idea what it could do and how it could relate to the owl. Therefore, I decided to add a shape of the sun to indicate that this can represent a sun and you need to cover this sun for the owl to sleep. Following this, I added instructions to the control panel. However, as a relaxing experience, I do not want the player to spend a lot of time reading the instructions. Therefore, I ended up using some simple illustrations and words to guide the player.

(After the showcase) It was interesting that almost nobody followed the instructions before I told them to. They liked pushing the button even when it was not lit up. And they never read what was on the LCD screen. The only persons who read them were kids. Probably this game was meant for kids. This really shows me the gap between the designed experience and the actual experience people have. It actually reflects on one of our readings that the interactive media artists should let the audience explore on themselves. Obviously, my project is not such a good example in which audience should be allowed to freely explore it as it might break my project… However, overall, people could understand what my project was about and made a laugh when they actually read the texts on the LCD screen!

Reflection & Improvements

This project is very interesting. It prompted me to utilize all the skills I learnt in this class with fabrication skills make this project. It is very satisfactory to see the final product. Reflecting on this project, I realized the power of physical computing and how the hardware and softwire can work together to create unique experiences. However, one of my initial ideas was to create an animal like controller that can act like an animal. However, that would require much more physical constructions, which I did not have enough time for this time. In this future improvement, this could be added, and more interactions could be added to more animals in this zoo. Maybe some customization functions could also be added to make this experience more interesting and personal.

Week 13: Final Project


Project concept:

For my final project, I stuck closely to the original concept and developed a straightforward yet engaging game. The premise involves safeguarding a car navigating a road from descending obstacles. Users are tasked to protect the car by moving it left and right using the buttons on the Arduino board. Failure to shield the car results is a game over, while successfully safeguarding it from at least 10 obstacles leads to victory. I introduced an element of challenge by ensuring that the car moves at a fast pace, adding a layer of difficulty for users as they skillfully escape the approaching obstacles.

User testing:

I tested the game with my friend Javeria, and given its straightforward design with limited options, she quickly understood the mechanics. During the experience, she said she was able to grasp the functionality effortlessly without any guidance. Her understanding of the game highlighted its user-friendly nature and accessibility.

Challenging part:

The core functionality of the game coding operates smoothly, demonstrating performance without encountering any errors related to its main features. Despite facing multiple challenges, the essential gameplay elements functioned flawlessly. However, the area requiring further improvement lies in the transition between pages. The aspect of navigating between different sections of the game could benefit from some enhancements.

I intentionally excluded the idea of an instruction page, as I, reflecting on my own experiences as a child, preferred the thrill of figuring things out independently. However, recognizing that not everyone shares this perspective, users may need guidance on understanding the fundamental operations of the game. 

For the arduino I implemented simple 2 switches coding. Initially my p5 coding was the movement of the car to right and left using the keys of the keyboard. But by utilizing the readSerial() function as the communication link between p5.js and Arduino, the Arduino code is structured to retrieve the statuses of two switches and transmit these values to p5.js.

Arduino code:

const int switch1Pin = 4;  // Replace with the actual pin for switch 1
const int switch2Pin = 8;  // Replace with the actual pin for switch 2

void setup() {
  Serial.begin(9600);
  pinMode(switch1Pin, INPUT_PULLUP);
  pinMode(switch2Pin, INPUT_PULLUP);
  

  while (Serial.available() <= 0 ){
    Serial.println("0,0");
    delay(300);
  }
}

void loop() {


  while(Serial.available()) {
    if (Serial.read() == '\n') {
      int switch1State = digitalRead(switch1Pin);
      delay(5);
      int switch2State = digitalRead(switch2Pin);
      
      Serial.print(switch1State);
      Serial.print(',');
      Serial.println(switch2State);
    }
  }


  // if (switch1State == LOW) {
  //   // Switch 1 is clicked, set output to 1
  //   Serial.println("1");
  //   while (digitalRead(switch1Pin) == LOW) {
  //     // Wait until switch 1 is released
  //   }
  // } else if (switch2State == LOW) {
  //   // Switch 2 is clicked, set output to 0
  //   Serial.println("0");
  //   while (digitalRead(switch2Pin) == LOW) {
  //     // Wait until switch 2 is released
  //   }
  // }
}

p5.js code:

let img;
let rock;
let bg;
let car;
let obstacles = [];
let score = 0;
let bgSpeed = 2; // Background scrolling speed
let y1 = 0;
let y2;
let switch1State, switch2State;
let start;
let restart;
let gameStarted = false;
let gameOver = false;
let gameWon = false;
let winThreshold = 5;
let win;
let music;

function preload() {
  img = loadImage('pinkcarsss.png');
  rock = loadImage('rockss.png');
  bg = loadImage('backgroundroad.png');
  start = loadImage('startpage123.png');
  restart = loadImage('restartpage.png');
  win = loadImage('winpage123.png');
  music = loadSound('gamemusic.mp3');
}


function setup() {
  createCanvas(500, 600);
  car = new Car();
  y2 = height;
  music.play();
}

function draw() {
  background(250);

  // displaying of pages according to win/lose
  if (gameWon) {
    // Player wins
    drawWinPage();
  } else if (gameOver) {
    // Player loses
    drawLosePage();
  } else {
    // Display the start page
    image(start, 0, 0, width, height);

    if (gameStarted) {
      drawGame();
    }
  }
}

function drawWinPage() {
  image(win, 0, 0, width, height);
}

function drawLosePage() {
  image(restart, 0, 0, width, height);
}

function restartGame() {
  gameOver = false;
  gameStarted = false;
  score = 0;
  obstacles = [];
  setupGame();
}

function winGame() {
  gameWon = true;
  gameOver = false;
  gameStarted = false;
}

function mousePressed() {
  if (gameOver || gameWon) {
    if (mouseX > 200 && mouseX < 328 && mouseY > 235 && mouseY < 300) {
      restartGame();
    }
  } else if (!gameStarted) {
    if (mouseX > 200 && mouseX < 328 && mouseY > 235 && mouseY < 300) {
      gameStarted = true;
      setupGame();
    }
  }
}

function drawGame() {
  y1 += bgSpeed;
  y2 += bgSpeed;

  if (y1 > height) {
    y1 = -height;
  }
  if (y2 > height) {
    y2 = -height;
  }

  // Draw background images
  image(bg, 0, y1, width, height);
  image(bg, 0, y2, width, height);

  car.show();
  car.move();

  if (frameCount % 80 === 0) {
    obstacles.push(new Obstacle());
  }

  for (let obstacle of obstacles) {
    obstacle.show();
    obstacle.move();

    if (car.hits(obstacle)) {
      gameOver = true;
    }

    if (obstacle.offscreen()) {
      score++;
      obstacles.shift();
    }
  }

  if (score >= winThreshold) {
    winGame();
  }

  // score
  showScore();
}

function setupGame() {
  obstacles = [];
  score = 0;
  y1 = 0;
  y2 = height;
  car = new Car();
  gameStarted = true;
  gameOver = false;
  gameWon = false;
}

function showScore() {
  fill(0);
  textSize(17);
  text(`Score: ${score}`, 20, 20);
}

class Car {
  constructor() {
    this.w = 80;
    this.h = 90;
    this.x = width / 2 - this.w / 2;
    this.y = height / 2 - this.h / 2;
  }

  show() {
    fill(0, 255, 0);
    image(img, this.x, this.y, this.w, this.h);
  }

  move() {
    // Car moves automatically in the vertical direction
    this.y -= 3;

    // Reset car's position when it goes off the top
    if (this.y < -this.h) {
      this.y = height - this.h - 20;
    }
  }

  moveLeft() {
    this.x -= 10;
  }

  moveRight() {
    this.x += 10;
  }

  hits(obstacle) {
    return (
      this.x < obstacle.x + obstacle.w &&
      this.x + this.w > obstacle.x &&
      this.y < obstacle.y + obstacle.h &&
      this.y + this.h > obstacle.y
    );
  }
}

class Obstacle {
  constructor() {
    this.w = 40;
    this.h = 50;
    this.x = random(width - this.w);
    this.y = -this.h;
  }

  show() {
    fill(255, 0, 0);
    image(rock, this.x, this.y, this.w, this.h);
  }

  move() {
    this.y += 5;
  }

  offscreen() {
    return this.y > height;
  }

As for the p5, it contains the main logic of the game, with four different pages. There are multiple images added and also the elements like moving car and the rock are all png images. A happy music was also implemented in p5.

Looking ahead, I aspire to elevate the game beyond its current straightforward nature, by infusing it with more excitement and thrill. In terms of future enhancements, my goal is to inject more excitement into the game, moving beyond its current straightforward design. I’m also eager to explore and incorporate additional physical elements, further enhancing the interactive and immersive aspects of the gaming experience.

Video:

Week 13: Final Project Progress and User Testing (Prototype)

Still in its prototype phase, I did user testing on my project. The video is seen below:


As of now, the project is not complete. The p5.js code needs to be improved (it is a little buggy) and sounds need to be added. The hardware setup is also not final right now – the strip will be attached to the box.

Thing that worked well was that The interface was pretty straightforward for people to figure out. I didn’t really feel the need to explain to people to what to do with the project. I also got positive feedback about the aesthetics of the project!

The main thing that could be improved was that the length of the light sequence was not congruent with the sequence on the screen. This led to people pressing on the button multiple times, but nothing on the lights changing, giving the impression that nothing was happening.


Week 13: Final Project Documentation & User Testing

Concept

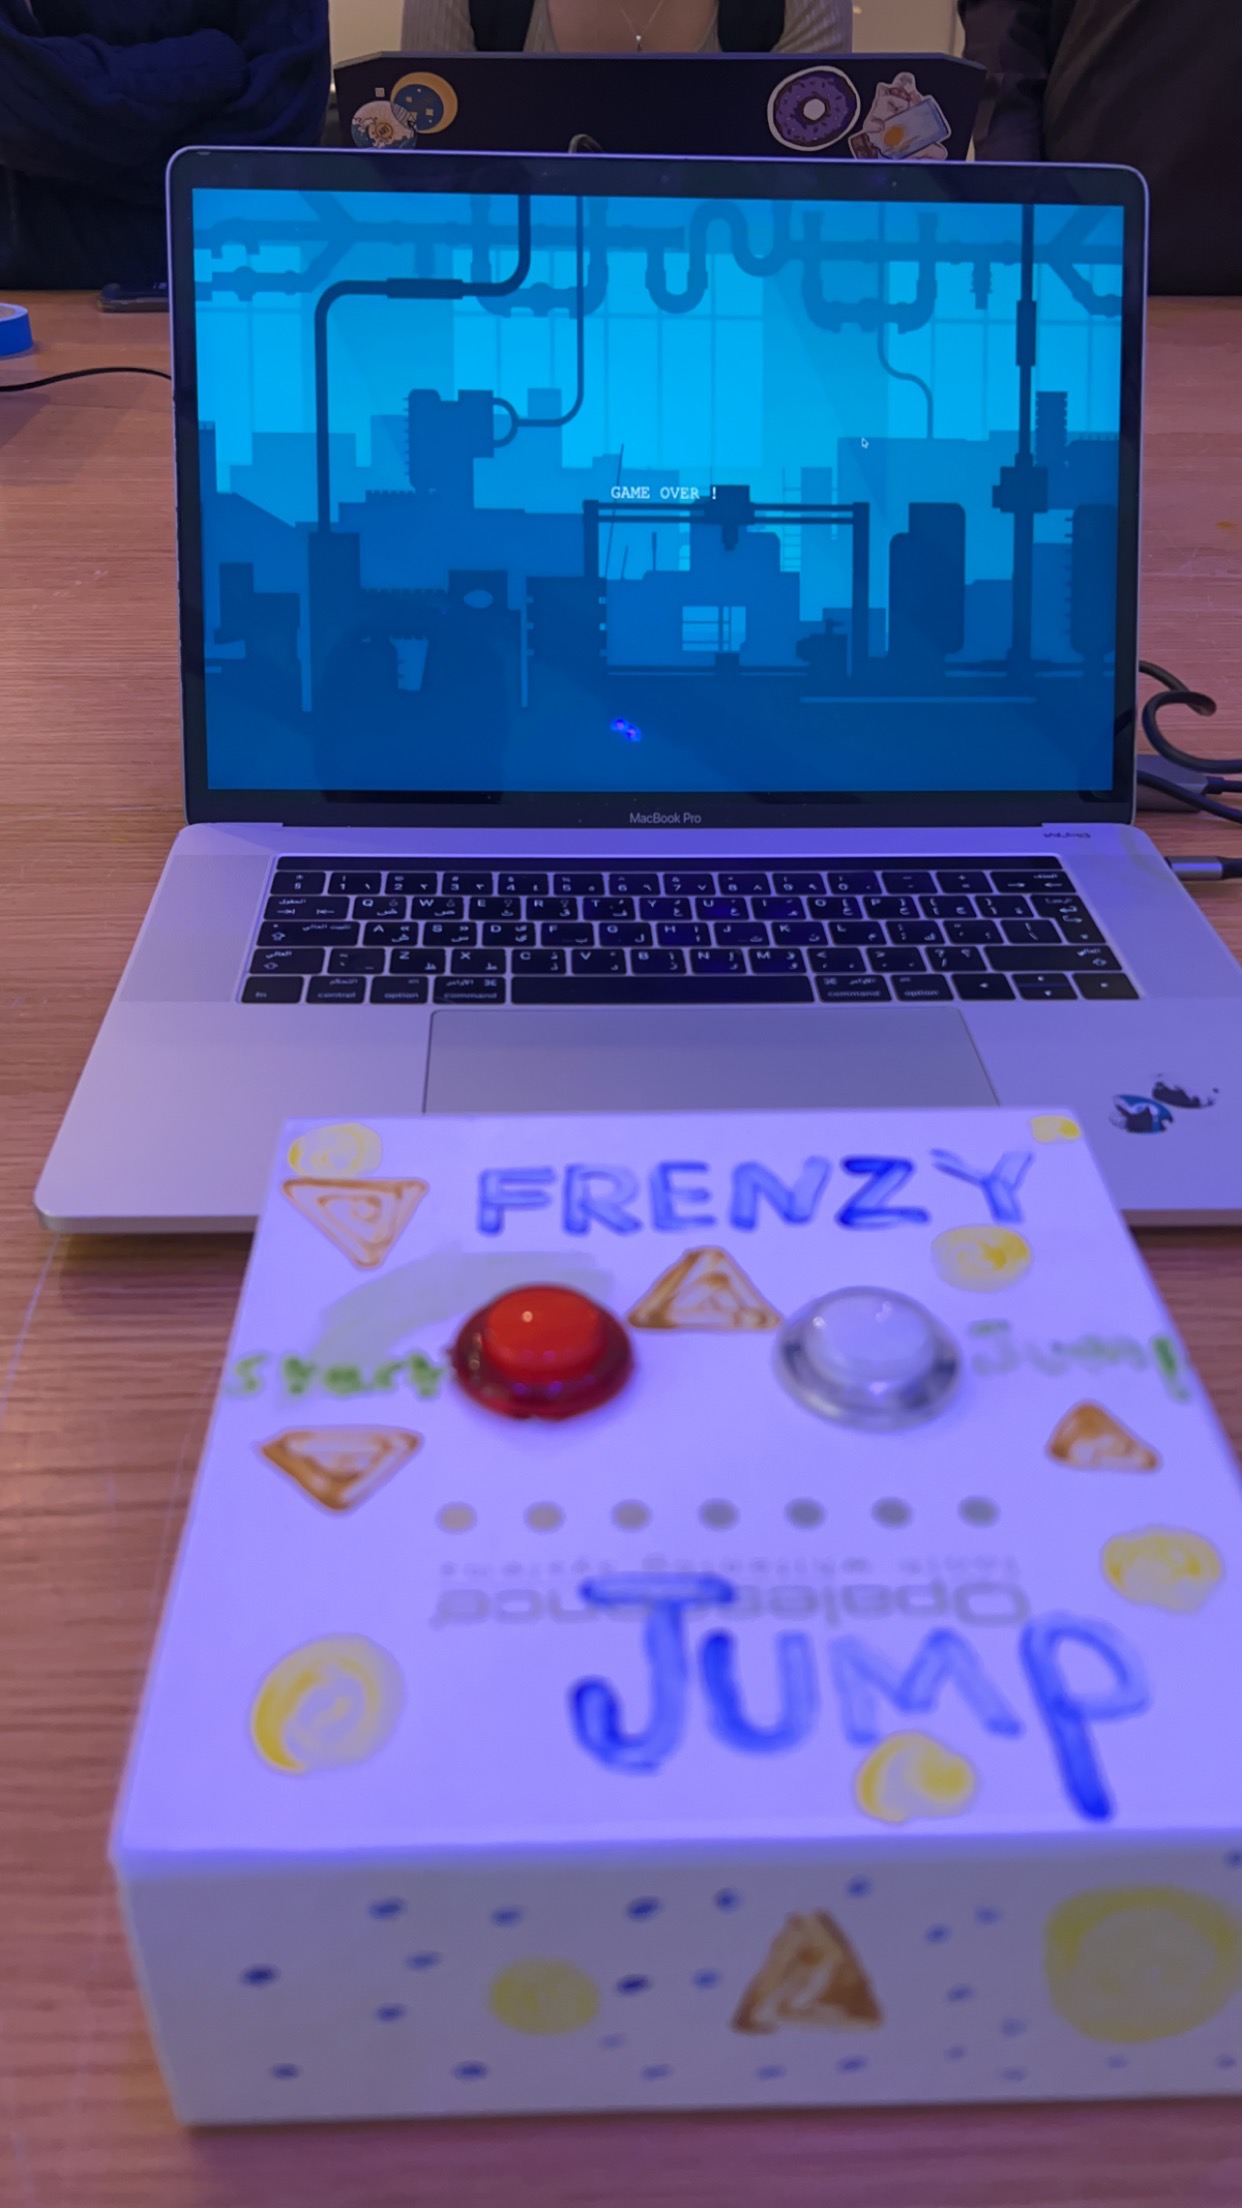
Fruitfall Frenzy is an entertaining and straightforward catching game where players aim to accumulate points by catching fruits while avoiding junk food to prevent point deductions. To achieve victory, players must collect fruits and reach a score of 15 or more. However, failing to do so and catching 10 junk foods with a score of 0 results in a loss for the player.

link to the game: https://editor.p5js.org/Javeria/sketches/e-4vC95i_

Implementation

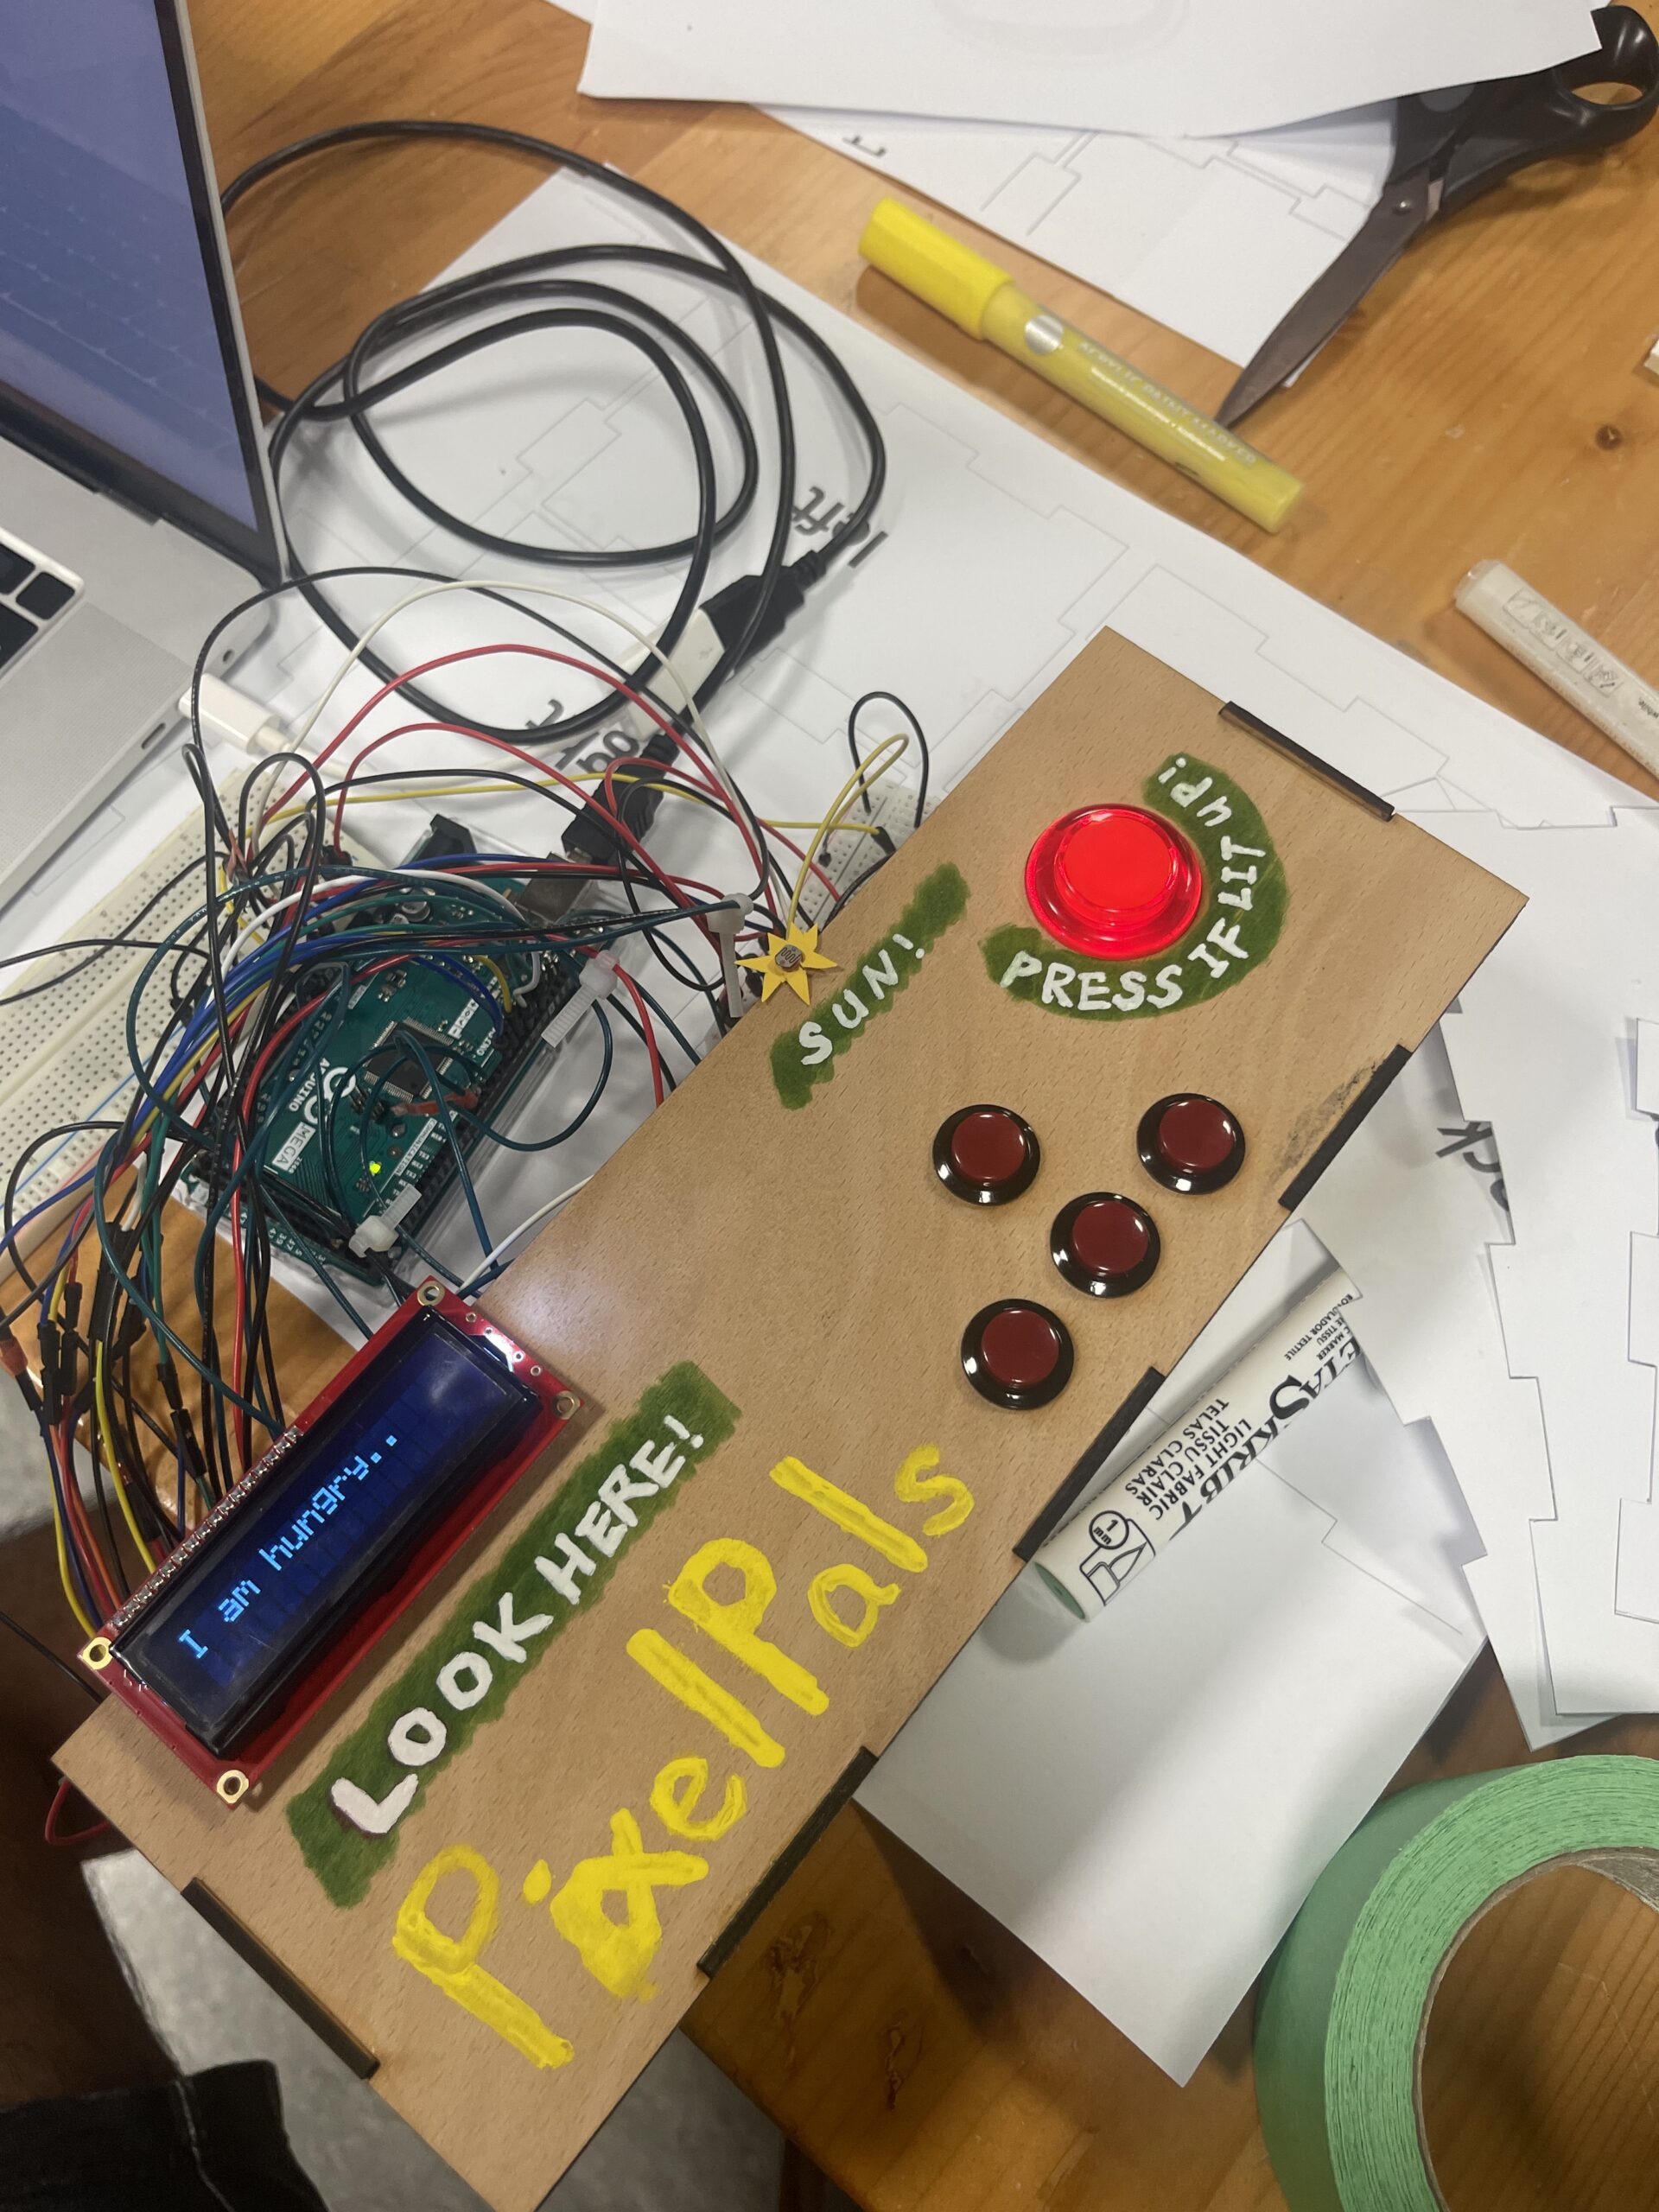
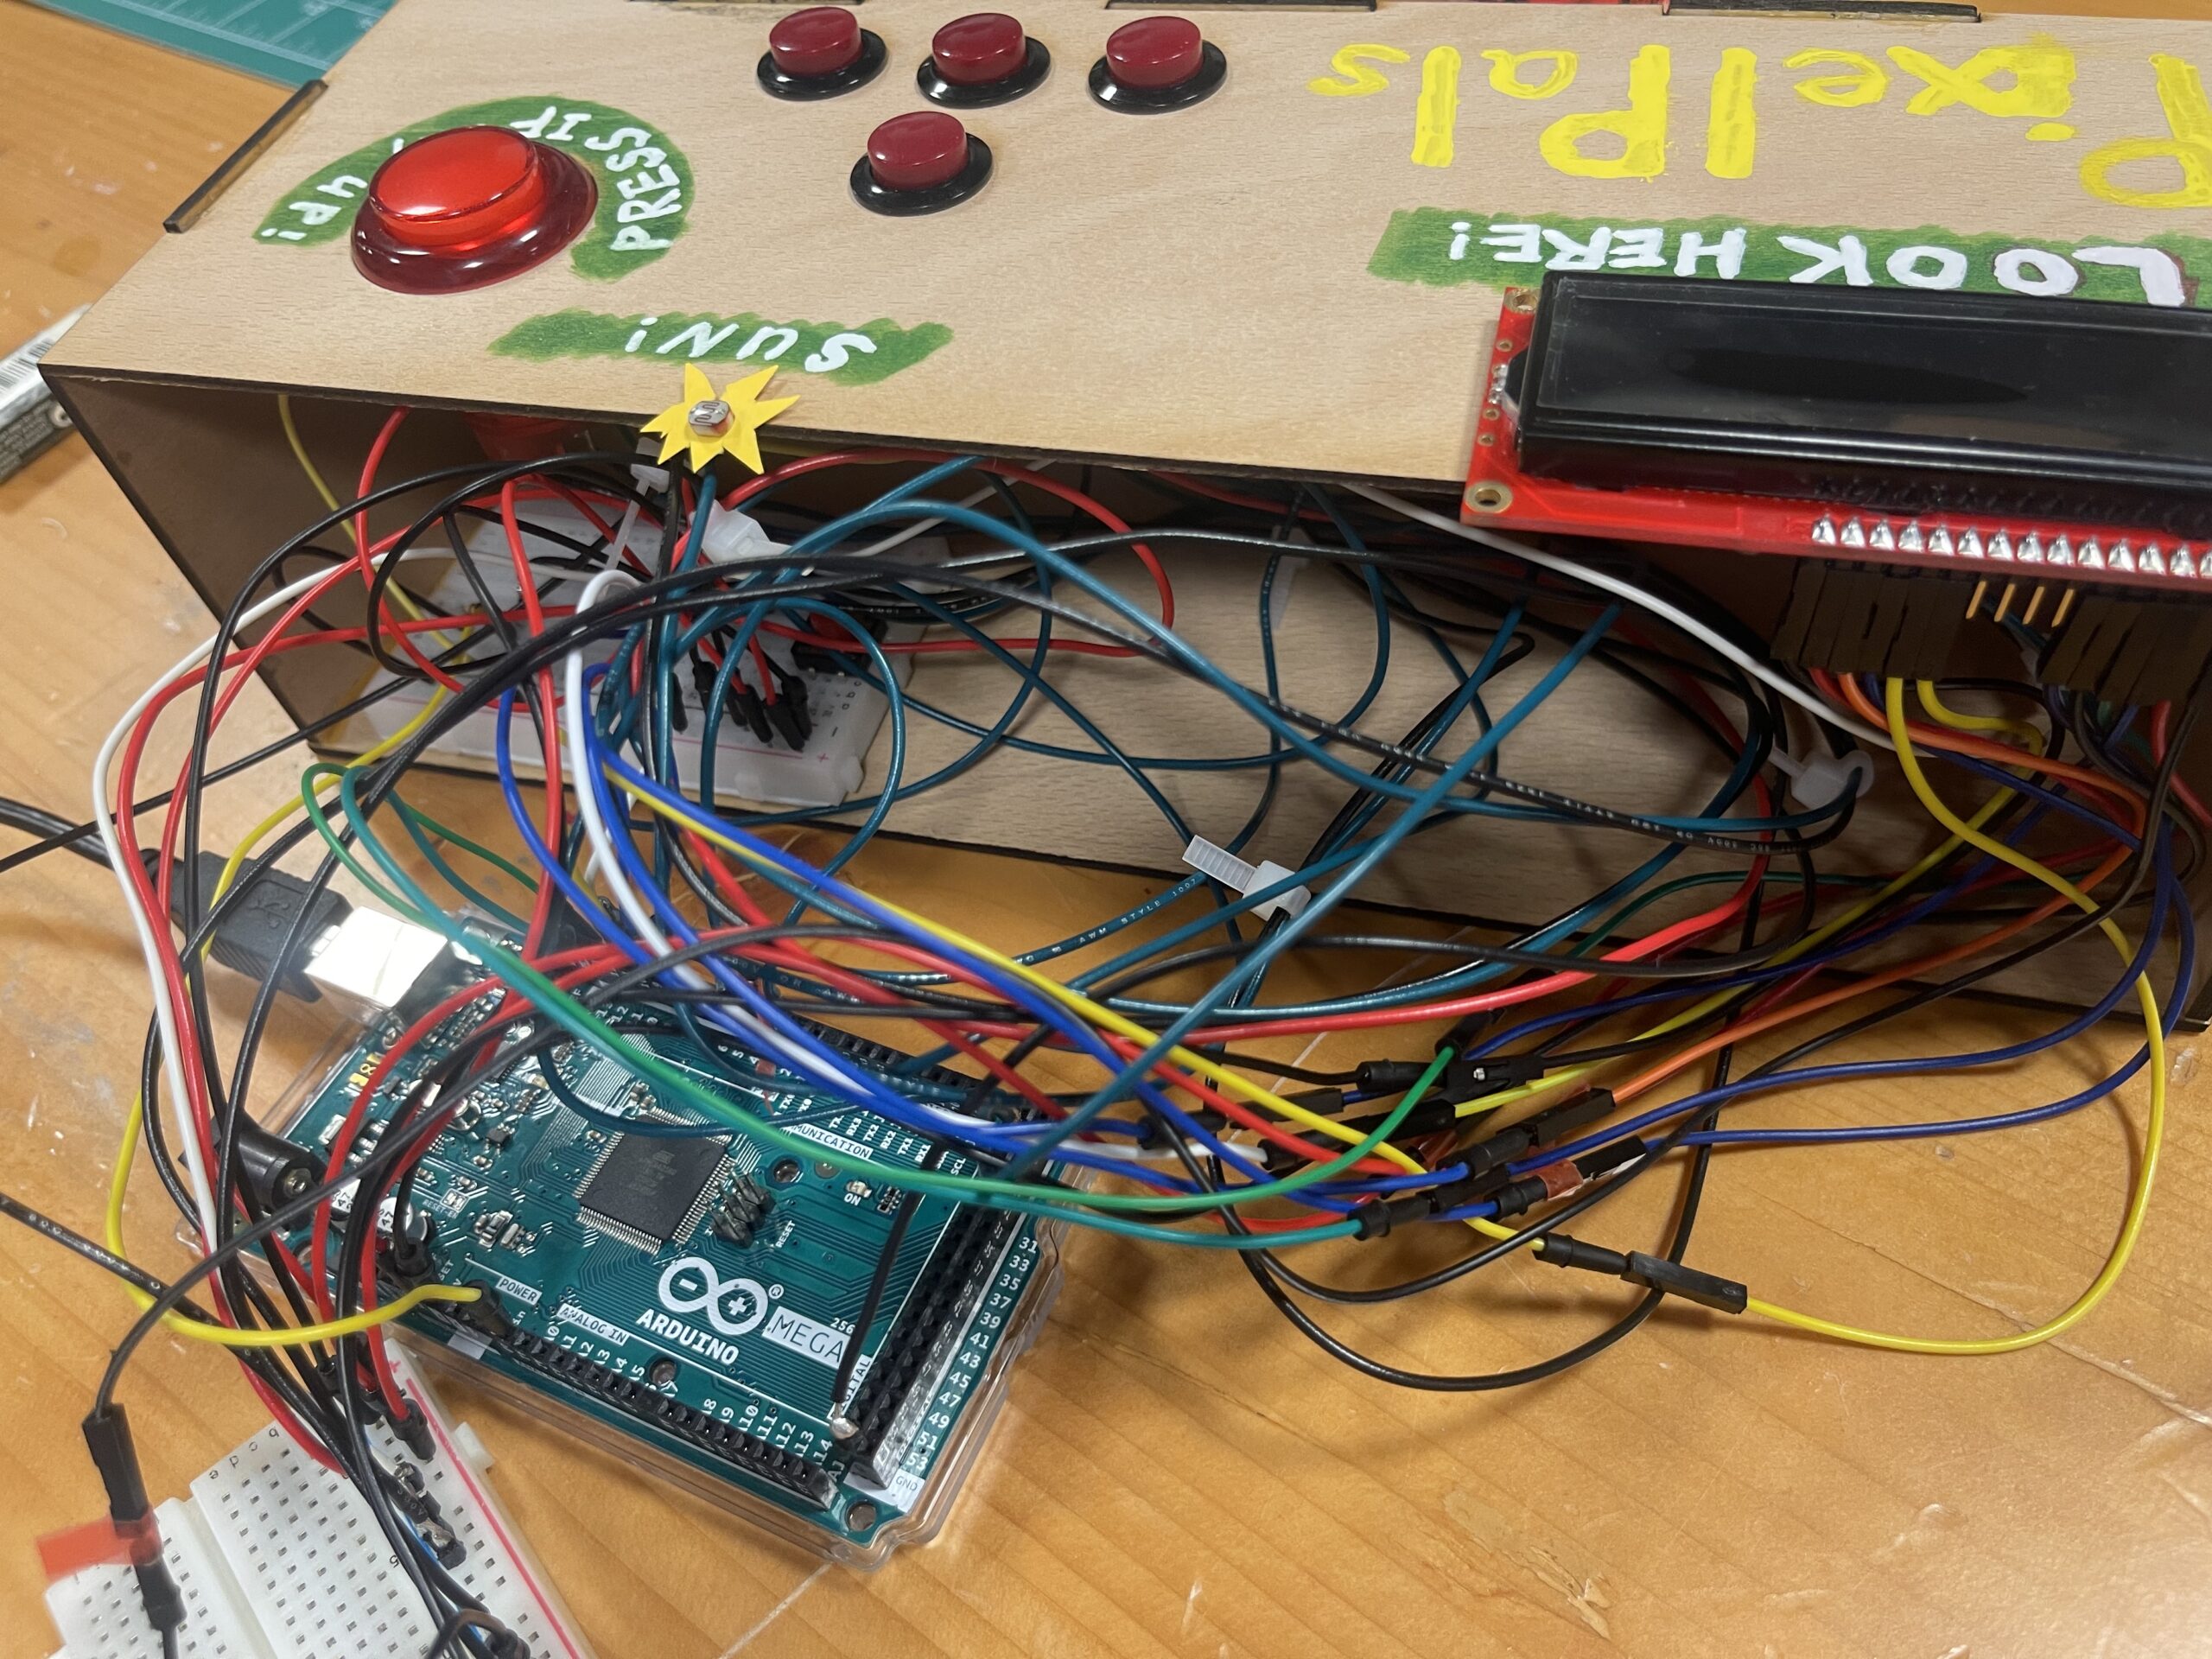
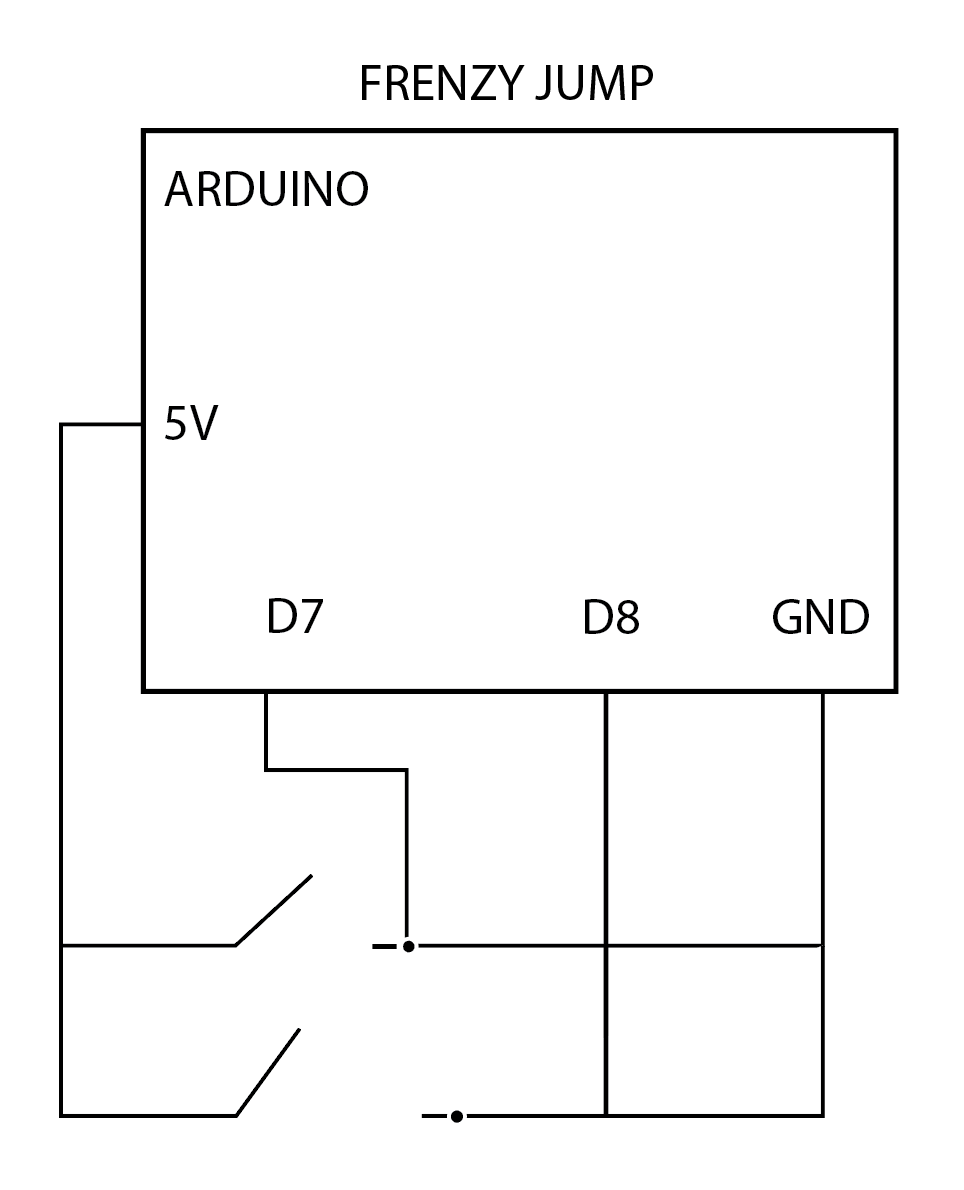
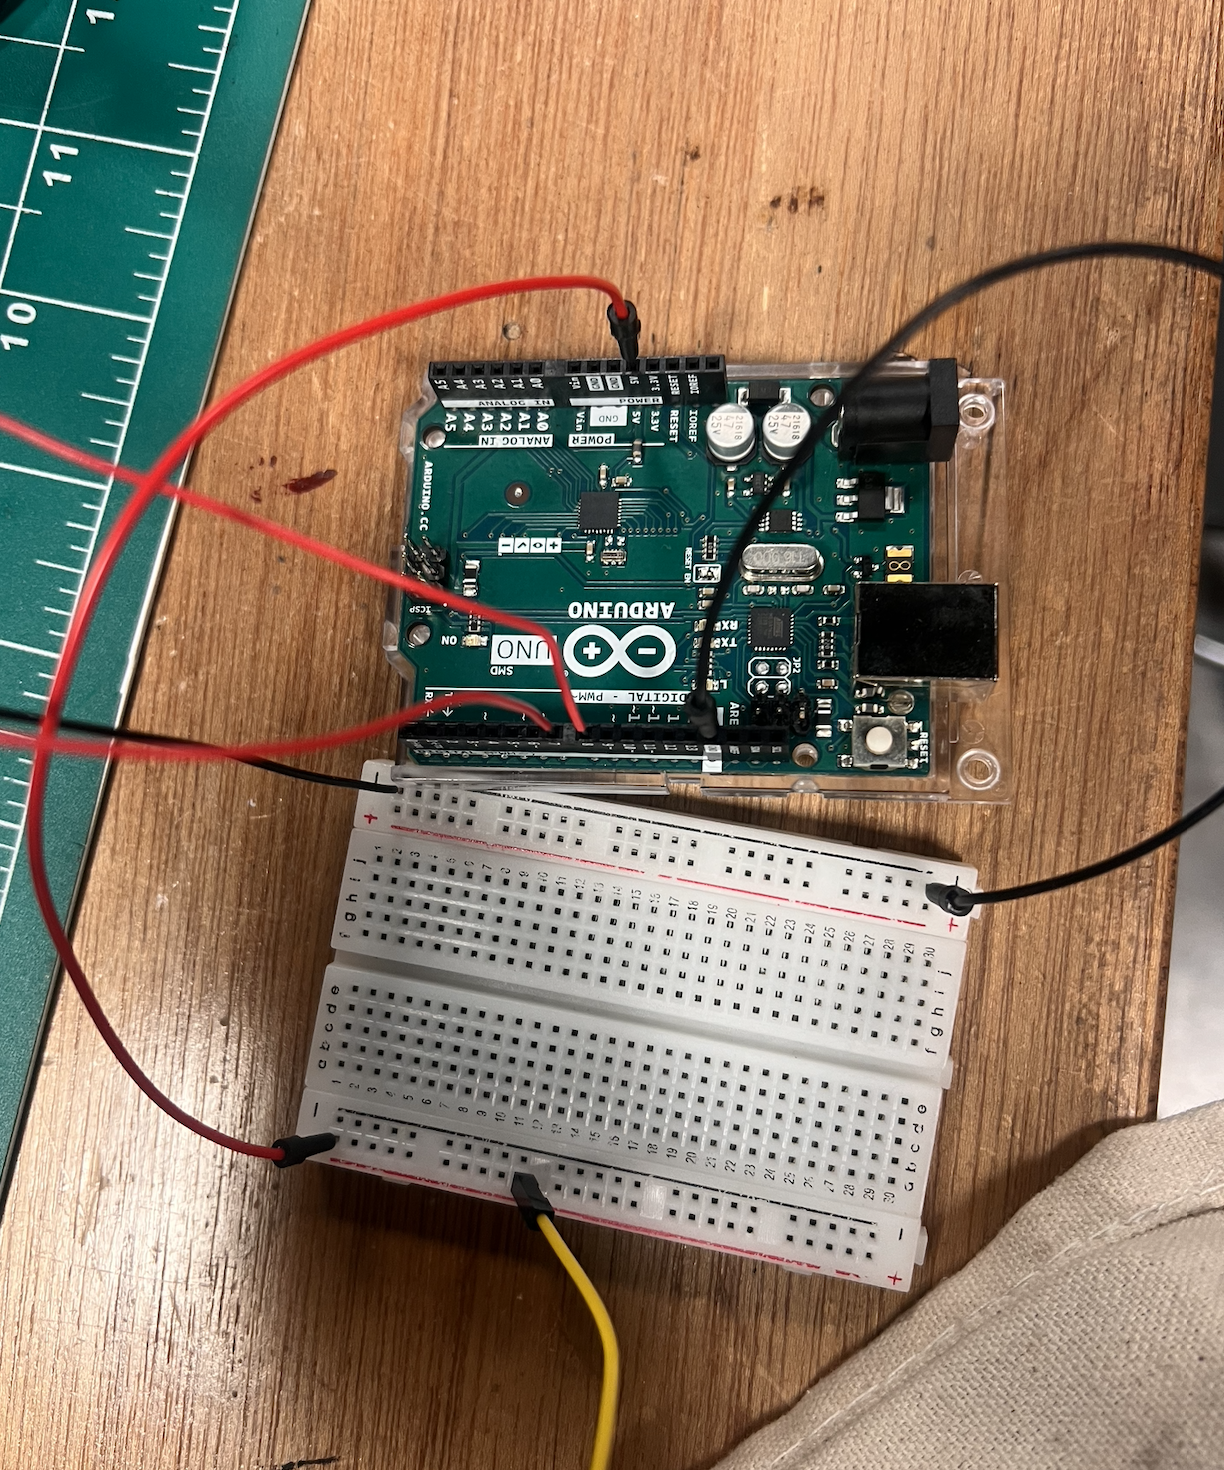
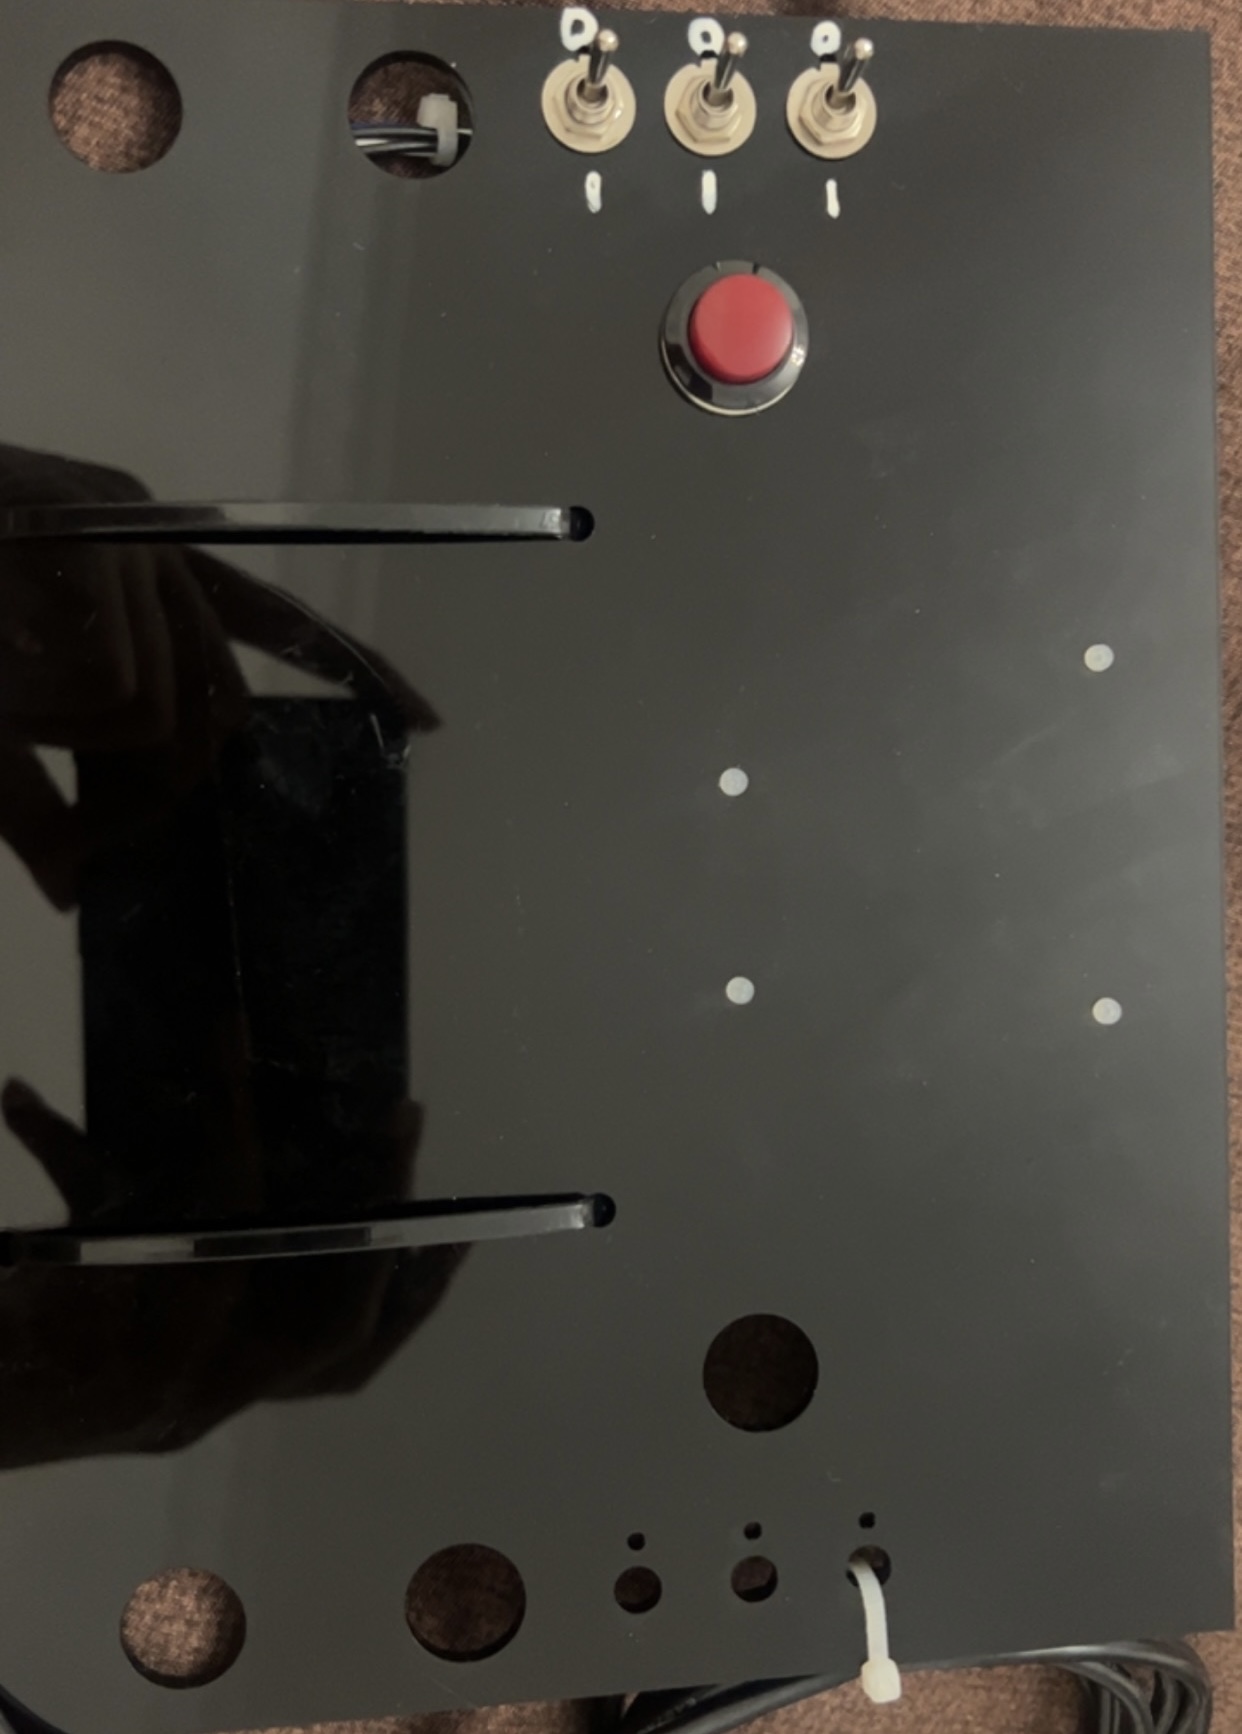
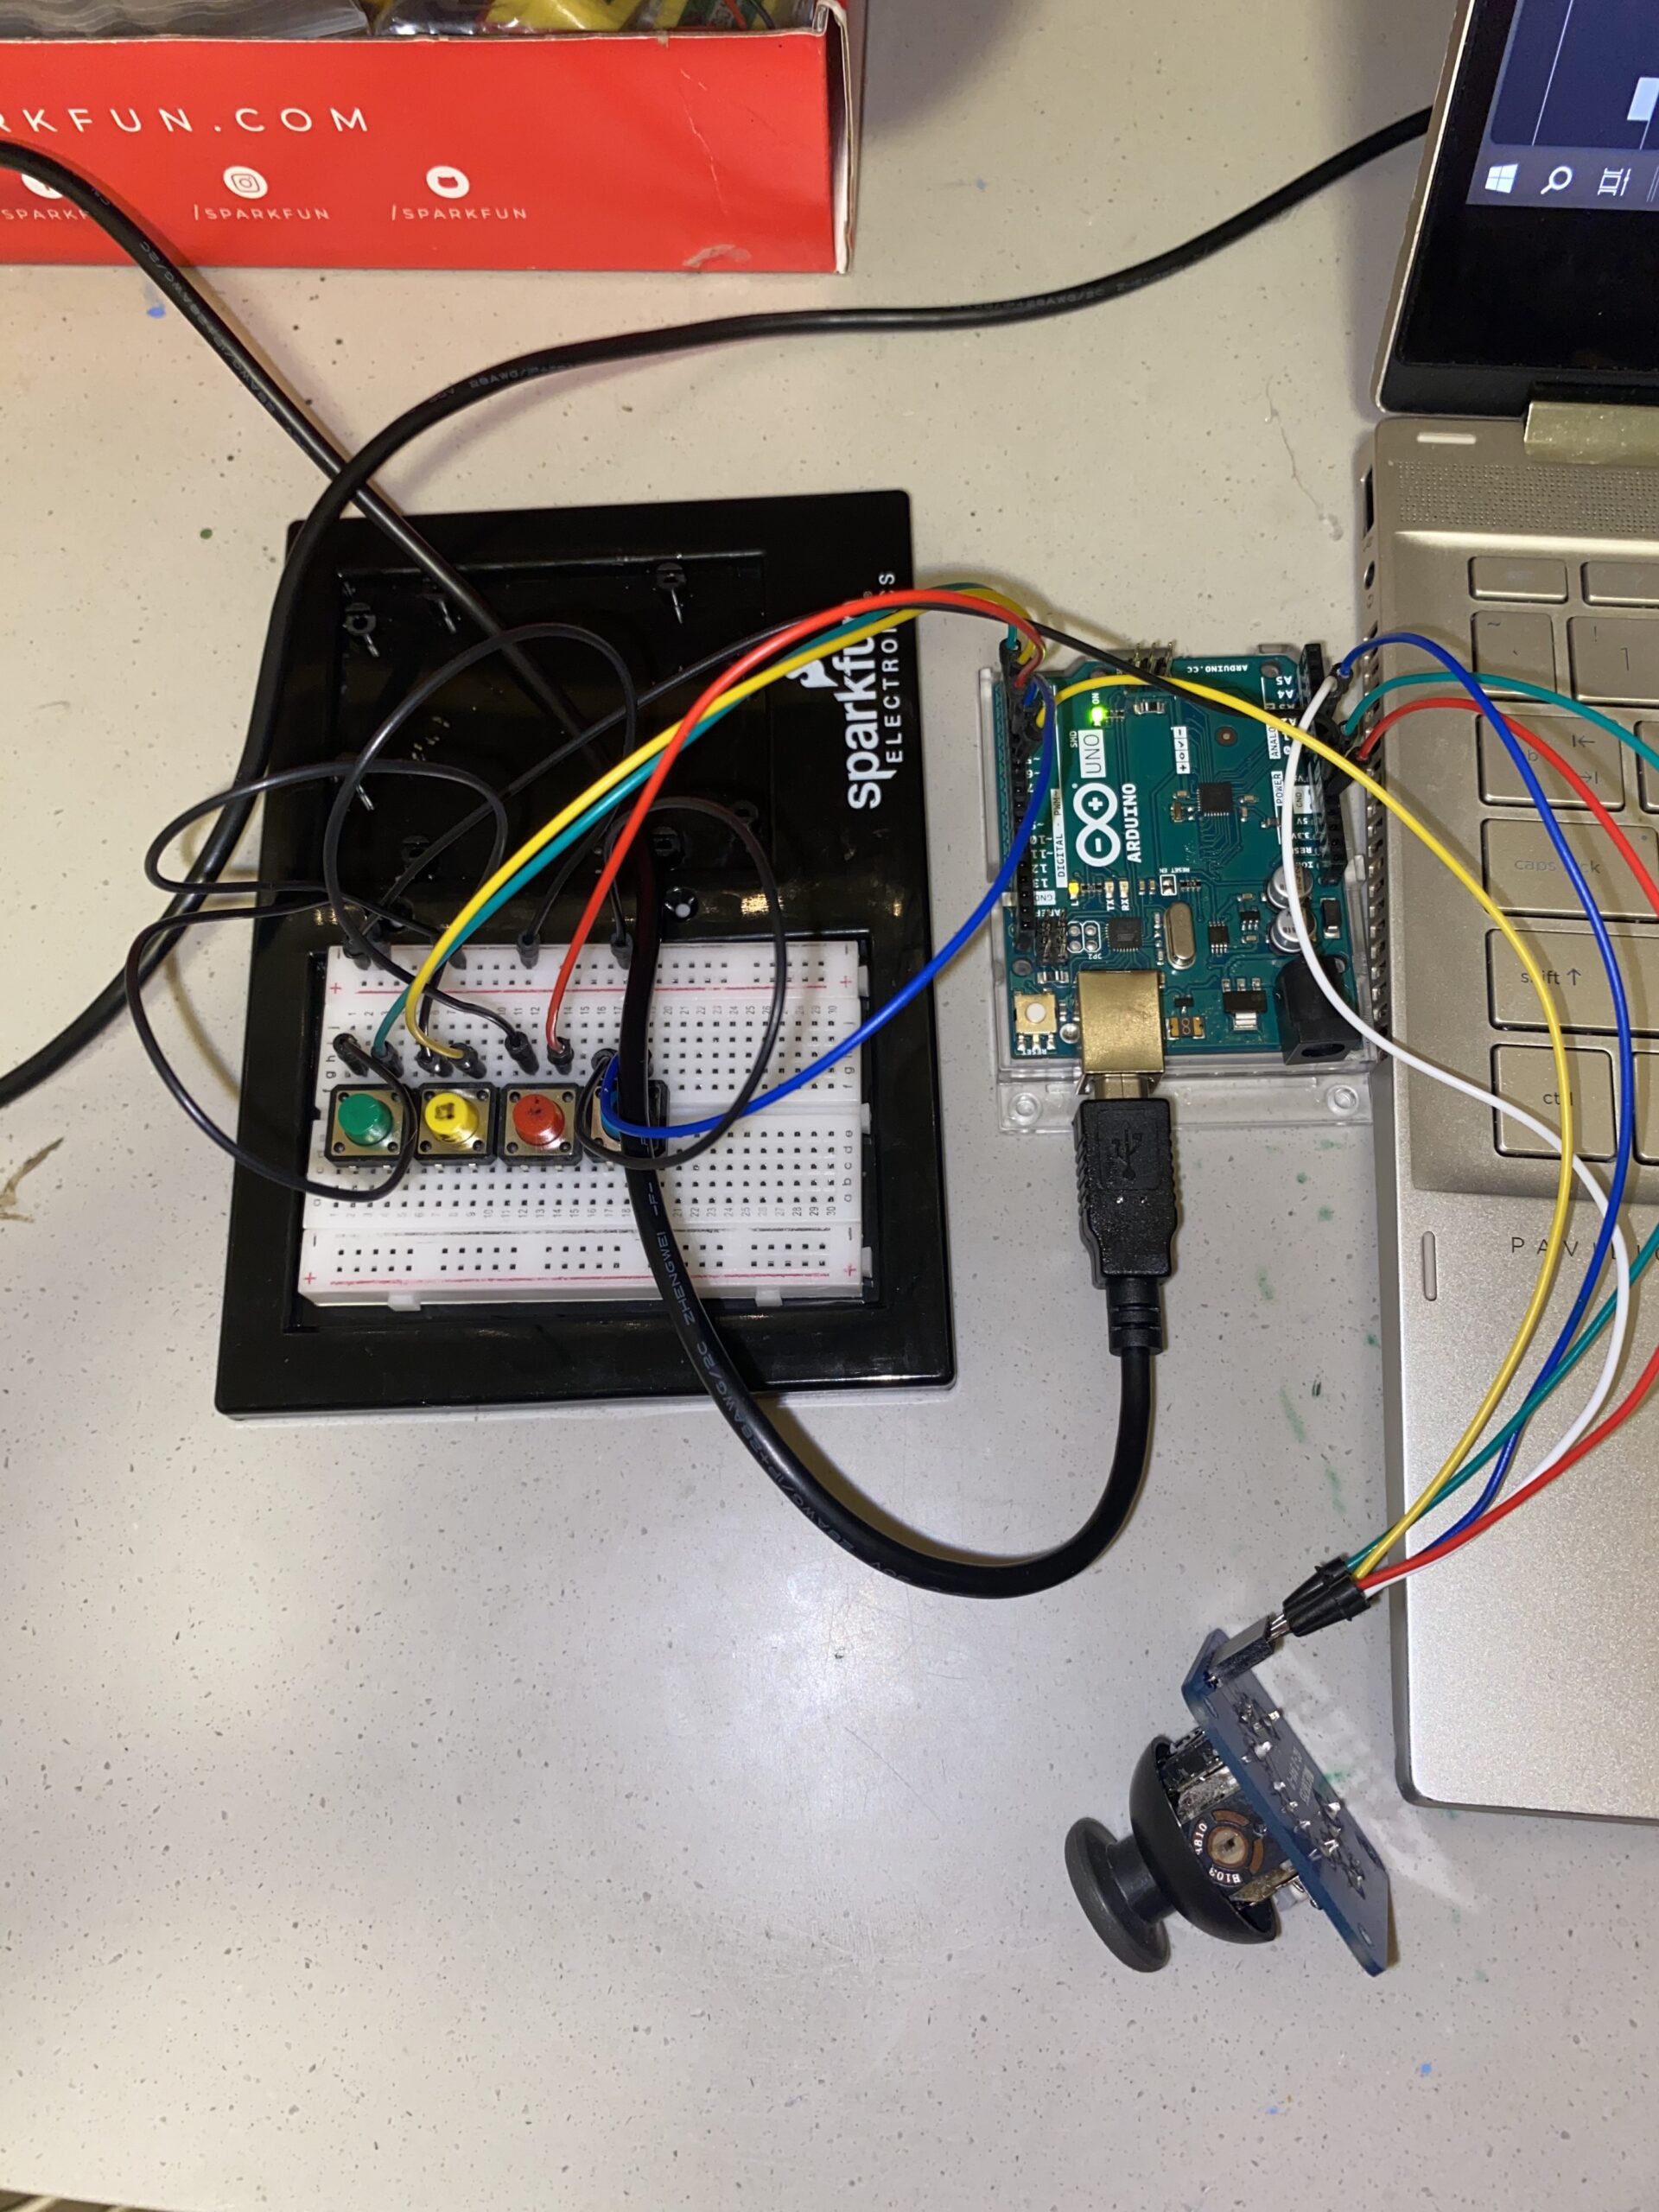
In terms of interaction, I’ve incorporated two buttons on the breadboard to facilitate the control of the basket’s left and right movements. The Arduino integration is seamlessly implemented, with the readSerial() function acting as the communication bridge between p5.js and Arduino. The Arduino code is designed to read the status of two switches and relay these values to p5.js. On the other hand, p5.js takes charge of displaying the game graphics, playing sounds, and managing the overall game logic.

p5js Code:

let basket;
let fruits = [];
let junkFoods = [];
let score = 0;
let gameOver = false;
let startPage;
let front;
let instructions;
let gifImage;
let win;
let lose;
let junkFoodsCaught = 0;
let gameStarted = false;
let instructionMode = false;
let customFont;
let gameWon = false;
let switch1State, switch2State;
let startmusic;
let winmusic;
let lossmusic;
let gamemusic;
let fruitmusic;
let junkfoodmusic;
let currentMusic;

let basketImg, backgroundImage;
let fruitImages = [];
let junkFoodImages = [];

function preload() {
  customFont = loadFont('Sunday Happy.ttf');
  startPage = loadImage('1.png');
  instructions = loadImage('2.png');
  basketImg = loadImage('basket.png');
  backgroundImage = loadImage('background.png');
  win = loadImage('win.png'); // Add this line
  lose = loadImage('lose.gif'); // Add this line
  startmusic = loadSound ('start.mp3');
  winmusic  = loadSound ('win.mp3');
  lossmusic  = loadSound ('loss.mp3');
  gamemusic  = loadSound ('game.mp3');
  fruitmusic  = loadSound ('fruit.mp3');
  junkfoodmusic  = loadSound ('junkfood.mp3');

  // Load different fruit images
  for (let i = 1; i <= 5; i++) {
    fruitImages.push(loadImage('fruit' + i + '.png'));
  }

  // Load different junk food images
  for (let i = 1; i <= 2; i++) {
    junkFoodImages.push(loadImage('junkfood' + i + '.png'));
  }
}

function setup() {
  createCanvas(620, 650);
  setupGame();
  currentMusic = startmusic;
  currentMusic.play();
}

function setupGame() {
  basket = new Basket(basketImg);

  // Limit the initial number of falling elements
  const initialFruitsCount = 2; // Adjust this value as needed
  const initialJunkFoodsCount = 2; // Adjust this value as needed

  for (let i = 0; i < initialFruitsCount; i++) {
    fruits.push(createRandomFruit());
  }

  for (let i = 0; i < initialJunkFoodsCount; i++) {
    junkFoods.push(createRandomJunkFood());
  }
}

function drawGame() {
  // Draw background image
  image(backgroundImage, 0, 0, width, height);

  basket.display();
  basket.move();

  // Add new fruits and junk foods based on certain conditions
  if (frameCount % 60 === 0 && fruits.length + junkFoods.length < 5) {
    // Check if there's enough space for a new fruit
    if (fruits.length < 2) {
      fruits.push(createRandomFruit());
    }

    // Check if there's enough space for a new junk food
    if (junkFoods.length < 2) {
      junkFoods.push(createRandomJunkFood());
    }
  } }
 //<-- Add this closing bracket

function draw() {
  background(250);

  if (gameWon) {
    // Player wins
    currentMusic.stop(); // Stop the current music
    winmusic.play();    // Play the win music
    currentMusic = winmusic;
    drawWinPage();
     currentMusic.stop(); // Stop the current music
    winmusic.play();    // Play the win music
    currentMusic = winmusic; // Update currentMusic
  } else if (gameOver) {
    // Player loses
    drawLosePage();
    currentMusic.stop(); // Stop the current music
    lossmusic.play();   // Play the lose music
    currentMusic = lossmusic; // Update currentMusic
  } else {
    if (instructionMode) {
      // Display instructions
      image(instructions, 0, 0, width, height);
      fill(255, 204, 0, 180);
      noStroke();
      rect(535, 524, 70, 35);
      fill(0);
      textSize(30);
      textFont(customFont);
      text("Back", 542, 549);
       if (currentMusic !== startmusic) {
        currentMusic.stop(); // Stop the current music if it's not start music
        startmusic.play();  // Play the start music
        currentMusic = startmusic; // Update currentMusic
      }

      
    } else {
      // Display the start page
      image(startPage, 0, 0, width, height);
      fill(255, 204, 0, 180);
      noStroke();
      rect(228, 335, 150, 35);
      fill(0);
      textSize(30);
      textFont(customFont);
      text("Start Game", 237, 359);
      fill(255, 204, 10, 180);
      noStroke();
      rect(227, 391, 150, 35);
      fill(0);
      textSize(30);
      textFont(customFont);
      text("Instructions", 235, 417);
      

      // Draw game elements if the game has started
      if (gameStarted) {
        drawGame();
         if (currentMusic !== gamemusic) {
          currentMusic.stop(); // Stop the current music if it's not game music
          gamemusic.play();   // Play the game music
          currentMusic = gamemusic; // Update currentMusic
      }
    }
  }
}
}


function drawWinPage() {
  // Draw the win background image
  image(win, 0, 0, width, height);
  fill(255, 204, 0, 180);
      noStroke();
      rect(247, 266, 140, 35);
      fill(0);
      textSize(30);
      textFont(customFont);
      text("Restart", 272, 290);
  
  
  if (mouseIsPressed && mouseX > 247 && mouseX < 387 && mouseY > 266 && mouseY < 301){
    
  
    restartGame();
   }
  
}

function drawLosePage() {
  // Draw the lose background image
  image(lose, 0, 0, width, height);
  fill(255, 204, 0, 180);
      noStroke();
      rect(247, 592, 150, 35);
      fill(0);
      textSize(30);
      textFont(customFont);
      text("Restart", 280, 616);
  
  
   if (mouseIsPressed && mouseX > 247 && mouseX < 397 && mouseY > 592 && mouseY < 627) {
    restartGame();
   }


}
function restartGame() {
  gameOver = false;
  gameStarted = false;
  score = 0;
  junkFoodsCaught = 0;
  gameWon = false;
  setupGame();
}

function mousePressed() {
  if (!gameStarted) {
    if (instructionMode) {
      // Handle mouse click to return to the main menu
      if (mouseX > 535 && mouseX < 605 && mouseY > 524 && mouseY < 559) {
        instructionMode = false;
      }
    } else {
      if (mouseX > 228 && mouseX < 378) {
        if (mouseY > 335 && mouseY < 370) {
          // Start the game
          gameStarted = true;
          setupGame(); // Call setupGame when the game starts
        } else if (mouseY > 391 && mouseY < 426) {
          // Show instructions
          instructionMode = true;
        }
      }
    }
  }
}


class Basket {
  constructor(img) {
    this.width = 200;
    this.height = 150;
    this.x = width / 2 - this.width / 2;
    this.y = height - this.height - 10;
    this.img = img;
  }

  display() {
    image(this.img, this.x, this.y, this.width, this.height);
  }

  move() {
    if (keyIsDown(LEFT_ARROW) && this.x > 0) {
      this.x -= 5;
    }
    if (keyIsDown(RIGHT_ARROW) && this.x < width - this.width) {
      this.x += 5;
    }
  }

  moveLeft() {
    if (this.x > 0) {
      this.x -= 5;
    }
  }

  moveRight() {
    if (this.x < width - this.width) {
      this.x += 5;
    }
  }
}


class Fruit {
  constructor(img) {
    this.x = random(width);
    this.y = 0;
    this.diameter = 120;
    this.img = img;
  }

  display() {
    image(this.img, this.x - this.diameter / 2, this.y - this.diameter / 2, this.diameter, this.diameter);
  }

  fall() {
    this.y += 5;
  }

  intersects(basket) {
    let halfBasket = basket.width / 2;
    return (
      this.x > basket.x - halfBasket &&
      this.x < basket.x + basket.width + halfBasket &&
      this.y > basket.y &&
      this.y < basket.y + basket.height
    );
  }

  intersectsBasket(basket) {
    let halfBasket = basket.width / 2;
    return (
      this.x > basket.x - halfBasket &&
      this.x < basket.x + basket.width + halfBasket &&
      this.y + this.diameter / 2 > basket.y &&
      this.y - this.diameter / 2 < basket.y + basket.height
    );
  }
}


class JunkFood extends Fruit {
  constructor(img) {
    super(img);
    this.diameter = 60;
   
  }

  // Override the intersectsBasket method
  intersectsBasket(basket) {
    let halfBasket = basket.width / 2;
    return (
      this.x > basket.x - halfBasket &&
      this.x < basket.x + basket.width + halfBasket &&
      this.y + this.diameter / 2 > basket.y &&
      this.y - this.diameter / 2 < basket.y + basket.height
    );
  }
}

function drawGame() {
  // Draw background image
  image(backgroundImage, 0, 0, width, height);

  basket.display();
  basket.move();

  if (frameCount % 60 === 0) {
    fruits.push(createRandomFruit());
    junkFoods.push(createRandomJunkFood());
  }

  for (let i = fruits.length - 1; i >= 0; i--) {
    fruits[i].display();
    fruits[i].fall();

    if (fruits[i].intersects(basket)) {
      score += 1;
      fruits.splice(i, 1);
    } else if (fruits[i].y > height) {
      fruits.splice(i, 1);
    }
  }

  for (let i = junkFoods.length - 1; i >= 0; i--) {
    junkFoods[i].display();
    junkFoods[i].fall();

    if (junkFoods[i].intersects(basket)) {
      score -= 1; // Deduct score if junk food touches the basket
      junkFoods.splice(i, 1);
    } else if (junkFoods[i].y > height) {
      junkFoods.splice(i, 1);
    }
  }

  textSize(20);
  fill(0);
  text("Score: " + score, 20, 30);

  // Check win condition
  if (score >= 10) {
    gameWon = true;
    drawWinPage();
  }

  // Check lose condition
  if (score < 0 || junkFoodsCaught >= 10) {
    gameOver = true;
    drawLosePage();
  }
}

function createRandomFruit() {
  let randomFruitImg = random(fruitImages);
  let fruit = new Fruit(randomFruitImg);

  for (let existingFruit of fruits) {
    while (fruit.intersects(existingFruit) || fruit.intersectsBasket(basket)) {
      fruit = new Fruit(randomFruitImg);
    }
  }

  return fruit;
}

function createRandomJunkFood() {
  let randomJunkFoodImg = random(junkFoodImages);
  let junkFood = new JunkFood(randomJunkFoodImg);

  for (let existingFruit of fruits) {
    while (junkFood.intersects(existingFruit) || junkFood.intersectsBasket(basket)) {
      junkFood = new JunkFood(randomJunkFoodImg);
    }
  }
  for (let existingJunkFood of junkFoods) {
    while (junkFood.intersects(existingJunkFood) || junkFood.intersectsBasket(basket)) {
      junkFood = new JunkFood(randomJunkFoodImg);
    }
  }

  return junkFood;
}
function keyPressed() {
  // Handle key presses (this function only detects if a key is pressed at the moment)
}
function readSerial(data) {
  ////////////////////////////////////
  //READ FROM ARDUINO HERE
  ////////////////////////////////////

  if (data != null) {
    // make sure there is actually a message
    // split the message
    let fromArduino = split(trim(data), ",");
    console.log(fromArduino);
    // if the right length, then proceed
    if (fromArduino.length == 2) {
      // only store values here
      // do everything with those values in the main draw loop
      
      // We take the string we get from Arduino and explicitly
      // convert it to a number by using int()
      // e.g. "103" becomes 103
      switch1State = int(fromArduino[0]);
      switch2State = int(fromArduino[1]);
      
      if (switch1State) {
        basket.moveLeft();
      } 
      
      if (switch2State) {
        basket.moveRight();
      }
    }

    //////////////////////////////////
    //SEND TO ARDUINO HERE (handshake)
    //////////////////////////////////
    let sendToArduino = "\n";
    writeSerial(sendToArduino);
  }
}


function keyPressed(){
  setUpSerial();
}

Arduino Code:

const int switch1Pin = 4;  
const int switch2Pin = 8;  

void setup() {
  Serial.begin(9600);
  pinMode(switch1Pin, INPUT_PULLUP);
  pinMode(switch2Pin, INPUT_PULLUP);
  

  while (Serial.available() <= 0 ){
    Serial.println("0,0");
    delay(300);
  }
}

void loop() {


  while(Serial.available()) {
    if (Serial.read() == '\n') {
      int switch1State = digitalRead(switch1Pin);
      delay(5);
      int switch2State = digitalRead(switch2Pin);
      
      Serial.print(switch1State);
      Serial.print(',');
      Serial.println(switch2State);
    }
  }


}


Future improvements

To enhance both the engagement and challenge levels of the game, I’m considering  incorporating additional features. These may include the gradual escalation of difficulty as the game progresses and the introduction of power-ups to provide players with unique advantages.
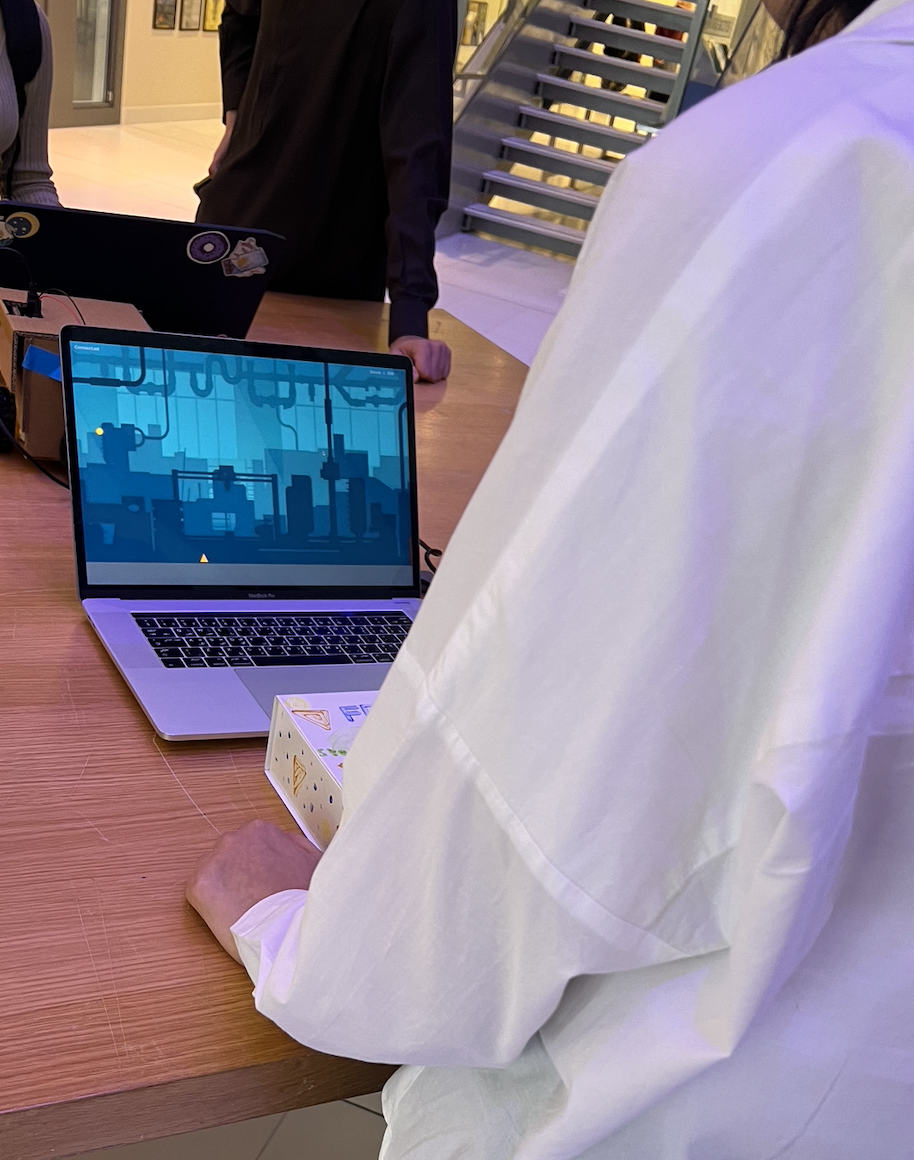
User Testing 

In the testing phase, I asked Nafiha to give my game a try. Impressively, she seamlessly utilized the buttons to navigate the basket without any hesitation. Her feedback highlighted that the controls were straightforward, requiring no additional instructions. Taking her suggestion into account, I modified the game dynamics by initially decreasing the number of falling objects and contemplating a gradual increase over time, resulting in a more balanced and enjoyable gameplay experience.

https://drive.google.com/file/d/1_36pcfyrhlTWxp_WqHmETfE6l8cfDicl/view?usp=sharing


EOS Final Project : Frenzy Jump


Concept : “Frenzy Jump”

For my project, I decided to create a simple game on p5js.

Idea of the game : For the Arduino part, there are two buttons one functions as a “restart button” to restart the game after losing, and the other functions as an action  button to make the player “triangle” to jump.
The game starts with a background that says “Press red button to start and white button to jump”, upon pressing the red red button the screen will start the game with the player being a “triangle”, as per instruction at the start the user will press the white button for the player to jump over rectangular obstacles, throughout the game there are golden “coins” which are ellipses created to gain extra points on the scoreboard that can be seen on the top right corner of the game. When the user fails with jumping over a certain obstacle, the screen will give you a message saying “GAMEOVER” . To restart the game, the user should press on the red button, and the game will automatically start again.

Inspiration:

I got this idea from a game i think most people have played once in their life, view the image below :

Components:

  • 2 LED buttons , red and white
  • Resistors are built in the led button i did not use the LED side of the button therefore i did not add extra resistors on the breadboard
  • 6 jumper wires

Controller:

Prototype 1 :

Final prototype :

User Experience and Gameplay :

IMG_4787

IMG_4783

IMG_4784

Embedded sketch :

Schematics:


its probably incorrect but i tried


Testing in Arduino Serial Port :

References :

P5js code : https://editor.p5js.org/mka413/sketches/kwS7JN7Wh

The code that made me proud: I cant choose only one part, because if i must say i am very proud of myself, and what i have achieved this semester, to knowing nothing about coding to creating this simple yet successful simple game. What about difficulties? i will talk about that later on in my blog post.

How does Arduino work with p5js? :

Starting with the code in Arduino after I’ve set up the connections in the controller i wrote the lines of code that we were taught in class about Serial Data communication and put in the corresponding pin numbers for the “restart” and “action”(jump) buttons also i used the Function (pinMode) as  an input for my pins , and the function digitalRead for my pins to be read in values of :false or true lastly, i used the Serial.println to send/print serial data to the port as seen in the lines of code below :

int RedButton= 7;
int whiteButton= 8;
bool isActionButtonPressed = false; //start with false as the buttons are not pressed 
bool isRestartButtonPressed = false;


void setup() {
  Serial.begin(9600); // setting the baud rate for serial data communication 

  pinMode(RedButton, INPUT_PULLUP); 
  pinMode(whiteButton, INPUT_PULLUP);


}

void loop() {
//sending signals whether the buttons are pressed and giving true or false statements to confirm 
  if(digitalRead(RedButton)) {
    if(!isActionButtonPressed) {

      eventActionButtonPressed(RedButton);

      isActionButtonPressed = true;
    }
  }
  else {
    if(isActionButtonPressed) {

      eventActionButtonReleased(RedButton);

      isActionButtonPressed = false;
    }  
  }

  if(digitalRead(whiteButton)) {
    if(!isRestartButtonPressed) {

      eventRestartButtonPressed(whiteButton);

      isRestartButtonPressed = true;
    }
  }
  else {
    if(isRestartButtonPressed) {

      eventRestartButtonReleased(whiteButton);

      isRestartButtonPressed = false; //// printing data to the serial port void eventActionButtonPressed(int pin) 
    }  
  }

}

// printing data to the serial port void eventActionButtonPressed(int pin) 
void eventActionButtonPressed(int pin) {
  Serial.println(String(pin) + ":pressed");
}

void eventActionButtonReleased(int pin) {
  Serial.println(String(pin) + ":released");
}

void eventRestartButtonPressed(int pin) {
  Serial.println(String(pin) + ":pressed");
}

void eventRestartButtonReleased(int pin) {
  Serial.println(String(pin) + ":released");
}


After finishing up the Arduino code, now its time to begin serial data communication in p5JS, with firstly adding the ready web serial file that was made available for us, then in the actual p5js sketch code i added these lines of code to make serial data communication work with Arduino IDE :

// Function to read serial data
function readSerial(data) {
  const pin = data.split(':')[0]; 
  const action = data.split(':')[1];
  
  console.log(data);
  
  if(pin == "7" && action == "pressed") {
    if(!player.isJumping) {
      player.isJumping = true;
      player.timeJump = millis();
      player.forceY = -10;
    }
  }
  
   if(pin == "8" && action == "pressed") {
      if(!gameStarted) {
        gameStarted = true;
      }
     
     if(gameover) {
        gameover = false;
        score = 0;
        player.posX = width / 3;
       
        for(const o of obstacles) o.posX += width;

      }
    }

}

// Function to handle key presses
function keyPressed() {
  // If space is pressed, set up serial communication
  if(key == " ") {
    setUpSerial();
  }
  
  // press f to play the game in fullscreen
  if(key == 'f') {
    const fs = fullscreen();
    fullscreen(!fs);
  }
}
// this function is called every time the browser window is resized
function windowResized() {
  resizeCanvas(windowWidth, windowHeight);
}

Difficulties :

I had a lot of difficulties in making my initial acrylic controller to work, which i firstly thought there must be a problem with my code, after numerous attempts in trying to make the button and flip switch to work, i gathered that the connections were not correct or they have been short circuited. Thinking fast, i created the usual breadboard  connections with push button switches that worked instantly when uploading the code to my arduino. Also i had trouble with making the serial data communication to work on p5js where the browser would not pop up so i can make the connection to the serial port, which was nerve wrecking but i eventually after trial and error i got it to work perfectly.

My initial Conntroller :

Changes for the future:

I would really liked to have my first controller to work, it looked really cool, and would have fit in more with my game and its aesthetic. Still i would like to advance more in my coding skills to create something much more complex. Adding more difficult obstacles, and increasing the speed the longer you play, with a high score page also.


Week 13 – Final Project Documentation

Concept

Reaction Game Based, or RGB, is a rhythm tool/game used to test your reaction time. Three randomized dots appear on the screen with two characteristics: number (1, 2, 3) and color (red, green, blue). Your objective is to hit each dot according to its assigned resistor, clearing the screen of all dots and obtaining the biggest score possible under the time limit of 40 seconds. After that, the user is presented with their score and their estimated age according to their reaction time.

Implementation

For the interaction, three force-sensitive resistors were used in order to hit the dots, along with a buzzer, which is responsible for playing a sound every time the user hits a resistor. As for the Arduino code, each input was declared, and the basic serial communication was established with P5.js, sending the data from each resistor. With each tap on the resistor, a sound is also played by the buzzer.

int fsrPin1 = A0;
int fsrPin2 = A1;
int fsrPin3 = A2;
int buzzerPin = 2;

void setup() {
  Serial.begin(9600);
}

void loop() {
  int fsrValue1 = analogRead(fsrPin1);
  int fsrValue2 = analogRead(fsrPin2);
  int fsrValue3 = analogRead(fsrPin3);

  // send FSR values to p5.js
  Serial.print(fsrValue1);
  Serial.print(",");
  Serial.print(fsrValue2);
  Serial.print(",");
  Serial.println(fsrValue3);

  // force sensitive resistor hits
  checkHit(fsrValue1, 1);
  checkHit(fsrValue2, 2);
  checkHit(fsrValue3, 3);
}

void checkHit(int fsrValue, int noteNumber) {
  if (fsrValue > 130) { // FSR threshold to activate sound
    Serial.println("Hit detected!");

    Serial.print("Note,");
    Serial.println(noteNumber);

    // buzzer sound on tap
    tone(buzzerPin, 1000, 100); // frequency and duration
  }
}

As for P5.js, the most important variables are the ones that keep track of the player’s score and the notes. The function “checkHit” is also important to determine whether a note has been successfully hit based on the input from force-sensitive resistors (FSRs). It iterates through the FSR values and compares them to predefined thresholds. If the FSR value exceeds its threshold and the associated note is not marked as already hit, it signifies a successful hit. The function then updates the score, initiates visual effects on the ellipses like glowing, sets a cooldown for the corresponding FSR, and checks if all notes are hit. If all notes are hit, it triggers the generation of new notes. Regarding serial communication, a p5.web-serial.js file provided in class by Michael Ang and Aaron Sherwood is responsible for the communication between Arduino and p5.js.

function checkHit() {
  for (let i = 0; i < fsrValues.length; i++) {
    if (resistorCooldowns[i] <= 0) {
      for (let j = notes.length - 1; j >= 0; j--) {
        let note = notes[j];
        if (fsrValues[i] > fsrThresholds[i] && !note.hit) {
          let expectedNote = i + 1; // expected note based on resistor index
          if (note.number === expectedNote) {
            console.log("Hit detected for note " + expectedNote + "!");
            score += 10;
            glowingFrames = glowingDuration;
            note.hit = true;
            resistorCooldowns[i] = cooldownDuration; // set cooldown for the resistor
            if (allNotesHit()) {
              setTimeout(generateNotes, 1000); // wait for 1 second before generating new notes
            }
            break; // exit the loop once a hit is detected
          }
        }
      }
    }
  }

Future improvements

Future changes to the project would depend on different purposes that it could offer, be it simply a reaction time test, a game focused on fun, or maybe a combination of both. Nonetheless, I believe that more colors could be added, and possibly music. Also, I would have liked to see different modes and dynamics for the notes, testing the user in different ways. Other than that, I am proud of offering a fun yet quite useful experience for the user.

User testing

User testing was conducted with three different people, and it went generally well. Most of them managed to figure out the controls and objectives of the game pretty much instantly, and they had no difficulty in obtaining quite high scores despite no prior knowledge of the game.

However, in one instance the controls did not seem as obvious, and the participant struggled a little bit to figure out the resistor and the timer.

Overall, the experience is working well, and not a lot of explanation is needed. Something that could be improved would be maybe utilizing different buttons other than the force-sensitive resistors. The reason is that the force-sensitive resistors do not work perfectly. Maybe they look less obvious than three huge buttons would, and it is a bit difficult to work with the force thresholds. Have too much necessary force for them, and you have to smash the table in order to register a hit, but if you have too little, they will register even if you barely touch them. Making it more obvious that each resistor is assigned to a number would also help.

Week 11 – Arduino and P5.js

1 – Make something that uses only one sensor on Arduino and makes the ellipse in p5 move on the horizontal axis, in the middle of the screen, and nothing on arduino is controlled by p5

Code:

const int potPin = A0;

void setup() {
  Serial.begin(9600);
}

void loop() {
  int potValue = analogRead(potPin);

  // send the potentiometer value to the serial port
  Serial.println(potValue);

  delay(50);
}

2 – Make something that controls the LED brightness from p5

Code:

int ledPin = 6;

void setup() {
  Serial.begin(9600);
  pinMode(ledPin, OUTPUT);
}

void loop() {
  while (Serial.available() > 0) {
    // read the incoming brightness value from p5.js
    int brightness = Serial.parseInt();

    // adjust the LED brightness based on the received value
    analogWrite(ledPin, brightness);
  }
}

3 – Take the gravity wind example and make it so every time the ball bounces one led lights up and then turns off, and you can control the wind from one analog sensor

int potPin = A0;
int ledPin = 6;

void setup() {
  Serial.begin(9600);
  pinMode(LED_BUILTIN, OUTPUT);
  pinMode(potPin, INPUT);
  pinMode(ledPin, OUTPUT);
}

void loop() {
  digitalWrite(LED_BUILTIN, LOW);
  while (Serial.available()) {
    digitalWrite(LED_BUILTIN, HIGH);
    int ambientBrightness = Serial.parseInt();
    if (Serial.read() == '\n') {
      int sensorReading = analogRead(potPin);
      Serial.println(sensorReading);
    }
    if (ambientBrightness >= 350 && ambientBrightness <= 360) {
      digitalWrite(ledPin, HIGH);
    } else {
      digitalWrite(ledPin, LOW);
    }
  }
  int sensorReading = analogRead(potPin);
  Serial.println(sensorReading);
}

Final Project – Interactive Glove

Concept:

My concept for the final presentation is the Interactive Glove: a completely different way of interacting with the computer. The idea behind this project comes from “A Brief Rant on the Future of Interaction Design”, where interaction with digital media is discussed and criticized. After thinking about it thoroughly, I imagined that the best way to innovate in the interaction field would be to use a medium that we commonly use, our hands, but in a way that will utilize the limbs differently.

In this case, we can imagine the interactive glove as a binary system: we have 4 sensors in the left hand and 4 pins on the right hand that will turn on a sensor on contact. This allows for the user to have versatility in terms of how they want to use the glove. Some users will prefer to use one finger for all 4 sensors, while others might require 4 fingers for 4 sensors. Because it is a binary system, the glove can do anything: It can become a mouse, a keyboard, a switch, a controller, etc…

To show the versatility of this input method, we will use p5.js alongside some small games and experiences in order to show how the glove inputs values.

Implementation:

P5.js Sketch: https://editor.p5js.org/ff2185/sketches/A4mnwlg4h

Arduino code:

/*
  DigitalReadSerial

  Reads a digital input on pin 2, prints the result to the Serial Monitor

  This example code is in the public domain.

  https://www.arduino.cc/en/Tutorial/BuiltInExamples/DigitalReadSerial
*/

// digital pin 2 has a pushbutton attached to it. Give it a name:
int inputA = 2;
int inputB = 3;
int inputC = 4;
int inputD = 5;

// the setup routine runs once when you press reset:
void setup() {
  // initialize serial communication at 9600 bits per second:
  Serial.begin(9600);
  pinMode(LED_BUILTIN, OUTPUT);
  pinMode(inputA, INPUT);
  pinMode(inputB, INPUT);
  pinMode(inputC, INPUT);
  pinMode(inputD, INPUT);
  while (Serial.available() <= 0) {
    digitalWrite(LED_BUILTIN, HIGH);  // on/blink while waiting for serial data
    Serial.println("0,0");            // send a starting message
    delay(300);                       // wait 1/3 second
    digitalWrite(LED_BUILTIN, LOW);
    delay(50);
  }
}

// the loop routine runs over and over again forever:
void loop() {
  // print out the state of the button:// wait for data from p5 before doing something
  while (Serial.available()) {
    digitalWrite(LED_BUILTIN, HIGH);  // led on while receiving data
    if (Serial.read() == '\n') {
      // read the input pin:
      int stateA = digitalRead(inputA);
      int stateB = digitalRead(inputB);
      int stateC = digitalRead(inputC);
      int stateD = digitalRead(inputD);
      delay(5);
      int sensor2 = analogRead(A1);
      delay(5);
      Serial.print(stateA);
      Serial.print(',');
      Serial.print(stateB);
      Serial.print(',');
      Serial.print(stateC);
      Serial.print(',');
      Serial.println(stateD);
    }
  }
  digitalWrite(LED_BUILTIN, LOW);
  delay(1);  // delay in between reads for stability
}


Arduino:

The Arduino Design is a simple switch system with 4 resistors connected to the ground, each connected to its proper pin and a cable which will be the connection to the 5v source. On the other side, we connected 4 cables to the 5v strip. This allows us to create a circuit in which any time 5v touches a cable that is on the other side, it will set the digitalInput of the pin to 1.

To cover the circuit, I handcrafted a “sandwich” shaped box that will allow the cables to move freely in the vertical axis. The biggest problem was to create an enclosure that would not disturb the cable movement. My idea, to not utilize the classic open top box, was to do this tringular enclosure that allows cables to move up and down freely. Due to the pure nature of the circuit itself, horizontal movement has to be limited in order to not disturb the functioning, so that is why movement is only constrained in the vertical axis

P5.js:

The P5.js sketch is a combination of past projects, examples provided by p5.js and other sketches I have gathered during my research. Each one of the experiences/games is a representation of different inputs styles: For example, the piano will behave differently based on the combination of fingers we press, while the rocket moves from left to right with the index and ring finger.

The available experiences are the following:

  • Piano: The piano experience is a recreation of a previous project. Back then, I utilized the keyboard in order to press the piano keys and generate the sound. This time, the gloves will do that function. Every key is mapped to a certain combination. For example. the “DO” note corresponds to touching just the index finger sensor. The following one is mapped to the middle finger, and so on until you will need to use two fingers. The input method shown here is converting the glove into a set of 2^4 inputs. In other words, a binary input.
  • Rocket: The Rocket Game involves long pressing a single sensor in order to fly the rocket up, go to the left or go to the right. There is no score, no timer, just you and a single fuel bar. Careful, if you go too low you will crash. Try your best to stay on air!
    This game simulates what it would be to use it as a mouse (the mouse clicks) to control the rocket.
  • Disco: The Disco experience is simple. Out of the 4 buttons you press, each of them will show a different ever-changing background. Try all of them and focus on the colors!
    This shows the glove working as 4 different buttons independent of each other.
  • Snake: The Snake Game is all about trying to eat the fruits that will randomly spawn in the map. The 4 sensors in the glove represent the 4 directions that the snake can go to: left, right, top, down. This makes the glove resemble the keyboard arrows system.

Code:

One piece of code I am proud of is the state management. A seemingly trivial problem becomes a major challenge when you realize every single experience needs to have a different setup. More over, the different frame rate, strokes, fill, background and other setting that vary in each screen make it especially specific to manage.

if (state == "intro") {
      scoreElem.html("");
      drawIntro();
    } else if (state == "piano") {
      scoreElem.html("");
      drawPiano();
      if (frameCount % 60 == 0) {
        for (var i = 0; i < 10; i++) {
          rSide[i].white();
          black[i].white();
          mid[i].white();
          lSide[i].white();
        }
      }
    } else if (state == "rocket") {
      rectMode(CENTER);
      scoreElem.html("");
      drawRocket();
    } else if (state == "disco") {
      scoreElem.html("");
      drawDisco();
    } else if (state == "snake") {
      scoreElem.html("Score = 0");
      frameRate(15);
      stroke(255);
      strokeWeight(10);
      drawSnake();
    }else if(state == "tutorial"){
      stroke(255);
      scoreElem.html("");
      drawTutorial();
    }

Another code I especially like is the code that allows the snake to move:

function updateSnakeCoordinates() {
  for (let i = 0; i < numSegments - 1; i++) {
    xCor[i] = xCor[i + 1];
    yCor[i] = yCor[i + 1];
  }
  switch (direction) {
    case "right":
      xCor[numSegments - 1] = xCor[numSegments - 2] + diff;
      yCor[numSegments - 1] = yCor[numSegments - 2];
      break;
    case "up":
      xCor[numSegments - 1] = xCor[numSegments - 2];
      yCor[numSegments - 1] = yCor[numSegments - 2] - diff;
      break;
    case "left":
      xCor[numSegments - 1] = xCor[numSegments - 2] - diff;
      yCor[numSegments - 1] = yCor[numSegments - 2];
      break;
    case "down":
      xCor[numSegments - 1] = xCor[numSegments - 2];
      yCor[numSegments - 1] = yCor[numSegments - 2] + diff;
      break;
  }
}

Learnings and Improvements

For this final project, I feel that I have learned a lot from the Arduino development field. Small things that we usually omit during the process of creating these types of projects become bigger problems when it comes to user usability and versatility. For example, the contacts for the glove are really hard to match due to the lesser amount of copper I had available. Moreover, the cables were extremely hard to position properly in order to fix them but also allow movement of the whole arm.

In general, the construction process for the cables and circuit was the hardest part of this project. I would like, in future iterations to improve the cable management and the outside box, maybe ideate some other way to construct a box that will allow the movement of the glove but also easy access if needed (open box).

To conclude, I have really enjoyed every step I took in this class. I have learned ways of expressing my ideas and thoughts in manners I would have never imagined. I have grown to love the idea of exploring new horizons and implementing new designs, approaches, methods for my projects.

Thank you and see you soon.

Week 12- Final Project Draft 2

New Concept:

In the true spirit of being a bit indecisive, I’ve opted for a puzzle game. It all started with the certainty that I’d be dealing with a joystick in my physical computing adventures. So, brainstorming around this joystick, the idea of a picture puzzle game struck me. The concept is simple: solve the puzzle using the joystick. To add a personal touch, I thought it’d be cool to let players use their own pictures for the puzzle. I mean, puzzles can be dull, right? So, why not make it more fun by solving a puzzle of yourself?

P5.js Code:

I’ve made some progress in coding the game using P5.js. The groundwork includes screens for welcoming players, providing instructions, selecting difficulty levels, activating the camera, and of course, the puzzle screen itself. The code varies in complexity since it’s still a work in progress. Here’s a snippet that deals with turning a captured picture into a puzzle, which excites me the most.

function captureAndSetupPuzzle(video) {
  if (video) {
    source = video.get();
    source.loadPixels(); // Ensure pixels are loaded
 if (source.width > 0 && source.height > 0) {
    // Resize the source image to fit the canvas
    source.resize(width, height);
    video.hide();

    w = Math.floor(width / cols);
    h = Math.floor(height / rows);

    for (let i = 0; i < cols; i++) {
      for (let j = 0; j < rows; j++) {
        let x = i * w;
        let y = j * h;
        let img = source.get(x, y, w, h); // Get a portion of the image for each tile

        if (i === cols - 1 && j === rows - 1) {
          board.push(-1);
          puzzle.tiles.push(new Tile(-1, img));
        } else {
          let index = i + j * cols;
          board.push(index);
          puzzle.tiles.push(new Tile(index, img));
        }
      }
    }

    puzzle.board = board.slice();
    puzzle.simpleShuffle(puzzle.board);

    currentScreen = 'game';
    puzzle.startTimer();
  } else {
    console.error("Error loading the video source");
    }
  }
}

function setup() {
  createCanvas(600,400);
  //createCanvas(displayWidth, displayHeight);
  
  video = createCapture(VIDEO);
  video.size(400, 400);
  video.position(0, 0);
  video.hide();
  
  
  let timerDuration ;
  let level;

  puzzle = new Puzzle(cols, rows, timerDuration, level); // Example level: 3x3 grid, 600 seconds timer
}

Arduino Code:

Additionally, I’ve been working on Arduino code. It seems mostly complete for now, though I might tweak it as my P5 code progresses. The aim of this code is to control the button movements and the movements of the puzzle tiles using the joystick.

const int XbuttonPin = 2;
const int SbuttonPin = 3;
const int TbuttonPin = 4;
const int CbuttonPin = 5;
const int joystickXPin = A0; // Analog pin for joystick X-axis
const int joystickYPin = A1; // Analog pin for joystick Y-axis
const int threshold = 50; // Threshold for joystick sensitivity
//bool isDifficulty = false;

void setup() {
  Serial.begin(9600);
  pinMode(XbuttonPin, INPUT_PULLUP);
  pinMode(SbuttonPin, INPUT_PULLUP);
  pinMode(TbuttonPin, INPUT_PULLUP);
  pinMode(CbuttonPin, INPUT_PULLUP);
}

void loop() {
  if (digitalRead(XbuttonPin) == LOW) {
    Serial.println("MOUSE_CLICK");
    delay(1000); // Debounce delay
  }
  
  if (digitalRead(SbuttonPin) == LOW) {
    Serial.println('2');
    delay(100); // Debounce delay
  }
  
  if (digitalRead(TbuttonPin) == LOW) {
    Serial.println('1');
    delay(10000); // Debounce delay
  }
  
  if (digitalRead(CbuttonPin) == LOW) {
    Serial.println('3');
    delay(100); // Debounce delay
  }

  if (digitalRead(TbuttonPin) == LOW) {
    Serial.println('C');
    delay(100); // Debounce delay
  }
  
  int xVal = analogRead(joystickXPin); // Read X-axis value
  int yVal = analogRead(joystickYPin); // Read Y-axis value

  if (xVal < 512 - threshold) {
    Serial.println("LEFT");
    delay(100); // Debounce delay
  } else if (xVal > 512 + threshold) {
    Serial.println("RIGHT");
    delay(100); // Debounce delay
  }

  if (yVal < 512 - threshold) {
    Serial.println("DOWN");
    delay(100); // Debounce delay
  } else if (yVal > 512 + threshold) {
    Serial.println("UP");
    delay(100); // Debounce delay
  }
}

Challenges popped up, especially when translating mouse movements to joystick actions. Initially, I aimed to use mouse clicks and key presses in my P5.js code, thinking I could easily convert them to buttons and switches. But handling joystick movements, considering up, down, left, and right, turned out more intricate than merely clicking a mouse to move a tile.

Prototype:

IMG_5120

Tasks on my to-do list seem endless because, well, I’m a bit of a perfectionist. At the moment, I’m focusing on crafting a case for my Arduino and breadboard. Simultaneously, I’m tirelessly refining my P5 sketch for a more appealing look. Adding background music and possibly turning the puzzle into more of an actual game are ideas I’m mulling over. But for now, this is where I stand in my project. I am also thinking of implementing the LED screen to the sketch that would display a message if the puzzle were solved because I think this would be a nice way to implement the p5 to Arduino communication.