Concept
The concept is recreation of the experience of walking through a gallery, through two mediums. In this work the floor plan board and the p5 virtual gallery are in conversation with each other. Where there are parallels in each artwork, where each two of the four works interact with each other and explore similar themes but in different mediums. They explore audio and visuals, where each medium has a different take on each. I wanted to also have a reflection of my journey in this class, which is why a lot of the works are inspired by previous assignments, reflecting my journey.
Video
Description of interaction design
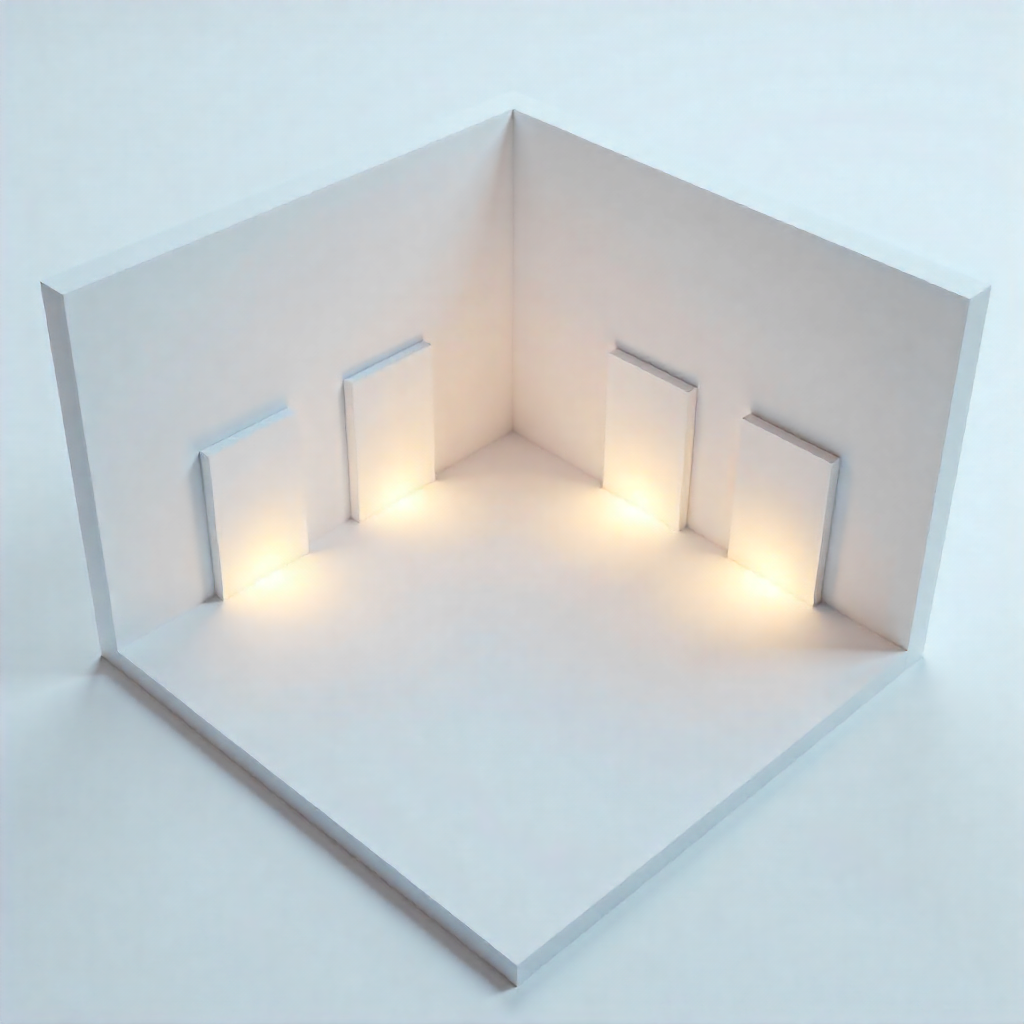
This project merges a physical Arduino-based floor-plan board of the gallery with a virtual 3D gallery built in p5.js. When the user presses one of four force sensors, they “walk” toward a corresponding artwork in the digital gallery, and a central toggle switch lets them enter or exit the artwork’s full-screen view. The Arduino constantly sends live sensor data to p5.js, while p5.js sends feedback, lighting LEDs and playing buzzer sounds, back to the board to make the physical and virtual experiences feel seamlessly connected.
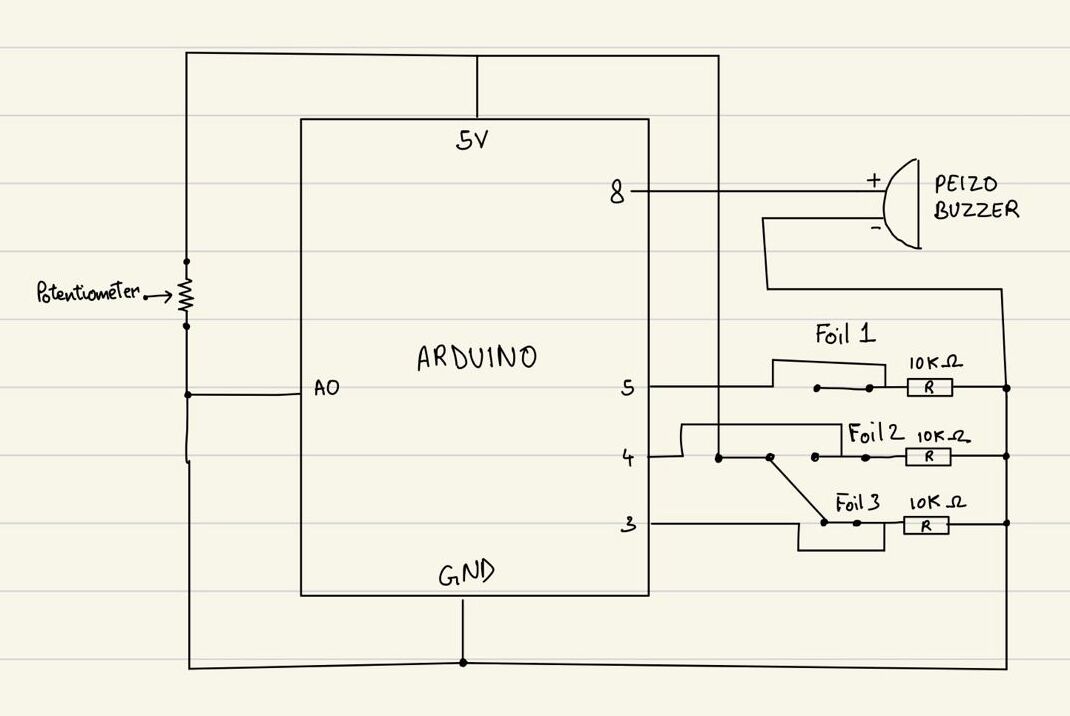
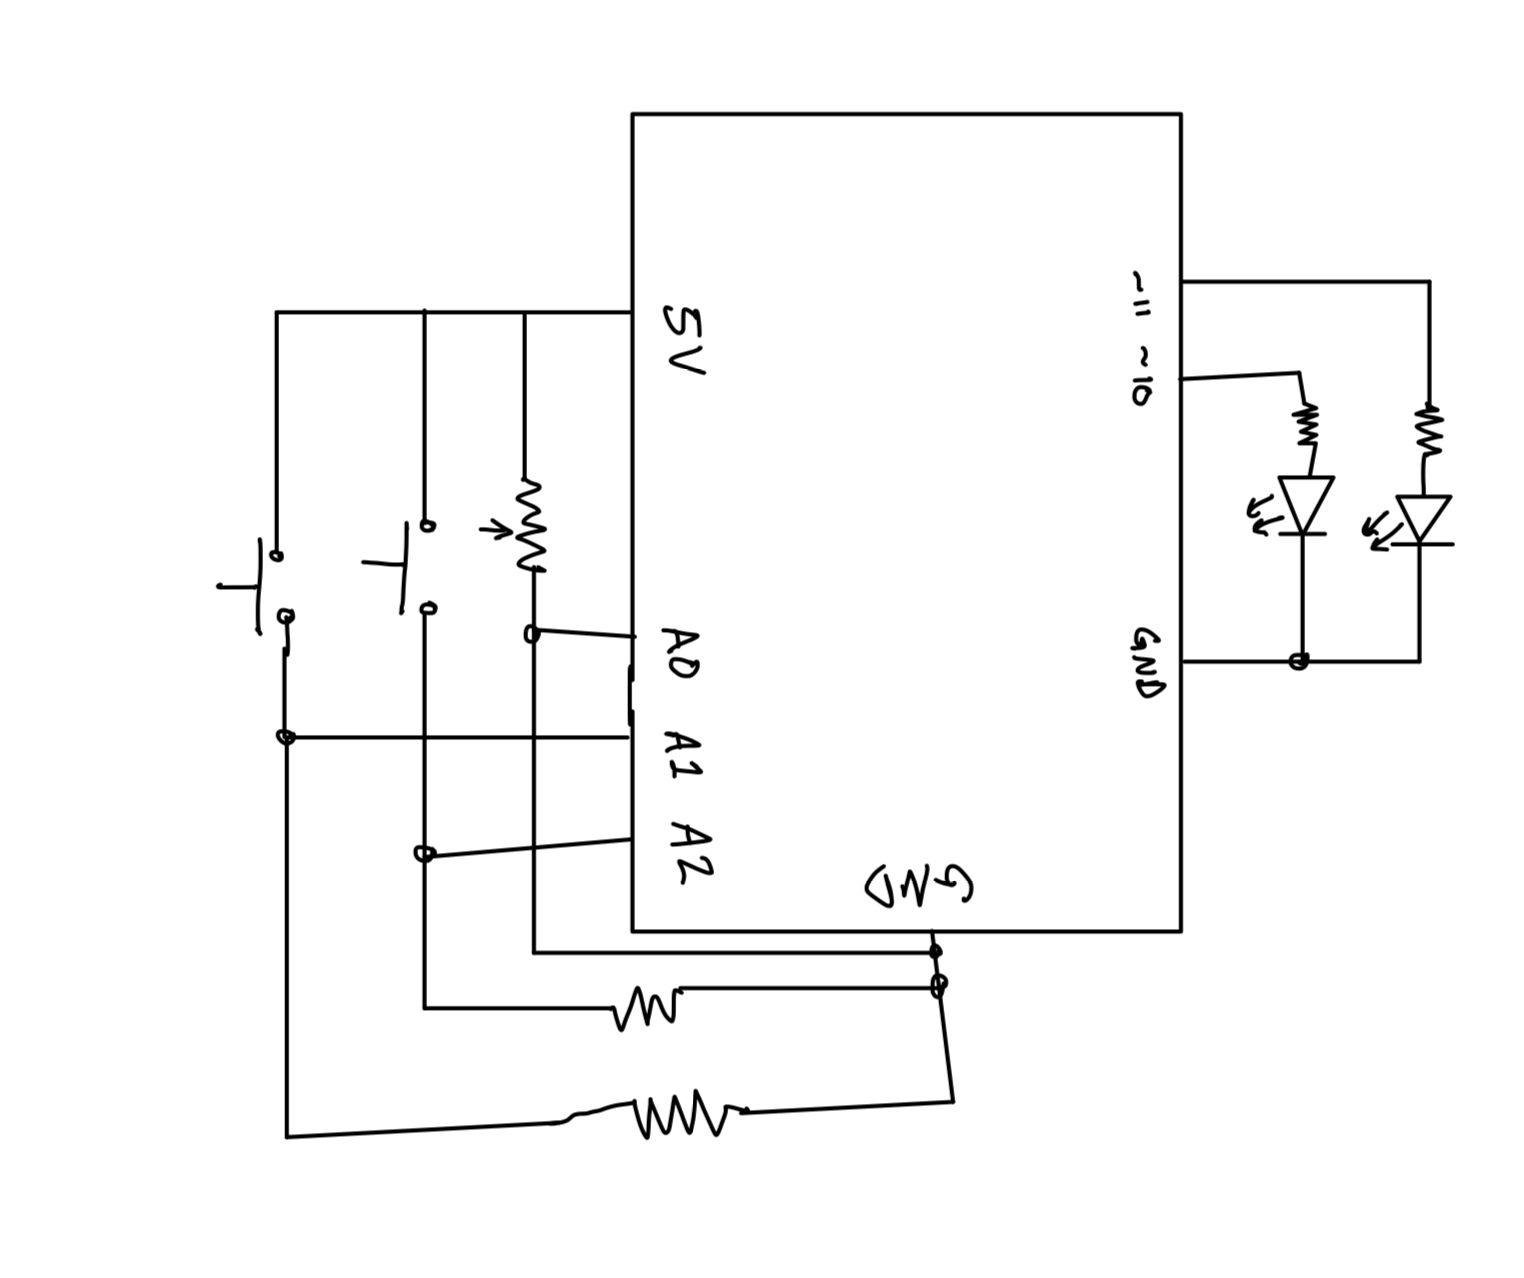
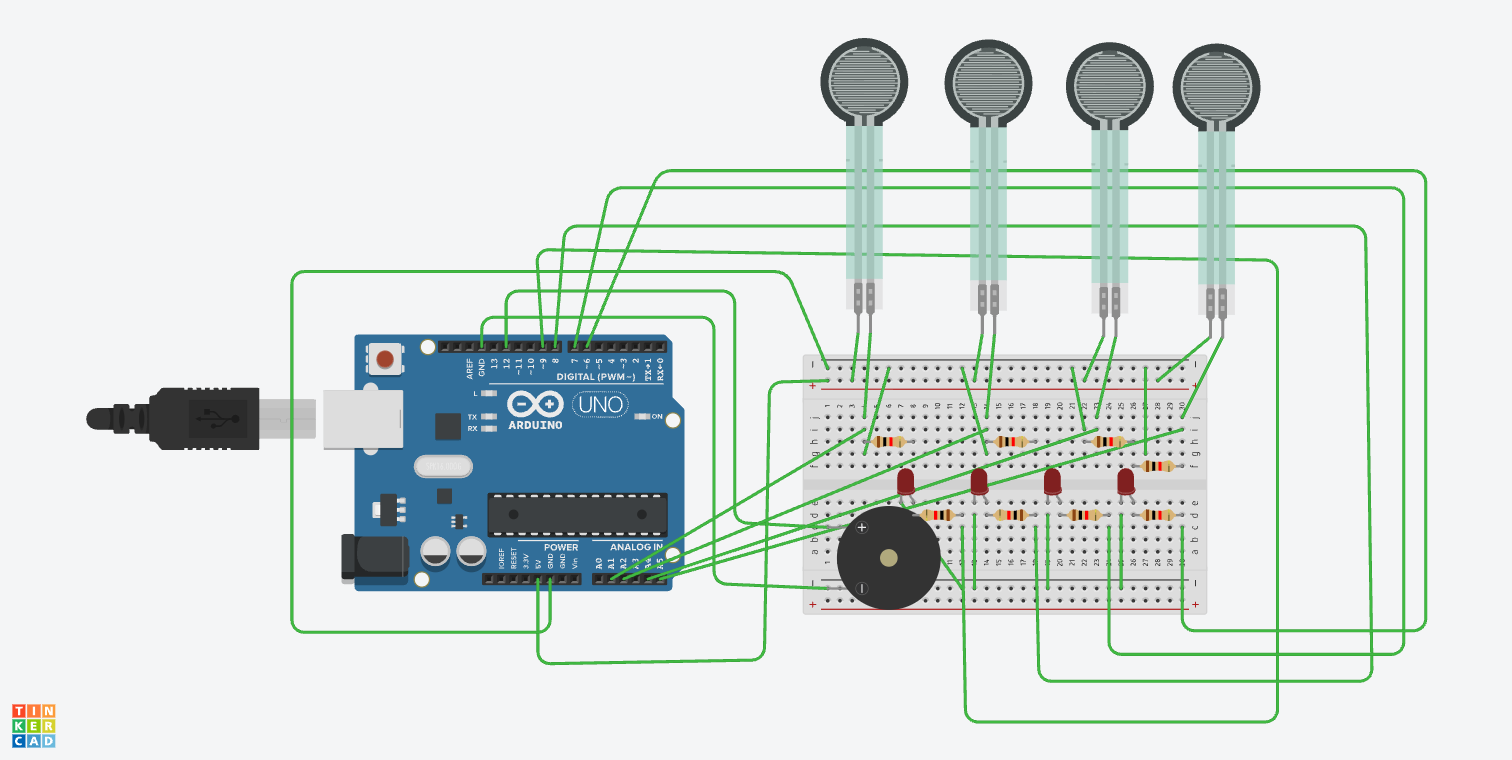
Schematic of your circuit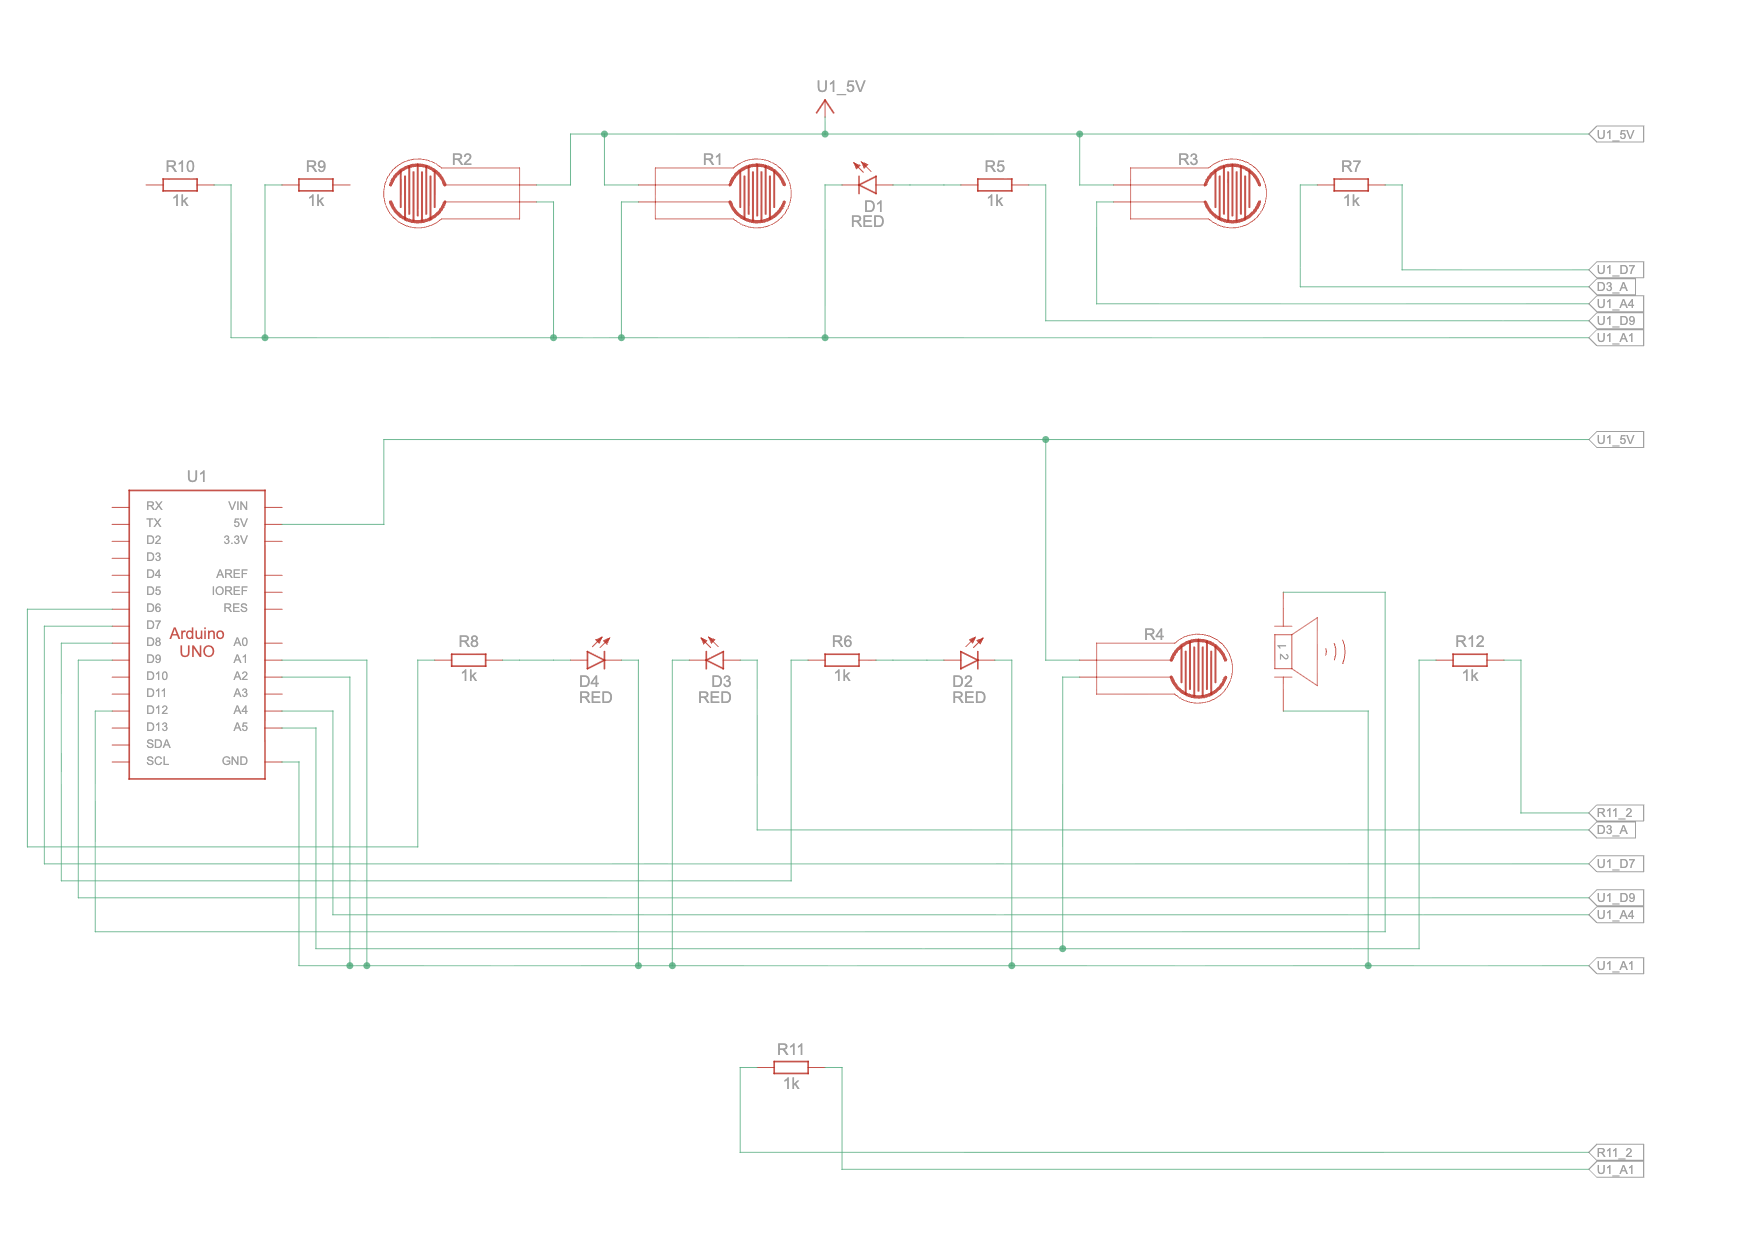
Description of p5.js code
The p5.js code sets up the simulation using WEBGL to create a 3D experience where the user can navigate the 3D space. It begins with an introduction screen where you connect the arduino before you enter the gallery and receive a few instructions. When the user is close to an artwork, the artwork will be highlighted yellow, then they can enlarge it using the toggle button on the floor board, where they will experience 4 different artwork experiences based on which frame they select. Two of the artworks explore visuals, while the other two explore audio. The main audio works, plays two different songs depending on whether or not the user is playing, while the visual changes the color of the work depending on the location of the cursor of the user.
Description of Arduino code
The arduino code controls the four force sensors, dividing their input into 4 categories each of which corresponding to a specific speed. It sends over to the p5 the values of the sensors along with the state of the toggle button. It also has 4 LEDs that it controls depending on the signal from the p5.js, to signal which artwork is currently being explored by the user and a buzzer to signal the opening and closing of a work. Further in parallel with the works in p5, one of the works plays a melody on the buzzer while the other controls the flashing on an LED.
Description of communication between Arduino and p5.js
There is multiple levels to the communication between arduino and p5.js, where arduino sends out signals in levels for the speed for each of the force sensors. It signals which force sensor is being pressed and how hard it is being pressed. It also has a toggle switch that controls when the artworks are opened and closed when the user is close to an artwork. There is also a buzzer that plays a note every time a work is opened or closed. Then there are the 4 leds that get signals from p5 on when to turn on, when the works are selected as well.
Arduino Code
P5 Sketch
What are some aspects of the project that you’re particularly proud of?
The exploration of a 3D space created a more interactive experience for the user, and I am proud of the work I put into creating a smooth movement with the sensors. I wanted to create a space that reflected the feeling of being in a gallery well, and I believe that included a smooth and seamless experience, which is why a lot of my time went into maintaining a minimalist but functional interface. Further, I believe the placement of the sensors and the toggle switch were quiet efficient for the user navigation and reflective of the virtual space well.
Future Improvements
I’d like to create a more intricate gallery with more works, maybe expanding it to different rooms. With potential of creating it for spaces on campus, giving a virtual representations of works, or even just the sensor navigation for regular spaces. I believe I like the idea of the interaction of the virtual and the physical and would like to explore the potential of using other sensors or physical elements to have a more engaging and interactive experience that explores more themes and expands the bounds of what this project covers.
Showcase User Trials