
My Concept:
For this project, I wanted to control two LEDs using sensors in a creative way. One LED would respond to a potentiometer, changing its brightness based on how much I turned it. The other LED would respond to a pushbutton, turning on or off each time I pressed it. The idea was to combine analog input (potentiometer) and digital input (pushbutton) to control outputs in two different ways. I also wanted to make sure everything was wired properly on the breadboard with the Arduino so it all worked together. At first, I wanted to do a breathing light where it kind of switches on and off gradually like it’s a human breathing, but it took me hours to try and it still wasn’t working, so that was a big challenge for me, because I couldn’t figure it out. I had to try a couple of times and it wasn’t giving me what I wanted. So, I decided to stick on to the simple foundation of it, because i realized I needed more time to get comfortable with using the potentiometer and switch.
Video Demonstration:
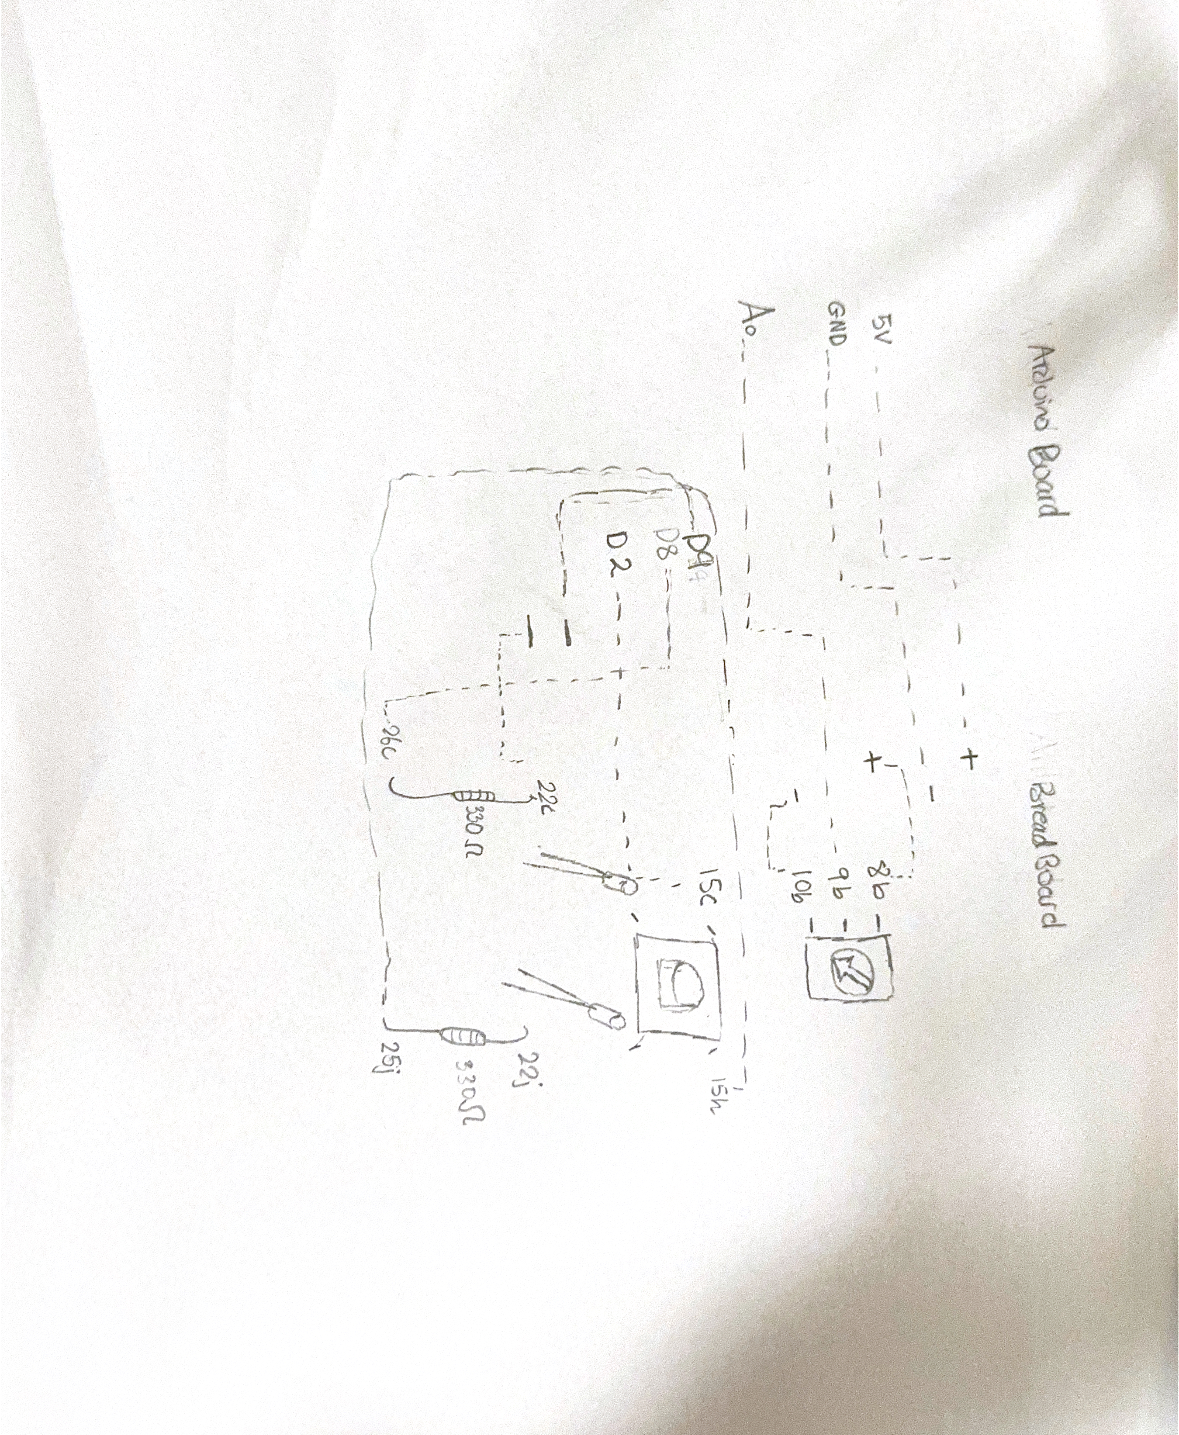
Hand-Drawn Schematic:
Code I’m most proud of:
// Pin Definitions
const int potPin = A0;       // Potentiometer middle pin connected to A0
const int buttonPin = 2;     // Pushbutton connected to digital pin 2
const int greenLedPin = 8;   // Green LED connected to digital pin 8
const int blueLedPin = 9;    // Blue LED connected to digital pin 9

// Variables
int potValue = 0;           // Stores analog reading from potentiometer
int ledBrightness = 0;      // Stores mapped PWM value for blue LED
int buttonState = HIGH;     // Current reading of the button
int lastButtonState = HIGH; // Previous reading of the button
bool greenLedOn = false;    // Green LED toggle state

void setup() {
  pinMode(buttonPin, INPUT_PULLUP); // Enable internal pull-up resistor
  pinMode(greenLedPin, OUTPUT);
  pinMode(blueLedPin, OUTPUT);

  Serial.begin(9600);
}

void loop() {
  //Read potentiometer and set blue LED brightness
  potValue = analogRead(potPin);                   // Read 0-1023
  ledBrightness = map(potValue, 0, 1023, 0, 255); // Map to PWM 0-255
  analogWrite(blueLedPin, ledBrightness);         // Set blue LED brightness

  // Read pushbutton and toggle green LED
  buttonState = digitalRead(buttonPin);

  // Detect button press (LOW) that just changed from HIGH
  if (buttonState == LOW && lastButtonState == HIGH) {
    greenLedOn = !greenLedOn;                       // Toggle green LED state
    digitalWrite(greenLedPin, greenLedOn ? HIGH : LOW);
    delay(50);                                     // Debounce delay
  }

  lastButtonState = buttonState;
The code I’m most proud of is basically the overall code where the green LED toggles ON/OFF with the pushbutton while the green LED changes brightness with the potentiometer. It was tricky at first because the button kept flickering, but I solved it with a debounce and I asked chatgpt to help me on what I had wrong and why this might have been happening. Here’s the code:
I’m proud of this code because it solves the switch problem elegantly; the green LED reliably turns on and off without flickering, while the blue LED smoothly responds to the potentiometer. It made me feel like I had full control over both analog and digital inputs in the same circuit.
Reflection and Improvements:
This project taught me a lot about wiring and sensor behavior. One big challenge was the pushbutton; at first, it would flicker, or the LED would turn on/off unexpectedly. Also, when I tried pressing the button with my finger, the breadboard wires kept moving because there were so many of them. Eventually, I realized using a pen to press the button made it much more stable and consistent.
For future improvements, I’d like to:
- Use more organized jumper wires to make the breadboard less messy
- Maybe add more sensors or another LED with creative behaviors
- Explore smoother debouncing techniques in software to make the switch even more responsive
Even with the challenges, seeing both LEDs working together exactly how I wanted was really satisfying. It showed me how analog and digital inputs can interact with outputs, and how careful wiring and coding logic are equally important.
Github Link: