Group members: Genesis & Nikita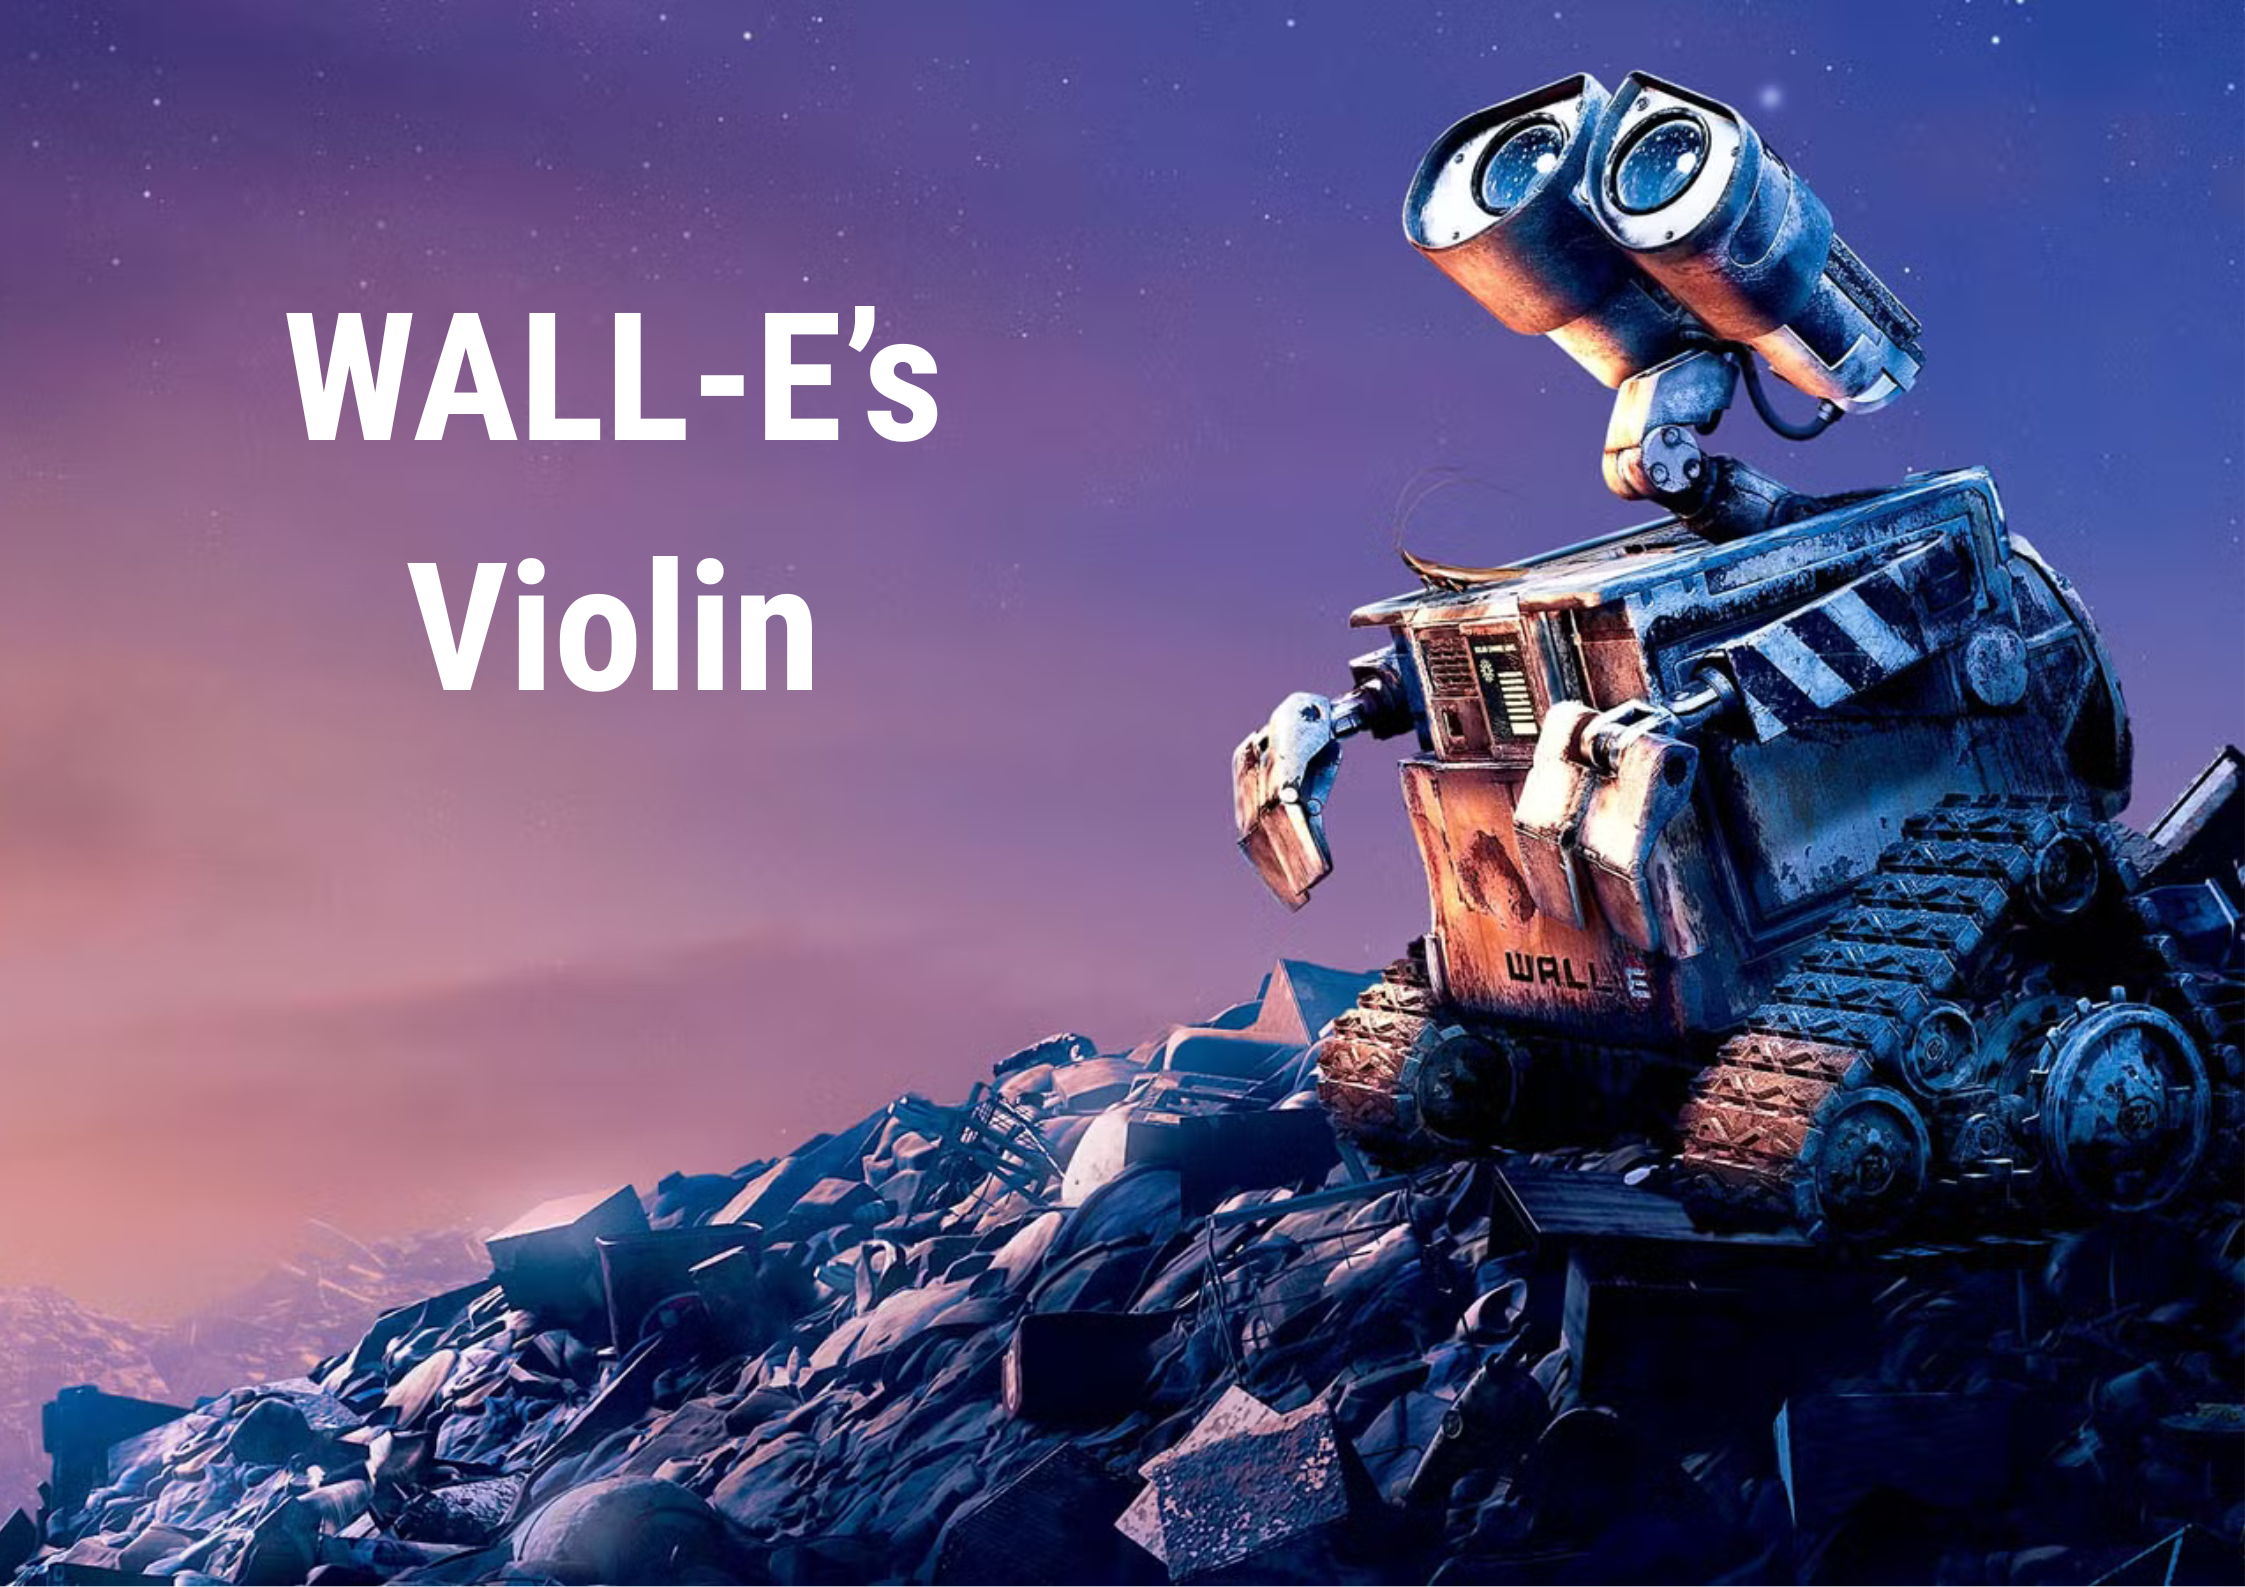
Concept:
video
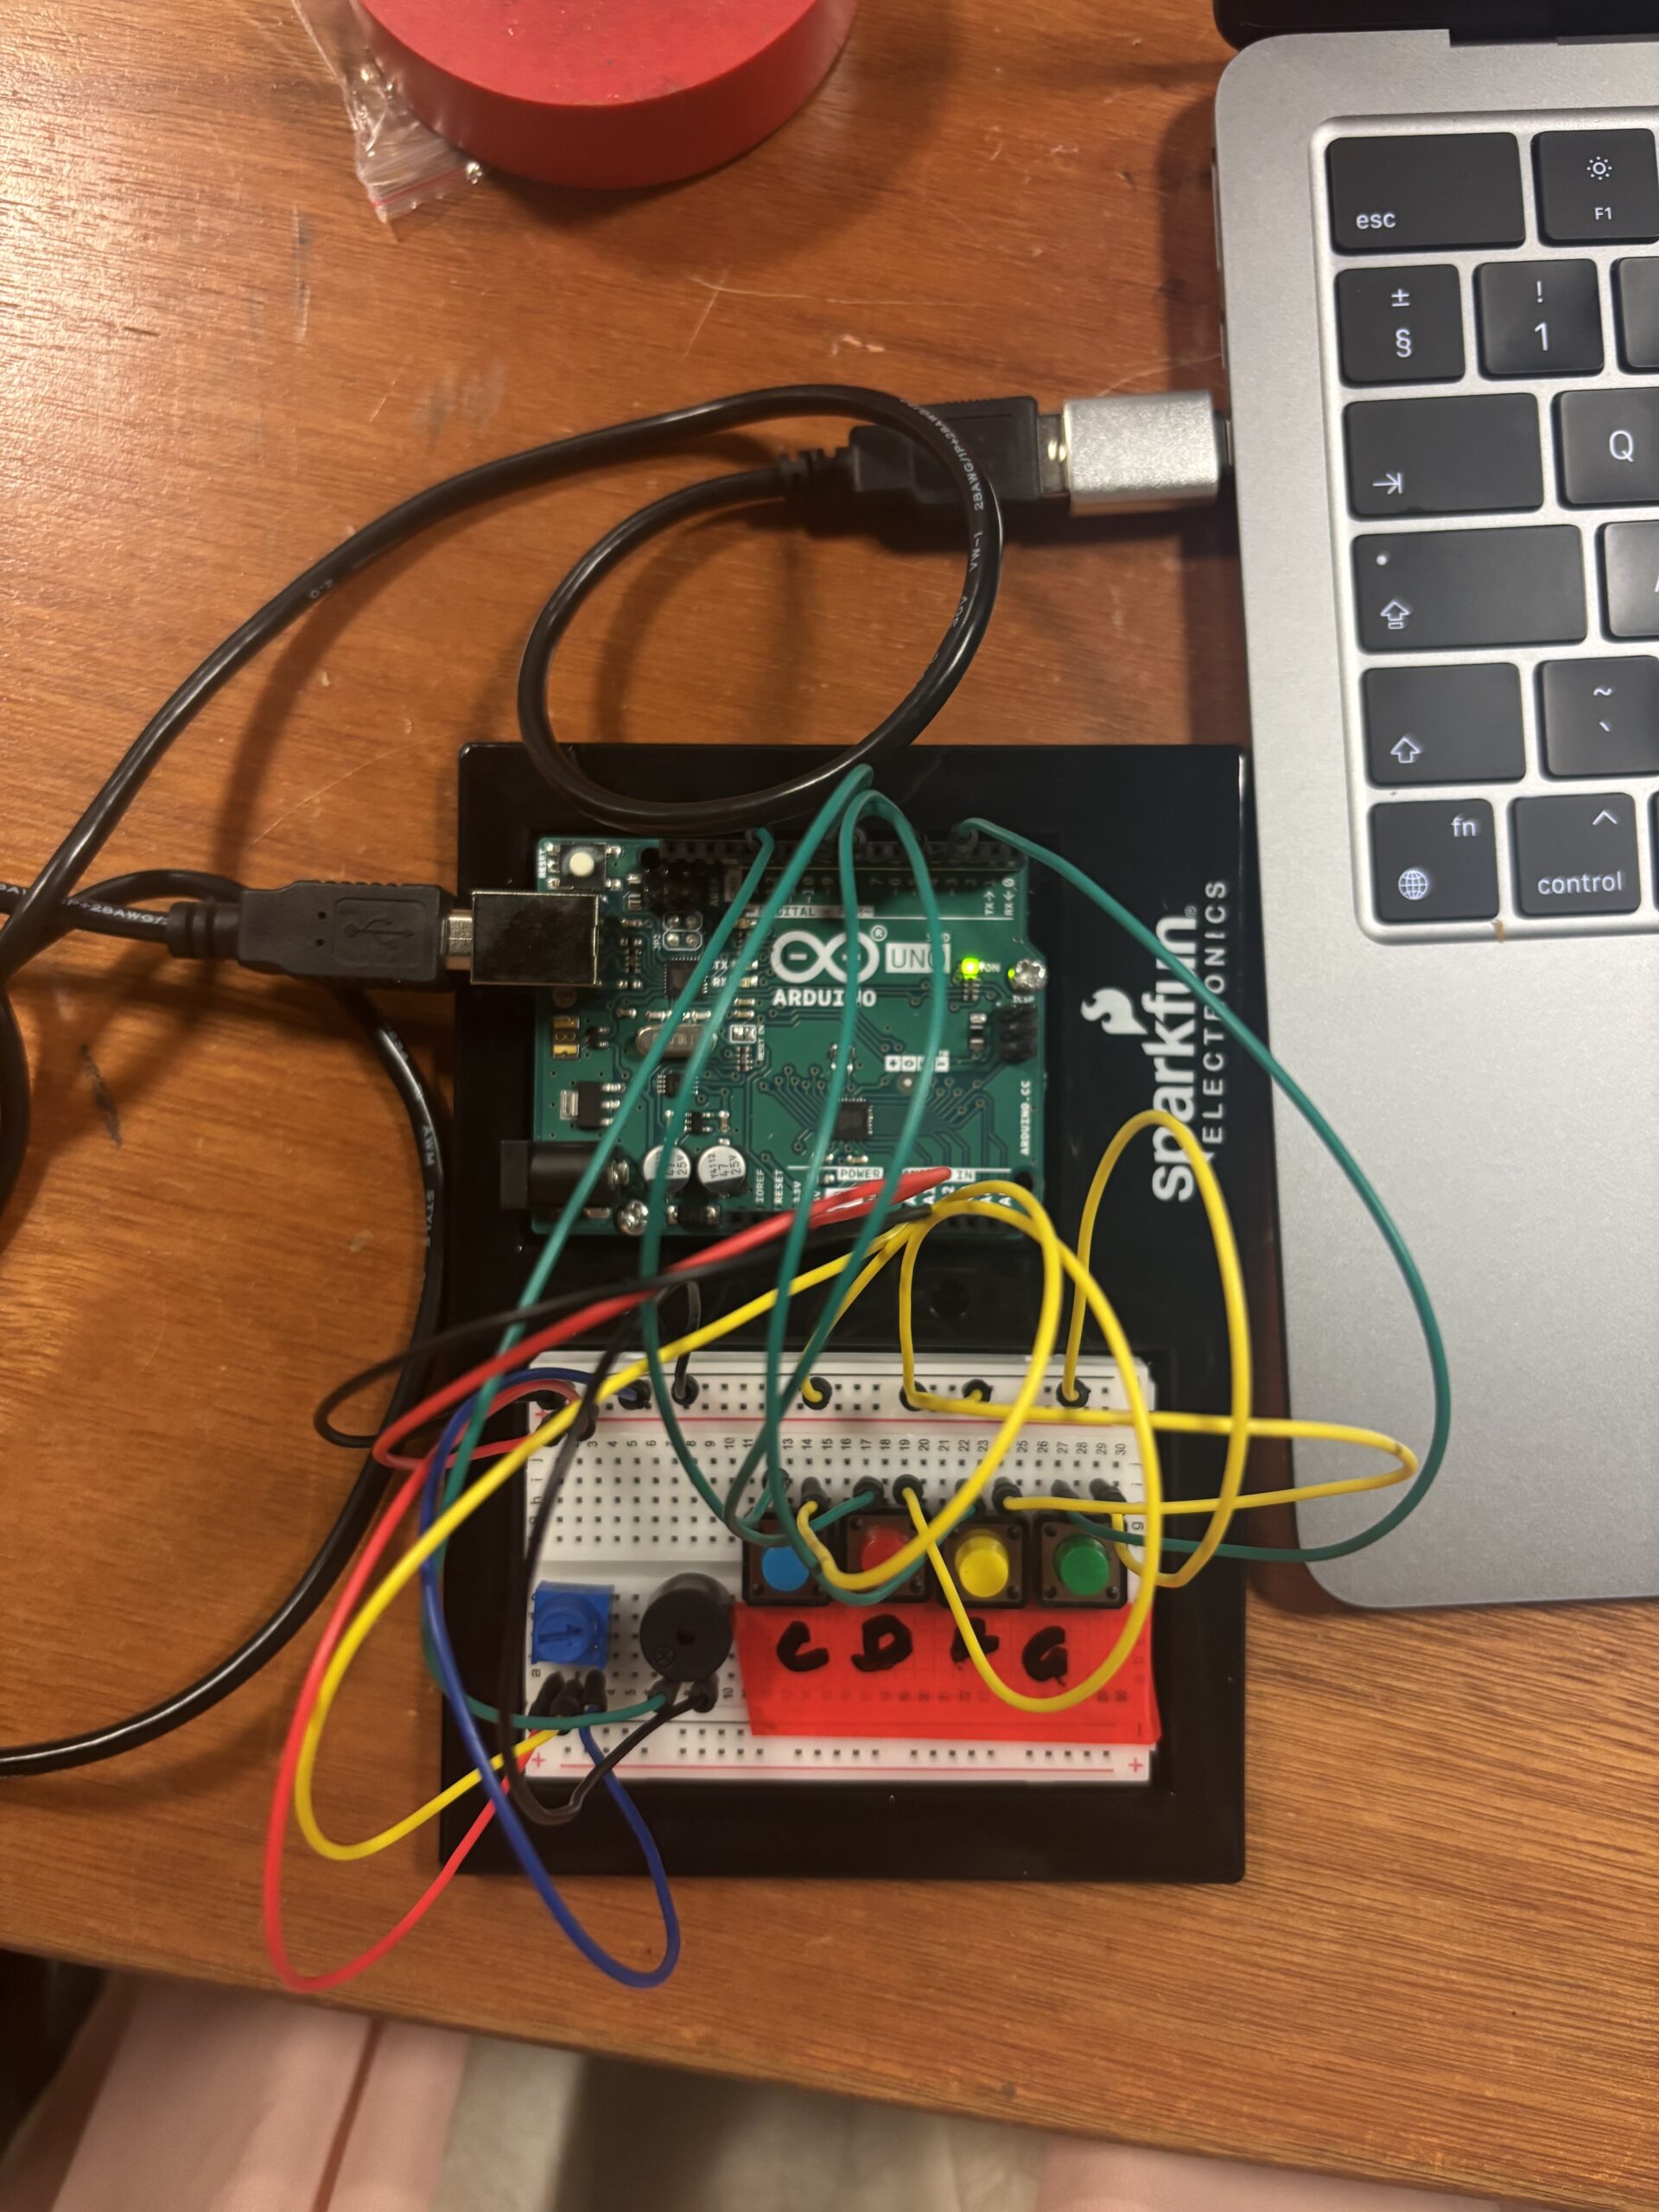
“WALL-E’s Violin” is inspired by the character WALL-E from the popular animated movie. The idea behind “WALL-E’s Violin” is to mimic WALL-E expressing emotion through music, specifically through a violin — a symbol of sadness and nostalgia. A cardboard model of WALL-E is built with an ultrasonic distance sensor acting as his eyes. A cardboard cutout of a violin and bow are placed in front of WALL-E to represent him holding and playing the instrument.
As the user moves the cardboard stick (the “bow”) left and right in front of WALL-E’s “eyes” (the ultrasonic sensor), the sensor detects the distance of the bow. Based on the distance readings, different predefined musical notes are played through a piezo buzzer. These notes are chosen for their slightly melancholic tones, capturing the emotional essence of WALL-E’s character
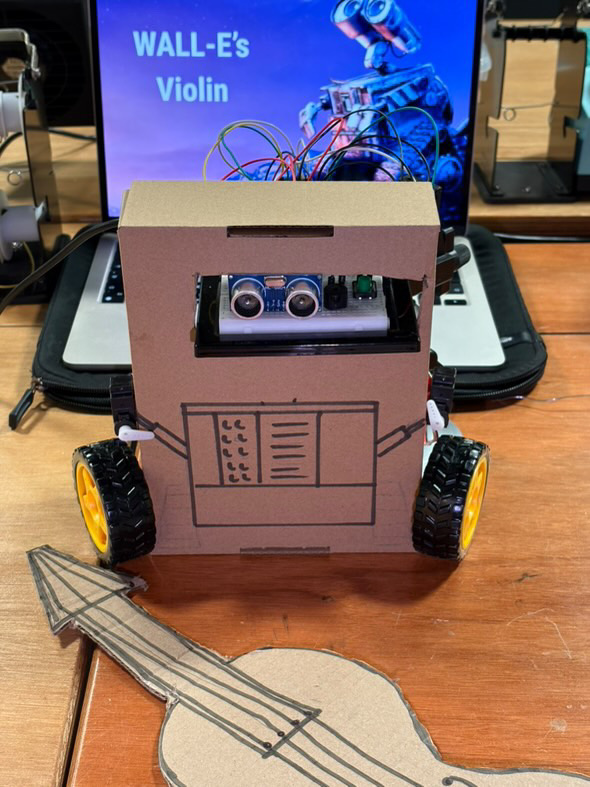
To add a layer of animation and personality, a push-button is included. When pressed, it activates two servo motors attached to WALL-E’s sides, making his cardboard arms move as if he is emotionally waving or playing along. The mechanical hum of the servos blends into the soundscape, enhancing the feeling of a robot expressing music not just through tones, but with motion — like a heartfelt performance from a lonely machine.
How it Works:
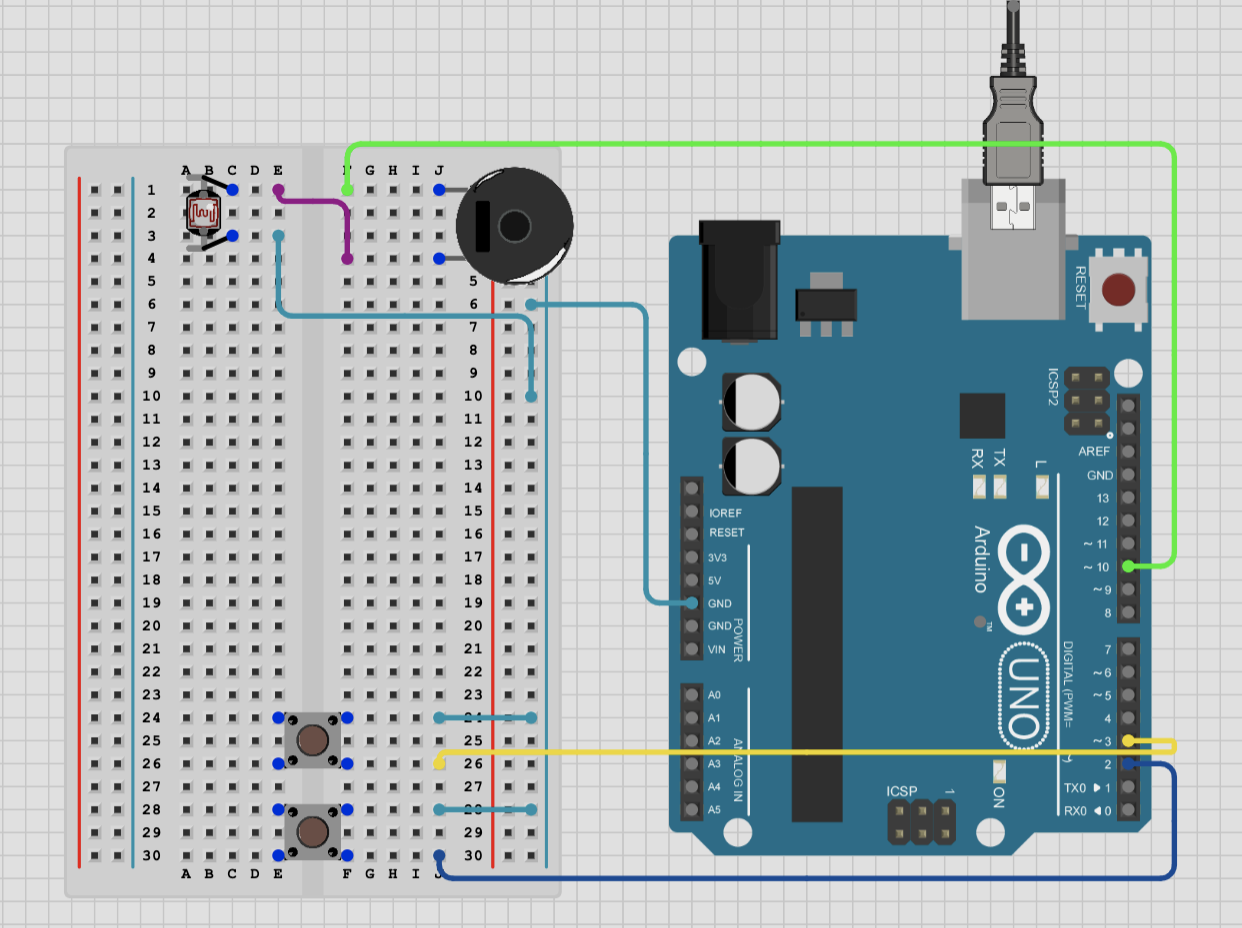
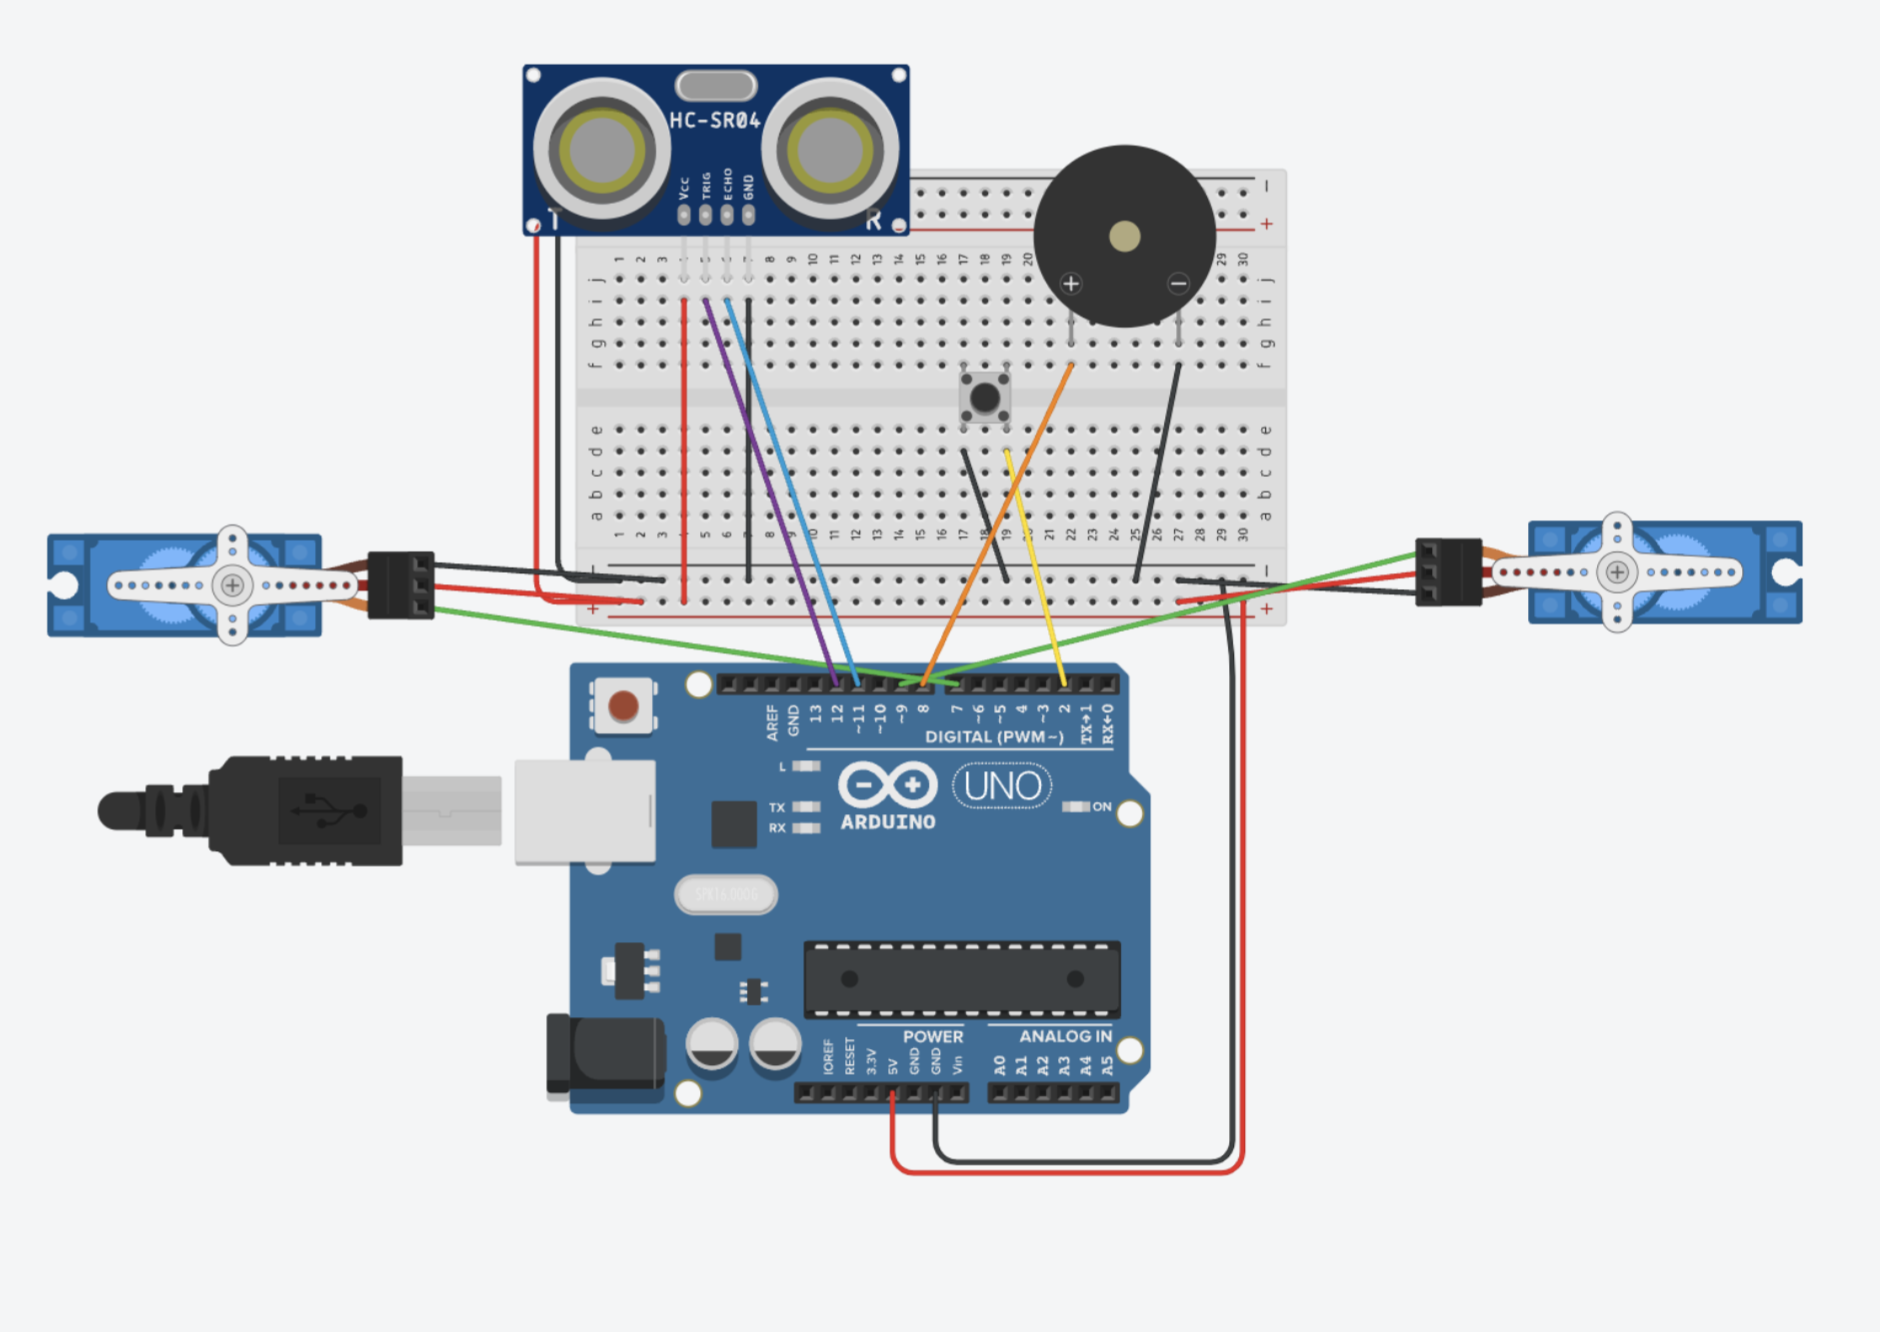
- Ultrasonic Sensor: Acts as WALL-E’s eyes. It continuously measures the distance between the robot and the cardboard bow moved in front of it.
- Note Mapping: The Arduino interprets the measured distances and maps them to specific, predefined musical notes. These notes are chosen to sound melancholic and emotional, fitting WALL-E’s character.
- Piezo Buzzer: Plays the corresponding musical notes as determined by the distance readings. As the user sways the bow, the pitch changes in real time, simulating a violin being played.
- Servo Motors + Button: Two servo motors are connected to WALL-E’s arms. When the button is pressed, they animate his arms in a waving or playing motion. The sound of the servos adds a robotic texture to the performance, further humanizing the character and blending physical movement with audio expression.
Code:
#include <Servo.h>
#include <math.h>

// Pin Assignments

const int trigPin   = 12;   // Ultrasonic sensor trigger
const int echoPin   = 11;   // Ultrasonic sensor echo
const int buzzerPin = 8;    // Buzzer output
const int buttonPin = 2;    // Button input for servo tap
const int servoPin  = 9;    // First servo control pin (default starts at 0°)
const int servoPin2 = 7;    // Second servo control pin (default starts at 180°)

Servo myServo;    // First servo instance
Servo myServo2;   // Second servo instance

// Bittersweet Melody Settings

int melody[] = {
  294, 294, 370, 392, 440, 392, 370, 294
};
const int notesCount = sizeof(melody) / sizeof(melody[0]);


// Sensor to Note Mapping Parameters

const int sensorMin = 2;     // minimum distance (cm)
const int sensorMax = 30;    // max distance (cm)
int currentNoteIndex = 0;

// Vibrato Parameters

const float vibratoFrequency = 4.0;
const int vibratoDepth = 2;

// Timer for vibrato modulation

unsigned long noteStartTime = 0;

void setup() {
  // Initialize sensor pins
  pinMode(trigPin, OUTPUT);
  pinMode(echoPin, INPUT);

 // Initialize output pins
  pinMode(buzzerPin, OUTPUT);
  pinMode(buttonPin, INPUT_PULLUP);

  // Initialize the first servo and set it to 0°.
  myServo.attach(servoPin);
  myServo.write(0);

   // Initialize the second servo and set it to 180°..
  myServo2.attach(servoPin2);
  myServo2.write(180);

 // Initialize serial communication for debugging
  Serial.begin(9600);

// Get the initial note based on the sensor reading
  currentNoteIndex = getNoteIndex();
  noteStartTime = millis();
}

void loop() {
 // Get the new note index from the sensor
  int newIndex = getNoteIndex();

 // Only update the note if the sensor reading maps to a different index
  if (newIndex != currentNoteIndex) {
    currentNoteIndex = newIndex;
    noteStartTime = millis();
    Serial.print("New Note Index: ");
    Serial.println(currentNoteIndex);
  }

 // Apply vibrato to the current note.
  unsigned long elapsed = millis() - noteStartTime;
  float t = elapsed / 1000.0;  // Time in seconds for calculating the sine function
  int baseFreq = melody[currentNoteIndex];
  int modulatedFreq = baseFreq + int(vibratoDepth * sin(2.0 * PI * vibratoFrequency * t));

// Output the modulated tone
  tone(buzzerPin, modulatedFreq);

  // Check the button press to trigger both servos (movement in opposite directions).
  if (digitalRead(buttonPin) == LOW) {
    tapServos();
  }

  delay(10);
}

// getNoteIndex() measures the sensor distance and maps it to a note index.
int getNoteIndex() {
  int distance = measureDistance();
// Map the distance (between sensorMin and sensorMax) to the range of indices of the array (0 to notesCount-1).
  int index = map(distance, sensorMin, sensorMax, 0, notesCount - 1);
  index = constrain(index, 0, notesCount - 1);
  return index;
}

// measureDistance() triggers the ultrasonic sensor and calculates the distance in cm.
int measureDistance() {
  digitalWrite(trigPin, LOW);
  delayMicroseconds(2);
  digitalWrite(trigPin, HIGH);
  delayMicroseconds(10);
  digitalWrite(trigPin, LOW);

  long duration = pulseIn(echoPin, HIGH);
  int distance = duration * 0.034 / 2;
  return constrain(distance, sensorMin, sensorMax);
}

// tapServos() performs a tap action on both servos:
// - The first servo moves from 0° to 90° and returns to 0°.
// - The second servo moves from 180° to 90° and returns to 180°.
void tapServos() {
  myServo.write(90);
  myServo2.write(90);
  delay(200);
  myServo.write(0);
  myServo2.write(180);
  delay(200);
}
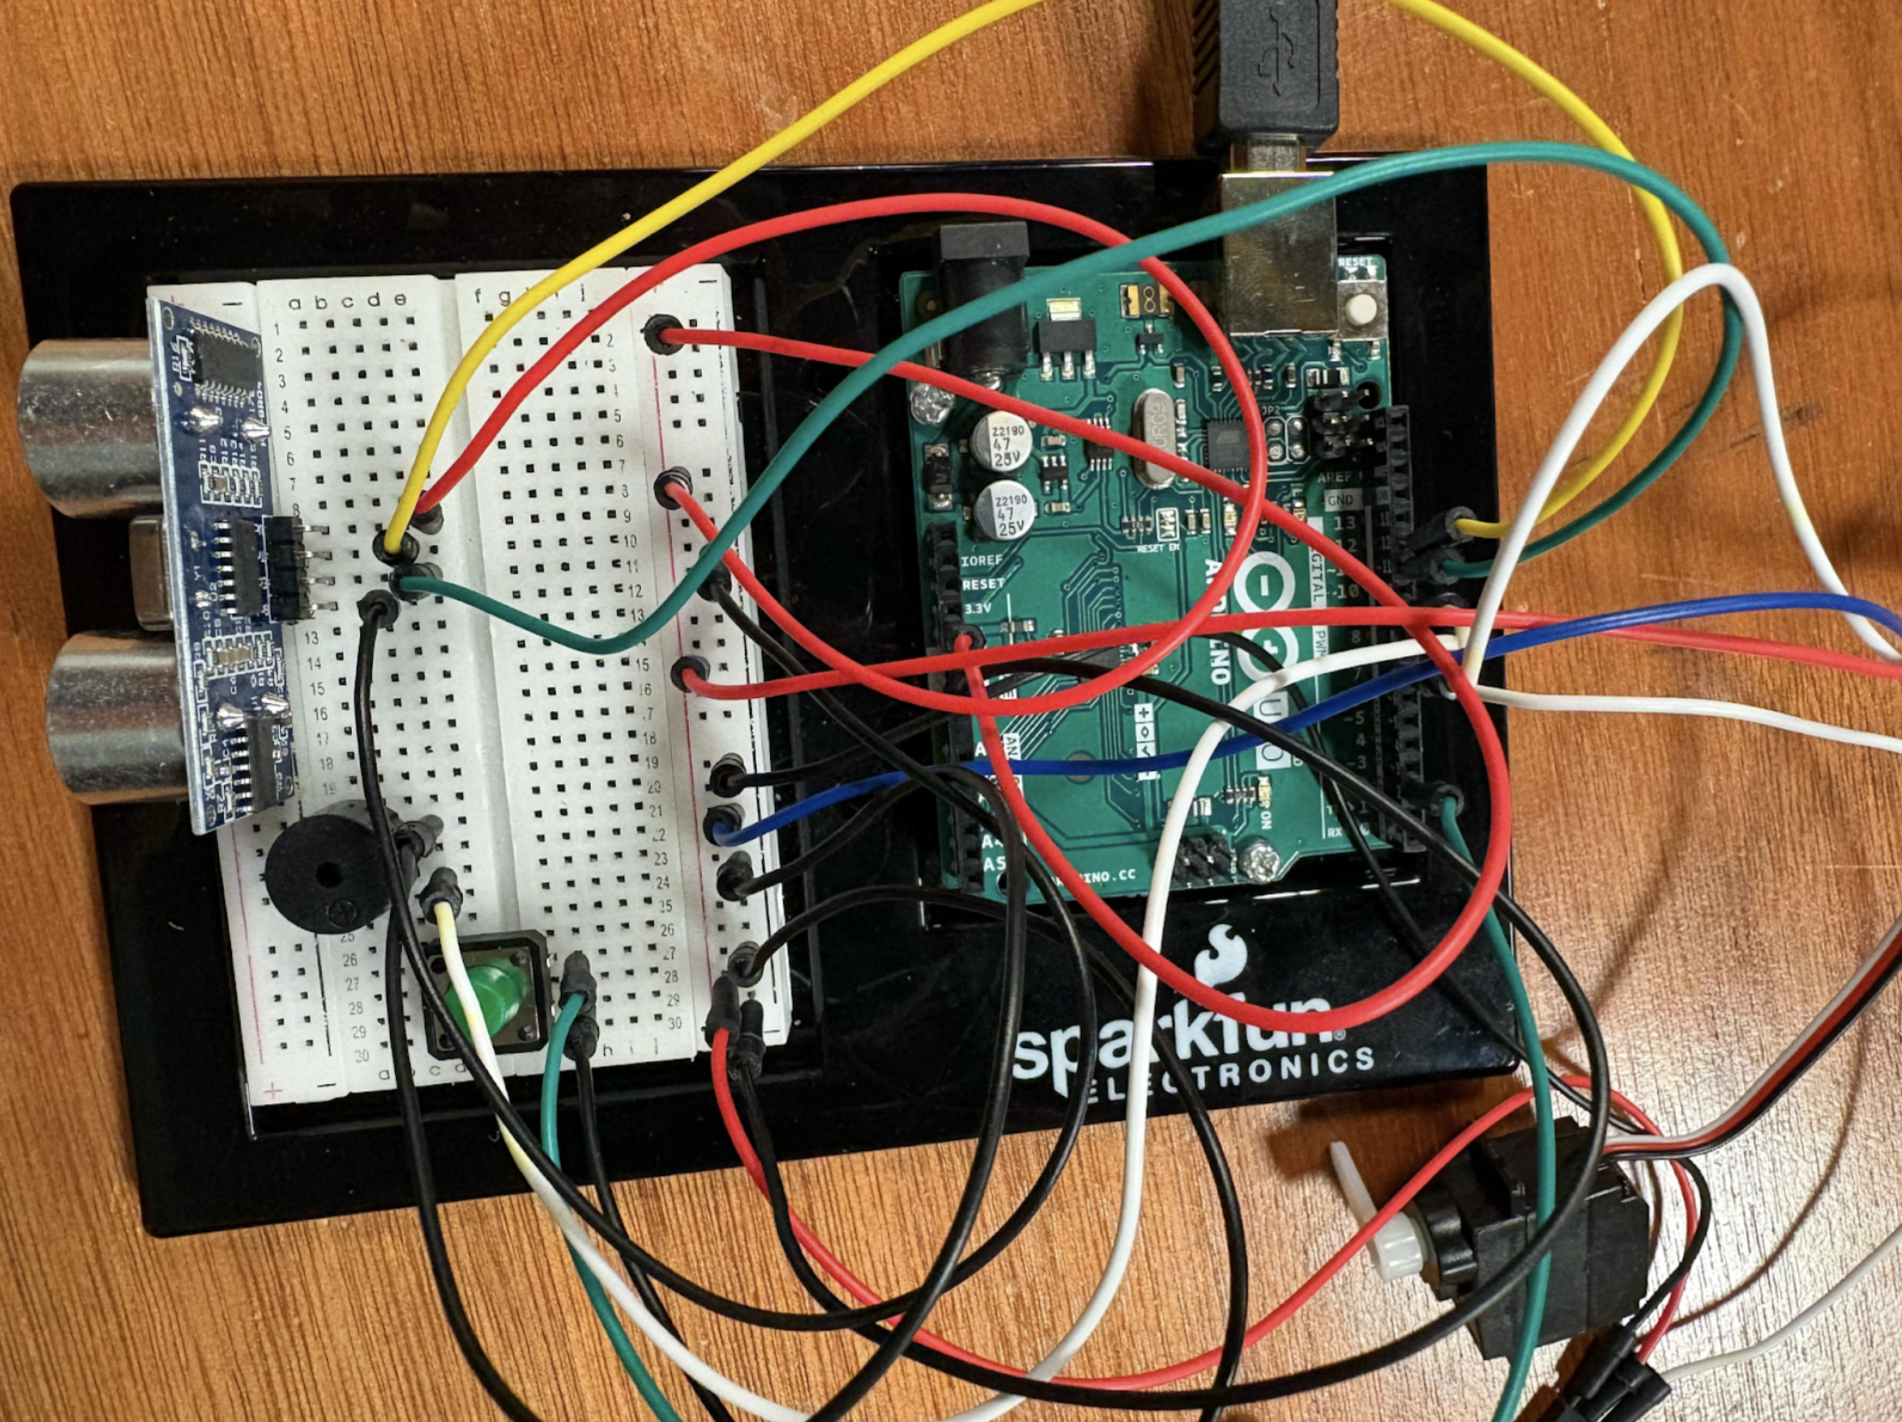
Circuit:
Future Improvements:
-
- Add more notes or an entire scale for more musical complexity.
- Integrate a servo motor to move the arm or head of WALL-E for animation.
- Use a better speaker for higher-quality sound output.
- Use the LED screen to type messages and add to the character.
 But I wanted to keep things happy and do just that part of mice following him in my preferred aesthetic- a night sky. In my version, a glowing dot represents the Piper, and mice randomly appear and start following it. But they’re not just mindless followers—if you move your mouse, you can actually distract them!