Every room in the dollhouse will have a variety of either physical interactions (lights, sounds), virtual tasks (that will be displayed on the computer), or a mixture of both. The goal of the game is to be able to interact with the dollhouse, but also to finish all the tasks set in place. The user will be able to complete the tasks on processing and this will be reflected on the dollhouse. We would also like to integrate a display on the dollhouse to display the progress as well display a message when the game is won.
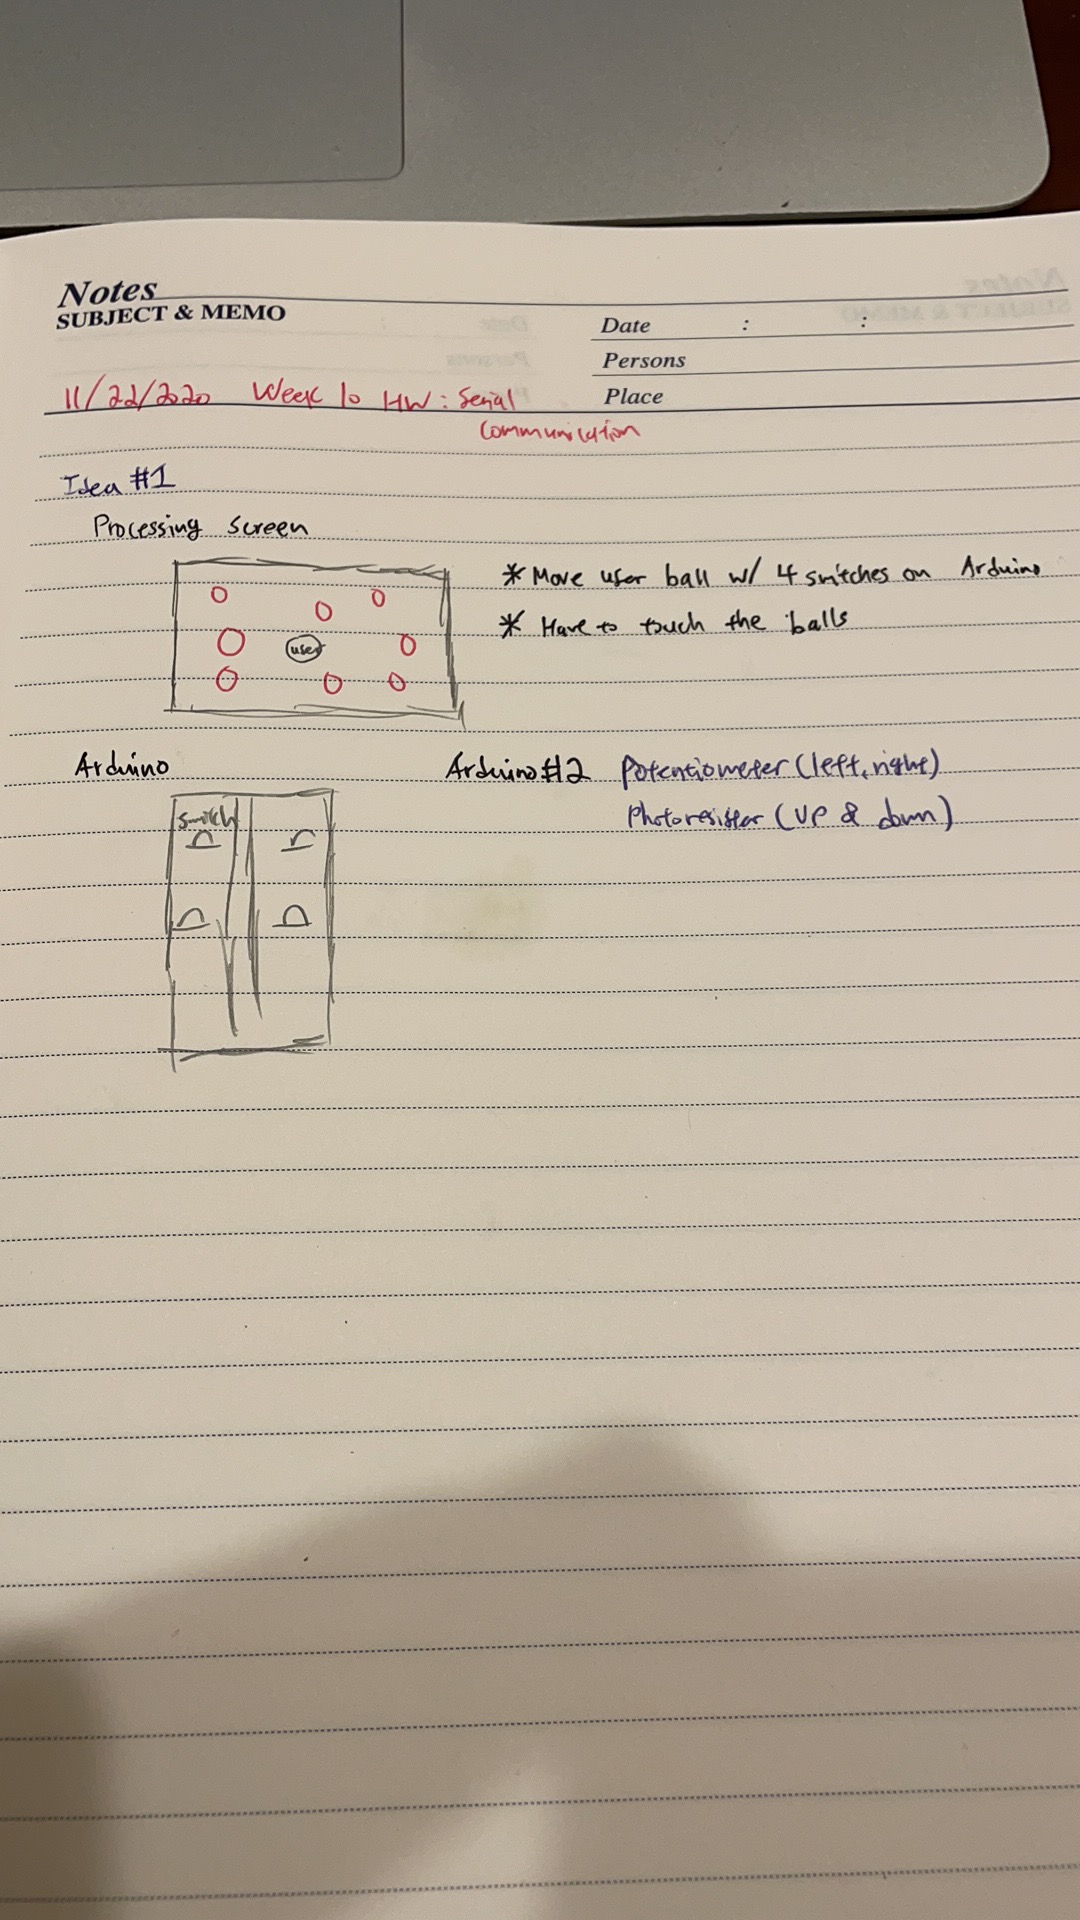
For this week’s assignment, I could not really think of another creative or original game so I just decided to create a simpler version of the game that I had created for my Midterm project but with a little twist. That twist is that instead of controlling the user ball with only arrow keys, I made it available to control the left & right movement of the ball with a potentiometer on the Arduino along with two buttons (Red and Green buttons) that controls the up and down movement of the user ball, Red being up and Green being down.
Challenges/Difficulties
There was not as much difficulties faced throughout the process of making it, but I would say that the most difficult part I encountered was understanding the relationship between Arduino and Processing as I was not able to fully grasp all of the information from our last lab session. However, after talking with Professor Aaron, I was able to get a clearer idea of serial communication.
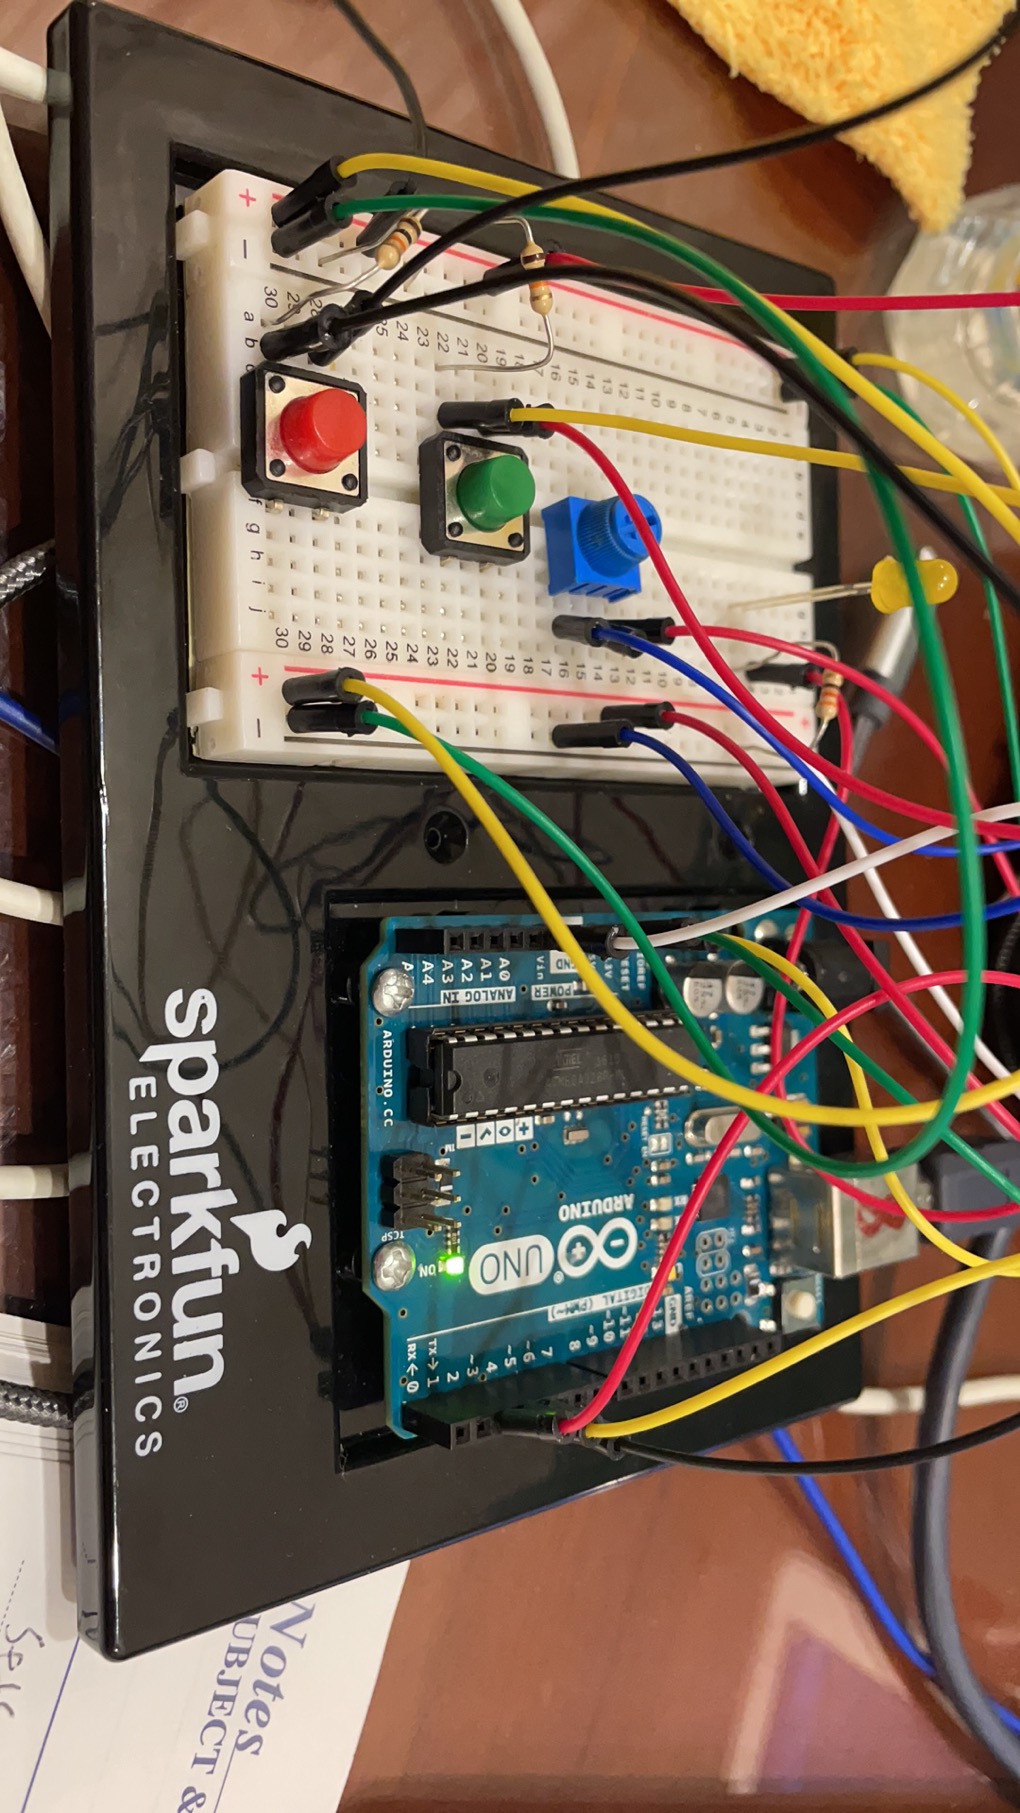
Setup
Final Demonstration
Arduino Code
const int greenSwitch = 3;
const int redSwitch = 4;

void setup() {
  // put your setup code here, to run once:
  Serial.begin(9600);
  Serial.println("0,0");
  pinMode(greenSwitch, INPUT);
  pinMode(redSwitch, INPUT);
}

void loop() {
  if (Serial.available() > 0) {
    char inByte = Serial.read();
    int sensor = analogRead(A0);
    delay(1);
    int sensor2 = digitalRead(greenSwitch);
    int sensor3 = digitalRead(redSwitch);
    Serial.print(sensor);
    Serial.print(',');
    Serial.print(sensor2);
    Serial.print(',');
    Serial.println(sensor3);
  }
}
Processing Code
import processing.serial.*;
Serial myPort;
int xPos=0;
Balls [] balls;
//Timer timer;
userBall myBall;
int numberofballs = 15;
int amountcollided;
void setup() {
  size(1280, 960);
  //printing out all the available ports
  printArray(Serial.list());
  //make the chosen port from the list as a string or a name
  String portname=Serial.list()[4];
  /*initializes the class "Serial"
   the 9600 is the baud (kinda the rate that bytes are being uploaded or transferred
   */
  myPort = new Serial(this, portname, 9600);
  //timer = new Timer();
  myBall = new userBall();
  balls = new Balls [numberofballs];
  for (int i=0; i<balls.length; i++) {
    balls[i] = new Balls();
  }
}
void draw() {
  background(255);
  //fill(0);
  //ellipse(xPos, height/2, 50, 50);
  for (int i=0; i<balls.length; i++) {
    balls[i].drawBalls();
  }
  myBall.drawuserBall();
  myBall.checkEdge();
  collisionDetection();
  //timer.showTimer();
}

void serialEvent(Serial myPort) {
  //read string of information
  String s=myPort.readStringUntil('\n');
  s=trim(s);
  //if there's sth in s
  if (s!=null) {
    //split the string s based on commmas and put it into integer array "values"
    int values[]=int(split(s, ','));
    /*as long as there's a total of three arrays of information from Arduino
     */
    if (values.length==3) {
      //potentiometer value
      myBall.xPos=values[0];
      //sthis is values for greenswitch
      if (values[1] ==1) {
        myBall.yPos +=3;
      }
      //this is values for redswitch
      if (values[2] == 1) {
        myBall.yPos -=3;
      }
      myBall.xPos = int (map(myBall.xPos, 0, 1023, 0, width));
    }
  }
  //println(xPos);
  myPort.write('0');
}

void collisionDetection() {
  amountcollided = 0;
  for (int i=0; i<balls.length; i++) {
    //if the x and y location distance of any NPC ball and user ball added together is smaller than the radius of the NPC ball and user ball, then it means it has collided
    if (dist(balls[i].locx, balls[i].locy, myBall.xPos, myBall.yPos)< balls[i].radius + myBall.radius) {
      //println(dist(balls[i].locx, balls[i].locy, myBall.locx, myBall.locy));
      //balls[i].iscollided=true; //if it collides, changes the boolean to true, changing the image
      //if (balls[i].iscollided == true) {
      //  amountcollided +=1;
        stroke(255);
        fill(139,0,139);
        ellipse(balls[i].locx, balls[i].locy, balls[i].ballwidth, balls[i].ballheight);
      //}
    }
  }
}
class Balls {
  float locx, locy;
  float ballwidth, ballheight;
  int radius=25;
  boolean iscollided=false;

  Balls() {
    locx=random(width); //putting random will let the balls appear at different locations
    locy=random(height);
    ballwidth=2*radius;
    ballheight=2*radius;
  }
  void drawBalls() {
    stroke(166, 134, 230);
    fill(255, 0, 0);
    ellipse(locx, locy, ballwidth, ballheight);

  }
  void collided() {
    if (iscollided == true) {
      stroke(255);
      fill(255);
      ellipse(locx, locy, ballwidth, ballheight);
    }
  }
}
class Timer {
  float locx, locy;
  float timerwidth, timerheight;
  int countdown=20;
  int seconds;
  float startTime;


  Timer() {// ask about the logic behind this and how to create a countdown timer?
    textSize(50);

    startTime= millis()/1000 + countdown;
    seconds = int(startTime- millis()/1000);
  }
  void showTimer() {
    if (seconds<0) {
      startTime= millis()/1000 + countdown;//resets the timer and restarts it when less than 0
      //if seconds is zero, display "game over"
    } else {
      seconds = int(startTime- millis()/1000);
      fill(255, 0, 0);
      text(seconds, width/2-100, 100);
    }
  }
}
This weekend, I visited an art exhibition in a space called Warehouse 421 in Mina Zayed. It was my first time exploring a creative space other than the Louvre, and I realized that I wanted to make a checklist of some of the main places that I would like to visit during my time here. Something else I realized, is that sometimes it’s hard to visualize how far something is in the UAE (does that make sense?), I’m still constructing a mental map of Abu Dhabi but find myself still needing to refer to Google Maps to make an estimate of the distance.
This inspired my game, I wanted to show the user pictures of some art/creative spaces in the UAE, and for them to estimate how far they are by interacting with the sensor.
Initial Attempts
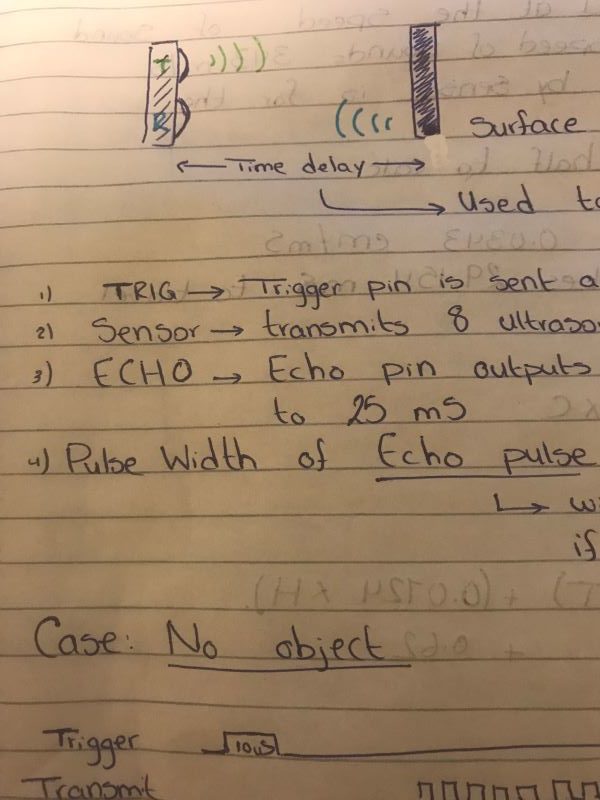
Again, I wanted to experiment with the Ultrasonic Sensor. I spent a lot of time understanding how it works, and the conversions needed to change time to distance. I found it really fascinating and actually recalled that it isn’t my first experience with the sensor! I used to use it in robotics back in high school, but I guess I didn’t have that clear of an understanding of it.
some of my notes
This video was really helpful in terms of understanding the functionality and conversion. However, I struggled a lot with the serial communication part. I was initially able to print out the distance in CM on the screen but then was faced with a lot of difficulties and errors when it came to working with the value for the game functionality.
Final Idea
So, for this one, I switched to the light sensor/photocell and thought it could be interesting to see how one could map brightness to distance. I completed my communication using the ascii handshake, as I wanted the full range of readings.
For the game, I created an array of locations in the UAE and another array of distances (referring to the distance from campus). I created three categories:
1-10 KM Away
11 – 20 KM Away
Outside the City
Then, based on the distance array I classified all the locations in the group. As for the input, I created brightness ranges, i.e. if the brightness was between 50- 200 (sensor covered), the spot is in the 1 – 10 KM category…etc. Whatever the user inputs is then saved in a variable that is used to compare with the “correctCategory”. So, if the user gets “Louvre Abu Dhabi”, they’re meant to cover the sensor. If they do, their input value saves UserInputCategory as 1, and hence it shows a correct message when it is compared to the CorrectCategory variable.
I tried to make the sequences logical in terms of cognitive mapping and how the user interacts with the game, rather than ordered in the code. Meaning that category 1 has the darkest range while category 2 has the brightest, and 3 (actually farthest from the sensor and farthest from campus) has a brightness in between.
Here’s an example of the gameplay, I’m missing a start screen and a replay button since I focused on getting this part to work. As you can see, I had indicators on my desk, the first one indicating spaces that are within the city but a bit farther from campus, and the second one indicating spaces outside of the city. So, for the second example, when I got “Alserkal Avenue” located in Dubai, it only worked when I moved to the suitable indicator.
However, this is not always the case, there’s a glitch in the code, and I’m afraid it might be how sensitive the photocell is, as sometimes it shows the “correct” message at the wrong time.
Possible Developments
I found myself understanding the concepts of serial communication we went over in class, and the other examples but struggled with the application a bit, especially with the distance sensor. So trying to work with it more could be helpful before starting to work on the final project.
A nice development/addition to this game would be inquiring about estimate cab price rather than distance. I found that many students estimate how far someplace is by how much a cab would cast. e.g. 50 AED to YAS mall, so anything around that would cost around the same amount. It might be more relatable and interesting that way!
Arduino Code:
int photoCell = A0;

void setup() {
  // put your setup code here, to run once:
  Serial.begin(9600);
  Serial.println('0'); //initial message

}

void loop() {
  if(Serial.available()>0){ //checks if something is recieved from processing
    char inByte=Serial.read(); //and reads it
    int photoCellReading = analogRead(A0); //reads my photocell
    delay(1);
    Serial.println(photoCellReading); //sends it to processing

  }
}
Processing Code:
import processing.serial.*;
Serial myPort;
int data=0;

int userInputCategory = 0; //variable dependent on user input
int correctCategory; //variable dependent on location distance, used to compare with user input
int randomLocation; //random location for each run

//arrays of locations and how far they are from campus
String[] locations =  {"Louvre Abu Dhabi", "Warehouse 421", "Abu Dhabi Cultural Foundation", "Etihad Modern Art Gallery", "Alserkal Avenue", "Sharjah Art Foundation"};
int [] distanceFromCampus = {6, 10, 13, 18, 132, 167};

//loading images and font
PImage image;
PFont f;

void setup() {
  size(960, 540);
  printArray(Serial.list());
  String portname=Serial.list()[2];
  println(portname);
  myPort = new Serial(this, portname, 9600);
  myPort.clear(); //clearing port from any previous data
  myPort.bufferUntil('\n'); // reading until the new line

  randomLocation = (int)random(0,locations.length); // generating a random location for the play

  //loading the suitable image
   image = loadImage(locations[randomLocation] + ".jpg");
   imageMode(CENTER);
   image.resize(350,350);


   //font
   f = createFont("Montserrat-BoldItalic.ttf",20);
   textFont(f);
   textMode(CENTER);


}
void draw() {
  background(102,133,147);
  fill(0);
  // if statement to set the correct category based on location
  if (distanceFromCampus[randomLocation] <= 10) {
    correctCategory = 1;
  } else if (distanceFromCampus[randomLocation] >= 10 && distanceFromCampus[randomLocation] <= 20) {
    correctCategory = 2;
  } else if (distanceFromCampus[randomLocation] > 100) {
    correctCategory = 3;
  }
  //setting user input categories
  if (data >= 100 && data <= 200) {
    userInputCategory = 1;
  } else if (data >= 700 && data <= 830) {
    userInputCategory = 3;
  } else if (data > 855) {
    userInputCategory = 2;
  }
//println(randomLocation);

  switch (randomLocation) {
  case 0:
    //display stuff
    textSize(40);
    text(locations[randomLocation],width/2-250, height - 450);
    image(image, width/2,height/2 + 30);
    //compares user input to the correct value and displays correct if the user is right
    if (userInputCategory == correctCategory) {
      background(102,133,147);
      text("CORRECT", width/2-100,height/2);
      break;
    }

  case 1:

    textSize(40);
    text(locations[randomLocation],width/2-250, height - 450);
    image(image, width/2,height/2 + 30);
    if (userInputCategory == correctCategory) {
        background(102,133,147);
      text("CORRECT", width/2-100,height/2);
      break;
    }
  case 2:

    textSize(40);
    text(locations[randomLocation],width/2-250, height - 450);
    image(image, width/2,height/2 + 30);
    if (userInputCategory == correctCategory) {
        background(102,133,147);
      text("CORRECT", width/2-100,height/2);
      break;
    }
  case 3:

    textSize(40);
    text(locations[randomLocation],width/2-250, height - 450);
    image(image, width/2,height/2 + 30);
    if (userInputCategory == correctCategory) {
       background(102,133,147);
      text("CORRECT", width/2-100,height/2);
      break;
    }
  case 4:

    textSize(40);
    text(locations[randomLocation],width/2-250, height - 450);
    image(image, width/2,height/2 + 30);
    if (userInputCategory == correctCategory) {
        background(102,133,147);
      text("CORRECT", width/2-100,height/2);
      break;
    }
  case 5:

    textSize(40);
    text(locations[randomLocation],width/2-250, height - 450);
    image(image, width/2,height/2 + 30);
    if (userInputCategory == correctCategory) {
        background(102,133,147);
      text("CORRECT", width/2-100,height/2);
      break;
    }
  }
}


void serialEvent(Serial myPort) {
  //recieves the value as string and reads it one line at a time
  String s=myPort.readStringUntil('\n');
  s=trim(s); //trimming for any additional or hanging white spaces
  if (s!=null) { // if something is received
    data=(int (s)); //set the variable to the integer value of the string
  }
  //println(data);
  myPort.write('0'); //send something back to arduino to complete handshake
}
For this week’s assignment I went with a simple paddle with ball game. the aim is to get the paddle and the bored to touch, their is a count for any times the played either missed or hit the paddle with the ball. The count can be reloaded just by pressing the mouse. The paddle can be moved using the potentiometer. It was very simple to make, however, I did face some difficulty understanding how to connect the Arduino to the processing. eventually after research and watching our class video a couple times , I was able to get it to work.
import processing.serial.*;

float ballX = 200;
float ballY =100;
float speedX= 7;
float speedY= 0;
int hit  = 0;
int miss =0;
String serialPortName ="/dev/cu.usbmodem141101";
Serial arduino;
float batPosition;
PImage bat;
void setup () {

  size ( 600, 600);
   bat = loadImage("bat.png");
 if(serialPortName.equals("/dev/cu.usbmodem141101")) scanForArduino();
  else arduino = new Serial(this, serialPortName, 9600);


}


void draw() {

  if (mousePressed){
    hit =0; miss =0;
  }
  if((arduino != null) && (arduino.available()>0)) {
    String message = arduino.readStringUntil('\n');
    if(message != null) {
      int value = int(message.trim());
      batPosition = map(value,0,1024,0,width);
    }
  }

  float paddle =100 ; // can make the paddle get smaller is if i add 1000/ (hit+10)
  if (ballX <0 || ballX > width ) speedX = -speedX;
  if ( ballY> height) {
    speedY = -speedY;
float distance = abs(mouseX - ballX);
if (distance < paddle ) hit += 1;
else  miss +=1;
}else speedY +=1;

  ballX +=speedX;
  ballY +=speedY;

  background(0, 0, 0);
  ellipse ( ballX, ballY, 50, 50);
   image(bat,batPosition,height-bat.height); //rect (width-paddle, height -10, 2*paddle, 10); // where i want to connect the potntiometer cause it is the paddle
text ( " hit :" + hit ,10,30);
text ( " miss :" + miss ,90,30);
}
void stop()
{
  arduino.stop();
}


void scanForArduino()
{
  try {
    for(int i=0; i<Serial.list().length ;i++) {
      if(Serial.list()[i].contains("tty.usb")) {
        arduino = new Serial(this, Serial.list()[i], 9600);
      }
    }
  } catch(Exception e) {
    // println("Cannot connect to Arduino !");
  }
}
This is the final demo of the game :
Link for the Game:
this was where I got the code to connect them together: https://www.instructables.com/Getting-started-with-Arduino-Potentiometer-Pong/
For the final project idea :
I have many ideas, but one that can work was actually inspired from an idea that Sarah had a while a go.
Sarah talked one time about a children’s game and i had the idea from that.
The concept would involve, buttons and a potentiometer.
The game would be a learning game for kids, the buttons would represent colors and the potentiometer and be used to draw things like circles and squares.
So far this idea , to me, is a foundational concept I wanna try. What I have pitched is not the whole concept, the further I explore I will be able to see what I can or can’t do and also mainly what I should and shouldn’t do. I believe it’ll be difficult but I do wanna explore this idea and I hope It works out.
During the break room meeting, I pitched this idea to my classmates who were there with me. Nathan gave me such a helpful idea , he said I could try having only two buttons and the my processing could be a type of quiz. I really liked this idea, it could be very simple for kids to learn from and after some research I believe it is doable . There for finally , for my final project I will be creating a simple trivia game for children using processing and with Arduino I will be using two button for the player to pick from the two option I will provide them with.
Ever since we did the simple example of the ball using Processing and Arduino together, I had the idea of implementing a hockey game using two potentiometers. Unfortunately, I was not able to visit the electronics store during the weekend and so I just decided to make player 2 use the mouse instead. Unlike previous assignments where I keep changing my mind over which idea to implement and what to do, I was pretty decided on my assignment for this week.
References:
I used example 4 from the folder which Aaron provided us with in order to have a proper serial event on Processing which can take in multiple inputs from Arduino and complete the handshake. I also used the example titled Bounce from the Processing application as reference.
Implementation:
I decided to make a class for every single object in order to have much deeper and control and power over what exactly happens in the game. At first, I only had gameOn and !gameOn as conditions for playing or a screen with instructional text. But then I realized that hockey usually involves 7 rounds and there should be some transitional phase between each round which requires some interaction from the players, so I added a situation named roundEnd and functions called display() in each class which show the pucks at the middle and the ball at the very middle and sets their positions there accordingly until the players click anywhere to continue playing, at which point the pucks go back to depending on the potentiometer and mouseX for position. The conditioning for this took some time because there are many factors involved and I need to calculate both scores simultaneously while keeping count of the rounds in order to finish the game at round 7 and declare a winner.
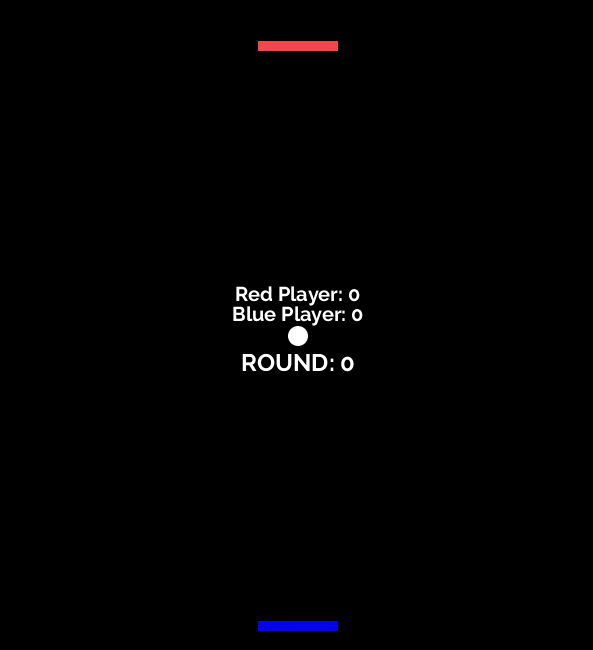
how the game looks like before playing/ after each round is finished
Challenges:
One major problem I faced which I actually didn’t exactly resolve was the collision of the ball with the pucks, where the blocks are wide and very thin so calculating the distance from the middle of the ball to the middle of the block varies greatly from one end to another, and I just took some average distance of collision as part of the equation but sometimes when the ball touches the far end of the block it looks as if it lags and is moving horizontally on the surface of the block before continuing on. I hope I can improve this aspect because I faced similar problems in past assignments when it comes to calculating distance.
I also realized that a player would not really be focusing on changing how dark/light their puck is but rather try to ensure they hit the ball quickly every time, so perhaps the photocell usage was just an extra feature that may not be very necessary or functional, even though it is still a cool effect in the theme of the game.
Improvement:
One thing I improved from the midterm is actually using mousePressed() instead of mouseClicked(), which is more effective when it comes to restarting the game and works better, the other required a particularly long click in order to work.
Here is my perspective as the player (very sad playing this alone and very hard as well):
Here is the actual final game:
Below is the Arduino Code:
//code inspired from example 4

void setup() {
  // put your setup code here, to run once:
  Serial.begin(9600);
  Serial.println("0,0");
}

void loop() {
  if(Serial.available()>0){
    char inByte=Serial.read();
    int knobValue = analogRead(A0);
    delay(1);
    int color = analogRead(A1);
    delay(1);
    Serial.print(knobValue);
    Serial.print(',');
    Serial.println(color);
  }
}
Below is the Processing Code:
import processing.serial.*;
Serial myPort;
Tab block;
Tab2 block2;
Ball ball;
int rounds = 0;
boolean gameOn = true;
boolean roundEnd = true;
int score1 = 0;          //initializing score to 0
int score2 = 0;
PFont f;              //f object for all the texts in the game

//inspired from bounce example

class Ball {

  int radius = 20;        // Width of the shape
  float xpos, ypos;    // Starting position of shape

  float xspeed = 2;  // Speed of the shape
  float yspeed = 2;  // Speed of the shape

  int xdirection = 1;  // Left or Right
  int ydirection = 1;  // Top to Bottom


 Ball()
  {

    noStroke();
    ellipseMode(CENTER);
    // Set the starting position of the shape
    xpos = random(radius, width - radius);
    ypos = radius;
  }

  void display() {
    xpos = width/2;
    ypos = height/2;
    ellipse(xpos, ypos, radius, radius);
  }

  void update(int x, int y)
  {

    // Update the position of the shape
    xpos = xpos + ( xspeed * xdirection );
    ypos = ypos + ( yspeed * ydirection );

    // Test to see if the shape exceeds the boundaries of the screen
    // If it does, reverse its direction by multiplying by -1
    if (dist(x, y, xpos, ypos) < radius + 15) {
      ydirection *= -1;
    }

    if (xpos > width-radius || xpos < radius) {
      xdirection *= -1;
    }

    // Draw the shape
    fill(255);
    ellipse(xpos, ypos, radius, radius);
  }

}

class Tab {
  int xPos=0;
  int yPos = height - 50;
  int rectWidth = 80;
  int rectHeight = 10;
  int colorInput=4;

  Tab() {
    fill(colorInput - 4, colorInput, random(230,255));
    rect(xPos,height - 50, rectWidth, rectHeight);
  }

  void display() {
    fill(colorInput - 4, colorInput, random(230,255));
    xPos = width/2;
    rect(xPos, yPos, rectWidth, rectHeight);
  }

  void update() {
    fill(colorInput - 4, colorInput, random(230,255));
    rect(xPos,yPos, rectWidth, rectHeight);
  }


  void serialEvent(Serial myPort){
    String s=myPort.readStringUntil('\n');
    s=trim(s);
    if (s!=null){
      int values[]=int(split(s,','));
      if (values.length==2){
        xPos=(int)map(values[0],0,1023, 0 + rectWidth/2 , width - rectWidth/2);
        colorInput=(int)map(values[1],0,1023, 150, 10);
      }
    }
    println(xPos);
    myPort.write('0');
  }
}

class Tab2 {
  int xPos= width/2;
  int yPos = 50;
  int rectWidth = 80;
  int rectHeight = 10;

  Tab2() {
    fill(255, 50, 50);
    rect(xPos,height - 50, rectWidth, rectHeight);
  }

  void display() {
    fill(random(230,255), 70, 75);
    xPos = width/2;
    rect(xPos, yPos, rectWidth, rectHeight);
  }

  void update() {
    fill(random(230,255), 70, 75);
    xPos = (int)map(mouseX, 0, width, rectWidth/2, width - rectWidth/2);
    rect(xPos,yPos, rectWidth, rectHeight);
  }


}

void setup(){
  size(600,680);
  printArray(Serial.list());
  String portname=Serial.list()[2];
  println(portname);
  myPort = new Serial(this,portname,9600);
  myPort.clear();
  myPort.bufferUntil('\n');
  rectMode(CENTER);
  block = new Tab();
  block2 = new Tab2();
  ball = new Ball();
  f = createFont("Raleway-Bold.ttf",72);      //aesthetic font that fits teh theme
}

void draw(){
  background(0);

  if (gameOn && !roundEnd) {
    block.serialEvent(myPort);
    block.update();
    block2.update();
    ball.update(block2.xPos,block2.yPos);
    ball.update(block.xPos,block.yPos);

    if ( rounds == 7) {
      gameOn = false;
      //roundEnd = false;
    }

    if (ball.ypos < 59) {
      score1++;
      rounds++;
      roundEnd = true;
    }
    else if (ball.ypos > height - 59) {
      score2++;
      rounds++;
      roundEnd = true;
    }

  }

  else if (roundEnd && gameOn) {
    ball.display();
    block.display();
    block2.display();

    textAlign(CENTER);
    String round = "ROUND: ";
    String Score1 = "Blue Player: ";          //constantly show score at the corner
    String Score2 = "Red Player: ";          //constantly show score at the corner
    textFont(f,20);
    fill(255);
    text(Score1 + score1, width/2, height/2 - 15);        //score text bottom right
    text(Score2 + score2, width/2, height/2 - 35);        //score text bottom right
    textFont(f,24);
    text(round + rounds, width/2, height/2 + 35);
  }

  else {
    textAlign(CENTER, CENTER);

    textFont(f,40);
    //same shade as in the flag
    String first;
    if (score1 > score2) {
      fill(#002868);
      first = "BLUE PLAYER WINS!!";
    }
    else {
      fill(#BF0A30);
      first = "RED PLAYER WINS!!";
    }

    text(first, width/2, height/2 - 90);

    textFont(f,24);
    //same shade as in the flag
    fill(255);
    String second = "CLICK TO PLAY AGAIN!";
    text(second, width/2 - 5, height/2 + 90);      //game over text

    textFont(f,20);
    fill(255);
    String third = "Blue Player: ";
    String fourth = "Red Player: ";
    fill(#002868);
    text(third + score1, width/2, height - 20);        //score text bottom right
     fill(#BF0A30);
    text(fourth + score2, width/2, height - 50);        //score text bottom right
  }

}

void mousePressed() {

   if (gameOn == false){        //if mouse is clicked when the game is off, turn it on and reset everything to zero and empty lists
      rounds = 0;
      score1 = 0;
      score2 = 0;
      ball.ypos = height/2;
      gameOn = true;
   }

   else if (roundEnd == true) {
      gameOn = true;
      roundEnd = false;
   }
}
This assignment was pretty fun to make and I look forward to diving deeper into the combination of the Arduino and Processing worlds.
For this weeks project I wanted to play with Arduino and create a really low budget version of the famous guitar hero game.
In the game, player has to press a button of the color corresponding to the note which is currently at the strum line. In my game I introduced 3 buttons Red, Green and Blue, which work on the 3 paths of the corresponding colors. When a note falls down to the bottom of the screen the user needs to press the button. Notes appear in random time intervals.
The hardest part of this weeks assignment was picking right time windows for the button reads. Calibrating that to the Arduino module took me quite some time.
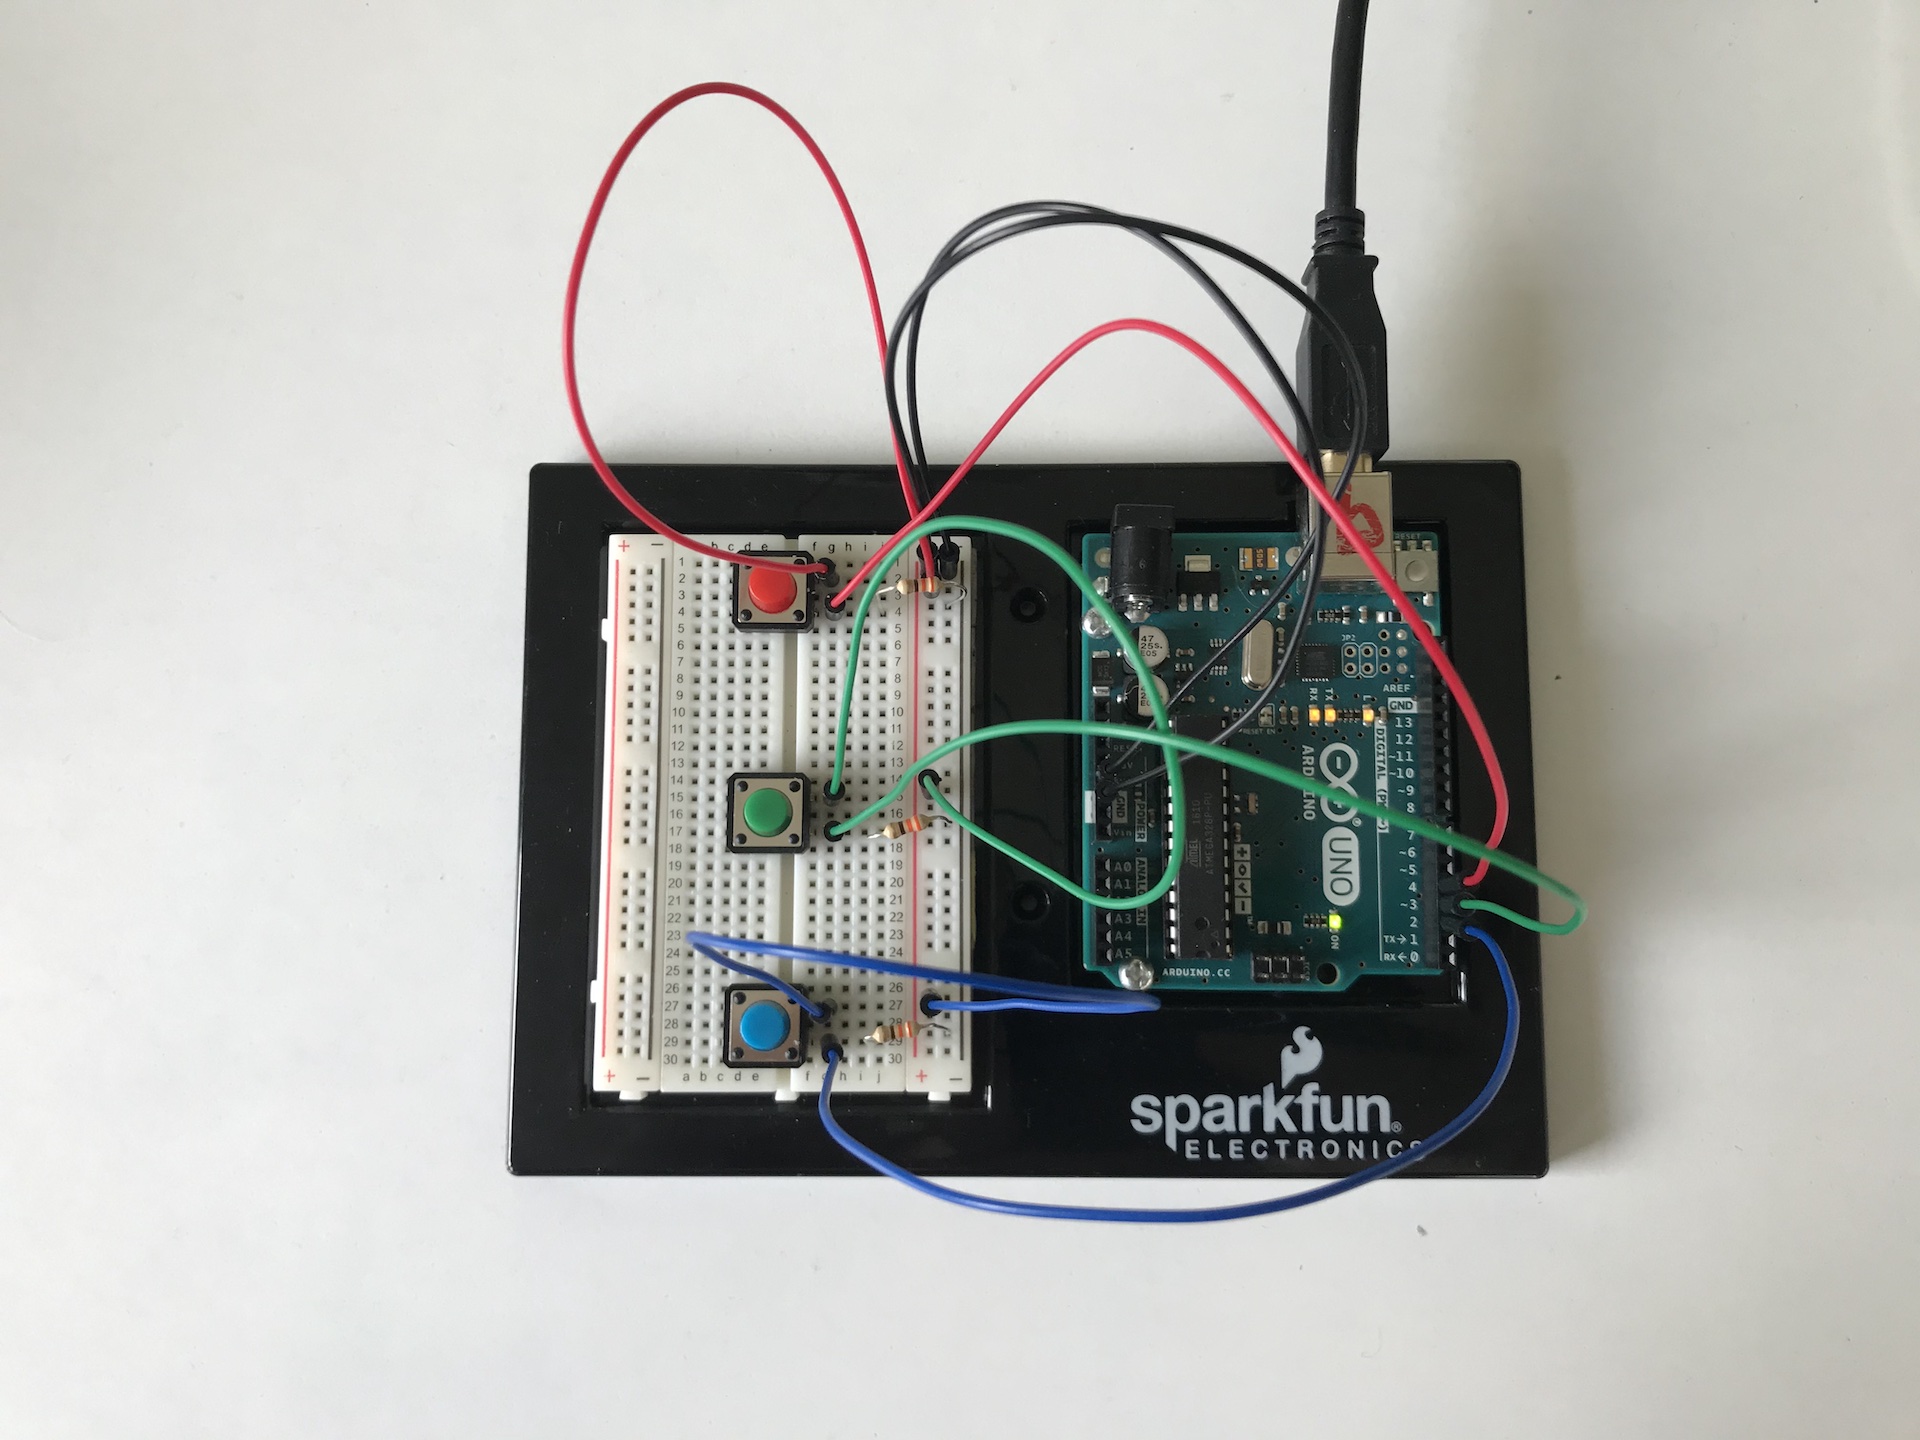
Here is my Arduino setup:
Here is me playing the game:
And at last my code:
import processing.serial.*;

Serial myPort;
Note[] notes = new Note[5];
int counter = 0;
int[] positions = {100, 250, 400};
int points = 0;

void setup() {
  size(500, 400);
  frameRate(30);
  textSize(30);
  String pName = Serial.list()[2];
  myPort = new Serial(this, pName, 9600);
}

void draw() {
  drawBackground();
  if (frameCount%30 == 0) {
    addNote();
  }
  drawNotes();
}

void serialEvent(Serial myPort) {
  String msg = myPort.readStringUntil('\n');
  msg = trim(msg);
  if (msg != null) {
    int btnVals[]=int(split(msg, ';'));
    if (btnVals.length == 3) {
      if (btnVals[0] == 1) {
        checkNote("red");
      }
      if (btnVals[1] == 1) {
        checkNote("green");
      }
      if (btnVals[2] == 1) {
        checkNote("blue");
      }
    }
  }
  myPort.write('0');
}

void checkNote(String col) {
  int xPos = 0;
  switch (col) {
  case "red":
    xPos = 100;
    break;
  case "green":
    xPos = 250;
    break;
  case "blue":
    xPos = 400;
    break;
  }

  for (int i=0; i<notes.length; i++) {
    if (notes[i] != null) {
      if (notes[i].x == xPos && notes[i].y > 350) {
        notes[i] = null;
        points+=1;
      }
    }
  }
}

void drawBackground() {
  background(30);
  noStroke();
  fill(90, 0, 0);
  rect(50, 0, 100, 400);

  fill(10, 90, 0);
  rect(200, 0, 100, 400);

  fill(0, 20, 90);
  rect(350, 0, 100, 400);

  fill(80);
  rect(0, 350, 500, 50);

  fill(255);
  text(points, 5, 30);
}

void drawNotes() {
  if (notes != null) {
    for (int i=0; i<notes.length; i++) {
      if (notes[i] != null) {
        notes[i].drawNote();
        if (notes[i].y > height) {
          notes[i] = null;
          points = 0;
        }
      }
    }
  }
}

void addNote() {
  notes[counter] = new Note(positions[int(random(3))]);
  counter = (counter+1)%5;
}

class Note {
  int x;
  int y = 0;
  Note (int xPos) {
    x = xPos;
  }
  void drawNote() {
    y += 5;
    switch(x) {
    case 100:
      stroke(255, 0, 0);
      break;
    case 250:
      stroke(0, 255, 0);
      break;
    case 400:
      stroke(0, 0, 255);
      break;
    }

    strokeWeight(50);
    point(x, y);
    strokeWeight(10);
    stroke(255);
    ellipse(x, y, 20, 20);
  }
}
const int redBtn = 4;
const int greenBtn = 3;
const int blueBtn = 2;

void setup() {
  Serial.begin(9600);
  Serial.println("0,0");
  pinMode(redBtn, INPUT);
  pinMode(greenBtn, INPUT);
  pinMode(blueBtn, INPUT);
}

void loop() {
  if (Serial.available() > 0) {
    char inByte = Serial.read();

    int red = digitalRead(redBtn);
    int green = digitalRead(greenBtn);
    int blue = digitalRead(blueBtn);

    Serial.print(red);
    Serial.print(';');
    Serial.print(green);
    Serial.print(';');
    Serial.println(blue);
  }
}
For the final project I want to go with the arcade vibe of Arduino and create a game.
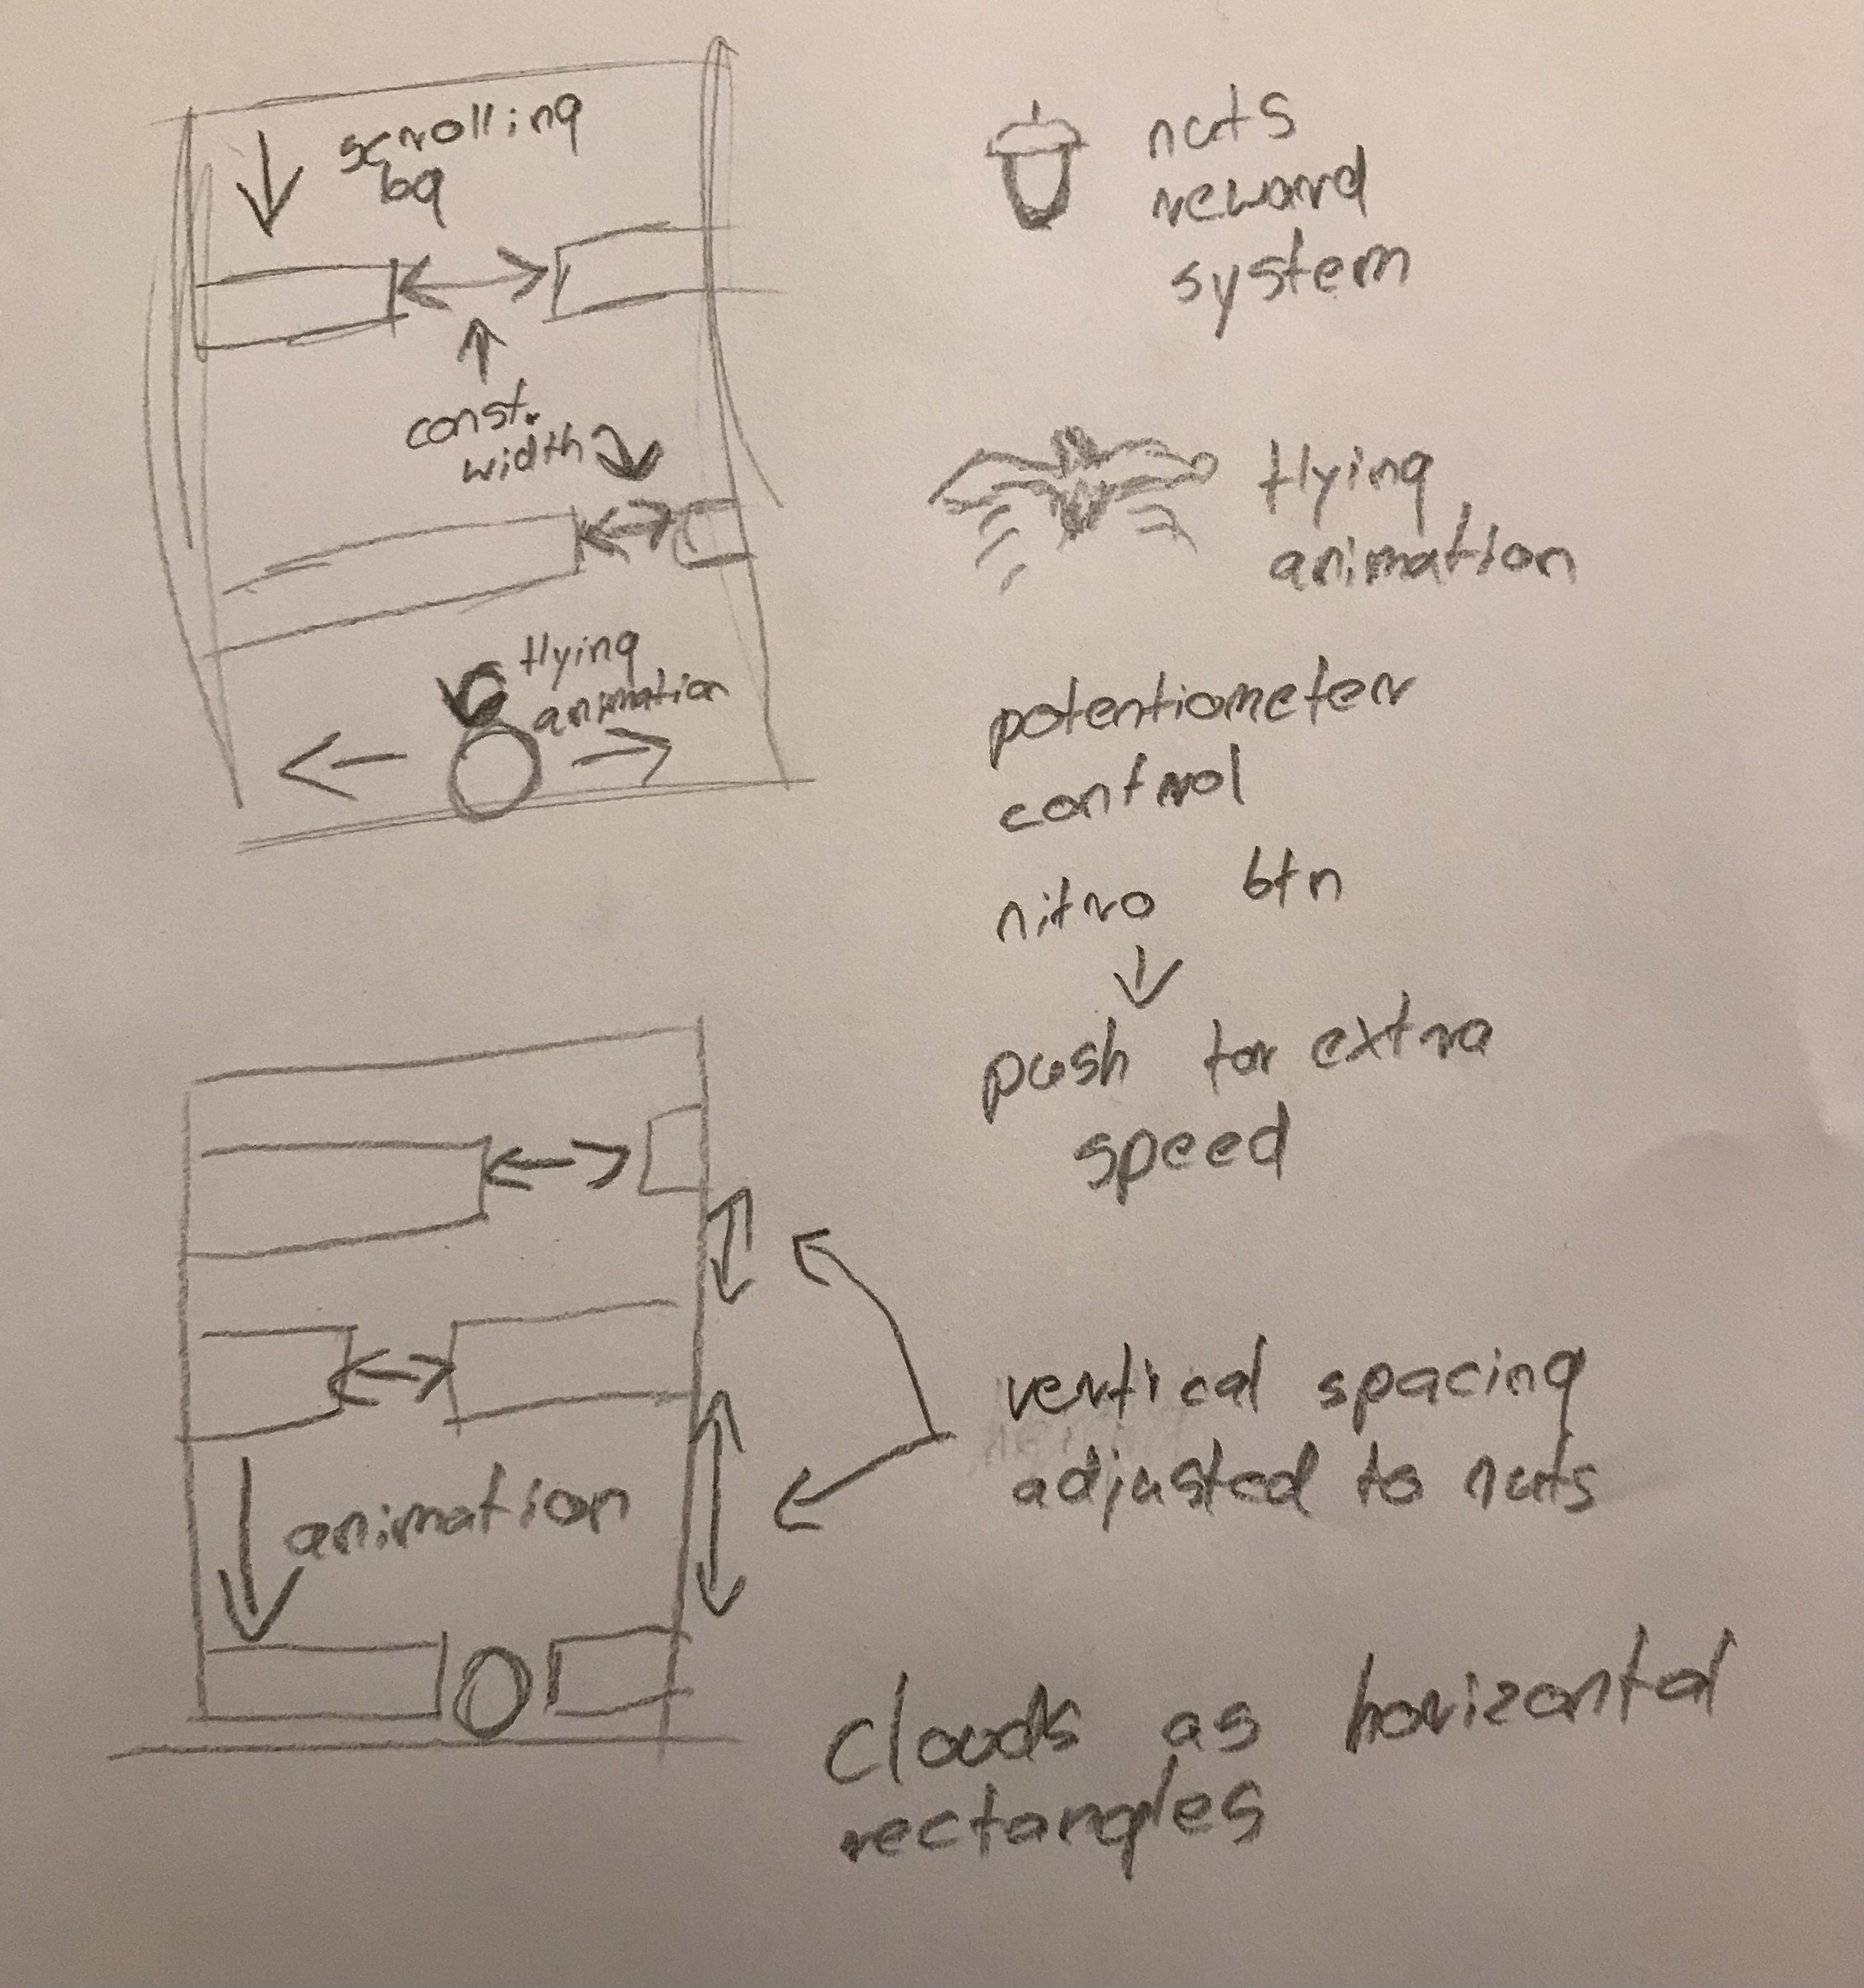
With simple controls in the form of the potentiometer the game will rely on the player controlling a bird, which wants to fly high into the air. On its way, the bird will encounter stormy clouds, which it should avoid at all cost. Also, to reward the courageous bird on its adventure, it will encounter some delicious nuts, which will work as the scoring mechanism for the game.
As the player will collect more and more nuts, the vertical spacing between the clouds will begin to shrink making the game progressively harder and harder.
To add some spice to the game I am also thinking about introducing a BOOST button, which will significantly increase birds flying speed. I think it would be fan to watch the bird dash through the clouds.
The projects seems a bit daunting with all the vertical animations and ways of achieving top quality responsiveness from Arduino buttons but I have two more weeks to figure that out 🙂
Breakout rooms brainstorming brought me a new idea. Instead of speeding things up the button will slow the time and make it easier to move though the clouds. The downside of that will be losing nuts for each second spent in the slow mode.
Also the game difficulty will change basing on the number of nuts collected. Their number will change the speed of downward animation, instead of reducing the vertical spacing of the clouds. That would make the game go faster and faster with each nut collected.
In my project Arduino will provide the input for the bird control. The bird movement will be mapped from the potentiometer, which fits the role perfectly. In addition to that, the slow mode button will provide a mechanism for slowing down vertical transitions.
The processing layer will be responsible for displaying the game as well as the logic. It will take the potentiometer value from Arduino and display the bird on an according position and watch out for the slow mode trigger from the button.
For the Final IM Project, Amina and I decided to work together.
Context 💻
Since we are both in different locations and Zoom is a central element of our life now, we want to incorporate the procedure of joining Zoom meetings but make it fun.
Idea 🎮
The basic idea is to create a musical game that takes input from the laptop keyboard in Processing and puts out sounds and LED signals through Arduino. In our game, the user wants to enter a Zoom meeting. For that, they have to repeat a pattern presented to them. This pattern, we thought, could be presented both through sound and LED output for greater accessibility as some might be more able or comfortable to observe either a sound or a visual pattern. If the pattern is wrong, the user gets to try again. If they repeat the correct pattern, they get to enter the Zoom meeting with congratulation sounds + LED visuals and a welcome message from us. End of game.
Ideas to be determined 🤔
What is the overall story line? Does it end when entering the Zoom meeting?
For the Intro to IM final project, I will be working with Susanne to build an integrated device utilizing Arduino and Processing.
💡 idea
The idea was inspired when Susanne mentioned “something visual about our connection or memory; something that relates us not being in the same location.” So, we decided to recreate the environment of logging into a Zoom meeting and entering the meeting’s password. The key feature of this project is to make the process accessible, by including both sounds and light.
🛠 how it will work
The password will be entered by the user using a computer keyboard to the graphical user interface, and during the typing process, different sounds and lights on Arduino will play. If the password combination is right, a congratulating tone will ring and the user will be let into the meeting.