I started the idea of pixel art with this piece of wooden pixel art that we mentioned in our first class(Wooden Segment Mirror). I’m also recently obsessed with Perler Beads(plastic fusible beads to form patterns and fuse together with an iron). So, I pixelated one of my self-portraits and created a canvas of 10 * 12 colored squares.
To make it more interactive, I also use the mouseClicked function to add a more immersive version to get rid of the pixel stroke.
Code Highlight
I’m particularly proud of the color list. When I just started, I wanted to do an automatic color picker program to create the list for me. However, after a few trials, all the available auto ones cannot handle many colors, either giving a fake hex code or a single palette with a maximum of 10. Then, I did some research on manual color pickers, and I found this one(https://colorpickerfromimage.com/) to be the best hex color picker shortcut among all. Since I had to manually picking up all the colors, it also pushes me to optimize other parts of my code to use less repeated manual calls but using the loop to create all the squares.
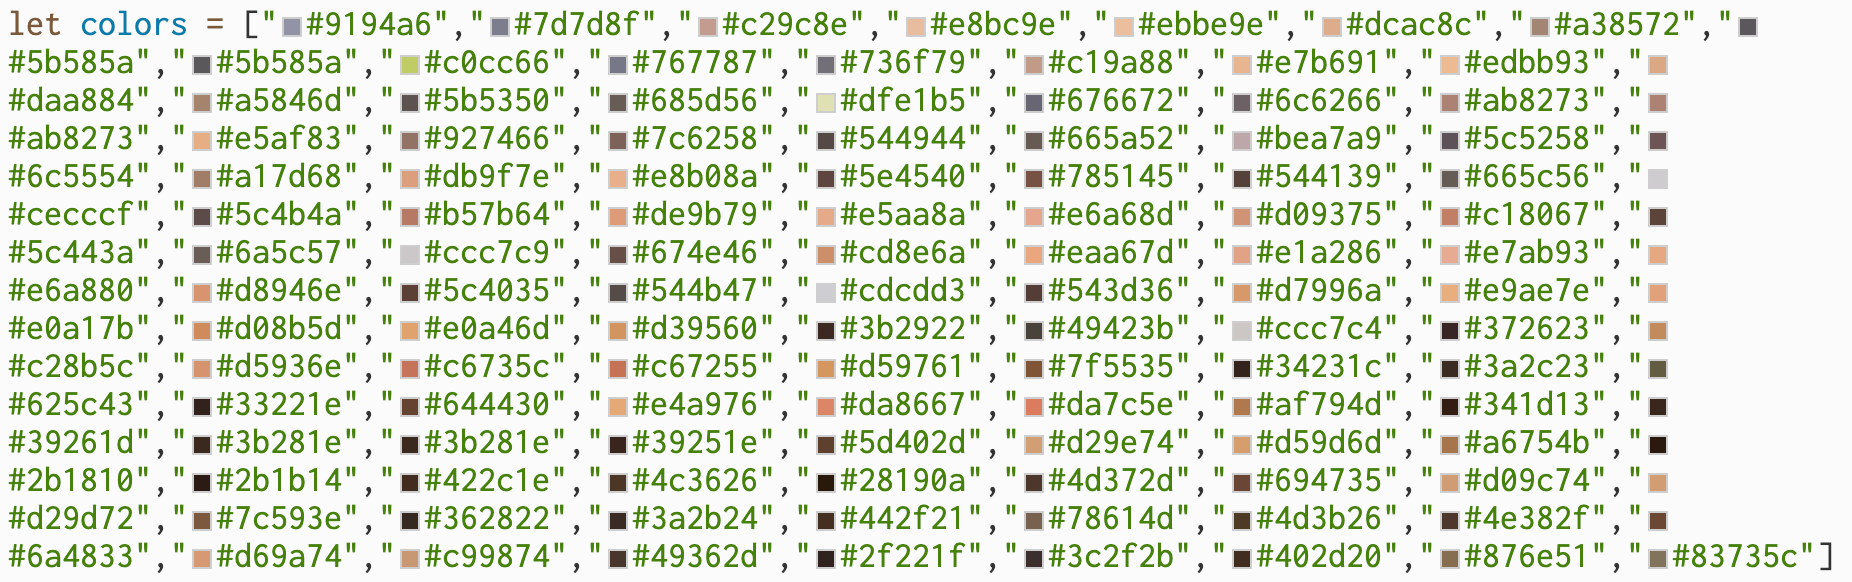
let colors = ["#9194a6","#7d7d8f","#c29c8e","#e8bc9e","#ebbe9e","#dcac8c","#a38572","#5b585a","#5b585a","#c0cc66","#767787","#736f79","#c19a88","#e7b691","#edbb93","#daa884","#a5846d","#5b5350","#685d56","#dfe1b5","#676672","#6c6266","#ab8273","#ab8273","#e5af83","#927466","#7c6258","#544944","#665a52","#bea7a9","#5c5258","#6c5554","#a17d68","#db9f7e","#e8b08a","#5e4540","#785145","#544139","#665c56","#cecccf","#5c4b4a","#b57b64","#de9b79","#e5aa8a","#e6a68d","#d09375","#c18067","#5c443a","#6a5c57","#ccc7c9","#674e46","#cd8e6a","#eaa67d","#e1a286","#e7ab93","#e6a880","#d8946e","#5c4035","#544b47","#cdcdd3","#543d36","#d7996a","#e9ae7e","#e0a17b","#d08b5d","#e0a46d","#d39560","#3b2922","#49423b","#ccc7c4","#372623","#c28b5c","#d5936e","#c6735c","#c67255","#d59761","#7f5535","#34231c","#3a2c23","#625c43","#33221e","#644430","#e4a976","#da8667","#da7c5e","#af794d","#341d13","#39261d","#3b281e","#3b281e","#39251e","#5d402d","#d29e74","#d59d6d","#a6754b","#2b1810","#2b1b14","#422c1e","#4c3626","#28190a","#4d372d","#694735","#d09c74","#d29d72","#7c593e","#362822","#3a2b24","#442f21","#78614d","#4d3b26","#4e382f","#6a4833","#d69a74","#c99874","#49362d","#2f221f","#3c2f2b","#402d20","#876e51","#83735c"]
I also think the way p5.js displays these hex codes is another piece of art that breaks down the color of me into hex code pieces.
Reflection
For my future works, this work reminded me the importance of planning before starting. Digital art is a more well-planned process compared to free-form drawing on papers. This time, I began by creating all the squares manually, but soon I realized how redundant that was. So, I turned back to a draft note to jot down the ratio calculations. Overall, the process of choosing colors and planning turned out to be quite meditative.
For this assignment, I made a self-portrait using p5.js, the online editor, with codes learned in class. I started by placing an ellipse at the center of the canvas and added smaller ellipses to make the eyes, circles for the irises, a rectangle and two circles for the nose, and thinned arcs for the eyebrows and eyelashes. Then, I used ellipses to make the shirt and a circle to show the flesh connecting the neck and shoulders, and two ellipses for the ears. After this, I created a series of arcs, all with different radians and sizes, to create the curls on the front and the rest of the hair in the back. At last, I used the “noStroke” code and added color to the background and all the shapes.
Favorite Codes
Although it isn’t the most creative or incredible code, I felt proud when I assembled the codes to create the structure of the face. I like the way the face, the neck, and the collarbone follow the founding shapes usually used for drawing sketches. While I am used to add more texture when I draw a person by hand or digitally, it is nice to see these shapes in a raw form, without any details or realism, and instead have a similar composition to a cartoon character. It was also fun to create the curls with the different variations of radians of the arcs.
One of the steps I struggled the most with was finding the right coordinates for the different shapes, especially when each shape had a different amount of values (for example, the circle only had three and the arc could have more than five). This was especially hard when I had to consider where in the canvas I wanted them and details such as height, width, etc. However, the more I practiced, the easier it became to mark said coordinates and sizes.
For the future I would like to learn how to further mold the different shapes to create more varied and distinct shapes. For example, instead of having to use the ellipses and the rectangle to make a neck and shoulders, I would like to understand how to create connected dots or merging shapes that can create this structure in a smoother, slightly more realistic way.
I had a few ideas of how I wanted to depict myself, none of which included a real depiction of my face, but more or less characters that I resonated with. I quickly scrapped that idea when I felt like it wouldn’t really be challenging me if I drew a depiction of an already existing illustration.
With my limited coding experience it would be certainly difficult to go from concept into actualization using just my keyboard and the funny colored words on screen, but I was committed to making something worth looking at.
One of the first things I tried to understand coming from a long photoshop/graphic design background was how layers would work on p5.js. Understanding this early gave me a lot of confidence that I wasn’t going to make something uncanny-looking. I made each body segment its own function and called it in the order from the lowest layer to the highest layer in draw()
function draw() { //draw runs on loop 60/sec
  background(110,40,80);//change later?

  //Draws Body Parts in Layers
  drawHair();
  drawTorso(90);
  drawHead();
  drawLeftEye(6.7);//parameter is for gap between lines
  drawRightEye(6.7)
  drawMouth();
  drawHands();
  drawBangs();
}
As I learned more about p5.js through tutorials, I wrote down lots of notes and reminders to myself. One tip that really helped me out initially was putting fill() before the shape I wanted to draw. When I was listening to the demonstration in class I thought it would make more sense for fill() to have parameters for what you wanted to fill, but after working with the shapes today I realized that would’ve caused a big confusing wall of text very quickly. Putting notes next to how many parameters and what each parameter did for each function was also really helpful in my learning process.
I wasn’t quite sure how to depict the face at first with just simple geometry but by removing the outline “strokes” and blending shapes I started sculpting some much nicer shapes.
I really wanted my avatar’s arms to be interactable with the user’s mouse values so I initially allowed the top Y-positions of the arm segments to be controlled using the mouse. I obviously didn’t want it to go out of bounds so I looked through the p5js reference until I found the constrain() function. This was a huge lifesaver for both this aspect of the self-portrait and some other aspects I worked on after this.
let armY = constrain(mouseY, 430, 500); //restricted value, min, max
  let armX = constrain(mouseX, 200, 350);

  //LEFT
  quad(
    armX-60, armY, //top left 220~
    armX-10, armY+20, //top right 280~
    220, 600, //bottom right
    100, 600  //bottom left
  );
  //RIGHT ARM
  quad(
    armX+110, armY, //top left 380~
    armX+60, armY+20, //top right 320~
    width-220, 600, //bottom right
    width-100, 600  //bottom left
  );
This snippet was taken as I was working out the arm animation and tracking. Mini-me was very deprived of any type of hair back then. He was also very gray.
Fig 1. Snapshot Right After Figuring Out Arm Animations
I feel like the hand movements made the avatar feel so much more alive and responsive, making good use of p5.js in ways beyond just turning code into still images. This would go a step beyond when I added the cookie into mini-me’s hands then another step beyond when the mouth would respond to having a cookie in front of it.
//COOKIE
fill(210, 180, 140);
stroke(190, 160, 120);
cookieX = armX+25
//main cookie area
if (cookieEaten) {
  arc(cookieX,armY,150,75,5.7,3.5) //cookie missing the top corner
  console.log("Cookie was Eaten")
} else {
  arc(cookieX,armY,150,75,0,2*PI) //a full cookie
}
//chocolate chips
fill(90, 60, 40);
noStroke();
//top left to bottom right
ellipse(cookieX-50,armY-10,19,14)
ellipse(cookieX-21,armY-2,16,10)
ellipse(cookieX-37,armY+10,12,7)
ellipse(cookieX+3,armY+8,17,12)
ellipse(cookieX+22,armY-6,12,8)
ellipse(cookieX+29,armY+20,15,10)
ellipse(cookieX+38,armY+2,18,13)
At first I didn’t have any chocolate chips on the cookie and my friend thought it was holding an empty plate so I decided to add some chocolate chips even though the way I did it was probably not very efficient. I considered using random variables like I’ve seen some previous projects utilize for their backgrounds but the choco chips needed to avoid a very specific area of the cookie that would be “bitten” into while looking well balanced.
One of my goals with the cookie in hand was to let the user be able to eat it by clicking on the mouth of mini-me, but I didn’t know how to program a bite mark into the ellipse so I decided to change it into an arc() halfway through and use the arc’s unique properties to cut out a portion of it near the mouth, making it appear like it had been bitten into. I was pretty proud of how I worked with my limited knowledge here.
cookieEaten = false
function mouseClicked() {
    console.log(mouseX,mouseY)
    if (mouseX > 280 && mouseX < 320 && mouseY > 330 && mouseY < 400){
      cookieEaten = true;
      console.log("clicked mouth");
     }
  }

//lots of stuff here in between in the real code...

if (cookieEaten) {
    arc(cookieX,armY,150,75,5.7,3.5) //cookie missing the top corner
    console.log("Cookie was Eaten")
  } else {
    arc(cookieX,armY,150,75,0,2*PI) //a full cookie
  }
By far the most unsatisfying part to me was definitely the way I did my hair. There were just so little polygons to work with to properly express what type of hairstyle I wanted for mini-me. However, a lot of my friends said they actually really liked how I depicted the hair so perhaps I’m fixating on it too much.
My biggest regret was that I only learned after I was nearly done with my self-portrait that I could’ve changed the angleMode() to degrees the whole time… I spent so much time trying to remember middle school math just to work out the PI angles for certain arcs.
If I were to do this exercise again, I would probably create more variables to make certain parameters look a little more organized and efficient. I changed a few parts to stuff like “width-X” rather than calculating it myself but there was definitely more I could’ve done to make everything look cleaner.
Overall for my first experience with p5.js and my limited experience with JavaScript , I think I would be proud of myself even later down the line.
The moment a friend joked that I’m “basically a flower,” while I was brainstorming ideas for this task, I knew exactly what I wanted to draw! A happy, cartoon daisy standing in for my portrait. Instead of wrestling with a realistic self-portrait, I leaned into something more playful and honest, something that resembled me in being bright, a little goofy, and imperfect in the best way. That choice took the pressure off and made the assignment fun, I wasn’t proving I could render a realistic portrait, but rather show a bit of personality.
Color was deliberate in this portrait. I picked a soft pink background (`#fae`) because it feels light and friendly, like a page from a sketchbook. The petals are white with a clean black outline because daisies are my favorite and that crisp edge gives a bold, sticker-like cartoon look. The center is a warm yellow (classic daisy!), and the stem is a saturated green so it reads immediately even at a glance. Together, the palette stays simple, cheerful, and high-contrast, perfect for for clarity on screen.
There were two small decisions that made a big difference. First, was the draw order: I coded the petals before the center so the yellow circle sits neatly on top. p5.js applies fill and stroke at the exact moment you draw, so layering matters, getting that step right eliminated messy overlaps without extra code. Second, the smiley face: two tiny circle calls for eyes and a single arc for the smile gave the flower a personality however this was probably the hardest part. I watched a few YouTube videos about coordinates which is how I learned to use “cx” and “cy” so I wasn’t typing magic numbers everywhere (much easier to tweak).
The smiley face was the specific piece of code that I was proud of. I know it looks very simple but it definitely took me the longest time to get right without looking completely wonky!
What went well: I kept the geometry minimal (lines, ellipses, and circles). The result feels cohesive: the color palette, the outlines, and the proportions all read “cartoon daisy” immediately. What I could have done better: the petals aren’t perfectly placed since I originally wanted to do 5, and they look kind of odd, some spacing could be cleaner. I wish I had more time to work on this so I could adjust the shapes to my liking.
Looking ahead,I’d also like to add motion, a subtle stem sway maybe or a smile that reacts on hover/click. Or perhaps, adding clouds or a sun in the background. For now, I’m happy that it isn’t perfect, neither am I, and that’s kind of the point. I’m still getting into the rhythm of JavaScript, and this little daisy felt like the right way to bloom.
For my self-portrait, I decided to create a cartoon-esque representation of myself, with a background that evokes the feeling of entering another world in the viewer. The expanding circles in the background represent a portal, implying that the portrait is a view into another world. Aiming to give a sense of exploration, I wanted to add layers of interaction where the eyes follow the viewer’s cursor. The wandering of the eyes with the viewer are there to represent the curiosity of the character as they enter another world exploring their surroundings along with the viewer’s cursor. Combining the concept of dimensional portals, exaggerated cartoon features, and interactivity expresses my interest in making a portrait that feels alive and dynamic. The work aims to combine a static drawing with an experience where viewer becomes part of the artwork with their movement.
One of my priorities while coding is to keep my code clear and concise, as it ensures that later if there are any edits to be made I can easily identify the exact area that I need to modify and edit it with ease. While creating the circles for the necklace at the start I was creating one by one using the circle() function, which was taking a lot of time and was starting to look pretty repetitive, especially with all of them sharing the same size. At the start I decided to create a size variable to avoid having to change the size in every line if I wanted to change it. But then I realized that I was still repeating the circle() function, so I decided to create an array of the coordinates of each bead and creating a loop to place a circle in each of them. The resulting code was what I am particularly proud of off due to its efficiency and clarity.
Self-Portrait
Reflection
As my focus for this assignment was to get comfortable with the use of code for the purpose of drawing, I spent majority of my time experimenting with functions and made different stylistic choices without focusing too much on the concept and the story behind the work. For future assignments and projects I’d like to look into how to use the code to deliver a message or a story, which in turn would lead to me adding more interactivity and complexity to the piece as there would be a more clear path I am following while working. In particularly, I’d like to focus on adding an element of animation to a piece to give it life and create a more engaging feel to it.
As someone who grew up watching suspense, mystery, and thrillers, I have always had a love for the unknown . It is practically part of my personality at this point. So for my self-portrait, I wanted to bring in that sense of intrigue.
When the sketch first loads, you see an anonymous figure – a faceless, question-marked silhouette. But if you click anywhere on the canvas, the figure is replaced by a self-portrait. Click again, and it disappears back into anonymity.
On the surface, it is a fun interactive switch. But on a deeper level, I think it reflects something more personal: the idea that people can choose to know you or not. Maybe someone clicks, sees the portrait (a glimpse of who I am), and then clicks again to hide it. Maybe they don’t want to see me. Or maybe, like in real life, they’re unsure if they’re ready to know the full picture.
I guess that is the suspense in being known . Once someone sees you, they can never unsee you. But they can still choose to look away.
Here is my sketch.
The part of my code I am most proud of is the use of a boolean and if…else logic to toggle between the anonymous and self-portrait modes when the user clicks on the canvas.
function draw() {
textAlign(CENTER, TOP);
textSize(12);
noStroke();

if (showPortrait) {
background(255);
fill(0);
text('click to hide', 200, 50);
drawPortrait();

} else {
background(0);
fill(255);
text('click to reveal', 200, 50);
drawAnonymous();
}
}

function mousePressed() {
showPortrait = !showPortrait;
}
I am also quite proud that I managed to create a relatively expressive smile using just one line of code. It is simple, but adds a lot of personality in I think.
arc(200, 330, 30, 10, 0, PI, CHORD);
For future improvements, I would love to build on the toggle idea by introducing multiple personalities or moods instead of just a binary switch between anonymous and self-portrait. I believe everyone reveals different layers of themselves depending on the environment or the people around them. It would be really cool if the portrait could reflect that. For example, changing facial expressions, clothing, or color schemes to represent different sides of my personality: serious, playful, thoughtful etc. This would add both depth and relatability to the sketch.
A self-portrait should show that part of you that makes you who you are, right? My concept was to depict myself ‘normally’, but when the user clicks on the canvas, they are shown a side of me that not many people know about. I am actually a HUGE ocean nerd: marine life, ocean sustainability, deep exploration, I’m a sucker for it all. Consequently, I also love diving!
So, clicking transports me with my diving gear under the water! My eye shape changes to depict how happy I am and I think the bubbles bubbling upwards is a cute touch.
Code I’m proud of
// bubbles
noStroke();
fill(255, 255, 255);
for (let b of bubbles) {
  ellipse(b.x, b.y, b.size);
  b.y -= b.speed;   // move bubble upward
  if (b.y < -20) {  // reset if off screen
    b.y = 145;
   }
}
I really like how I animated the bubbles to float upwards and out from the snorkel and continue to regenerate. I was already familiar to how to implement such a logic due to my previous coding experience, but it definitely took a bit of trial-and-error to figure out the initial placement, size, and speed of the bubbles.
My Sketch
Reflection
For future improvement, I would really love to add a kind of gradient of different shades of blue to enhance the underwater effect. I also think it would be pretty cool to have more animations, such as tiny fishes swimming in the background (and maybe a shark).
I think this assignment was particularly fun because I got to use JavaScript in a different creative manner compared to what I am used to. I was able to see my idea come to life just through simple shapes and colors! Overall, this self-portrait is an expression of a space I really care about and hope to get other people to care about too. Help keep our oceans clean, thank you!
Last summer, I watched Dexter (the TV series), which has multiple seasons and sequels. I really enjoyed it, and it inspired me to create a portrait of the main character. I opened a picture of Dexter on my computer and worked on the portrait in p5.js on my MacBook while I was in the library. Since I already have some background in HTML, CSS, and JavaScript, I didn’t struggle much while making it.
A quick introduction to the character: he is a serial killer who targets other serial killers, following his own moral code. His ritual involves keeping trophies from his victims, specifically by collecting blood slides after cutting their faces. In my portrait, the rotating element around him represents those blood slides, one of his signature trophies.
I really like how I managed to create certain details. For example, when I wanted arcs for the eyebrows or around the ears, I achieved them by covering parts of ellipses with skin coloured shapes. I used the same method for the mouth, ears, and eyebrows. That I think involves a lot of logic. More importantly, I applied some techniques I learned from a tutorial to make the blood slides rotate around Dexter, which I thought was a great touch. So, the code above showcases rotation of the blood sample based on the frameCount. By increasing the constant, the blood sample would rotate even faster.
Reflection
For improvements: I’d like to add more interactivity and animation in the future. For example, animating blood actually dripping down his face would be a really cool effect. I could also add knife animations circling around him. Since I’m so invested in the show, I like to think of this piece almost as a self-portrait of my interests and feelings at the moment of doing this assignment. It feels very personal and entertaining to me, even if that sounds a bit delusional. For future projects, I definitely want to experiment with WEBGL to explore a 3D space. That way, I could even create a full 3D knife kit for Dexter, or add other extra details.
SonarGame is an interactive browser-based game that uses a sonar sensor connected to an Arduino to control gameplay. The game features two modes – Submarine and Exploration – where players navigate through underwater environments by physically moving their hand or an object in front of the sonar sensor.
System Requirements
Computer with a modern web browser (Chrome recommended for WebSerial API)
Avoid obstacles like rocks, mines, and enemy submarines
Collect power-ups for extra lives and points
Exploration Mode:
Explore ocean depths with diving gear
Avoid sharks, jellyfish, and trash
Collect treasures and discover sea creatures
Controls
The game is controlled using a sonar sensor. The distance measured by the sonar determines the vertical position of the player:
Closer to the sensor = higher position on screen
Further from sensor = lower position on screen
Scoring System
Each obstacle successfully avoided: +1 point
Power-up collection: +10 points
Level increases every 20 points
Starting with 3 lives
Game over when lives reach 0
Game Elements
Obstacles:
Submarine mode: rocks, mines, enemy submarines
Exploration mode: sharks, jellyfish, trash
Colliding with obstacles reduces lives
Power-ups:
Extra life: Restores 1 life
Extra points: Adds 10 points
Visual effects:
Sonar waves: Visually represent sonar activity
Particles: Created on collisions and power-up collection
P5JS
Arduino Integration
Arduino Code
cpp
// SonarGame Arduino Code// Connects HC-SR04 ultrasonic sensor to send distance readings to browser// Pin definitionsconstint trigPin =9;// Trigger pin of the HC-SR04constint echoPin =10;// Echo pin of the HC-SR04// Variableslong duration;int distance;voidsetup(){// Initialize Serial communication
Serial.begin(9600);// Configure pinspinMode(trigPin, OUTPUT);pinMode(echoPin, INPUT);}voidloop(){// Clear the trigger pindigitalWrite(trigPin, LOW);delayMicroseconds(2);// Send a 10μs pulse to triggerdigitalWrite(trigPin, HIGH);delayMicroseconds(10);digitalWrite(trigPin, LOW);// Read the echo pin, duration in microseconds
duration =pulseIn(echoPin, HIGH);// Calculate distance in centimeters// Speed of sound is 343m/s = 34300cm/s// Duration is time for sound to travel to object and back// So distance = (duration * 34300) / 2 / 1000000
distance = duration *0.034/2;// Limit range to 0-400cm to match game expectationsif(distance >400) distance =400;if(distance <0) distance =0;// Send the distance to the Serial port
Serial.println(distance);// Small delay before next readingdelay(50);}
WebSerial Integration
The game uses the WebSerial API to communicate with the Arduino. The webSerial.js file should handle:
Requesting port access from the browser
Opening serial connection
Reading and parsing serial data
Handling connection errors
Here’s a sample implementation:
javascript
// webSerial.js - Handles communication with Arduino via WebSerial APIlet port;let serialActive =false;let reader;let readableStreamClosed;asyncfunctionsetUpSerial(){if('serial'innavigator){try{// Request port access
port =awaitnavigator.serial.requestPort();// Open the port with appropriate settingsawait port.open({baudRate:9600});
serialActive =true;// Set up reading from the portconst decoder =newTextDecoder();const readableStreamClosed = port.readable.pipeTo(newWritableStream({write(chunk){// Process each chunk of datalet string = decoder.decode(chunk);// Call the readSerial function from sketch.jsif(typeof readSerial ==='function'){readSerial(string);}}}));console.log("Serial connection established successfully");}catch(error){console.error("Error opening serial port:", error);}}else{console.error("WebSerial API not supported in this browser");alert("WebSerial is not supported in this browser. Please use Chrome or Edge.");}}
Customization
Adding New Obstacles
To add new obstacles, modify the createObstacle() function in sketch.js:
javascript
functioncreateObstacle(){// Increase the range for obstacle typeslet obstacleType;if(gameMode ==="submarine"){
obstacleType =floor(random(4));// Increased from 3 to 4}else{
obstacleType =floor(random(4))+4;// Adjusted accordingly}let obstacle ={x: width +50,y:random(50, height -50),width:random(30,80),height:random(20,60),speed:2+ level *0.5,type: obstacleType,};
obstacles.push(obstacle);}// Then update the drawObstacles() function to handle the new typefunctiondrawObstacles(){for(let obstacle of obstacles){// ... existing code ...if(gameMode ==="submarine"){// ... existing obstacle types ...elseif(obstacle.type===3){// New obstacle type// Add drawing code here}}else{// ... existing code ...elseif(obstacle.type===7){// New obstacle type for exploration mode// Add drawing code here}}}}
Adjusting Difficulty
To adjust game difficulty, modify these variables:
Initial values in the resetGame() function:
javascript
functionresetGame(){
score =0;
level =1;
lives =5;// Increased from 3 for easier gameplay// ...}
Obstacle generation rate in the updateGame() function:
let obstacle ={// ...speed:1.5+ level *0.3,// Slower progression// ...};
Troubleshooting
Game Performance Issues
If the game is running slowly:
Reduce the number of background elements
Decrease particle effects
Lower the frequency of sonar waves
javascript
functioncreateBackgroundElements(){const numElements =30;// Reduced from 50// ...}functioncreateParticles(x, y, count, particleColor){
count =Math.floor(count /2);// Half the number of particles// ...}
Arduino Connection Problems
Cannot connect to Arduino:
Ensure Arduino is connected via USB
Verify correct driver installation
Try using a different USB port
Restart browser and try again
Erratic sonar readings:
Check sensor wiring connections
Ensure stable power supply
Add smoothing to the readings:
javascript
// In Arduino code, add smoothing:const int numReadings =5;
int readings[numReadings];
int readIndex =0;
int total =0;
int average =0;voidsetup(){// Initialize all the readings to 0for(int i =0; i < numReadings; i++){
readings[i]=0;}// ... existing setup code ...}voidloop(){// ... existing sonar reading code ...// Subtract the last reading
total = total - readings[readIndex];// Read from sensor
readings[readIndex]= distance;// Add the reading to the total
total = total + readings[readIndex];// Advance to the next position in the array
readIndex =(readIndex +1)% numReadings;// Calculate the average
average = total / numReadings;// Send the smoothed valueSerial.println(average);// ... delay code ...}
Browser compatibility:
WebSerial API is only supported in Chromium-based browsers (Chrome, Edge)