Assignment 4

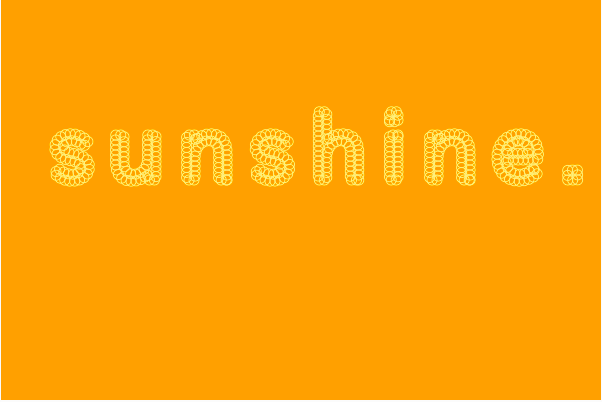
My assignment is based on Generative text output. I liked the Professor’s example of text displayed in a circle and I wanted to do use images to make text (like in the example where circles are drawn as text). It was like using an exclamation mark image and displaying it for the word ‘hello’, I wanted the animation to scream ‘hello’ at the viewer!

However, when in this case, the for loop has to run for every point in the text letters. And every time I had to call the image. This made my program extremely slow and I couldn’t even type (I got really scared because the screen felt frozen).

So, I scrapped this idea and then was looking to display text in a circle and move it in a circular direction. I put my text ‘hello world’ and then divided it using the split function. The split function splits the string after the given parameter occurs. I used to rotate and translate functions to position the text to look like a triangular/star. Using speed, I made the text move. Here is what it looks like:

I saw an example on the web that used for-loop to display every letter in an array and split function as I did in mine which was also like an inspiration to do this one.
Here’s the link.

The Professor’s example of ‘circular orbit’ using sine and cosine was difficult to use here as I wanted the zig-zag pattern of ‘hello world'(it would have required me to create multiple objects and then manipulate the angles for each circle)

Overall, this was very fun to implement and tricky at certain points.


Assignment 4: Generative Text

For this assignment I began with my first iteration which just basically drew out my desired shape onto my text outline using texttopoint. I followed a similar theme from my past assignments of working with rainbow squares, just because I like to explore how I can manipulate the movement of this same shape and its random colors to make different generative art. I also played with using cosine to see how differently my rects would move when I began adding interaction

My next step was adding interaction. For this part, I mainly followed professor’s code. I changed the values so it can correspond to an outcome that I was aiming for which is to be rigid in its movements, as the rectangles on their own feel quite stiff, so I wanted the rigidness to be consistent. After manipulating the values and adding some of my own math, I ended up with this final outcome:

I ended up removing the value that causes the rectangles to move slightly, because I liked how it looked in place ( like a glitch effect). I also made my rectangles smaller since the word was fussy to look at when everything was too close to each other. I also attempted to reuse cosine in noise so that when the mouse hovers over the letters, the rectangles expand in a cool pattern.

Generative text

For this assignment I wanted to try using mathematical equations to make a cool text animation. I decided to use a sin wave because the values don’t go higher than 1 and not lower than -1 so i thought it would be a good way to make the ellipses expand and shrink continuously. Initially i tried using just the sin wave within the ellipse function to determine the size of each ellipse but then I realized that the ellipses were too small so I messed around with a bunch of different values to get an effect that I liked. I also decided to use comic sans and alternate between different shades of purple because I felt like they portray my personality. Overall I am really happy with the outcome 🙂

Week 5 Examples – Images and Sounds (& conditionals)

Images Basic (mouse over):

Sprite sheet (person) (use arrows to navigate):

Sprite sheet (running cat) (use arrows):

Short sound files (click mouse):

Looping sounds file (sounds don’t work while embedded, click link):

Conditionals

Assignment 4 – Data Visualization

For this assignment I was keen to experiment with data and data visualization. There are so many ways data can be visualized and presented – I wanted to explore this. I began by looking up ways data can be visualized such as bar charts, pie charts, maps,  etc. I liked the look of bubble charts.

By using data found on trends.google.com about the number of types of flowers in different regions in the US, I decided to make a bubble chart. By using the preload function I loaded the data. Then within my for loop I drew the bubbles which had sizes according to their frequencies – bigger bubbles have a larger amount of types of flowers in their assigned region and smaller bubbles have less number of different types of flowers in their designated region. I wanted to visualize these at random locations thus used ‘const x = random(0, width);’ and ‘const y = random(0, height)’. However this caused an issue of overlapping bubbles – which is one of the biggest challenges I had. As shown below, the bubbles’ sizes to respond to their frequencies however there are many overlapping bubbles and many are cutting cut off of the canvas.

I wasn’t able to grasp how to solve this issue on my own hence watched many tutorials online such as Shiffman’s YouTube tutorials as well as used the p5.js references to help. Although I couldn’t completely apply the code Shiffman demonstrated, I was able to implement the logic. I had to make a bubbles array.  Also, I was able to avoid the bubbles getting cut off by declaring width and height and then implementing it into the code. Here it seems like the bubbles are getting cut off however on my canvas all the bubbles are within the frame of the canvas – https://editor.p5js.org/zainaiqbal/sketches/8jXV8InrS

In the future, I would like to work on reducing the spacing between the bubbles as well as increase their sizes so that the differences are more obvious – like they were in my code earlier (shown above). Every time I attempt to do this, my code crashes. Also, I would like to include a function where every time the mouse is pressed on the canvas, the canvas refreshes and so the arrangement of the bubbles change.

This is the final outcome –


Sunshine (Assignment 4)

I took a very beautiful picture of the sunset a few days ago, and when looking for inspiration for this assignment I decided to make this the theme of my artwork. I planned to have two lines of text, one with the word “Sunshine”, and another with its definition. That way, I would get to explore with different styles and dynamics.

Before writing any code, I decided to browse through the in-class examples a few more times. I really liked the circles example, and decided to do something similar with my main line of text. I struggled to understand its elements and, thus, had to watch a tutorial to fully grasp textToPoints. With this, I built my first draft. I included it as a picture given that it has no interactivity or other component to it. My next step was to figure out if I could include images and add my second line of text.

This is how it began to take shape:

After investigating, asking my friends, and Monday’s class, I figured out how to add an image and alter its transparency. I initially played arround with tint, and got the piece to a very beautiful aesthetic. Nevertheless, it made my computer very very slow and ruined the experience. I fixed this problem by adding the image and drawing a black rectangle in front of it, which I gave a low opacity, to increase the transparency  of the image.

For the interactivity, since I was using a picture of a sunset, I thought it would be really cool to alter the size of the ellipses forming the letters only on the x-axis, as to create an arch-like path that would imitate the sun rising and setting. In the final piece, move the cursor from left to right and see how it resembles this natural movement.

I am very very happy with the overall look and feel of this piece. Working with text was very interesting to me, and I am very curious to see what else can be done with textToPoints. Furthermore, I would like to include object oriented programming to perhaps, give each ellipse  its own identity. Could I get the ellipses shaping the word to make the shape of a sun upon a click?

this is water

For this week, there we many different ideas that came to mind, but at some point, I thought about the saying, “This Is Water”, that David Foster Wallace refers to in a commencement speech. The first image that came to mind was of fish, and when I googled it, this came up:

I then thought about how I could recreate this in some way while focusing on the text, originally I wanted to recreate the entire image, with the words “This is Water” using circle packing to recreate water. So I began by looking at different videos,

random circles with no overlap
animated circle packing 
animates circle packing image 

While these videos were very helpful in understanding the concept, they weren’t in psj5 so while I could understand the components, I still needed help recreating the idea in psj5, which is when I was able to find examples like the ones in the videos but in psj5, none of them had all of the components of what I wanted to do, so I added a component that would make the circles stop filling in empty spots,  and another that from a black and white image, would fill in the spots where there is a white pixel.

One of my first attempts I began with this:


But then I tried a bunch of different images and styles,

These were the final images, that allowed me to get this result:

Moving forward, I would want to combine the idea of letters coming back to a home location so that the bubbles can go from random positions to form a word.

credit to:

https://editor.p5js.org/aryan.chharia@gmail.com/sketches/RdVQUoMEJ

https://editor.p5js.org/AmritAmar/sketches/oL0gKBOyS

Week 4 – “a reminder to all of you :)”

Inspiration
I found a media outlet on Instagram, which is called We The Urbans. As far as I understand, this is the community that empowers people through art, music, fashion and other creative ways. I enjoyed their works on Instagram, which may serve as a constant source of inspiration and motivation. Being impressed by their ways of delivering important messages, I got inspired to create something similar.
https://www.instagram.com/wetheurban/

Design
I made a quick sketch of my work. Also, to be honest, I make the same mistakes of sticking to the design rather than thoroughly thinking about the ways of programming it. Yet, thanks to Professor Aaron, the idea could be put into action, and the professor demonstrated to me how to put a text into a circle. Then, thinking about making my work more interactive, I decided to use the mousePressed() function to make appearing words when you move a mouse. Also, I used frameCount to create a sort of flashlight effect. However, the facing issue was that I did not know how to rotate the text. After searching the web, I found that there is an explanation presented on the p5js website. The information presented there was quite useful, so I used it as a reference.
https://p5js.org/examples/typography-text-rotation.html

Result
Generally, I am satisfied with the result. That was a nice practice of self-love and working with a text in p5js 🙂 Yet I still need to clarify some details regarding the text inside a circle.

Assignment 4: Clock

For this assignment I decided to make a clock. I was inspired by my wallpaper which has a pretty cool moving clock.

Then I looked for a cool font online and found one called Roboto on Font Squirrel. I then added the .ttf file to my sketch and loaded the font using loadFont.

I used the hour(), minute() and second() functions inside the text() function with textAlign(CENTER) to print out the time on the screen. I also messed around with if statements to gradually change the color of the time and give it a breathing effect.

Then I used the textBounds() and textToPoints functions to create the points using the font and store it in an array to display the word Clock on the screen similarly to the Circles example we looked at in class.
My final product was pretty simple and didn’t come out nearly as cool as my wallpaper but I had fun working with text.

Assignment 4 – Explosion

When the Professor shared the “dispersing circles” sketch in class, I immediately thought of an explosion. With this assignment, I decided to implement a similar concept using text instead of those circles.

I created a class Mover for the moving objects, characters in this case. All the characters in the parent string are instances of this class in the program. Upon pressing the mouse button, these characters scatter in random directions and the colors change to mimic an explosion. When the characters slow (speeds less than 0.1 – update()) down significantly to the point of not moving, they come back to their original place in the center of the screen.

I decided to integrate most of the concepts I have learned in class in this assignment. For example, when the characters are aligned in the center of the screen, I add noise to them to make it seem like they are unstable and reading to go flying in different directions. Perhaps the most technical part of my implementation was to ensure that they return to the center after the explosion. I did this by the subtraction method the Professor has pointed out in class numerous times. Each character has a position element associated with it which indicates its position within the word. Based on that, the offset from the starting of the word is calculated and then every character is positioned in the right order in the word.

I have also made sure not to hardcode the string being used so anything can be used in place of the “BOOM!” in the code. Here is what I got: