Concept and Inspiration
For this week’s assignment, I drew inspiration from spirals and circles, as symmetry has always intrigued me. The goal was to create a generative artwork, and after reading about interaction in this week’s reading, I wanted to give the viewer creative freedom over the composition. To achieve this, I incorporated keyboard controls for selecting different color gradients and allowed users to click anywhere on the canvas to generate a spiral at that point. Additionally, the canvas can be cleared to provide users with a blank canvas.
IMP : Read before creating ART
Color Scheme (click to choose) –
- Rainbow: ‘R’ or ‘r’
- Blues: ‘B’ or ‘b’
- Blue-Green: ‘G’ or ‘g’
- Pink-Purple: ‘P’ or ‘p’
- Yellow-Orange-Red: ‘O’ or ‘o’
- Purple-Red: ‘S’ or ‘s’
- Clear Canvas: C or ‘c’
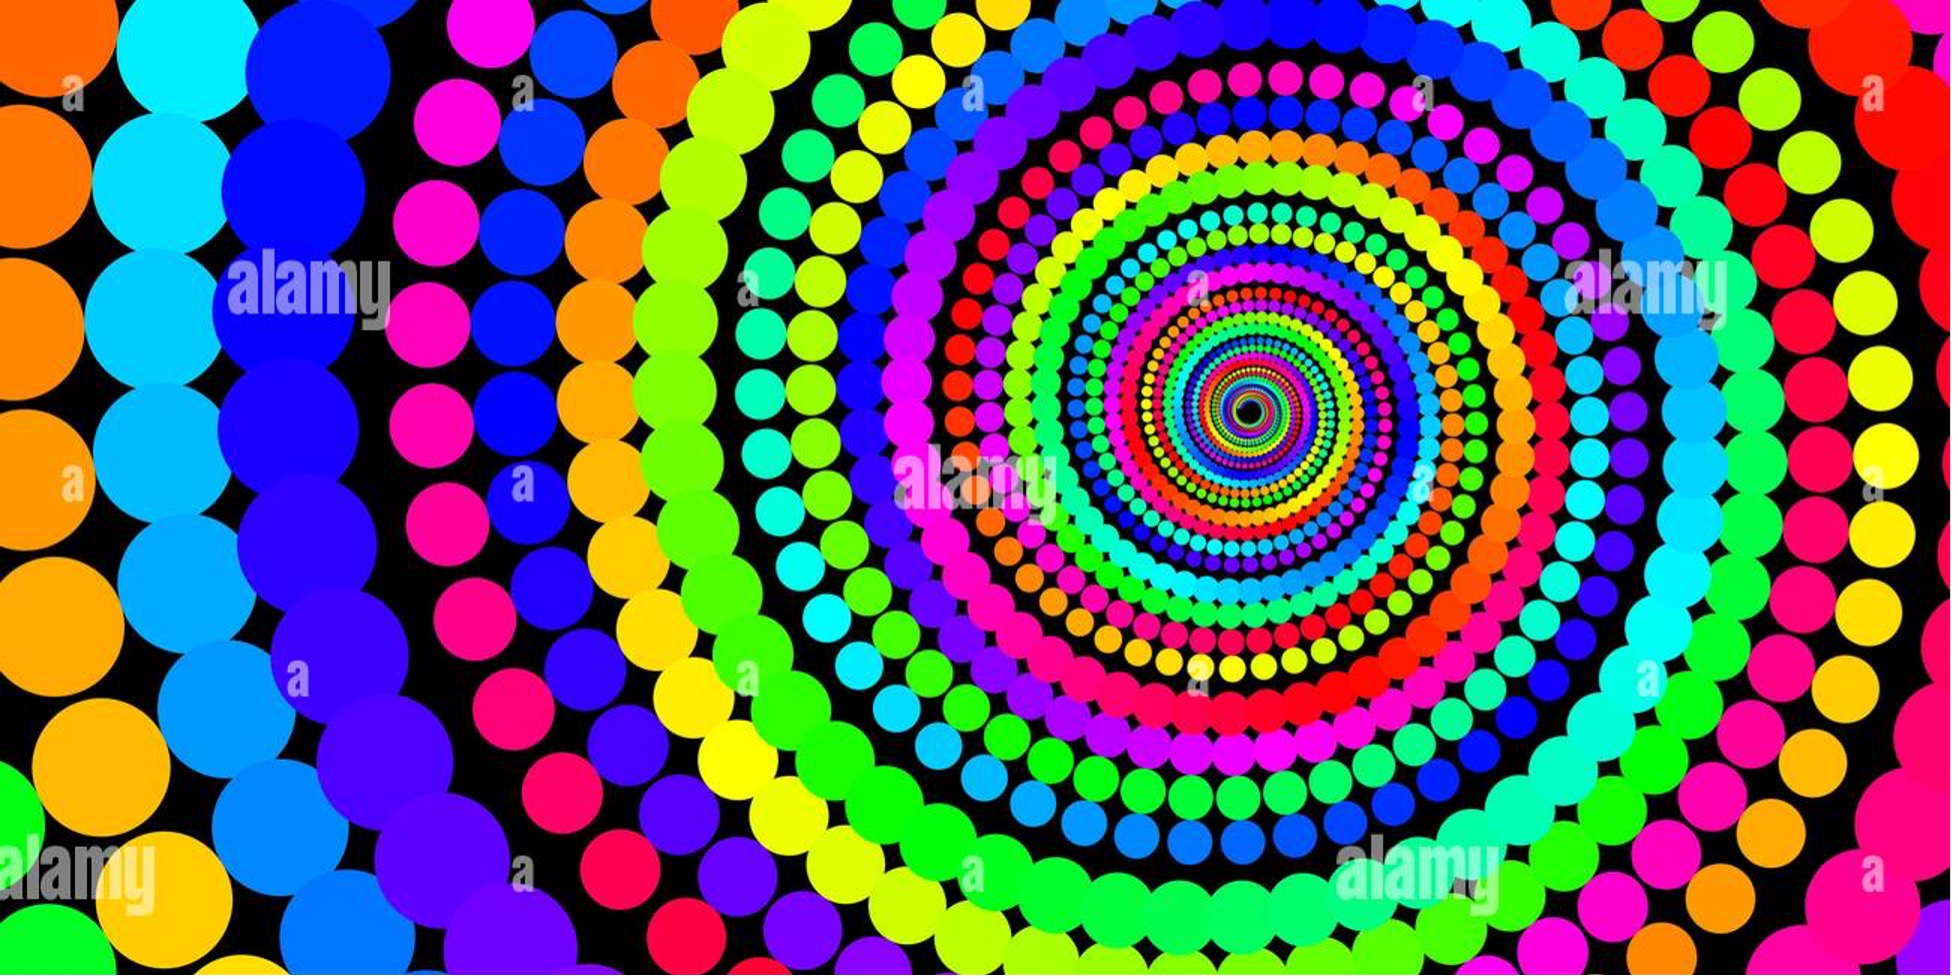
The biggest challenge I faced during this project was related to the creation and positioning of the spiral. I had to make sure that the circles followed the spiral’s curve closely, without leaving gaps between them. Initially, the gaps were too large, and the spiral looked disjointed. I spent a lot of time figuring out how to make the circles remain close together as they moved outward and to ensure they were placed one after another in a way that created a continuous, tightly packed spiral.
The part I’m most proud of is the creating the spirals. Initially, my spirals weren’t very pretty, as the circles grew apart too much and it didn’t even look like a spiral. It took some time to figure out how to position the circles in a way that made the spiral look smooth and cohesive. After lots of tweaking, I managed to figure out the conditions where the circles would be placed in a way that created an organized spiral.
// Creates Spiral class, which acts as a template to print all spirals
class Spiral {
  constructor(x, y, max_radius, num_circles, color_palette) {
    this.x = x;
    this.y = y;
    this.max_radius = max_radius;
    this.num_circles = num_circles;
    this.current_circle = 0;
    this.angle_increment = 10;  // Places individual circles closer depending on value
    this.radius_increment = 0.3;  // Reduces outward distance between concentric circles of spiral depending on value
    this.color_palette = color_palette;
  }

  // creates new mini circle each time function is called in draw function
  update() {
    if (this.current_circle < this.num_circles) {
      this.current_circle += 1;
    }
  }

  // prints spiral on canvas
  display() {
    push();
    translate(this.x, this.y);

    for (let i = 0; i < this.current_circle; i++) {
      let angle = i * this.angle_increment;
      let radius = i * this.radius_increment;
      // to control transition of colors for diff color palettes
      let gradient_factor = map(i, 0, this.num_circles, 0, 1);

      // defining color gradient for each transition
      let col;
      if (this.color_palette === "rainbow") {
        // Full rainbow transition
        if (gradient_factor < 0.25) {
          col = lerpColor(color(255, 0, 0), color(255, 255, 0), map(gradient_factor, 0, 0.25, 0, 1)); // Red → Yellow
        } else if (gradient_factor < 0.5) {
          col = lerpColor(color(255, 255, 0), color(0, 255, 0), map(gradient_factor, 0.25, 0.5, 0, 1)); // Yellow → Green
        } else if (gradient_factor < 0.75) {
          col = lerpColor(color(0, 255, 0), color(0, 0, 255), map(gradient_factor, 0.5, 0.75, 0, 1)); // Green → Blue
        } else {
          col = lerpColor(color(0, 0, 255), color(255, 0, 255), map(gradient_factor, 0.75, 1, 0, 1)); // Blue → Purple
        }
      } else if (this.color_palette === "blueGreen") {
        col = lerpColor(color(0, 0, 255), color(0, 255, 0), gradient_factor); // Blue → Green
      } else if (this.color_palette === "orangeRedYellow") {
        col = lerpColor(color(255, 255, 0), color(255, 0, 0), gradient_factor); // Orange → Red
      } else if (this.color_palette === "pinkPurple") {
        col = lerpColor(color(255, 105, 180), color(96, 15, 156), gradient_factor); // Pink → Purple
      } else if (this.color_palette === "purpleRed") {
        col = lerpColor(color(128, 0, 128), color(255, 69, 0), gradient_factor); // Purple → Orange → Red
      } else if (this.color_palette === "Blues") {
        col = lerpColor(color(0, 0, 139), color(0, 255, 255), gradient_factor); // Deep Blue → Cyan
      }

      // prints each circle with chosen color after calculating positions
      fill(col);
      noStroke();
      let x = cos(angle) * radius;
      let y = sin(angle) * radius;
      ellipse(x, y, 8);
    }

    pop();
  }
}
Reflections and Future Improvements
Looking back, I’m happy with how everything turned out, and I especially like that so many different variations can be generated based on user interactions from such simplicity. However, I feel there’s still room to improve the spiral’s look. I want to learn how to adjust the spacing between circles so that they grow proportionally as they move outward, filling the space more evenly. Additionally, I would love to experiment with making the spiral tighter and more closely packed. Also I want to figure out a different ending for the spiral, maybe something like it keeps growing and takes over the whole screen, since right now it just stops adding circles to the spiral.
One thing I loved was how much easier my life became using OOP. Using a class to create a template for the spirals allowed me to generate as many spirals as I wanted without much effort. It’s fascinating to see how simple code structures can support more dynamic and complex artistic ideas, and I’m excited to keep refining my approach to generative art.