I found this reading particularly intriguing because it introduced a concept I hadn’t considered before: the significance of “mindspace” in our interactions with objects. As the text points out, when users are in a relaxed state, they are more likely to successfully complete tasks, such as unlocking a door.
Additionally, the reading thoughtfully explores the idea that an object’s beauty extends beyond mere aesthetics; its functionality plays a crucial role as well. This connection between emotion and design is fascinating—attractive objects not only draw us in but also enhance our overall experience and effectiveness in using them.
Initially, the idea of using a switch that didn’t require hands felt challenging to execute. However, after some contemplation, the thought process shifted: if not manually, perhaps turning on the switch wirelessly would be ideal. My initial idea was to see if I could use my laptop to turn on the light with a clap. This, however, didn’t work for two main reasons: 1) it still required using my hands, and 2) the claps were too soft, as sound is typically best detected in a controlled setting. I then considered if I could control the light by turning my head left or right. Once this idea settled, the execution began.
Design and Execution:
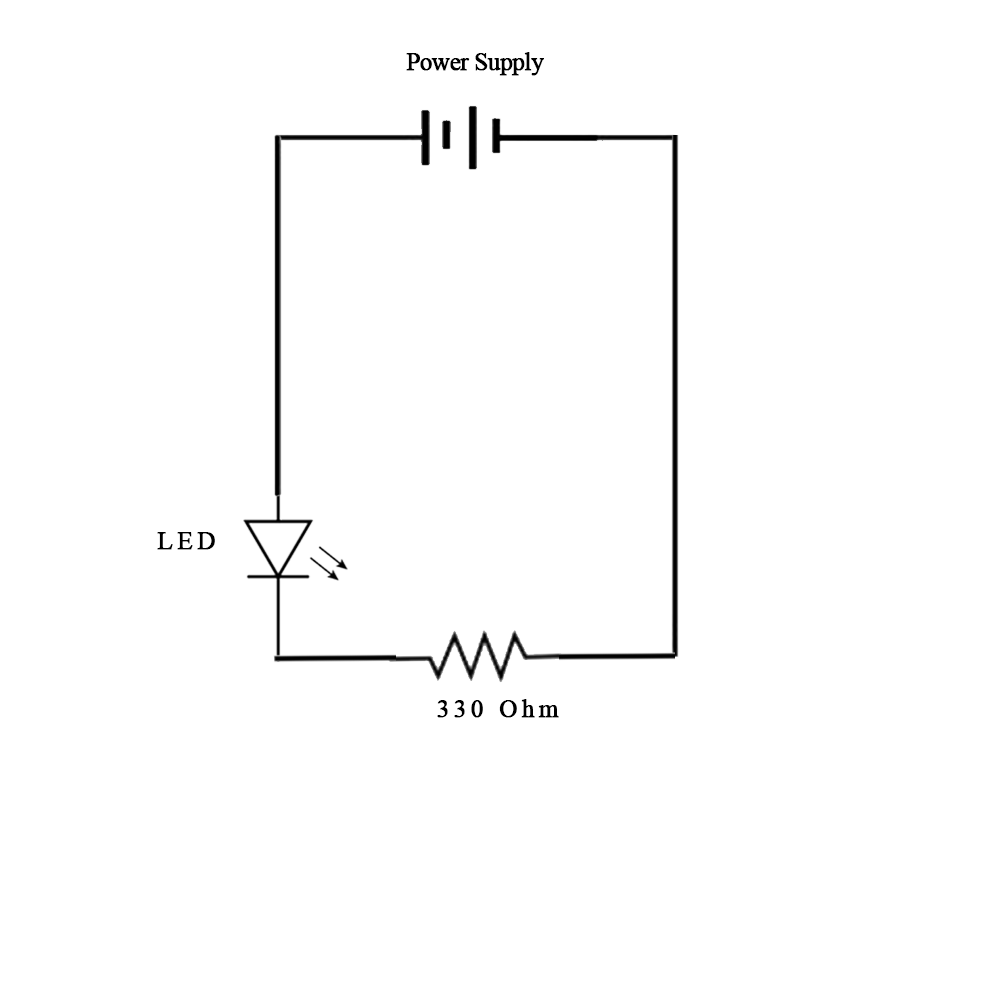
The following schematic represents the electrical connection for the Arduino Uno board:
Schematic image painfully made using photoshop.
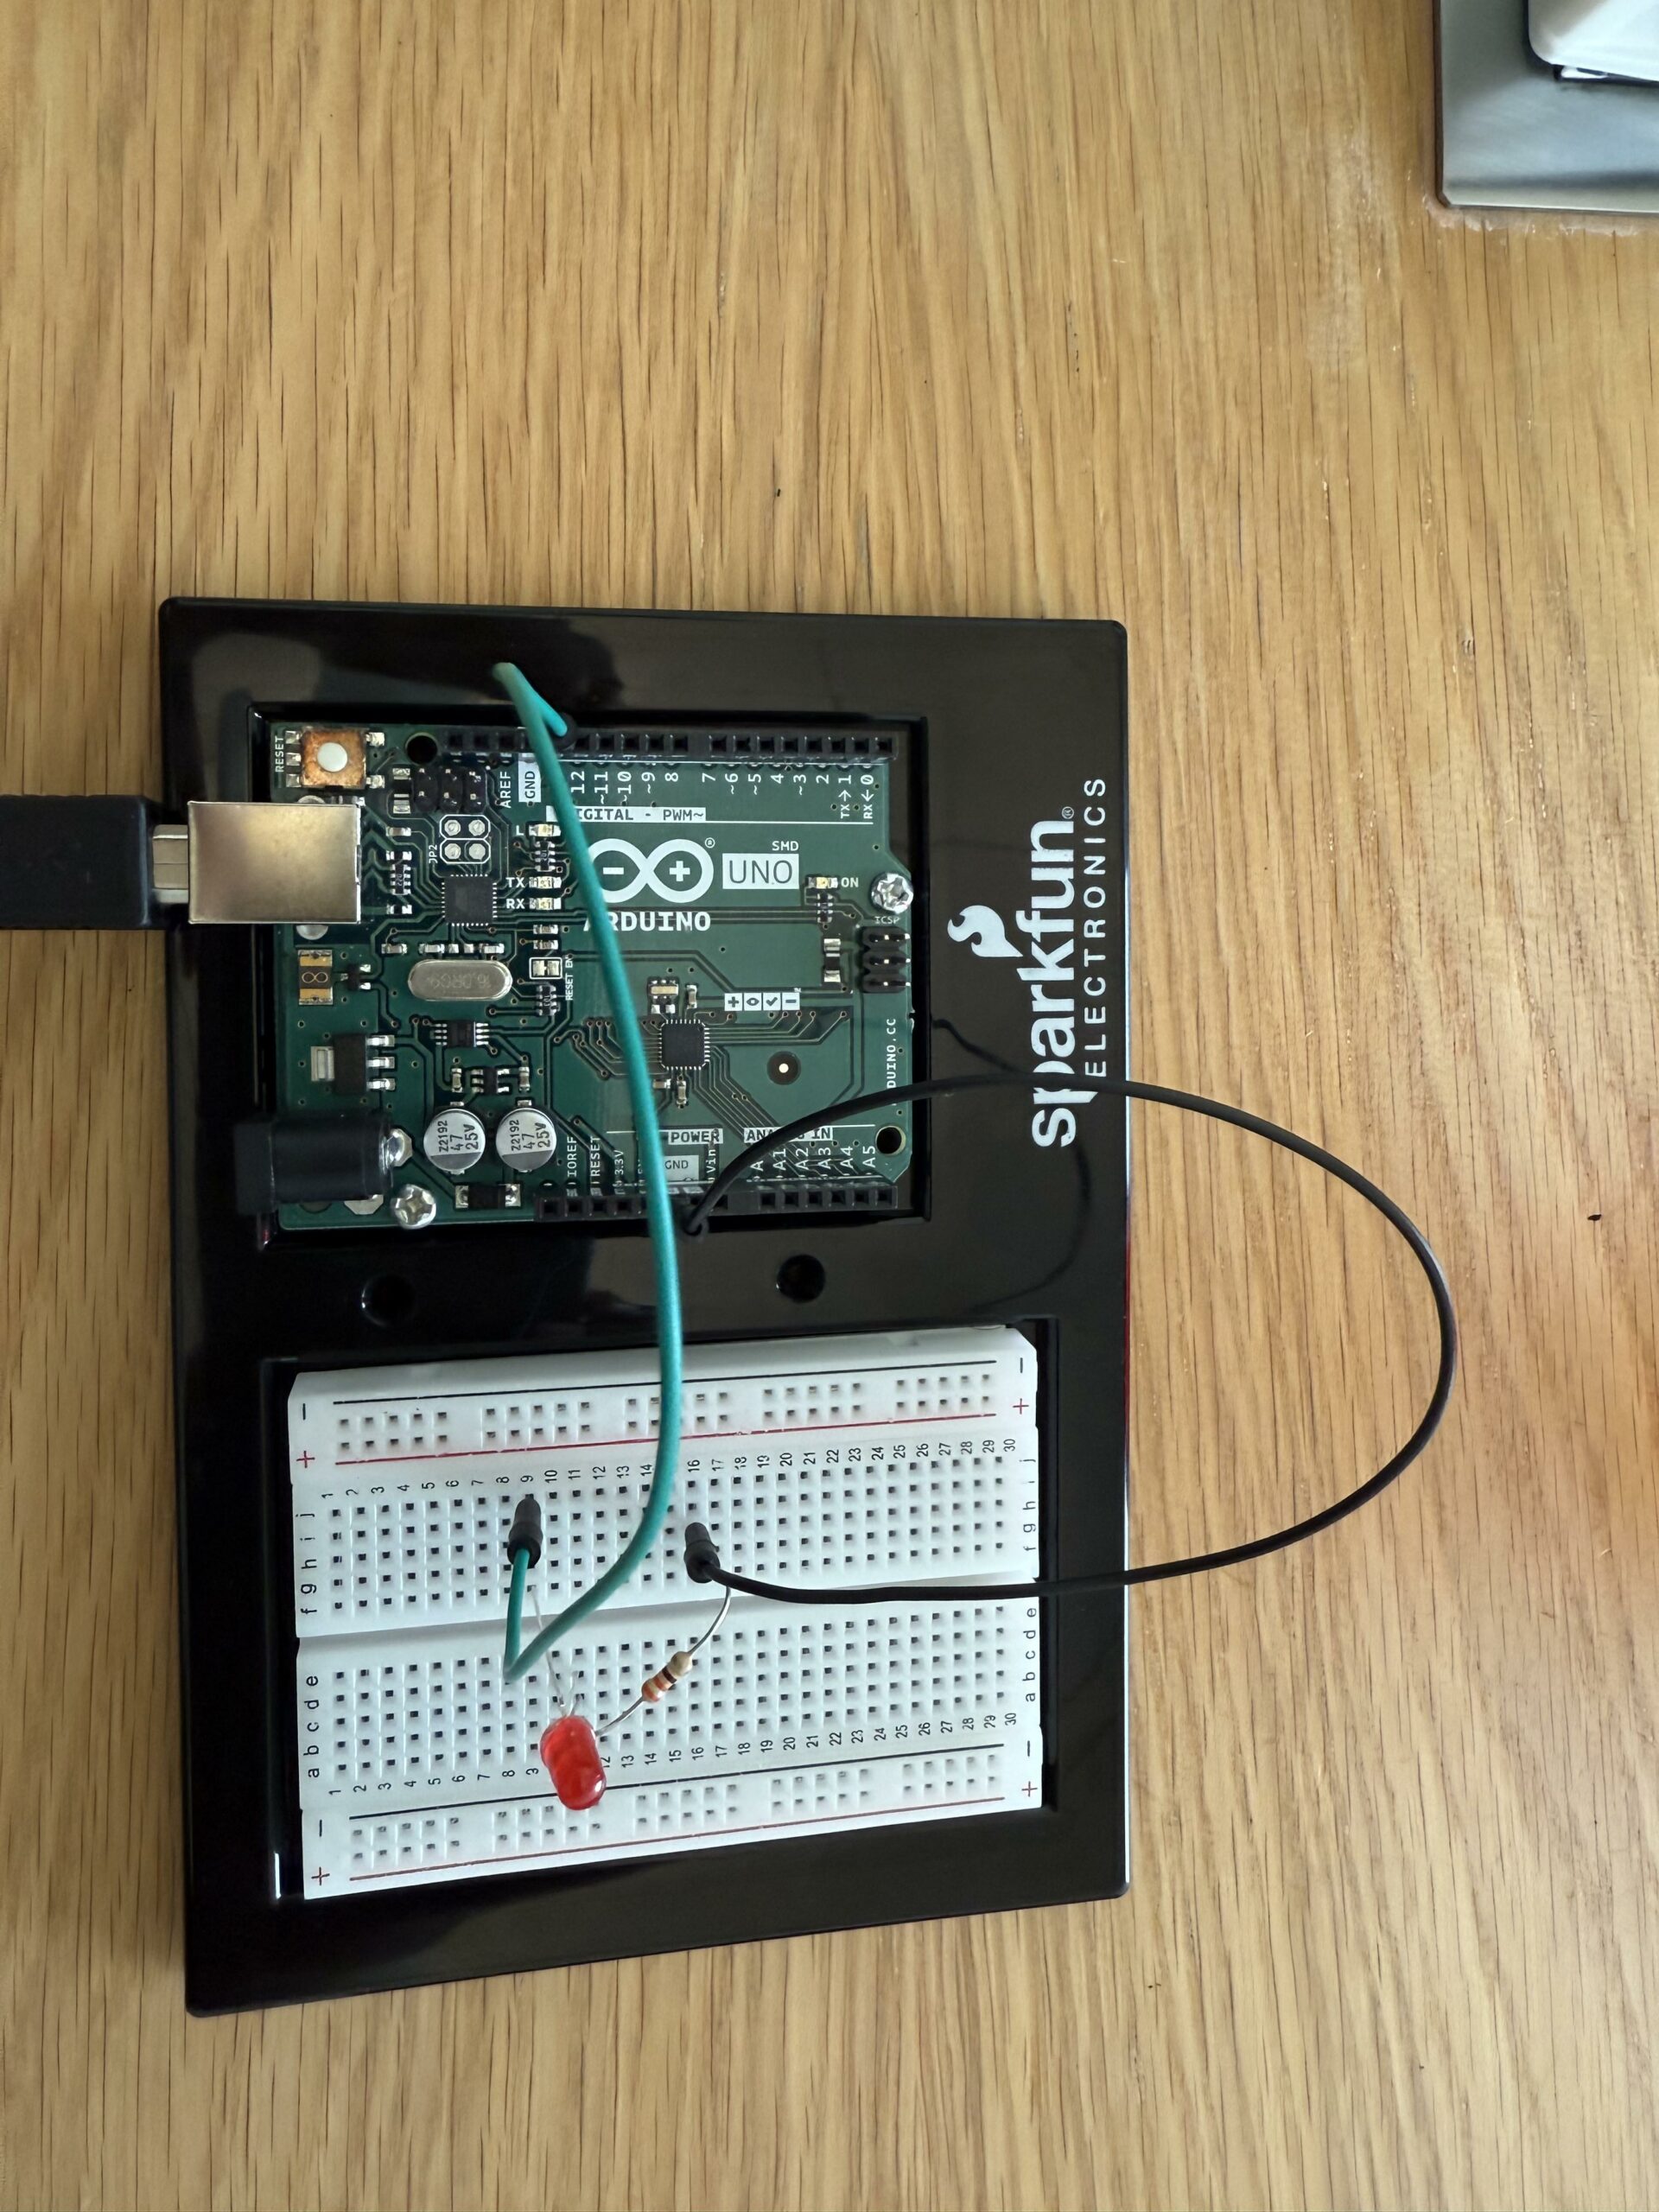
The final connection represented by the image above can be found from the image below:
Connection Image for the head switch LED control
Finally, the magic that brought everything together was not only the Arduino code but also a Python script, with a bit of help from everyone’s favorite chatbot. The following code was used in the Arduino IDE:
const int ledPin = 13;  // Pin connected to the LED

void setup() {
  Serial.begin(9600);       // Initialize serial communication
  pinMode(ledPin, OUTPUT);  // Set the LED pin as output
}

void loop() {
  if (Serial.available() > 0) {  // Check if data is available on the serial port
    char command = Serial.read();  // Read the incoming byte

    if (command == '1') {
      digitalWrite(ledPin, HIGH);  // Turn LED on
    } else if (command == '0') {
      digitalWrite(ledPin, LOW);   // Turn LED off
    }
  }
}
I then ran the Python code in my terminal, which activated the camera. Head tracking began, and from that point, turning my head to the left switched the light on, while turning it to the right switched it off. The following portion of the code made this possible:
while True:
       # Capture a frame from the camera
       ret, frame = cap.read()
       if not ret:
           break

       # Convert frame to RGB
       rgb_frame = cv2.cvtColor(frame, cv2.COLOR_BGR2RGB)

       # Process the frame with Mediapipe
       results = face_mesh.process(rgb_frame)

       # If a face is detected, analyze head direction
       if results.multi_face_landmarks:
           landmarks = results.multi_face_landmarks[0].landmark
           direction = calculate_turn_direction(landmarks)

           if direction < LEFT_THRESHOLD and not led_on:
               print("Head turned left - Turning LED on")
               arduino.write(b'1')  # Send signal to Arduino to turn LED on
               led_on = True

           elif direction > RIGHT_THRESHOLD and led_on:
               print("Head turned right - Turning LED off")
               arduino.write(b'0')  # Send signal to Arduino to turn LED off
               led_on = False

       # Display the frame (optional)
       cv2.imshow("Head Movement Detection", frame)
       if cv2.waitKey(1) & 0xFF == ord('q'):
           break
Final Project:
Have a look at how the final project turned out in this short YouTube video:
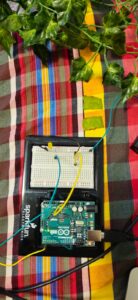
Here is a progress of what happens when the user turns their head left and right:
Progress of head turns
Final Thoughts & Reflection:
This homework exercise was both fun and enjoyable. It pushed me to learn Arduino while thinking creatively about solving problems. Throughout the project, I kept considering how it might be integrated into my final project. So, instead of making this exercise long and complex, I approached it as a potential feature for the final project. That’s where I envision improvements and a broader application of this single project. That’s all for now!
Concept:
The idea for creating an unusual switch with my arm actually struck me while I was at the gym. As I was practicing with dumbbells, I thought, “Why not use the motion of my arm to activate a switch?” When I was doing bicep curls — you know, the exercise where you pull the dumbbells up toward your shoulders, maybe called as bicep curls— it clicked. I needed some conductors that could connect the wires and pass electricity when my arm moved upward. I initially thought of using aluminum foil, but that felt too common. I wanted to do something different, so I decided to go with aloe vera gel instead. It seemed like a more unique choice, and I was curious to see how well it would conduct electricity.
Hardware Used:
Arduino
LED
330 ohm resistor
Jumper wires
Breadboard
Aloe vera gel (as a conductor)
Aluminum foil (optional, used for wrapping, but didn’t use)
Glue to attach the aloe vera slices with a decorative plant that can be wrapped around my arm
Process:
Prepare the Aloe Vera Gel: I first applied some aloe vera gel to the inside of my elbow, creating a path for electricity when my arm bends during the bicep curl motion. This would serve as a conductor, allowing the current to flow when I made contact. But, it did not work. So, I used this decorative plant to wrap my arm and put the aloe vera slices glued on to it.
Set Up the LED Circuit:
I placed the LED on the breadboard, with the shorter leg (cathode) on one row and the longer leg (anode) on another.
I connected a 330 ohm resistor to the same row as the shorter leg of the LED. The other end of the resistor was connected to one of the Arduino’s GND pins.
Then, I took a jumper wire and connected the row with the longer leg of the LED (anode) to digital pin 13 on the Arduino.
Integrate the Aloe Vera Gel as the Switch:
I connected a jumper wire from the Arduino’s 5V pin to one piece of aloe vera that was in contact with my elbow.
Another jumper wire went from the same piece of aloe vera to pin 2 on the Arduino (set up as an input pin).
I then placed the second piece of aloe vera on the outer part of my elbow, completing the circuit when my arm was bent.
Coding the Arduino:
In the code, I used digitalRead() to check if there was a connection between the two pieces of aloe vera (when the gel completed the circuit during the bicep curl).
If the circuit was closed, the LED would turn on. When I relaxed my arm, breaking the connection, the LED would turn off.
Testing: I tried different amounts of aloe vera gel and even experimented with wrapping aluminum foil around the gel for better conductivity. Eventually, I found a sweet spot where the gel was conductive enough to switch the LED on and off based on my arm movement.
Pictures From The Process:
The circuit: This is the circuit with aloe vera slices and decor plant on my arm.
Unfortunately, the decor plant did not work properly. So, I used a black rope ( does not look good) to tie aloe vera with my arm directly. Here is the final one!
Video of the switch:
Reflection and Future Implementation:
Need to find a way to adjust the aloe vera properly on my arm as I tried to use glue on a decor plant which did not work and gave me burning sensation on my elbow area instead.
Overall, I find it amusing to work with aloe vera and electronics. It was fun!
For this assignment, I decided to create something that would make sense rather than just something funny. Many people, especially students, are known to have trouble concentrating on their work. Thanks to our phones and social media, YouTube, Netflix, and other stuff inside, the focus span of a young person is deteriorating. The idea behind my device is specifically targeting people who lack self-discipline and cannot spend even a little time without looking at the screens of their phones – this can be adults, teenagers, or even kids. I decided to call it the Antiprocrastination iPhone Case.
Concept
The concept is simple – the tracking device, which can be attached to any surface, and the case itself.
1) You can put the tracking device on your desk if you are using it for yourself. However, for people like parents or teachers who want to use the device to not allow their children or students to look at their phones, it is recommended to put the device in the common area.
2) Put the iPhone case on. It is equipped with a special electrified silk on the backside that transfers the signal to the green LED lamp whenever it is lying on the surface of the tracking device. Thus, if you see the green light, it means that everything is good and the phone is connected to the tracking device.
3) As soon as the phone leaves the surface of the tracking device, the lamp turns off, indicating that the person is trying to use the phone.
Refer to the video below to check how it works: P.S. don’t mind my tired voice, it’s been a pretty packed weekend haha
Reflection
The idea was simple to implement – I used the same logic that the professor showed us during the class. What I did differently was the usage of electrified silk that would be cut into 3 pieces. 2 would lie on the table with wires connected to them and with a short distance between them, so the chain would not be closed until the third bigger piece of silk would cover both of the smaller ones from the top. I attached the bigger piece to the iPhone case, and whenever it lies on the smaller pieces, the chain gets closed, and electricity circles and flows as intended, which allows the LED light to turn on.
It is the Antiprocrastination iPhone Case 1.0 as it does not include advanced features. For example, I could add the sound effect whenever the iPhone is removed to warn a user. I could also make the vice-versa LED light effect by, for instance, putting on the red LED light and turning it on whenever the iPhone is removed from the surface.
Anyway, I enjoyed my first experience with Arduino and I am extremely excited to learn more in the upcoming classes to start building more advanced things.
My investigation into water-based conductivity started with a straightforward observation of the water I used to take my daily magnesium dose. It was pleasant to go back to the basic concepts of electricity and conductivity after working with Arduino extensively on a variety of intricate projects.
Why Water?
As I drank my water supplement with magnesium, the thought came to me. It was amazing to see how something so ordinary could be transformed into an interactive component. Since water is a universal solvent and necessary for life, it looked like the ideal medium for investigating conductivity in a way that relates science to everyday life.
The Magnesium Connection
Scientific Curiosity
The water that was enhanced with magnesium was not chosen at random. Being an essential component for our bodies, magnesium tells an intriguing story of how the same elements that keep us alive may energize our circuits. The water is an efficient conductor for our switch because of the Mg2+ ions in it, which greatly boost conductivity as compared to ordinary water.
Learning Through Simplicity
Despite my previous experience with Arduino projects, this exploration offered valuable insights. It reaffirmed fundamental electrical ideas that I hadn’t considered in years.reminded me that common materials can be transformed into interactive components. It also proved that sometimes the most elegant answers are the most straightforward ones 😅
Technical Growth
Despite being simple in theory, this assignment forced me to: Go over basic conductivity principles
When handling liquids, take safety precautions into account.
Design clean, efficient circuits
Produce reliable readings despite fluctuating conductivity.
This assignment demonstrated that going back to basics can be both humbling and instructive, demonstrating how even experienced makers can find delight and learn from simple experiments.
For this week’s project I had a lot of different ideas of how I wanted to create an “unusual switch.” I thought the mustache and eye-blink-polaroid designs were both really interested and tried to use the creativity and usability from either one in my design. For my project, I created a switch that notifies a user when they need to correct their posture. In my family I am known for having terrible posture and am often corrected for constantly looking at the ground while I walk. The idea of this design is to work as an independent reminder, because it tracks when you are looking down (by creating a connection in the switch), versus when you are looking up (breaking the connection.
Final Product
Design & Build Process
For this project I used the following materials: 4 jumper wires, 2 alligator cables, 1 LED light, Arduino Uno, 1 resistor, 2 cardboard circles, masking tape, and conductive fabric. For the code, I used Arduino’s pre-designed button example code. Originally, I considered using tinfoil as the conductive piece between my jumper wires but then found some conductive fabric in the IM lab so I decided to work with that instead. I found the conductive fabric a bit difficult to work with because it was so flimsy and didn’t provide a stable connection between the wires. However, I was too lazy to go buy tinfoil so before compromising on the conductive fabric I tried to work with what I assumed to be copper wire (it was actually just copper colored magnetic wire). I coiled up little pieces and clipped them on each end of the alligator clips but quickly realized that they were not conductive and resorted back to the original plan.
The circle pieces of cardboard were originally from a different idea I had of “glasses” that connect a switch when you raise your eyebrows or scrunch your nose. After I abandoned that idea I decided to use them to hook the wires onto your ears because I originally just had them hanging down.
The last thing I wanted to quickly highlight was the usage of the alligator clips to extend the jumper wires. The length of the wires caused me a lot of confusion in the design process because I wasn’t sure how I would have anything attached to my face with such short wires. My first solution was to build a small platform for my Arduino board to sit on that would raise it closer to my face but after running into a few issues with that as well a quick Google search reminded me of the convenience of alligator cables.
Reflection
Overall I am pretty satisfied with the design of my project. Although this is a very rough prototype, I have a real need for this design in my life so I was pleased to find a creative solution to the issue at hand. In terms of improvements, I would definitely like to make this design a bit more visually appealing. Although I somewhat solved the issues of the wires by using the alligator cables and ear loops, it still is quite ugly to look at and difficult to put on so that would definitely be my number one priority in improving the design.
The reading on Hamilton’s journey and the early days of computer programming highlights some important points about physical computing. The reading shows how important the software was in the Apollo mission and the project was very complex and expensive. Therefore the designed software was to be very accurate leaving no room for errors as they would be extremely expensive and could even cause the entire mission to fail. As I look forward to the second half of this course, where we’ll work on physical programming, I plan to approach my projects with similar care, knowing there’s little room for errors. I hope to use strategies to avoid mistakes, like how the Apollo mission used simulations to test things before putting designs into the project.
Norman,“Emotion & Design: Attractive things work better”
The reading caught my attention with its focus on how emotions, aesthetics, and usability affect designs. The idea that “attractive products are not just nice to look at; they also work better because they make people feel good” really stood out to me. It reminded me that when I create my own designs, I should encourage people to explore them. One approach could be adding elements that spark curiosity and raise questions like “How does it work?” while offering hints for exploration.
The idea that, when people feel good, they are often more flexible and creative, leading to better interactions with products, made me think about how designing attractive designs can also boost user engagement and functionality. Based on this for my upcoming projects, I hope to create designs that mix good looks and usability to build a stronger connection with users, making the experience more enjoyable and improving overall satisfaction.
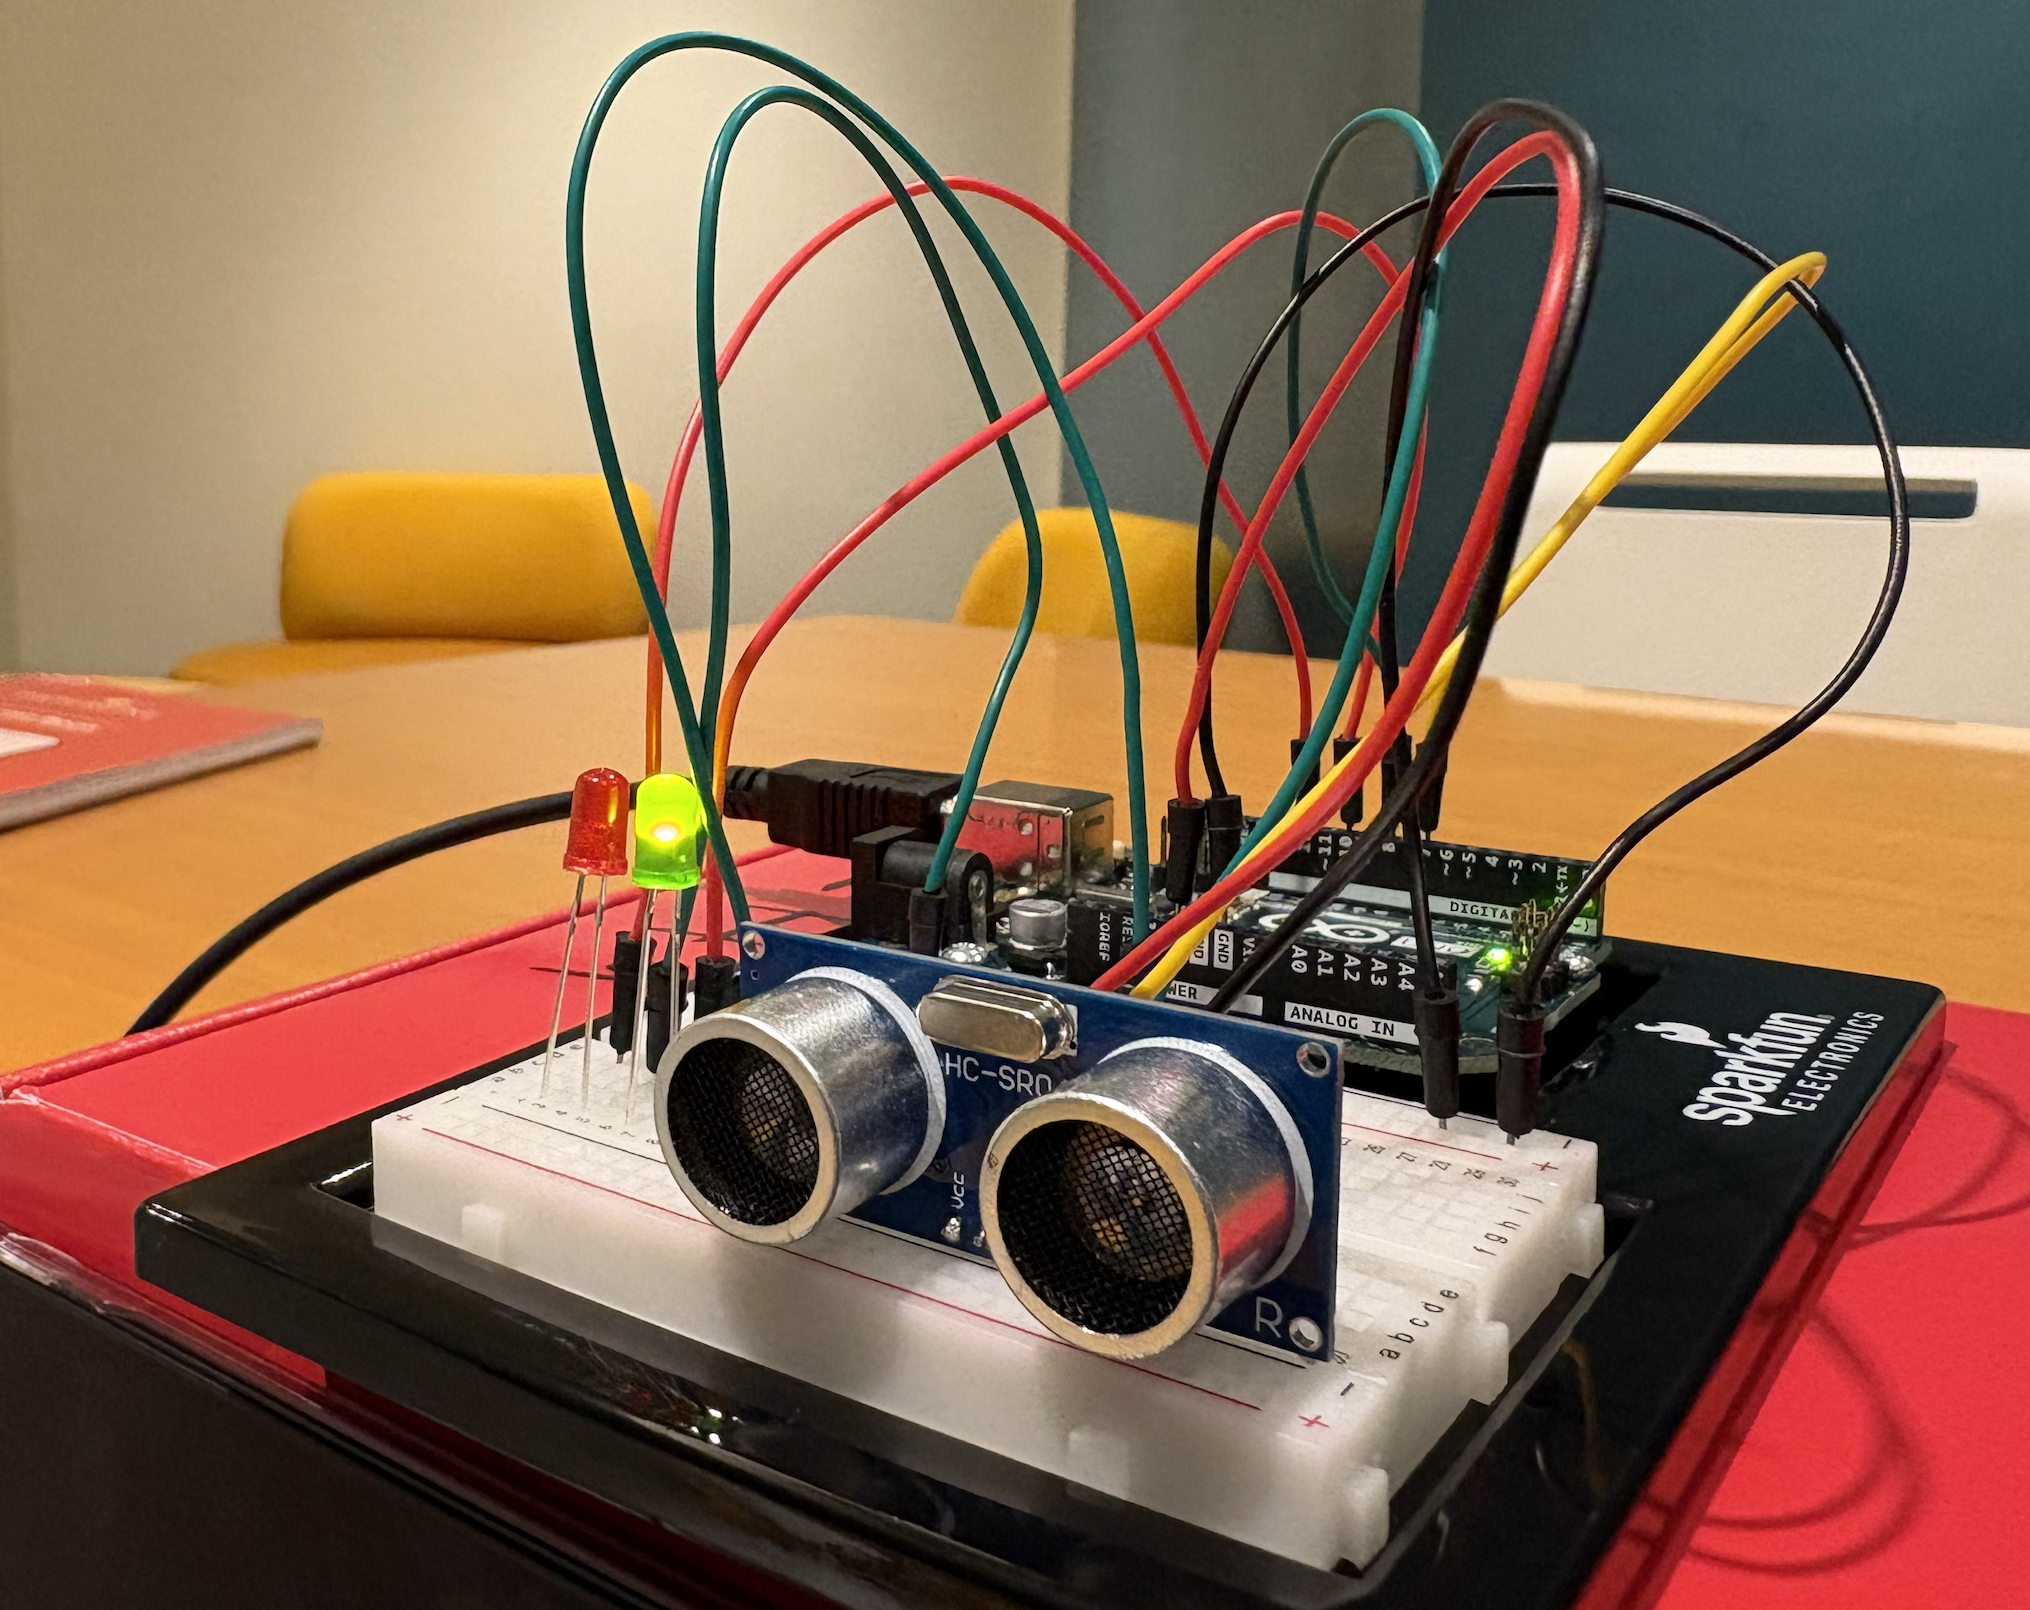
For this week’s assignment, I designed a simple switch to be positioned in front of a screen, like a laptop. This switch uses an HC-SR04 distance sensor and an Arduino board to control either a red or green LED. When the user is at a healthy distance from the screen—set to 50 cm or more—the green LED lights up. If the user gets too close, the red LED turns on as a warning to move back. This setup helps promote good screen-distance habits to protect eye health.
To implement the logic, I modified an example code for Sensors from the Arduino IDE. Below is a demonstration video for my switch.
I have gained knowledge on how Simple switches are fundamental devices used to control the flow of current in a circuit. It was also interesting to use the HC-SR04 sensor and see how it works. Going forward, I hope to use switches in combination with other logics to design complex and interesting projects.
Hamilton has made imperative and remarkable contributions to the field of space. As the director of the Software Engineering Division at MIT’s Instrumentation Laboratory, Hamilton led the team that developed the on-board flight software for NASA’s Apollo missions, including the historic Apollo 11 moon landing.
Margaret Hamilton’s contributions to the Apollo program and computer science have been widely recognized and celebrated. She coined the term “software engineering” to elevate the field and give it the respect it deserved alongside other engineering disciplines. Hamilton’s story not only highlights the crucial importance of software development in the success of the Apollo missions but also sheds light on the often-overlooked contributions of women in the early days of computer science and space exploration. Her pioneering work and leadership helped pave the way for future generations of software engineers and computer scientists.
The idea of the reading is simple – if you want to achieve great results in your product development, good design and usefulness should go hand in hand. However, most people forget about it and mess up one of the parts. I saw many ideas that were great but lacked design and attractiveness. As an example, I can take the startup competition. The team with a great idea but a bad slide deck design and pitch can easily lose to the team with a great slide deck and pitch, even though the latter might have an idea that is technically worse for implementation.
I would also like to mention that design can play a crucial role in marketing. As I have learned from one great professional, marketing is a systematic creation and capture of value. While value can be perceived straightforwardly as a utility and purpose, it can also mean something aesthetically pleasing or something that is very well differentiated from other ideas or products. It is important to remember that we are, after all, human beings, and our emotions and feelings can sometimes play a crucial role in deciding what is worth purchasing, using, wearing, etc. Thus, a great design can be a decisive factor for a customer to buy your product while encountering your advertisement.
Her Code Got Humans on the Moon
I was impressed by what I learned from reading this article. Margaret Hamilton basically saved the Apollo mission and also opened the door to the world of computer engineering. I am sure that many people still do not know about this fact, and this is true that the role of women in the STEM field was underrepresented throughout the 20th century and before, not to mention that educational opportunities became available for women much later than for men. Nowadays, this is being changed and many women have a chance to contribute to the development of science. Talking from my personal experience, I know a lot of women in science, particularly in space development and exploration fields in my country, Russia. Even in the 20th century, there were female astronauts, physicians, and mathematicians. Although their role and contribution might not be as significant as the one of Margaret Hamilton, they all also played a role in empowering women in STEM in my country.