Final Project Documentation

Concept

Link to my user testing video:
https://drive.google.com/file/d/1r4EBRKhNevopUEoBOfhuoM1EDaFciAEV/view?usp=sharing

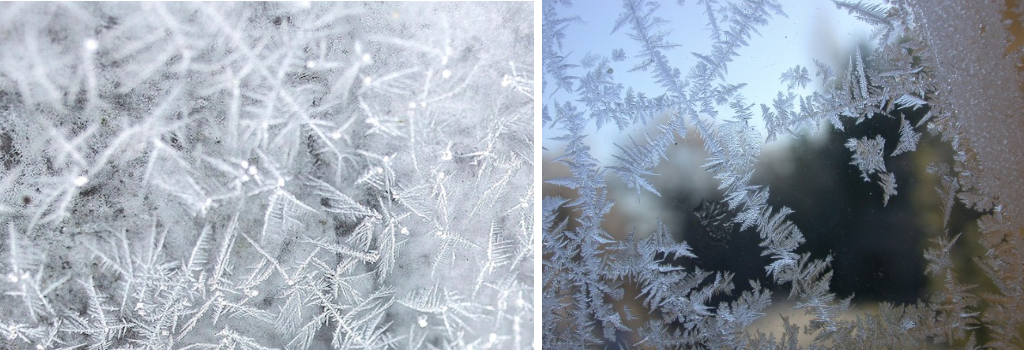
I created an interactive mini-game based on a fairy tale I heard when I was a child. I was told that at night in winter, Ayaz ata(Santa) and his magical helpers painted on the windows, to delight children in morning . Of course, these “patterns” on the windows do not appear by themselves, but when the weather is very cold, the windows freeze and there is a miracle of nature. Lines and patterns are random, so there are numerous ways to interpret them. To recreate this idea, I used the potentiometer as a basis for random and free drawing- specifically to create the pattern by rotating rectangles. Through the potentiometer, the users will be able to control the rotation angle and feel themselves as a character of my childhood fairytale.
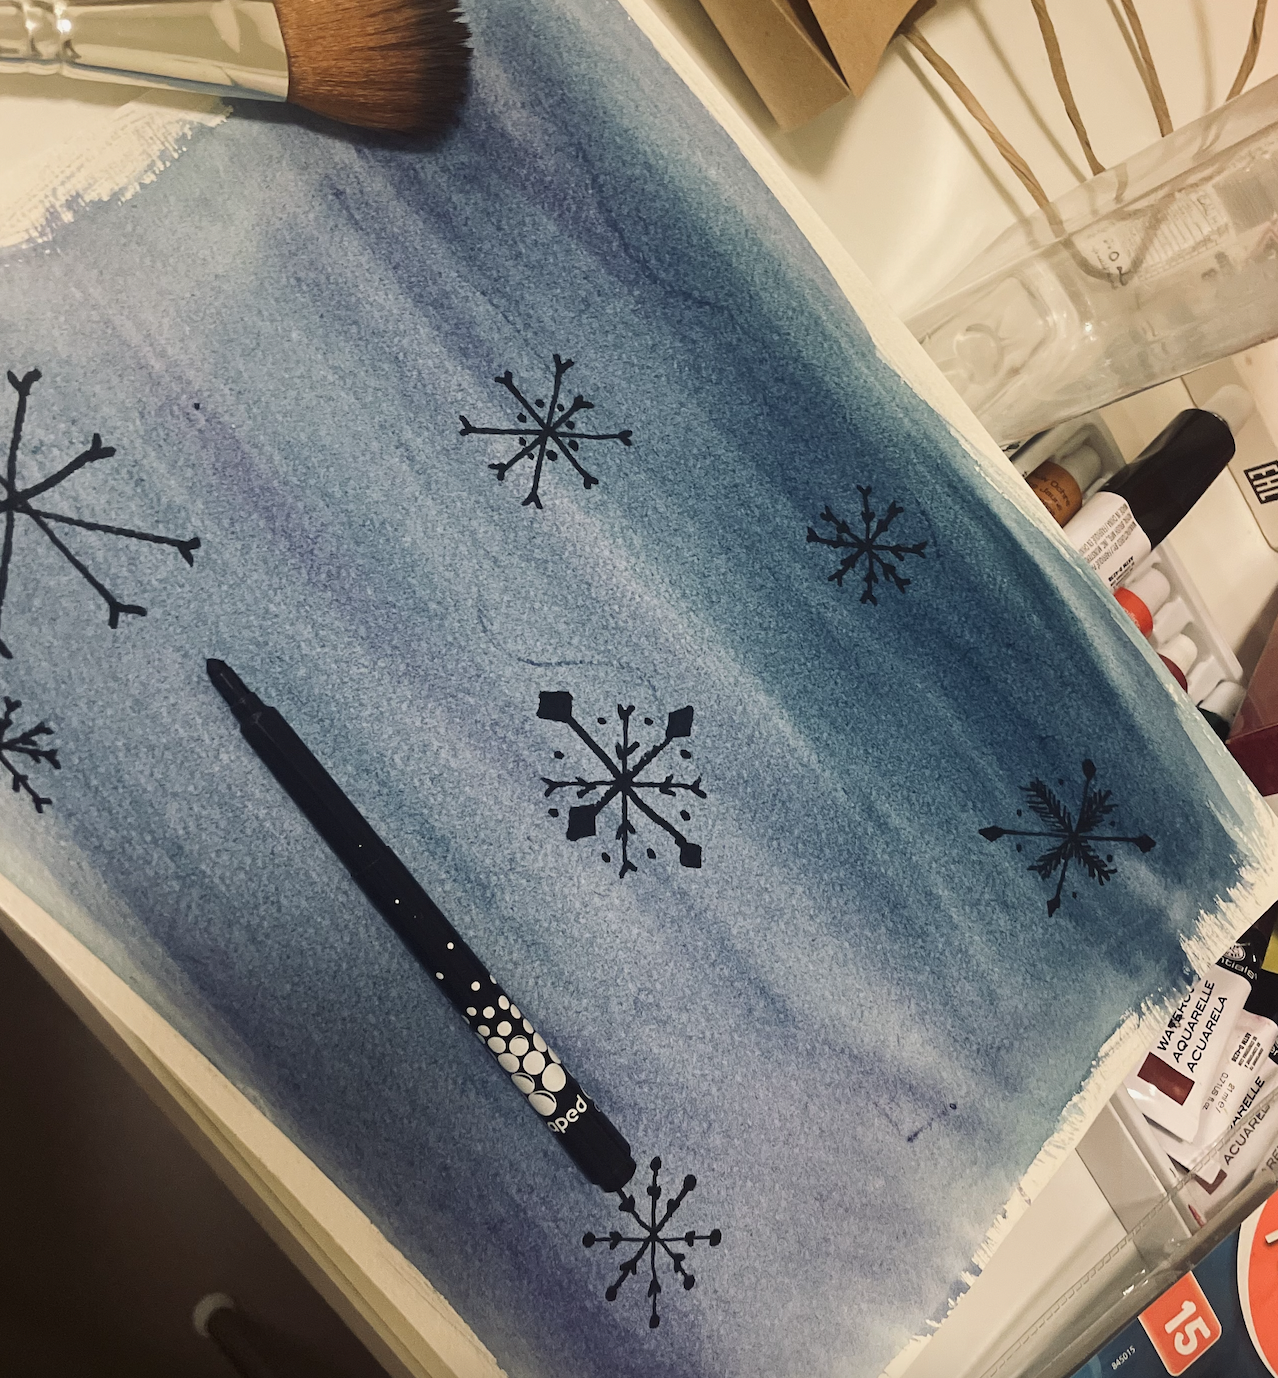
Inspo:

Implementation
The implementation process involves the following steps:
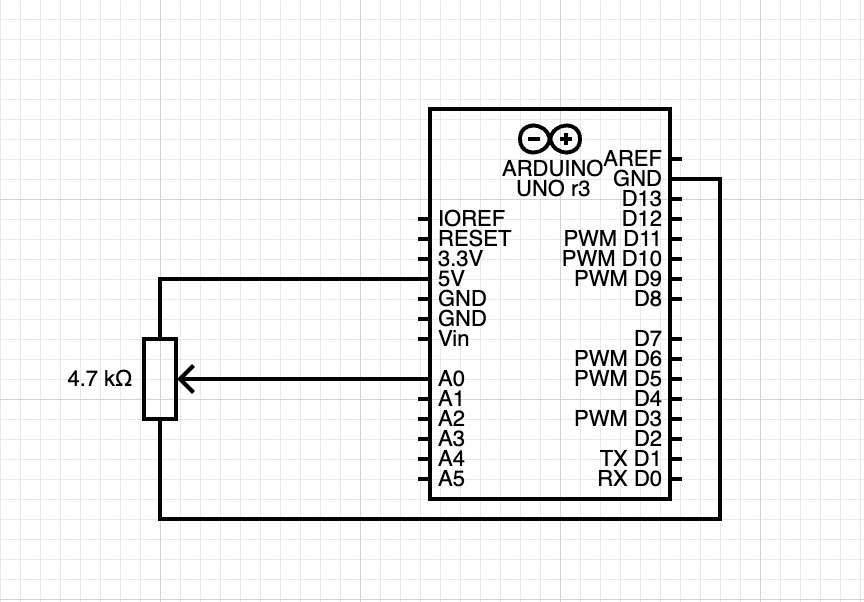
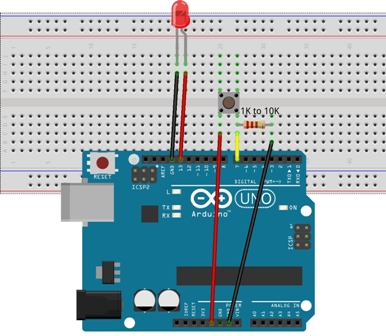
The interaction design involves creating a control interface that allows users to rotate the rectangles in order to create patterns on the window. This interaction will be implemented using a potentiometer, which is connected to an Arduino board.

1. Writing the Arduino code:
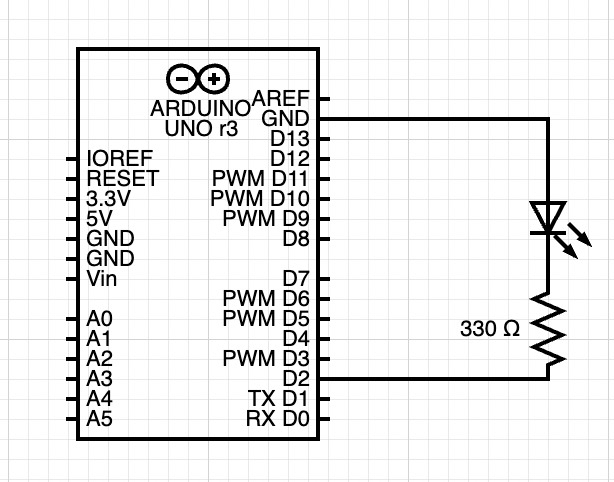
The Arduino code is responsible for reading the data from the potentiometer and sending it to the p5.js code. This code sets up the Arduino to use 5 LEDs, each connected to a different pin. It then sets up a loop to turn on each of the LEDs one by one and wait for 200 milliseconds before turning on the next one. It then turns off each of the LEDs in a similar way but with a longer wait time of 300 milliseconds. Finally, it reads an analog value from pin A0, maps it between 0 and 255, and sends it over a serial port.
Final Arduino code:

int LED1 = 13;
int LED2 = 12;
int LED3 = 11;
int LED4 = 10;
int LED5 = 9;

// Arduino Code
void setup() {
Serial.begin(9600);
pinMode(LED1, OUTPUT);
pinMode(LED2, OUTPUT);
pinMode(LED3, OUTPUT);
pinMode(LED4, OUTPUT);
pinMode(LED5, OUTPUT);
}
void loop() {
digitalWrite(LED1, HIGH); // turn on LED1
delay(200); // wait for 200ms
digitalWrite(LED3, HIGH); // turn on LED2
delay(200); // wait for 200ms
digitalWrite(LED2, HIGH); // turn on LED3
delay(200); // wait for 200ms
digitalWrite(LED5, HIGH); // turn on LED3
delay(200);
digitalWrite(LED4, HIGH); // turn on LED3
delay(200);

delay(200);
digitalWrite(LED1, LOW); // turn off LED1
delay(300); // wait for 300ms
digitalWrite(LED3, LOW); // turn off LED2
delay(300); // wait for 300ms
digitalWrite(LED2, LOW); // turn off LED3
delay(300);
digitalWrite(LED5, LOW); // turn off LED3
delay(300);
digitalWrite(LED4, LOW); // turn off LED3
delay(300);
int analogValue = analogRead(A0);
byte byteToSend = map (analogValue, 0, 1023, 0, 255);
Serial.write(byteToSend);
delay(50);
}

2. Writing the p5.js code:
The p5.js code is responsible for drawing the rectangles and rotating them in response to the data received from the Arduino board. Moreover, P5js code included background which had a snowflakes behind the pattern. This code sets up a program that displays a colorful background with snowflakes falling in the background. The pattern is made up of different rectangles with randomly selected colors from a list of colors. The snowflakes are made up of ellipses that move down the screen, with gravity affecting their speed(0, so the overall image is not too messy). To control the angle of rotation, a serial port is used to read real-time data. The size of the snowflakes and the number of layers in which they fall is also configurable.
Final Version of p5js:

3. Communication between Arduino and p5.js:
The communication between the Arduino board and the p5.js code is done via serial communication. The Arduino code sends the data from the potentiometer to the p5.js code, which then uses the data to rotate the rectangles. I also used p5.serial control app, since other methods didn’t really work for me.
Additional:
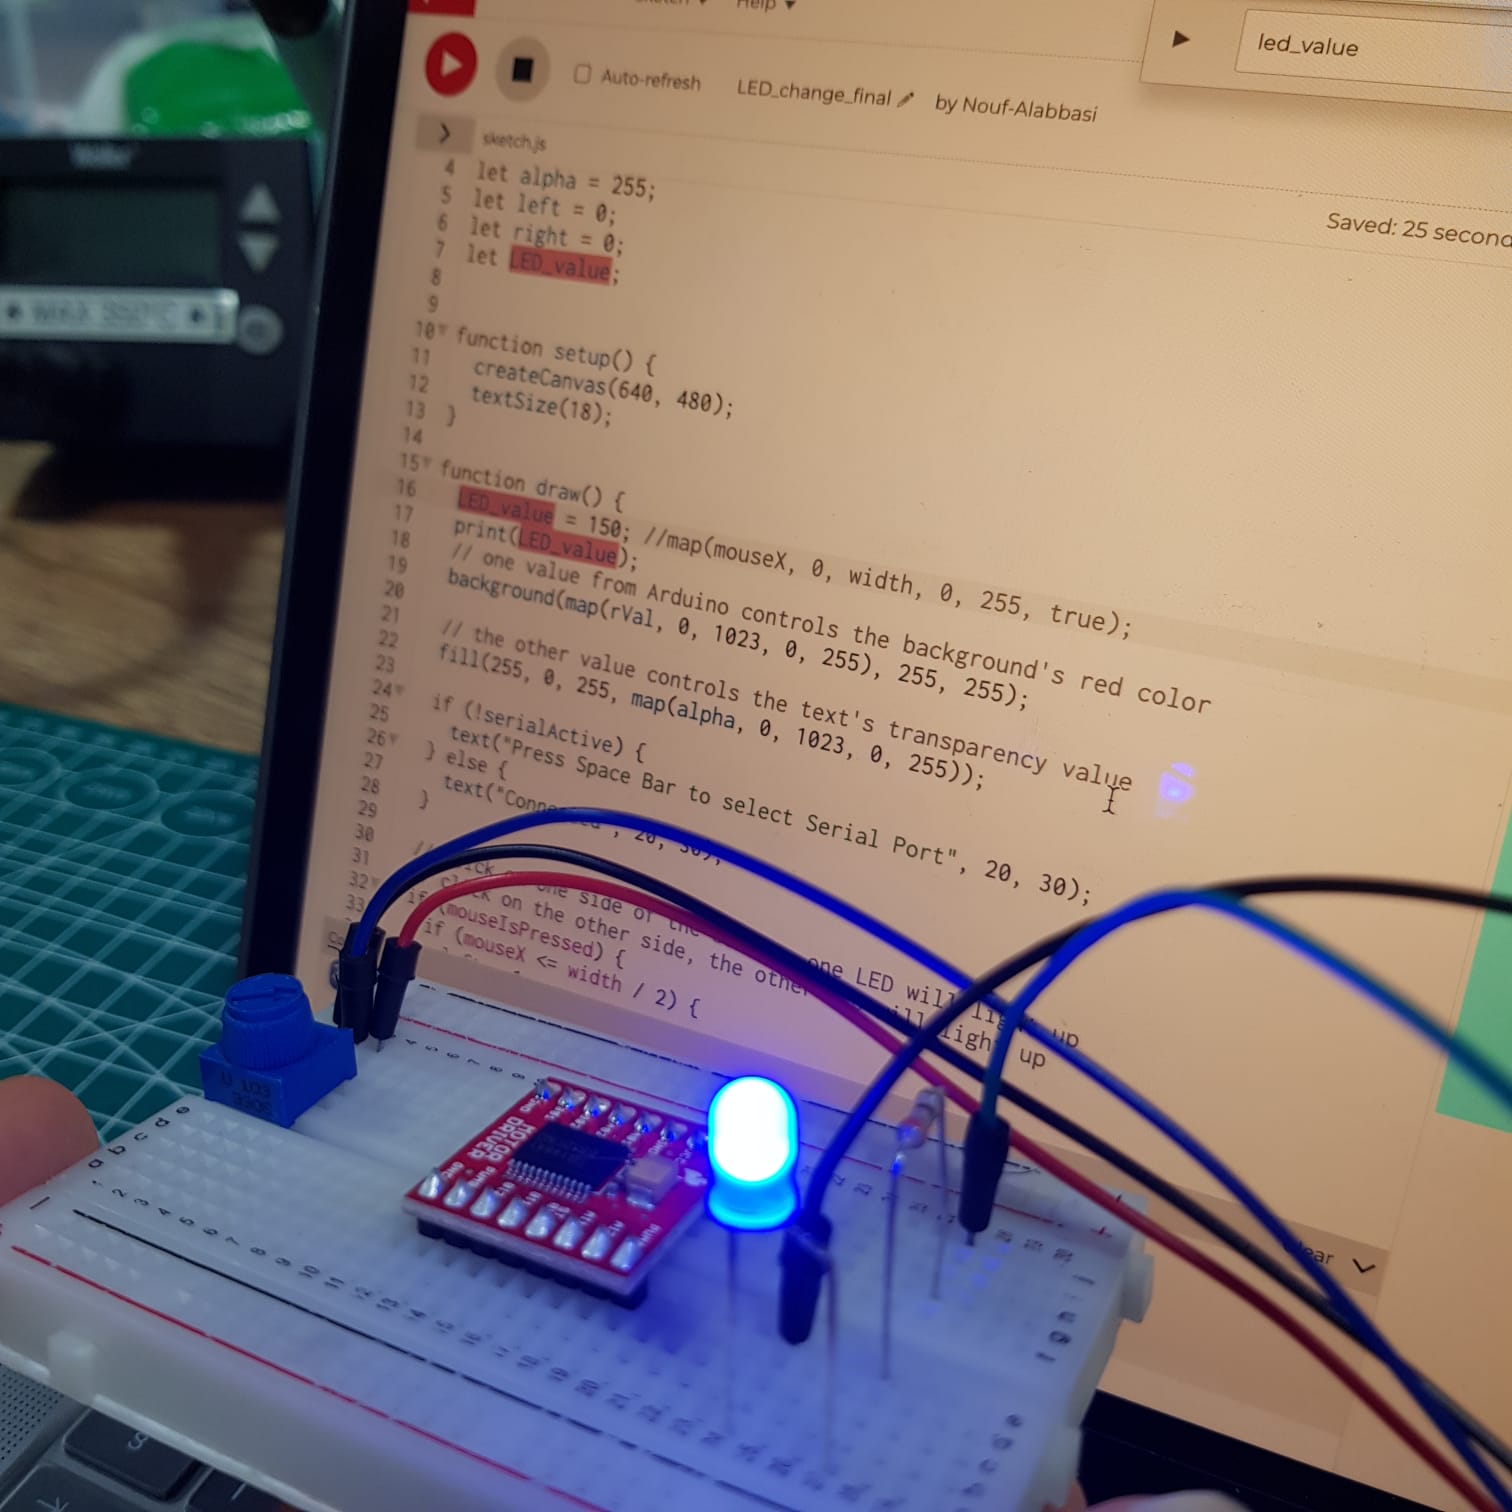
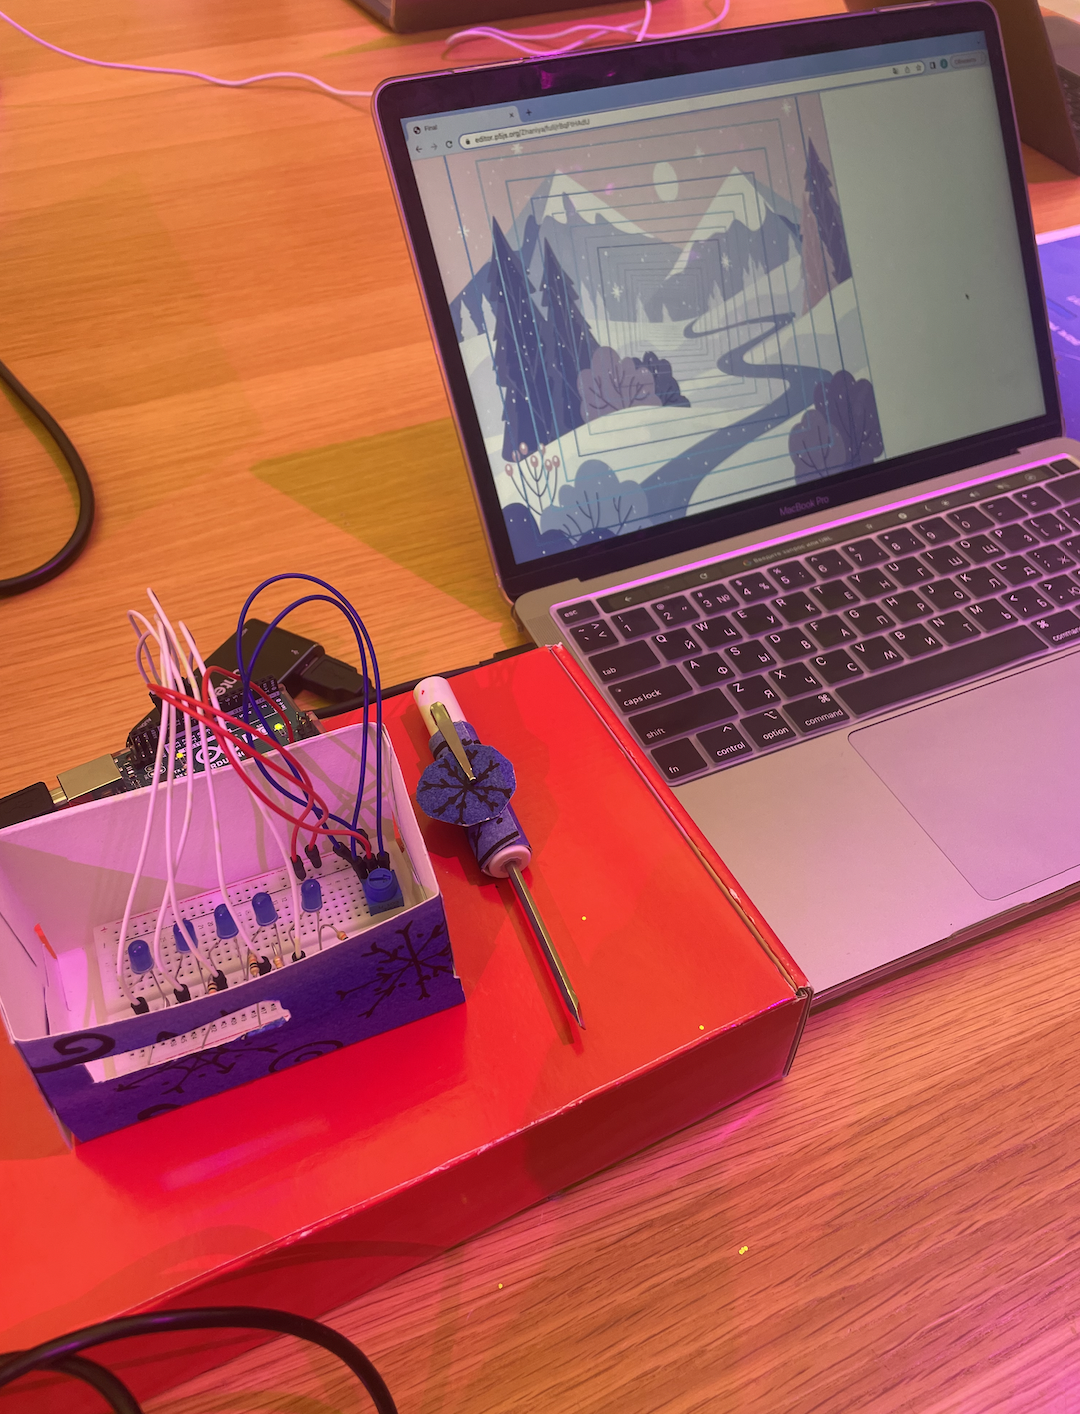
I decided to create little box and the “wand” for the best experience of the user.Moreover I’ve added LED to my board which created sparkling effect in a little house(box).

Once all of the steps are complete, the user will be able to rotate the rectangles to create their own patterns on the window and recreate the magic of Ayaz ata.
Here are the materials that I found useful:
https://editor.p5js.org/shfitz/sketches/n42x2dg8R – rotation of the rectangle
inspo
https://makeabilitylab.github.io/physcomp/communication/p5js-paint-io.html
https://www.youtube.com/watch?v=jsXLMm-FnSY

Reflection
I am happy overall with my experience of creating the interactive aspect of my project. It is a fun way to bring the childhood fairytale to life and interact with it. I think it is a creative way to bring the story to life. I run into a lot of problems, but by trial and error I managed to create my idea.
For future improvement, I think I could add more features to create more complex patterns. Additionally, I could add a timer or a score system to make the game more fun. Moreover, I could work on creating full game, with more elements like joystick for example. Future improvements could include refining the user interface to make it more intuitive and easier to use, as well as adding additional user controls to allow for more varied patterns. Additionally, an option to save or export the patterns could be added, so users can share their final creations with others.

Final Project: progress update

Concept
Since last time I was not completely clear on the idea, I continued brainstorming. As a result, I came up with an idea that combines everything I had planned: a mini game with a winter (Christmas/New Year) theme and related to drawing. I will create a mini-game based on a fairy tale I was told as a child. I was told that at night in winter, Ayaz ata(Santa) and his magical assistants painted on the windows in the morning to delight children. Of course, these “patterns” on the windows do not appear by themselves, but when the weather is very cold, the windows freeze and there is a miracle of nature. To recreate this idea, I will use the potentiometer as a basis for random and free drawing. Through the potentiometer, the user will be able to control the step-size and feel themselves as a character of my childhood fairytale.

Here are the photos I was inspired by:
Frost on the window photo
Also, using p5js I will create a nice background which will include snow outside and snowflakes falling on the ground. I will add a window to my image and try to make something similar to this illustration.
Winter cozy window

I want my idea to be an interactive mini game where the user can draw his pattern and then save it. Inspiration: https://vividfax.itch.io/ceramic-flux
This game is about ceramic flux, where the user can draw anything on flux, then fire and be done with that. I like idea of adding a little bit more of interactivity.
Progress:
So far I have all basic things settled, everything works individually and needs to be put together.
* I made a base for my background:

To do this, I used my knowledge from past assignments about generative art and also briefly skimmed through TheCodingTrain youtube channel resources.
* Video video test
Arduino code:

void setup() {
// put your setup code here, to run once:
Serial.begin(9600);
}
void loop() {
// put your main code here, to run repeatedly:
int potentiometer = analogRead(A0);
int mappedPot = map(potentiometer, 0, 1023, 0, 30);
Serial.write(mappedPot);
delay(1);
}

P5:
The variable inData is used to manage the intervals in this code.The serial.on(“data”, serialEvent) line of code means that when there is new data sent through the serial connection, the serialEvent() function will be called. Inside this function, we update the inData variable to read the signal from the Arduino board. As the input type is a string, it needs to be changed to a number with inData = Number(serial.read()).

Next?
-develop more, connect all parts
-add some interesting things with LEDs for creativity
-play with bg in p5js

Final Project Concept

Ideas:
I brainstormed for a while on what I could create using both arduino and p5js. My first idea was to add some changes to my game that I created for the midterm project. I wanted to control the movement of the player in the game with sensors and add some extra features controlled with the help of the arduino kit. The second idea was to draw using a joystick. I was inspired by this video: https://www.youtube.com/watch?v=jnZWHbsNSUk
Since I really like the idea of drawing with the interaction of P5js and Arduino, I plan to do something connected with sketching. Also, I want my project to have a winter atmosphere and the concept to be related to the upcoming holidays. For instance : https://markerplay.itch.io/yolka
To make my project more entertaining , I plan to make something like a game.The final version should include:
* Start/Finish Page
* Interactive background(probably will use experience from work with generative artworks in p5js)
* Sound
* Control from arduino with joystick/potentiometer/sensor/switch

Nouf&Zhaniya exercises

Task 1

For the first task, we used potentiometer on our circuit and controlled the X_pos of an ellipse in p5js. We also set up a port choosing thing, so the code requested port connection every time we start the program.
Link to our full code:
https://editor.p5js.org/Zhaniya/full/ft2iMvilF


Circuit:

result:

Task 2

We used aaron sherwood’s code code which sends and receive data to the arduino. We tried to move those two lines of code

let sendToArduino = LED_value + "\n";
writeSerial(sendToArduino);

In the draw function instead of the readSerial() function, but that resulted in a errors with the writeSerial function. We also tried to remove the code in the readSerial function that waits for input from the arduino before sending anything while keeping the two lines of code where it originally is, but that wasn’t working either. We ended up using the original code, but we sent random values to p5js from the arduino and sending the LED brightness value (which is based on where the mouse is horizontally) to the arduino.

LED_value = map(mouseX, 0, width, 0, 255, true);
print(LED_value);

Here is a link to the code: https://editor.p5js.org/Nouf-Alabbasi/sketches/gJtQGnh0w

circuit:

the video below shows the LED reacting to the mouse movement (the first video shows the LED and the second Shows the mouse moving)


Task 3

For the third exercise we followed similar to exercise 2 steps to complete it. We used with gravity wind example with bouncing ball (https://editor.p5js.org/aaronsherwood/sketches/I7iQrNCull) to send the data to the Arduino. After that, we initialized LED_value and set up serial connection.

Code:
https://editor.p5js.org/Nouf-Alabbasi/sketches/Eq7USk-wJ


circuit:

Problems that we faced:

Some of the problems we faced were simply fixed by uploading the code to the arduino microcontroller but others were a little more challenging to fix. One thing that was not going the way we expected was the LED not gradually changing from one value to another. It seemed to jump from on to off which is not what we were going for.
Here is the p5js code:

// define the LED brightness as the mouse movement
LED_value = map(mouseX, 0, width, 0, 255, true);
print(LED_value);
…
let sendToArduino = LED_value + "\n";
writeSerial(sendToArduino);

And here is the Arduino code:

…
int LED_val = Serial.parseInt();
if (Serial.read() == '\n') {
analogWrite(2, LED_val);
…

One hypothesis is perhaps parseInt doesn’t handle decimals in numbers, so we expect that it might’ve stopped at the first part of the decimal before the decimal. The numbers should still be usable though, so this doesn’t fully explain why the LED wasn’t being controlled in the way we wanted. (After searching online we found that using parseFloat would be a better fit for our code.

Piano by Hessa&Zhaniya

For this week’s assignment, we wanted to design a mini piano using switch buttons. Our goal was to make each button have a different note so that when users play the piano they can recreate the sound from the “Happy Birthday” song. We also added a potentiometer to our circuit so that we could regulate the volume of the sound.

Image of notes:

To build the circuit we added switch buttons and resistors and connected the wires to the pins. We downloaded pitches from examples→toneKeyboard, each switch button had its own musical note from the song(C5, B4, A4, G4, D5). We struggled a bit with adding potentiometer and piezo buzzer to our circuit with piano buttons, however we managed to solve the problems and understand the process.

At the beginning we initialized the piano buttons, buzzer and potentiometer. Next, we went on to add the code for the buzzer and potentiometer. We wrote code to read the input on the analog pin and turn the piezo buzzer on and off. Also, we set a tone for each button and activated it. To improve this work, next time we can add more buttons and play new songs:)

Final code:
Link to GitHub

Final result:
IMG_6078

analog input & output

For this assignment I had to get info from at least one analog and one digital sensor using two LEDs. There were different attempts to do this, as well as various outcomes. I experimented with using some methods to connect the LEDs to the sensor as well as the LEDs to the switch button.

A few resources I have found useful:
https://www.youtube.com/watch?v=4fN1aJMH9mM
https://www.youtube.com/watch?v=0p1B74TosTs

The challenge for me was to connect the LEDs to the sensor when I pressed the button and also if I waved over the sensor, it would react on actions. I managed to do it separately for the button and the sensor.

Video:
IMG_5987

Code:


int LDR = 0;
void setup() {
pinMode(12, OUTPUT);
pinMode(13, OUTPUT);
pinMode(A0, INPUT);
Serial.begin(9600);
}
void loop() {
LDR = analogRead(A0);
Serial.println(LDR);
if(LDR < 512) { digitalWrite(12, 1); digitalWrite(13, 1); } else { digitalWrite(12, 0); digitalWrite(13, 0); } }

However, I could not connect the sensor and the button because the light sensor stopped working when I connected the button. I tried redoing my circuit completely, but it was not quite working. It seemed that the button and the light sensor worked together when I could turn the LEDs on with a movement over the sensor and turn them off with the button, but as it turned out later, this was a glitch in the program, not the final result.
In reflection of this, next time I would like to work and understand the code better, so that I could fix the issue I had in this task.

Switch

To work on his assignment I had a few ideas on how to creatively replace the switch button, and my ideas varied in the process of creation. To start with, I built a simple circuit with LED and Switch button, ran it and tested the program.

Then I removed the button and began experimenting with wires. While I have my free time I do some embroidery, and often in that process I need to check the back of the needlework. I always lack the additional light from underneath to see mistakes with needles or the mess that happens sometimes. In order to implement the idea with the unusual switch, I sewed ( no harm done to the cords) the ends of the wires to the needlework so that when folded, they would touch each other. In the beginning I did it with mini aluminum foil balls, but then I found it inconvenient and removed them. The result is very simple, but a nice start.

Final Result:
switch video
I would make the contact of both ends of the wires more precise in the future, because sometimes when I moved my hand accidentally and the light turned off.

week 4 work

To create this work, I was inspired by the concept of winter. In fact, some time before I saw examples of different interactive backgrounds and really wanted to try to do something like that. After that, I decided to add the lyrics to Frank Sinatra’s “Let it snow”.

Link:

I uploaded a CSV file and opened it with the loadStrings function. Then, I set it so that when mouseClicked, the text from the file appears on the canvas. After that, I started working on the background, which turned out to be interesting and very wintery 🙂

Link:

Here are some tutorials that helped me learn more about working with CSV files:
https://www.youtube.com/watch?v=hokTcLVtZs8
https://www.youtube.com/watch?v=QFVzJsyKngQ

And of course, it was not without advice from The Coding Train channel.

Unfortunately, I could not combine these works into one due to time constraints. But in the future, I would like to make them all in the same picture and make the end result more interesting, like changing the font and style of the letters. Also, I would add additional elements to this work.

Midterm documentation

The game creation process starts with a simple concept or idea. Usually this is an original concept created within the company, but it happens that the idea is taken from outside. For my midterm project, I was inspired by different “Catching games”.
For example: http://learningprocessing.com/examples/chp10/example-10-10-rain-catcher-game

This is both a simple and very complex game that captures the user. I chose this game because I add a lot of my own stuff along the way and it’s very easy to interpret my ideas into this project.

At the moment I am planning to do something like a game where the player will collect different flowers and make his own bouquet. I will choose a suitable character (maybe there will be several). Also, I plan to choose flowers, approximately it will be lilacs.

At the moment, I have done research on creating the base of the game, the so-called “skeleton”. Next, I need to completely decorate the game, add win and lose screens, add pictures, and adjust the colors. Also, think about what conditions the game will have.

Helpful links:

https://happycoding.io/tutorials/p5js/arrays– Arrays and more
https://creative-coding.decontextualize.com/media/
https://www.youtube.com/watch?v=SpfJUlSusj0
https://dev.to/lukegarrigan/top-5-best-games-to-code-as-a-beginner-9n – inspo
https://itch.io/games/made-with-p5js – inspo(complex but fascinating projects)
https://creative-coding.decontextualize.com/making-games-with-p5-play/ (Collision callbacks and other interesting things with sprites)
https://www.youtube.com/watch?v=TgHhEzKlLb4 (basic functions-need )