The part I struggled the most was finding a way of connecting bracelets to the breadboard and for them to react once they touched each other in response to the code in the digitalRead. After a long time of trial and error, I managed to make the LED light respond to the touch between the bracelets by inserting the jumper wires where the button would have been as we learned in class.
Final product
For the final result, every time the bracelets touched, by pressing my wrists together, the LED light would turn off. And when they were separated, the light would turn on.
Arduino code
void setup() {
  // put your setup code here, to run once:
pinMode(13,OUTPUT);
pinMode(A2,INPUT_PULLUP);

}

void loop() {
  int buttonState = digitalRead(A2);

  if(buttonState == LOW){         // button pressed
    digitalWrite(13, HIGH);
  } else {
    digitalWrite(13, LOW);
  }
}
One of the greatest challenges I faced happened while I tried to find the way of arranging the jumper wires and the wires connected to the copper bracelets so they would react on the LED light once they touched.
For my next project, I would like to make something more creative, and add some more responses such as making the lights blink or react to the movement of the wrists too.
What stood out to me in both readings was how they started off with what seemed like simple, everyday stories, but ended up conveying something much deeper. It reminded me of those stories given in TedTalks or podcasts that sound ordinary at first, until the speaker reveals the real lesson behind it.
For example, “Her Code Got Humans on the Moon” wasn’t just about the perseverance of Margaret Hamilton, but about the process that led her to help with the success of the Apollo’s mission; how she build a code to anticipate human error to prevent what could have been a major accident. That shifted how I think about programming, it’s not just about building that works, but planning for when things go south.
In Norman’s “Emotion & Design: Attractive Things Work better”, the example of the mugs seemed simple too, but it lead a much more important point too: just how function and aesthetics aren’t separate, Affect and cognition work together rather than against each other when it comes to processing information in a system, despite their difference functions and parameters.
Overall, both texts made me more aware that behind things we experience everyday, whether it is when we are programming or designing something to enhance its function or reduce “irrelevancies”, there are consequential decisions, intentions, and values that beyond the surface of what we see.
Floral Frenzy is an original design experience which seeks to tap on the emotional responses of the users. Unlike other video games, there is no “winning” or “losing”. Instead, this project relies on the exploration and curiosity of the individual, as well as offering a visually pleasing experience.
The initial ideas consisted of creating a background with multiple static elements, such as mountains, trees, and bushes, and only a few interactive objects that would contain multiple functions. However, after some trial and error, this plan shifted and I decided to add more objects with interactivity in order to balance the weight of static vs interactive.
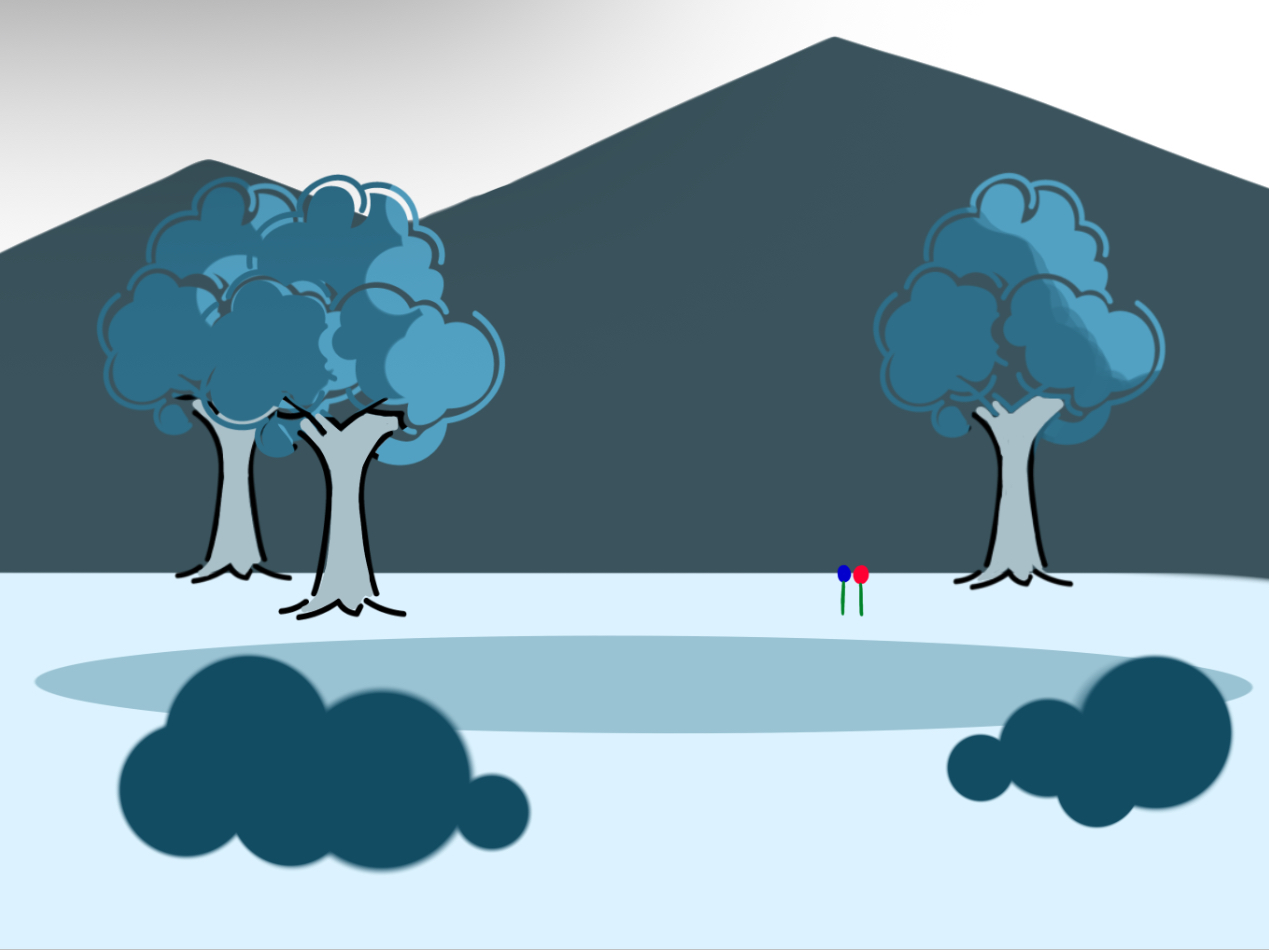
This was the initial sketch for the project, mainly focused on the aesthetics and potential elements to include in the final draft.
How does the project work
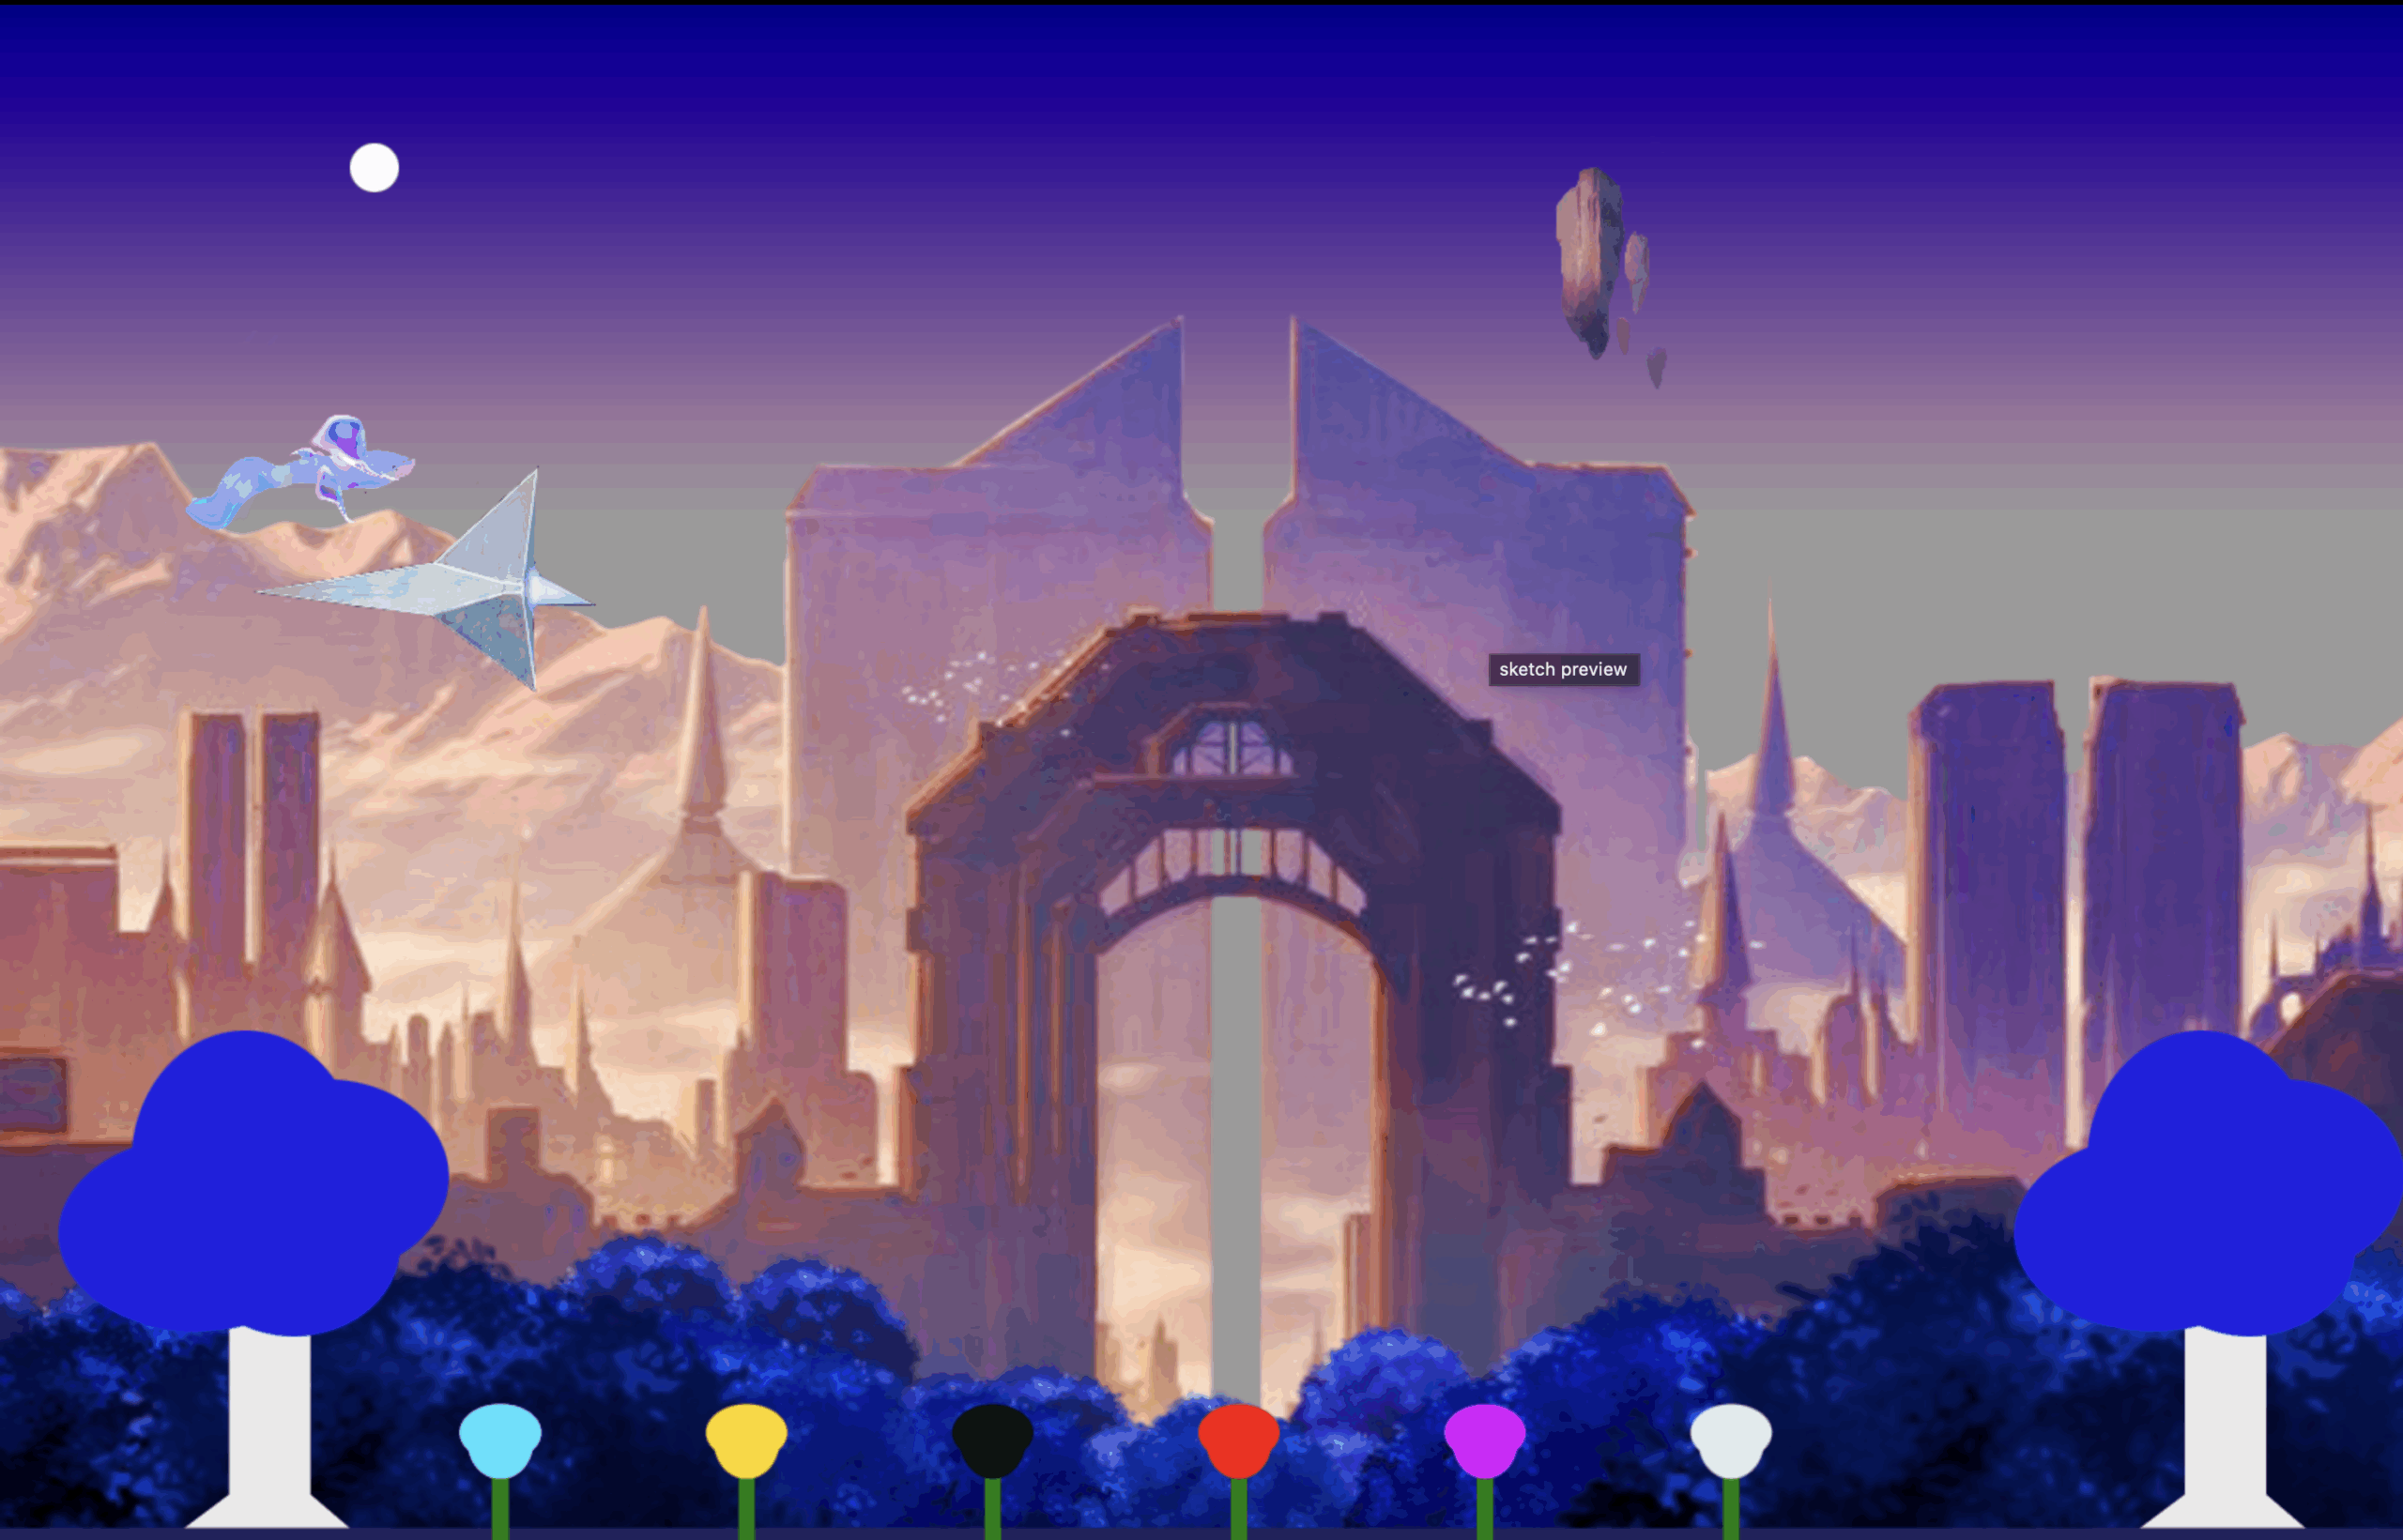
From the spaceships, floating stones, and blue trees to the massive fantasy-like structure, this project consists of a mystical, otherworldly plane, drawing the user’s attention from one point to another. Nonetheless, the roses are meant to be the main focus of interactivity, as each of these contain a different reaction, such as releasing a symphony, displaying text, or displaying an unexpected result. Nonetheless, in order to produce the illusion of failure and success, two of the roses are programmed to either poison or compliment the user.
Overall the end result is a game-like set of visuals in which the user is given the instructions to interact with the object, these being the roses, and press a single key in order to delve into the real experience filled with animations in the background, vibrant colors, elements of a variety of sizes, and the interactive objects. Two of these objects provide different outcomes which then take the user back to the homepage.
Although it appears to be a simple, clear function and codes at first glance, it took me many hours to decipher how to make the music, text, change of color, and other reactions to activate whenever the user clicked on them. Nevertheless, once it proved to be operational, I was filled with joy and I was proud to have completed it successfully, especially since this is the main interactive attraction of the project.
function mousePressed() {
  // helpful debug print
  print('mousePressed at', mouseX, mouseY, 'gameState:', gameState);

  // Only win/lose while the game is playing
  if (gameState === "playing") {
    if (winningRose.contains(mouseX, mouseY)) {
      print("clicked winningRose");
      wonGame = true;
      gameState = "end";
      return; // stop further handling this click
    }

    if (losingRose.contains(mouseX, mouseY)) {
      print("clicked losingRose");
      wonGame = false;
      gameState = "end";
      return;
    }
  }

  // Other clickable objects (always checked)
  if (flower.contains(mouseX, mouseY)) {
    print("clicked flower");
    song.play();
  }

  if (messageRose.contains(mouseX, mouseY)) {
    print("clicked messageRose");
    displayText = !displayText;
  }
}
Another code I am very proud of is the one that allows my cut image of a rock float in the background. At the start, I had to introduce all the variables such as the image, the preload function, fixing the size, speed at which it moved, tracking the time, among other things. While this wasn’t the most difficult codes to understand, it took me a while to find a way to transfer them from a clean, almost empty sketch to one filled with more than one hundred codes. Not to mention, once I managed to implement this code, I found myself struggling to make the music in one of my objects play again. Nevertheless, it was worth the effort as I like how this simple animation adds a new layer of life, along the moving spaceship and fantastical creature, compared to the rest of the composition.
let rockX, rockY; // Position of background rock
let amplitude = 20; // How far up and down the rock moves
let speed = 0.04; // How fast the rock bobs
let time = 0; // A variable to track time for the sine wave
let rockImage; // Image of the rock
// --- ROCK ANIMATION (only in game) ---
let yOffset = sin(time) * amplitude;
let currentY = rockY + yOffset;
image(rockImage, rockX, currentY, 160, 160);
time += speed;
Areas for improvement and obstacles along the way
Some of the major obstacles I ran into was the integration of interactivity to the sketch. While I managed to build the necessary functions, classes, and parameters to apply interactivity for the sounds, text, and other responses, embedding these into my designed objects proved to be far more challenging than I expected. Not only did these responses have to activate as a result of the interaction of the user, but they also had to be contained within the “game-like” structure of the sketch. Furthermore, fixing the position of these objects, along the non-responsive ones, also forced me to explore multiple x and y positions so that the objects, images, and all additional elements could adapt to the windowWidth and windowHeight. Finally, after solving the issue of merging interactivity with the objects, finding a way to assemble Game states and the transitions between start, playing, and end states turned out to be a difficult challenge. Given that my project was specifically designed to be explored and simply be “visually pleasing”, integrating a game-like structure meant finding an end result that would match my project’s story and tone, and remain original. Despite all the struggling, after many hours of exploring and researching the p5 references, libraries, and works done by students in the past, I managed to overcome all these obstacles and offer this final product which I am genuinely happy about.
Some areas of improvement I would like to work on my next project would be the use of interactivity. Although I did include interactive objects, these are not as impressive as I initially thought. I would like to challenge myself to create a more interactive and engaging element such as the games designed by my peers, not only for my assignments but to also implement in my future non-academic works. Furthermore, I would like to learn how to make my codes look “cleaner” and make functions and classes in a way that reduces my stress when I need to find a specific code.
References:
Images: Rocks, Spaceship, and Fantasy structure were downloaded from Pinterest. The fantasy creature is an original design
Used ChatGTP to clean my codes, (also to store and recover them since I suffered from constant glitches that deleted my information), and to find errors in my work whenever a specific element was not showing or it wasn’t processing its intended objective.
Vision for humans can vary. Some might not be able to distinguish colors properly. Others may need glasses to focus on little details, or see what is slightly farther away from them. However, one thing remains consistent, what humans see is not what they choose to see, but what is in front of them. They can’t see a pool if there is not a pool in front of them. If there is a house, they will see a house. However, a human’s vision will also vary on different factors: the brightness, the colors arounds them, the state of an individual’s eyes, and more. On the other hand, computer vision relies mostly on algorithms, pattern and feature recognition, etc. However, all of these are process, that, as described in the text, if they are low-level computer vision, they won’t even be able to resister a person or object in a video, making it flawed and susceptible to making crucial mistakes if not programmed properly. Nonetheless, this arguably shares a similar trait with humans when their vision is not 20/20, hinting that computer and human vision are both prone to having flaws.
One useful technique, aside from the others mentioned in the reading, such as keeping track of environmental conditions, patterns of pixels, and frame differencing or background subtraction, I found interesting is the example of the use of a “telecentric” lens to improve the performance of certain kinds of shape-based or size-based object recognition algorithms. I have always known that every algorithm in any computer system has a distinct role. However reading about how this lens has such a meticulous and specific task in detail has taught me the importance of each algorithm in the larger scale of aiming to achieve a successful, computer vision.
Personally, a computer’s vision capacity for tracking and surveillance can be quite effective in the use of interactive art, especially when it comes to immersive experiences. Its ability to “modify physical conditions” and capturing things such as movement or gestures can be useful to create responses to human actions which can be explore in immersive installations. Hence, like many immersive experiences, these responsive systems would allow participants to enhance the value and experience, conveying a more complex and meaningful kind of interactive artwork.
For this project, I wanted to go for something mystical yet down to earth. This is why I wanted to integrate “ordinary” objects such as trees, flowers, and combine them with magical designs, such as the fantasy-like structures on the background, and blue hues.
Although I am still in the process of deciding what the interaction will be for the viewers to engage with this project, I have narrowed my main ideas to two.
The roses will display different colors and musical tracks whenever the viewer clicks on them. For example, one rose will show a different color after the viewer clicks on it. Another will change music every time it is clicked on it. And the third one might give an inspirational message after every click. This will allow an entertaining and colorful interaction to match the tone of the sketch.
Another option, while less entertaining, will focus on the visual aesthetics, hence, the interaction will rely on a function that resembles a magnifying glass so viewers can take a closer look at all the objects displayed, and depending on where in the canvas they move the mouse, they will be able to listen to a different musical track.
Most Frightening/Complex Part
Although I haven’t written a code or program that can detect, prevent, or avoid specific problems or glitches, I one code I wrote to prevent the image in my canvas from having any issues is the preload function. This should allow the code to load properly before displaying the image.
// Edited Image PNG
let palace;
function preload(){
   palace = loadImage('palace.PNG');
}
Another function I struggled to make but eventually led to a success was the custom shape, which initially was made in another sketch to define the shape of the tree. However, after I realized that I would need to move this shape in my final sketch, I introduced the translate code, along function “drawCustomShape” in order to execute the function for the custom shape and translate it in the canvas to my desired position.
function draw() {
  background(51);


 drawCustomShape(450, 230);
  drawCustomShape(-50, 230);


}


// function of custom shape (tree) + translation of position at x and y

function drawCustomShape(x, y) {
  push();

  translate(x, y);

  noStroke();
  fill("rgb(235,233,233)");
  beginShape();

  vertex(140, 95);
  vertex(140, 250);

  vertex(140, 250);
  vertex(100, 280);
  vertex(225, 280);
  vertex(225, 280);

  vertex(190, 250);

  vertex(190, 95);
  endShape(CLOSE);

  fill("rgb(32,32,228)");
  ellipse(120, 90, 170, 120);
  ellipse(180, 98, 130, 110);
  ellipse(150, 45, 140, 160);
  ellipse(200, 55, 150, 120);

  pop();
  // end of code for custom shape
}
Embedded sketch
Reflection and ideas for future work or improvements
My next steps are to find a way to display text to introduce the context and instructions for the interaction. I also plan to decide what said interaction will be based on the feedback and begin to write the codes necessary in a separate sketch before applying it to the final one. In the meantime, I will also search for the music pieces I will be using and edit them accordingly.
Furthermore, I need to plan how to include the option to start a new session without restarting the sketch. Any kind of feedback will be highly appreciated.
What’s something that drives you crazy and how could it be improved?
One aspect of mobile design that has always bothered me is the design of exit buttons on ads. Often the (x) icon is so small that even when I tap directly, I am redirected to the App Store instead. This forces me to switch back and forth between apps until I can finally close the ad. This issue becomes even more frustrating when it occurs repeatedly on the same app, making the user experience distasteful. Evidently, one of the solutions to this problem is simply increasing the size of the “x” button. While I understand the choice of design might be on purpose as part of a strategy to encourage users to download the advertised app once they are looking at the App Store, personally this makes the advertised product or app less appealing.
How can you apply some of the author’s principles of design to interactive media?
Throughout the text, Don Norman emphasizes a few arguments that can be applied to any kind of design. One is particularly significant, I believe, that can also be used as part of the brainstorming that comes before writing a code is trying to imagine how would someone without the experience respond to the work presented. As he effectively describes, there should be a clear communication between the user and the technology in use. For example, if I make an interactive artwork, it should be clear for the user what they are supposed to do to set in motion said interaction. I know that there are displayed images or text resulting from a code and that by clicking on the canvas, some kind of reaction occurs. However, someone who doesn’t have my experience or knowledge on interactive media might not catch on what is happening. Thus, it would be necessary to make instructions for the user to understand how to process, or indicate in some other form what must be done. Norman’s arguments made me realize how often we forget that all our accumulated experiences and knowledge are not shared by anyone, and even if it might seem unnecessary for ourselves, we must find ways to let a designed programs be accessible to a broader audience.
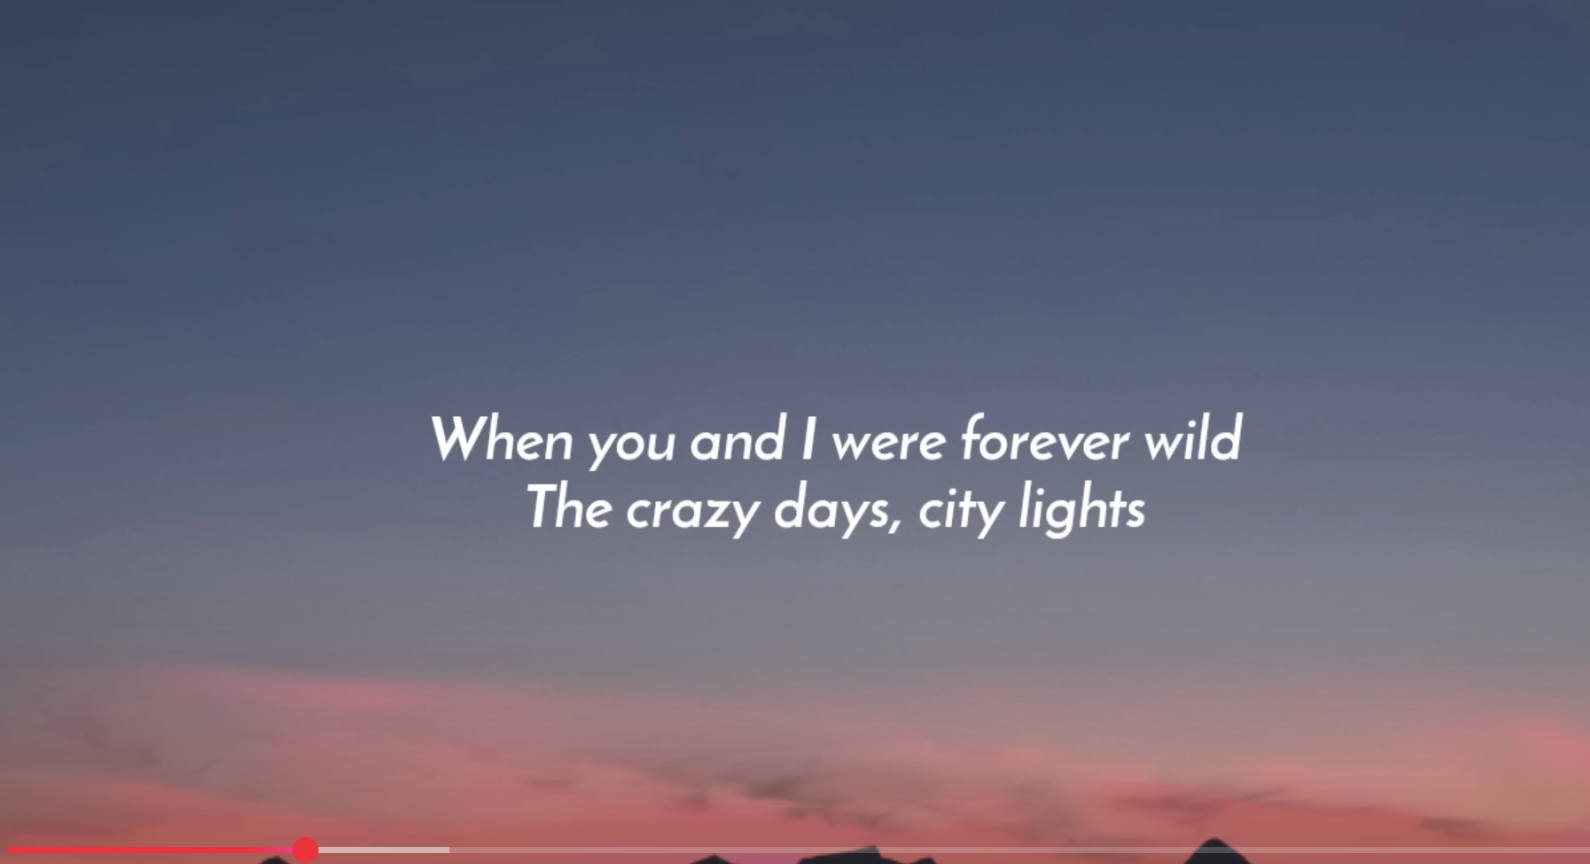
Lana Del Rey – Young And Beautiful (Lyrics) – Youtube
This piece was inspired by the landscapes that are usually used for some songs when a person wants to look at the lyrics, and I thought it would be a nice idea to explore with the generative text output. Although the parameters and functions used are very similar to the ones we learned in class, I tried to make changes to the structure of the text, as well as its position in the canvas, the background, and the color of the text. Overall, the generative text output resulted from a combination of words which I found most “romantic” and appealing, while also integrating a sense of “discomfort” laced within the text.
Highlight code
As previously mentioned, most of the codes are drawn from the ones learned in class. Despite this, my favorite code I incorporated into this project was the use of random text color and the gradient color background. These codes allowed me to 1) set a random change of color of text that adjusts to the random changes of the words for each sentence, and 2) create a gradient color background to resemble a sunset.
// This function is to make the background colors gradient
let c1, c2;


function setup() {
  createCanvas(400,400);
   c1 = color(240, 0, 110); // Red
  c2 = color(240, 120, 0); // yellow
  // setting the function so that the colors are displayed


  // Number of lines (2)
print('The number of lines:' + strings.length);
print(strings);

}


function draw() {
  background(255);


  // mapping the text from excel to the canvas
  for (let y = 0; y < height; y++) {
        let n = map(y, 0, height, 0, 1); // Scale y to a 0-1 range
        let newColor = lerpColor(c1, c2, n); // Interpolate between colors
        stroke(newColor);
        line(0, y, width, y); // Draw a horizontal line
      }

  // random function for text color
    // these are random RGB values
  let r = random(255);
  let g = random(255);
  let b = random(255);
Embedded sketch
Reflection and ideas for future work or improvements
While this project was able to fill the basic requirements for a generative text output, I wish I could have been more creative and explore a different and more interactive way of displaying the text. For future works, I will try to research in advance how to implement interactivity while also taking in consideration the time needed and if the techniques I found are accessible to my level of experience. Nevertheless, I do appreciate the visual aspect of the work, and believe it adjusts to my initial vision of how I wanted the outcome to be.
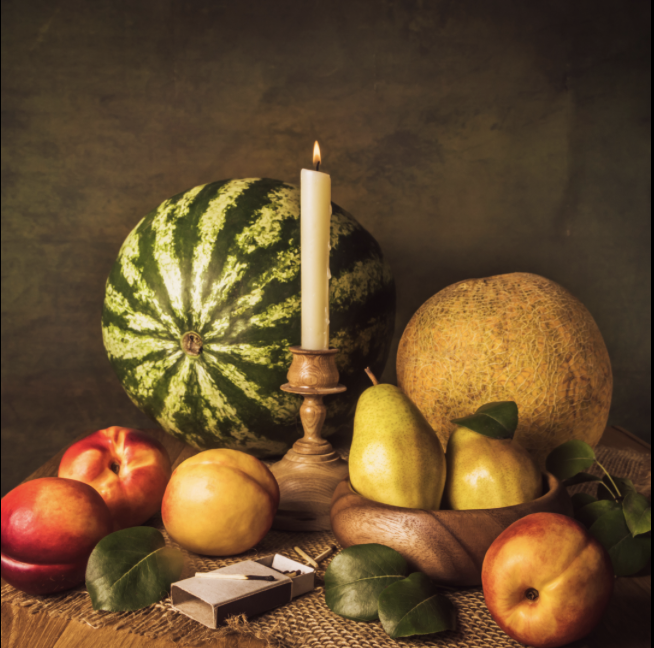
For this artwork, I was actually inspired by the composition of Still-life, a genre of art in which the artist focuses on applying an outstanding level of detail to an arrangement of everyday objects. One of the most popular choices for this genre are the paintings of fruit, which I decided to feature in my work. However, I decided to display these with their most fundamental structure, lacking any of the depth or level of detail found within the Still-life. After this, to exercise the use of the arrays, and object-oriented programming, using as inspiration one of the array functions I found in the section of Array Functions on p.5 j.s tutorials, I decided to create a trail for one of my favorite fruit, the watermelon.
Although the watermelon trail is the most eye-catching, interactive, and unique code in this entire work, the code I am actually most proud of are the ones that make up the functions for my fruit. It was fun to create these functions and later simply add the berry(x coordinate, y coordinate) under the function draw() as well as for the apples, since not only did this process make it easier to make multiple copies, but it was nice to see objects of my own creation as part of the objects as if they were another primitive shape we can use whenever we want.
function apple(x,y){
  fill(200,40,50);
  ellipse(x,y,35,35);
  fill(0);
ellipse(x-1,y-10,10,8);
  //stem
  fill(50,190,40);
  rect(x-3,y-25,4,15);

}

function berry(x,y){
  fill(70,40,190);
  ellipse(x,y,15,15);

}
Embedded sketch
Reflection and ideas for future work or improvements
Although I am happy with the results, I wish I could understand more properly how the function of the trail works so I could make it smoother even if I move the mouse faster. Also, I would like to learn how to make more than one form of interactivity at a time, since I also wanted the rest of the fruit to fall down the canvas while the watermelon remained interactive for the viewers. Despite this, I learned the advantages of creating one’s own functions, how arrays can provide a a¿variety of interactive outcomes, and how all of these elements compliment each other to make the final piece more engaging.
Throughout the text, Chris Crawford emphasizes that interactivity requires three essential components: listening, thinking, and speaking. He illustrates this by presenting multiple examples where these elements are absent, such as reading a book, dancing, or watching a movie. I find this argument compelling, and agree when he highlights that certain situations, subjects, or objects cannot be considered truly interactive. The three conditions and examples highlighted by Crawford also resemble my own experiences in conversation. Usually, a conversation doesn’t really feel like an interaction if both parties aren’t engaged and responding. In fact, if one of the “actors”, as Crawford describes both participants in a conversation, is not thinking, listening, or speaking in response to the dialogue started by the other person, this situation might as well be like the one with an individual reading a book, an inanimate object that in spite of all the knowledge or information it contains, does not reply back.
This perspective becomes even clearer when I connect it to the coding concepts we have studied in class. A function not only interacts with variables and other elements of code to produce a visual animation or design, but each act of writing code itself is a form of interaction. In this case, the interaction arises from thinking and analyzing what is needed to structure the code, determining the requirements for it to function, and then writing it out. The system, in response, processes my input and responds to my actions, whether by successfully executing the program or by pointing out an error.
Although our current application of different technologies might be limited to a certain extent, Crawford’s argument has led me to wonder if there is a way to make non-interactive objects interactive. This draws my attention to the example of the book and makes me want to find a way in which a book can respond to our thoughts and opinions and response with enough intellectual and complexity to regard it as a form of interactivity.
Throughout my artistic journey, I have learned about the many rules of composition and other elements when it comes to creating an artwork, especially in certain genres. However, more and more artists continue to break these rules, leading to the creation of new genres and pieces of profound meaning and reflection. For this reason, what stood out the most to me was the introduction of “randomness” to the coding used for the works displayed, such as in the example of the cells where the use of randomness determined what the position and scale of the clusters would be, breaking the order and rules, but at the same time complimenting said order.
Nonetheless, in my eyes this randomness is a more subtle way of describing chaos. Chaos, the opposite of order, has always been a fascinating concept to me. How it disrupts what brings comfort and despite its unpredictability, its beauty emerges from what encourages artists to twist the horizon of expectations for viewers, offering new perspectives to “cliche” subject matter. Although I wasn’t foreign to any of these concepts, it was surprising to see them being introduced to systems and codes to produce the works shown. Before this video I always thought that coding relied mostly on the order, the simplicity, the structure, and precision of all the elements presented. This makes me want to explore more of this “randomness” in hope of applying the unpredictable on my codes as I do with my traditional artworks.

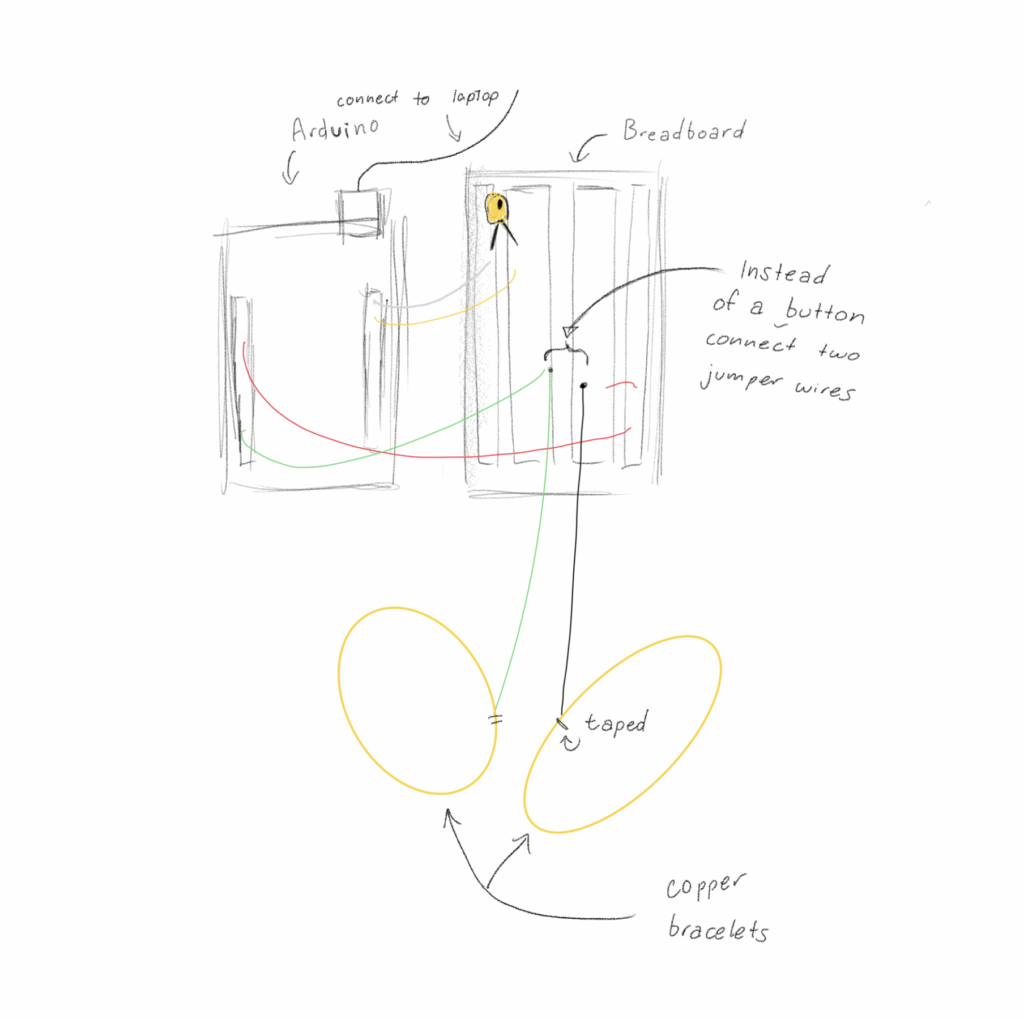 Circuit Illustration
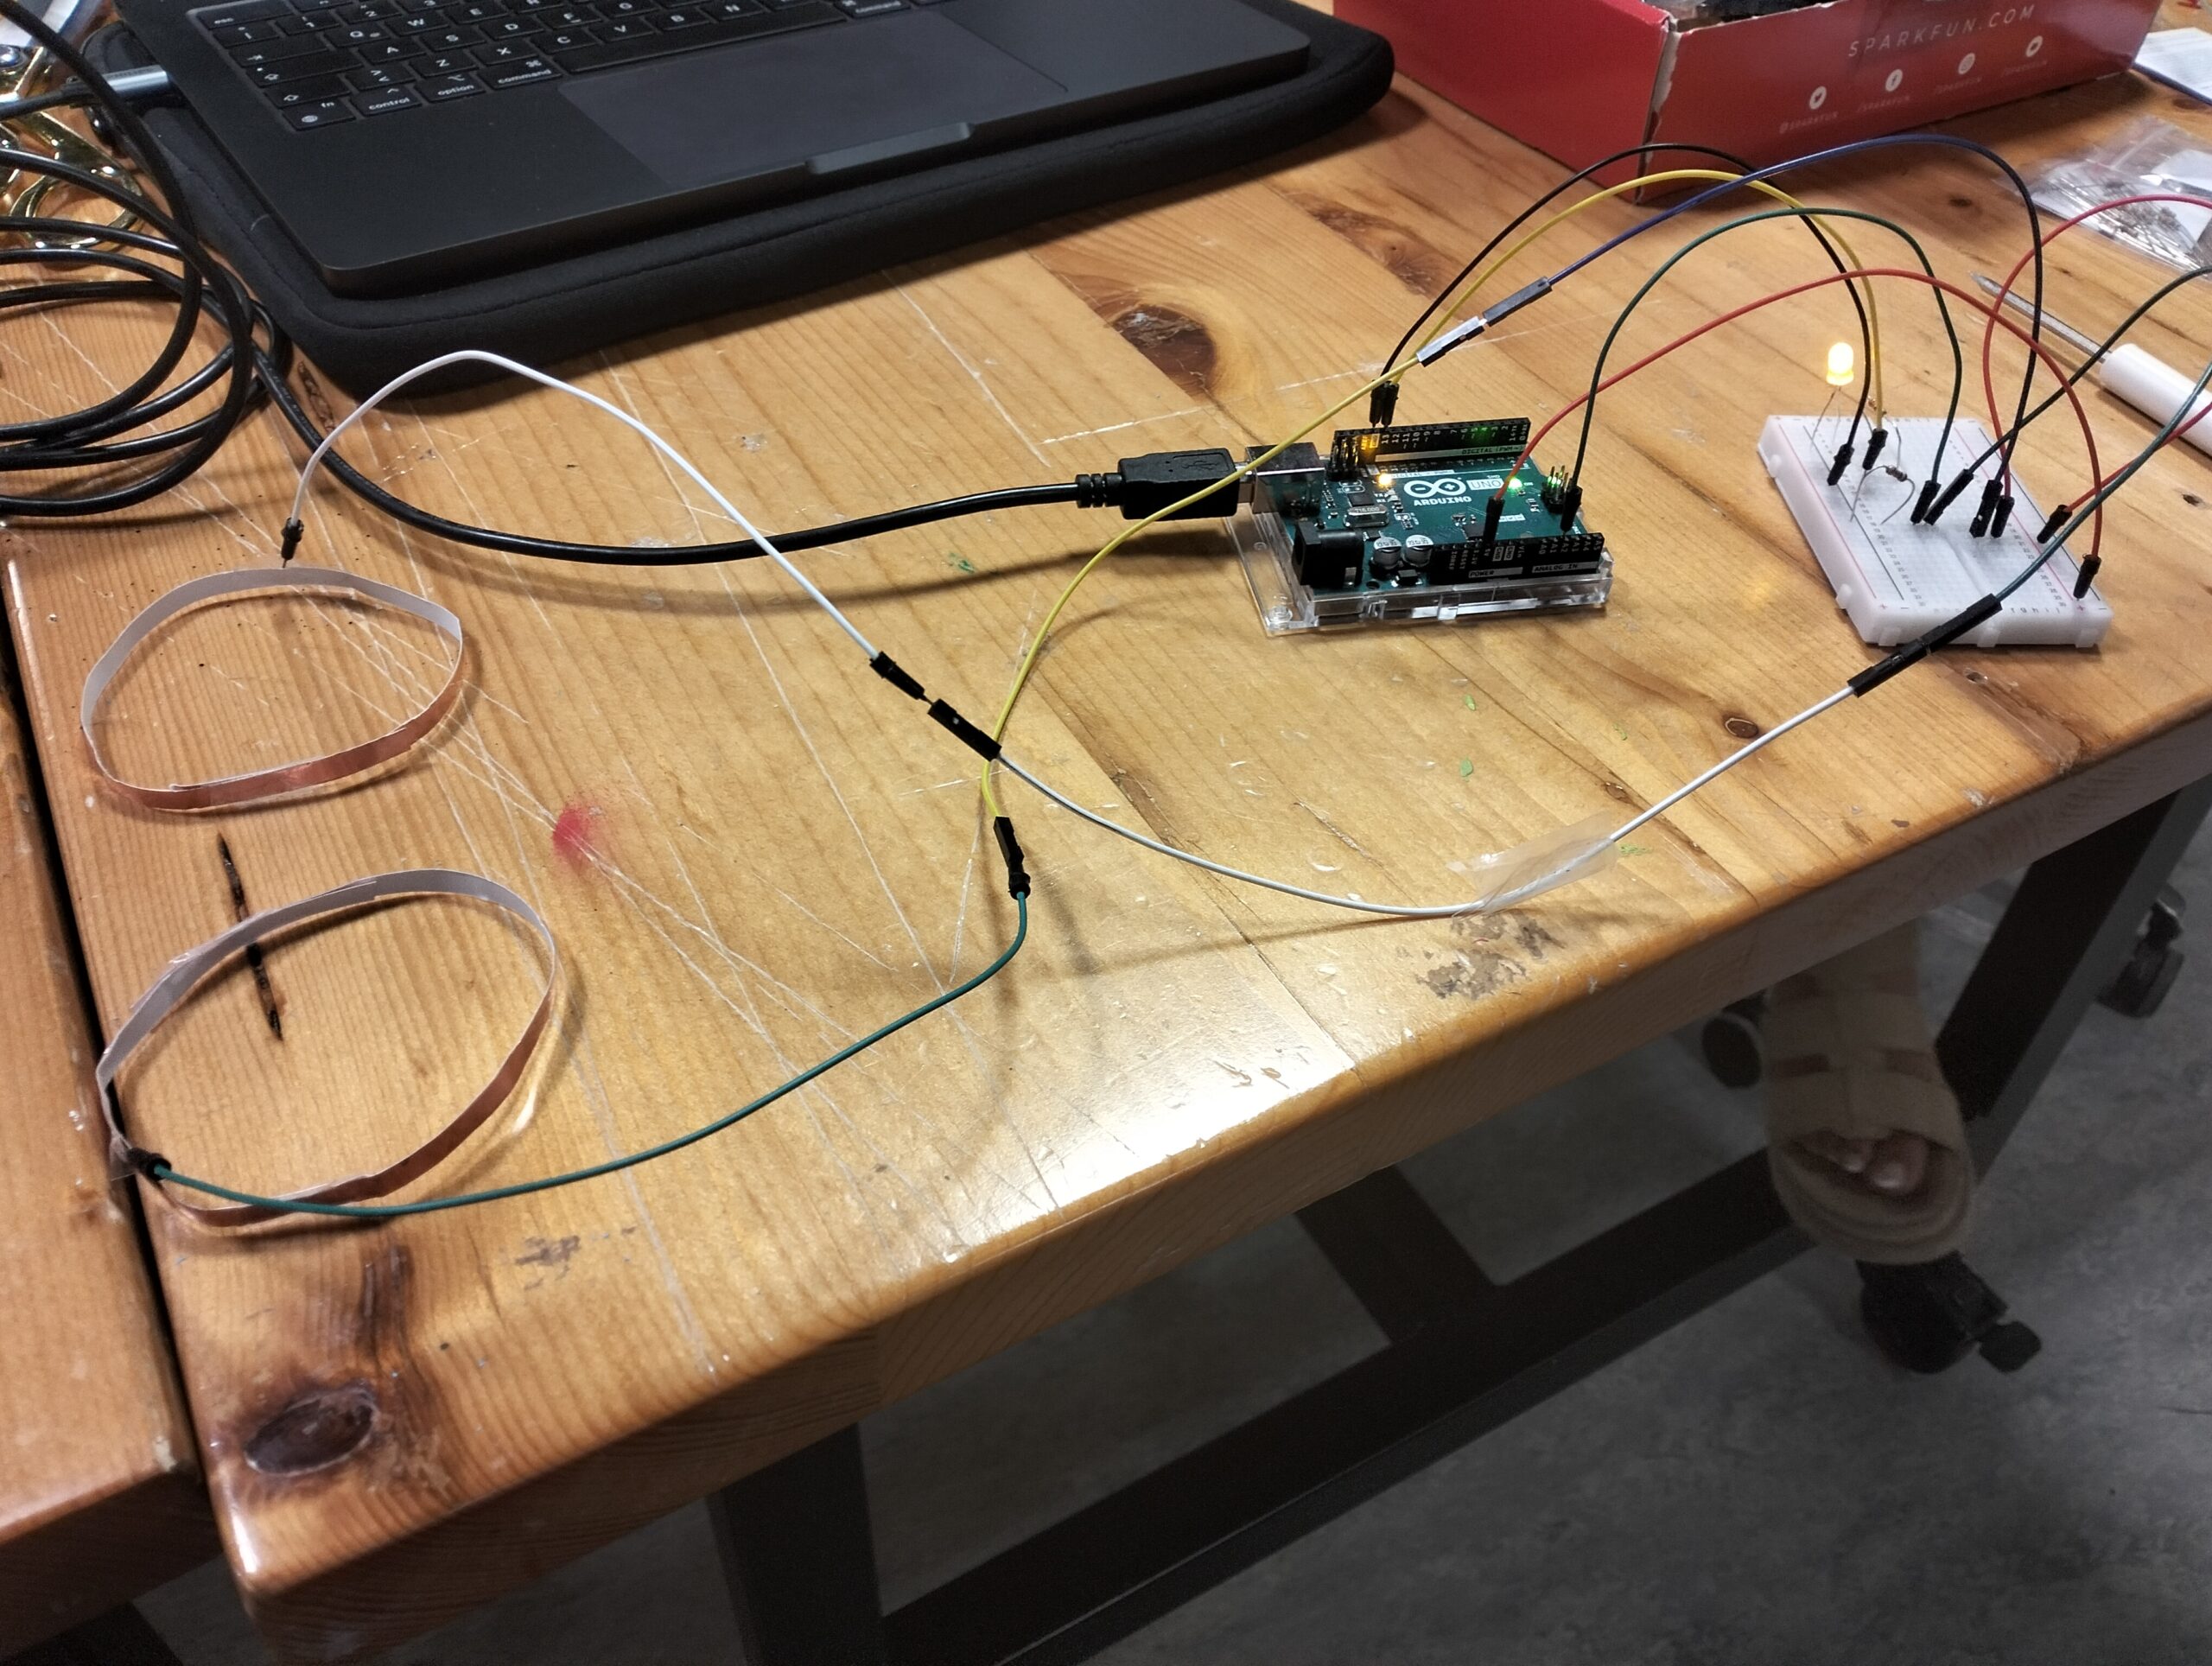

