ARCANE DASH – Final Project!!!

IDEA

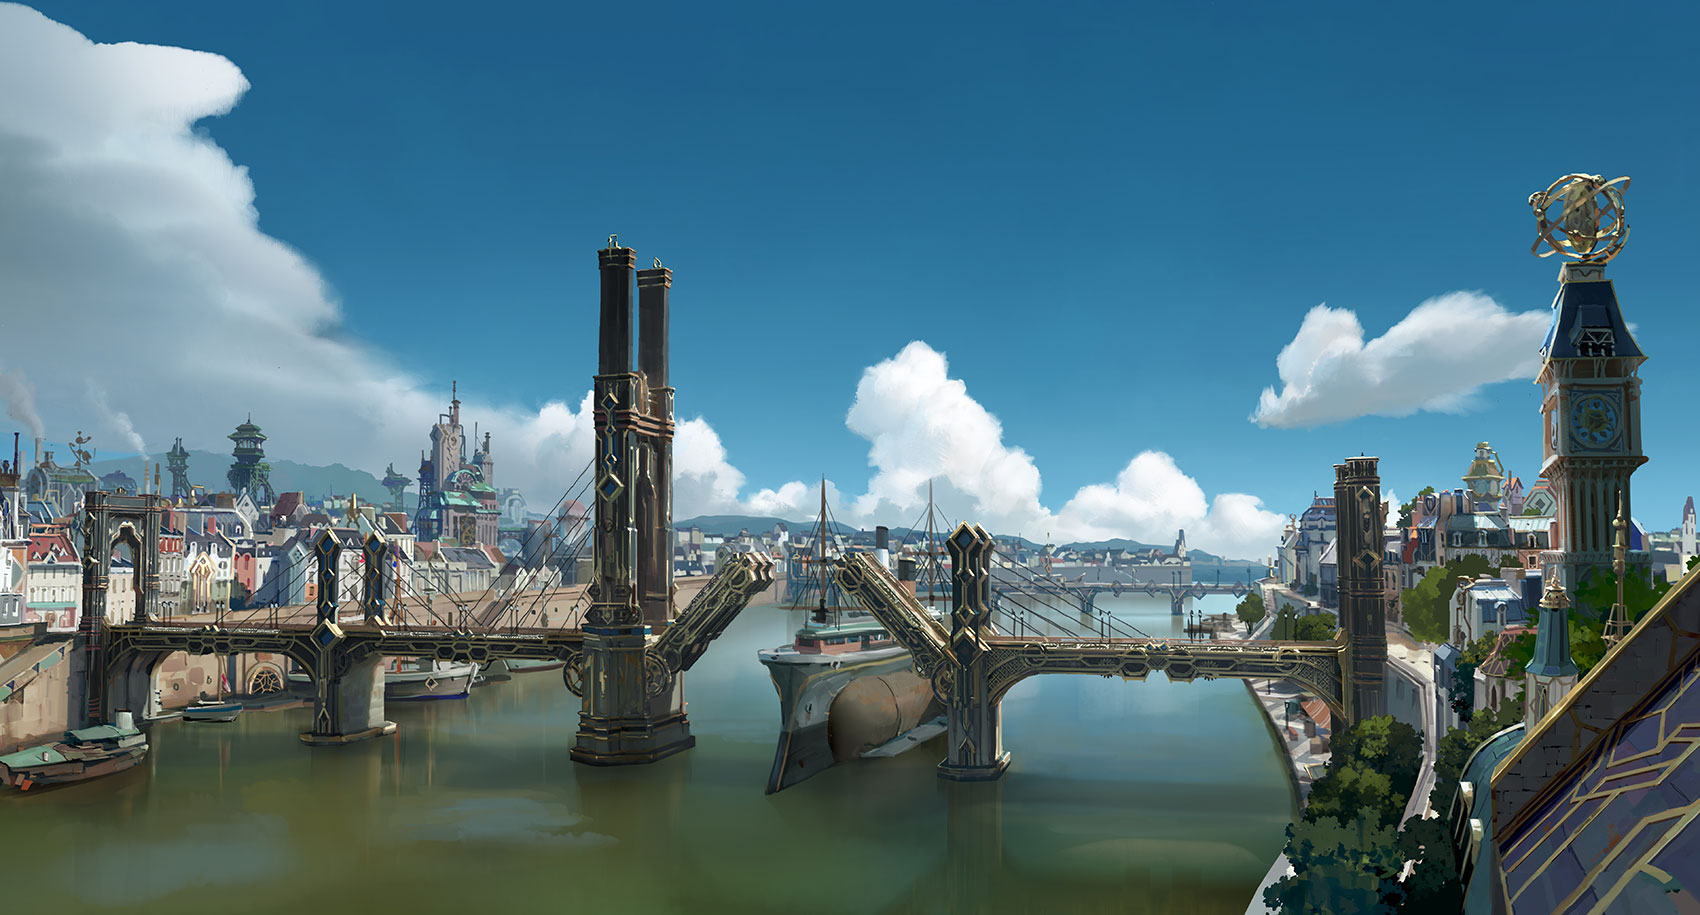
The idea was to create my own version of Geometry Dash, which is described as a rhythm-based action platformer. I added my own twist by making it have an Arcane theme as it is my favourite TV show. In my game, you play as Vi in the city of Piltover and need to pass the level to escape to Zaun.

IMPLEMENTATION

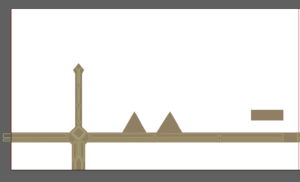
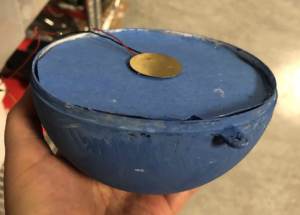
I first started with creating all the custom art for the game using Adobe Illustrator. I took inspiration from the city of Piltover in Arcane and made my own art. Then, I was able to get started on working on the P5.js code. It took me the longest time to figure out the gravity and jump in P5.js but once I was able to get it working, then the rest of my time was spent creating a custom level to my liking using my art. I tried to make it challenging and match the beat of the song just like Geometry Dash. Then I added details such as sound, particle effects and text. After the level was finished, I did some user testing to make sure that the difficulty was at a good level. I was then able to move on to the Arduino aspect of my game. Unfortunately, there were no more pressure sensors available so I had to use a piezo disk as a replacement for the controls. I then created the Hextech crystal which the piezo disk would be placed in to suit the Arcane theme. Afterwards, I did final touches such as fixing the end and start screen.

USER TESTING

I did my user testing after I finished creating my level. I allowed students in the IM lab to try it out to see if they were able to beat it and change things accordingly if I saw too many people were not able to make a certain jump. I also let my friends try my game once the Arduino control was working, I saw that the disk can be unreliable and unresponsive at times so I tried my best to make it so that the disk can input their touch correctly by tweaking the codes.

RESULTS

Arduino Code:

void setup() {
  Serial.begin(9600);
  // start the handshake
  while (Serial.available() > 0) {
    Serial.println("0,0"); // send a starting message
    delay(300);            // wait 1/3 second
  }
}

void loop() {
  int sensorValue = analogRead(A1);
  Serial.println(sensorValue);
  // wait for data from p5 before doing something
  while (Serial.available() > 0) {
    // read the incoming byte:
   int inByte = Serial.read();
    Serial.println(sensorValue);
  }
}

P5.js Code:

Full Level Completed

Arduino Controller:

FINAL THOUGHTS

I am very happy with the result of my game, I love the art and gameplay and it reminds me of the fun I had playing geometry dash. It is very addictive as you feel the urge to keep retrying until you pass the level as well. Feel free to try it out and let me know if you manage to beat it!

In the future, I would change the sensor I used to the pressure sensor or perhaps just a regular button would have been fine. I might change the disk to a button in my own time to help with the issues I was facing with the piezo disk. In terms of the actual game, I would add a character select button as I designed many of the characters from the show and it would be a fun personalized experience for the user.

 

Final Project Progress – Arcane Dash

I finally decided on a theme and decided to go with an Arcane themed game. I realised that most of my work will revolve around the game design on p5.js with timing the music to the obstacles so I will have to do a lot of trial and error to make sure that is working. I managed to get the jumping function working for the character but right now I’m mainly focusing on the level design and art as that is what will take me the most time. I also selected all the songs that I will include for the levels which are from the Arcane soundtrack.

Here is some pictures of how the levels are looking so far. I took inspiration from pictures of the bridges in the tv show:

Arcane: League of Legends

The square will be replaced later with designs of the 3 main characters that the player will be able to choose from as well as select the level they want to play.

Everything is still a work in progress and theres a lot to do but I am really passionate about Arcane so I think that will motivate me a lot in order to finish the game and make it look like how I imagine it.

Exercises – Hind & Maimuna

Exercise 1

The ellipse was controlled on the horizontal axis with the potentiometer.

void setup() {
  Serial.begin(9600);
  while (Serial.available() <= 0) {
    Serial.println("0,0"); // send a starting message
    delay(300);              // wait 1/3 second
  }
}
void loop() {
  while (Serial.available() > 0) {
    // read the incoming byte:
   int inByte = Serial.read();
    int sensorValue = analogRead(A0);
    Serial.println(sensorValue);
  }
}

https://editor.p5js.org/hindyounus727/sketches/B7U2fCaNp

Exercise 2

The LED brightness was controlled by the mouseX value, and is constrained in case it passes the canvas width.

int lightValue = 0;

void setup() {
  Serial.begin(9600);
  pinMode(2, OUTPUT);
  pinMode(5, OUTPUT);
  while (Serial.available() <= 0) {
    Serial.println("0,0"); // send a starting message
    delay(300);              // wait 1/3 second
  }
}
void loop() {
  while (Serial.available() > 0) {
   int lightValue = Serial.read();
   analogWrite(5, lightValue);
  }
    // read the incoming byte:
   int inByte = Serial.read();
    int sensorValue = analogRead(A0);
    Serial.print(sensorValue);
    Serial.print(",");
    sensorValue = analogRead(A1);
    Serial.print(sensorValue);
    Serial.println();
}

https://editor.p5js.org/hindyounus727/sketches/SoQkb_ztQ

Exercise 3

void setup() {
  Serial.begin(9600);
  pinMode(2, OUTPUT);
  while (Serial.available() <= 0) {
    Serial.println("0,0"); // send a starting message
    delay(300);              // wait 1/3 second
  }
}

void loop() {
  while (Serial.available() > 0) {
    // read the incoming byte:
   int inByte = Serial.read();
    analogWrite(2, inByte);

    int sensorValue = analogRead(A0);
    Serial.print(sensorValue);
    Serial.println();
  }
}

https://editor.p5js.org/mz2934/sketches/kUwzGxtQ5


Hind – Traffic Light!

My idea was to make a traffic light with the red, yellow and green LEDs. I decided to use a single switch button that cycles between modes as well as a potentiometer that changes the LED activated.

In order to make the button that cycles between modes, I got a lot of help from https://gist.github.com/navillus5/6699360

The 3 modes of my traffic light:

  1. All LEDS blinking
  2. Potentiometer activates either of the red, yellow, and green LEDs when dialed to a specific point
  3. Off

Overall I think I executed my idea well as everything I intended for the assignment works, however one small issue I ran into is that when switched to the 2nd mode, the LEDS are very dim. My best guess is that it has to do with the resistors but I haven’t tested out this theory as I don’t want to accidentally damage my LEDs.

My Code:

const int buttonPin = 3;
const int redLight = 9;
const int yellowLight = 6;
const int greenLight = 5;
unsigned long timer = 0;
bool onOff = LOW;
byte prevButtonState = LOW;
bool blinking = false;
byte buttonMode = 0;
bool traffic = false;

boolean currentState = LOW;
boolean lastState    = LOW;
boolean stateChange  = false;

int currentButton = 0;
int lastButton    = 2;

void setup() {
  // put your setup code here, to run once:
  Serial.begin(9600);
  pinMode(redLight, OUTPUT);
  pinMode(yellowLight, OUTPUT);
  pinMode(greenLight, OUTPUT);
  digitalWrite(redLight, LOW);
  digitalWrite(yellowLight, LOW);
  digitalWrite(greenLight, LOW);
  pinMode(buttonPin, INPUT);
}

void loop() {
  currentState = debounceButton();
  stateChange = checkForChange(currentState, lastState);
  currentButton = getButtonNumber(lastButton, currentState, stateChange);
  lastState  = currentState;
  lastButton = currentButton;
  
  // put your main code here, to run repeatedly:
  int potValue = analogRead(A0);
  int mappedPotValue = map(potValue, 0, 1023, 0, 255);
  int constrainedPotValue = constrain(mappedPotValue, 0, 255);
  Serial.println(currentButton);
//  byte buttonState  = digitalRead(buttonPin);

  if (currentButton == 0) {
    blinking = true;
//    buttonMode = buttonMode + 1;
  }
  if (currentButton == 1) {
    blinking = false;
    traffic = true;
  }
  if (currentButton == 2) {
    traffic = false;
  }

  if (traffic == true) {
    if (constrainedPotValue > 170) {
       digitalWrite(redLight, HIGH);
       digitalWrite(yellowLight, LOW);
       digitalWrite(greenLight, LOW);
    }
    if (constrainedPotValue <= 170 && constrainedPotValue > 85) {
       digitalWrite(redLight, LOW);
       digitalWrite(yellowLight, HIGH);
       digitalWrite(greenLight, LOW);
    }
    if (constrainedPotValue <= 85) {
      digitalWrite(redLight, LOW);
      digitalWrite(yellowLight, LOW);
      digitalWrite(greenLight, HIGH);
    }
  }
  
  if (blinking == true) {
    if (millis() > timer) {
      onOff = !onOff;
      timer = millis() + 250;
      digitalWrite(redLight, onOff);
      digitalWrite(yellowLight, onOff);
      digitalWrite(greenLight, onOff);
    }
  } else {
    digitalWrite(redLight, LOW);
    digitalWrite(yellowLight, LOW);
    digitalWrite(greenLight, LOW);
  }
}

// FUNCTIONS

//debounce
boolean debounceButton()
{
  boolean firstCheck   = LOW;
  boolean secondCheck  = LOW;
  boolean current = LOW;  
  firstCheck  = digitalRead(buttonPin);
  delay(50);
  secondCheck = digitalRead(buttonPin);  
  if (firstCheck == secondCheck){
    current = firstCheck;
  }
  return current;
}


//checks for change
boolean checkForChange(boolean current, boolean last)
{
  boolean change;  
  if (current != last){
    change = true;
  }
  else {
  change = false;
  }  
  return change;
}

//gets button num
int getButtonNumber(int button, boolean state, boolean change)
{
  if (change == true && state == LOW){
    button++;
    if (button > 2){
      button = 0;
    }
    Serial.println(button);
  }
  return button;
}


Unusual switch – Hind

At first, I was going to do a switch involving headphones but then I realized that that would require the use of my hands. So I moved on to another one of my limbs, the legs. I decided to make a switch that turns on when I sit down. I used aluminum foil to connect the wire from the seat, back to the light bulb. Then, I stuck another foil on my bottom which would connect the wires together and complete the circuit.


Midterm Final Assignment – CITY RUN

Inspiration:
So at first I wanted to create something similar to the game Crossy Road, but overtime my game started to look like the 2D version of Subway Surfers and I decided to go with it because I really liked how my game was turning out. My game is called City Run and has a retro, mafia theme.

Process:
I began my first iteration of my project with letting my character move forward, but I found it was impractical as the character would go off screen so I removed the upward direction. I later decided to use the up button as a Jump button as sometimes the 3 lanes would all be blocked at the same time. I was also trying to think of a way to entice players to keep playing my game so I decided to scrap my original idea of my game being time based to just being score based with a high score tracker that would incentivize the players to want to beat it.

Reflection:
Overall, I feel that my confidence with p5.js has been lifted drastically after this assignment. I have a better grasp of the language and I feel like I learnt a lot and can finally manipulate the language in order to create something I want. Previously it was a lot harder to create what I envisioned in my head due to my skill level. I really enjoyed this assignment and I hope you enjoy my game!

Midterm Progress

So I was inspired by the game Crossy Road and wanted to do a similar concept. I chose the concept of a game where you have to run away from your boss and escape in time while avoiding all the workplace obstacles in the way. The camera will pan down slowly while you are running and if you touch the border you will lose.

I implemented my chosen sprite of a guy in a suit and got it to move left right and up as going down is not needed. I also created a background using photoshop of the hallway that the player will run through. My next step will be to add all the furniture objects that the character has to avoid and the camera pan.

Making all the objects move down while the character runs is something I need to try and figure out as I am not entirely sure how that would work, especially on top of the camera not being static and having to move slowly on its own even when the character is not moving.


Generative text

For this assignment I wanted to try using mathematical equations to make a cool text animation. I decided to use a sin wave because the values don’t go higher than 1 and not lower than -1 so i thought it would be a good way to make the ellipses expand and shrink continuously. Initially i tried using just the sin wave within the ellipse function to determine the size of each ellipse but then I realized that the ellipses were too small so I messed around with a bunch of different values to get an effect that I liked. I also decided to use comic sans and alternate between different shades of purple because I felt like they portray my personality. Overall I am really happy with the outcome 🙂

ATLA OOP

I decided to make something related to one of my favourite shows of all time, Avatar the Last Airbender. I wanted to show the character Appa soaring through the sky past clouds. I thought the code that the professor showed us in class would aid me in making the clouds pass by at random speeds so I took inspiration from what the professor showed us in class. I also tried to use the image() function to add a png of Appa and I am happy with the result.