run or gone!

concept:

This entire journey starst with me almost losing an eyeI was in the hospital due to an eye operation procedure that presented personal, medical, and academic circumstances I did not expect. After healing and returning home, my family and I had to go to our Emirate, Fujairah. As a result, I found myself without the Arduino kit we were given in class, but instead, a smaller one that I previously had when teaching myself coding throughout the summer. The Arduino kit did not have all of the equipment that a complete kit would offer but only included a potentiometer, a couple of wires, two buttons, a couple of resistors, and a Liquid Display Screen. Yet, rather than being demotivated and giving up, I took this as an opportunity to explore coding on the LCD!

This opened new doors allowing me to have more than one medium to display imagery. I ended up utilizing this by having the breadboard double as both a controller and a screen while the p5.js sketch is presented as a ‘game state’ indicator. Like all projects I have worked on throughout this course, I wanted to add an artistic element, so I ended up drawing all illustrations presented on p5.js to provide a sense of attraction to the user.
I wish I could have presented this during the IM showcase, as I would have loved to make it a competitive game where the highest score would win a prize and, as a result, attract more people. Nevertheless, despite the limitations and circumstances, I am happy with how the project turned out. I have attached the assets, code (including references), and demonstration video below (presenting the game from a stranger’s perspective).

code:

(code that is altered and commented is due to an Arduino update that messed around with the code. Please reach out if you have any questions)

                            // HAMAD ALSHAMSI

                      // RUN OR DONE: FINAL PROJECT


                                // code


// const int buttonPin = 2; // pin for the button
// int buttonState = 0; // variable to store the button state

// void setup() {
//   pinMode(buttonPin, INPUT); // set the button pin as an input
//   Serial.begin(9600); // start the serial connection
// }

// void loop() {
//   buttonState = digitalRead(buttonPin); // read the button state

//   // if the button is pressed, send a "1" over the serial connection
//   if (buttonState == HIGH) {
//     Serial.println("1");
//   }

//   delay(100); // delay to prevent sending too many "1"s
// }


//allow the incorporation of the LCD for the project
#include <LiquidCrystal.h>

//indicate used pin variables
#define pinPress 2
#define pinPlay 1
#define pinWriteNRead 10
#define pinBrightness 12

//indicate variables for game animations used
#define runAnimation1 1
#define runAnimation2 2
#define jumpAnimation 3
#define topJumpAnimation '.'
#define bottomJumpAnimation 4
#define noObstacleAnimation ' '
#define yesObstacleAnimation 5
#define yesRightObstacleAnimation 6
#define yesLeftObstacleAnimation 7

//fix position for character
#define characterPosition 1
//define obstacle attributes
#define obstacleYSize 16
#define obstacleBlank 0
#define obstacleBottom 1
#define obstacleTop 2
//define character running attributes and poses when on floor
#define characterLocationNul 0
#define characterLocationBottom1 1
#define characterLocationBottom2 2
//define character hopping attributes and poses
#define characterLocationHop1 3
#define characterLocationHop2 4
#define characterLocationHop3 5
#define characterLocationHop4 6
#define characterLocationHop5 7
#define characterLocationHop6 8
#define characterLocationHop7 9
#define characterLocationHop8 10
//define character running attributes and poses when on obstacle
#define characterLocationRunTop1 11
#define characterLocationRunTop2 12

//LCD attributes and pixel arrangement inspired from Rees5286 on YouTube
LiquidCrystal lcd(11, 9, 6, 5, 4, 3);
static char obstaclePresentTop[obstacleYSize + 1];
static char obstaclePresentBottom[obstacleYSize + 1];
static bool pushButton = false;

//assign specific pixels to light up for corresponding poses
void drawCanvasNPixels(){
  static byte canvasNPixels[] = {
    //first running pose
    B01100,
    B01100,
    B00000,
    B01110,
    B11100,
    B01100,
    B11010,
    B10011,
    //second running pose
    B01100,
    B01100,
    B00000,
    B01100,
    B01100,
    B01100,
    B01100,
    B01110,
    //high hop
    B01100,
    B01100,
    B00000,
    B11110,
    B01101,
    B11111,
    B10000,
    B00000,
    //low hop
    B11110,
    B01101,
    B11111,
    B10000,
    B00000,
    B00000,
    B00000,
    B00000,
    //on ground
    B11111,
    B11111,
    B11111,
    B11111,
    B11111,
    B11111,
    B11111,
    B11111,
    //right side on ground
    B00011,
    B00011,
    B00011,
    B00011,
    B00011,
    B00011,
    B00011,
    B00011,
    //left side on ground
    B11000,
    B11000,
    B11000,
    B11000,
    B11000,
    B11000,
    B11000,
    B11000,
  };

  int i;
  //code, referenced from AymaanRahman on YouTube, to skip using '0' and allow rapid character alterations
  for (i = 0; i < 7; ++i) {
      lcd.createChar(i + 1, &canvasNPixels[i * 8]);
  }
  for (i = 0; i < obstacleYSize; ++i) {
    obstaclePresentTop[i] = noObstacleAnimation;
    obstaclePresentBottom[i] = noObstacleAnimation;
  }
}

//move obstacle
void generateObstacles(char* obstacle, byte newObstacle){
  for (int i = 0; i < obstacleYSize; ++i) {
    char current = obstacle[i];
    char next = (i == obstacleYSize-1) ? newObstacle : obstacle[i+1];
    switch (current){
      case noObstacleAnimation:
        obstacle[i] = (next == yesObstacleAnimation) ? yesRightObstacleAnimation : noObstacleAnimation;
        break;
      case yesObstacleAnimation:
        obstacle[i] = (next == noObstacleAnimation) ? yesLeftObstacleAnimation : yesObstacleAnimation;
        break;
      case yesRightObstacleAnimation:
        obstacle[i] = yesObstacleAnimation;
        break;
      case yesLeftObstacleAnimation:
        obstacle[i] = noObstacleAnimation;
        break;
    }
  }
}

//move character
bool characterDraw(byte position, char* obstaclePresentTop, char* obstaclePresentBottom, unsigned int score) {
  bool collision = false;
  char topStore = obstaclePresentTop[characterPosition];
  char bottomStore = obstaclePresentBottom[characterPosition];
  byte top, bottom;
  switch (position) {
    case characterLocationNul:
      top = bottom = noObstacleAnimation;
      break;
    case characterLocationBottom1:
      top = noObstacleAnimation;
      bottom = runAnimation1;
      break;
    case characterLocationBottom2:
      top = noObstacleAnimation;
      bottom = runAnimation2;
      break;
    case characterLocationHop1:
    case characterLocationHop8:
      top = noObstacleAnimation;
      bottom = jumpAnimation;
      break;
    case characterLocationHop2:
    case characterLocationHop7:
      top = topJumpAnimation;
      bottom = bottomJumpAnimation;
      break;
    case characterLocationHop3:
    case characterLocationHop4:
    case characterLocationHop5:
    case characterLocationHop6:
      top = jumpAnimation;
      bottom = noObstacleAnimation;
      break;
    case characterLocationRunTop1:
      top = runAnimation1;
      bottom = noObstacleAnimation;
      break;
    case characterLocationRunTop2:
      top = runAnimation2;
      bottom = noObstacleAnimation;
      break;
  }
  if (top != ' ') {
    obstaclePresentTop[characterPosition] = top;
    collision = (topStore == noObstacleAnimation) ? false : true;
  }
  if (bottom != ' ') {
    obstaclePresentBottom[characterPosition] = bottom;
    collision |= (bottomStore == noObstacleAnimation) ? false : true;
  }

  byte digits = (score > 9999) ? 5 : (score > 999) ? 4 : (score > 99) ? 3 : (score > 9) ? 2 : 1;

  //create canvas for game
  obstaclePresentTop[obstacleYSize] = '\0';
  obstaclePresentBottom[obstacleYSize] = '\0';
  char temp = obstaclePresentTop[16-digits];
  obstaclePresentTop[16-digits] = '\0';
  lcd.setCursor(0,0);
  lcd.print(obstaclePresentTop);
  obstaclePresentTop[16-digits] = temp;
  lcd.setCursor(0,1);
  lcd.print(obstaclePresentBottom);

  lcd.setCursor(16 - digits,0);
  lcd.print(score);

  obstaclePresentTop[characterPosition] = topStore;
  obstaclePresentBottom[characterPosition] = bottomStore;
  return collision;
}

//take in digital button signal
void buttonPush() {
  pushButton = true;
}

//allow the button to act as an interruption to make the character hop
void setup(){
  pinMode(pinWriteNRead, OUTPUT);
  digitalWrite(pinWriteNRead, LOW);
  pinMode(pinBrightness, OUTPUT);
  digitalWrite(pinBrightness, LOW);
  pinMode(pinPress, INPUT);
  digitalWrite(pinPress, HIGH);
  pinMode(pinPlay, OUTPUT);
  digitalWrite(pinPlay, HIGH);
  attachInterrupt(0/*pinPress*/, buttonPush, FALLING);
  drawCanvasNPixels();
  lcd.begin(16, 2);
}

//constantly check for new obstacle generation
void loop(){
  static byte characterLoc = characterLocationBottom1;
  static byte newObstacleType = obstacleBlank;
  static byte newObstacleDuration = 1;
  static bool playing = false;
  static bool blink = false;
  static unsigned int distance = 0;

  if (!playing) {
    characterDraw((blink) ? characterLocationNul : characterLoc, obstaclePresentTop, obstaclePresentBottom, distance >> 3);
    if (blink) {
      lcd.setCursor(0,0);
      lcd.print("Press Start");
    }
    delay(250);
    blink = !blink;
    if (pushButton) {
      drawCanvasNPixels();
      characterLoc = characterLocationBottom1;
      playing = true;
      pushButton = false;
      distance = 0;
    }
    return;
  }

  //constantly move obstacles towards the character
  generateObstacles(obstaclePresentBottom, newObstacleType == obstacleBottom ? yesObstacleAnimation : noObstacleAnimation);
  generateObstacles(obstaclePresentTop, newObstacleType == obstacleTop ? yesObstacleAnimation : noObstacleAnimation);

  //create obstacle repeatedly
  if (--newObstacleDuration == 0) {
    if (newObstacleType == obstacleBlank) {
      newObstacleType = (random(3) == 0) ? obstacleTop : obstacleBottom;
      newObstacleDuration = 2 + random(10);
    } else {
      newObstacleType = obstacleBlank;
      newObstacleDuration = 10 + random(10);
    }
  }

  //allow character to jump if interruption senses
  if (pushButton) {
    if (characterLoc <= characterLocationBottom2) characterLoc = characterLocationHop1;
    pushButton = false;
  }

//constantly check if character is in collision, if so game ends
  if (characterDraw(characterLoc, obstaclePresentTop, obstaclePresentBottom, distance >> 3)) {
    playing = false;
  } else {
    if (characterLoc == characterLocationBottom2 || characterLoc == characterLocationHop8) {
      characterLoc = characterLocationBottom1;
    } else if ((characterLoc >= characterLocationHop3 && characterLoc <= characterLocationHop5) && obstaclePresentBottom[characterPosition] != noObstacleAnimation) {
      characterLoc = characterLocationRunTop1;
    } else if (characterLoc >= characterLocationRunTop1 && obstaclePresentBottom[characterPosition] == noObstacleAnimation) {
      characterLoc = characterLocationHop5;
    } else if (characterLoc == characterLocationRunTop2) {
      characterLoc = characterLocationRunTop1;
    } else {
      ++characterLoc;
    }
    ++distance;

    digitalWrite(pinPlay, obstaclePresentBottom[characterPosition + 2] == noObstacleAnimation ? HIGH : LOW);
  }
  delay(100);
}


                                      // references

//inspired projects
//https://www.youtube.com/@rees5286
//https://rishanda.github.io/BSE_Template_Portfolio/

//learning how to incorporate LCD in project
//https://www.youtube.com/watch?v=EAeuxjtkumM&ab_channel=AymaanRahman
//https://www.youtube.com/watch?v=dZZynJLmTn8&ab_channel=HowToMechatronics

wake up!

concept:

During this week’s assignment, we were required to use Arduino by experimenting with a way to construct a hands-free switch (one that does not require an included analog/digital switch). Approaching this assignment, I had intentions of utilizing the Arduino in a way that would be beneficial.

code:

// Define pin for buzzer
const int buzzerPin = 9;

// Define alarm time in hours and minutes
const int alarmHour = 7;
const int alarmMinute = 30;

void setup() {
  // Set the buzzer pin as an output
  pinMode(buzzerPin, OUTPUT);
}

void loop() {
  // Get the current time
  int currentHour = hour();
  int currentMinute = minute();

  // Check if it is time for the alarm
  if (currentHour == alarmHour && currentMinute == alarmMinute) {
    // Turn on the buzzer
    digitalWrite(buzzerPin, HIGH);
    delay(1000);
    // Turn off the buzzer
    digitalWrite(buzzerPin, LOW);
    delay(1000);
  }
}


method:

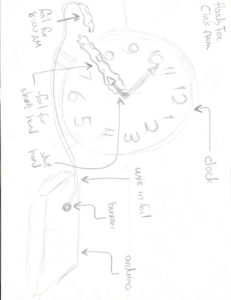
Throughout the 12th week of the semester, another Interactive Media course, Communication and Technology, required us to experiment with going through a digital detox. As a result, I faced the issue of not being able to wake myself up since I ultimately pushed my phone away from me. That being said, I found this assignment perfect as I could make my own digital clock while also including the “hands-free” concept. The hands-free aspect was to add foil to an alarm clock’s hour hand to recognize when it hits a specific hour. This is displayed in the illustration below. To further utilize this, I adapted a simple alarm clock script that exerts a sound as soon as the signal is detected, requiring the person to wake up and pull the foil until they have to place it on again before sleeping.

sketch:

The hands-free element is when the hour arm of the clock moves to 8:00AM and eventually makes contact with the other foil piece that houses the wire connected to the Arduino, further turning on the buzzer.


future improvements:

Possibly present an element that would automatically replace the foil after it is removed to prevent further redundancy.

rawr


concept:

This week required us to utilize the tools offered in the Arduino kit to construct a build that would serve as an instrument! This was extremely fun to work with, especially given the musical background I used to be fond of years ago. The idea revolved around building a piano instrument that would appeal to all different age groups! Going back to this felt nostalgic.


process:

The initial plan was to construct a keyboard that would serve as a piano for the user while trying my best to stay away from a cliche approach. As a result, I shifted my focus to an analog perspective and discovered the ultrasonic shock sensor. This was convenient for the approach I was going through as it utilized music and human interaction simultaneously. After researching and finalizing the code, adding an artistic element was essential not only to make it appealing to adults but also children. I sketched, colored, and cut a layout that beautifully complements the program.


sketch:


future improvements:

Adding LEDs would be beneficial to the young target audience in mind as it would serve as an indicator for them, thus making the functionality easier.

stop… go!


concept:

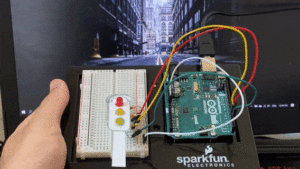
During this week’s exercise assignment, we were encouraged to explore Arduino and digital outputs such as the LED. As a result, I decided to delve into the delay function to make a traffic light system that accurately mimics the ones we see outside campus.


process:

An essential element I intended to present was the creative aspect of the project. As a result, I ended up making a traffic light-like cut out in addition to previewing an image of a  street behind the Arduino to make it more realistic.


sketch: (click, wait till red lights blink to end)


future improvements:

Presenting an analog aspect would have been the next step, in the sense of adding a button that possibly controls two different traffic lights.

germ worm

concept:

The midterm of this course required us to implement everything we had learned, ranging from the simplicity of shapes to the complexity of object-oriented programming. I intended to provide the skills I learned throughout these past seven weeks while also implementing my touch of art and creativity. That being said, this required me to code a playable game and make it aesthetically pleasing in its own art style. I chose to aim towards a retro-pixelated black-and-white art style that would make the user delve into a nostalgic experience when playing the game. I decided to get inspired by the most prominent game in video game history, snake. However, in my game (germ-worm), the player is in a black-and-white world where they control a worm in need of collecting germs to reach the highest possible score while exploring the setting available to play, making it a more complex or more manageable experience.

code:

//                      HAMAD ALSHAMSI
//                GERM WORM: MIDTERM PROJECT


//                           code

//game state variable
var mode = 0;

//set object/player variables
let worm = []; //variables for worm and player
let player;
let germ;

//set game's rules variables
let gameExtent = 20;
let edgeExtent = 1;
let collectibles = 10;
let playState = true;
let direction, frameChange, scoreCount;
let portionValue, collectiblesValue, frameValue;
let portionSlider, lengthSlider, multiplierSlider, speedSlider;

//classify worm portions and
class Portion {
  constructor(x, y) {
    this.x = x;
    this.y = y;
    this.wormLength = gameExtent - edgeExtent * 2;
  }

  //used to test if player is offscreen
  testEdges() {
    return this.x < 0 || this.x > width || this.y < 0 || this.y > height;
  }

  //used to test player self-collision
  testWorm() {
    for (let portio of worm) {
      if (this.x == portio.x && this.y == portio.y && direction) return true;
    }
    return false;
  }

  //used to test player germ-collision
  testGerm() {
    return this.x == germ.x && this.y == germ.y;
  }

  //update position to player's direction input
  update() {
    switch (direction) {
      case "up":
        player.y -= gameExtent;
        break;
      case "right":
        player.x += gameExtent;
        break;
      case "down":
        player.y += gameExtent;
        break;
      case "left":
        player.x -= gameExtent;
        break;
    }

    //test offscreen or self-collision, if so, lose. else test germ-collision
    if (this.testEdges() || this.testWorm()) {
      //implemet pixelated font
      textFont(fontPixel);
      fill(60);
      push();
      translate(width / 2, height / 2);
      textSize(52);
      text("GAME OVER", -150, 0);
      textSize(18);
      text("press ' SPACE ' to restart", -134, 30);
      pop();
      playState = false;
    } else if (this.testGerm()) germ.consume();
  }

  //first worm section drawn using image asset alongside a white background
  create() {
    noStroke();
    fill(255);
    image(wormIMG, this.x, this.y, this.wormLength, this.wormLength);
  }
}

//classify germs
class Germ {
  constructor(x, y) {
    this.x = x;
    this.y = y;
    this.wormLength = gameExtent - edgeExtent * 2;
    this.collectibles = 2;
  }

  //when worm collides with germ, increase length. then pick random spot for new germ
  consume() {
    collectibles += this.collectibles;
    this.x = floor(random(width / gameExtent)) * gameExtent + edgeExtent;
    this.y = floor(random(height / gameExtent)) * gameExtent + edgeExtent;
  }

  //draw germ in new spot using image from asset
  create() {
    image(germIMG, this.x, this.y, this.wormLength, this.wormLength);
  }
}

//load images from asset file
function preload() {
  menuIMG = loadImage("assets/menuImage.png");
  germIMG = loadImage("assets/germImage.png");
  wormIMG = loadImage("assets/wormImage.png");
  fontPixel = loadFont("assets/PixelDigivolve-mOm9.ttf");
}

function setup() {
  //define default game state
  mode = 0;

  //center shapes and images
  rectMode(CENTER);
  imageMode(CENTER);

  //set canvas size
  createCanvas(400, 600);

  //create new germ
  let x = floor(random(width / gameExtent)) * gameExtent + edgeExtent;
  let y = floor(random(height / gameExtent)) * gameExtent + edgeExtent;
  germ = new Germ(x, y);

  //view score counter
  scoreCount = createP(
    "&nbspS &nbspC &nbspO &nbspR &nbspE &nbsp: &nbsp1 &nbsp"
  );
  scoreCount.style("color", "white");
  scoreCount.style("font-size", "15px");
  scoreCount.style("background-color", "#5c5c5c");
  scoreCount.position(5, 560);

  //worm size slider
  portionValue = createP("size: 20");
  portionValue.position(50, 610);
  portionValue.style("font-size", "15px");
  portionValue.style("margin:2px");
  portionValue.style("color", "#5c5c5c");
  portionSlider = createSlider(10, 50, 20, 10);
  portionSlider.position(10, 630);

  //worm length slider
  lengthP = createP("length: 0");
  lengthP.position(50, 660);
  lengthP.style("font-size", "15px");
  lengthP.style("margin:2px");
  lengthP.style("color", "#3c3c3c");
  lengthSlider = createSlider(1, 30, 1, 1);
  lengthSlider.position(10, 680);

  //score per germ slider
  collectiblesValue = createP("multiplier: 1");
  collectiblesValue.position(290, 610);
  lengthP.style("font-size", "15px");
  collectiblesValue.style("margin:2px");
  collectiblesValue.style("color", "#3c3c3c");
  multiplierSlider = createSlider(1, 10, 1, 1);
  multiplierSlider.position(270, 630);

  //frames per second slider
  frameValue = createP("speed: 8");
  frameValue.position(300, 660);
  lengthP.style("font-size", "15px");
  frameValue.style("margin:2px");
  frameValue.style("color", "#3c3c3c");
  speedSlider = createSlider(1, 20, 8, 1);
  speedSlider.position(270, 680);

  //set default framerate
  frameRate(8);

  //prnt rules in console.log
  print(
    "arrow keys   -->    MOVE. \nspace        -->    RESTART. \nclick        -->    START."
  );
}

function keyPressed() {
  //different arrows correspond to different directions
  if (frameChange) {
    switch (key) {
      case "ArrowUp":
        if (direction != "down") direction = "up";
        break;
      case "ArrowRight":
        if (direction != "left") direction = "right";
        break;
      case "ArrowDown":
        if (direction != "up") direction = "down";
        break;
      case "ArrowLeft":
        if (direction != "right") direction = "left";
        break;
      case " ":
        player = new Portion(width / 2 + edgeExtent, height / 2 + edgeExtent);
        germ.x = floor(random(width / gameExtent)) * gameExtent + edgeExtent;
        germ.y = floor(random(height / gameExtent)) * gameExtent + edgeExtent;
        //display score
        scoreCount.html(
          "&nbspS &nbspC &nbspO &nbspR &nbspE &nbsp: &nbsp1 &nbsp"
        );
        direction = undefined;
        worm = [];
        playState = true;
        break;
    }
    frameChange = false;
  }
}

//game state display
function draw() {
  if (mode == 0) {
    menuGame();
  } else if (mode == 1) {
    startGame();
  }
}

//command lines responsible before the game starts
function menuGame() {
  background(255);
  push();
  translate(width / 2, height / 2);
  image(menuIMG, 0, 0);
  pop();
}

//command lines responsible for when the game starts
function startGame() {
  frameChange = true;
  //update information on sliders accordingly
  portionValue.html(
    portionValue.html().split(" ")[0] + " " + portionSlider.value()
  );
  lengthP.html(lengthP.html().split(" ")[0] + " " + lengthSlider.value());
  collectiblesValue.html(
    collectiblesValue.html().split(" ")[0] + " " + multiplierSlider.value()
  );
  frameValue.html(frameValue.html().split(" ")[0] + " " + speedSlider.value());
  if (!direction) {
    //if game not run, update using sliders info
    background(255);
    gameExtent = portionSlider.value();
    edgeExtent = gameExtent / 20;
    collectibles = lengthSlider.value() - 1;
    frameRate(speedSlider.value());
    player = new Portion(
      floor(width / gameExtent / 2) * gameExtent + edgeExtent,
      floor(height / gameExtent / 2) * gameExtent + edgeExtent
    );
    germ.x = floor(random(width / gameExtent)) * gameExtent + edgeExtent;
    germ.y = floor(random(height / gameExtent)) * gameExtent + edgeExtent;
    germ.wormLength = gameExtent - edgeExtent * 2;
    germ.collectibles = multiplierSlider.value();
    player.create();
  } else if (playState) {
    background(255);
    //copies player into a worm array and replaces index to show worm moving motion
    worm.push(new Portion(player.x, player.y));
    //if germ is present, erase it. else kill worm
    if (collectibles) collectibles--;
    else worm.shift();
    //update game scores and display
    player.update();
    player.create();
    germ.create();
    for (let portio of worm) portio.create();
    scoreCount.html(
      "&nbspS &nbspC &nbspO &nbspR &nbspE &nbsp: &nbsp" +
        (worm.length + 1) +
        " &nbsp"
    );
  }
}

//launch game by clicking
function mousePressed() {
  if (mode == 0) {
    launchGame();
  }
}

function launchGame() {
  mode = 1;
}


//                           references

// game rule variables inspired from "GeoCrafter57" on YouTube
// color palette from "https://colorhunt.co/palettes/grey"
// images from "https://www.alamy.com/stock-photo/star-pixel-video-game-play.html"


method:

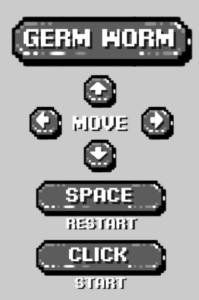
Initially, having an object, a worm, move through the screen in a manner that is up, down, right, and left was an essential aspect of the game. Then, it was necessary to include a collectible germ that would also serve as a point system. These goals were managed by classifying both the ‘worm’ and ‘germ’ and implementing them into arrays and indexes to stylize further the motion presenting an illusion of a worm-like movement. Then, adding a difficulty aspect where the user can freely adjust the difficulty level was an enjoyable feature, as it required sliders, a concept never delved into before. Finally, adding menu and end screens containing instructions would be the icing on the cake. To do that, I fully customized an entire image in Photoshop that compliments the pixelated theme present in the game. These images possessed easy-to-follow instructions such as an icon of arrows with “move,” a space bar with “restart, and a click with “start” phrases next to them.

sketch:

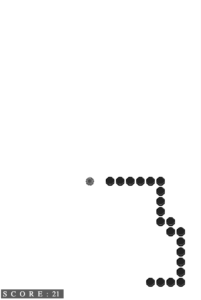
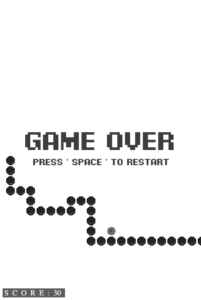
The following pictures preview the menu, game, and end screens of the game. Additionally, images of the gameplay with the various rules are previewed to present the difficulty range offered.


menu screen


gameplay screen

end screen


future improvements:

Presenting a worm-customization aspect allowing the user to customize the shape of the worm would be a fun and interactive feature. Additionally, adding a high-score element to possibly implement a competitive aspect to the game would be extremely fun.

faded cells

concept:

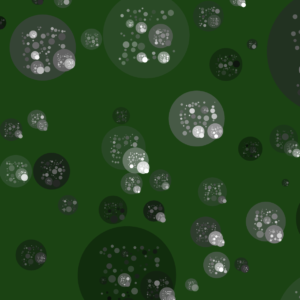
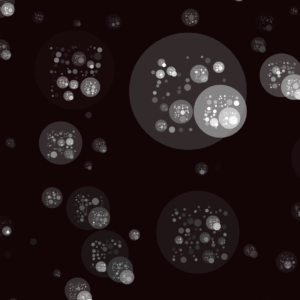
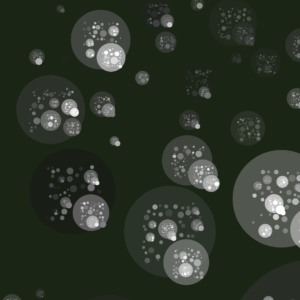
This week’s assignment required us to implement the notion of object-oriented programming, which includes utilizing classes and arrays. Given how beneficial and ambitious it could be, I was excited to delve into this coding section. My intention was to focus on implementing the concept more than forcing my usual out-of-the-box idea that might jeopardize my understanding of it. I decided to present an art-motivated sketch representing faded COVID-like cells (green shades) all over the canvas representing how this prominent virus has been a part of our lives and will slowly fade away.

code:

//initiate variables
var circ;

function setup() {
  createCanvas(600, 600);

  //setup a circle with attributes with color range randomness (greenish)
  circ = new Circ(width, width, 0, 0, [random(35), random(110), random(35)], 0);

  noLoop();
}

function draw() {
  background(circ.color);

  //translate origin of canvas
  translate(width / 4, height / 4);

  circ.createChildren();
  circ.show();
}

class Circ {
  //set constructors and default positioning
  constructor(circW, circWPar, circXPar, circYPar, color, circNo) {
    this.circNo = circNo;
    this.circW = circW;
    this.circXPar = circXPar;
    this.circYPar = circYPar;
    if (circNo == 1) {
      this.x = random(-width + circW, width);
      this.y = random(-height + circW, height);
    } else {
      this.x = random(-circWPar / 3 + circW, circWPar / 3, -circW);
      this.y = random(-circWPar / 3 + circW, circWPar / 3, -circW);
    }

    this.color = color;

    this.children = [];
  }

  createChildren() {
    //set amount of circles and how recursive
    if (this.circW > 15) {
      for (var i = 0; i < 2000; i++) {
        var color = [this.color[0] + random(110), this.color[1] + random(120)];
        var circ = new Circ(
          this.circW * random(0.02, 0.6),
          this.circW,
          this.x,
          this.y,
          color,
          this.circNo + 1
        );

        if (i == 0) {
          this.children.push(circ);
        } else {
          for (var j = 0; j < this.children.length; j++) {
            //keep values + using absuloute function
            if (
              abs(circ.x - this.children[j].x) <
                circ.circW / 2 + this.children[j].circW / 2 &&
              abs(circ.y - this.children[j].y) <
                circ.circW / 2 + this.children[j].circW / 2
            ) {
              break;
            } else if (j === this.children.length - 1) {
              this.children.push(circ);
            }
          }
        }
      }
    }
  }
  show() {
    noStroke();
    fill(this.color);
    translate(this.circXPar, this.circYPar);
    circle(this.x, this.y, this.circW, this.circW, this.circW / 20);

    for (var i = 0; i < this.children.length; i++) {
      push();

      this.children[i].createChildren();
      this.children[i].show();

      pop();
    }
  }
}


method:

It was essential to find a way to take advantage of how beneficial the functionality of classes and arrays are, so I ended up classifying circles and assigning constructors to particular colors, sizes, and recurrences. I proceeded by saving the outcomes on the array, which was beneficial to have different results on each sketch run.

sketch:

The following pictures preview different art sketch runs from the program, all possessing a green tint with various shades:


future improvements:

Presenting an animation, perhaps a pulsing effect would be fun, indicating how ‘alive’ the cells are. Maybe also making them interactive with the user’s mouse.

dissolving matrix

concept:

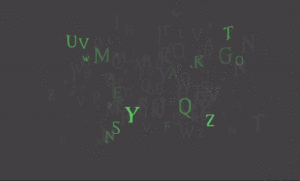
This week’s assignment required us to explore letters and text functions offered in the p5 coding program and make a program from that. I initially wanted to figure out a way in which I could somehow separate the letters in a word in a creative way. That said, I opted to delve into a ‘matrix’ and mysterious related theme.

code:

//modify how many letters you would like to have appear
letterAppear = 26;

function setup() {
  createCanvas(500, 300);
}

function preload() {
  //loading a matrix-themed font 
  fontMatrix = loadFont("assets/matrix.ttf");
}

function draw() {
  //setting the background color, transparency, text color, and random sizes
  background(80, 20);
  textSize(random(48));
  textFont(fontMatrix);
  fill("#64d86b");

  text(
    "*"
    //attributes that repeat the phrase "ABCDEF..." while mapping it into separate letters
      .repeat(letterAppear)
      .split("")
      .map((m, i) => String.fromCharCode(i + 97))[frameCount % letterAppear],
    noise(frameCount ) * 500,
    noise(frameCount + 1) * 300
  );
}

method:

It was essential to start laying out the text and knowing what and how to modify it. So, I uploaded a preferred font and set the size of the text and what the text would be. Then I played around with ‘text’ attributes such as ‘.repeat,’ ‘.split,’ and ‘.map.’ In the end, I was able to modify the text presented in a way that randomly separates its letters, which presents a fabulous sketch that reminds me of the matrix. A final thought I had, in the end, was lowering the transparency of the background, which previewed a dissolving effect on the text/letters presented.

sketch:

The following gif preview how the program displays the hacked matrix program!


(^ click me)

future improvements:

Adding some sort of secret message of a specific word that would randomly pop up would be a mysterious and engaging element to the program.

instrumentalist with a hat

concept:

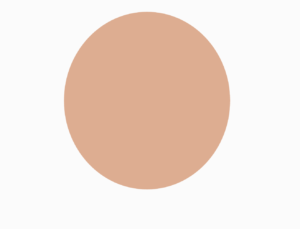
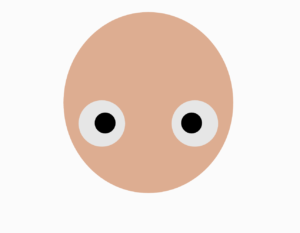
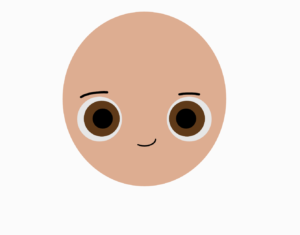
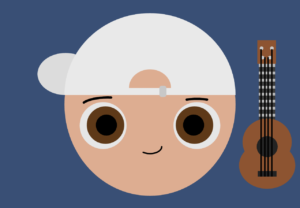
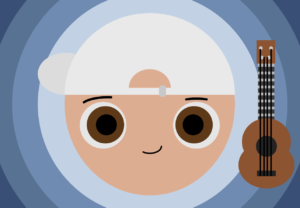
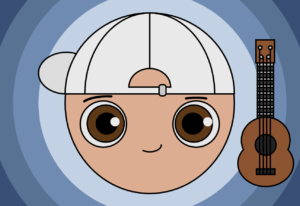
This week’s assignment required us to explore the shapes offered in the p5 coding program and make a self-portrait. The first thing I did was to draw a huge circle right in the middle of the canvas, and that was when I saw it… my face. I planned to draw a minimalistic cartoonish face that represents my hobby, playing the ukulele, and myself with a certain clothing item of some sort.

code:

function setup() {
  createCanvas(650, 450);
  
    //assign variables
  let midX = width/2;
  let midY = height/2;
    
    //blue background circles
  background(50, 80, 120);
  strokeWeight(0);
  fill(80, 115, 150);
  circle(midX, midY, 690);
  fill(105, 140, 180);
  circle(midX, midY, 590);
  fill(190, 210, 230);
  circle(midX, midY, 480);
    
    //head
  fill(230, 170, 140);
  strokeWeight(3);
  ellipse(midX, midY, 365, 390);

    //eyes
  fill(230);
  circle(midX -100, midY +45, 100);
  circle (midX +100, midY +45, 100);

    //iris
  fill(100, 55, 15);
  //stroke(80, 35, 0);
  ellipse(midX -95, midY +44, 80, 80);
  ellipse(midX +95, midY +44, 80, 80);

    //pupils
  fill(0);
  circle(midX -93, midY +44, 45);
  circle (midX +93, midY +44, 45);

    //glare
  noStroke();
  fill(235);
  circle(midX -75, midY +40, 20);
  circle (midX +125, midY +40, 20);
  
    //smile
  stroke(0);
  noFill();
  arc(midX, midY + 90, 50, 30, radians(0), radians(140));
  
    //hat
  fill(220);
  ellipse(midX - 180, midY - 65, 120, 90);
  fill(233);
  arc(midX, midY - 20, 365, 350, PI, TWO_PI, CHORD);
  
    //hat details
  fill(230, 170, 140);
  arc(midX, midY - 35, 90, 80, PI, TWO_PI, CHORD);
  line(midX, midY -195, midX, midY - 75);
  noFill();
  arc(midX, midY - 20, 280, 350, radians(270), radians(0));
  arc(midX, midY - 20, 280, 350, radians(180), radians(270));
  noFill();
  fill(200);
  rect(midX + 20, midY - 40, 15, 24, 5);
  
    //eyebrows
  stroke(0);
  strokeWeight(5);
  noFill();
  arc(midX -90, midY + 5, 115, 40, radians(190), radians(290));
  arc(midX +100, midY + 8, 110, 40, radians(220), radians(320));
  
    //instrument
  strokeWeight(3);
    //ukulele neck
  fill(60);
  rect(midX +232, midY -80, 35, 255);
  fill(180);
  rect(midX +232, midY -90, 35, 10);
    //ukulele frets
  fill(180);
  rect(midX +232, midY - 70, 35, 6);
  rect(midX +232, midY - 55, 35, 6);
  rect(midX +232, midY - 40, 35, 6);
  rect(midX +232, midY - 25, 35, 6);
  rect(midX +232, midY - 10, 35, 6);
  rect(midX +232, midY + 5, 35, 6);
  rect(midX +232, midY + 20, 35, 6);
    //ukulele head
  fill(150, 80, 40);
  rect(midX +229, midY -137, 40, 50);
  fill(200);
  circle(midX +238, midY -120, 8);
  circle(midX +260, midY -120, 8);
  circle(midX +240, midY -100, 8);
  circle(midX +256, midY -100, 8);
    //ukulele body
  fill(150, 80, 40);
  ellipse(midX +250, midY +130, 120, 100);
  ellipse(midX +250, midY +80, 105, 100);
  fill(35);
  circle(midX +250, midY +90, 45);
  fill(35);
  rect(midX +230, midY +142, 40, 12);
  stroke(150, 80, 40);
  strokeWeight(5);
  noFill();
  arc(midX +250, midY +80, 105, 100, radians(27), radians(153))
    //ukulele strings
  fill(235);
  stroke(0);
  strokeWeight(2);
  rect(midX +236.5, midY -117, 1, 270);
  rect(midX +259.5, midY -117, 1, 270);
  rect(midX +244.5, midY -100, 1, 253);
  rect(midX +251.5, midY -100, 1, 253);

}

function draw() {
  //print(mouseX, mouseY);
}


method:

Initially, I started the sketch by limiting myself to solely using the ‘circle’ and ‘ellipse’ functions. I successfully managed to fill that huge circle with glaring brown eyes, eyebrows, and a mouth. Then came the clothing aspect of the sketch. I wanted something that represented me, and the first item that came to mind was the hat I occasionally wear to class. This was somewhat challenging given that the hat is completely constructed using the ‘arc’ function. It was an extremely challenging yet rewarding addition to the sketch as I could add little details such as a metal strap using the ‘rect’ function. Finally, n instrumentalist would not be one without an instrument. Thus I added the ukulele, a combination of circles, rectangles, lines, and arcs.

sketch:

The following images preview how the portrait sketch came to life to become what it is!

future improvements:

Adding some sort of movement to the program that provides an animation aspect would be amusing. For instance, making the eyes move to look wherever the mouse is, or possibly even making the ukulele a playable instrument!

iconic scribbles

concept:

As soon as I was informed about the assignment being an art presentation, world-known art pieces immediately came to mind. Whether it’s the beautiful Mona Lisa, the alluring Great Wave of Kanagawa, or the charming Starry Nights, I knew that using such iconic art pieces would be my inspiration for this assignment. However, I did not want to approach it from an ordinary/cliche perspective. Instead, I intended to present art in its most crucial form… when it’s nothing lines, shapes, and scribbles during a quick sketch. This drawing stage is what shows the artist what path this art piece will eventually take. That being said, how would you imagine those incredible art pieces mentioned earlier in a form where it is composed of nothing but lines and shapes? How thick would the lines be? What shapes would be used? How far will the spacing between the shapes and lines be? Answering and exploring these questions will display the concept I have in mind.

code:

//indicate variables
let img;
let canvas;

//load image
function preload() {
  img = loadImage("assets/5.jpeg");
}

function setup() {
  //create canvas with image dimensions
  canvas = createCanvas(img.width, img.height);

  //update canvas
  let updatedCanvasX = (windowWidth - img.width) / 2;
  let updatedCanvasY = (windowHeight - img.height) / 2;
  canvas.position(updatedCanvasX, updatedCanvasY);

  //draw until canavs edge and set difference between curves
  for (let column = 0; column < img.width; column += 2) {
    for (let row = 0; row < img.height; row += 2) {
      let x = column;
      let y = row;

      //get image attributes
      let m = img.get(x, y);

      //strokes attributes
      push();
      translate(x, y);
      rotate(radians(random(360)));
      noFill();
      strokeWeight(random(1));
      stroke(color(m));

      //add random circles representing splash
      push();
      strokeWeight(random(3));
      point(x, y);
      pop();

      //draw curved lines
      curve(
        x,
        y,
        sin(x) * random(5),
        cos(x) * sin(x) * random(50),
        random(30),
        random(50),
        cos(y) * sin(y) * random(10),
        cos(x) * sin(x) * 20
      );
      pop();
    }
  }
}


method:

Starting off, to work with already-existing art pieces that I would have to import into my program, I initially had to research how images work in JavaSript. Understanding how a loaded image’s dimensions can work and be modified with a program’s attributes allowed me to link my image’s colors to the shape I would eventually choose. I started exploring numerous shapes to see what would be ideal for a ‘scribble’ theme and found the ‘curve’ ideal to my vision. After confirming the shapes used in the program, I started experimenting with the thickness, length, and spacing of the curves. Also, adding small circles of different sizes was revealed to be a convenient way to represent some form of splatter on the canvas. That being said, these experiments resulted in a vast range of incredible yet unique sketches.

sketch:

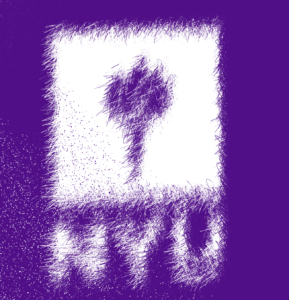
The following images are different runs on the program used on the NYUAD Logo where the ‘curve’ line attributes were modified:


^ stroke weight: 1 – 6 ; rotation: 360 ; circle radius: 1 – 4 ; spacing = 5


stroke weight: 1 – 4 ; rotation: 180 ; circle radius: 1 – 10 ; spacing = 12


stroke weight: 1 ; rotation: 120 ; circle radius: 1 – 2 ; spacing = 2


future improvements:

I initially had several ambitious plans that I, unfortunately, could not complete due to my limited knowledge of JavaScript. All of these ideas would have added a form of user interaction that would be great to have in such a program. First, allowing the user to change the image by pressing the keys ‘1’ through ‘5’, all of which display a different iconic art piece. The second would be a ‘save’ button allowing the user to save one’s own art piece, given that each run displays a completely new, never-seen-before illustration! Last but definitely not least would have been a functionality allowing the user to possibly upload their own picture/art piece and see how it would be if it were a ‘scribble!’

game:

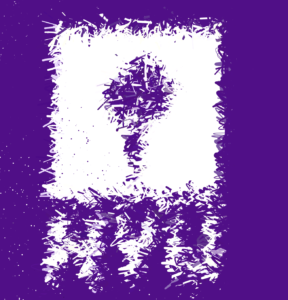
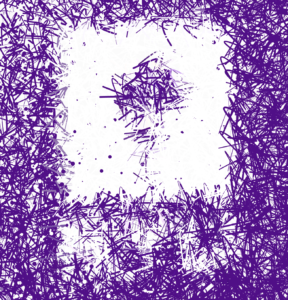
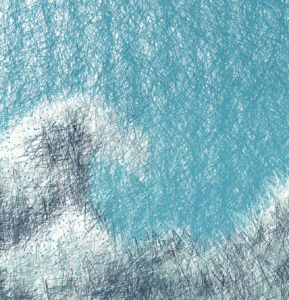
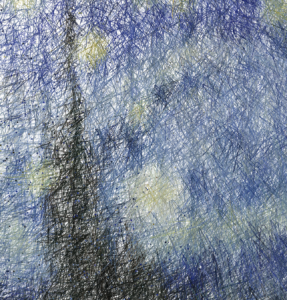
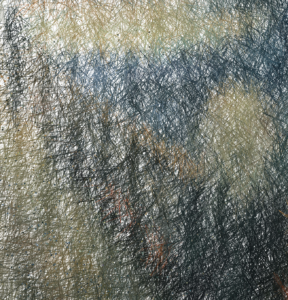
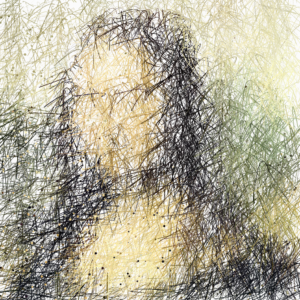
Guess the following art pieces from the displayed program edited image: (answers below)


  1. The Great Wave of Kanagawa
  2. Starry Nights
  3. The Scream
  4. Mona Lisa