
Concept:
For my final project, I created an interactive healthy-choice game inspired by foods and everyday habits familiar in Kazakh culture. It features a girl character positioned at the center of the canvas. The core mechanic involves catching and avoiding falling items that represent healthy and unhealthy choices. Healthy foods such as apples, dates, milk, and water increase the player’s score, while unhealthy items like burgers and Coca-Cola reduce it by 10 points. Different point values are assigned to healthy foods, for example apples and milk give +20 points, while dates and water give +10 to encourage players to visually recognize and prioritize healthier options rather than relying solely on quick reactions.
The game is structured into two alternating phases to maintain engagement. In Phase 1, apples, dates, and burgers appear (food), while Phase 2 introduces milk, water, and Coca-Cola (liquid). Player movement is controlled through real apples connected to Arduino using capacitive touch sensors, with Arduino sending control signals to p5.js. Touching the green apple moves the character left, while touching the red apple moves the character right, translating real-world interaction into on-screen movement. When the timer ends, p5.js communicates back to Arduino to trigger an LED. The Kazakh national music plays during gameplay, reinforcing cultural context and creating an immersive experience that combines physical computing, digital interaction, and culturally grounded storytelling. Adding on that, to hide the wiring and make the project look clean, I built a wooden box that holds the Arduino. The box has the game name engraved on top, apple designs on the sides, and traditional Kazakh ornaments engraved along the bottom and in the corners (please see the picture below)
User Testing Video:
I am especially happy with my choice of controllers—the apples. While working on the project in the IM Lab, many people were curious about how the game worked and approached me with questions or asked to try it themselves. This led to informal user testing, where I was able to observe how people interacted with the game in real time. From this feedback, I learned how to make the project clearer and more accessible, and I added improved and more descriptive instructions so that first-time players could understand the controls more easily. Many users also mentioned that they enjoyed touching the real apples while playing. Some even pointed out the fresh apple smell, which made the experience feel more engaging and sensory. Please see the first user experience video:
Interaction design:
The interaction design of the game relies heavily on embodied physical input through real apples, which successfully bridges the digital and physical worlds. This approach encourages players to engage tactilely with the interface, making the act of moving the character more memorable and immersive than conventional keyboard or touchscreen controls. Observations during testing revealed that the novelty of physically touching an apple, paired with its natural scent, enhances user engagement and creates an intuitive connection between the player’s actions and in-game consequences. This sensory dimension supports learning, as players are more likely to remember which items are healthy or unhealthy when the interaction is multisensory.
Arduino Part:
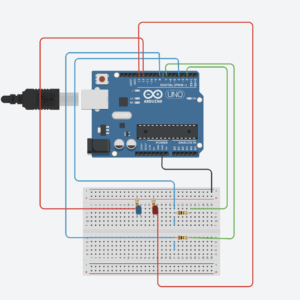
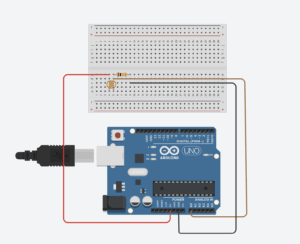
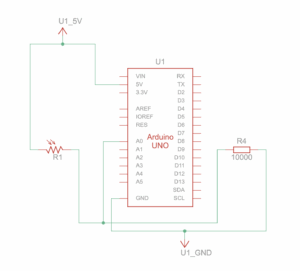
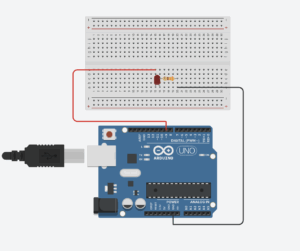
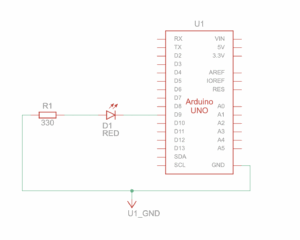
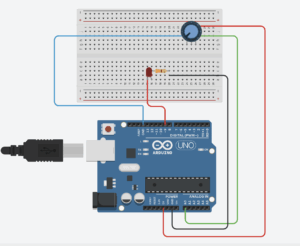
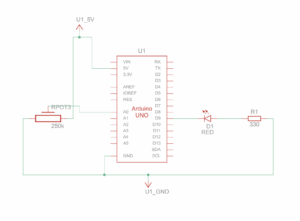
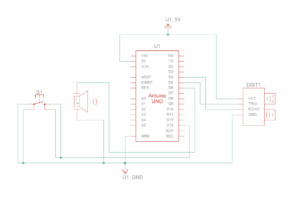
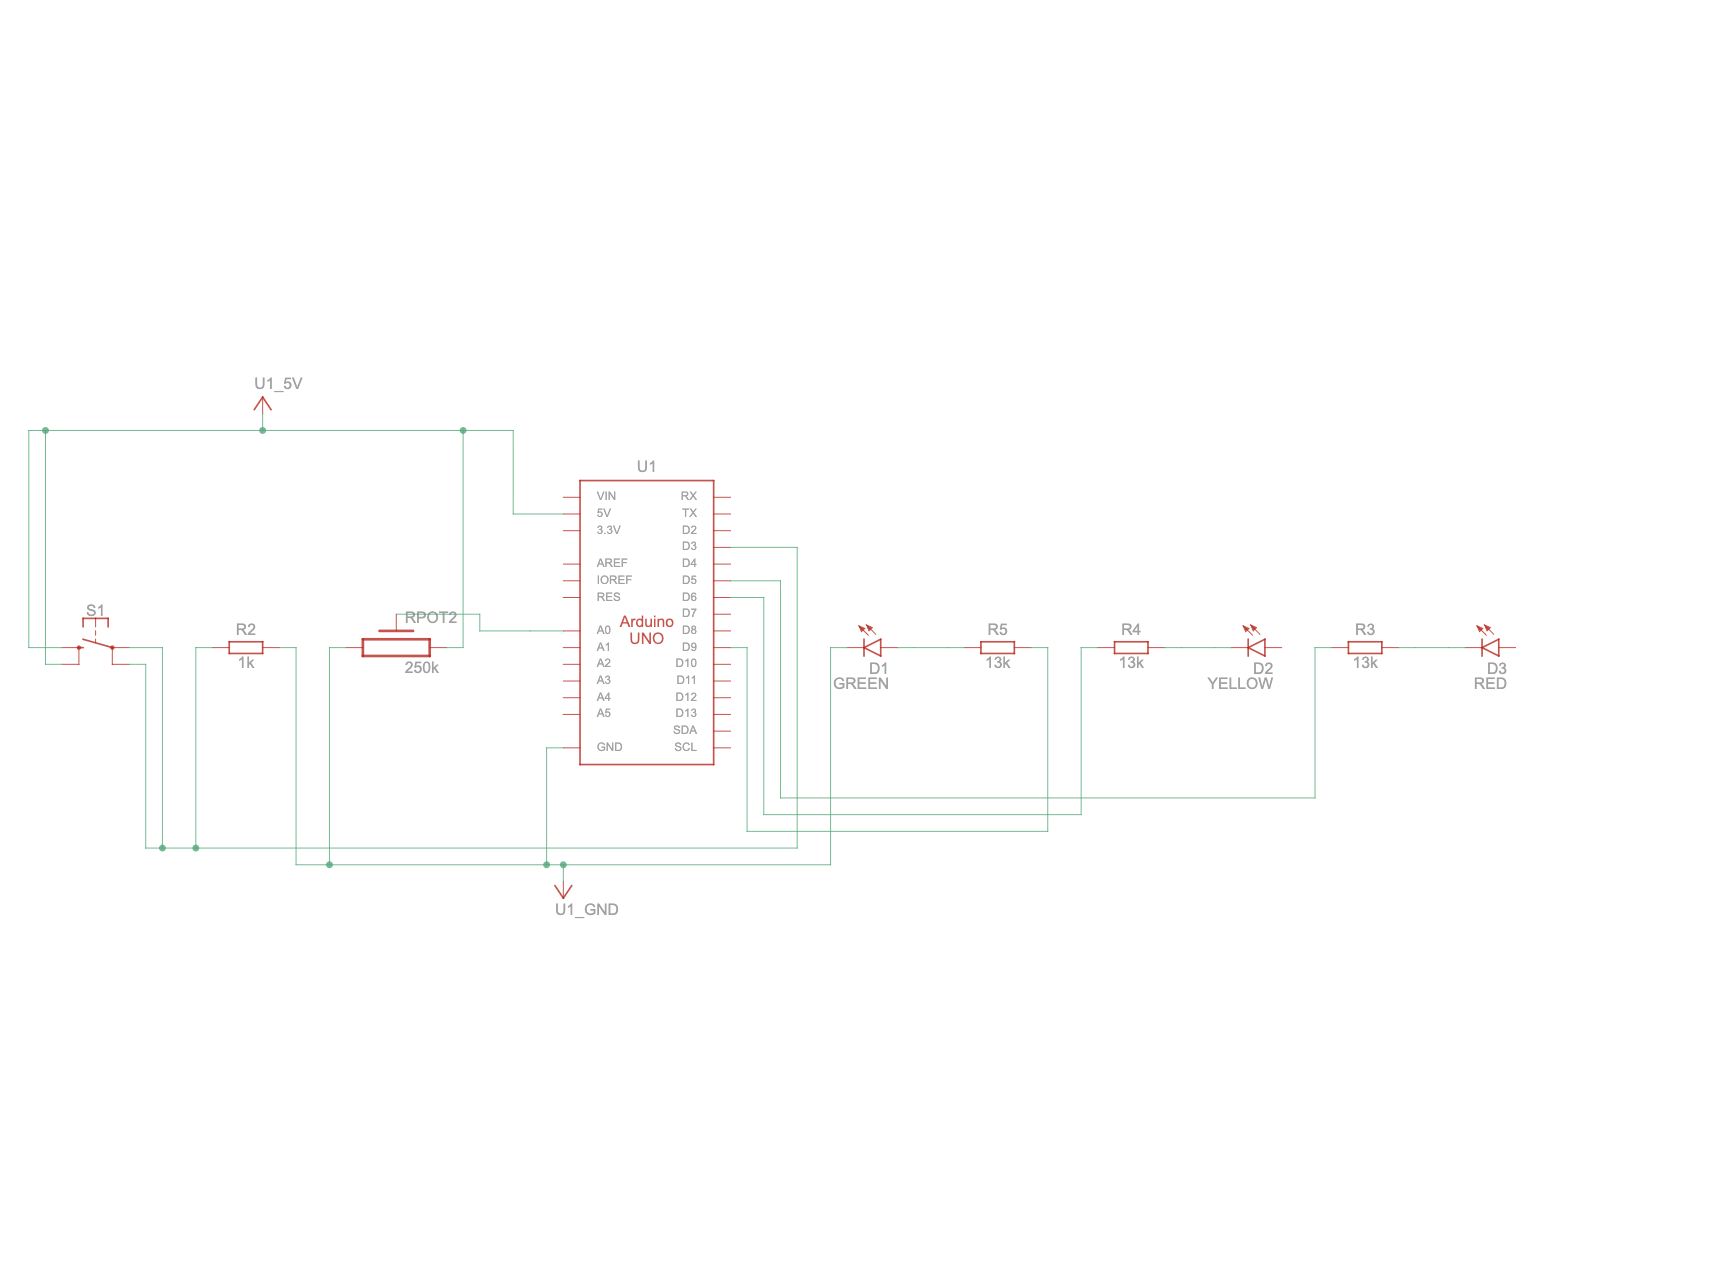
For the Arduino part I used the following wiring:


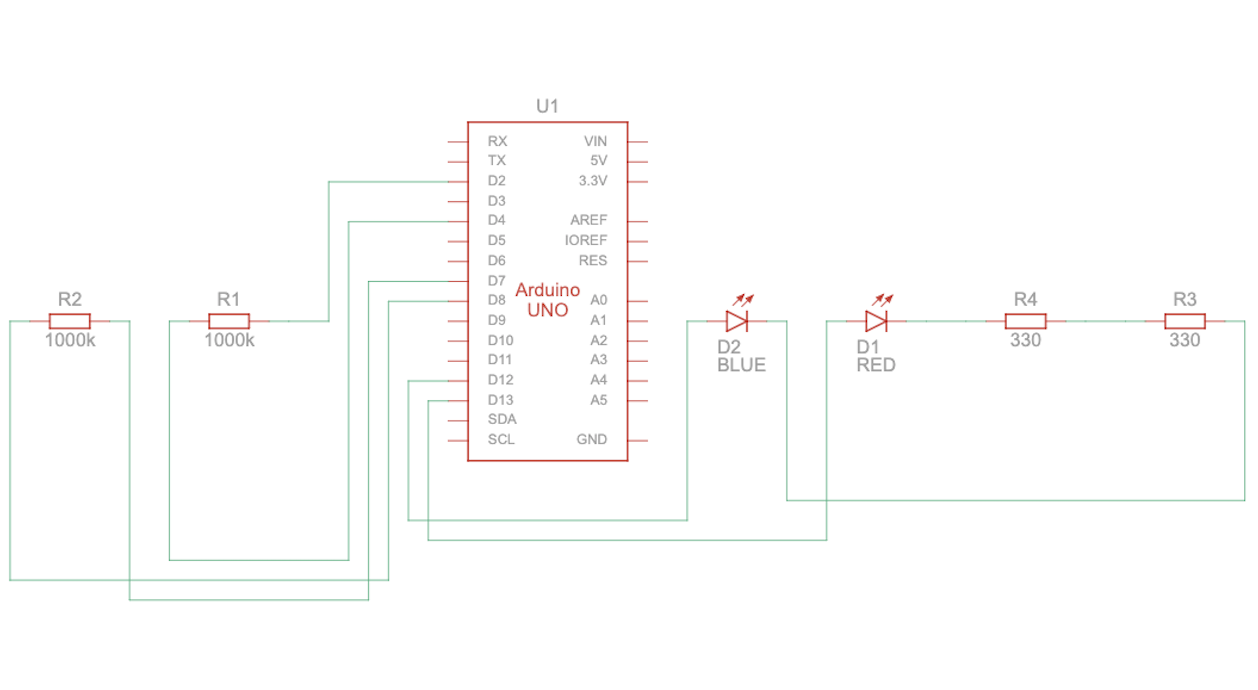
Schematic:
Code Snippet:
// Determine if sensors are being touched
    bool rightActive = rightValue > (rightBase + touchOffset);
    bool leftActive  = leftValue  > (leftBase  + touchOffset);


 // Send RIGHT command only when the right sensor is newly touched
    if (rightActive && !rightTouched) {
      Serial.println("RIGHT");
    }
 // Send LEFT command only when the left sensor is newly touched
    if (leftActive && !leftTouched) {
      Serial.println("LEFT");
    }
  // Detect release: touch was active before but now inactive
    bool rightReleased = rightTouched && !rightActive;
    bool leftReleased  = leftTouched  && !leftActive;
// Send STOP only when both sensors are released
    if ((rightReleased || leftReleased) && !(rightActive || leftActive)) {
      Serial.println("STOP");
    }
  // Update current touch state
    rightTouched = rightActive;
    leftTouched  = leftActive;
I really like the part of the Arduino code that checks when the apples are touched and sends commands. It only sends a command when the touch actually starts or ends, which prevents too many repeated messages and keeps the game running smoothly. The code tracks three states: touch started, touch ended, and no touch, making the sensors easy to understand and reliable. By remembering whether each apple was already being touched, the Arduino responds only to intentional actions, so the character in the game moves accurately. This design makes the game feel responsive and natural when players use the apples. To build the capacitive touch sensors, I used the CapacitiveSensor library (Paul Badger’s CapacitiveSensor) and a 1 MΩ resistor, which allows the Arduino to detect even gentle touches on the apples. I also soldered my LEDs to put it into wood box. This setup is effective for creating sensitive, stable input for the game.
P5 Code:
function handleFallingObjects() {
    // Generate a new object approximately once every second (60 frames)
    if (frameCount % 60 === 0) {
        generateFallingObject();
    }

    // Iterate backwards to safely remove objects during the loop
    for (let i = fallingObjects.length - 1; i >= 0; i--) {
        let obj = fallingObjects[i];
        obj.y += objectSpeed; // Move object down
        drawObject(obj); // Draw object

        // Collision check
        let d = dist(obj.x, obj.y, charX, charY);
        if (d < (obj.size / 2) + (CATCHER_RADIUS / 2)) {
            handleCatch(obj, i); // Process score and remove item
            continue; // Skip to next item since this one was removed
        }
        // Check if object has fallen off the bottom of the screen
        if (obj.y > height + 50) {
            fallingObjects.splice(i, 1); // Remove missed object
        }
    }
}
I like this part because it keeps the gameplay dynamic and challenging while staying organized. Objects appear randomly, move smoothly, and are removed cleanly when they are caught or missed, which prevents the array from growing unnecessarily. It also checks for collisions in a simple and effective way, making the game feel responsive and fun.
Communication between Arduino and P5.js
The communication between Arduino and p5.js works by sending and receiving serial data. Arduino detects touches on the capacitive sensors and sends commands like left, right, or stop. The p5.js sketch listens for these messages and changes the character’s movement on the screen, creating a seamless interaction between the physical sensors and the digital game. From p5.js to Arduino interaction happens when the game is over, as the LED lights up.
// Serial Data Processing
function readSerial(data) {
    let msg = data.trim(); // Clean up incoming string from Arduino

    // Set movement direction based on serial commands
    if (msg === "LEFT") {
      currentDirection = -1; // Move left
    }
    else if (msg === "RIGHT"){
       currentDirection = 1; // Move right
    }
    else if (msg === "STOP") {
      currentDirection = 0; // Stop movement
    }
}
Challenges and what I am most proud of:
This part of the challenge is handled in the Handle Falling Object, and Generate Falling Object functions. As it was my first time creating the game in p5, where the objects fall down from the top, it was at first hard to manage it. As I started I noticed that too many objects were appearing at the same time or in the same spot, which made it hard for the player to catch anything. To manage how often objects appear, I used the game’s frame count as a timer. The program runs many times per second, and I checked the frame count to create a new object only when it reached a certain number, specifically every 60 frames. Since the game usually runs at 60 frames per second, this means a new object appears roughly once per second. This method made the falling items appear at a steady, predictable pace, giving the player enough time to react and catch them. I also set a random horizontal position for each object within the valid range using random (minX, maxX). What I am proud of is that after these adjustments, the game became much smoother and more playable. Each object now appears evenly across the screen and at a steady pace, making it easier for the player to react. This shows how careful timing and thoughtful use of randomness can improve the gameplay experience.
Link to resources and use of AI:
I used new library: Paul Badger’s CapacitiveSensor.
ChatGPT was used to generate the image for the start and play pages and helping me finding the sources about the capacity touch sensor, to be more specific, by asking ChatGPT: give me more information and tutorials on capacity touch sensor, he gave me this tutorial, which I looked up to understand the wiring and the whole circuit better.
The Game Over page was made using Canva.
The images of the food, liquid and the character was found on the internet, specifically this website.


