
Conceptualization
For this week’s assignment, the requirement is to “Make a musical instrument “while using at least one digital sensor (switch), at least one analog sensor (photoresistor, potentiometer, or distance measuring sensor).” I have worked with photoresistor last week, and potentiomter isn’t aesthetic enough for a musical instrument in my view, so I looked into the toolbox and proposed to apply ultrasonic sensor, or in another word, distance measuring sensor. It works perfectly as a tool to measure the distance between the sensor and any solid object in real-time and we were thinking to map this distance to pitches so that whenever people move their hands in front of the sensor, the sound the buzzer make would change accordingly.
After implement this simple step, I was thinking about two problems: first, how could i integrate a switch into this system, and second, is there anyway to alter the tempo, which is another important factor in making music, of the sound the buzzer made. To resolve the first problem, i first decide to add a system on/off switch since it’s just logical to add a switch to control the entire system. To resolve the second problem, I proposed to add a switch to control the tempo of the sound it made since after the first implementation, the buzzer would just make continuous sound and it would be hard to add any tempo element to the instrument.
We decided there could be 2 means to control the tempo:
- The switch would record manual interaction with the switch and play the sound precisely how it is manually inputted.
- The switch would record how many times people push the button within a 5-second time period(starting from the first push) and calculate the tempo based on 1000ms dividing the times the button is pushed.
We finally decided to go with the second option as it would provide us with a more steady tempo since manual input could be mathematically unstable otherwise.
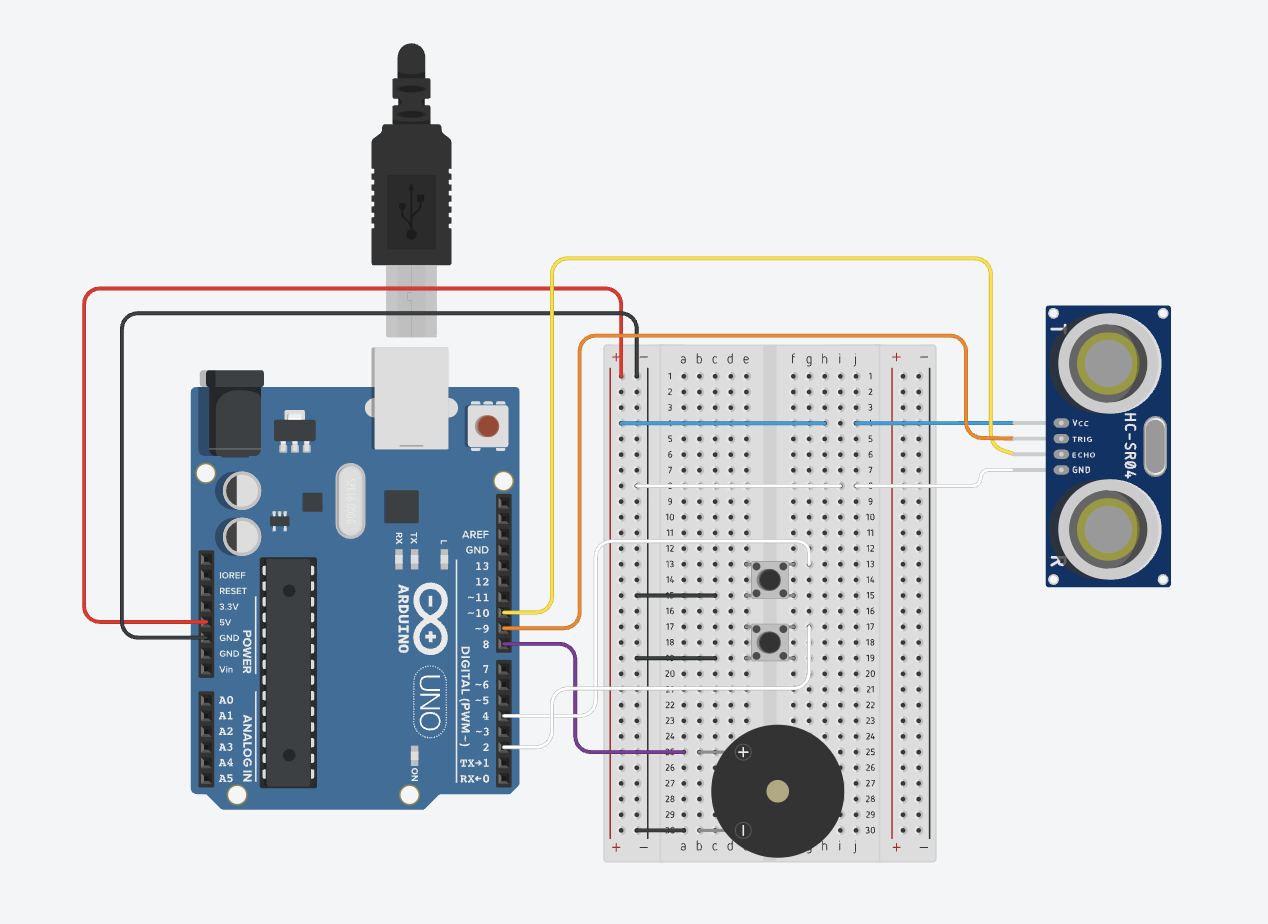
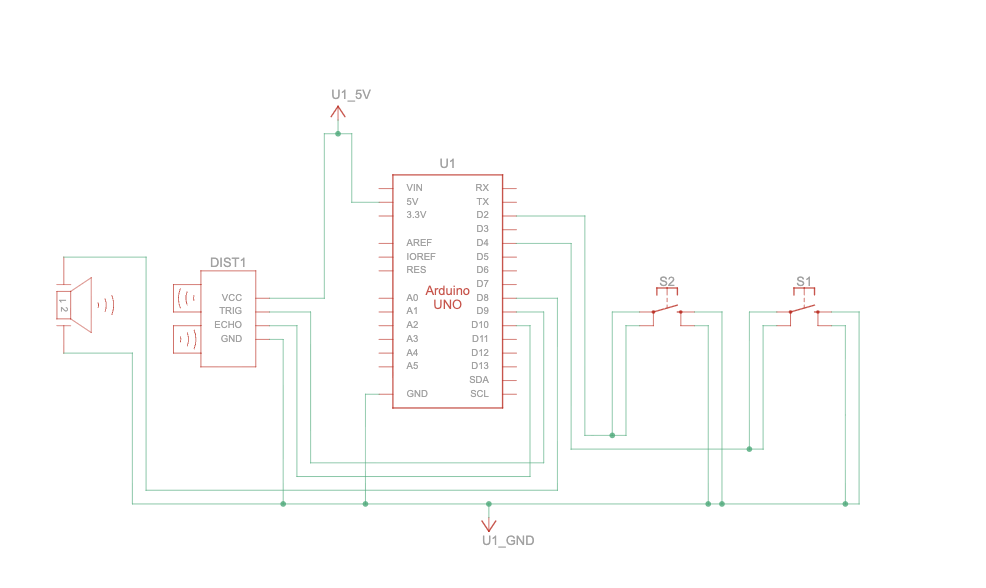
So the final output(the video demonstration and the schematic) is demonstrated below.
Video Demonstration
Schematic
Code Highlight:
In my opinion, there are two interesting part about this program. First, how the pitch is controlled(a basically mapping program) and secondly, the program to control the tempo(the logic of the tempo-control is listed above).
duration = pulseIn(echoPin, HIGH);
distance = (duration * 0.0343) / 2.0;  // in cm
// Check if distance is valid and in a usable range
  if (distance > 0 && distance < 200) {
    float d = distance;

    // Limit distances for stable mapping
    if (d < 5)  d = 5;
    if (d > 50) d = 50;

    // Map distance to frequency (closer = higher pitch)
    int frequency = map((int)d, 5, 50, 2000, 200);
This code highlights how the pitch is correlated to the distance in programs.
duration = pulseIn(echoPin, HIGH);
This measures how long the echo signal stayed HIGH. This is the time for the sound to travel to the obstacle and back.
distance = (duration * 0.0343) / 2;
The duration(in microseconds) is multiplied by the speed of sound in air (0.0343 cm/µs). It’s divided by 2 because the sound traveled to the object and back, but we only want one-way distance.
// Detect a press (falling edge: HIGH -> LOW)
  if (tempoButtonState == LOW && lastTempoButtonState == HIGH) {
    if (!tempoSettingActive) {
      // First press: start 5-second capture window
      tempoSettingActive = true;
      tempoStartTime = millis();
      tempoPressCount = 1;  // Count this first press
      Serial.println("Tempo setting started: press multiple times within 5 seconds.");
    } else {
      // Additional presses inside active window
      tempoPressCount++;
    }

    delay(40); // debounce for tempo button
  }
This is the tempo controlling program. I think it is very self-explanatory with the comments in the code.
The entire code is completed with assistance from GPT.
Reflection:
For future improvements, i want to work with buzzer that produce better sound than this one, but the working experience with this buzzer is transitive for future works.