
 I started this project with a few ideas. One of the ideas was to make a secret switch hidden on a bookshelf. One of the books would have a piece of copper tape underneath that would touch the copper tape beneath it on the shelf. However…I realized that I didn’t have enough books to make it look convincing so I started looking around my room for something that inherently had motion to make my life easier. So I thought– what if I used my door?
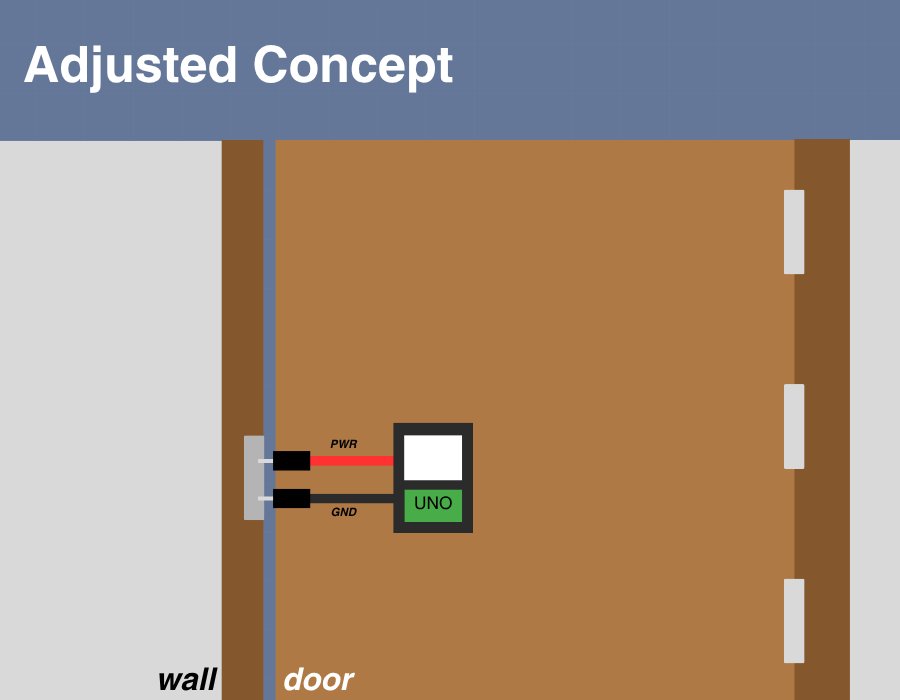
Sometimes I don’t fully close my door properly and don’t know if it’s fully closed. That inspired me to make the door a switch to act like a DIY security system. I have no experience with physical computing so I had some trouble visualizing how it would look in my head, and it didn’t help that I’ve been out sick for so long. This image below was my initial concept for it.
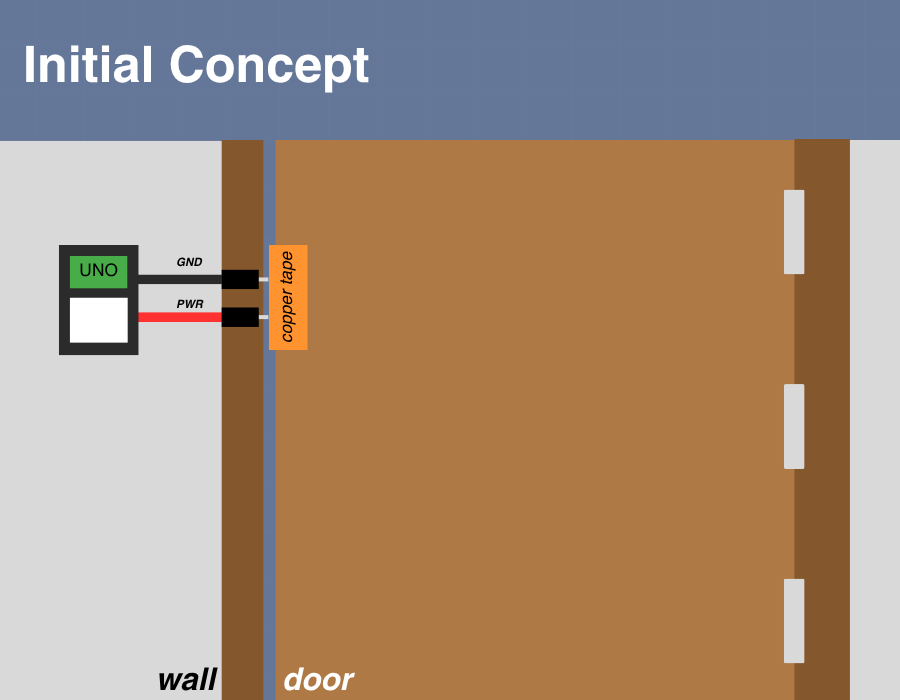
The idea is to set up a simple LED light on the breadboard that would light up when the door was fully closed. I think I understood that pretty comfortably, but I didn’t know how the rest would work.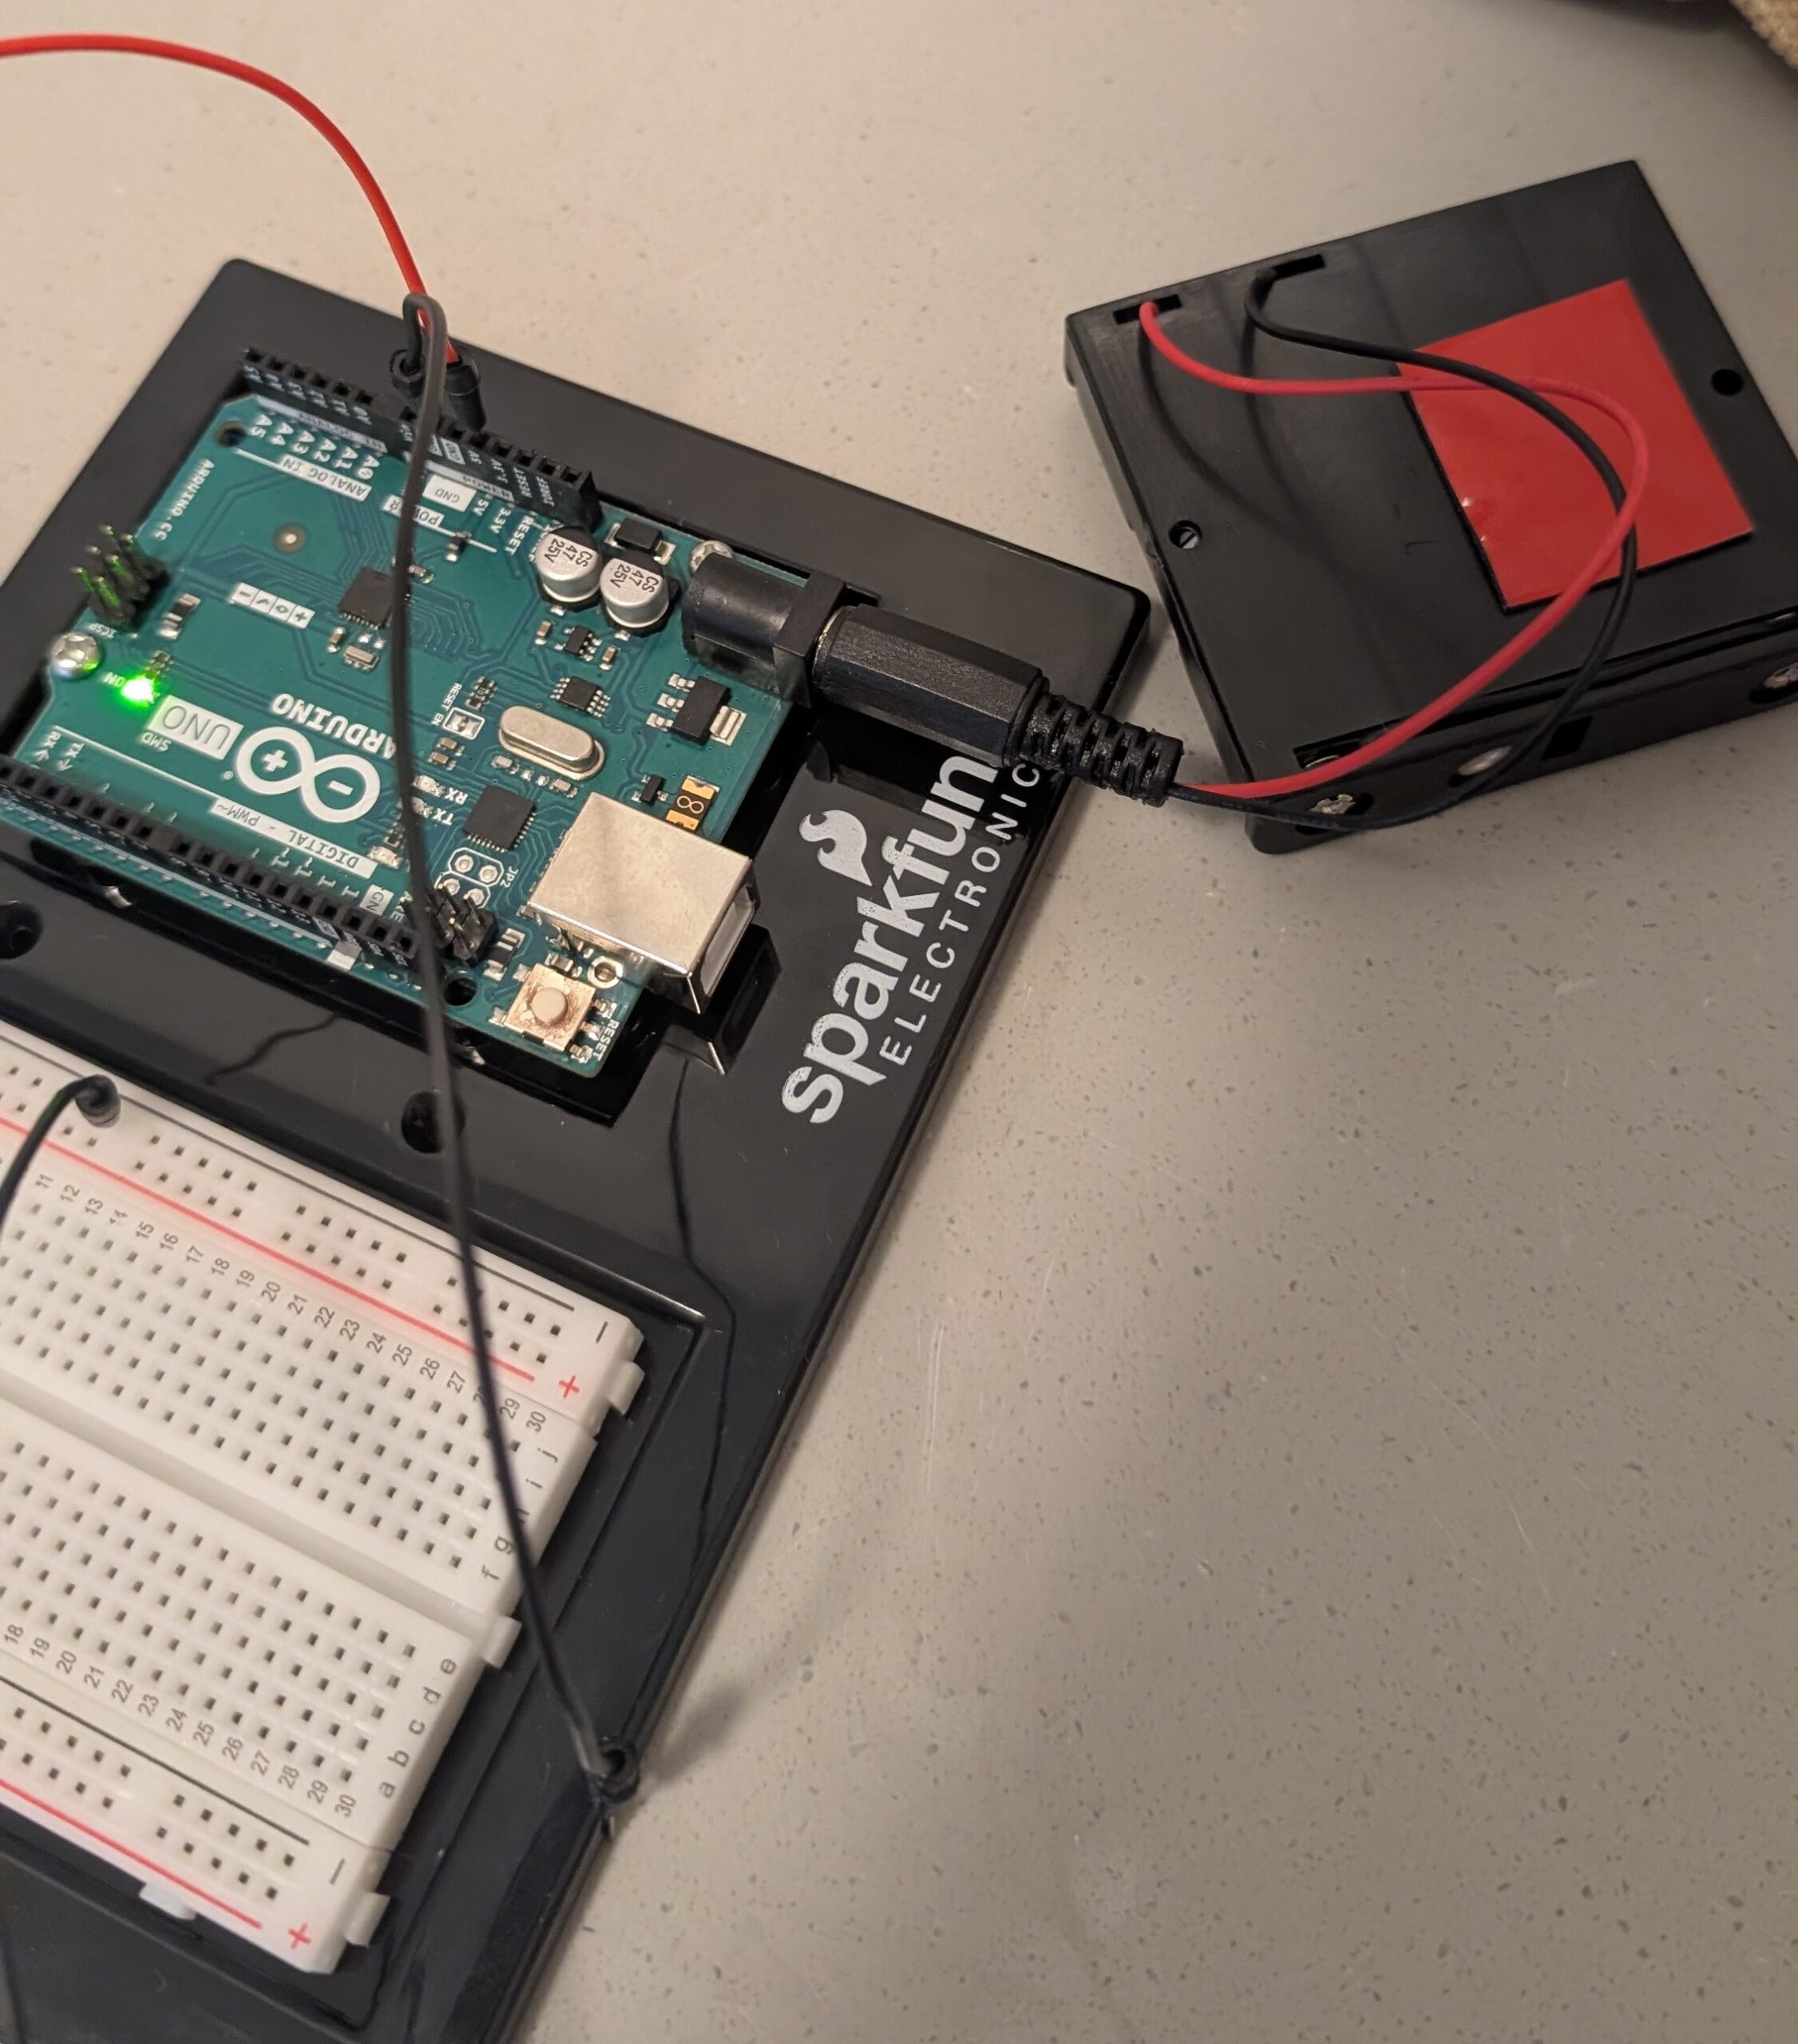
One of the challenges was having a mobile power source, as I was definitely not going to use my laptop for power when the Arduino kit is all the way up on the wall. I remembered that I found a battery pack in the kit so I dug that out and went down to the IM lab to ask for help and got some spare AA batteries.
The breadboard and Arduino setup was pretty straightforward but the one thing I had to think about was which wires to leave as an open connection later. From my perspective, it made sense to have the ground be split up and later connected using the copper tape so that’s what I did, while following the color conventions of PWR and GND.
I walked over to my door and applied some copper tape and set up my Arduino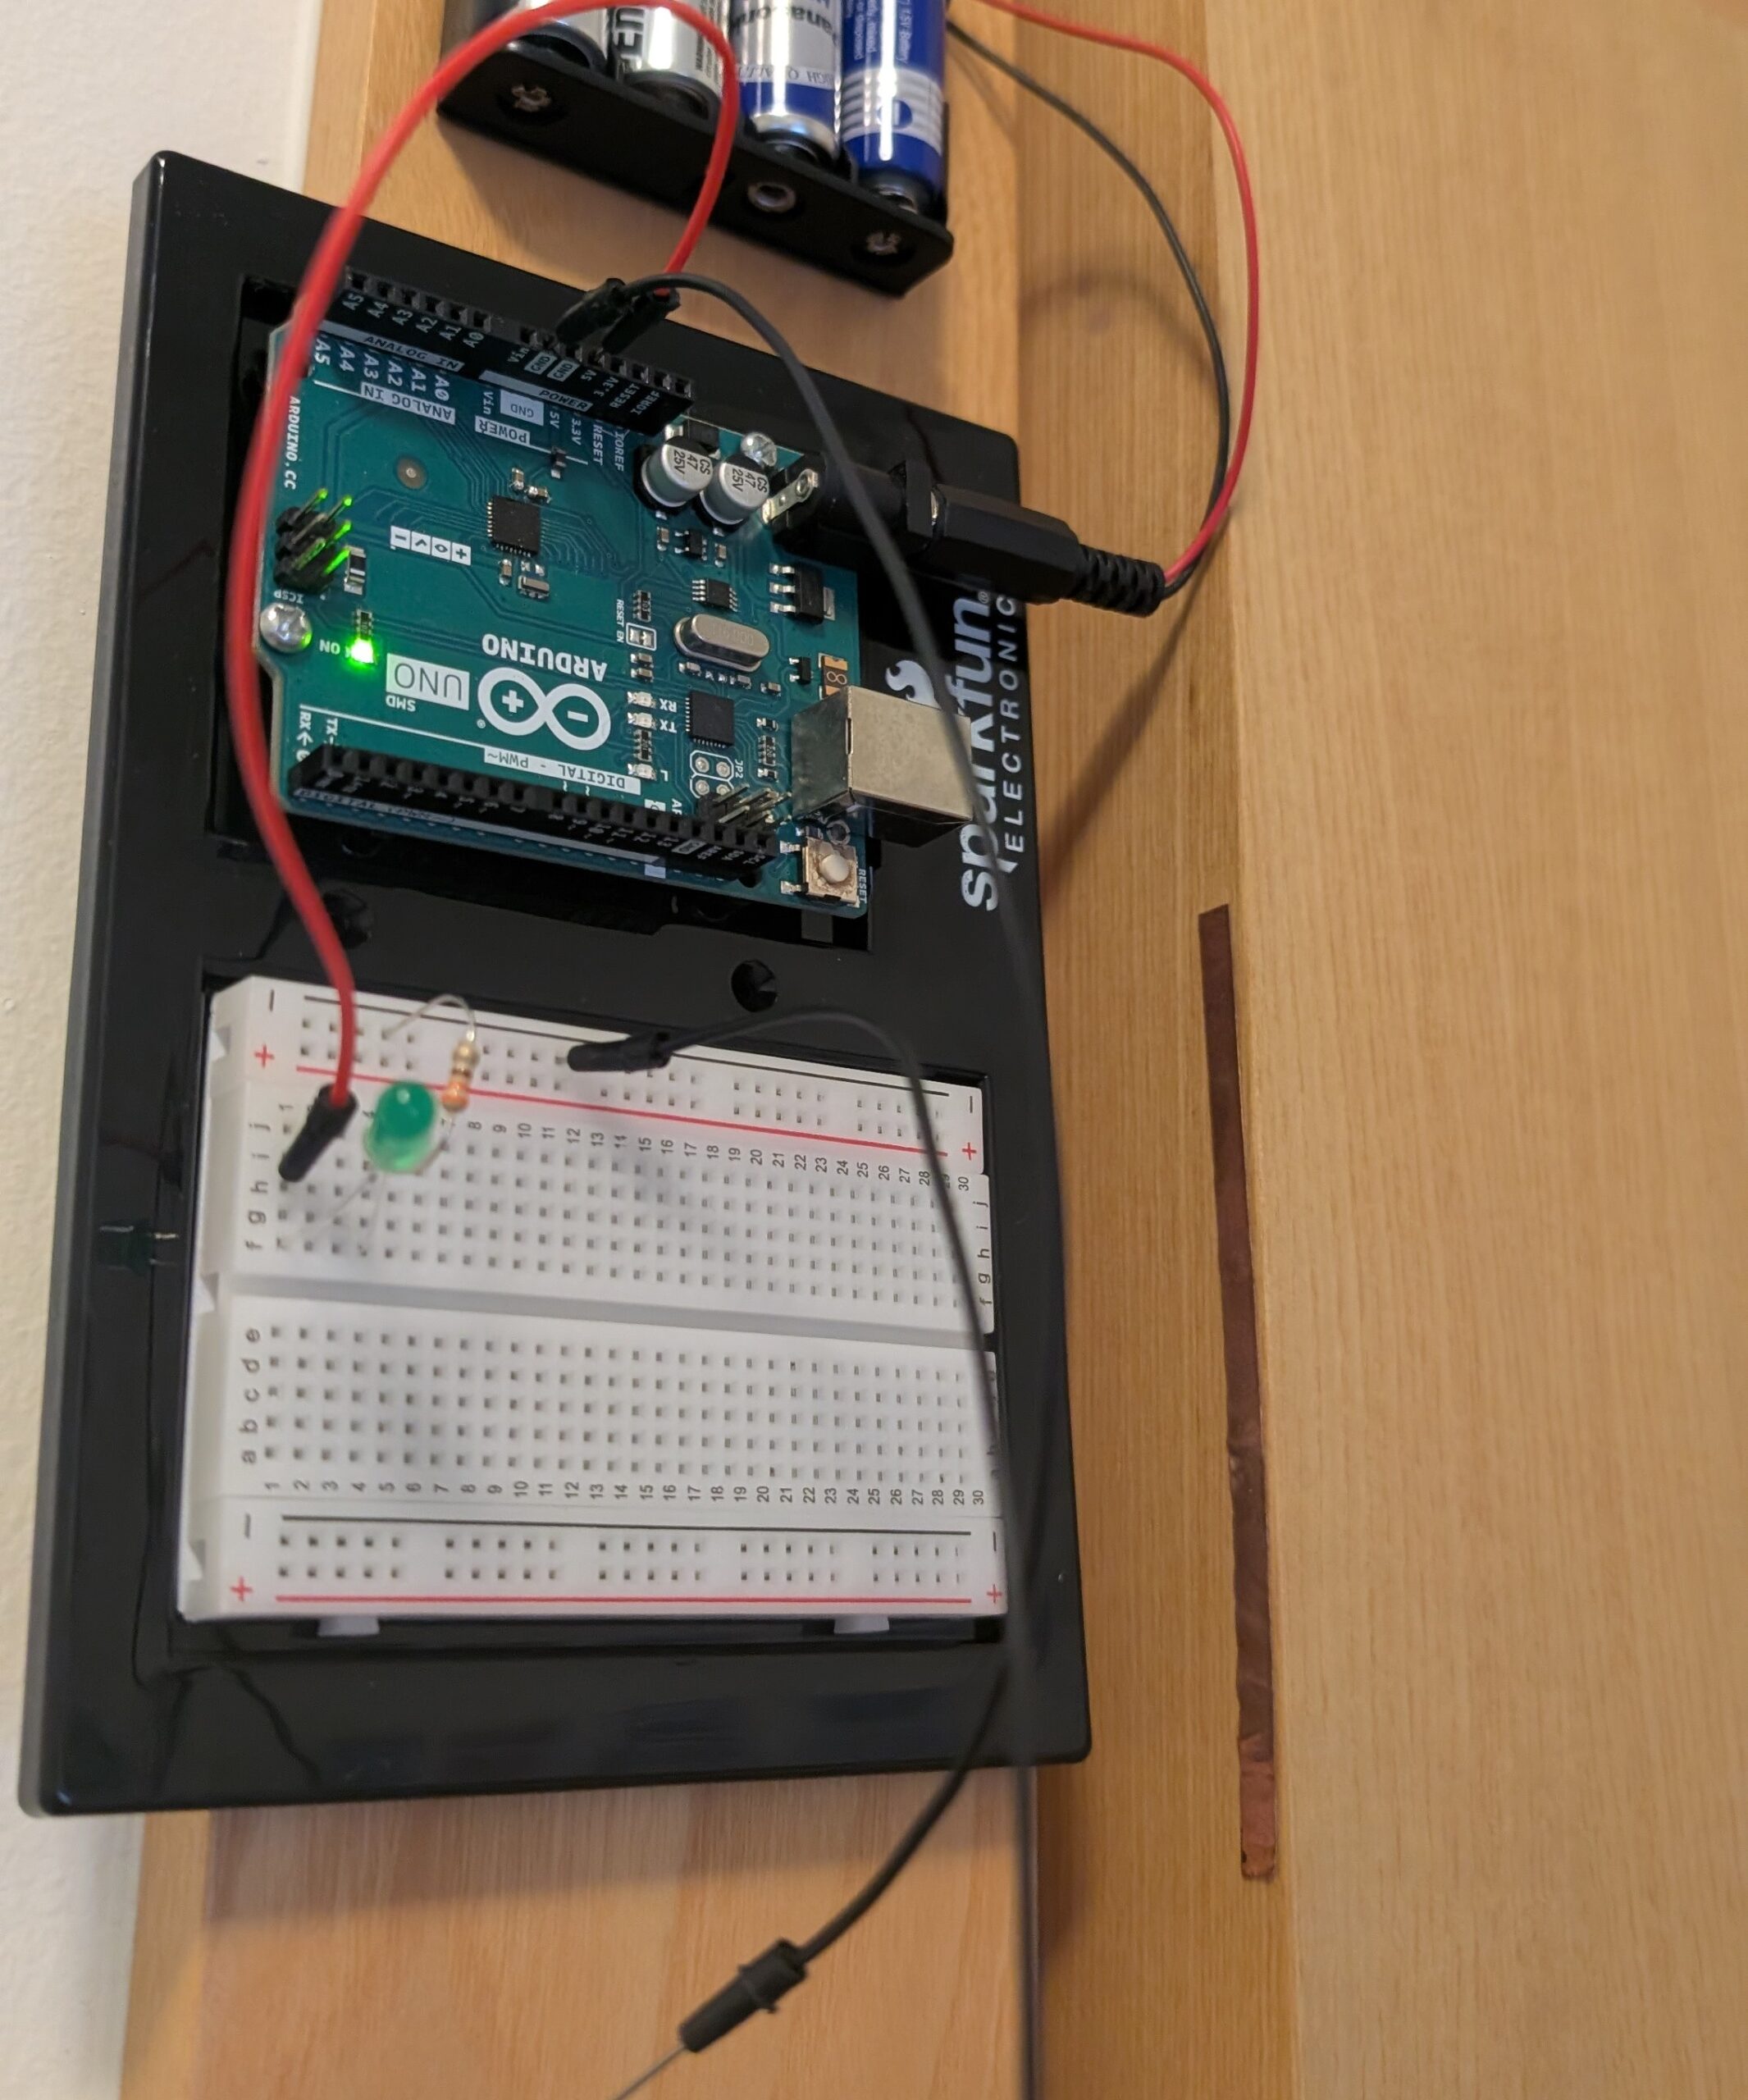 & battery pack on the wall using some mounting tape. However, as I worked on setting up the rest of the copper tape, I realized that this was going to very clunky– the door’s frame is not seamless with the door itself which means I need something solid to connect it; however, the copper tape was a bit too flimsy to be that connection. This is what I had so far at the time:
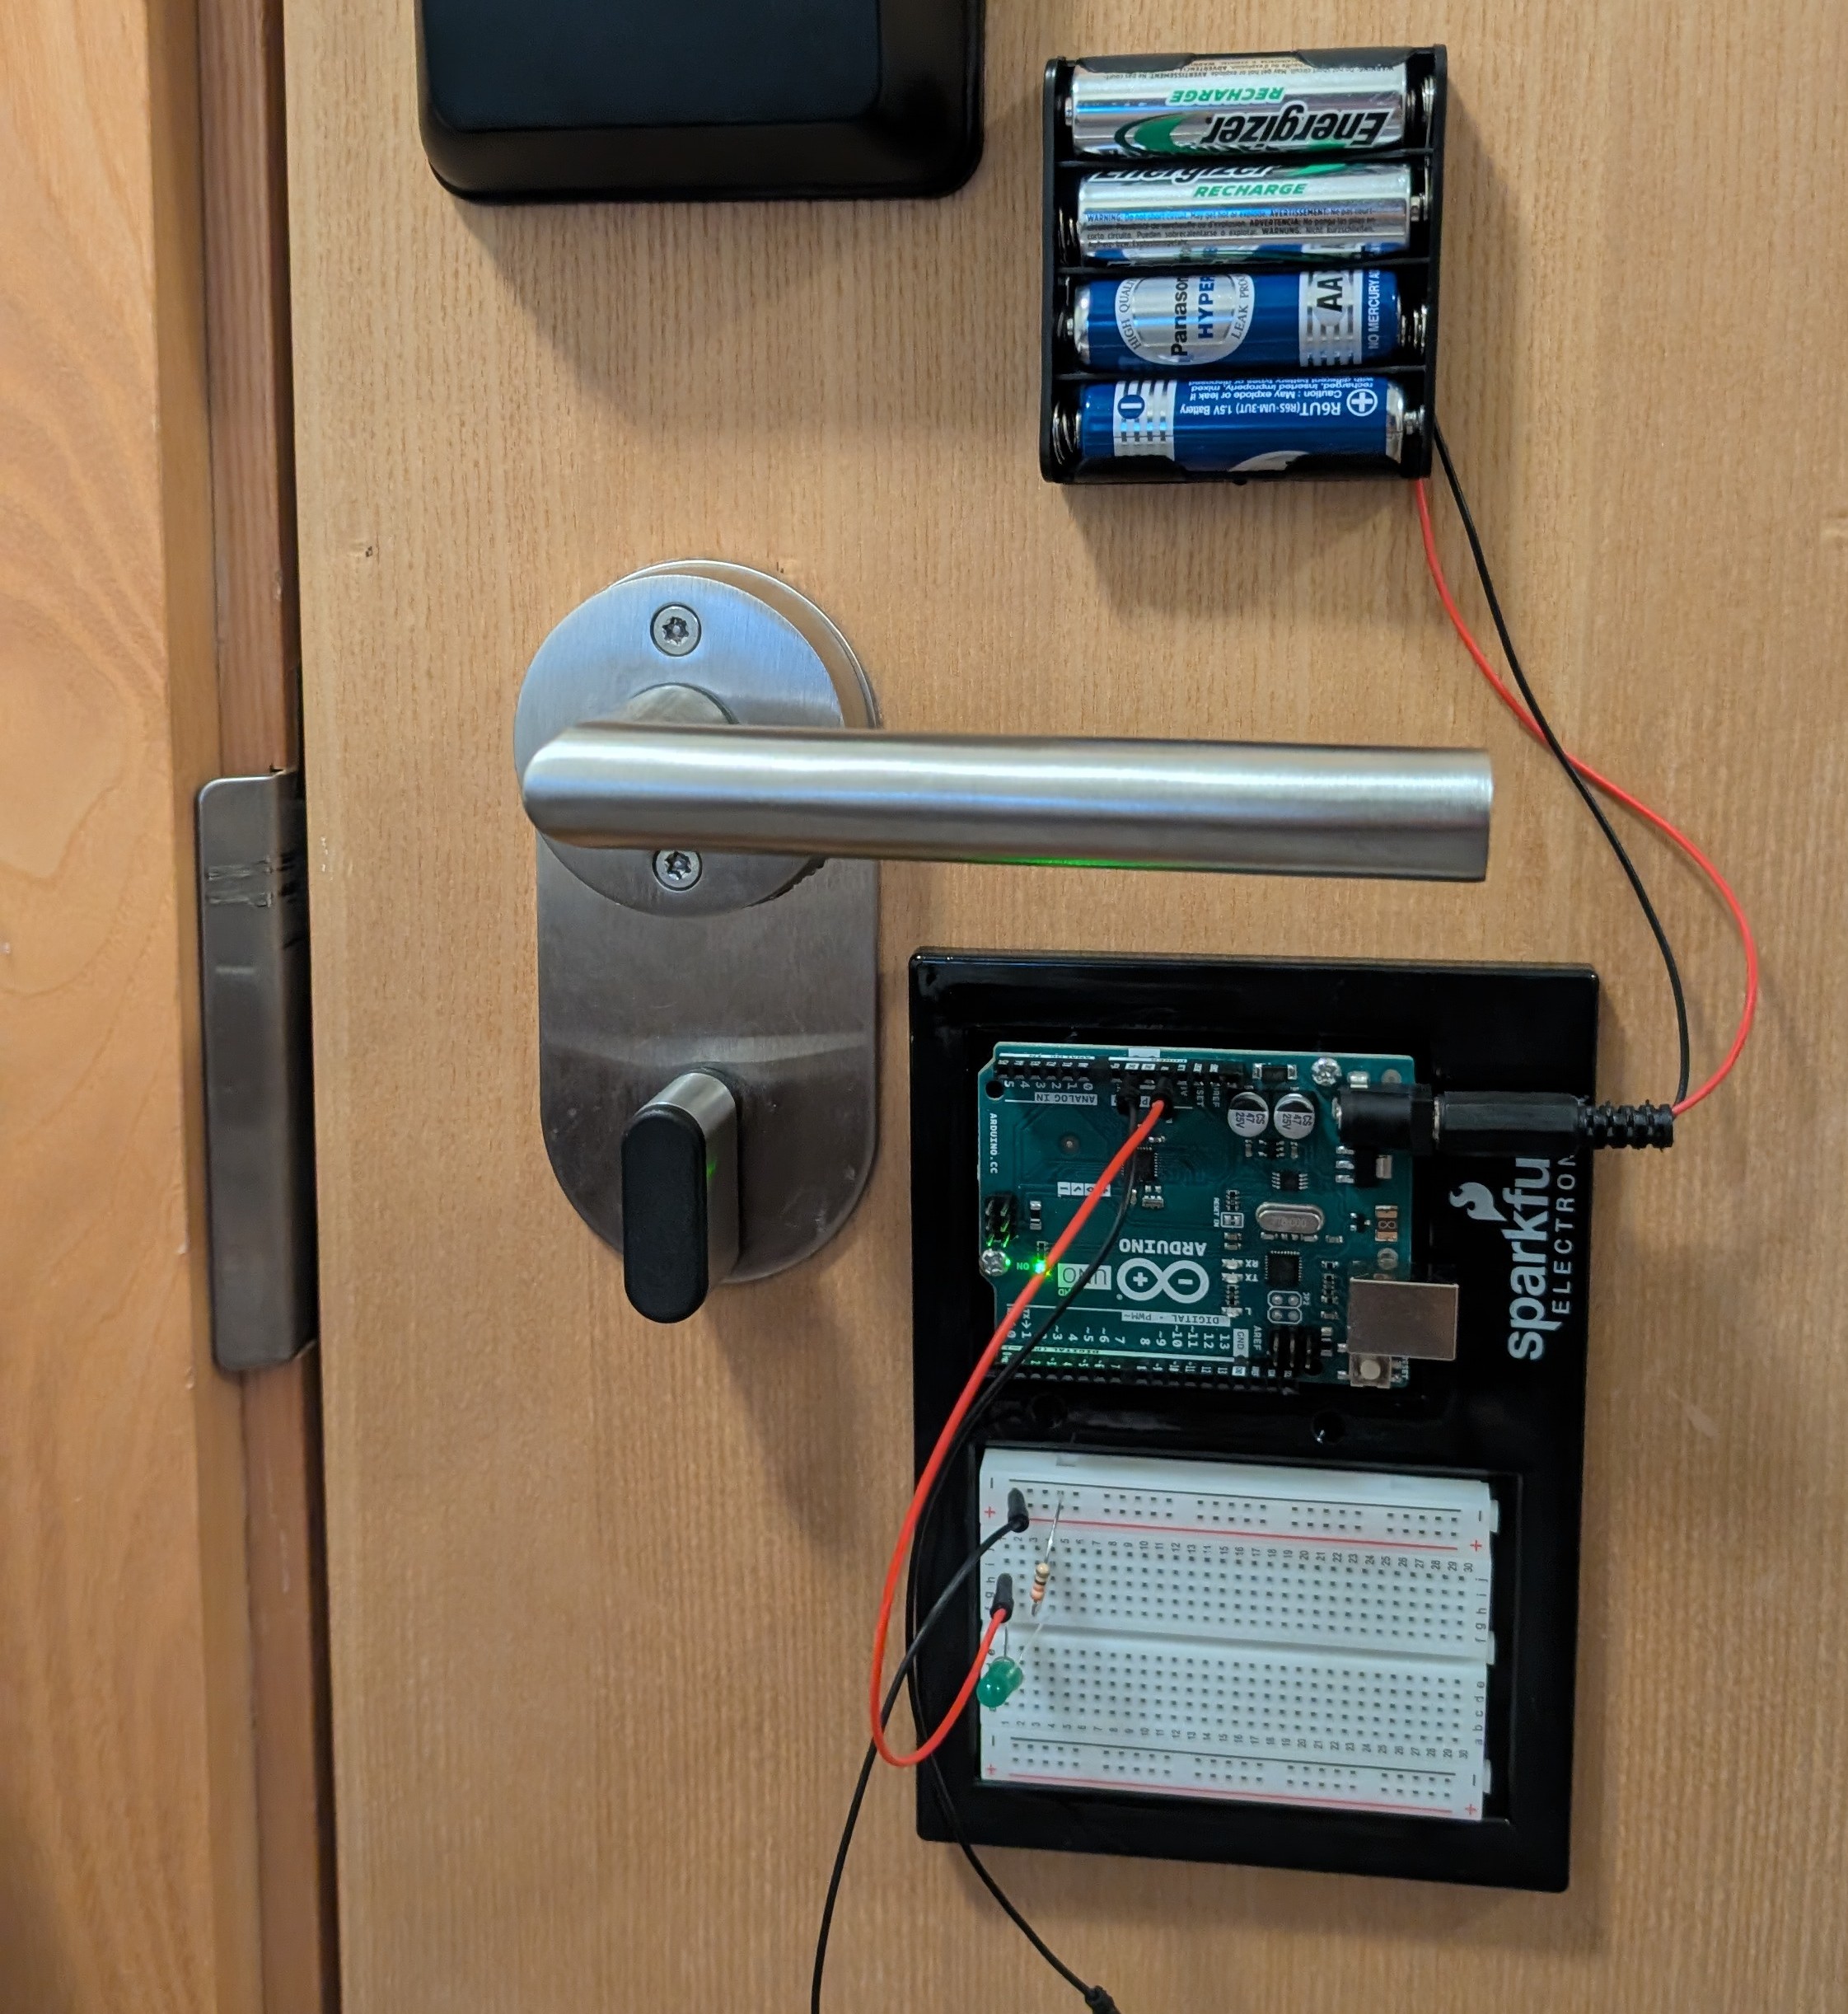
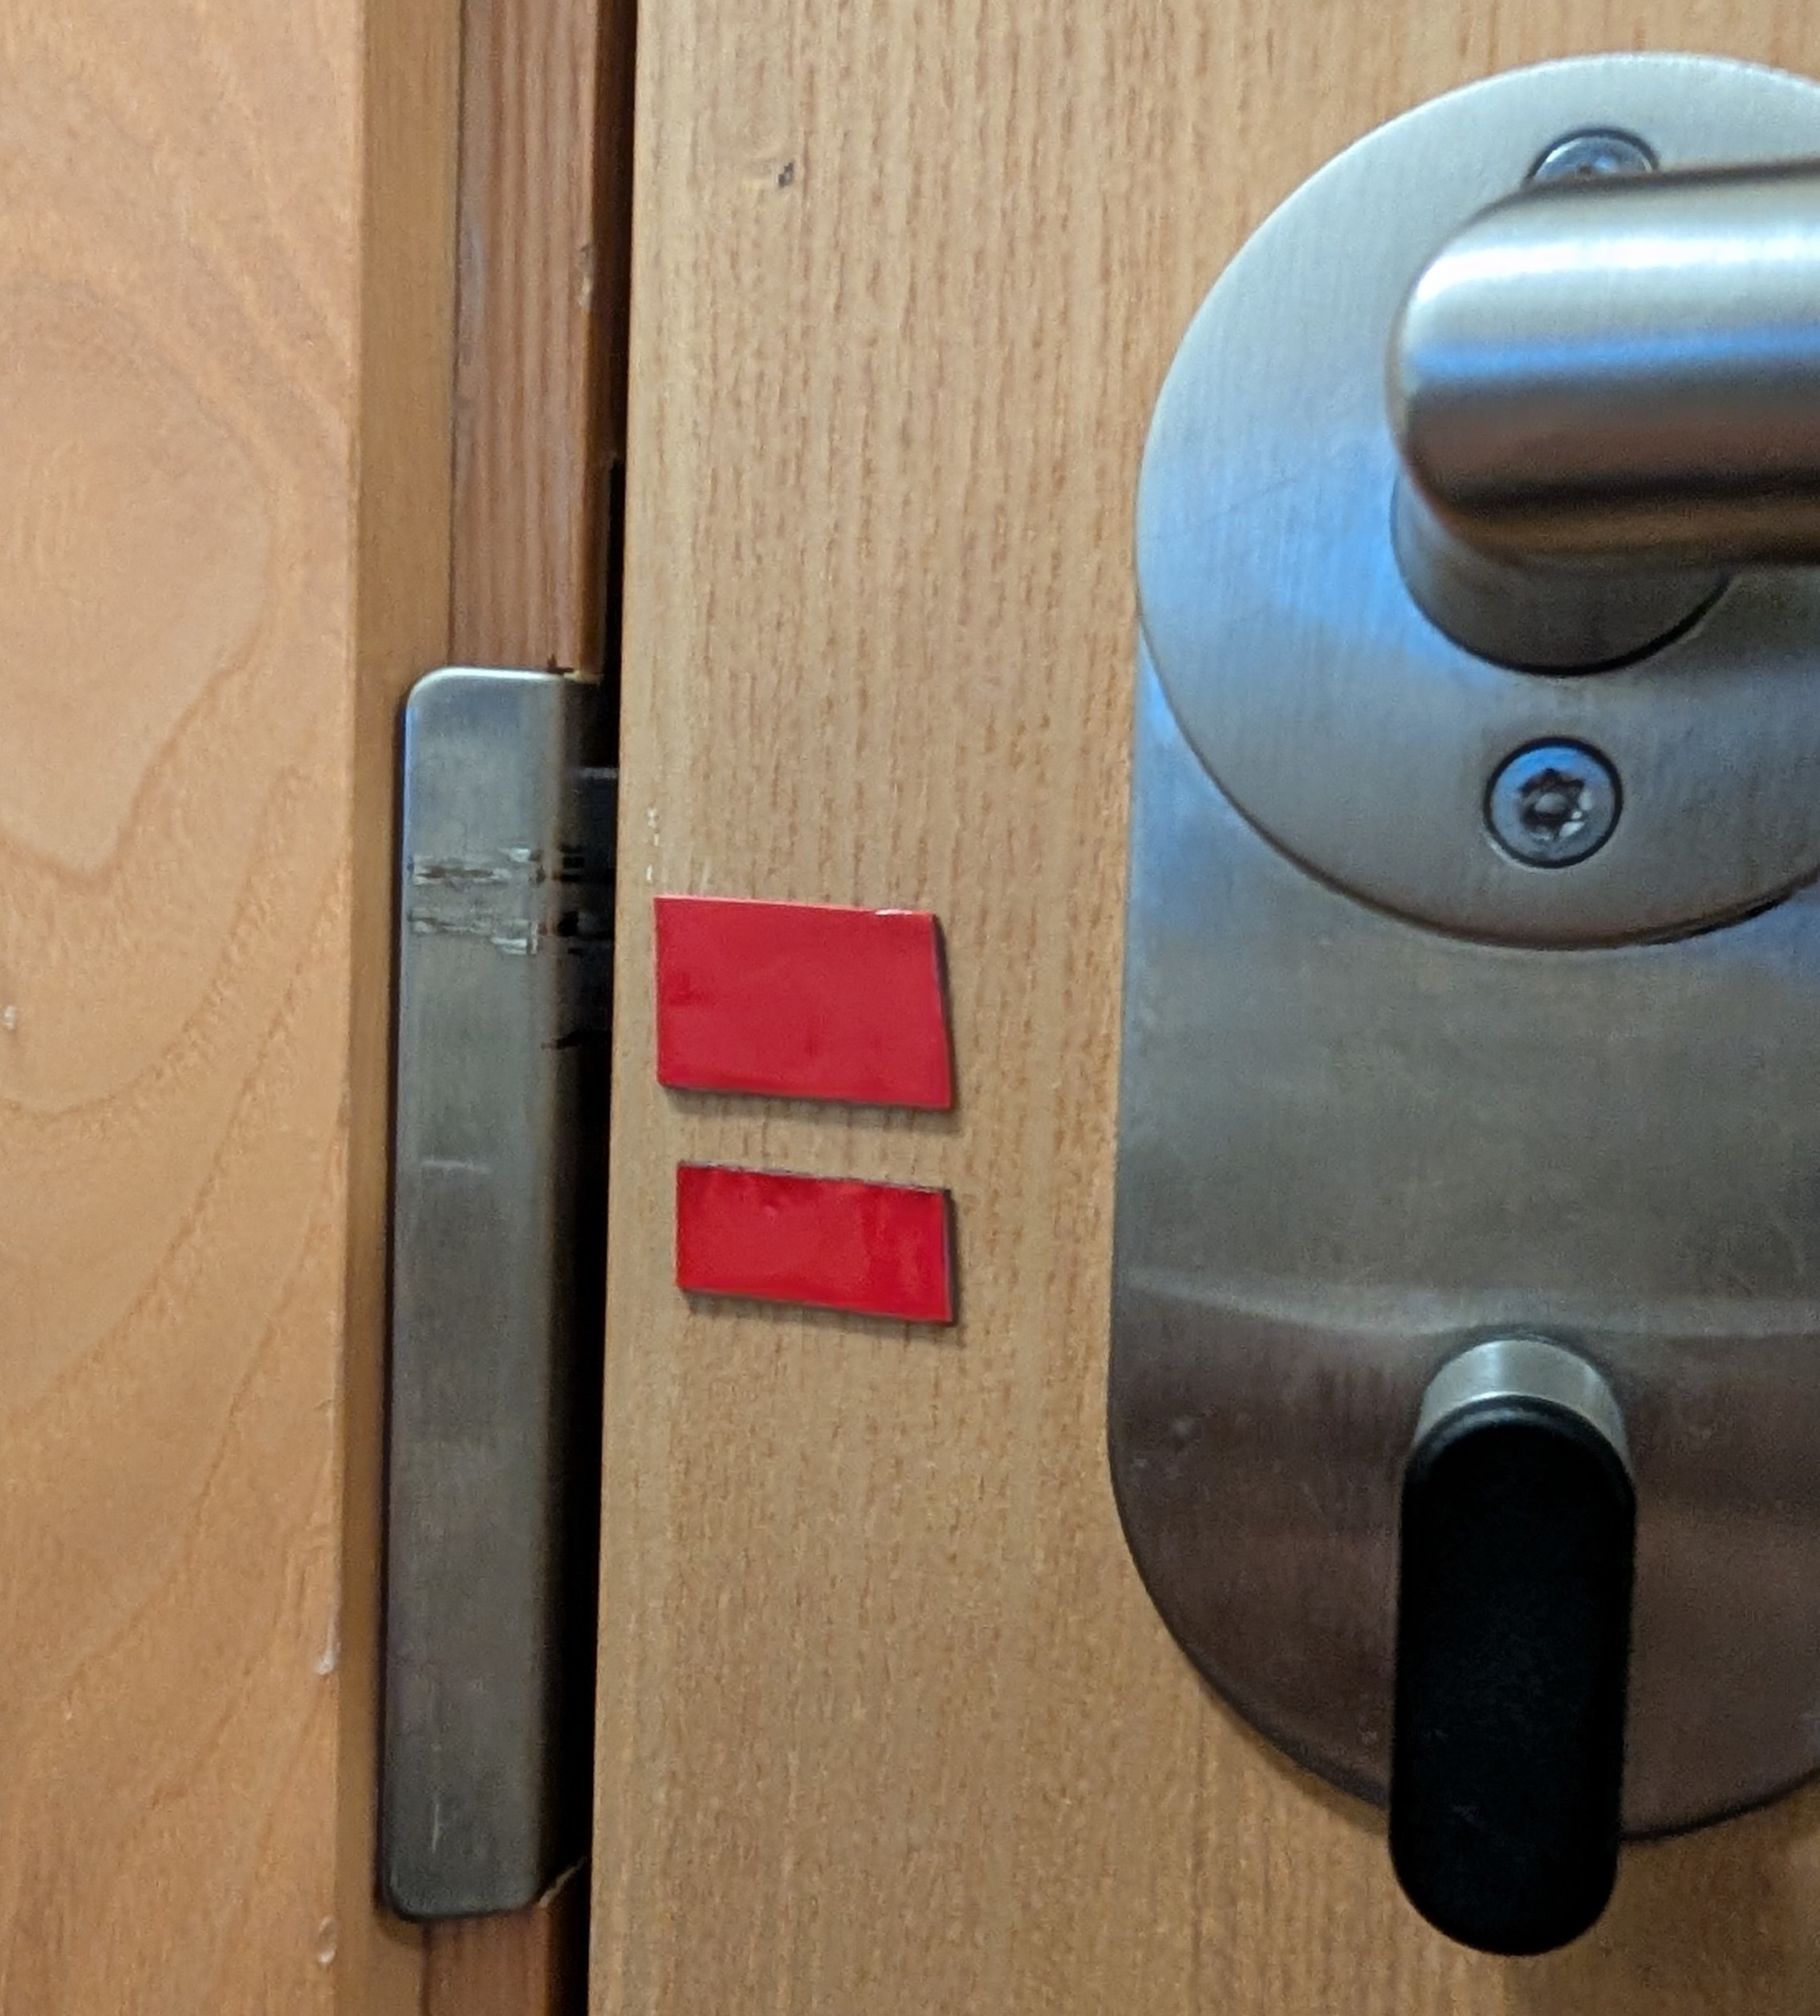
I was pretty perplexed by this. After some critical thinking, I realized that I could set up the arduino on the door itself. And not only that– I could even take advantage of this metal piece that helps the door slide into the lock near the door handle. This was my updated plan for my switch:
When it came to positioning the wires, I thought the copper tape would suffice to keep the wires in place but it just wouldn’t stick very well; I also needed to be able to micro-adjust and tune the location of my wires to make sure the system worked smoothly. I decided to use mounting tape again to make fine tuning the position of the wires much easier on me
I think the final result turned out to be really nice, and I’m proud of myself for adapting to the difficulties encountered during the process of mounting the project on the wall. It’s a shame I have to take it down to make future projects but I had fun making it.
Here’s a video of the final result in action; the green LED lights up to indicate a full lock when closed properly. I would not recommend installing this as your sole security system.