
Assignment Overview:
The goal of this task was to create a simple interactive circuit using one digital sensor (a pushbutton) and one analog sensor (an LDR) to control two LEDs on the Arduino Uno. The digital LED turns on and off when the button is pressed, while the analog LED smoothly changes brightness depending on the amount of light detected by the sensor. This task helped me understand how digital and analog inputs behave differently and how they can work together in one circuit.
My Circuit:

Planning the Schematic:
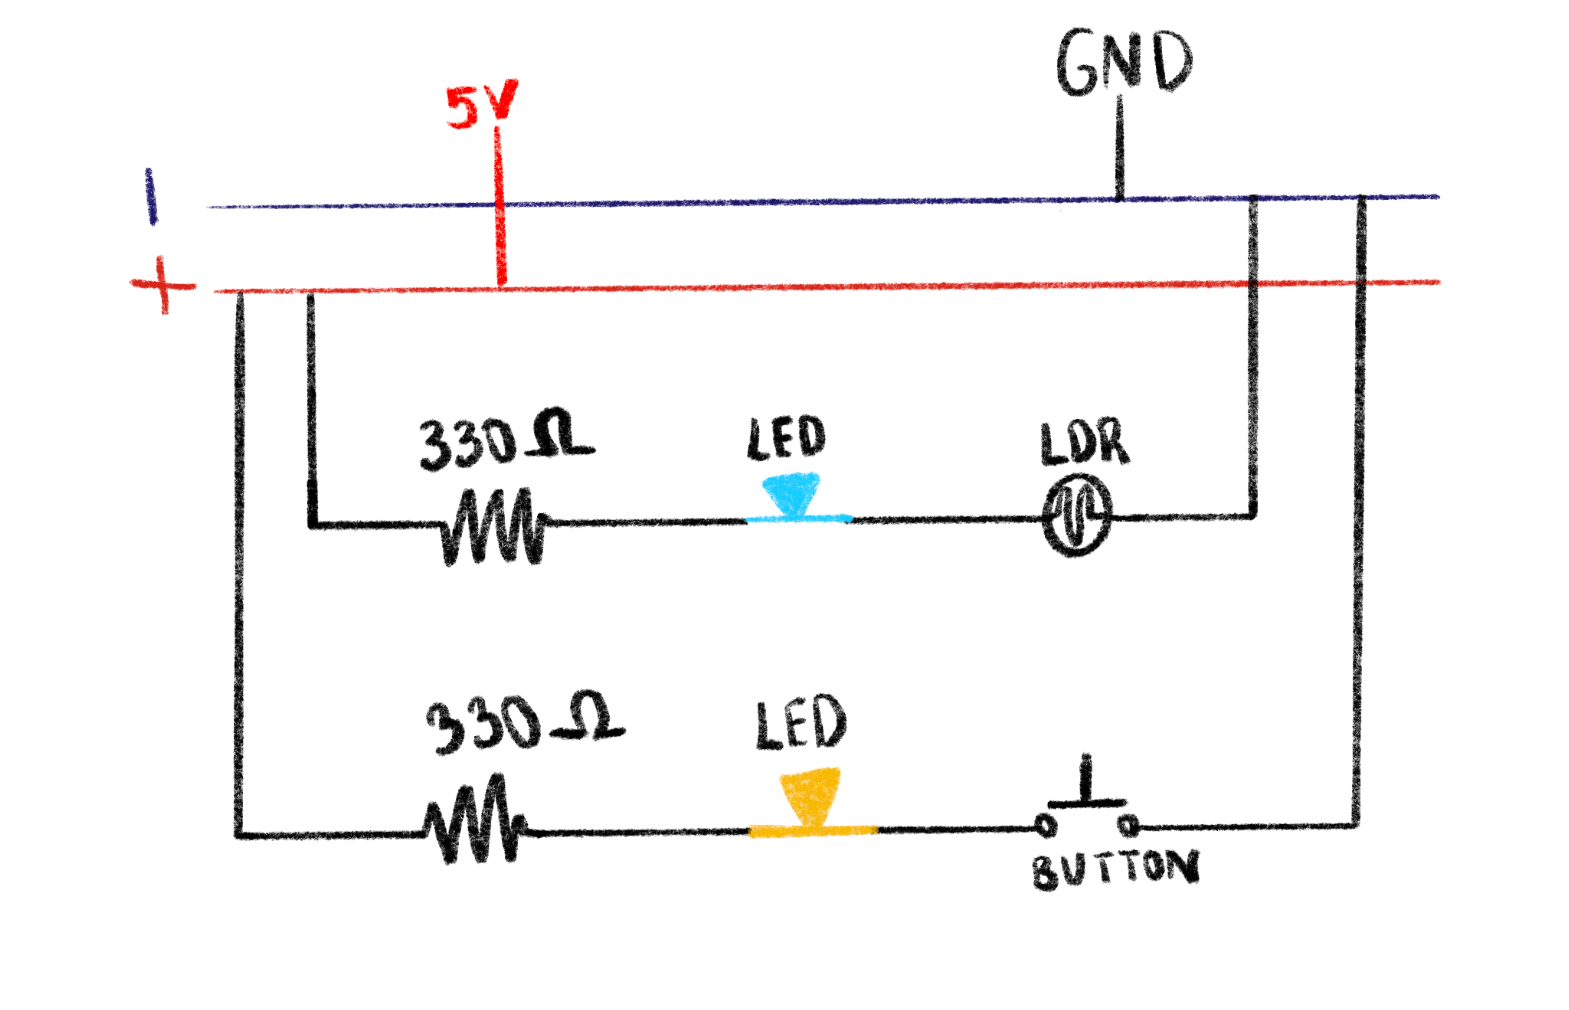
I started by sketching a schematic on my iPad on procreate to visualize how each component would connect. The schematic represents the button on pin D2, the LDR with a 330 kΩ resistor forming a voltage divider to A0, and two LEDs connected to D8 and D9, each with their own 330 Ω resistor to ground. Planning it out first helped me avoid confusion later when placing components on the breadboard and made the whole process smoother. Of course when actually going to build the board a few elements moved around but the schematic mainly shows my thought process and “map” while planning this assignment.
Building the Circuit
Next, I built the circuit on the breadboard, carefully following the schematic. I color-coded my jumper wires to stay organized: red for power, black for ground, green for digital signals, and yellow for analog. One small challenge was understanding that the breadboard’s left and right halves are not connected across the middle gap. Once I fixed that mistake, the circuit started to behave exactly as expected.
(Its kinda hard to see but when I cover the sensor the blue LED shifts in brightness, and the button turns the yellow LED on)
Coding Elements:
This Arduino code connects both a digital and an analog input to control two LEDs in different ways. The process starts with defining pin connections: the pushbutton on pin 2, the LDR sensor on analog pin A0, and two LEDs on pins 8 and 9. In the setup function, the button uses input pullup so it naturally stays HIGH until pressed (no external resistor needed). The digital LED on pin 8 simply turns on when the button is pressed and off when it’s released. The LDR, wired as part of a voltage divider, continuously sends changing light readings to A0. In the loop, these readings (ranging 0–1023) are mapped to 0–255 with the map function so they can control the brightness of the second LED through analogWrite on pin 9. The small delay at the end makes the light level changes smooth and stable. Overall, the code demonstrates how digital and analog signals can be read simultaneously to control different outputs in real time.
// Pin setup
const int buttonPin = 2;   // Button connected to D2
const int ledDigital = 8;  // Digital LED (on/off)
const int ledAnalog = 9;   // Analog LED (brightness control)
const int ldrPin = A0;     // LDR sensor connected to A0

void setup() {
  pinMode(buttonPin, INPUT_PULLUP);
  pinMode(ledDigital, OUTPUT);
  pinMode(ledAnalog, OUTPUT);
}

void loop() {
  // Digital LED controlled by button
  bool pressed = (digitalRead(buttonPin) == LOW); // LOW = pressed
  digitalWrite(ledDigital, pressed ? HIGH : LOW);

  // Analog LED controlled by LDR light level
  int lightValue = analogRead(ldrPin);        // Reads LDR
  int brightness = map(lightValue, 0, 1023, 0, 255);
  analogWrite(ledAnalog, brightness);         // Set LED brightness

  delay(10);
}
Troubleshooting and Adjustments 🙁
The most challenging part was honestly just starting this task. It was very overwhelming since I never used arduino before and had no experience in coding C++. It took me a few hours to look through videos and articles just to get a better understanding of how the board works, and I even gave myself a few warm up tasks, like a simple blink test which I will show later in this documentation. In this particular assignment, one of my main challenges was getting the circuit itself right. The first few times I tried to setup the button the led wouldn’t turn on and I felt like I had so many wires and it was hard to focus on what the problem was. To combat this, I took the time to properly think about my schematic as a map, then followed that instead of blindly building my board first then drawing my schematic after. This really helped me when I got frustrated, and I also took many breaks in between so I could come back to the task with fresh eyes.
Random Blink Test Experiment:
Before starting the full circuit, I experimented with a simple blink test using just one LED. I uploaded the basic Blink example to the Arduino IDE to see the LED turn on and off every second. This small test helped me understand how the digital pins, resistors, and ground connections actually worked together in a real circuit. Since it was my first time using Arduino, doing this warm-up made me more confident in reading pin numbers, placing components correctly, and recognizing how code controls physical outputs on the board.
Reflection 🙂
Overall, I really want to emphasize that i’m very proud of myself for this assignment. This showed me how coding and wiring work hand in hand, the schematic guided the hardware setup, and the code brought it to life. This was a rewarding first experience combining both analog and digital sensors in one interactive circuit.