
Concept
We were thinking a lot about what kind of instrument we want to make and wanted to stray away from the classic, well known ones like guitar and piano and drums and we decided to recreate an instrument many haven’t probably heard of, called Otomatone.
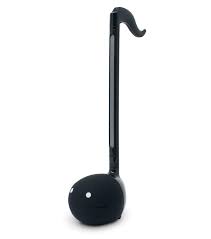
The instrument work by the user pressing the upper longer part of the instrument in different positions and pressing the “mouth” on both sides so it opens. The instrument than creates a sound and makes it look like the character is singing.
Our design
To recreate this we decided to use light resistors as the upper part of the body. The resistors would detect when the user puts their hand over them and create a sound. But the sound wouldn’t be heard until the user pressed on the “cheeks” of the character which had force resistors to detect the force of the press.
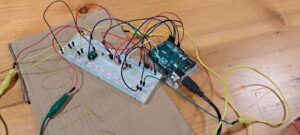
Here is the photo of the board and the photoresistors. We also added a button which, if held, will give the sound some vibration while playing. The final design of our Otomatone instrument looks like this:

Code higlight
The code for this instrument wasn’t that complicated. The hardest part was finding the values for all the notes but we used the help of the internet for that.
// Multi-note LDR1
if (ldrVal1 < 500 && duration > 10) {
if (totalPressure < 256) {
activeNote = 440; // A4
} else if (totalPressure < 512) {
activeNote = 523; // C5
} else if (totalPressure < 768) {
activeNote = 659; // E5
} else {
activeNote = 784; // G5
}
Serial.print("LDR1 note: "); Serial.println(activeNote);
}
This is the code for one of the light resistors which as you can see combines the value of the resistor with the total pressure of the force sensors detected and gives us a tone based on those calculations. The code for other light resistors is similar and not too complicated to understand.
Challenges and future improvement
The biggest challenge for this project was, surprisingly, getting the buzzer inside the “mouth” of the instrument. Getting 2 holes in the back of the “head” of the instrument was very hard, and even though we tried to do it with our hands it prove impossible to do without a drill which in the end, after many attempts, broke the inside of the ball enough for a jumper cable to pass. The idea was to stick the breadboard to the back of the head and in that way recreate the original instrument and also not have the alligator clips inside the mouth, rather have the buzzers nodes sticking out through the holes. Due to the time constraint this sadly wasn’t possible, but I hope in the future we will be able to add it. As for the future improvements I would like to clean up the wires a bit and add a breadboard to the back of the head. Overall we are happy with the final result and we had a lot of fun working on this project and we also learned a lot!