Week 11 – Final Project Prompt

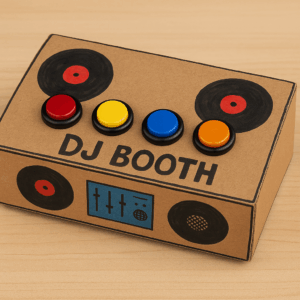
My final project is an interactive installation titled “The Snail’s Journey to School.” The idea is inspired by the opening scenes of Monsters University, where a small character makes their way toward school. In my version, the user helps a robot snail travel through a physical obstacle course until it reaches its destination.

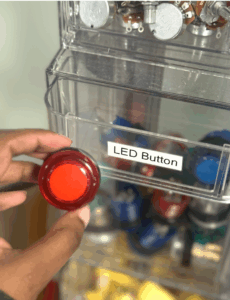
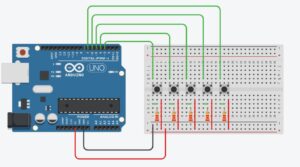
Arduino will control the physical movement of the robot snail using motors and buttons for directional input. It may also include an optional sensor, such as a photoresistor or distance sensor, to detect obstacles or the finish line. The snail robot and the obstacle course will be fabricated by me, either through 3D printing or hand-built materials.

p5.js will act as the narrative and feedback layer. It will display an introduction, instructions, and story elements that respond to the user’s physical interactions. As the user presses buttons to move the snail, Arduino will send messages to p5.js, which will update the visuals, play small animations or sounds, and react to progress in real time. When the snail reaches the “school” area, p5 will display the final scene.

The interaction loop centers on listening (reading the user’s button presses), thinking (moving the snail and sending corresponding data), and speaking (p5.js reacting immediately with feedback).

Week 11 Reading Response

Reading Design Meets Disability made me think about how deeply design shapes the way we see ability and difference. I liked how the book challenged the traditional idea that design for disability should be purely functional. When I saw examples like the stylish hearing aids or the eyeglasses that evolved from medical tools to fashion accessories, I realized how design doesn’t just solve problems—it tells stories about people and identity. I found myself really appreciating how the author described the tension between discretion and expression, especially in how disability devices can either hide or celebrate difference. It made me think about how design always carries a message, even when it pretends to be neutral.

What I liked most was the way the book connected design with emotion and culture. I loved seeing how something as simple as a prosthetic leg could become a work of art, or how Apple’s minimalist products fit into the same conversation about accessibility and beauty. The idea that “good design on any terms” can come from understanding human diversity really stayed with me. I felt inspired by the thought that inclusive design isn’t about charity but creativity—it’s about expanding what we consider beautiful and functional at the same time. This reading made me want to look more closely at everyday objects and think about the values they quietly express.

Week 11 – Reading Response

In Design Meets Disability, Graham Pullin challenges the way society frames disability by questioning why assistive devices are often treated as purely functional rather than expressive. He argues that design for disability should not be limited to medical necessity, it should also include aesthetics, identity, and personal preference. What stood out to me is how Pullin highlights the quiet power imbalance in design: mainstream objects like glasses or smartphones have endless variations and styles, while many assistive tools remain clinical and uniform. This difference reveals how disability is still seen as something to “fix” instead of a natural part of human diversity.

Pullin pushes the reader to consider that assistive devices could be opportunities for creativity rather than reminders of limitation. For example, he discusses the possibility of hearing aids becoming fashionable accessories instead of devices people feel pressured to hide. His argument reframes disability not as a deficit but as a design space full of potential innovation.

Overall, the reading invites designers to rethink their assumptions. Instead of designing for disabled people, Pullin encourages designing with them, treating disability as a source of insight and richness. The book ultimately suggests that inclusive design is not just ethical, it also expands the possibilities of design itself.

Lily pad

For this project, I wanted to recreate a peaceful scene of a frog sitting on a lily pad in a pond. Since I hadn’t worked much with sensors yet, I thought this would be the opportunity to incorporate one. I decided to use a distance sensor to control the ripples in the water, the closer your hand gets to the sensor, the more frequently the frog hops and creates ripples.

The Arduino codesimply measures how far away your hand is from the sensor and sends that data to the p5.js code. The Arduino code measures distance by sending an ultrasonic pulse and calculating how long it takes to bounce back, then converts that time into cms using the speed of sound (0.034 cm/microsecond) divided by 2 since the sound travels to the object and back.

The p5.j code then uses that distance data to dictate how often the ripples should occur. In the p5 code, I also hosted the visuals/art element of the project.

Next time, I think it would be fun to use a pressure sensor and have users actually jump up and down at different strengths and show that on p5.js.

// ARDUINO CODE
const int trigPin = 9;
const int echoPin = 10;

void setup() {
  Serial.begin(9600);
  pinMode(trigPin, OUTPUT);
  pinMode(echoPin, INPUT);
}

void loop() {
  // measure distance
  digitalWrite(trigPin, LOW);
  delayMicroseconds(2);
  digitalWrite(trigPin, HIGH);
  delayMicroseconds(10);
  digitalWrite(trigPin, LOW);
  
  long duration = pulseIn(echoPin, HIGH);
  int distance = duration * 0.034 / 2;
  
  // send distance to p5.js
  Serial.println(distance);
  
  delay(50);
}

IMG_2539

Week 11 – Reading Response

Design Meets Disability treats constraint more than a deficit. When a flow fails under limited vision or one‑hand use, the failure is a measurement of hidden demand, e.g., precision, memory, timing. Fixing those loads tends to make the product faster and safer for everyone.

The shift from accommodation to inclusive design is a key shift in the design workflow. An add‑on ramp or a screen reader retrofit treats accessibility as a patch. Building large hit targets, consistent structure, multimodal signals, and undo by default treats accessibility as a core requirement. The second approach reduces support costs and broadens use. Captions prove the point, becuase they serve deaf users first, but help viewers in noisy spaces, language learners, and anyone scanning a video on mute. Curb cuts started for wheelchairs, then made cities usable for strollers, carts, and bikes. The spillover is not an accident, but it is the direct result of “designing for constraints” that generalize. As Charles Eames believed, “design depends largely on constraints.” And I agree.

Inputs, perception, and cognition form a clear framework. Products assume hands with fine motor control, perfect vision and hearing, and uninterrupted attention. Alternatives (e.g., switch controls, eye‑tracking, high contrast, scalable text, haptics, chunked steps) lower friction and error rates across contexts. Voice control demonstrates its utility along this path—essential for limited mobility, valuable hands‑free while cooking or driving. Predictive text began as assistive technology, now it is an everyday efficiency feature, especially in coding today, a humorous but significant save of less efficient efforts. That’s why Cursor dominates.

I do have questions. Are there cases where inclusive design adds complexity that hurts clarity? For instance, voice, haptic, and visual signals can compete. The answer may be progressive disclosure. Maybe default to one strong signal, then let users layer or swap modes. But it raises another concern. How do we balance among options, and must we spend resources to develop all of them? How do teams budget for inclusive testing without turning it into a checkbox? We must tie success to task completion under constraint, not to the presence of features. If two flows pass under one‑hand use, low contrast, and divided attention, or even less for a more specific use case they are ready.

The actionable stance: Write constraints into requirements. Set minimum hit area sizes, enforce semantic structure, and require undo and confirmation for destructive actions. Prefer multimodal capability, but choose a clear default per context. Measure success as completion with minimal precision under time pressure.

Shahram Chaudhry – Final Project Brainstorm

I don’t know why I’m so obsessed with memories, even my midterm project was memory-themed. I guess that’s what happens when you don’t get to major in neuroscience but end up majoring in computer science instead.

For my final project, I want to create a physically interactive memory-sequence game that plays with the idea of “recovering a forgotten memory.”  I’ve always liked memory games, and I thought it would be interesting to turn that mechanic into a metaphor: every correct sequence helps restore a blurry image on the screen, as if the player is trying to remember something long lost.

The physical side of the project is intentionally minimal. I’m planning to use four LEDs (diff colours) paired with four corresponding buttons, wired to an Arduino. The Arduino will flash sequences of LEDs, starting easy and growing in complexity, and the user has to repeat them by pressing the buttons in the same order. When the user gets a sequence right, the p5 interface will respond instantly by revealing more detail in the image, for e.g. decreasing the blur.  If they get it wrong, the image  becomes more distorted, symbolizing the memory slipping further away. Only if the player successfully completes all three levels does the final clear image appear. Otherwise, the memory remains lost. I’m also considering having a different image each game, so even if the user replays the game, they can’t recover a memory they “failed”, reinforcing the idea that some memories can be lost forever. (Life is unfair , I know.)

On the p5 side, I want to focus on smooth feedback and atmosphere. The screen will always show the partially recovered image, and p5 will handle visualization, sound feedback (buzzer for wrong sequence) , tracking correctness, and the level progression. The project feels manageable for my current skill level, but I think it is still creative and expressive. 

Week 11 — Reading Response — Design Meets Disability

What stood out to me most in this reading is how deeply innovation is tied to the desire to solve a problem. I didn’t read this text as “design theory”  I read it as a reminder of something I’ve always believed: when something doesn’t work for the human body, we don’t stop; we fix it. Disability becomes a spark that pushes design forward, not a limitation that holds it back. This idea felt almost obvious once I saw it in writing. Synthetic legs exist because someone needed to walk. Hearing aids exist because someone needed to hear. Braces exist because someone needed their teeth to function better. When life presents a barrier, our instinct as humans is to invent ways around it. I’ve always been a problem solver by nature, so this perspective resonated with me on a personal level it aligns with the way I already think.

Another part I connected with was the discussion about discretion vs. expression. I honestly never understood why disability-related devices were expected to be “hidden,” made to look like they don’t exist. Glasses used to be seen this way too, and now they’re almost a fashion statement. I love the idea that assistive technologies shouldn’t be things people are ashamed of. If an object was created to make someone’s life easier, why wouldn’t that be something to show proudly? I hope more devices follow the path that glasses took — becoming normal, stylish, and expressive. There’s something beautiful about the idea of a prosthetic leg being carved out of wood like art, or a hearing aid designed like jewelry. These devices are part of someone’s identity, and identity shouldn’t be minimized.

What the text made me think about is how much of our world is actually built on disability innovation without people noticing. A lot of mainstream design only exists because someone once had a challenge that needed solving. Things we take for granted today ergonomic chairs, Velcro, touchscreens, even certain furniture techniques came from disability-driven constraints. I like how the book almost flips the conversation: instead of treating disability as something society has to “cope” with, it becomes a source of creativity and new possibilities.

Week 11 – Final Project Concept

UAE History Interactive

I want to create an interactive piece that shows the transformation of the UAE the same way my grandpa used to describe it to me. When he talked about his childhood, he always used to say, “Everything was sand… everything was quiet,” and it honestly shocked me how different life was back then. We grow up surrounded by skyscrapers, malls, lights, and busy streets, and sometimes we forget that underneath all of this was once nothing but desert, small fishing villages, and long stretches of empty land. I want this project to make people feel that transition  not just see it.

I’m going to create a set of images using generative AI: first, an empty desert with soft, muted colors, representing the UAE before development. Then, a second stage with small hints of growth, old houses, dhow boats, maybe the beginnings of trade and community. And finally, a fully developed UAE today: bright, modern, busy, full of life. These images will live inside my P5 sketch, and as the user interacts with the physical object, the scene will change smoothly from past to present. It’s almost like time is responding to their touch.

The interaction will come from the Arduino. I want to use one simple input — probably a pressure sensor or something that can “feel” how much the user is pressing. The Arduino will read how soft or strong the touch is, like it’s sensing the user’s curiosity. Light pressure will show the early UAE, the untouched sand dunes. A little more pressure will reveal the beginning of development. And a stronger press will bring the scene into the modern UAE we know now. It’s not about force it’s about guiding the story. The sensor becomes like a storyteller’s tool, the thing that decides which chapter you’re seeing.

I also want the Arduino to do something small in the real world, so it feels alive on both sides. Maybe a soft LED that glows brighter as the UAE “grows,” or a tiny sound from a buzzer that plays a subtle tone when the country reaches the modern stage almost like the present humming with life. But nothing loud, nothing dramatic, just small hints of the past and present waking up.

This whole idea is about honoring heritage and culture through interaction. When my grandpa tells stories, I always feel this warm, emotional contrast between the silence of the old desert and the energy of the city today. I want my project to recreate that feeling the quiet beginning, the slow growth, and the incredible transformation. Not as a history lesson, but as an emotional journey. A way to let people travel through the UAE’s story just by placing their hand on a simple sensor, turning their touch into a timeline. It’s simple, but I want it to feel meaningful.

Week 11 – Serial Communication Exercises


Exercise 1

Reflection:

I built a simple circuit using the Arduino and a 10kΩ potentiometer to control an on-screen ellipse in p5.js. I connected the potentiometer’s outer legs to 5V and GND and the middle leg to the analog pin A0, allowing it to act as a variable voltage divider. After uploading the Arduino code and checking the serial monitor, I could see how turning the knob changed the analog readings from 0 to 1023. This helped me understand how analog sensors translate physical movement into numerical data that can be visualized digitally. It was satisfying to see the system work after troubleshooting my wiring and realizing how the order of connections affects the readings.

Codes:

p5js

// === Arduino + p5.js WebSerial (directional movement, fixed) ===
// Pot controls direction/speed by how its value changes. p5 does NOT control Arduino.

let port;
let reader;
let connectButton;
let isConnected = false;

let latestData = null; // last parsed int from serial (0..1023)
let prevData   = null; // previous sample to compute delta
let lineBuffer = '';   // accumulate serial chunks until '\n'

let posX = 0;          // ellipse position
let speed = 0;         // horizontal velocity

function setup() {
  createCanvas(windowWidth, windowHeight);
  background(240);
  textFont('monospace');

  connectButton = createButton('Connect to Arduino');
  connectButton.position(20, 20);
  connectButton.mousePressed(connectToSerial);

  // start centered; we'll keep it centered until first data arrives
  posX = width / 2;
}

async function connectToSerial() {
  try {
    // Request and open port
    port = await navigator.serial.requestPort();
    await port.open({ baudRate: 9600 });
    isConnected = true;
    console.log(' Port opened');

    // Create a text decoder stream and reader for clean line-by-line reads
    const textDecoder = new TextDecoderStream();
    const readableClosed = port.readable.pipeTo(textDecoder.writable);
    reader = textDecoder.readable.getReader();

    // Kick off read loop
    readSerialLines();
  } catch (err) {
    console.error(' Connection failed:', err);
    isConnected = false;
  }
}

async function readSerialLines() {
  try {
    while (true) {
      const { value, done } = await reader.read();
      if (done) break; // reader released
      if (!value) continue;

      // Accumulate and split by newline
      lineBuffer += value;
      let lines = lineBuffer.split(/\r?\n/);
      lineBuffer = lines.pop(); // save incomplete tail

      for (let line of lines) {
        line = line.trim();
        if (!line) continue;
        const v = parseInt(line, 10);
        if (!Number.isNaN(v)) {
          // Clamp to expected 10-bit range
          latestData = Math.min(Math.max(v, 0), 1023);
          // Initialize prevData on first valid sample
          if (prevData === null) prevData = latestData;
        }
      }
    }
  } catch (err) {
    console.error(' Read error:', err);
  } finally {
    try { reader && reader.releaseLock(); } catch {}
  }
}

function draw() {
  background(240);

  if (!isConnected) {
    fill(200, 0, 0);
    noStroke();
    textAlign(CENTER, CENTER);
    textSize(20);
    text("Click 'Connect to Arduino' to begin", width / 2, height / 2);
    return;
  }

  // If we haven't received any valid data yet, show waiting status
  if (latestData === null || prevData === null) {
    fill(0);
    textSize(16);
    textAlign(LEFT, TOP);
    text('Waiting for data...', 20, 60);
    // Keep ellipse centered until first data arrives
  } else {
    // Change in pot reading determines direction and speed bump
    const delta = latestData - prevData;

    // Deadband to ignore small noise
    const deadband = 4;
    if (delta > deadband) {
      speed = constrain(speed + 0.6, -12, 12); // turn right -> move right
    } else if (delta < -deadband) {
      speed = constrain(speed - 0.6, -12, 12); // turn left -> move left
    } else {
      // friction when knob still
      speed *= 0.90;
    }

    // Integrate position and clamp
    posX += speed;
    posX = constrain(posX, 0, width);

    // Update prev for next frame
    prevData = latestData;
  }

  // Draw ellipse at vertical center
  noStroke();
  fill(50, 100, 255);
  ellipse(posX, height / 2, 80, 80);

  // HUD
  fill(0);
  textSize(14);
  textAlign(LEFT, TOP);
  const shown = latestData === null ? '—' : latestData;
  text(⁠ Sensor: ${shown} ⁠, 20, 60);
  text(⁠ Speed:  ${nf(speed, 1, 2)} ⁠, 20, 80);
}

function windowResized() {
  resizeCanvas(windowWidth, windowHeight);
  // Keep position on-screen if you resize smaller
  posX = constrain(posX, 0, width);
}

Arduino IDE

const int potPin = A0;

void setup() {
  Serial.begin(9600);  
}

void loop() {
  int val = analogRead(potPin);   // 0..1023
  Serial.println(val);            
  delay(10);                     
}

Schematic + Board

Exersize 2

Reflection

Reflection on the Schematic and Circuit

For this project, I created both the schematic and the circuit, and I kept them very simple. My setup only included one LED and one resistor connected to the Arduino and grounded. The main purpose of the assignment was to use serial communication with p5.js to control the brightness of the LED, so I focused more on the coding rather than making the hardware complex. Before starting the p5 part, I tested my circuit using a simple Arduino code just to make sure that the LED was lighting up correctly and everything was connected properly. Once I confirmed that it worked, I added the schematic and moved on to the serial communication part. The schematic itself was very basic something I’ve done before so it wasn’t hard to figure out. I liked that I could keep the circuit minimal but still meet the goal of the exercise, which was to control the LED’s brightness through p5. It showed me how even a simple circuit can become interactive and meaningful when combined with code.

Reflection on the Code

The coding part was definitely the hardest and most time-consuming part of this project. I’ve never connected p5.js and Arduino together before, so figuring out how to make them communicate took a lot of trial and error. At first, I kept trying to make it work on Safari without realizing that the serial connection doesn’t actually work there, it only works on Google Chrome. So, I kept rewriting and rechecking my code, thinking there was something wrong with it, even though the logic itself was fine. My professor had already shown us the structure for serial communication, so I kept following it, creating and recreating the same code over and over again, but it just wouldn’t connect.

It got really frustrating at one point because I had everything wired correctly, and my code looked right, but the Arduino and p5 still weren’t talking to each other. I spent a lot of time trying to figure out what was wrong. Once I finally switched to the right browser and saw the serial connection actually working, it was such a relief. The LED started responding, and it felt like everything finally came together. After so many attempts, seeing both the Arduino and p5.js working together perfectly was honestly so rewarding. I was really proud of how it turned out in the end it looked simple but worked exactly how I wanted it to. All that frustration was worth it because the final design turned out really good, and it felt amazing to watch it finally come to life.

Codes

P5js embedded

Arduino IDE

// ===== Arduino: LED brightness  =====

const int ledPin = 10;  // LED connected to pin 10

void setup() {
  Serial.begin(9600);   // must match p5.js baud rate
  pinMode(ledPin, OUTPUT);
}

void loop() {
  if (Serial.available() > 0) {
    int brightness = Serial.read();      // read 0–255
    brightness = constrain(brightness, 0, 255);
    analogWrite(ledPin, brightness);     // control LED brightness
  }
}

Circuit + Schematic

Exersize 3

codes

p5

let velocity;
let gravity;
let position;
let acceleration;
let drag = 0.99;
let mass = 50;

let brightnessValue = 0; // Potentiometer value from Arduino (0–5)
let ballDropped = false;
let ledOn = false;

function setup() {
  createCanvas(640, 360);
  noFill();
  textSize(18);

  position = createVector(width / 2, 0);
  velocity = createVector(0, 0);
  acceleration = createVector(0, 0);
  gravity = createVector(0, 0.5 * mass);
}

function draw() {
  background(255);

  fill(0);
  if (!ballDropped) {
    text("Press D to drop the ball", 20, 30);
    text("Press Space Bar to select Serial Port", 20, 50);
    return;
  }

  if (serialActive) {
    text("Connected", 20, 30);
    text(⁠ Potentiometer: ${brightnessValue} ⁠, 20, 50);
  } else {
    text("Serial Port Not Connected", 20, 30);
  }

  // Gravity only (no wind)
  applyForce(gravity);

  // Update ball
  velocity.add(acceleration);
  velocity.mult(drag);
  position.add(velocity);
  acceleration.mult(0);

  // Draw ball
  ellipse(position.x, position.y, mass, mass);

  // Bounce
  if (position.y >= height - mass / 2) {
    velocity.y *= -0.9;
    position.y = height - mass / 2;

    // Tell Arduino: turn LED on briefly
    if (serialActive && !ledOn) {
      writeSerial("1,0\n");
      ledOn = true;
    }
  } else if (ledOn) {
    // Tell Arduino: turn LED off
    writeSerial("0,0\n");
    ledOn = false;
  }
}

function applyForce(force) {
  let f = p5.Vector.div(force, mass);
  acceleration.add(f);
}

// Serial setup and drop ball
function keyPressed() {
  if (key == " ") setUpSerial();
  if (key == "D" || key == "d") dropBall();
}

function dropBall() {
  position.set(width / 2, 0);
  velocity.set(0, 0);
  mass = 50;
  gravity = createVector(0, 0.5 * mass);
  ballDropped = true;
}

// Read data from Arduino
function readSerial(data) {
  if (data != null) {
    let fromArduino = split(trim(data), ",");
    if (fromArduino.length === 1) {
      brightnessValue = int(fromArduino[0]); // Potentiometer value
    }
  }
}

Arduino IDE

int potPin = A5;   // Potentiometer
int ledPin = 3;    // LED on PWM pin

void setup() {
  Serial.begin(9600);
  pinMode(ledPin, OUTPUT);

  // Blink LED to confirm setup
  analogWrite(ledPin, 255);
  delay(200);
  analogWrite(ledPin, 0);
}

void loop() {
  // Read potentiometer (0–1023)
  int raw = analogRead(potPin);

  // Map to PWM range (0–255)
  int brightness = map(raw, 0, 1023, 0, 255);

  // Continuously send brightness value to p5 if you need it
  Serial.println(brightness);

  // Check for serial commands from p5
  if (Serial.available()) {
    String data = Serial.readStringUntil('\n');

    // When ball hits ground → p5 sends "1,0"
    if (data == "1,0") {
      analogWrite(ledPin, brightness);  // flash with pot brightness
      delay(100);
      analogWrite(ledPin, 0);           // turn off after flash
    }
  }

  delay(30); // loop stability
}

Schematic + Circuit

IMG_9469

Week 11: Final Project Preliminary Idea

From the very week of the semester when I learned what the final project would involve, I wanted to implement my skateboard into it as a controller.

The Digital Side of Things

I’m not quite sure of how the P5 side of things would look yet, but one of the ideas I had was to create an experience that commentates on the shaking feeling of anxiety and expresses it as speed wobbles going downhill. I’m not quite sure I can simulate that safely or even have a mechanism that provides movement to the board at all, but it could be a fun idea. You would have to balance the board at certain times but also lean in to either side to make decisions.

Another idea I had was to make a more simple arcade-styled game that uses the skateboard controller. For example, I could make a pong game with two skateboard controllers that have the same mechanics as my midterm project (the forward and backward velocity factors). This would definitely be a little easier on me on the programming side but I’m not sure how I would do two separate skateboard controllers, or if it’d even be fun.

The Physical Side of Things

I have actually thought extensively about how the board might be physically situated.

I want the skateboard to sit stationary so I’m probably going to create something like a wooden frame to hold the board either by the trucks or by the wheels. If I want the frame to hold onto the trucks, I would need to unscrew the wheels and create screw holes in the wooden frame. If I want to keep the wheels on, I would make a mold to hold the board with the wheels on.

For the input sensors, I would need a pair of two distance sensors, one for each side of the board. Each of them will be placed on the ground facing upward to detect how tilted the board is. If the distance between ground and board is closer on the left side than the right side, that means the rider is probably tilting left to turn left. I’m not sure if there’s a more efficient way of approaching this but that’s the idea I have so far.

I want to take advantage of resources we have in the IM lab and scene shop but I’ve never worked with physical materials on this scale before so I’m not sure where to start. That’s definitely one of the bigger pain points on the table right now.

Ultimately, there’s a good chance I might change the concept of my project entirely to fit a little closer to the scope of my current abilities. I realize there’s a lot of unfamiliar territory I want to explore here and it might be best to play it safer.