
The Planning Process

When I first started working on my Arduino project, I was really excited to just begin building the circuit. I started connecting the wires and components right away without any plan, but everything quickly got messy. The setup didn’t look neat, and nothing was working properly.
That’s when I decided to stop and make a clear plan. I drew a circuit sketch first, showing where every wire, resistor, LED, and sensor would go. Having that plan made a huge difference it helped me organize everything and made the setup much cleaner and easier to follow.
I realized that starting with a plan is the foundation of any successful Arduino project. Without it, things can get confusing fast. But when you have a sketch or diagram to look back at while you’re working, you always know what to do next. This experience really taught me that planning first saves a lot of time and makes the whole process smoother and more enjoyable.
Arduino Setup
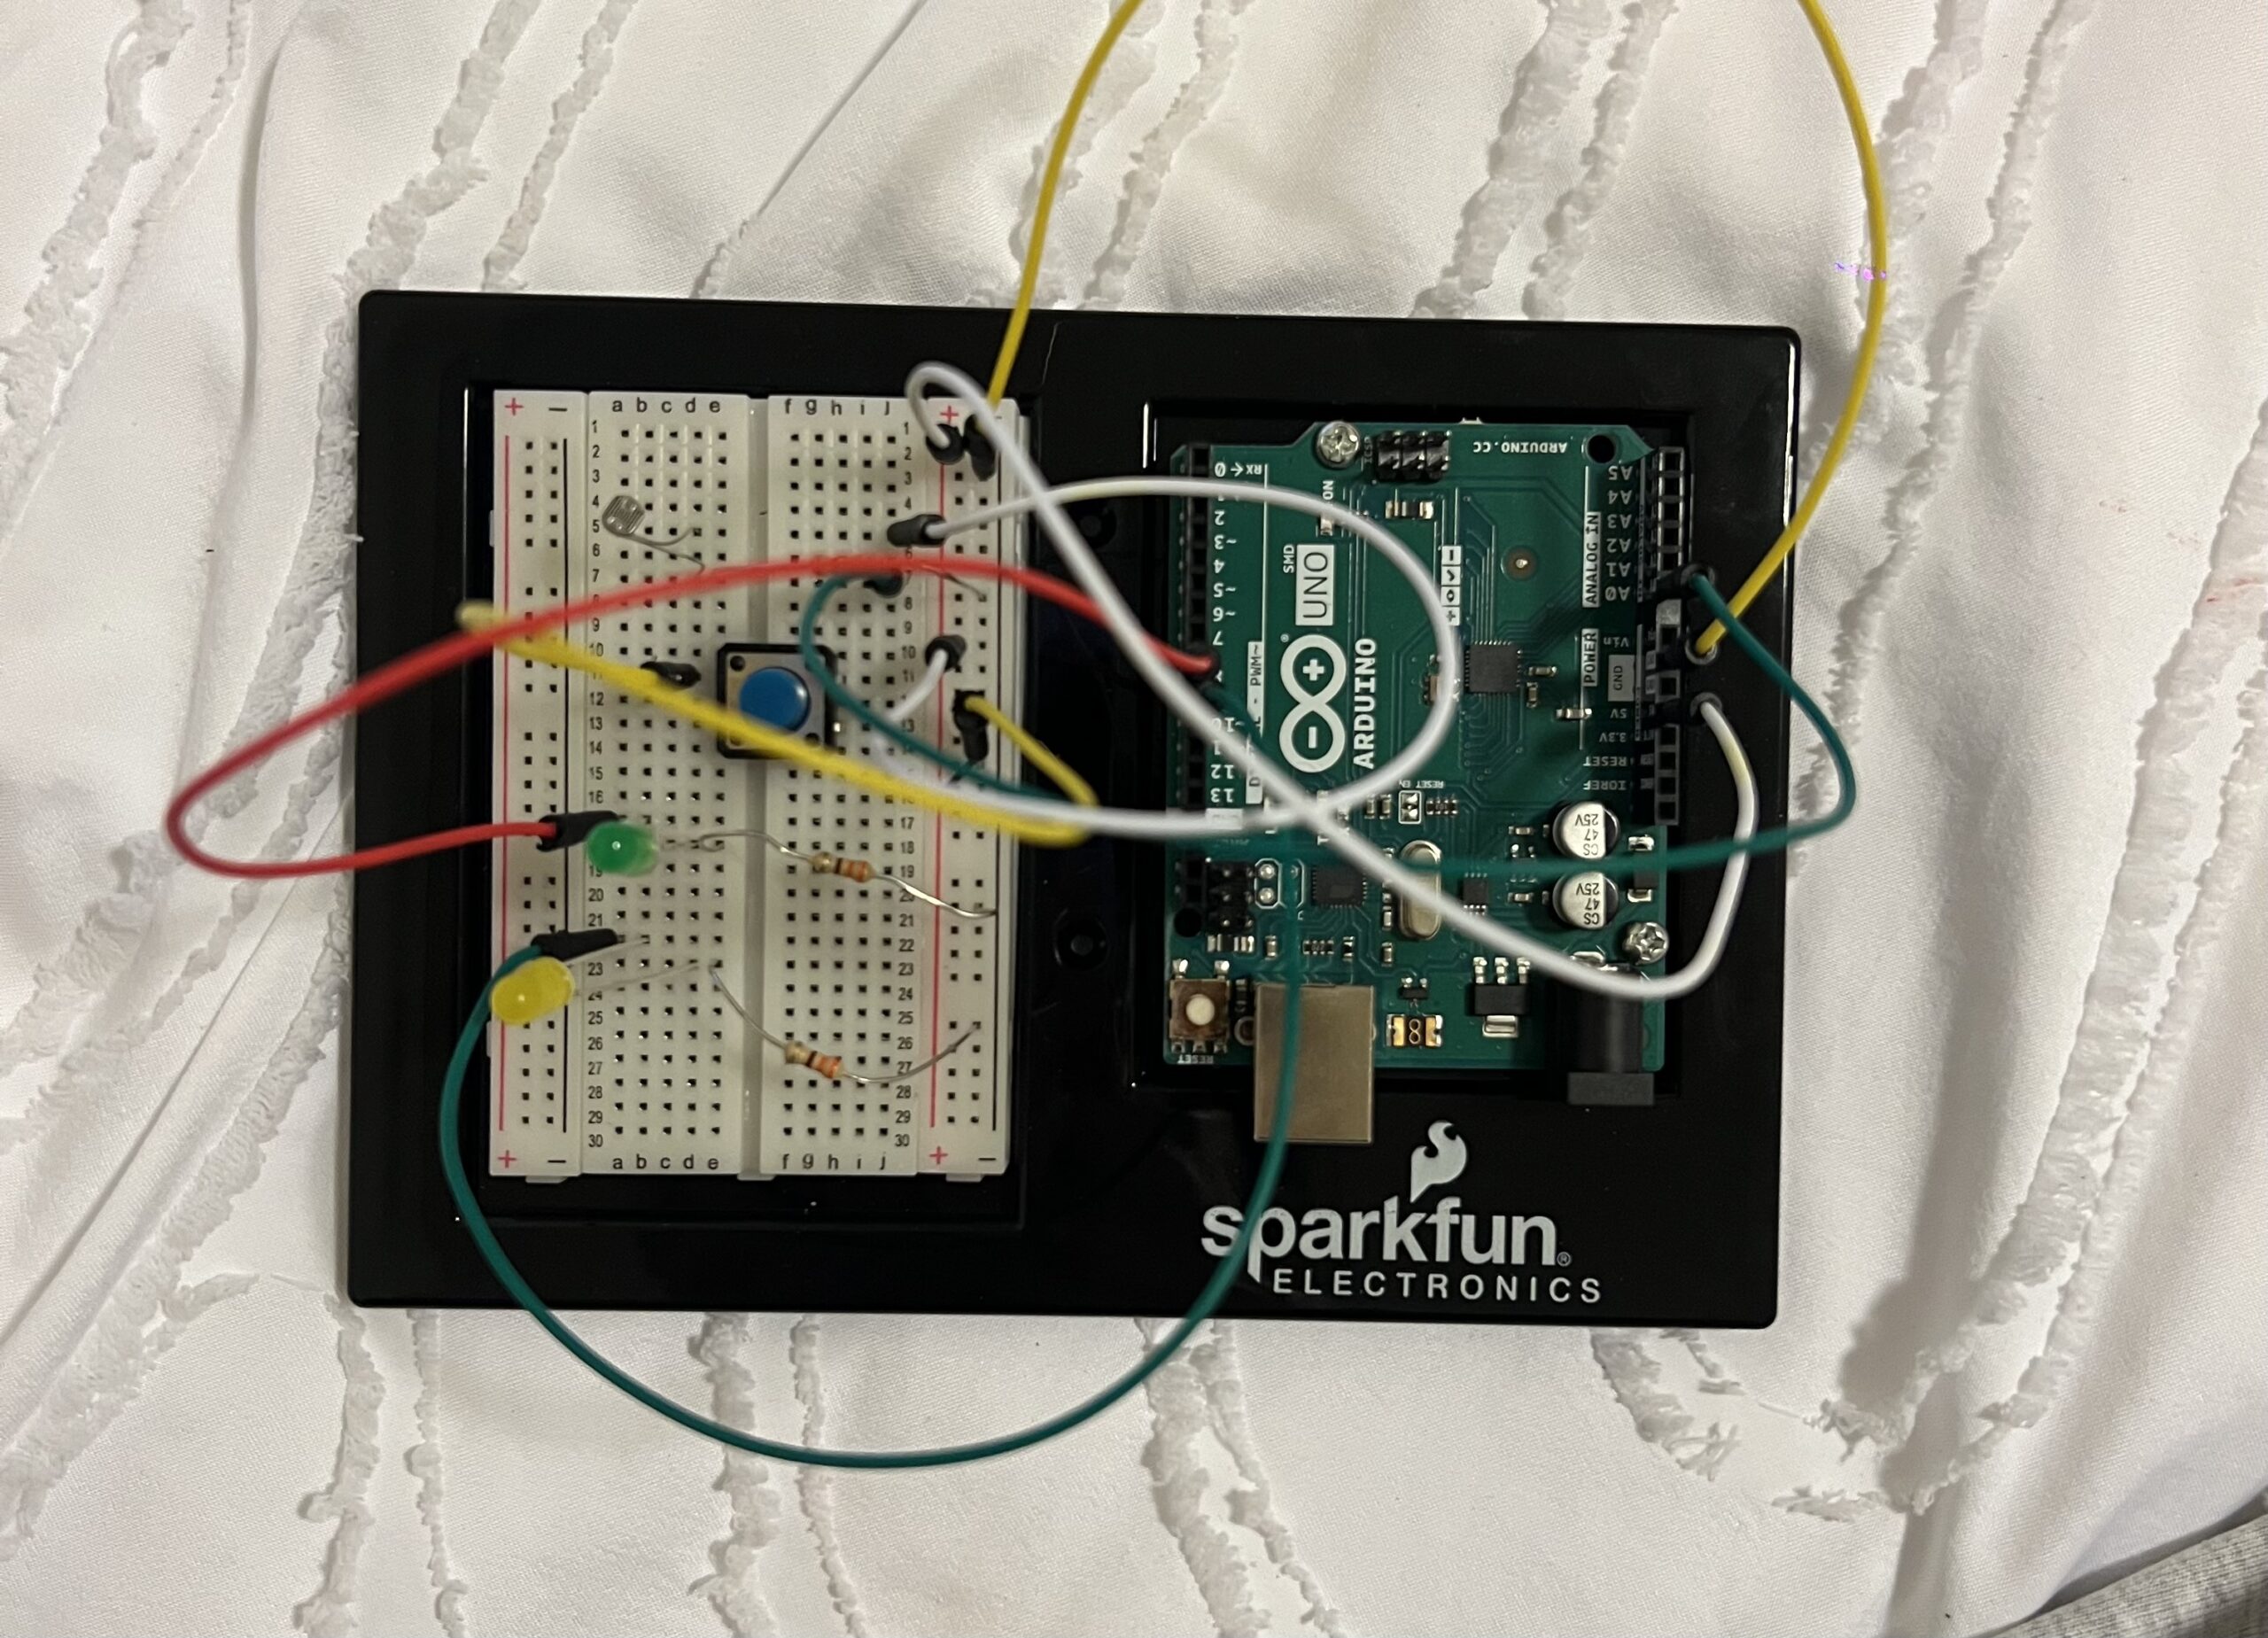
This setup was a little complicated for me because it was my first time doing something more advanced on the Arduino that involved several wires and components. I used about seven different wires, and at first, it was really confusing to figure out where everything should go.
At the beginning, when I tried building the circuit without any plan, it turned into a big mess and nothing worked properly. But after creating a proper plan and sketch, everything became so much clearer. I started connecting each part slowly and carefully, double checking as I went along.
Sometimes I made small mistakes, like connecting the long leg of the LED to the resistor instead of the correct side, but having the plan helped me find and fix them easily. I realized how important it is to work precisely and patiently, making sure each wire is placed in the right spot before moving on.
Overall, the planning process made the project much easier and more enjoyable. I also liked that my circuit included two different sensors a button (digital sensor) and an LDR (Light Dependent Resistor), which is an analog sensor with a squiggly pattern on top. It was really cool to see how both types of sensors could work together in one project.
Coding Process
// Pin setup
const int buttonPin = 2;   // Button connected to D2
const int ledDigital = 8;  // Digital LED (on/off)
const int ledAnalog = 9;   // Analog LED (brightness control)
const int ldrPin = A0;     // LDR sensor connected to A0

void setup() {
  pinMode(buttonPin, INPUT_PULLUP);
  pinMode(ledDigital, OUTPUT);
  pinMode(ledAnalog, OUTPUT);
}

void loop() {
  // Digital LED controlled by button
  bool pressed = (digitalRead(buttonPin) == LOW); // LOW = pressed
  digitalWrite(ledDigital, pressed ? HIGH : LOW);

  // Analog LED controlled by LDR light level
  int lightValue = analogRead(ldrPin);        // Reads LDR
  int brightness = map(lightValue, 0, 1023, 0, 255);
  analogWrite(ledAnalog, brightness);         // Set LED brightness

  delay(10);
}
I really liked the simplicity of the code in this project. The Arduino part allowed me to be more creative with how I connected the components, but the coding felt more like solving a puzzle. I just had to match everything correctly each sensor, LED, and button had its own number, and I connected them in the code like putting puzzle pieces together.
What I enjoyed most was how logical the coding process was. Once I understood how each part worked, everything made sense and came together smoothly. The code itself was clear and easy to follow, and the only thing I really had to play around with was the numbers to get the behavior I wanted. Overall, it was a really satisfying and smooth experience seeing the hardware and code work perfectly together.
Blink Test
Before starting my main circuit, I first tried the Blink Test, which is the simplest Arduino program that makes an LED turn on and off. It helped me confirm that my Arduino board was connected properly and that the code could upload successfully. Even though it’s a very basic test, it gave me confidence that everything was working before I started adding more components and sensors. It also helped me understand how timing and digital outputs work in Arduino.