Midterm Project – Jedi’s Revenge

Link to Sketch: https://editor.p5js.org/ma9331/full/ZSQDV21v5

Concept

For my midterm project, I decided to make it Star Wars-themed. The main character of the game is Luke Skywalker, who is on a mission to defeat the Galactic Empire. Luke is on the Death Star (the enemy’s base), where he encounters countless Stormtroopers whom he needs to defeat.

Instead of having a main objective to achieve, I made it a score-based game. In this one-player game, the user plays as Luke Skywalker and slashes as many Stormtroopers (enemies) on the ship before the timer runs out and gets their score at the end.


Process

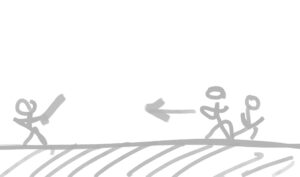
This is my initial sketch which ended up being pretty similar to the final game’s outcome. The Stormtroopers emerge from the far right side of the screen and move towards the other end of the screen. Luke moves using the arrow keys and attacks by holding the “e” key.

I made two separate classes: one for Luke (the player) and one for the Stormtroopers (NPC enemies). Luke has a constant speed but the Stormtroopers have a random speed to make it a bit more challenging.


Code I’m Proud of

//initial/starter enemies
  new Stormtroopers(windowWidth, windowHeight * 1.2, scale, enemies);
stormtroopers.push(
  new Stormtroopers(windowWidth + 200, windowHeight * 1.2, scale, enemies)
);
function spawnEnemies() { //respawn function
  stormtroopers.push(
    new Stormtroopers(windowWidth, windowHeight * 0.8, scale, enemies)
  );
  stormtroopers.push(
    new Stormtroopers(windowWidth - 10, windowHeight * 0.8, scale, enemies)
  );
}
if (stormtroopers[i].x < -10) { // enemies go offscreen
  stormtroopers.splice(i, 1); // remove from array once offscreen
  
  if(score>0){
    score -=10; // decrease score, keep >= 08
  }

I had a lot of issues with the enemies spawning and positioning. At first, only a few enemies would spawn at the start of the game but would not respawn. This was because i set the Stormtroopers to stop walking at x=0, so they could never reach less than x=-10 and trigger the respawn function. I had to experiment with different values because the first enemies spawn as soon as you click run (because they’re in the function setup), so their positioning in fullscreen was different from the ones that respawn after. Ultimately, the Y-positioning for the initial enemies had to be windowHeight*1.2, and for the respawns it had to be set to windowHeight*0.8 in order for it work on fullscreen, and to be in the same Y-position as the initial enemies.


Design

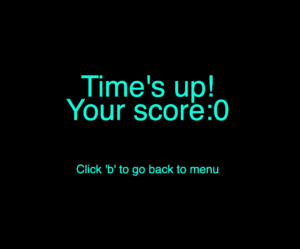
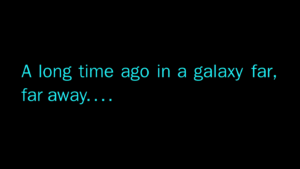
For the end screen in my game, I took inspiration from the title screen at the start of every Star Wars movie.

This is what my end screen looks like:

And this is the title screen from Star Wars films:


I thought it would be a really cool but simple nod to the movies.

Areas of Improvement

If I had more time, I would’ve experimented more with the Stormtroopers’ abilities and gave them their own attacks: one attack could be that they shoot the player from their guns and deal damage to the player. Also, I had the thought of adding a health bar for both Luke and the enemies to make the game a bit harder (killing the enemies would require more than just one slash) and not time-based.

PhotoboothMidterm Project

Concept:

For my project, I wanted to recreate that nostalgic, slightly awkward fun of using a photo booth, but in a digital, interactive way. The idea was to make something playful that still feels personal, where you type your name, pick a filter and a frame, and get a “thank you” screen at the end, almost like a real booth session. It’s simple, but it captures that small moment of anticipation and result. From entering your name to seeing your face appear across different frames and filters, I wanted it to feel like a sequence, a mini experience rather than just a photo being taken.

I was inspired by the photo booths you see at malls, the kind people use with friends, but I also wanted it to reflect me a little more. Since I love using my digital camera, I leaned into that and made it more camera-oriented, blending that nostalgic booth feel with something that connects to my own personality and interests. 

What I’m Proud of:

Not to toot my own horn, but I’m proud of various aspects of this project. I’ll start with the more design-oriented aspects, then get to the more technical parts.

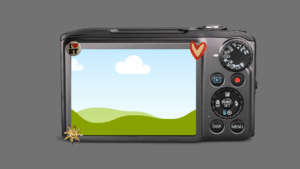
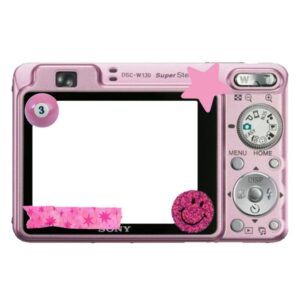
For the frames, I originally wanted to use these camera frames on pinterest but I found the resolution to not be optimal so I decided to just make it myself using Canva. For reference, here’s a Pinterest frame and mine side by side. 

I decided on only three frames just to make the user experience notfeel overwhelming, but would love to add more in the feature.

Another design aspect I’m proud of is the flow of which the project goes. The path from one screen to another makes for a simple yet effective way to guide the user through the experience.

Now for the technical! There’s quite a few so I will narrow it down to my top 3. 

Firstly, this could count as design but setting a current screen variable made testing out different screens so much easier, without having to go back to the beginning everytime. It felt like a shortcut.

Secondly, when the project goes from one screen to the other, some features stayed and overlapped with features from the currents screen so learning when to show and hide was interesting and made me learn how important order is with code (even more than before). I think getting the hang of hide and show is very important for big scale project so I’m glad to have learnt it through this project.

Lastly, fitting the video feed to the frame. This might’ve been the second most difficult thing I had to deal with just because when I was looking at different ways to fit the feed into a frame, mostly by consulting chatGPT, it kept making me think that I had to look at the type of picture and make part of it transparent, and when that didn’t work, I was thinking of just doing it manually which is where frameData came from.

//define video feed positions per frame
//this lets us fit the live video inside each frame nicely
const frameData = {
 camera1: { x: 355, y: 249, w: 635, h: 440 },
 camera2: { x: 255, y: 245, w: 650, h: 480 },
 camera3: { x: 253, y: 215, w: 730, h: 530 },
};

So for every frame, it set the position and size for the feed.

Areas of improvement:

While I really wanted to use FaceMesh from ml5.js and had originally planned to draw a little red circle on the user’s nose when a face was detected, I couldn’t get it to work properly. I spent a huge amount of time debugging, revisiting documentation, and even consulting AI for help, but it kept interfering with my video feed in unpredictable ways. Eventually, I decided to set that idea aside for now, not because I don’t want to do it, but because I want to do it right.

In the future, I’d also love to add more frame options and maybe even a way for users to design their own frames. I imagine a simple drag-and-drop system where they can choose shapes, colors, or even add text onto the live feed. 

Overall, I really enjoyed working on this project. I think being from a coding background definitely helped me approach it with less hesitation, especially when dealing with the logic and structure. But I also found myself overflowing with ideas and not enough time to bring them all to life, which was both exciting and frustrating. In the end, I’m proud of how it came together. It feels playful and functional, and I think that balance is what makes it work.

References:

I used ChatGPT to debug for the most part, and used the ml5.js documentation when I was attempting to implement face detection to draw a circle on the nose.

P.S. I don’t have the sketch embedded since I worked on the project in VS Code instead of the online p5 editor, but here’s the GitHub website link: https://kzeina.github.io/Photobooth/ .

Midterm Project – Floral Frenzy

Overall concept  

Floral Frenzy is an original design experience which seeks to tap on the emotional responses of the users. Unlike other video games, there is no “winning” or “losing”. Instead, this project relies on the exploration and curiosity of the individual, as well as offering a visually pleasing experience.

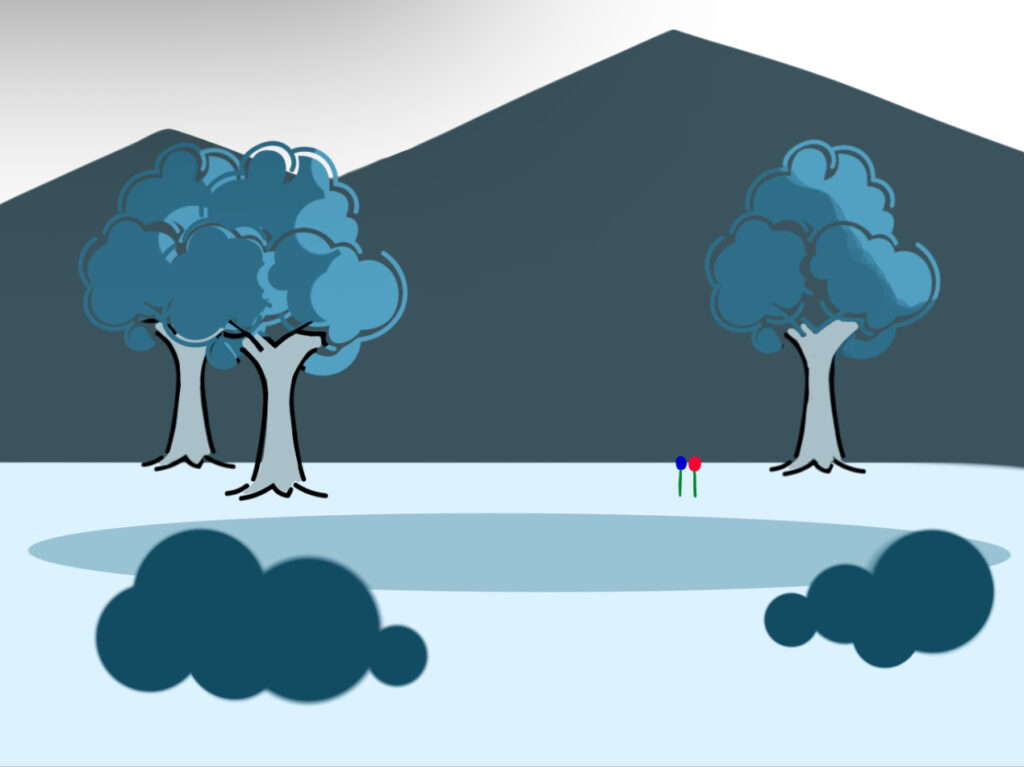
The initial ideas consisted of creating a background with multiple static elements, such as mountains, trees, and bushes, and only a few interactive objects that would contain multiple functions. However, after some trial and error, this plan shifted and I decided to add more objects with interactivity in order to balance the weight of static vs interactive.

This was the initial sketch for the project, mainly focused on the aesthetics and potential elements to include in the final draft.
How does the project work 

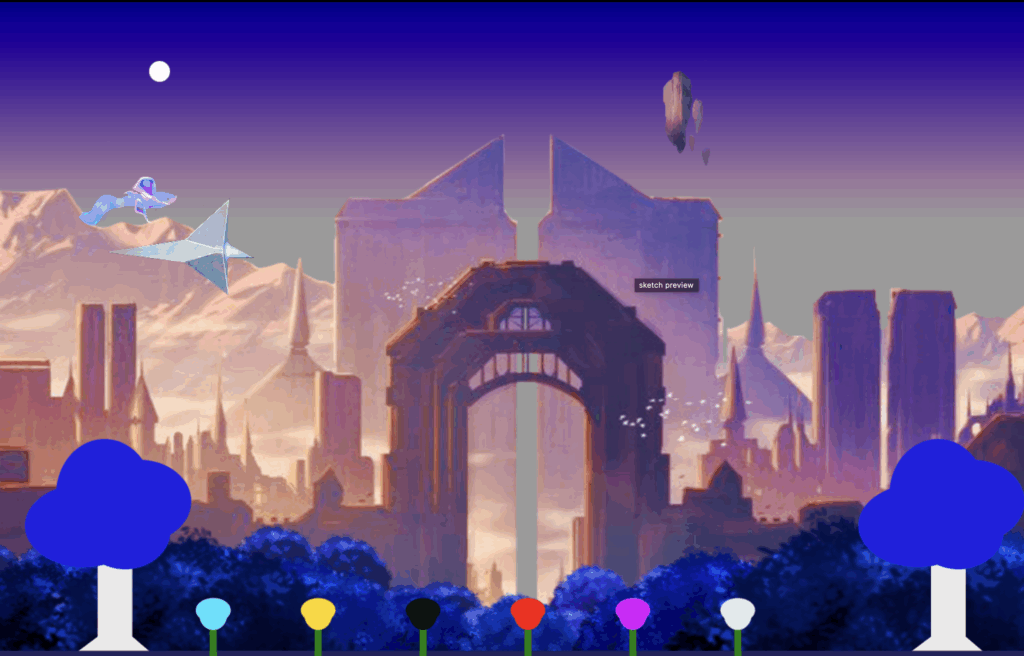
From the spaceships, floating stones, and blue trees to the massive fantasy-like structure, this project consists of a mystical, otherworldly plane, drawing the user’s attention from one point to another. Nonetheless, the roses are meant to be the main focus of interactivity, as each of these contain a different reaction, such as releasing a symphony, displaying text, or displaying an unexpected result. Nonetheless, in order to produce the illusion of failure and success, two of the roses are programmed to either poison or compliment the user.

Overall the end result is a game-like set of visuals in which the user is given the instructions to interact with the object, these being the roses, and press a single key in order to delve into the real experience filled with animations in the background, vibrant colors, elements of a variety of sizes, and the interactive objects. Two of these objects provide different outcomes which then take the user back to the homepage.

Fullscreen Mode Sketch 

Link to sketch: https://editor.p5js.org/imh9299/full/HPfU68QCi

Embedded sketch:

Favorite code snippets

Although it appears to be a simple, clear function and codes at first glance, it took me many hours to decipher how to make the music, text, change of color, and other reactions to activate whenever the user clicked on them. Nevertheless, once it proved to be operational, I was filled with joy and I was proud to have completed it successfully, especially since this is the main interactive attraction of the project.

function mousePressed() {
  // helpful debug print
  print('mousePressed at', mouseX, mouseY, 'gameState:', gameState);

  // Only win/lose while the game is playing
  if (gameState === "playing") {
    if (winningRose.contains(mouseX, mouseY)) {
      print("clicked winningRose");
      wonGame = true;
      gameState = "end";
      return; // stop further handling this click
    }

    if (losingRose.contains(mouseX, mouseY)) {
      print("clicked losingRose");
      wonGame = false;
      gameState = "end";
      return;
    }
  }

  // Other clickable objects (always checked)
  if (flower.contains(mouseX, mouseY)) {
    print("clicked flower");
    song.play();
  }

  if (messageRose.contains(mouseX, mouseY)) {
    print("clicked messageRose");
    displayText = !displayText;
  }
}

Another code I am very proud of is the one that allows my cut image of a rock float in the background. At the start, I had to introduce all the variables such as the image, the preload function, fixing the size, speed at which it moved, tracking the time, among other things. While this wasn’t the most difficult codes to understand, it took me a while to find a way to transfer them from a clean, almost empty sketch to one filled with more than one hundred codes. Not to mention, once I managed to implement this code, I found myself struggling to make the music in one of my objects play again. Nevertheless, it was worth the effort as I like how this simple animation adds a new layer of life, along the moving spaceship and fantastical creature,  compared to the rest of the composition.

let rockX, rockY; // Position of background rock
let amplitude = 20; // How far up and down the rock moves
let speed = 0.04; // How fast the rock bobs
let time = 0; // A variable to track time for the sine wave
let rockImage; // Image of the rock


// --- ROCK ANIMATION (only in game) ---
let yOffset = sin(time) * amplitude;
let currentY = rockY + yOffset;
image(rockImage, rockX, currentY, 160, 160);
time += speed;


Areas for improvement and obstacles along the way

Some of the major obstacles I ran into was the integration of interactivity to the sketch. While I managed to build the necessary functions, classes, and parameters to apply interactivity for the sounds, text, and other responses, embedding these into my designed objects proved to be far more challenging than I expected. Not only did these responses have to activate as a result of the interaction of the user, but they also had to be contained within the “game-like” structure of the sketch. Furthermore, fixing the position of these objects, along the non-responsive ones, also forced me to explore multiple x and y positions so that the objects, images, and all additional elements could adapt to the windowWidth and windowHeight. Finally, after solving the issue of merging interactivity with the objects, finding a way to assemble Game states and the transitions between start, playing, and end states turned out to be a difficult challenge. Given that my project was specifically designed to be explored and simply be “visually pleasing”, integrating a game-like structure meant finding an end result that would match my project’s story and tone, and remain original. Despite all the struggling, after many hours of exploring and researching the p5 references, libraries, and works done by students in the past, I managed to overcome all these obstacles and offer this final product which I am genuinely happy about.

Some areas of improvement I would like to work on my next project would be the use of interactivity. Although I did include interactive objects, these are not as impressive as I initially thought. I would like to challenge myself to create a more interactive and engaging element such as the games designed by my peers, not only for my assignments but to also implement in my future non-academic works. Furthermore, I would like to learn how to make my codes look “cleaner” and make functions and classes in a way that reduces my stress when I need to find a specific code.

References:

Images: Rocks, Spaceship, and Fantasy structure were downloaded from Pinterest. The fantasy creature is an original design

Mouse press: https://drive.google.com/drive/u/0/folders/1Qx5kltRZwxzt7Z6l-G-mabzWDUs7nLgj

Elements: https://p5js.org/reference/p5/p5.Element/

Ai overview displaying text through an object: how to display text when clicking an object p5

Window width height example by professor Aya: https://editor.p5js.org/mangtronix/sketches/t4G0erH1B

Text Font: https://p5js.org/reference/p5/textFont/

Mirror image: https://editor.p5js.org/icm4.0/sketches/ETcm93Ua1

Float: https://p5js.org/reference/p5/float/

Used ChatGTP to clean my codes, (also to store and recover them since I suffered from constant glitches that deleted my information), and to find errors in my work whenever a specific element was not showing or it wasn’t processing its intended objective.

Midterm Project: “Save Polar Bear from Climate Change”

Fullscreen sketch

Overall Concept:

“Save Polar Bears” is a game designed to raise awareness of the impacts of climate change on the ecosystem of polar bears. It is an interactive game yet educational in a sense that it teaches you the real ongoing situation for polar bears. The reason why I made this game is I’ve been super passionate about climate change and I love polar bears since I was a child. I have been doing research about climate change since high school and I found out that polar bears are struggling with hunting due to the melting icebergs. Thus, I incorporated this situation as a main theme of this game: polar bears need to eat as many fish as possible to survive while running away from melting icebergs. 

How my project works: 

My game is simple. The user’s mission is to collect as many fish as possible without falling into the ocean. The field is made of a 10 X 10 grid representing icebergs. One of the icebergs is randomly chosen every 3 seconds to melt. But here is the tricky part that I’m proud of: every 2 seconds, the temperature increases, as shown in the top-left corner by the temperature parameter. The higher the temperature becomes, the faster the icebergs melt. However, there is also a power-up that appears every 7 seconds. If you pick it up, two icebergs will be restored. So, users have to figure out how to collect as many fish as possible while also restoring icebergs at the same time. 


Users can also learn about why we need to save polar bears from climate change by selecting the “Why Save Polar Bears?” button. I wanted to include this feature to educate people about the real situation affecting polar bears and their ecosystem due to the impacts of climate change.

The part of the game design I am proud of:

The part of the game design I’m most proud of is the gimmick where, as the temperature rises, more icebergs start to melt. I wanted to create a feature that reflects the real effects of climate change on the ecosystem of polar bears, and the idea of rising temperatures causing ice to melt felt the most meaningful and engaging to me. It represents what is happening in the Arctic Ocean, where polar bears are struggling to hunt their prey due to the rapid melting of icebergs.


The problems I ran into & Future improvements: 

The most challenging problem I ran into during the production of this game was definitely adjusting everything to full-screen mode. Since I am using 10 X 10 grids, it is not very suitable for a full-screen game, especially if you are using a laptop with varying screen sizes. Therefore, I had to calculate everything to make it fit properly in full-screen mode. For instance, I had to make the polar bear slightly larger when using full-screen mode by including fullscreen() in the if statement and multiplying the polar bear’s size by 1.4. I also had to resize each button depending on if users are in fullscreen mode or not using a ternary operator. But, I was able to learn how to use a ternary operator instead of using if statements again and again, so it was a good learning experience for me to make the code more readable. 


In terms of future improvements, I would like to add more interactive features to the game. For example, I was planning to include a feature where polluted garbage is scattered around the field, and if the polar bear collects three pieces of garbage, it dies. However, since I didn’t have enough time to implement it this time, I would like to add that feature later to incorporate more elements related to climate change. Furthermore, in terms of implementation details, since I had to manually calculate the sizes of the polar bear, fish, power-ups, etc., to match the full screen, I would like to adjust them more precisely next time to improve the user experience. Currently, if you touch the tip of a melted iceberg, it immediately results in a game over. I want to modify this so that players can slightly touch the edge of melted icebergs without immediately losing, as it can be confusing when they feel they didn’t actually fall into the ocean but still lose the game.


The part of code I’m most proud of: 

The part of the code that I’m most proud of is the GameManager class. This is the core of how the game works. It contains the addFish() function, which makes fish appear at random locations and adds them to the fish array for display. It also includes the addPowerups() function, which works similarly to addFish(). Furthermore, the fillWithIcebergs() function creates 10  X 10 grids by precisely calculating the position of each iceberg using the nested loops we learned in class. 


I also spent a lot of time designing the isOver() function, which is the core mechanic of the game. It checks whether the polar bear has stepped on a melted iceberg. To determine whether an iceberg has melted, I created a Boolean variable called melted to indicate which ones are completely melted. In the isOver() function, I used an if statement to only check the melted icebergs and added a condition where, if the distance between the polar bear and the iceberg becomes shorter than half the size of either, the game ends. I still need to fine-tune this logic so that small touches on the melted icebergs are allowed, making the game a bit more forgiving. 

class GameManager {
  constructor() {
    this.score = 0; //score starts with 0
    this.icebergs = [];
    this.fish = [];
    this.powerUps = [];
  }

  //function to fill up the canvas with 15 X 15 grids
  fillWithIcebergs() {
    let cols = 10;
    let rows = 10;
    let x_width = width / cols; //how wide each grid is
    let y_height = height / rows; //how tall each grid is

    this.icebergs = [];

    //create 15 X 15 grids
    for (let i = 0; i < cols; i++) {
      for (let j = 0; j < rows; j++) {
        //push all the icebergs into an array called icebergs to display them
        this.icebergs.push(
          new Iceberg(
            i * x_width + x_width / 2,
            j * y_height + y_height / 2,
            x_width,
            y_height
          )
        );
      }
    }
  }

  //function to restore 3 icebergs
  addIcebergs(num) {
    let restored = 0;
    for (let iceberg of this.icebergs) {
      if (iceberg.melted && restored < num) {
        iceberg.restore();
        restored++;
      }
    }
  }

  //function to add more fish
  addFish(num) {
    for (let i = 0; i < num; i++) {
      let x = random(width);
      let y = random(height);
      this.fish.push(new Fish(x, y, fishSprites));
    }
  }

  //function to add more powerups
  addPowerUp(num = 1) {
    for (let i = 0; i < num; i++) {
      let x = random(width);
      let y = random(height);
      this.powerUps.push(new PowerUp(x, y));
    }
  }

  //function to check if bear went into melted icebergs
  IsOver(bear) {
    //adjust the size of polar bear accordingly
    let bearSize = width * bear.baseScale;
    if (fullscreen()) {
      bearSize *= 1.6;
    }
    //don't make polar bear too big or too small
    bearSize = constrain(bearSize, 90, 300);

    const bearHitbox = bearSize * 0.5;
    const bearHalf = bearHitbox / 2;

    for (let iceberg of this.icebergs) {
      if (iceberg.melted) {
        const overlapX = abs(bear.x - iceberg.x) < bearHalf + iceberg.w / 2;
        const overlapY = abs(bear.y - iceberg.y) < bearHalf + iceberg.h / 2;

        if (overlapX && overlapY) {
          return true;
        }
      }
    }

    return false;
  }
}

This is the final production of my project:


Reference: 

In this midterm project, chatGPT was used to help me rectify several problems I faced during the development phase. Here is a breakdown of how I used chatGPT in this midterm project: 

    • ChatGPT helped me understand how to use a lambda function to carry out a certain action, which in my case switching the game state, when a certain button was pressed.
    • ChatGPT helped me adjust the size of objects (polar bear, fish, powerups, and icebergs), text (title and body paragraph), and buttons to adjust to the fullscreen mode. 
    • ChatGPT helped me calculate and adjust the position and size of the score display and the temperature slider at the corner of the game

Midterm Project

Concept

Color Gate Challenge is a fast and colorful reaction game where the player controls a glowing ball that changes colors to pass through matching gates. The idea came from color-matching and reflex games I used to play, but I wanted to create something that feels more modern and bright, with glowing effects and smooth motion.

The goal of the game is to move the ball through falling gates without hitting the walls. Each gate has a color, and the player must change their ball to the same color to pass safely. If you pass the wrong color or crash into the barrier, the game ends.

My Final Game:

Code Snippet and Parts I Am Proud Of:

One of the parts I am most proud of is how I  control the player, the gates, and the full game system.
Each part of the game (player, gate, and main game) is built as a class, which made it easier to add new features later.

The player’s color can change, and the game checks if it matches the gate’s color before letting the player pass. This made the logic clear and fun.

if (this.player.checkCollision(gate)) {
this.gameOver();
return;
}

This simple check controls the whole challenge of the game.
If the player touches the wrong color or hits the gate walls, the game ends immediately.

I also added a color preview system that shows the next few gate colors, so the player can plan ahead.
It uses small color dots on the screen to help the player see which color to switch to next.

this.upcomingGates.forEach((gate, index) => {
const dot = document.createElement('div');
dot.className = 'color-dot';
dot.style.background = this.getColorString(this.player.colors[gate.color]);
colorPreview.appendChild(dot);
});

Another part I am proud of is how the speed control works. The player can press keys to make the gates fall faster or slower, and there is a live bar that shows the speed level. This made the game more interactive and customizable.

Problems and Future Improvements

At first, the game was too easy because the gates were falling too slowly, and it didn’t feel challenging. I changed the gate speed and added random colors to make it more unpredictable and exciting.

Another problem was keeping everything in the right position when resizing the window. I had to fix the player’s size and position every time the screen changed, using the windowResized() function.

In the future, I want to:

  • Add special gates that move sideways

  • Add sound effects for color switches and collisions

  • Add power-ups that give the player a shield or slow motion

  • Create a moving space background for more depth

  • Add more visual effects like explosions and particle trails

Midterm Project – Chic & Click

Concept:

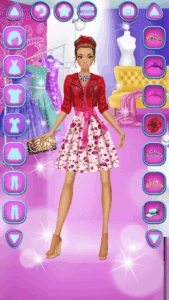
Chic & Click is an interactive dress-up game where players create stylish outfits by mixing and matching hats, tops, and skirts on a mannequin. The project is inspired by the dressing games I loved playing as a child, which sparked my interest in fashion and interactivity. Before building the game, I researched similar games and gathered references to refine the concept of changing outfits, making sure that each clothing piece fits properly and looks visually appealing (I attached the inspiration image below). The mission of the game is to provide a fun and creative experience that allows players to explore their personal style. Interactivity is at the core of the game: players click on the hat, top, or skirt areas to cycle through clothing options, accompanied by audio feedback and visual effects like neon glows and a camera flash when taking a photo of their final outfit. 

Inspiration from the dressing game:

Sketch:

Link to the sketch: https://editor.p5js.org/Aizhan/sketches/h5QYwQTMS

Key Elements of the Game:

Starting Page:
The game begins with a clean and minimalist start page designed to be visually pleasant, using pastel and calm colors throughout the game. On this page, players see the game cover and instructions, along with a “Start” button. When pressed, it transitions to the main playing page. The background image was designed using a ChatGPT image generator, while the button is created using shapes and text. The game can also be played in full-screen mode by pressing the “F” key, providing a bigger and more immersive experience.

Playing Page:
On the playing page, players can interact with the mannequin to change outfits. The clothing items—hats, tops, and skirts/pants were designed in Canva, with five options for each category, giving a total of 15 different clothing pieces. When a player clicks on a clothing area, they can go through the different options, and after the fifth item, it loops back to the first. The clothes come in various colors and styles, and each click plays a game click sound, making the game more engaging and interactive.

Result Page:
After clicking the “Finish” button, the chosen outfit is displayed on a result page with a photo studio background. A fun gaming song starts playing as the page appears, creating a celebratory mood. This page includes a “Take a Photo” button,  which triggers a camera sound, a visual flash effect, and automatically downloads the screenshot to the user’s computer as “MyOutfit.png.” This allows players to save and share their styled outfits. The second button of the page is “Finish”, and as the users press the button, they move on to the next page.

Restart Page:
The restart page thanks the player for playing and provides a “Restart” button. The background image remains consistent with the aesthetic of the game, maintaining the calm pastel theme, and allows players to start a new round of outfit creation easily.

Code snippet and parts I am proud of:

I am proud of how I implemented the camera effect and photo feature. The flash effect combined with the screenshot download feels polished and gives the game a fun feeling To be honest, this was a last-minute addition, as I initially only had music and the background. The p5 references and tutorials really helped me bring it to life.

// Camera Effect
function drawCameraEffect() {
  let elapsed = millis() - flashStartTime;
  if (elapsed < 500) { // flash lasts 0.5 seconds
    fill(255, 255, 255, 150);
    rect(0, 0, width, height); // semi-transparent overlay
    image(cameraImage, width / 2 - 450, height / 2 - 400, 900, 750); // display camera overlay
  } else if (showFlash) { // save screenshot after flash ends
    saveCanvas(cnv, "MyOutfit", "png");
    showFlash = false;
  }

I am also proud of how I handled the clothing interactivity. Using arrays and a simple .next() function to cycle through hats, tops, and skirts kept the code clean and easy to manage, while keeping the gameplay smooth and responsive.

// Clothing class 
class Clothing {
  constructor(images, offsetX, offsetY) {
    this.images = images;       // array of clothing images
    this.offsetX = offsetX;     // array of X offsets for each image
    this.offsetY = offsetY;     // array of Y offsets for each image
    this.current = 0;           // index of the currently displayed clothing
    this.show = false;          // whether to display this clothing
  }

  // Loops back to the first item after the last one
  next() {
    this.current = (this.current + 1) % this.images.length;
  }

  // Display the current clothing item on the canvas
  display(x, y, w, h, extraOffsetY = 0) {
    if (this.show) { // only draw if show is true
      let img = this.images[this.current];
      let aspect = img.width / img.height;       // maintain aspect ratio
      let targetW = w;
      let targetH = targetW / aspect;
      let offsetX = this.offsetX[this.current] || 0; // use offset for proper alignment
      let offsetY = this.offsetY[this.current] || 0;
      image(img, x + offsetX, y + offsetY + extraOffsetY, targetW, targetH);
    }
  }
}

I was also inspired by other students’ work to add neon hover effects on the buttons, which were fun to code and added polish without making the program more complicated.

function applyNeonEffect(btn) {
  let x = btn.x, y = btn.y, w = btn.width, h = btn.height;
  
  // Check if mouse is over the button
  if (mouseX > x - 20 && mouseX < x + w + 20 && mouseY > y - 20 && mouseY < y + h + 20) {
    // Apply neon glow effect
    btn.style("box-shadow", "0 0 10px #fff, 0 0 20px #fff, 0 0 30px #fff, 0 0 50px #fff");
  } else {
    // Remove glow when mouse is not over
    btn.style("box-shadow", "none");
  }
}

Problems/Future Improvements:

One of the most difficult parts of this project was getting the clothes to fit correctly on the mannequin. Each clothing image had a different size and shape, so I spent several hours trying to align them properly. At first, it was tricky because using the same coordinates for every clothing item caused them to look off. I solved this by creating offset arrays for X and Y positions for each clothing item. For example, topOffsetsX, topOffsetsY, skirtOffsetsX, skirtOffsetsY, and hatOffsetsY allowed me to manually adjust the position of each item so it would sit correctly on the mannequin.

Regarding future improvements, I would focus on a few key areas. One of them would be adding more clothing options and categories, like shoes, accessories, or jackets, would give the game more variety and customization. I could also implement a drag-and-drop feature so users can position clothes more freely instead of just clicking to cycle through them. Overall, this project was a great way for me to combine coding and design. I learned how to manage interactive elements, solve alignment issues, and create a smooth user experience.  It also improved my problem-solving skills, especially when dealing with image alignment and user interactions. This midterm game gave me a better understanding of how design and programming can come together to create an engaging user experience.

Midterm

  • Embed or link to your sketch (e.g. link to the sketch in fullscreen mode)
  • Include code snippets and one or more images
  • Describe the overall concept of your project (1-2 paragraphs)
  • Describe how your project works and what parts you’re proud of (e.g. good technical decisions, good game design) 2-3 paragraphs
  • Describe some areas for improvement and problems that you ran into (resolved or otherwise) (1-2 paragraphs)

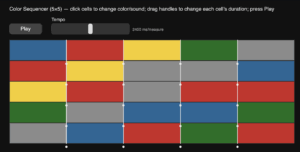
This is the final output:

Conceptualization:

For this project, I decide to create a design includes interactivity with sound. When I looked at how musicians create their music, they always apply something called as “soundtrack” that could be dragged around to edit their produced songs. So, for this midterm project, I decide to build on this concept.

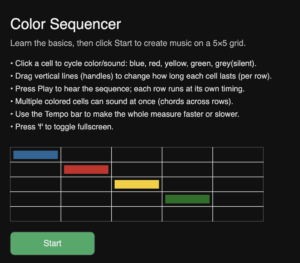
However, it would be too technical if I just recreate a soundtrack control system and it wouldn’t be very artistic. To add certain aesthetics to the design and to simplify the system. I decided to create a visual system that is similar to this picture.

With different color representing different sound, user could drag the gridlines to increase/decrease the length of certain sound. With colored blocks designated to certain sound, I decrease the difficulty to choose which sounds are available to the sound track. Also, I want to design a system in which the user could click on the grid inside and change the color(grid) of the sound. There should also be a play button which plays the sound block once the user finish design the block.

How the program works:

There are two pages in total, the first page allow users to read instructions so that they will grasp idea on how this program work. Then the second page allow user to interact freely with their creativity.


When users adjust the color of the grid, the “music”. that is created with the sound blocks would be different. Additionally, users are allowed to control the length of each block. Overall, I added a adjust tempo feature to control the total length of the block.

The code that I am proud of is the rebuild function. It is the core of this program as user interacted with the grid, its sound will be altered based on how user rebuild the entire grid.

function rebuildBlocks() {
  // Precompute row boundaries (equal height rows)
  const ys = [];
  for (let r = 0; r <= N_ROWS; r++) {
    ys.push(gridY + (r * gridH / N_ROWS));
  }

  blocks = [];
  for (let r = 0; r < N_ROWS; r++) {
    const row = [];
    const xs = [gridX, ...handles[r], gridX + gridW];

    for (let c = 0; c < N_COLS; c++) {
      const x0 = xs[c], x1 = xs[c + 1];
      const y0 = ys[r], y1 = ys[r + 1];

      // Aesthetic default color pattern:
      // Use a repeating gradient based on row/column indices.
      let baseState;
      const pattern = (r + c) % 5;
      switch (pattern) {
        case 0: baseState = 0; break; // blue
        case 1: baseState = 1; break; // red
        case 2: baseState = 2; break; // yellow
        case 3: baseState = 3; break; // green
        case 4: baseState = 4; break; // grey (silent)
      }

      // Slight random variation for natural look
      if (random() < 0.15) {
        baseState = floor(random(0, 5));
      }

      row.push(new Block(x0, y0, x1 - x0, y1 - y0, baseState, r, c));
    }
    blocks.push(row);
  }
}

In the future I believe it is a good practice to improve the aesthetics of the user interface and additionally, I could add several sound effect blocks so that users could alter the entire style of the music.

Midterm Project – Barbie Dreamhouse

Barbie’s Dreamhouse 

Link to sketch: https://editor.p5js.org/rma9603/full/y2y3-M4zC

Whenever I play with interactive art, I try to build something that invites slow exploration instead of a single-goal game. For my final project I built Barbie’s Dreamhouse: a small interactive world with rooms to explore (Outside → Inside → Closet, Kitchen, Bedroom, Living Room), each containing subtle objects the user can click or interact with. The goal was to create a calm, nostalgic environment that encourages clicking, discovering, and lingering.

Concept

The Dreamhouse is not a “win/lose” game, it’s an exploratory scene. The idea was to capture the cozy, pastel vibe you expect from a dreamhouse and layer in small interactive details:

  • An exterior view with a theme song and a door that rings a real doorbell when clicked.

  • An interior view with hotspots for the closet, kitchen, bedroom, and living room.

  • A Closet (Wardrobe) with multiple outfit sets and selectable frames, accompanied by sparkle effects and sound.

  • A Kitchen  to pick a cupcake base, bake it, then decorate with frosting.

  • A Bedroom with a clickable book that opens a reader overlay

  • A Living Room with a TV area and remote control for channel-like images with music that resonated with the pic shown.

On a personal note: I loved Barbie as a kid, and some of my favorite Barbie movies directly inspired the look and feel of the living room — the pastel decor, playful props, and the idea of a tiny TV full of different “channels” came straight from that nostalgia.

The focus was on atmosphere: soft pastel visuals, gentle audio, and small surprises that reward clicking around.

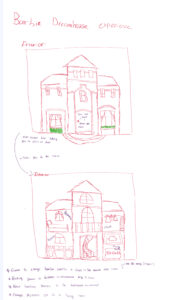
Here is a rough sketch of what I envisioned:

Key features and interactions

Room transitions

  • Click the door from the exterior to enter the house.

  • From the interior, click room hotspots to open that room full-screen.

  •  Scene state management makes switching easy.

Closet 

  • Pages of outfit frames sliced from larger sprite sheets. (took me a while to slice them correctly).

  • Click dots to switch pages/sets, arrows to cycle frames, and a ✓ button to confirm selection.

  • Sparkle overlay + sparkle sound on selection when outfit is confirmed.

  • I added a wardrobe reset so pressing R reliably restarts the closet to its initial state.

Kitchen

  • A mini workflow: pick base → bake (progress bar) → confirm → decorate (frosting).

  • Cupcake base and frosting are separate sprites; frosting is aligned to the base bottom using computed offsets so different frosted overlays sit properly.

  • Tweaked the base preview size so the cupcake base doesn’t dominate the scene.

Bedroom

  • A book hotspot that opens a reader overlay with pages.

  • Prev/Next page buttons and R to close.

Living room

  • The living room is where my childhood Barbie inspiration shows most — pastel furniture, framed photos, and a playful TV nook. I built a small TV area with channel-like images and a responsive remote so users can flip through visuals like changing channels in a cozy movie night.

  • TV image area and remote hotspots scale responsively with the canvas; the living room’s color and props riff off my favorite Barbie movies.

Audio

  • Background theme for the exterior (looping Barbie Life in the Dreamhouse theme song).

  • Doorbell sound that plays when clicking the door — the theme song stops when the door is pressed so the bell is audible and the audio doesn’t overlap.

  • Special audio for sparkle, baking ding, closet music, and bedroom lullaby — all are conditionally played/stopped when entering/exiting rooms or selecting items.

Workflow & what went well

  1. Scene manager + state machine
    Making a small SceneManager (global state variable with states like outside, inside, closet, bedroom, living room) made it trivial to manage transitions and keep room-specific logic isolated.
  2. Drawing and assets
    I drew assets in  Canva and used AI to generate some of the visuals  at the same size as the p5 canvas where possible — this hugely simplified positioning and saved time. For sprite sheets (like cupcake bases/frostings and outfits) I sliced frames programmatically so I could treat them like tiled sprites.
  3. Small polish details
  • Preventing continuous hover sounds (door bell) by gating the knock with a boolean.

  • Ensuring music doesn’t layer (check .isPlaying() and .pause() before starting a new track).

  • Adding a “sparkle” overlay and stopping closet music when confirming a selection so the sparkle sound can be heard.

What coding I’m proud of

The piece of code I’m proudest of is  honestly the whole kitchen, specifically the sprite-slicing + alignment system for the Kitchen. I wrote utilities that trim transparent pixels from sprite frames, compute each frame’s visual center/bottom, and then use those offsets to automatically align frosting to the cupcake base across many different sprite sheets and sizes. That makes wildly different art assets behave as a single cohesive object without manual per-frame positioning. It also required careful handling of canvas scaling, timing (bake/ding), and audio overlap — a lot of little edge cases that had to work together cleanly. 

 // slice sprites  — trims each frame and computes offsets on trimmed images
  _sliceSprites() {
    // base frames
    this.baseFrames = [];
    this.baseOffsets = [];
    if (
      this.cupcakeImg &&
      this.cupcakeImg.width &&
      this.cupcakeImg.height &&
      this.baseCount > 0
    ) {
      const g = this._bestGridFor(this.cupcakeImg, this.baseCount);
      const fw = Math.round(this.cupcakeImg.width / g.cols);
      const fh = Math.round(this.cupcakeImg.height / g.rows);
      let idx = 0;
      for (let r = 0; r < g.rows; r++) {
        for (let c = 0; c < g.cols; c++) {
          if (idx >= this.baseCount) break;
          const sx = c * fw,
            sy = r * fh;
          try {
            const raw = this.cupcakeImg.get(sx, sy, fw, fh);
            const trimmed = this._trimTransparent(raw) || raw;
            this.baseFrames[idx] = trimmed;
            this.baseOffsets[idx] = this._computeContentBounds(trimmed);
          } catch (e) {
            this.baseFrames[idx] = null;
            this.baseOffsets[idx] = {
              xOffset: 0,
              yOffset: 0,
              maxY: Math.floor(fh / 2),
            };
          }
          idx++;
        }
      }
    }

    // frosting frames
    this.frostingFrames = [];
    this.frostingOffsets = [];
    if (
      this.frostingImg &&
      this.frostingImg.width &&
      this.frostingImg.height &&
      this.frostingCount > 0
    ) {
      const g = this._bestGridFor(this.frostingImg, this.frostingCount);
      const fw = Math.round(this.frostingImg.width / g.cols);
      const fh = Math.round(this.frostingImg.height / g.rows);
      let idx = 0;
      for (let r = 0; r < g.rows; r++) {
        for (let c = 0; c < g.cols; c++) {
          if (idx >= this.frostingCount) break;
          const sx = c * fw,
            sy = r * fh;
          try {
            const raw = this.frostingImg.get(sx, sy, fw, fh);
            const trimmed = this._trimTransparent(raw) || raw;
            this.frostingFrames[idx] = trimmed;
            this.frostingOffsets[idx] = this._computeContentBounds(trimmed);
          } catch (e) {
            this.frostingFrames[idx] = null;
            this.frostingOffsets[idx] = {
              xOffset: 0,
              yOffset: 0,
              maxY: Math.floor(fh / 2),
            };
          }
          idx++;
        }
      }
    }
  }


Areas for improvement / future work

  • Add instructions or an optional guided mode (right now the experience is intentionally exploratory, but an in-game menu could help some users).

  • Refine click detection for non-rectangular images (pixel-perfect hit testing for PNGs with transparency).

  • Add more kitchen interactions: coffee machine, more decoration options, or an inventory for outfits.


What I learned

  • Breaking the app into small room controllers (Wardrobe, Kitchen, Bedroom, LivingRoom) makes the codebase much easier to maintain and debug.

  • Small details matter: gating hover sounds, preventing overlapping music, and subtle visual feedback (sparkle, dots) make the experience feel much more polished.

  • Drawing assets at canvas scale saves tons of time when positioning interactive pieces.

Closing

I loved Barbie when I was a kid, and designing this project felt like a grown-up, interactive love letter to those movies ,  especially when building out the living room. I enjoyed making something soft and low-pressure that rewards clicking and exploration. The Dreamhouse was a great exercise in scene management, responsive layout, and polishing interactions that make users want to hang out in a piece of art.

Midterm Project – Music Vent

What is Music Vent?


So I created this music visualizer called **Music Vent**, and the whole idea came from thinking about how we use music when we’re feeling emotional – especially when we’re sad or need to vent. You know how sometimes you just want to put on some music and let it all out? That’s exactly what this project is about.


The point of Music Vent is to create an immersive experience for music listening, especially for those moments when you want to vent through sad music. But here’s the thing – while you’re going through those emotions, there are these cute, colorful elements that somehow bring you ease and comfort.


The Concept Behind It:


I wanted to capture this duality that happens when we listen to music emotionally. On one hand, you have these really comforting, almost therapeutic elements:


– **Flying radio-cloud birds**: These little radios attached to clouds that float across the screen in the most adorable way. They’re like digital companions that keep you company while you’re listening.
– **A beautiful galaxy background**: I created this artistic Milky Way galaxy with twinkling stars and colorful dust clouds that creates this peaceful, cosmic atmosphere.
– **Soft colors and smooth animations**: Everything flows gently and uses calming colors that make you feel at ease.


But then on the other hand, you have the more intense, cathartic elements:


– **Beat-responsive visualizations**: These are the NCS-style spectrum analyzers (those green bar graphs you see in the middle) that react aggressively to the music’s beats. They can feel a bit disruptive to the peaceful vibe, but that’s intentional – they represent the raw emotional energy you’re releasing.


How I Built It


The Technical Setup


I built this using p5.js and JavaScript, and I tried to keep the code organized using classes so it wouldn’t become a complete mess. Here’s basically how it’s structured:


“`class MusicVisualizerApp {
constructor() {
this.audioManager=newAudioManager();
this.visualManager=newVisualizationManager();
this.uiManager=newUIManager();
}
}“`
I have separate managers for handling the audio, the visuals, and the user interface. This way, if I want to change how the audio analysis works, I don’t have to mess with the visual code.


The Audio Analysis Part


This was probably the trickiest part. I needed the system to actually “understand” the music and respond to it emotionally. So I created this mood detection algorithm:


“`javascript
class MoodProfile {
analyzeMood() {
constavgEnergy=this.average(this.analysisBuffer.map(d=>d.energy));
constavgBass=this.average(this.analysisBuffer.map(d=>d.frequencyBands.bass));
constavgHigh=this.average(this.analysisBuffer.map(d=>d.frequencyBands.high));
// Calculate emotional characteristics
this.currentMood.energy=Math.min(avgEnergy*2, 1.0);
this.currentMood.danceability=Math.min((avgBass+this.currentMood.energy) *0.8, 1.0);
this.currentMood.valence=Math.min((avgHigh+avgCentroid) *0.9, 1.0);
}
}
“`


Basically, the system listens to the music and analyzes different frequency bands – like how much bass there is, how much high-frequency content, the overall energy level. Then it tries to figure out the “mood” of the song and adapts the visuals accordingly.


The cool thing is that it can detect beats in real-time and make the black hole effect happen right when the beat hits. I spent way too much time getting the beat detection algorithm right!


Creating the Galaxy Background


I wanted something that felt cosmic and peaceful, so I created this Milky Way galaxy effect. It has about 500 twinkling stars, colorful dust clouds, and these spiral arms that slowly rotate. But here’s the cool part – when a beat hits in the music, the whole galaxy gets sucked into a black hole!


“`javascript
// When beats are detected, everything spirals inward
if (beatDetected) {
this.targetBlackHoleIntensity=1.0;
// Stars and particles get pulled toward the center
}
“`


The black hole effect was inspired by how intense emotions can feel like they’re pulling everything into them. When the beat drops, you see this dramatic transformation where all the peaceful elements get drawn into this swirling vortex with orange and purple colors.


### The Flying Radio-Cloud Birds


This was probably my favorite part to code. I took inspiration from a radio drawing I had made before and turned it into these little geometric radios that fly around attached to fluffy clouds. They spawn randomly from either side of the screen and just float across peacefully.


“`javascript
class RadioCloudBird {
constructor(x, y, direction=1) {
this.cloudColor=random([‘white’, ‘lightblue’, ‘pink’, ‘purple’]);
this.radioColor=random([‘brown’, ‘black’, ‘silver’, ‘gold’]);
this.bobSpeed=random(0.02, 0.05); // Makes them bob gently
}
}
“`


Each radio is drawn using basic geometric shapes – rectangles for the body, circles for the speakers and knobs, lines for the antenna. I had to figure out how to scale everything properly so they’d look right when flying around, but once I got it working, they became these adorable little companions that make the whole experience feel less lonely.


## What I Learned and Challenges I Faced


### Making Everything Feel Smooth


One thing I really focused on was making sure all the animations felt organic and not jarring. I used a lot of interpolation to smooth out the transitions:


“`javascript
// Instead of sudden changes, everything gradually transitions
this.values.bass = lerp(this.values.bass, newBassValue, 0.1);
this.values.energy = lerp(this.values.energy, newEnergyValue, 0.1);
“`


This makes the whole experience feel more natural and less like you’re watching a computer program.


### A Small Touch: Conversation Detection


I also added this feature where if the system detects you’re talking (through the microphone), it automatically lowers the music volume. I Included this interactivity feature because that one feature I really wished to see in music party listening softwares. As someone who used to listen to music bots a lot on discord a lot, I always found it annoying to manually reduce or mute the music bot whenever I wanna speak to my friends while listening. This was the initial inspiration to create this project by the way, but then I got the idea of the concept behind this visualizing experience so I focused more on it.

Here is the project on p5, have fun experiencing it!


Reading reflection –  The Design of Everyday Things

Honestly, the biggest thing for me in this chapter was just how validating it felt. I can’t count how many times I’ve pushed a door that was clearly a ‘pull’ and felt stupid for a second. The whole idea of the “Norman Door” made so much sense, especially since I see it constantly on campus. There are all these big doors with these handles, the kind of signifier that just screams ‘pull me.’ But half the time, they’re actually push doors. What’s even more confusing is that you can go to another building, see the exact same handle, and that one will actually be a pull. It’s like the design is actively working against you, making it impossible to learn or build a consistent mental model.

And it’s not just doors. My friend’s shower is another perfect example. It’s one of those single, modern-looking knobs with absolutely no signifiers, so there are no red or blue dots, no icons, nothing to tell you which way to turn for hot or cold. Every time I use it, it’s this huge guessing game where I have to turn it on and then quickly jump back to avoid getting blasted with freezing or scalding water. It’s a design that creates a genuinely stressful experience out of something that should be simple.

Now I can’t stop noticing this stuff everywhere. It’s made me realize that good design is basically invisible. It just works, and you don’t even think about it. Bad design, on the other hand, is loud and frustrating. So yeah, I guess my main takeaway is that I’m going to start blaming the objects around me a lot more, and myself a lot less.