
Concept & Inspiration
This project began with a video example shown in class where a mustache prop was used as a switch. I was fascinated by the idea that something worn on the face could become part of an electronic interaction. It reminded me that the body itself can be the input device and that playful design can still be technically meaningful. That influenced my first idea. I wanted to place aluminum foil pads above my eyebrows so that every time I scrunched them together, the circuit would close and the LED would react. It felt like a fun and expressive interaction because eyebrows are a natural part of communication.
As I started building, I realized a limitation. The wires available were not long enough to comfortably reach my face while plugged into the Arduino. The setup became impractical and would not stay connected. Instead of forcing the idea, I adapted it while keeping the core concept: using a body gesture that does not involve hands. I moved the conductive pads from my face to my elbows, which allowed me to keep the same interaction logic without fighting the hardware constraints.
The result is a simple but playful design. When the user touches their elbows together, their body closes the circuit which becomes a digital input to the Arduino that changes the LEDs. This transforms a physical gesture into a clear visual response and reinforces the connection between the human body and digital behavior.
How It Works
Two small pieces of aluminum foil are taped to the elbows. Each foil pad is connected to the Arduino: Left elbow foil → Digital Pin 2 (input) Right elbow foil → GND When the elbows are apart, the circuit is open, and the Arduino reads a HIGH signal using an internal pull-up resistor. The red LED turns on to indicate no contact. When the elbows touch each other, the conductive path through the body closes the circuit, pulling the input LOW. The green LED turns on, signaling that contact is detected. This simple interaction demonstrates digital input detection, human conductivity, and conditional output control.
Circuit Diagram:
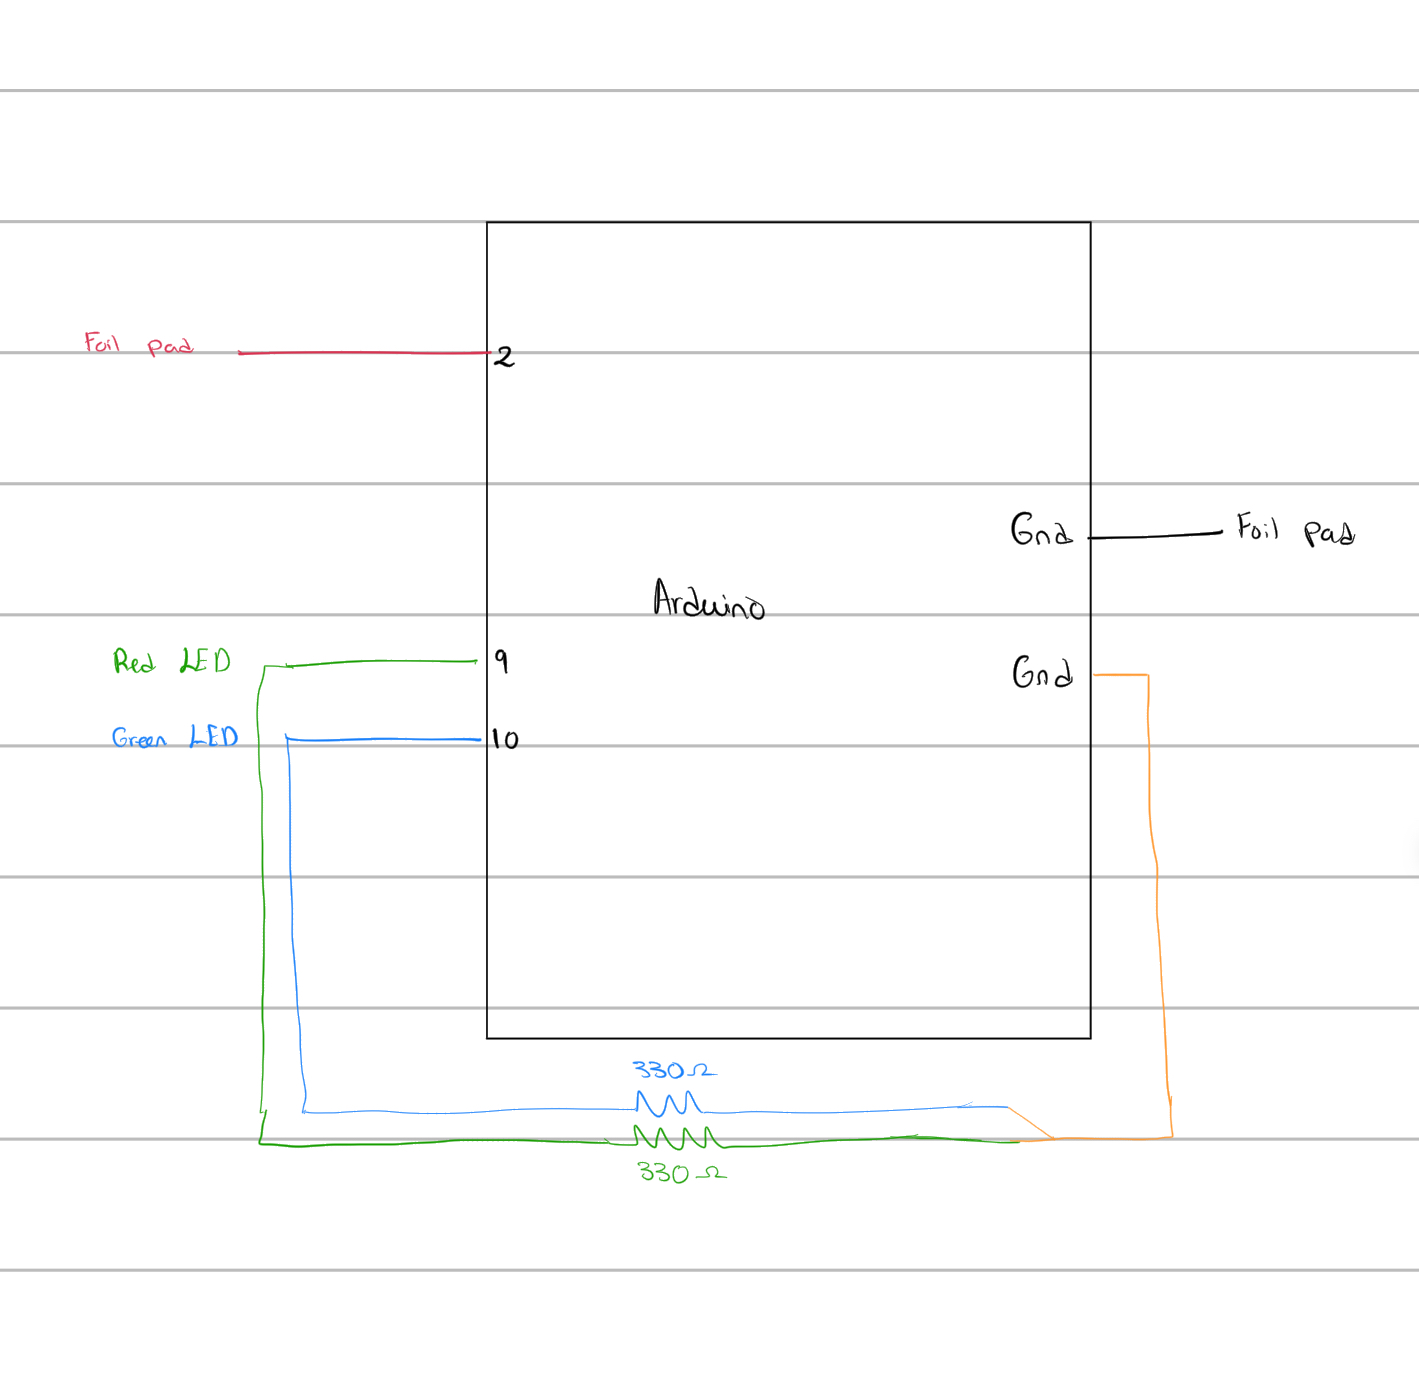
I included a labeled schematic showing the Arduino Uno, foil pads, and LED wiring. Red LED connects to Pin 9 through a 330 resistor, Green LED to Pin 10 through a 330 Ω resistor, and all components share the same GND reference.
Arduino Code:
const int SWITCH_PIN = 2;
const int RED_LED = 9;
const int GREEN_LED = 10;

void setup() {
  pinMode(SWITCH_PIN, INPUT_PULLUP);
  pinMode(RED_LED, OUTPUT);
  pinMode(GREEN_LED, OUTPUT);
}

void loop() {
  int state = digitalRead(SWITCH_PIN);

  if (state == LOW) {
    digitalWrite(GREEN_LED, HIGH);
    digitalWrite(RED_LED, LOW);
  } else {
    digitalWrite(GREEN_LED, LOW);
    digitalWrite(RED_LED, HIGH);
  }
}
The INPUT_PULLUP keeps the signal stable when the body is not closing the circuit.
Heres the video demonstration (I used my little sister as demonstration):
C18BC5EF-F946-4D9D-9A64-42D32D1BC5B3
Challenges:
Ensuring the elbow foil stayed in place during arm movement was a big challenge since the jumper wires are pretty short.
This challenge was resolved by connecting one of the wires to from the Arduino to the breadboard and then connecting another on the same row to give me more extension to work with.
Future Improvements:
More inputs, using additional body contact points.
I could potentially add other outputs, such as sound.
I could learn a way to extend the wires so I have access to make funner projects with no limitations.