
Concept:
For my project, I wanted to recreate that nostalgic, slightly awkward fun of using a photo booth, but in a digital, interactive way. The idea was to make something playful that still feels personal, where you type your name, pick a filter and a frame, and get a “thank you” screen at the end, almost like a real booth session. It’s simple, but it captures that small moment of anticipation and result. From entering your name to seeing your face appear across different frames and filters, I wanted it to feel like a sequence, a mini experience rather than just a photo being taken.
I was inspired by the photo booths you see at malls, the kind people use with friends, but I also wanted it to reflect me a little more. Since I love using my digital camera, I leaned into that and made it more camera-oriented, blending that nostalgic booth feel with something that connects to my own personality and interests.
What I’m Proud of:
Not to toot my own horn, but I’m proud of various aspects of this project. I’ll start with the more design-oriented aspects, then get to the more technical parts.
For the frames, I originally wanted to use these camera frames on pinterest but I found the resolution to not be optimal so I decided to just make it myself using Canva. For reference, here’s a Pinterest frame and mine side by side.
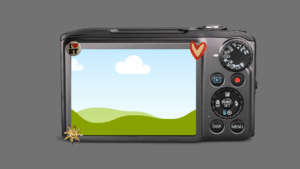
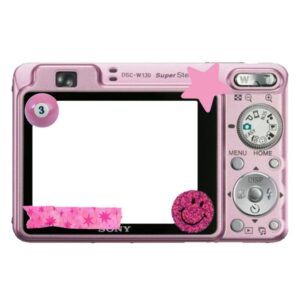
I decided on only three frames just to make the user experience notfeel overwhelming, but would love to add more in the feature.
Another design aspect I’m proud of is the flow of which the project goes. The path from one screen to another makes for a simple yet effective way to guide the user through the experience.
Now for the technical! There’s quite a few so I will narrow it down to my top 3.
Firstly, this could count as design but setting a current screen variable made testing out different screens so much easier, without having to go back to the beginning everytime. It felt like a shortcut.
Secondly, when the project goes from one screen to the other, some features stayed and overlapped with features from the currents screen so learning when to show and hide was interesting and made me learn how important order is with code (even more than before). I think getting the hang of hide and show is very important for big scale project so I’m glad to have learnt it through this project.
Lastly, fitting the video feed to the frame. This might’ve been the second most difficult thing I had to deal with just because when I was looking at different ways to fit the feed into a frame, mostly by consulting chatGPT, it kept making me think that I had to look at the type of picture and make part of it transparent, and when that didn’t work, I was thinking of just doing it manually which is where frameData came from.
//define video feed positions per frame
//this lets us fit the live video inside each frame nicely
const frameData = {
 camera1: { x: 355, y: 249, w: 635, h: 440 },
 camera2: { x: 255, y: 245, w: 650, h: 480 },
 camera3: { x: 253, y: 215, w: 730, h: 530 },
};
So for every frame, it set the position and size for the feed.
Areas of improvement:
While I really wanted to use FaceMesh from ml5.js and had originally planned to draw a little red circle on the user’s nose when a face was detected, I couldn’t get it to work properly. I spent a huge amount of time debugging, revisiting documentation, and even consulting AI for help, but it kept interfering with my video feed in unpredictable ways. Eventually, I decided to set that idea aside for now, not because I don’t want to do it, but because I want to do it right.
In the future, I’d also love to add more frame options and maybe even a way for users to design their own frames. I imagine a simple drag-and-drop system where they can choose shapes, colors, or even add text onto the live feed.
Overall, I really enjoyed working on this project. I think being from a coding background definitely helped me approach it with less hesitation, especially when dealing with the logic and structure. But I also found myself overflowing with ideas and not enough time to bring them all to life, which was both exciting and frustrating. In the end, I’m proud of how it came together. It feels playful and functional, and I think that balance is what makes it work.
References:
I used ChatGPT to debug for the most part, and used the ml5.js documentation when I was attempting to implement face detection to draw a circle on the nose.
P.S. I don’t have the sketch embedded since I worked on the project in VS Code instead of the online p5 editor, but here’s the GitHub website link: https://kzeina.github.io/Photobooth/ .