
Barbie’s Dreamhouse
Link to sketch: https://editor.p5js.org/rma9603/full/y2y3-M4zC
Whenever I play with interactive art, I try to build something that invites slow exploration instead of a single-goal game. For my final project I built Barbie’s Dreamhouse: a small interactive world with rooms to explore (Outside → Inside → Closet, Kitchen, Bedroom, Living Room), each containing subtle objects the user can click or interact with. The goal was to create a calm, nostalgic environment that encourages clicking, discovering, and lingering.
Concept
The Dreamhouse is not a “win/lose” game, it’s an exploratory scene. The idea was to capture the cozy, pastel vibe you expect from a dreamhouse and layer in small interactive details:
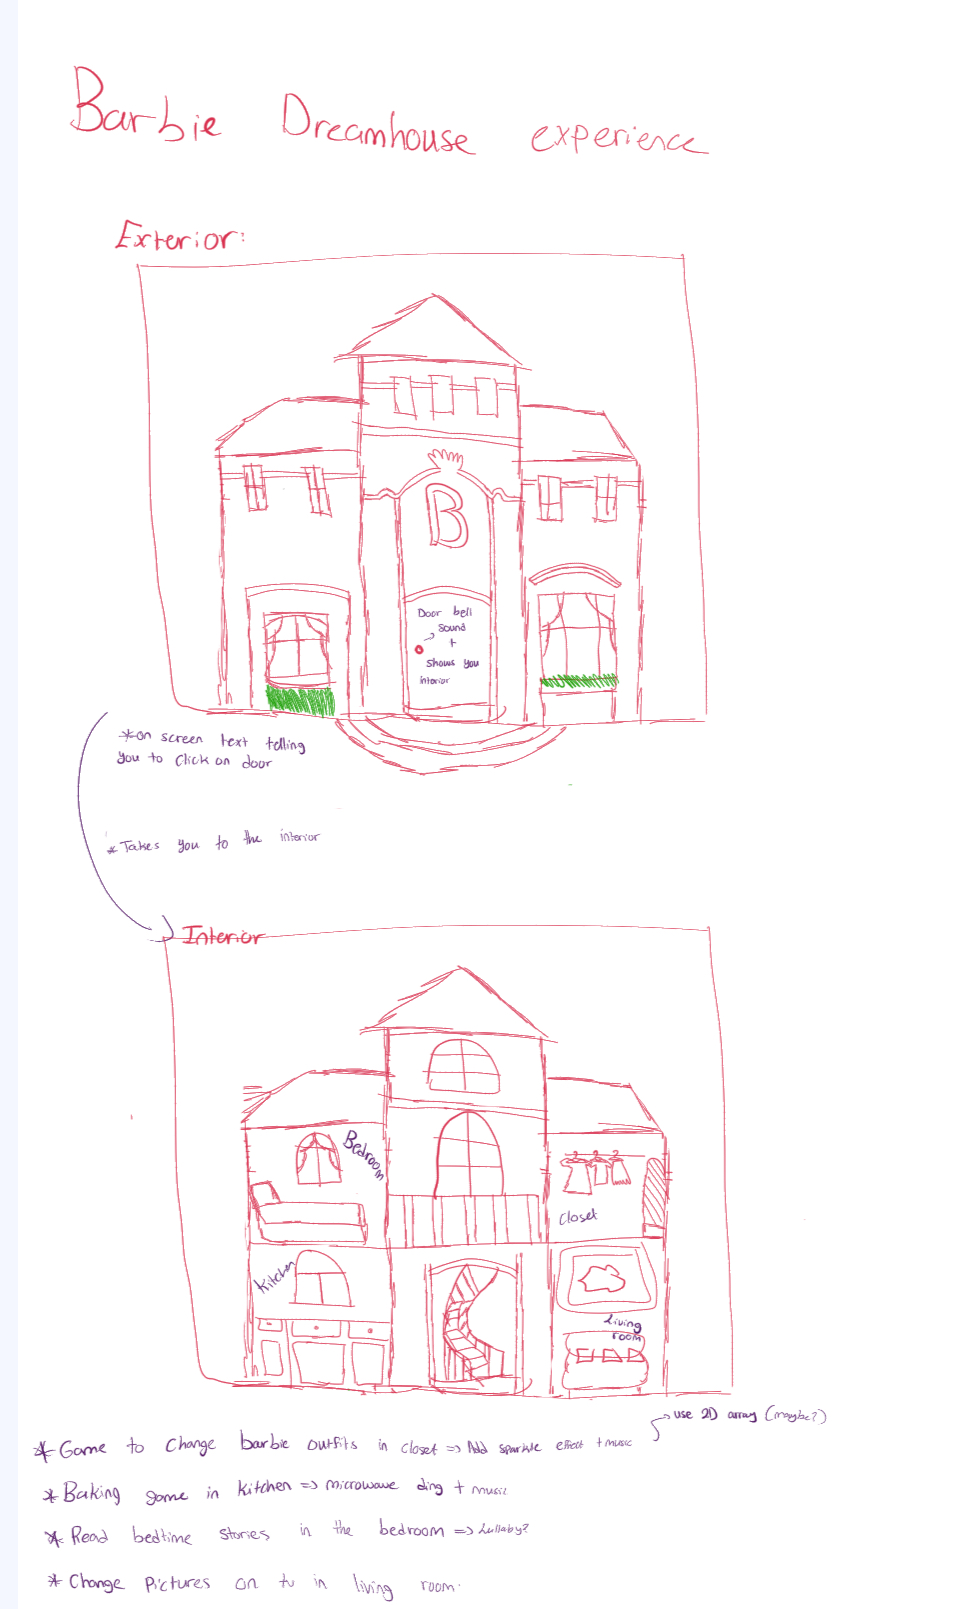
- An exterior view with a theme song and a door that rings a real doorbell when clicked.
- An interior view with hotspots for the closet, kitchen, bedroom, and living room.
- A Closet (Wardrobe) with multiple outfit sets and selectable frames, accompanied by sparkle effects and sound.
- A Kitchen to pick a cupcake base, bake it, then decorate with frosting.
- A Bedroom with a clickable book that opens a reader overlay
- A Living Room with a TV area and remote control for channel-like images with music that resonated with the pic shown.
On a personal note: I loved Barbie as a kid, and some of my favorite Barbie movies directly inspired the look and feel of the living room — the pastel decor, playful props, and the idea of a tiny TV full of different “channels” came straight from that nostalgia.
The focus was on atmosphere: soft pastel visuals, gentle audio, and small surprises that reward clicking around.
Here is a rough sketch of what I envisioned:
Key features and interactions
Room transitions
- Click the door from the exterior to enter the house.
- From the interior, click room hotspots to open that room full-screen.
- Scene state management makes switching easy.
Closet
- Pages of outfit frames sliced from larger sprite sheets. (took me a while to slice them correctly).
- Click dots to switch pages/sets, arrows to cycle frames, and a ✓ button to confirm selection.
- Sparkle overlay + sparkle sound on selection when outfit is confirmed.
- I added a wardrobe reset so pressing R reliably restarts the closet to its initial state.
Kitchen
- A mini workflow: pick base → bake (progress bar) → confirm → decorate (frosting).
- Cupcake base and frosting are separate sprites; frosting is aligned to the base bottom using computed offsets so different frosted overlays sit properly.
- Tweaked the base preview size so the cupcake base doesn’t dominate the scene.
Bedroom
- A book hotspot that opens a reader overlay with pages.
- Prev/Next page buttons and R to close.
Living room
- The living room is where my childhood Barbie inspiration shows most — pastel furniture, framed photos, and a playful TV nook. I built a small TV area with channel-like images and a responsive remote so users can flip through visuals like changing channels in a cozy movie night.
- TV image area and remote hotspots scale responsively with the canvas; the living room’s color and props riff off my favorite Barbie movies.
Audio
- Background theme for the exterior (looping Barbie Life in the Dreamhouse theme song).
- Doorbell sound that plays when clicking the door — the theme song stops when the door is pressed so the bell is audible and the audio doesn’t overlap.
- Special audio for sparkle, baking ding, closet music, and bedroom lullaby — all are conditionally played/stopped when entering/exiting rooms or selecting items.
Workflow & what went well
- Scene manager + state machine
Making a small SceneManager (global state variable with states like outside, inside, closet, bedroom, living room) made it trivial to manage transitions and keep room-specific logic isolated. - Drawing and assets
I drew assets in Canva and used AI to generate some of the visuals at the same size as the p5 canvas where possible — this hugely simplified positioning and saved time. For sprite sheets (like cupcake bases/frostings and outfits) I sliced frames programmatically so I could treat them like tiled sprites. - Small polish details
- Preventing continuous hover sounds (door bell) by gating the knock with a boolean.
- Ensuring music doesn’t layer (check .isPlaying() and .pause() before starting a new track).
- Adding a “sparkle” overlay and stopping closet music when confirming a selection so the sparkle sound can be heard.
What coding I’m proud of
The piece of code I’m proudest of is honestly the whole kitchen, specifically the sprite-slicing + alignment system for the Kitchen. I wrote utilities that trim transparent pixels from sprite frames, compute each frame’s visual center/bottom, and then use those offsets to automatically align frosting to the cupcake base across many different sprite sheets and sizes. That makes wildly different art assets behave as a single cohesive object without manual per-frame positioning. It also required careful handling of canvas scaling, timing (bake/ding), and audio overlap — a lot of little edge cases that had to work together cleanly.
 // slice sprites  — trims each frame and computes offsets on trimmed images
  _sliceSprites() {
    // base frames
    this.baseFrames = [];
    this.baseOffsets = [];
    if (
      this.cupcakeImg &&
      this.cupcakeImg.width &&
      this.cupcakeImg.height &&
      this.baseCount > 0
    ) {
      const g = this._bestGridFor(this.cupcakeImg, this.baseCount);
      const fw = Math.round(this.cupcakeImg.width / g.cols);
      const fh = Math.round(this.cupcakeImg.height / g.rows);
      let idx = 0;
      for (let r = 0; r < g.rows; r++) {
        for (let c = 0; c < g.cols; c++) {
          if (idx >= this.baseCount) break;
          const sx = c * fw,
            sy = r * fh;
          try {
            const raw = this.cupcakeImg.get(sx, sy, fw, fh);
            const trimmed = this._trimTransparent(raw) || raw;
            this.baseFrames[idx] = trimmed;
            this.baseOffsets[idx] = this._computeContentBounds(trimmed);
          } catch (e) {
            this.baseFrames[idx] = null;
            this.baseOffsets[idx] = {
              xOffset: 0,
              yOffset: 0,
              maxY: Math.floor(fh / 2),
            };
          }
          idx++;
        }
      }
    }

    // frosting frames
    this.frostingFrames = [];
    this.frostingOffsets = [];
    if (
      this.frostingImg &&
      this.frostingImg.width &&
      this.frostingImg.height &&
      this.frostingCount > 0
    ) {
      const g = this._bestGridFor(this.frostingImg, this.frostingCount);
      const fw = Math.round(this.frostingImg.width / g.cols);
      const fh = Math.round(this.frostingImg.height / g.rows);
      let idx = 0;
      for (let r = 0; r < g.rows; r++) {
        for (let c = 0; c < g.cols; c++) {
          if (idx >= this.frostingCount) break;
          const sx = c * fw,
            sy = r * fh;
          try {
            const raw = this.frostingImg.get(sx, sy, fw, fh);
            const trimmed = this._trimTransparent(raw) || raw;
            this.frostingFrames[idx] = trimmed;
            this.frostingOffsets[idx] = this._computeContentBounds(trimmed);
          } catch (e) {
            this.frostingFrames[idx] = null;
            this.frostingOffsets[idx] = {
              xOffset: 0,
              yOffset: 0,
              maxY: Math.floor(fh / 2),
            };
          }
          idx++;
        }
      }
    }
  }
Areas for improvement / future work
- Add instructions or an optional guided mode (right now the experience is intentionally exploratory, but an in-game menu could help some users).
- Refine click detection for non-rectangular images (pixel-perfect hit testing for PNGs with transparency).
- Add more kitchen interactions: coffee machine, more decoration options, or an inventory for outfits.
What I learned
- Breaking the app into small room controllers (Wardrobe, Kitchen, Bedroom, LivingRoom) makes the codebase much easier to maintain and debug.
- Small details matter: gating hover sounds, preventing overlapping music, and subtle visual feedback (sparkle, dots) make the experience feel much more polished.
- Drawing assets at canvas scale saves tons of time when positioning interactive pieces.
Closing
I loved Barbie when I was a kid, and designing this project felt like a grown-up, interactive love letter to those movies , especially when building out the living room. I enjoyed making something soft and low-pressure that rewards clicking and exploration. The Dreamhouse was a great exercise in scene management, responsive layout, and polishing interactions that make users want to hang out in a piece of art.