For my final project, I want to create a game called “Go Ichi-Go!”, something like the Chrome Dinosaur Game, but a bit different. So the game would have a character called Ichigo (strawberry), who runs and has to jump over obstacles like jumping puddles of whipped cream, and towers of chocolate, and slide under floating slices of cake. After each jump/dive, there would be randomised text giving cute strawberry themed puns. There would also be sound effects for each jump or dive. There would be two buttons to jump or dive, using Arduino, and a button to start/restart the game. The player wins after successfully overcoming ten obstacles. This would display a congratulations image and a restart option. If they fail to do so, then it would just go yo a Game Over state with a restart button. If I do have the time/skill set for it, I want to add a treat component, where when they win, a sweet will be ejected out, probably using DC motors, but I’m not sure about this yet (really really want to try this). I want to make this game in a very kawaii retro vibe, but also focus more on the interaction design on the game itself.
Month: April 2025
Week 11 – Serial Communication
Group members : Liya Rafeeq, Kashish Satija
Exercise 11.1 :
-
Make something that uses only one sensor on Arduino and makes the ellipse in p5 move on the horizontal axis, in the middle of the screen, and nothing on arduino is controlled by p5 – for this we used a potentiometer. We mapped the values of the potentiometer to change the X coordinate of the ellipse, making it move along the horizontal axis.
P5.JS CODE :
let port;
let connectBtn;
let baudrate = 9600;

function setup() {
  createCanvas(400, 400);
  background(220);

  port = createSerial();

//serial connection
  let usedPorts = usedSerialPorts();
  if (usedPorts.length > 0) {
    port.open(usedPorts[0], baudrate);
  }
  let connectBtn = createButton("Connect to Serial");
  connectBtn.mousePressed(() => port.open(baudrate));
}

function draw() {


  //read from the serial port, complete string till the ""
  let str = port.readUntil("\n");
  if (str.length > 0) {
    background("white");
    ellipse(int(str),200,40,40);
  }

}
ARDUINO CODE:
void setup() {
  Serial.begin(9600); // initialize serial communications
}

void loop() {
  // read the input pin:
  int potentiometer = analogRead(A1);
  // remap the pot value to 0-400:
  int mappedPotValue = map(potentiometer, 0, 1023, 0, 400);
  // print the value to the serial port.
  Serial.println(mappedPotValue);
  // slight delay to stabilize the ADC:
  delay(1);

  // Delay so we only send 10 times per second and don't
  // flood the serial connection leading to missed characters on the receiving side
  delay(100);
}
Exercise 11.2 :
2. Make something that controls the LED brightness from p5. For this, we made a circle that moves along the Y axis. According to the Y coordinates, the LED turns brighter or lower.
P5.JS. CODE:
let port;
let connectBtn;
let baudrate = 9600;

function setup() {
  createCanvas(255, 285);
  port = createSerial();

  // in setup, we can open ports we have used previously
  // without user interaction

  let usedPorts = usedSerialPorts();
  if (usedPorts.length > 0) {
  port.open(usedPorts[0], baudrate);
} else {
  connectBtn = createButton("Connect to Serial");
  connectBtn.mousePressed(() => port.open(baudrate));
}
}

function draw() {
  background(220);
  circle(128,mouseY,30,30)
  let sendtoArduino = String(mouseY) + "\n"
  port.write(sendtoArduino);
}
ARDUINO CODE:
int led = 5;

void setup() {
  // put your setup code here, to run once:
  Serial.begin(9600);
  pinMode(led, OUTPUT);
}

void loop() {
  // put your main code here, to run repeatedly:
  while (Serial.available())
    {
    digitalWrite(LED_BUILTIN, HIGH); // led on while receiving data
    int brightness = Serial.parseInt(); //get slider value from p5
     if (Serial.read() == '\n') {
       analogWrite(led, brightness);
    }
  }
}
Exercise 11.3:
Take the gravity wind example (https://editor.p5js.org/aaronsherwood/sketches/I7iQrNCul) and make it so every time the ball bounces one led lights up and then turns off, and you can control the wind from one analog sensor: For this, we used the potentiometer as the analog sensor.
P5.JS CODE:
let baudrate = 9600;
let velocity;
let gravity;
let position;
let acceleration;
let wind;
let drag = 0.99;
let mass = 50;
let str="";
let val;
let heightOfBall = 0;

function setup() {
  createCanvas(640, 360);
  noFill();
  position = createVector(width/2, 0);
  velocity = createVector(0,0);
  acceleration = createVector(0,0);
  gravity = createVector(0, 0.5*mass);
  wind = createVector(0,0);
  port = createSerial();

  // in setup, we can open ports we have used previously
  // without user interaction

  let usedPorts = usedSerialPorts();
  if (usedPorts.length > 0) {
  port.open(usedPorts[0], baudrate);
} else {
  connectBtn = createButton("Connect to Serial");
  connectBtn.mousePressed(() => port.open(baudrate));
}
}

function draw() {
  background(255);
  applyForce(wind);
  applyForce(gravity);
  velocity.add(acceleration);
  velocity.mult(drag);
  position.add(velocity);
  acceleration.mult(0);
  ellipse(position.x,position.y,mass,mass);
  if (position.y > height-mass/2) {
      velocity.y *= -0.9;  // A little dampening when hitting the bottom
      position.y = height-mass/2;
      heightOfBall = 1;
    } else {
      heightOfBall = 0;
    }
  str = port.readUntil("\n");
  val=int(str);
  if (!isNaN(val)) {
  breeze(val);
  }
}
function applyForce(force){
  // Newton's 2nd law: F = M * A
  // or A = F / M
  let f = p5.Vector.div(force, mass);
  acceleration.add(f);
}

function breeze(val){
  if (val<400){
    wind.x=-1;
  }
  else if (val>500 && val<900){
    wind.x=1;
  } else {
    wind.x=0
  }
  let sendToArduino = String(heightOfBall)  + "\n";
  port.write(sendToArduino);
}
function keyPressed(){
  if (key==' '){
    mass=random(15,80);
    position.y=-mass;
    velocity.mult(0);
  }
}
ARDUINO CODE:
int led = 5;

void setup() {
// put your setup code here, to run once:
Serial.begin(9600);
pinMode(led, OUTPUT);
}

void loop() {
// put your main code here, to run repeatedly:
while (Serial.available())
{
digitalWrite(LED_BUILTIN, HIGH); // led on while receiving data
int brightness = Serial.parseInt(); //get slider value from p5
if (Serial.read() == '\n') {
analogWrite(led, brightness);
}
}
}
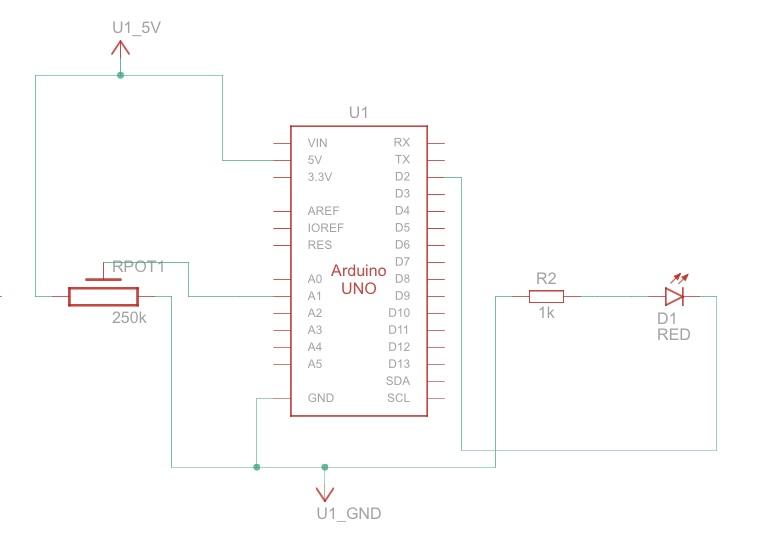
VIDEO and SCHEMATIC:
Midterm Project – Oracle Lady
Oracle Cards – Midterm Project Report
Oracle Cards is an interactive web-based application I developed, inspired by the mystical allure of tarot and oracle card readings. For this project, I utilized the p5.js library to create a visually engaging and user-friendly experience that allows users to select a category and receive either advice or a reflection question. My goal was to craft an accessible and contemplative digital experience, drawing from my interest in mindfulness and self-reflection. This project leverages p5.js for rendering graphics, handling user input, and incorporating audio to enhance immersion.
About
Gameplay Instructions:
To play Oracle Cards, click the game link above to open the application in a new window. Ensure your browser supports p5.js and that you have a stable internet connection for loading assets (images and audio). The game is controlled entirely via mouse clicks, making it intuitive and accessible. Upon loading, you’ll see a welcome screen with a background image and category buttons. Click a category to proceed, then choose between receiving advice or a reflection question. The result is displayed on a card, accompanied by ambient music you can control with on-screen buttons. All images (e.g., backgrounds, cards) were sourced from royalty-free libraries, and the music tracks are licensed for non-commercial use. I do not claim ownership of these assets but have customized their integration to suit the game’s aesthetic.
How the Game Works
Oracle Cards simulates a digital card-reading experience, drawing inspiration from oracle decks used for introspection and guidance. The game progresses through three states:
-
Start: Users select a category (“Yourself,” “Friends & Family,” or “Transcendence”).
-
Choose Type: Users pick between “Advice” or a “Reflection Question.”
-
Result: A randomly selected response is displayed on a card, based on the chosen category and type.
The game uses a desk-themed interface with a lady in the background (inspired by a fortune-teller aesthetic) to create an immersive atmosphere. Users can control background music via play/pause, next, and previous buttons, enhancing the reflective mood. The sequence of events is as follows:
-
The game loads with a welcome screen and category buttons.
-
Clicking a category transitions to the choice screen, displaying a card with two options.
-
Selecting a choice reveals the result on a card, with a prompt to restart by clicking anywhere.
The design emphasizes simplicity and emotional resonance, encouraging users to pause and reflect.
Game Controls
The controls are straightforward:
-
Mouse Click: Click on category buttons (e.g., “Yourself”) to select a category, choice buttons (e.g., “Advice”) to pick a type, or anywhere on the result screen to restart.
-
Music Controls: Click the previous, play/pause, or next buttons in the top-right corner to manage background music.
This minimal input method ensures accessibility for users of all skill levels.
Proud Moment
I’m particularly proud of implementing the state management system using p5.js, which seamlessly transitions between the start, chooseType, and result states without glitches. Debugging the button click detection was challenging, especially ensuring accurate hitboxes for the buttons, but I resolved this by carefully calculating their positions relative to the canvas. Additionally, integrating audio functionality with p5.js’s loadSound and managing playback states (play/pause, next/previous) was a significant achievement. The randomization of responses, tailored to each category and choice, adds replayability and depth, which I fine-tuned to ensure a balanced and meaningful user experience.
The Code
Reusability and p5.js
The code is designed with modularity in mind, separating concerns like state management, rendering, and user input. Key p5.js functions (preload, setup, draw) are organized to handle asset loading, canvas initialization, and continuous rendering efficiently. For example, the drawButtons function is reusable for rendering both category and choice buttons:
function drawButtons(options, yStart) {
  for (let i = 0; i < options.length; i++) {
    let x = width / 2;
    let y = yStart + i * 50;
    fill(200, 100, 100); // Button color (red)
    rect(x - 100, y - 20, 200, 40, 10); // Draw button with rounded corners
    fill(255); // White text
    textAlign(CENTER, CENTER);
    text(options[i], x, y); // Display button label
  }
}
This function is called in both the start and chooseType states, reducing code duplication. The preload function ensures all images and sounds are loaded before rendering, with error handling via callbacks:
deskLadyImage = loadImage('assets/desk_lady.png',
  () => console.log("Desk lady image loaded successfully"),
  (err) => console.error("Failed to load desk lady image:", err)
);
Object-Oriented Code
While the project primarily uses functional programming, the responses object is structured hierarchically to store advice and reflection questions for each category, enabling easy access and randomization:
let responses = {
  "Yourself": {
    "Advice": [
      "Take a deep breath and trust yourself.",
      // ... other advice
    ],
    "Reflection Question": [
      "What is one thing you truly love about yourself?",
      // ... other questions
    ]
  },
  // ... other categories
};
The mousePressed function handles state transitions and music controls, using conditional logic to detect clicks within button boundaries:
if (gameState === "start") {
  for (let i = 0; i < categories.length; i++) {
    if (mouseX > width / 2 - 100 && mouseX < width / 2 + 100 &&
        mouseY > height / 2 + 150 + i * 50 - 20 && mouseY < height / 2 + 150 + i * 50 + 20) {
      selectedCategory = categories[i];
      gameState = "chooseType";
    }
  }
}
This modular approach ensures the code is maintainable and extensible.
Training the Model
No machine learning models were used in this project, as the focus was on user interaction and randomization within p5.js. However, the randomization logic for responses mimics a lightweight decision model. I curated the responses object by researching mindfulness and self-help literature, ensuring each piece of advice or question is concise yet impactful. The random function in p5.js was used to select responses, tested extensively to confirm uniform distribution across options.
Areas of Improvement
I’m delighted with Oracle Cards as a reflective and engaging experience that aligns with my vision of digital mindfulness. However, there are opportunities for enhancement:
-
Additional Features: I’d like to add animations for card transitions and a settings menu to adjust music volume or toggle visuals (e.g., enabling/disabling the crystal ball image).
-
Visual Polish: Incorporating hover effects for buttons and more varied card designs could elevate the aesthetic.
-
Content Expansion: Adding more categories or allowing users to input custom questions would increase replayability.
-
Accessibility: Implementing keyboard controls alongside mouse clicks would make the game more inclusive.
As for the game logic, I plan to explore subtle physics-based animations (e.g., card flipping) using p5.js to enhance interactivity.
Conclusion
Overall, I’m proud of Oracle Cards and how it blends creativity, technical skill, and emotional resonance. It’s a meaningful step in my journey with interactive design, and I look forward to refining it further to share its calming experience with others.
Below is the Game:
Week 11 Reading Response
Reading Design Meets Disability made me rethink how I’ve traditionally understood assistive devices—as purely functional tools. Pullin challenges that limited view by showing how design and disability can intersect in creative, expressive, and even fashionable ways. What stood out most to me was the idea that disability devices, like hearing aids or prosthetics, shouldn’t have to be hidden or neutral—they can be bold, beautiful, and part of someone’s personal identity. The example of Aimee Mullins using prosthetic legs designed by Alexander McQueen was especially powerful. It showed how design can shift perceptions of disability from something to be fixed or minimized to something that can be celebrated and uniquely expressed.
This reading made me reflect on how design influences the way we feel about ourselves and how others see us. It made me realize how much design has to do with dignity, pride, and empowerment—not just function. I found myself thinking about how many products I use daily that are designed to be sleek or stylish, and how unfair it is that many people with disabilities are given tools that feel like medical equipment instead. Pullin’s emphasis on co-design really resonated with me; involving disabled people directly in the design process isn’t just practical, it’s respectful. This reading left me inspired to think more inclusively about design and more critically about who gets to have choice, beauty, and individuality in the products they use.
Week 11 – Exercises
1: Ellipse
/*
 * Week 11 Production (1)
 *
 * Inputs:
 *   - A1 - 10k potentiometer connected to 5V and GND
 *
 */

int interval = 100;
int lastMessageTime = 0;

int potPin = A1;

void setup() {
  Serial.begin(9600); // initialize serial communications
}

void loop() {
  // read the input pin:
  int potentiometer = analogRead(potPin);
  // remap the pot value to 0-255:
  int mappedPotValue = map(potentiometer, 0, 1023, 0, 255);
  // print the value to the serial port.
  Serial.println(mappedPotValue);
  // slight delay to stabilize the ADC:
  delay(1);

  delay(100);
}
let port;
let connectBtn;
let baudrate = 9600;
let lastMessage = "";
let currX;

function setup() {
  createCanvas(400, 400);
  background(220);

  port = createSerial();

  let usedPorts = usedSerialPorts();
  if (usedPorts.length > 0) {
    port.open(usedPorts[0], baudrate);
  }

  connectBtn = createButton("Connect to Arduino");
  connectBtn.position(80, height-60);
  connectBtn.mousePressed(connectBtnClick);

  currX = width/2;
}

function draw() {
  background("white");
  fill('grey');
  circle(currX, height/2, 100);

  let str = port.readUntil("\n");
  if (str.length > 0) {
    // console.log(str);
    lastMessage = str;
  }

  // Display the most recent message
  text("Last message: " + lastMessage, 10, height - 20);

  // change button label based on connection status
  if (!port.opened()) {
    connectBtn.html("Connect to Arduino");
  } else {
    connectBtn.html("Disconnect");
  }

  // // Move shape based on received value
  if (!lastMessage) {lastMessage = "127"}
  currX = map(int(lastMessage), 0, 255, 0, width);
  currX = floor(currX);
  // console.log(currX);
}

function connectBtnClick() {
  if (!port.opened()) {
    port.open("Arduino", baudrate);
  } else {
    port.close();
  }
}
2: LED Brightness
/*
 * Week 11 Production (2)
 *
 * Outputs:
 * - 5 - LED
 *
*/

int ledPin = 5;

void setup() {
  Serial.begin(9600);

  pinMode(LED_BUILTIN, OUTPUT);
  pinMode(ledPin, OUTPUT);

  // Blink them so we can check the wiring
  digitalWrite(ledPin, HIGH);
  delay(200);
  digitalWrite(ledPin, LOW);

  // start the handshake
  while (Serial.available() <= 0) {
    digitalWrite(LED_BUILTIN, HIGH); // on/blink while waiting for serial data
    Serial.println("0,0"); // send a starting message
    delay(300);            // wait 1/3 second
    digitalWrite(LED_BUILTIN, LOW);
    delay(50);
  }
}

void loop() {
  // wait for data from p5 before doing something
  while (Serial.available()) {
    digitalWrite(LED_BUILTIN, HIGH); // led on while receiving data

    int brightness = Serial.parseInt();
    if (Serial.read() == '\n') {
      analogWrite(ledPin, brightness);
    }
  }
  digitalWrite(LED_BUILTIN, LOW);
}
let port;
let baudrate = 9600;

// Show button to connect / disconnect
let showConnectButton = false;

function setup() {
  createCanvas(640, 480);
  textSize(20);

  // Create the serial port
  port = createSerial();

  // If the user previously connected, reopen the same port
  let usedPorts = usedSerialPorts();
  if (usedPorts.length > 0) {
    port.open(usedPorts[0], baudrate);
  }

  // any other ports can be opened via a dialog
  if (showConnectButton) {
    connectBtn = createButton('Connect to Arduino');
    connectBtn.position(80, 350);
    connectBtn.mousePressed(setupSerial);
  }

}

// Show serial port connection dialog in response to action
function setupSerial() {
  if (!port.opened()) {
    port.open('Arduino', baudrate);
  } else {
    port.close();
  }
}

function draw() {
  background('white');
  fill('black');

  if (showConnectButton) {
    // changes button label based on connection status
    if (!port.opened()) {
      connectBtn.html('Connect to Arduino');
    } else {
      connectBtn.html('Disconnect');
    }
  }

  if (!port.opened()) {
    text("Disconnected - press space to connect", 20, 30);
  } else {
    text("Connected - press space to disconnect", 20, 30);

    // // Transmit brightness based on mouse position
    mappedX = floor(map(mouseX, 0, width, 0, 255));
    console.log(mappedX);
    let sendToArduino = mappedX + "\n";
    port.write(sendToArduino);
  }
}

function keyPressed() {
  if (key == " ") {
    setupSerial();
  }
}
3: Wind Gravity
/*
 * Week 11 Production (3)
 *
 * Inputs:
 *   - A1 - 10k potentiometer connected to 5V and GND
 *
 * Outputs:
 * - 5 - LED
 *
*/

int potPin = A1;
int ledPin = 5;

int interval = 100;
int lastMessageTime = 0;

void setup() {
  Serial.begin(9600);

  pinMode(LED_BUILTIN, OUTPUT);
  pinMode(potPin, INPUT);
  pinMode(ledPin, OUTPUT);

  // Blink them so we can check the wiring
  digitalWrite(ledPin, HIGH);
  delay(200);
  digitalWrite(ledPin, LOW);

  // start the handshake
  while (Serial.available() <= 0) {
    digitalWrite(LED_BUILTIN, HIGH); // on/blink while waiting for serial data
    Serial.println("127"); // send a starting message
    delay(300);            // wait 1/3 second
    digitalWrite(LED_BUILTIN, LOW);
    delay(50);
  }
}

void loop() {
  // wait for data from p5 before doing something
  while (Serial.available()) {
    digitalWrite(LED_BUILTIN, HIGH); // led on while receiving data

    // blink LED based on p5 data
    int status = Serial.parseInt();
    if (Serial.read() == '\n') {
      digitalWrite(ledPin, status);
      delay(10);
      digitalWrite(ledPin, LOW);
    }

    if (lastMessageTime > interval) {
      lastMessageTime = 0;
      // send mapped potentiometer reading to p5
      int potentiometer = analogRead(potPin);
      int mappedPotValue = map(potentiometer, 0, 1023, 0, 255);
      Serial.println(mappedPotValue);
      // slight delay to stabilize the ADC:
      delay(1);
    }
    else {
      lastMessageTime++;
    }

  }
  digitalWrite(LED_BUILTIN, LOW);
}
let velocity;
let gravity;
let position;
let acceleration;
let wind;
let drag = 0.99;
let mass = 50;

// // Arduino
let port;
let connectBtn;
let baudrate = 9600;
let lastMessage = "";
let showConnectButton = false;

function setup() {
  createCanvas(620, 400);
  noFill();
  position = createVector(width/2, 0);
  velocity = createVector(0,0);
  acceleration = createVector(0,0);
  gravity = createVector(0, 0.5*mass);
  wind = createVector(0,0);

  // // Arduino
  port = createSerial();
  let usedPorts = usedSerialPorts();
  if (usedPorts.length > 0) {
    port.open(usedPorts[0], baudrate);
  }
  if (showConnectButton) {
    connectBtn = createButton('Connect to Arduino');
    connectBtn.position(80, 300);
    connectBtn.mousePressed(setupSerial);
  }
}

function draw() {
  background(255);
  applyForce(wind);
  applyForce(gravity);
  velocity.add(acceleration);
  velocity.mult(drag);
  position.add(velocity);
  acceleration.mult(0);
  ellipse(position.x,position.y,mass,mass);
  if (position.y > height-mass/2) {
      velocity.y *= -0.9;  // A little dampening when hitting the bottom
      position.y = height-mass/2;
      flashLight();
    }

  // // Arduino
  if (showConnectButton) {
    if (!port.opened()) {
      connectBtn.html('Connect to Arduino');
    } else {
      connectBtn.html('Disconnect');
    }
  }
  fill('black');
  if (!port.opened()) {
    text("Disconnected", 20, 30);
  } else {
    text("Connected", 20, 30);
  }
  let str = port.readUntil("\n");
  if (str.length > 0) {
    // console.log(str);
    lastMessage = str;
  }

  // Display the most recent message
  text("Last message: " + lastMessage, 10, height - 20);

  // // Convert received value to wind.x value
  mappedPot = map(int(lastMessage), 0, 255, -1, 1);
  wind.x = mappedPot;
  let windSpeed = "Wind speed: " + wind.x
  text(windSpeed.substring(0,20), 10, height - 5);

  fill('white');
}

function applyForce(force){
  // Newton's 2nd law: F = M * A
  // or A = F / M
  let f = p5.Vector.div(force, mass);
  acceleration.add(f);
}

function keyPressed(){
  if (keyCode==LEFT_ARROW){
    wind.x=-1;
  }
  if (keyCode==RIGHT_ARROW){
    wind.x=1;
  }
  if (key==' '){
    mass=random(15,80);
    position.y=-mass;
    velocity.mult(0);
    port.write("0\n"); // reset light
  }
}

// // Arduino
function setupSerial() {
  if (!port.opened()) {
    port.open('Arduino', baudrate);
  } else {
    port.close();
  }
}

function flashLight() {
  if (port.opened()) {
    port.write("1\n");
    // port.write("0\n");
  }
}
Week 11 — Reading Response
Reading about the intersection between design and disability really got me thinking about many facets of design that I often ignore in my day to day life as an able-bodied person. For example, when I purchase makeup, let’s say, a face cream, I see what the lid or container looks like and whether it looks easy to pack, carry, and open (while also being hygienic). However, recently I saw a video about how a rare beauty blush lid was disability friendly since it had a circular grip that made opening it much easier.
Similarly, in the reading they talk about something called trickle-down effect where designs are expected to eventually find its way to disabled people in a way that is accesible to them. It then mentions that the splint medical device to chair furniture pipeline challenges this idea. Usually we think innovation flows from mainstream products down to specialized disability products — like how smartphone tech might eventually make its way into accessible devices years later, but usually as watered-down technological versions. Although I understand that this is also a matter of making profit, it seems to me from the reading that this is actually a missed opportunity since looking at things from a different angle can also birth innovation for the masses in unexpected ways.
This makes me wonder about whether we approach software design in a very constrained way. For instance, we’re often taught to build for the “average users” first, then maybe add accessibility features later if we have time (which let’s be honest, most student projects never get to). But what if we started with accessible design principles from the beginning? Would we end up with more innovative solutions that actually work better for everyone? This is the question I was left with, that I still don’t have an answer to.
Week 11 — Homework
Before diving into the first task, we began by loading the sample Arduino and p5.js code from the previous class. We then read through each line to see how Arduino connects and communicates with p5. This served as a helpful foundation to jumpstart our workflow.
Task 1:
After reviewing the code and identifying the necessary components, we proceeded to build the circuit using a sliding potentiometer. Using analogRead from pin A0, we captured the potentiometer’s data and sent it to p5. The values ranged from 0 to 900, so we divided them by 2.25 to map them to the x-position on the canvas, ensuring smooth and accurate movement. A global variable ‘pos’ is updated and mapped into the x position of the ellipse.
Here is the p5.js code:
let pos = 0;
function setup() {
  createCanvas(400, 400);
}

function draw() {
  background(220);
  ellipse(pos,200,100,100);
}

function keyPressed() {
  if (key == " ") {
    setUpSerial(); // setting up connection between arduino and p5.js
  }
}

function readSerial(data) {

  if (data != null) {
    let fromArduino = trim(data) + "\n";
    pos = fromArduino/2.25; // to map 0 to 900 in the right range in p5.js (400 by 00) canvas
    writeSerial(sendToArduino);
  }
}
and the arduino code:
int sensor = A0;

void setup() {
  Serial.begin(9600);
  pinMode(LED_BUILTIN, OUTPUT);
  digitalWrite(led, HIGH);
  delay(200);
  digitalWrite(led, LOW);

  // starting the handshake
  while (Serial.available() <= 0) {
    digitalWrite(LED_BUILTIN, HIGH); // on/blink while waiting for serial data
    Serial.println("0"); // send a starting message
    delay(300);            // wait 1/3 second
    digitalWrite(LED_BUILTIN, LOW);
    delay(50);
  }
}

void loop() {
  digitalWrite(LED_BUILTIN, LOW);
  int sensor = analogRead(A0);
  Serial.println(sensor); // sending sensor information to p5.js

}
Here’s the video of it in action:
https://drive.google.com/file/d/1kT32H353kkMX_5HeKBphHf4Cxy-xhMF_/view?usp=sharing
Task 2:
We decided to create an input box where if the user inserted a number between 0-255 and pressed enter, it would then reflect the corresponding brightness onto the blue LED on the breadboard. It was a relatively simple implementation that required very minimal code changes.
Here’s the p5.js code:
let ledval = 0;
let input;

function setup() {
  createCanvas(400, 400);
  input = createInput('');
  input.position(120, 100);
}

function draw() {
  background(220);
}

function keyPressed() {
  if (key == " ") {
    setUpSerial(); // setting up connection
  }
}

  if (data != null) {
    let fromArduino = trim(data);
    let sendToArduino = input.value() + "\n";
    writeSerial(sendToArduino);
  }
}
and the arduino code:
int led = 3;

void setup() {
  Serial.begin(9600);
  pinMode(LED_BUILTIN, OUTPUT);
  pinMode(led, OUTPUT);

  // Blink them so we can check the wiring
  digitalWrite(led, HIGH);
  delay(200);
  digitalWrite(led, LOW);

  // start the handshake
  while (Serial.available() <= 0) {
    digitalWrite(LED_BUILTIN, HIGH); // on/blink while waiting for serial data
    Serial.println("0,0"); // send a starting message
    delay(300);            // wait 1/3 second
    digitalWrite(LED_BUILTIN, LOW);
    delay(50);
  }
}

void loop() {
  // wait for data from p5 before doing something
  while (Serial.available()) {
    digitalWrite(LED_BUILTIN, HIGH); // led on while receiving data

    int ledVal = Serial.parseInt();
    if (Serial.read() == '\n') {
      analogWrite(led, ledVal);
      delay(5);
    }
  }
  digitalWrite(LED_BUILTIN, LOW);

}
and finally, the video of it in action:
https://drive.google.com/file/d/1eMi1d_3H6abYxtYwyEpybCnZB7-fTVXF/view?usp=sharing
Task 3:
For the last task, we needed to first open up and examine the given gravity wind code. We identified two key things we could alter that would complete the given task at hand: the “wind.x” variable and the “(position.y > height-mass/2)” IF statement. We could map the analog value we read in from pin A0 to the wind.x position to alter the ball’s position on the x axis and since the aforementioned IF statement indicates when the ball has touched the ground, we could simply sneak in a line that sets a boolean flag to true and sending this to arduino and performing a digitalWrite (replacing the previous analogWrite from the input()).
Here’s how we did it in p5.js:
let velocity;
let gravity;
let position;
let acceleration;
let wind;
let drag = 0.99;
let mass = 50;
let floor = false;

function setup() {
  createCanvas(640, 360);
  noFill();
  position = createVector(width/2, 0);
  velocity = createVector(0,0);
  acceleration = createVector(0,0);
  gravity = createVector(0, 0.5*mass);
  wind = createVector(0,0);
}

function draw() {
  background(255);
  applyForce(wind);
  applyForce(gravity);
  velocity.add(acceleration);
  velocity.mult(drag);
  position.add(velocity);
  acceleration.mult(0);
  ellipse(position.x,position.y,mass,mass);
  if (position.y > height-mass/2) {
      velocity.y *= -0.9;  // A little dampening when hitting the bottom
      position.y = height-mass/2;
      floor = true; // light up the LED!
    }

}

function applyForce(force){
  // Newton's 2nd law: F = M * A
  // or A = F / M
  let f = p5.Vector.div(force, mass);
  acceleration.add(f);
}

function keyPressed(){
  if (key == " ") {
    setUpSerial(); // setting up serial connection
  }

  if (keyCode==LEFT_ARROW){
    wind.x=-1;
  }
  if (keyCode==RIGHT_ARROW){
    wind.x=1;
  }
  if (key=='s'){ // changed from space to 's' since SPACEBAR is used to initiate serial connection pairing to arduino
    mass=random(15,80);
    position.y=-mass;
    velocity.mult(0);
  }
}

function readSerial(data) {
  if (data != null) {
    let fromArduino = trim(data);
    wind.x = map(fromArduino, 0, 912, -2, 2); // mapping sensor's analog value to ball's wind x axis value

    let sendToArduino = Number(floor) + "\n";

    writeSerial(sendToArduino);
    floor = false; // turning off blue LED
  }
}
*We used the Number() function to convert the boolean flag value to an integer value since initially we were encountering issues where it was not actually being send as a numeric value to turn on the LED in digitalWrite.
and the arduino code:
int sensor = A0;
int led = 3;

void setup() {
  Serial.begin(9600);
  pinMode(LED_BUILTIN, OUTPUT);
  pinMode(led, OUTPUT);

  // Blink them so we can check the wiring
  digitalWrite(led, HIGH);
  delay(200);
  digitalWrite(led, LOW);

  // start the handshake
  while (Serial.available() <= 0) {
    digitalWrite(LED_BUILTIN, HIGH); // on/blink while waiting for serial data
    Serial.println("0,0"); // send a starting message
    delay(300);            // wait 1/3 second
    digitalWrite(LED_BUILTIN, LOW);
    delay(50);
  }
}

void loop() {
  // wait for data from p5 before doing something
  while (Serial.available()) {
    digitalWrite(LED_BUILTIN, HIGH); // led on while receiving data

    int ledVal = Serial.parseInt();
    if (Serial.read() == '\n') {
      digitalWrite(led, ledVal);
      delay(5);
    }
  }
  digitalWrite(LED_BUILTIN, LOW);
  int sensor = analogRead(A0);
  Serial.println(sensor);

}
Finally, here’s the video of the final product (we have two to demonstrate both the analog and digital capacity):
1. https://drive.google.com/file/d/1TcwYwz7HcyUobzH0MwLQ3P1pbf2rw8BR/view?usp=sharing
2. https://drive.google.com/file/d/1Ydz9OjHuqt8VPypLTQhBYDtB-ShDBGmk/view?usp=sharing
VOILÁ!
Week 11: Reading Response
I really appreciated this reading, and the way that the author juxtaposes design with disability, and also underscores problems that are faced by those with disabilities due to, at times, arbitrary design constraints. For instance, the conversation about hearing was a bit shocking–especially how hearing aids could be significantly better for the people wearing them–if they could just be a bit larger.
This phenomena underscored a couple of problems to me… One of the first was that as a society, we potentially have stigmatized the need for hearing aids, and as such, smaller hearing aids are better. They should be subtle and not noticeable at all costs–including their primary purpose. At that point, hearing aids are prioritizing preferences of the broader society over the needs of the person who is hard of hearing.
As the article later explores how to “keep the design in design for disability,” I think that it’s crucial these engineering teams be comprised of diverse groups of people, who can provide additional perspectives and ensure that products are usable by a broader range of people. Moreover, I appreciate how it emphasizes that tools designed for those with disabilities are in no way less in need of design as products for those without disabilities.
week 10- assignment
Concept: Music Box
Our inspiration for this project was from a music box, which is a pretty nostalgic instrument that plays melodies when you wind it up. Music boxes are usually these small, mechanical devices that play a set of tunes with a simple winding mechanism, and have a sweet, tinkling sound.
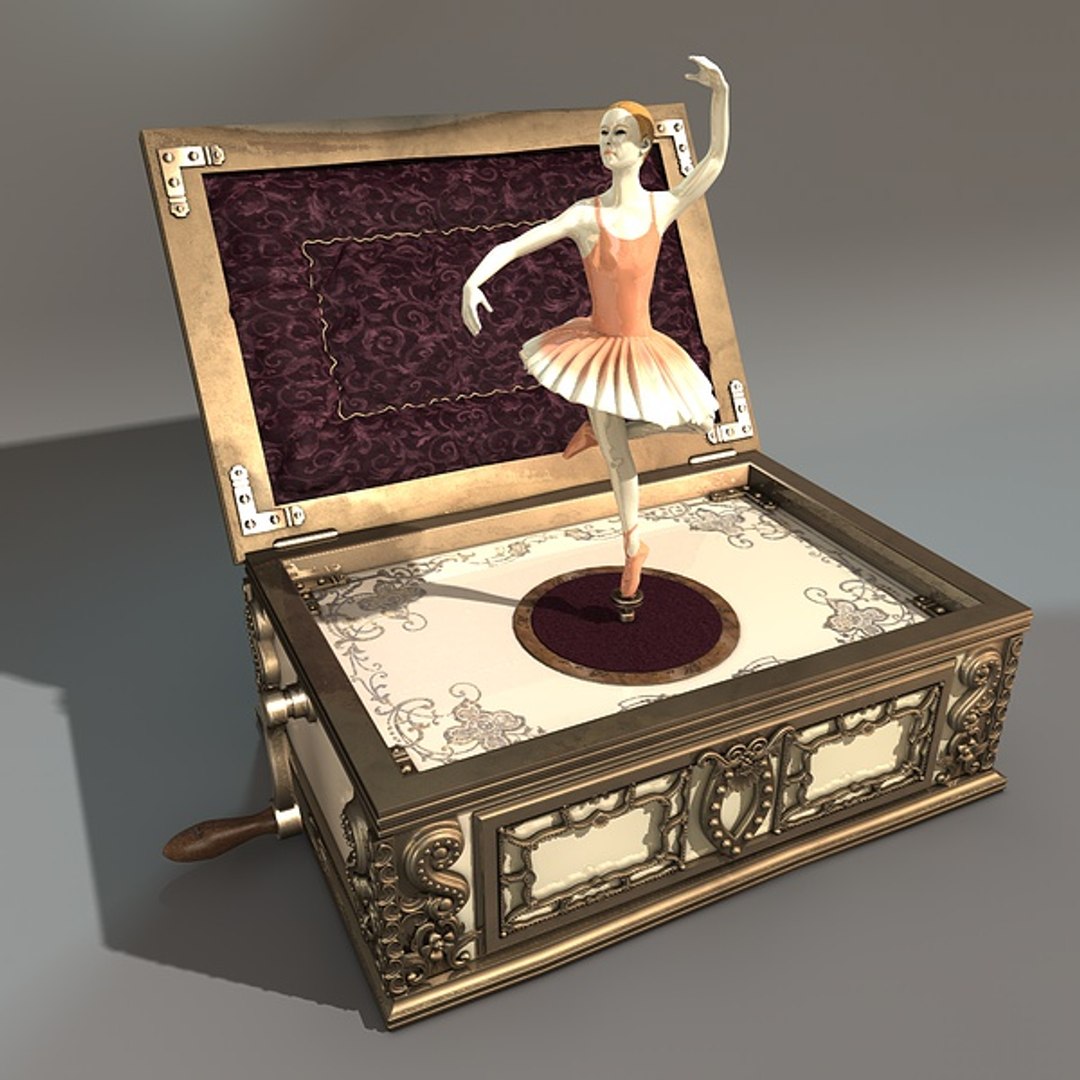
Our version of this is more interactive and customizable. Instead of just one melody, our “music box” allows the users to choose between two pre-programmed songs , which are Twinkle Twinkle Little Star and Frère Jacques. In addition to that, they can also increase or decrease the tempo of the song with a button, adjust the pitch of the melody with the potentiometer, and as the music plays, the LEDs flash and change, synchronized to the rhythm and notes.
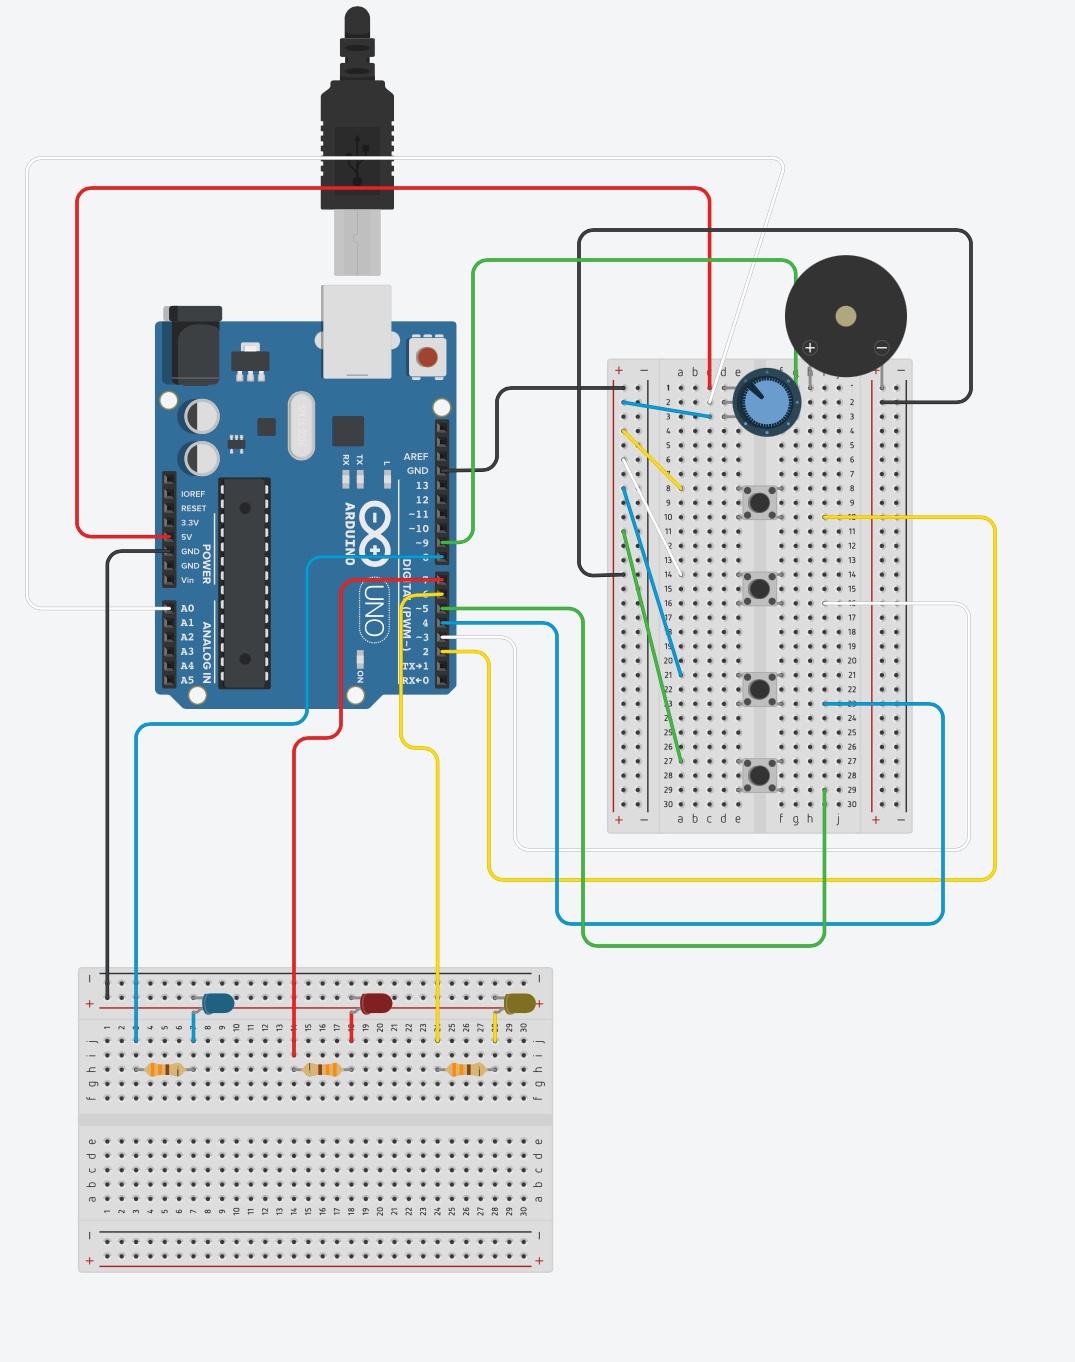
Code Snippet/Difficulties
One aspect we had difficulties with was getting the LED’s to align with music and the notes played, however after a few tries we were able to get this code. In summary, to get this “visualizer” effect, we used the flashVisualizer() function , and called it inside the playSong() function, right after each note was played. The i variable, which is the index of the current note in the song, is passed to flashVisualizer(), and so, as the song progresses, the i value increments, causing the 3 LEDs we used to cycle through in sequence. In general, every time a note is played, the flashVisualizer() function is called, which results in a flash of an LED that matches the timing of the note. So, the flashing LED visualizes the rhythm of the music, and since the song is made up of an array of notes, the LEDs change with each note.
// Function to play the melody
void playSong(int *melody, int *durations, int length) {
  for (int i = 0; i < length; i++) {
    int baseNote = melody[i];
    int noteDuration = tempo * (4.0 / durations[i]);  // Calculate note duration
    // Read potentiometer and calculate pitch adjustment
    int potVal = analogRead(potPin); // range: 0–1023
    float pitchFactor = 0.9 + ((float)potVal / 1023.0) * 0.4;  // pitch range: 0.9–1.3
    int adjustedNote = baseNote * pitchFactor;
    if (baseNote == 0) {
      noTone(buzzer); // Pause
    } else {
      tone(buzzer, adjustedNote, noteDuration); // Play adjusted tone
      flashVisualizer(i); // Flash LEDs
    }
    delay(noteDuration * 1.3);
  }
  // Turn off all LEDs after song ends
  digitalWrite(led1, LOW);
  digitalWrite(led2, LOW);
  digitalWrite(led3, LOW);
}
// LED Visualizer Function
void flashVisualizer(int index) {
  // Turn off all LEDs first
  digitalWrite(led1, LOW);
  digitalWrite(led2, LOW);
  digitalWrite(led3, LOW);
  // Turn on one LED based on index
  if (index % 3 == 0) digitalWrite(led1, HIGH);
  else if (index % 3 == 1) digitalWrite(led2, HIGH);
  else digitalWrite(led3, HIGH);
}
Reflections/Improvements
Overall, this project was very fun and engaging, and we are very happy with how it turned out as we were able to implement most of the ideas we brainstormed. That said, there are a few things we’d improve. For one, we could expand the number of songs it can play. Also, the current LED visualizer is pretty simple and linear, so adding more LEDs or creating more complex patterns based on pitch, tempo, or things like that, could make it feel more like a true light show.
Final Project Idea
For the final project, I am leaning more towards creating an interactive experience/artwork rather than a game. The user would interact with the physical components on Arduino which would trigger changes / feedback on the p5js sketch. I want my project to have a coherent theme that ties the physical and visual components together, and though I haven’t settled on this idea completely, this is what I’m currently thinking:
-
- theme: human connection / friendship / bonding
- 2 users each put one hand on a surface that measures temperature (temperature sensor) and uses the other hand to hold each other’s hand, with an object containing a force dependent resistor (FDR) in between
- the warmth of the hands are used to change the color of the visualization and the 2 temperatures make the colors lerp
- how strongly the 2 are holding hands together, measured by the FDR, changes the stroke width of the illustration (tbd) or how big/small it is etc
- the resulting sketch would represent the 2 users’ connection; their body warmths dictate the color changes and the illustration dynamically changes depending on how strongly the 2 are holding hands together
- resources: temperature sensor, force dependent resistor bundled up inside a flat/thin object that 2 people can hold in between their palms while holding hands
- theme: human connection / friendship / bonding
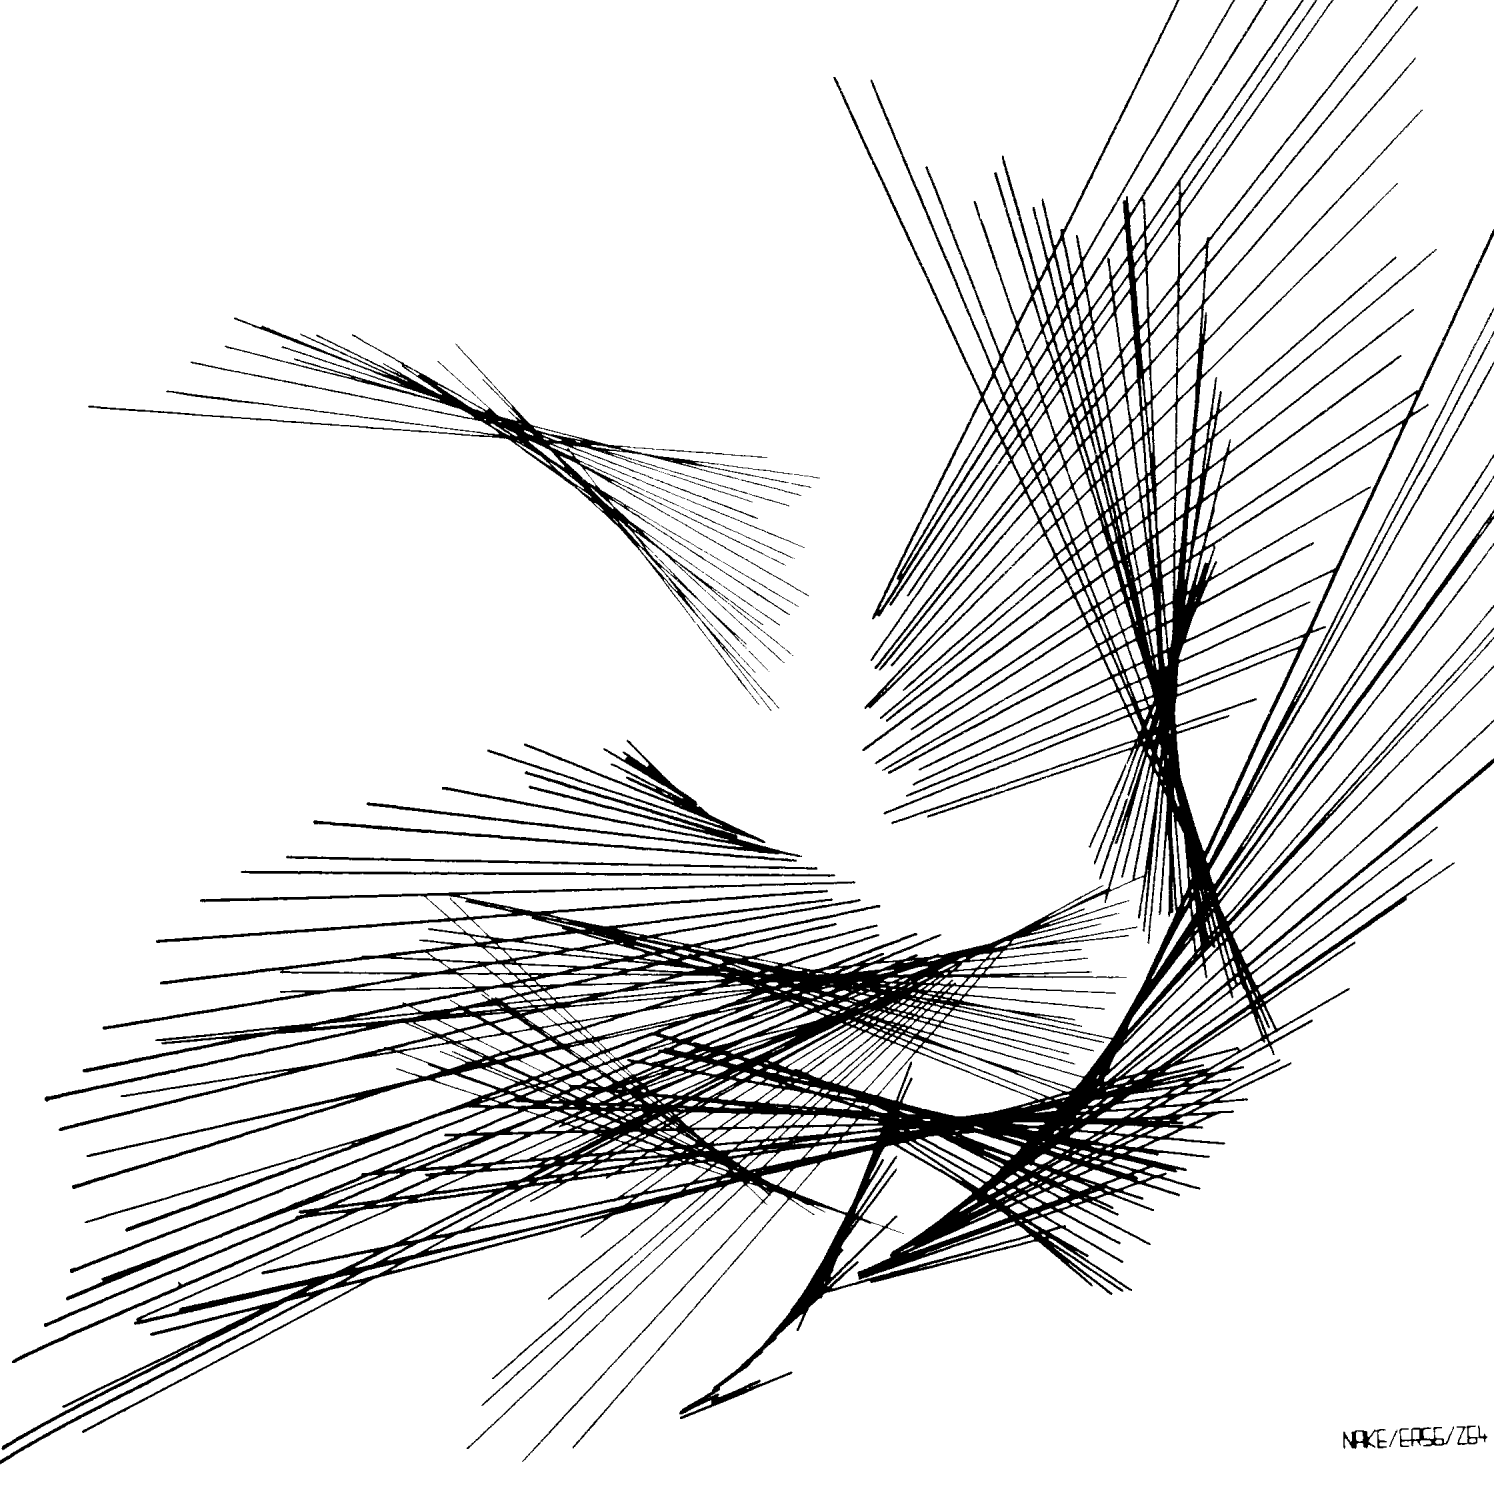
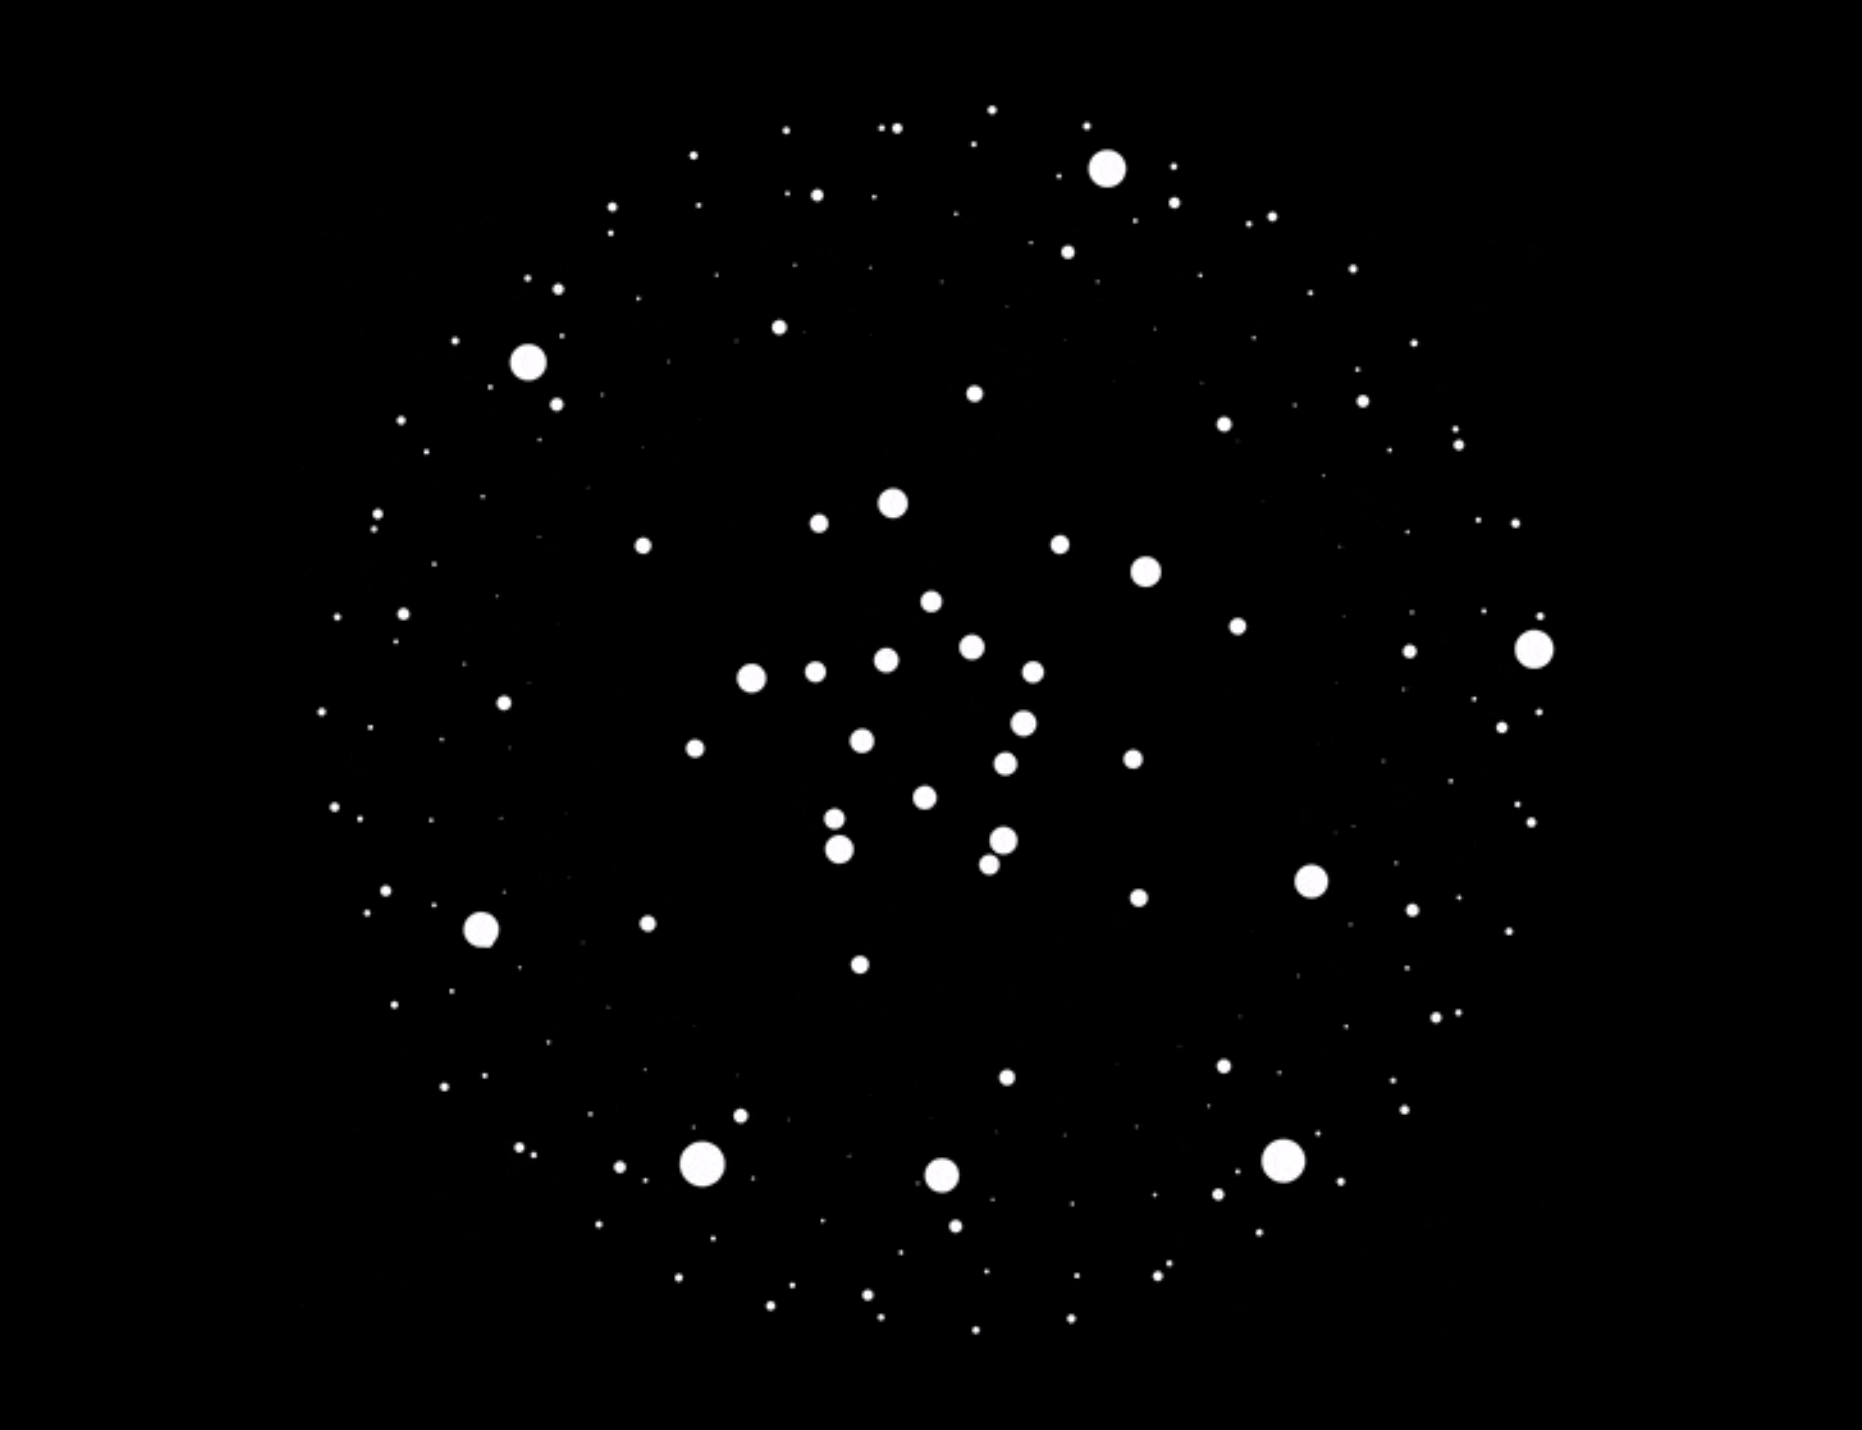
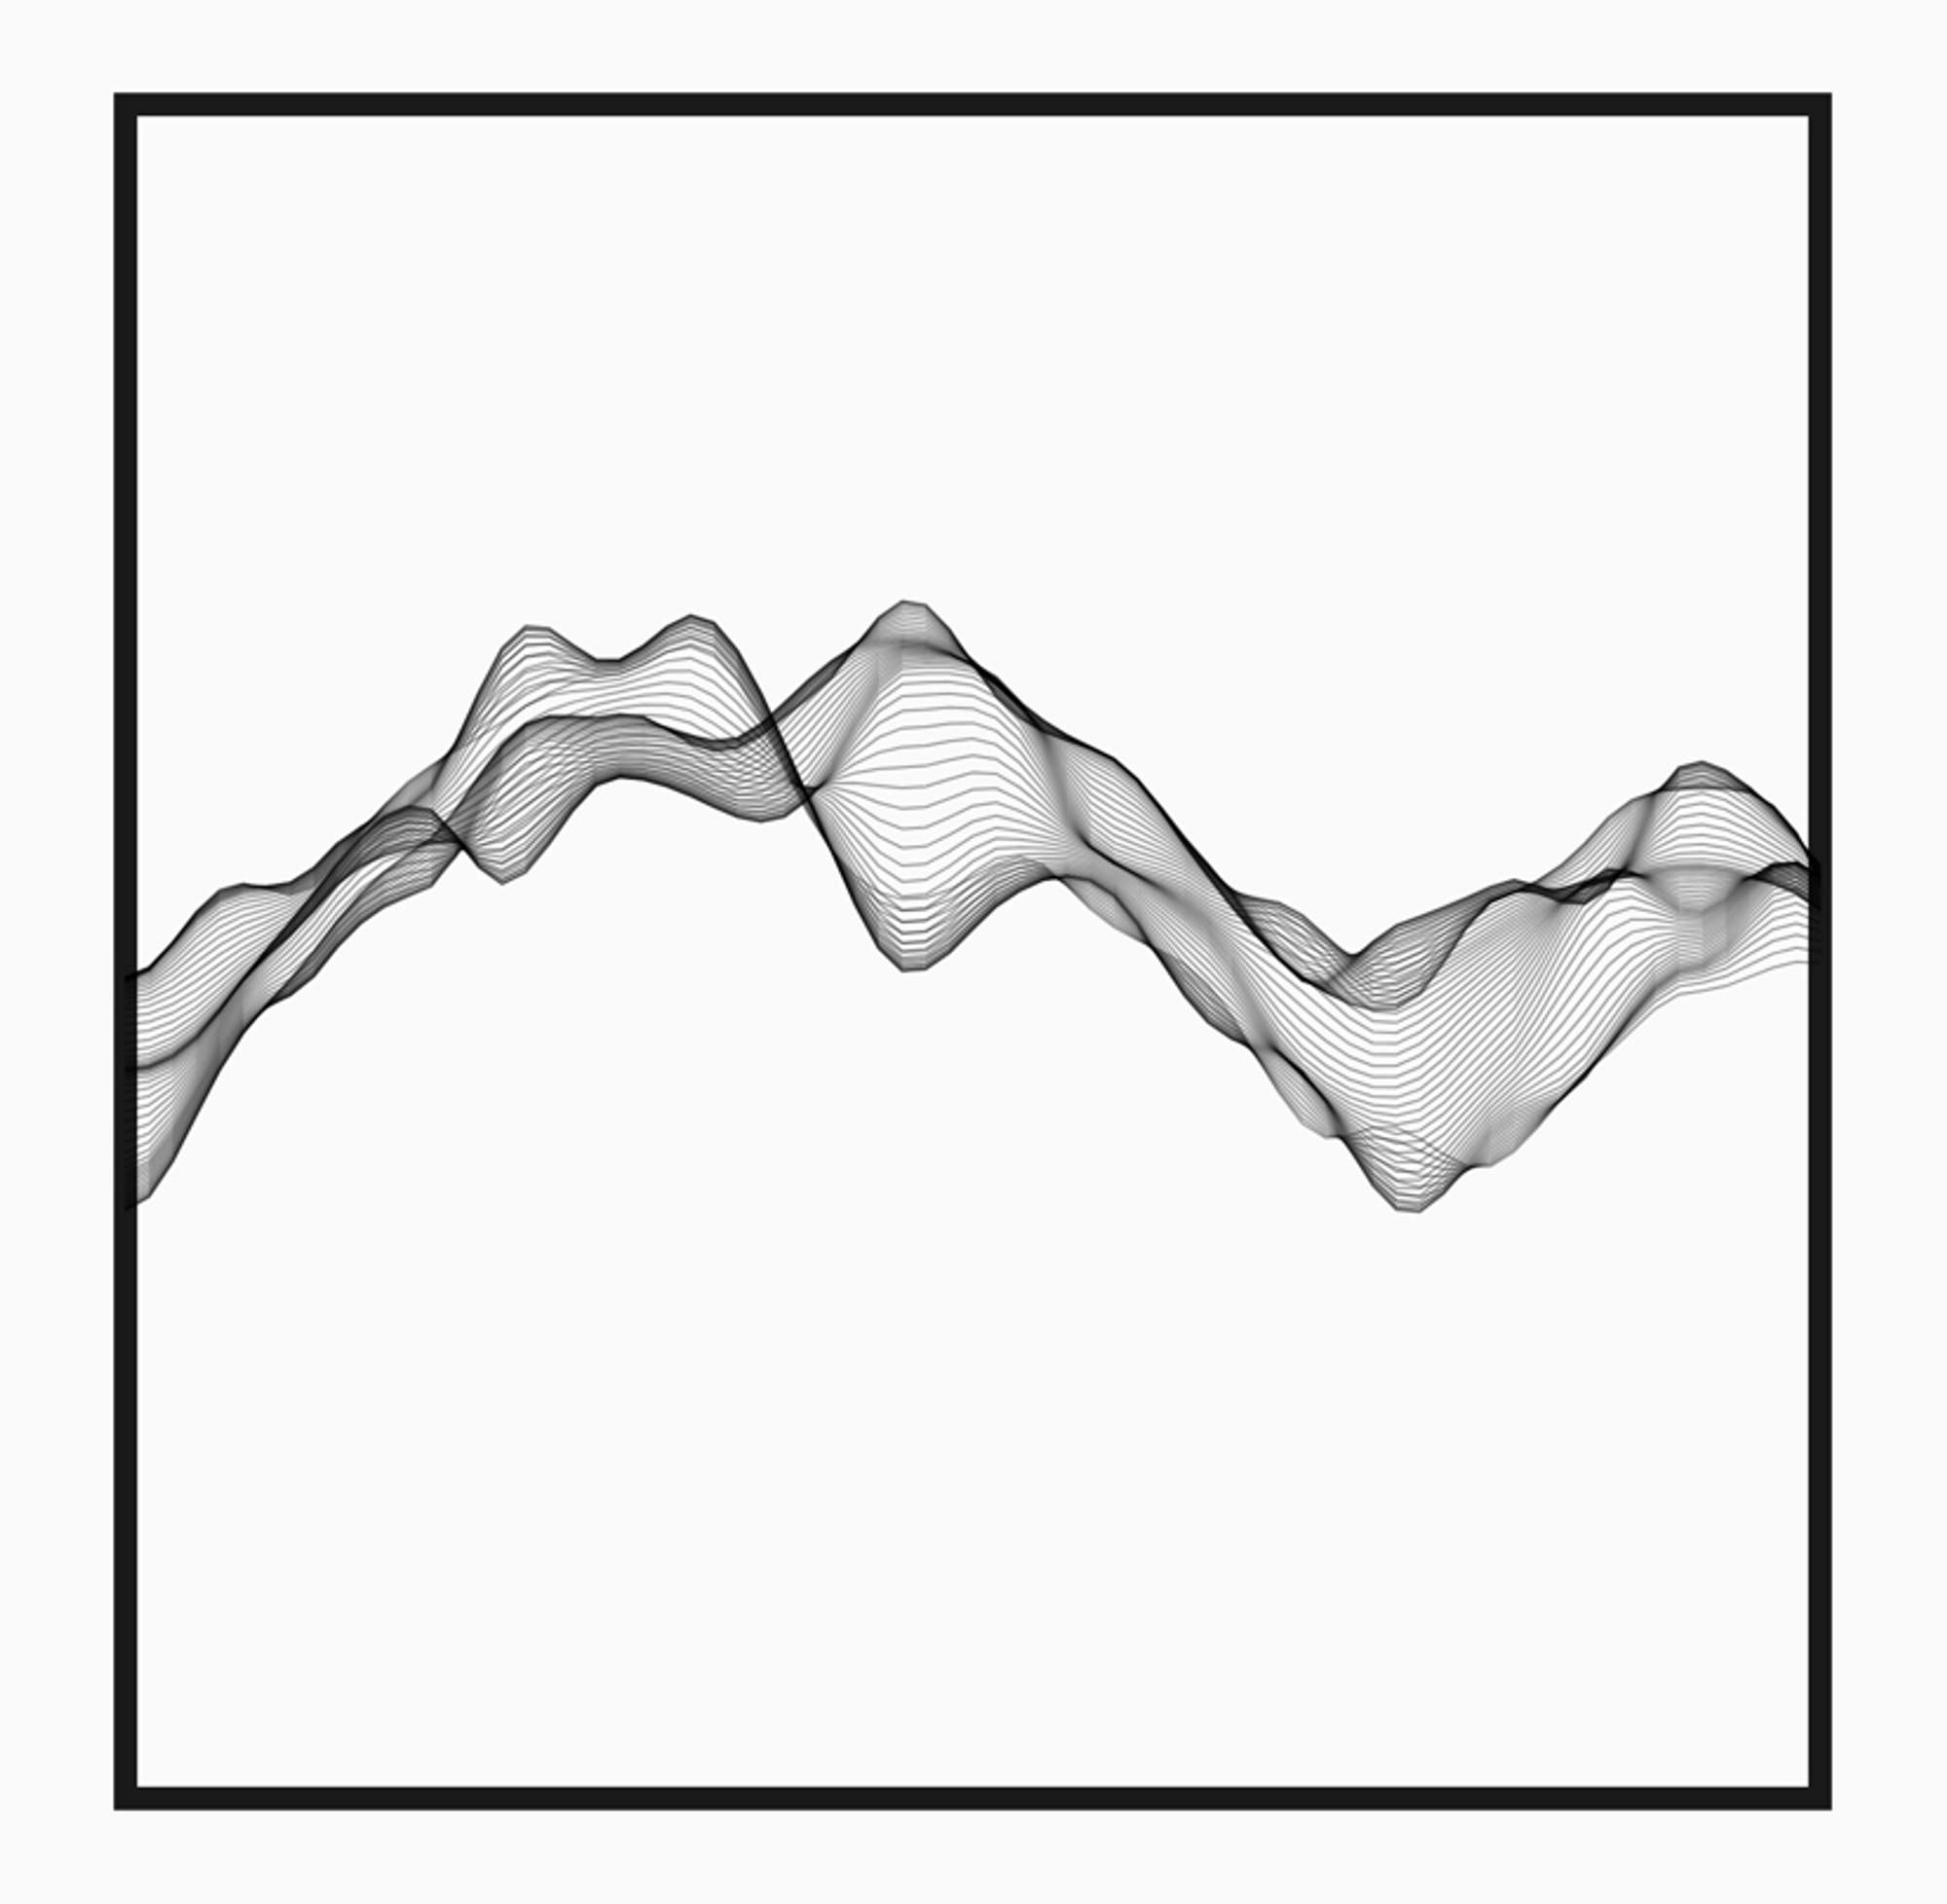
I want the p5js visuals to be minimalistic, calming and have a mild/muted color palette.
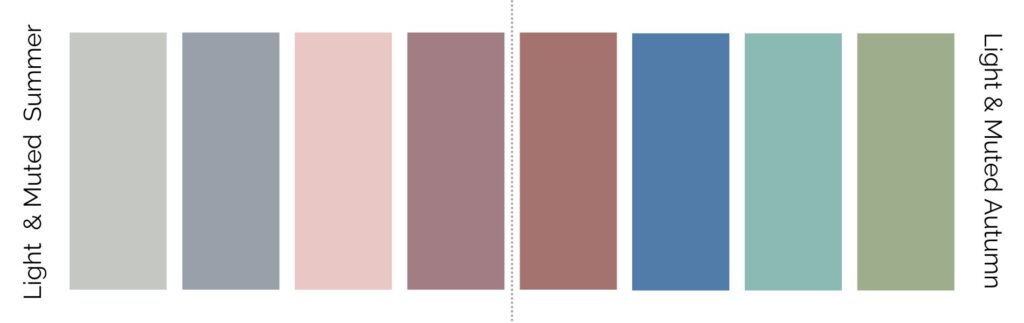
I am currently looking for inspiration for the actual illustration/art on the p5js and here are some I really liked after searching on the web and revisiting some of our past class readings: