
Exercise 1: ARDUINO TO P5 COMMUNICATION
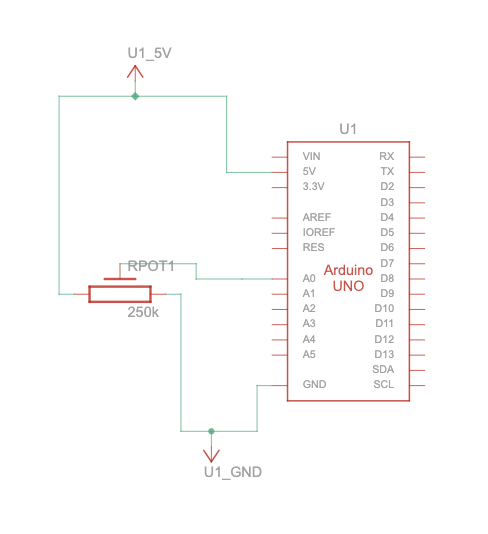
Schematic
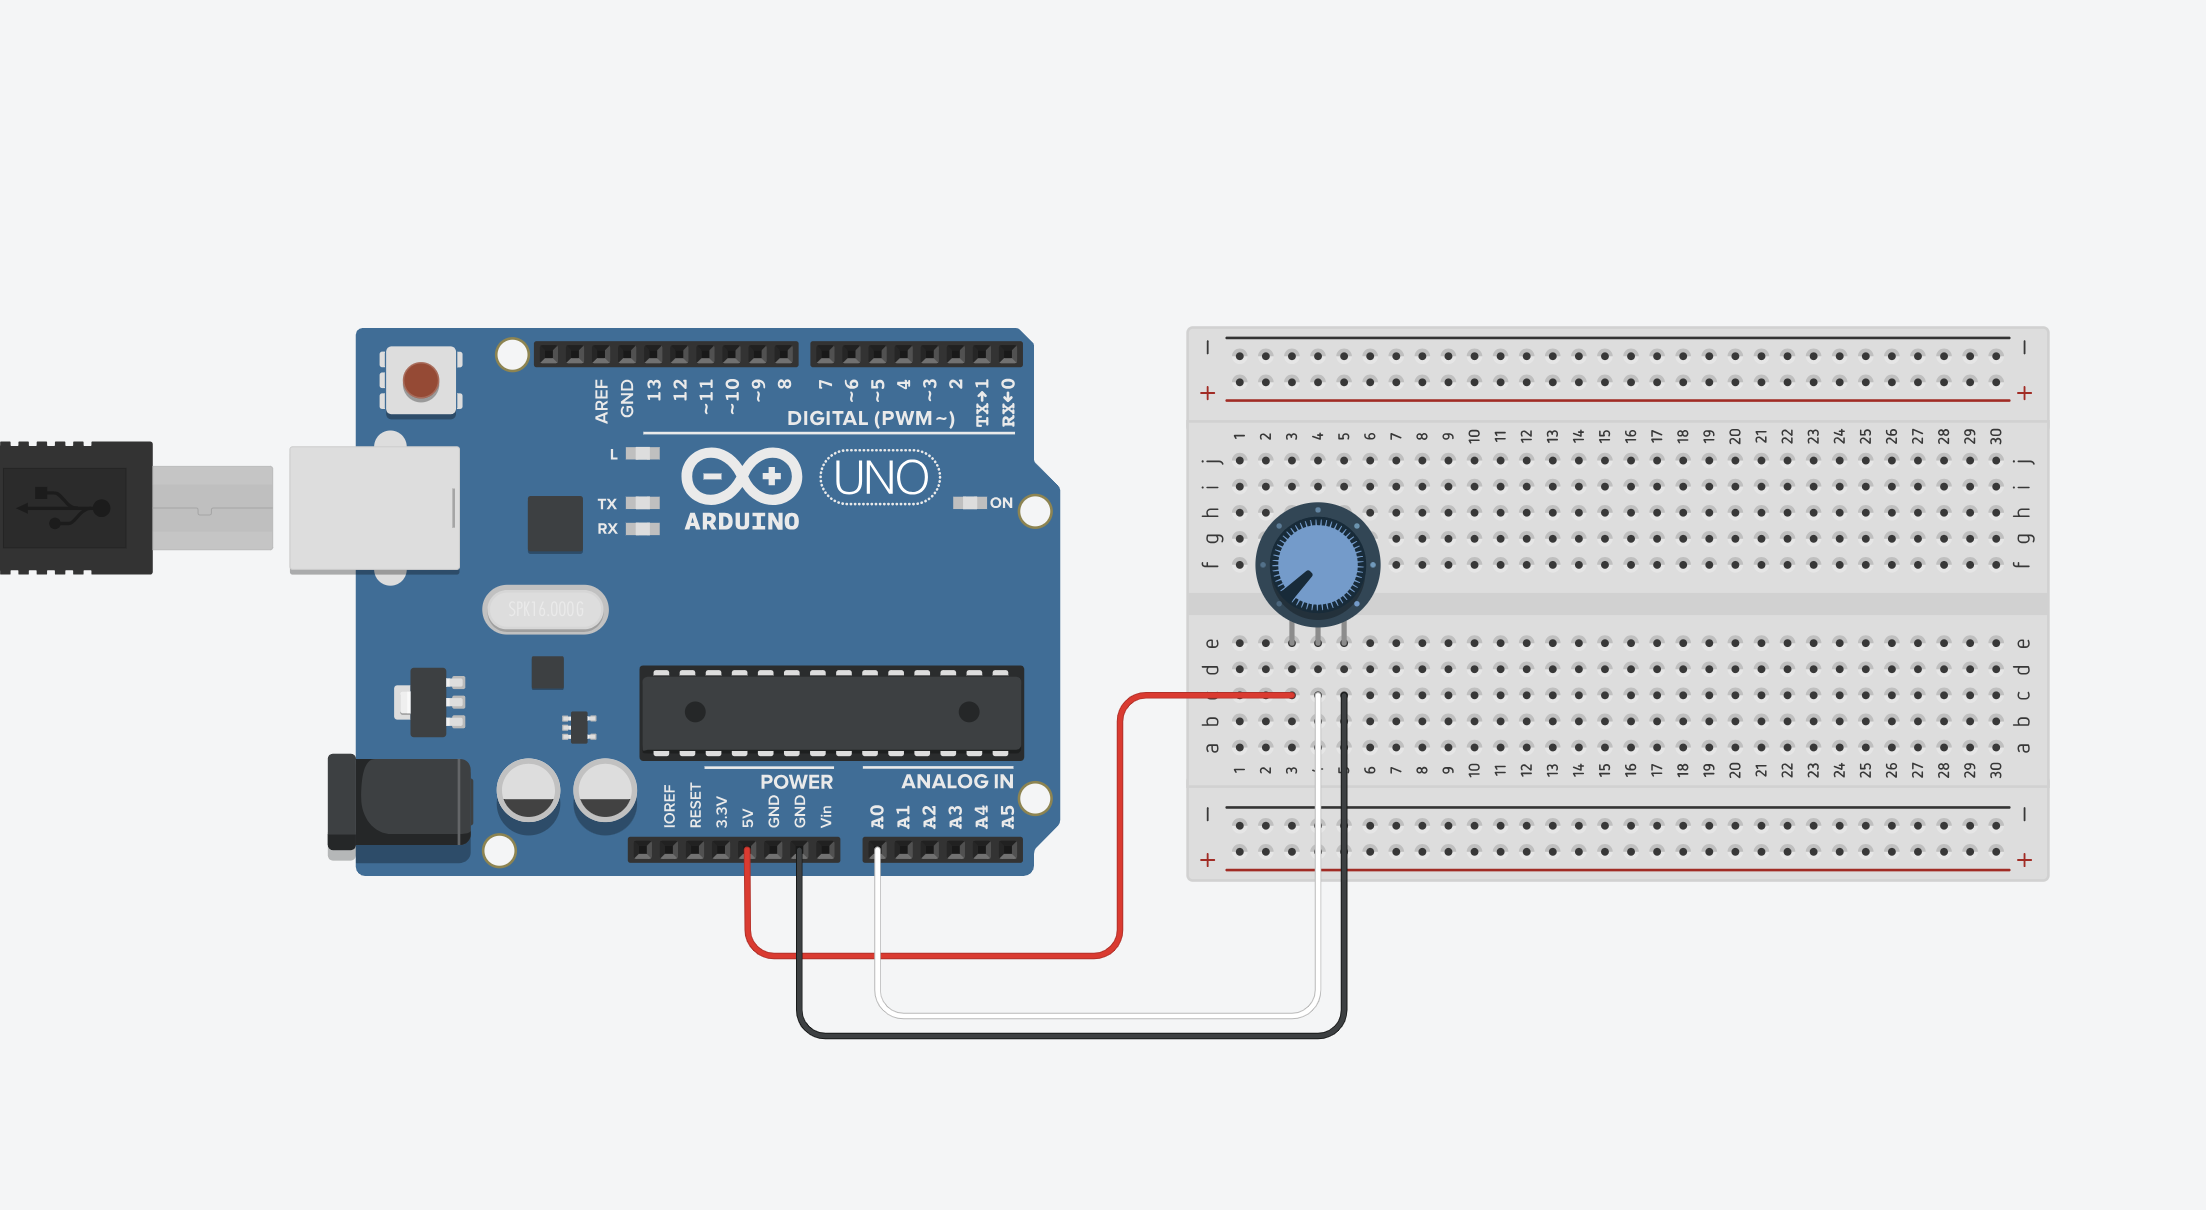
Circuit Diagram
P5.js Code
We used the same example provided in class, however, we just added this part to the code:
function draw() {

  background('#6FA9B0')

  if (!serialActive) {
    fill("rgb(255,255,255)")
    text("Press Space Bar to select Serial Port", 20, 30);
  } else {

    noStroke()
    // draw a circle, alpha value controls the x-position of the circle
    circle(map(alpha, 0, 1023, 0, 640), 240, 50)

  }
}
Arduino
We used the same one provided in class.
Video
Exercise 2: P5 TO ARDUINO COMMUNICATION
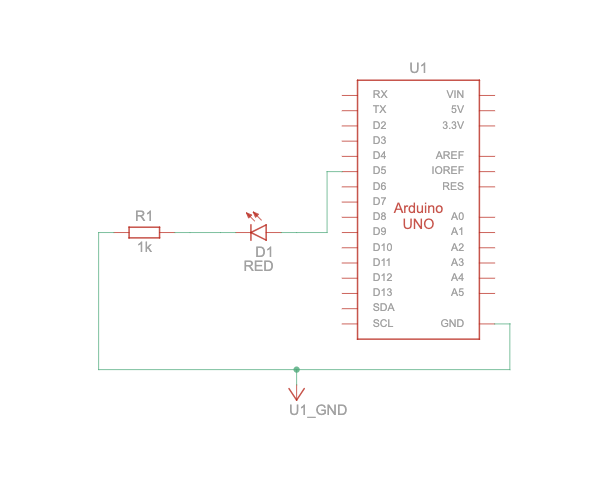
Schematic
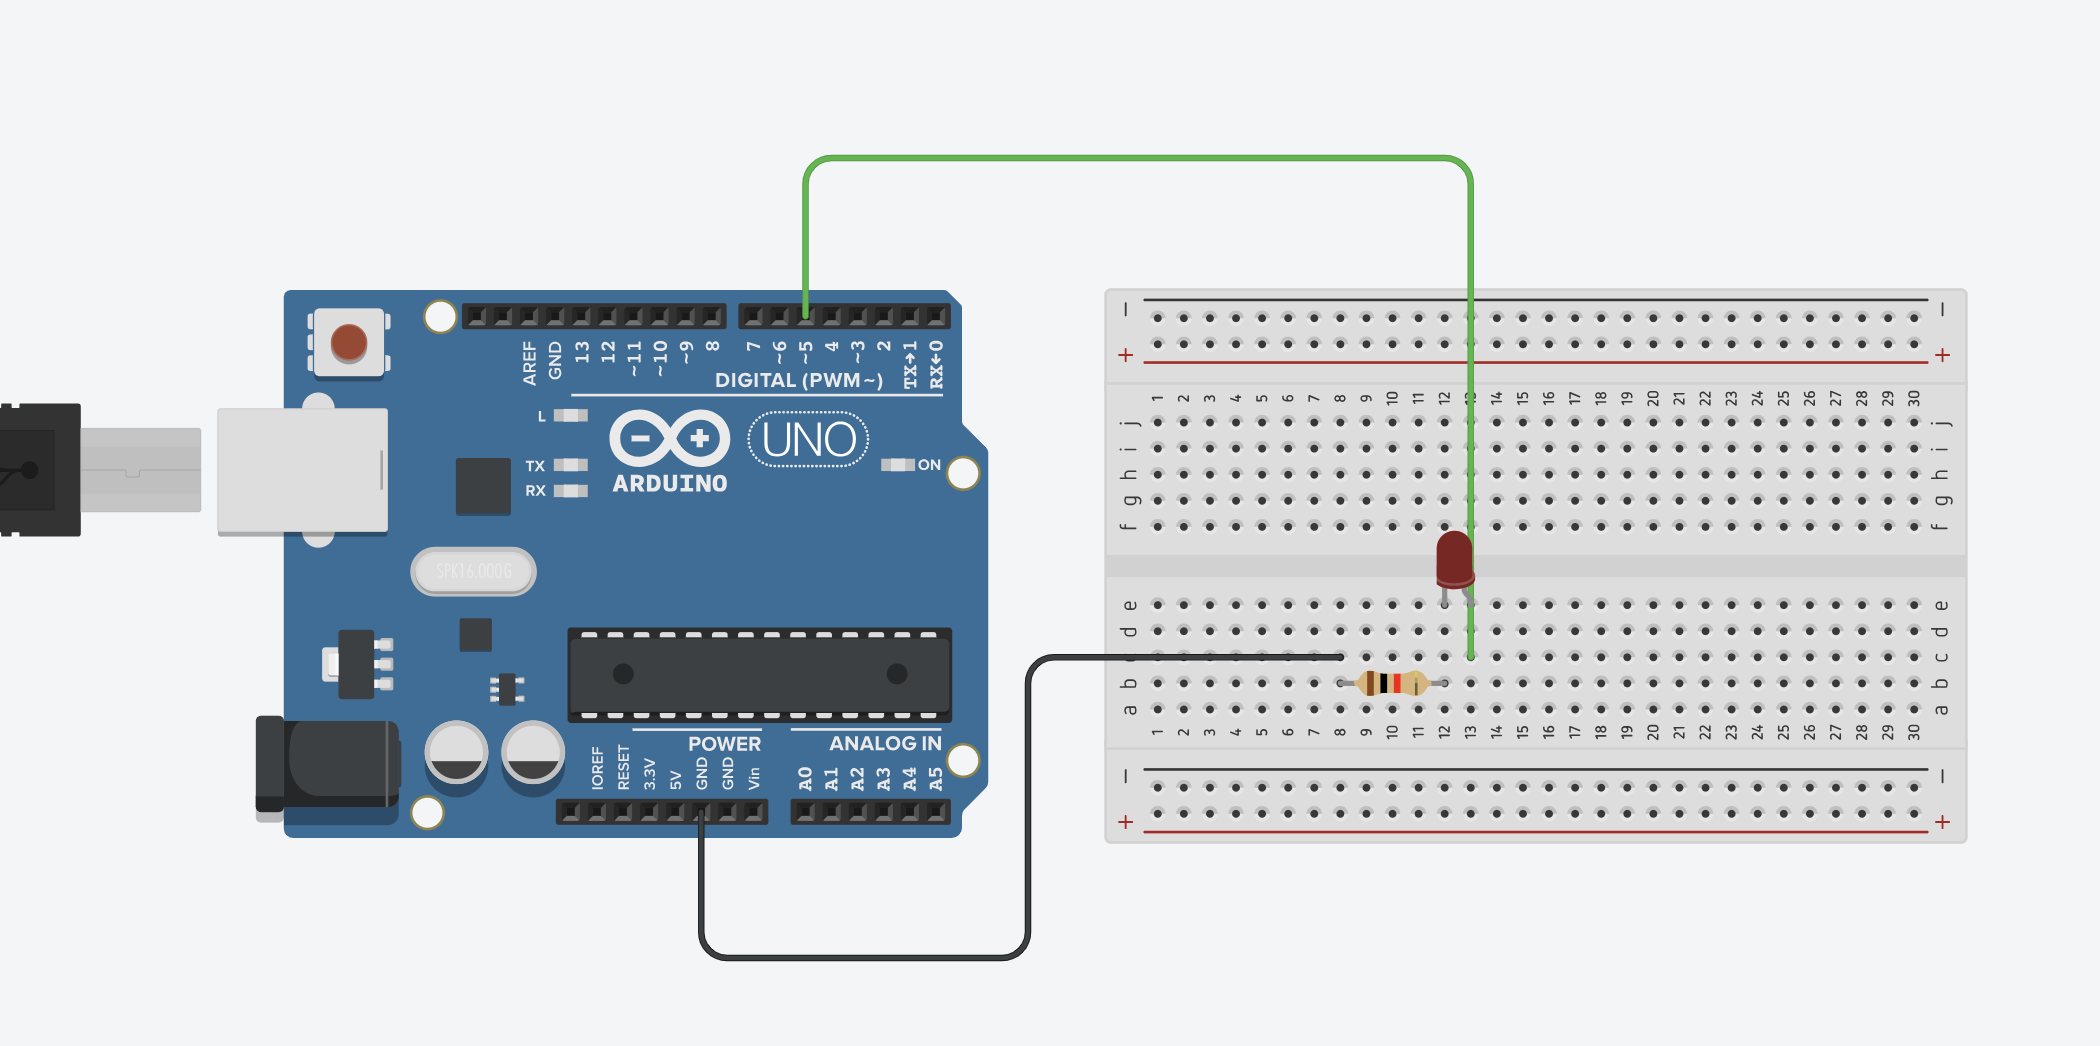
Circuit Diagram
P5.js Code
let brightness = 0;
let slider;
let img;

//preload images
function preload(){
  img = loadImage('sun.png');
  img2 = loadImage('moon.png');
}

function setup() {
  createCanvas(400, 400);
  //create slider
  slider = createSlider(0, 255, 100);
  slider.position(width/2-50,height/2+25);
  slider.style('width', '80px');
}

function draw() {
  background('#85CCEC');
  image(img,235,130,150,180);
  image(img2,30,140,100,160);

  let val = slider.value();
  brightness = val;

  // instructions
  textAlign(CENTER,CENTER);
  textSize(16);
  textStyle(BOLD)
  text("Control the brightness using the slider below!",width/2,100);

  //connects serial port
  if (!serialActive) {
    textSize(10);
    text("Press Space Bar to select Serial Port", 100, 30);
  } else {
    textSize(10);
    text("Connected",100,30);
  }


}

function keyPressed() {
  if (key == " ") {
    // important to have in order to start the serial connection!!
    setUpSerial();
  }
}


function readSerial(data) {

  //READ FROM ARDUINO HERE

  if (data != null) {
    // if there is a message from Arduino, continue

    //SEND TO ARDUINO HERE (handshake)

    let sendToArduino = brightness + "\n";
    writeSerial(sendToArduino);
  }
}
Arduino Code
int LED = 5;
void setup() {
  Serial.begin(9600);
  pinMode(LED, OUTPUT);
  // start the handshake
  while (Serial.available() <= 0) {
    Serial.println("Wait");  // send a starting message
    delay(300);               // wait 1/3 second
  }
}
void loop() {
  // wait for data from p5 before doing something
  while (Serial.available()) {
    int brightness = Serial.parseInt();
    if (Serial.read() == '\n') {
      analogWrite(LED, brightness); // turn on LED and adjusts brightness
      Serial.println("LIT");
    }
  }
}
Video
Exercise 3: BI-DIRECTIONAL COMMUNICATION
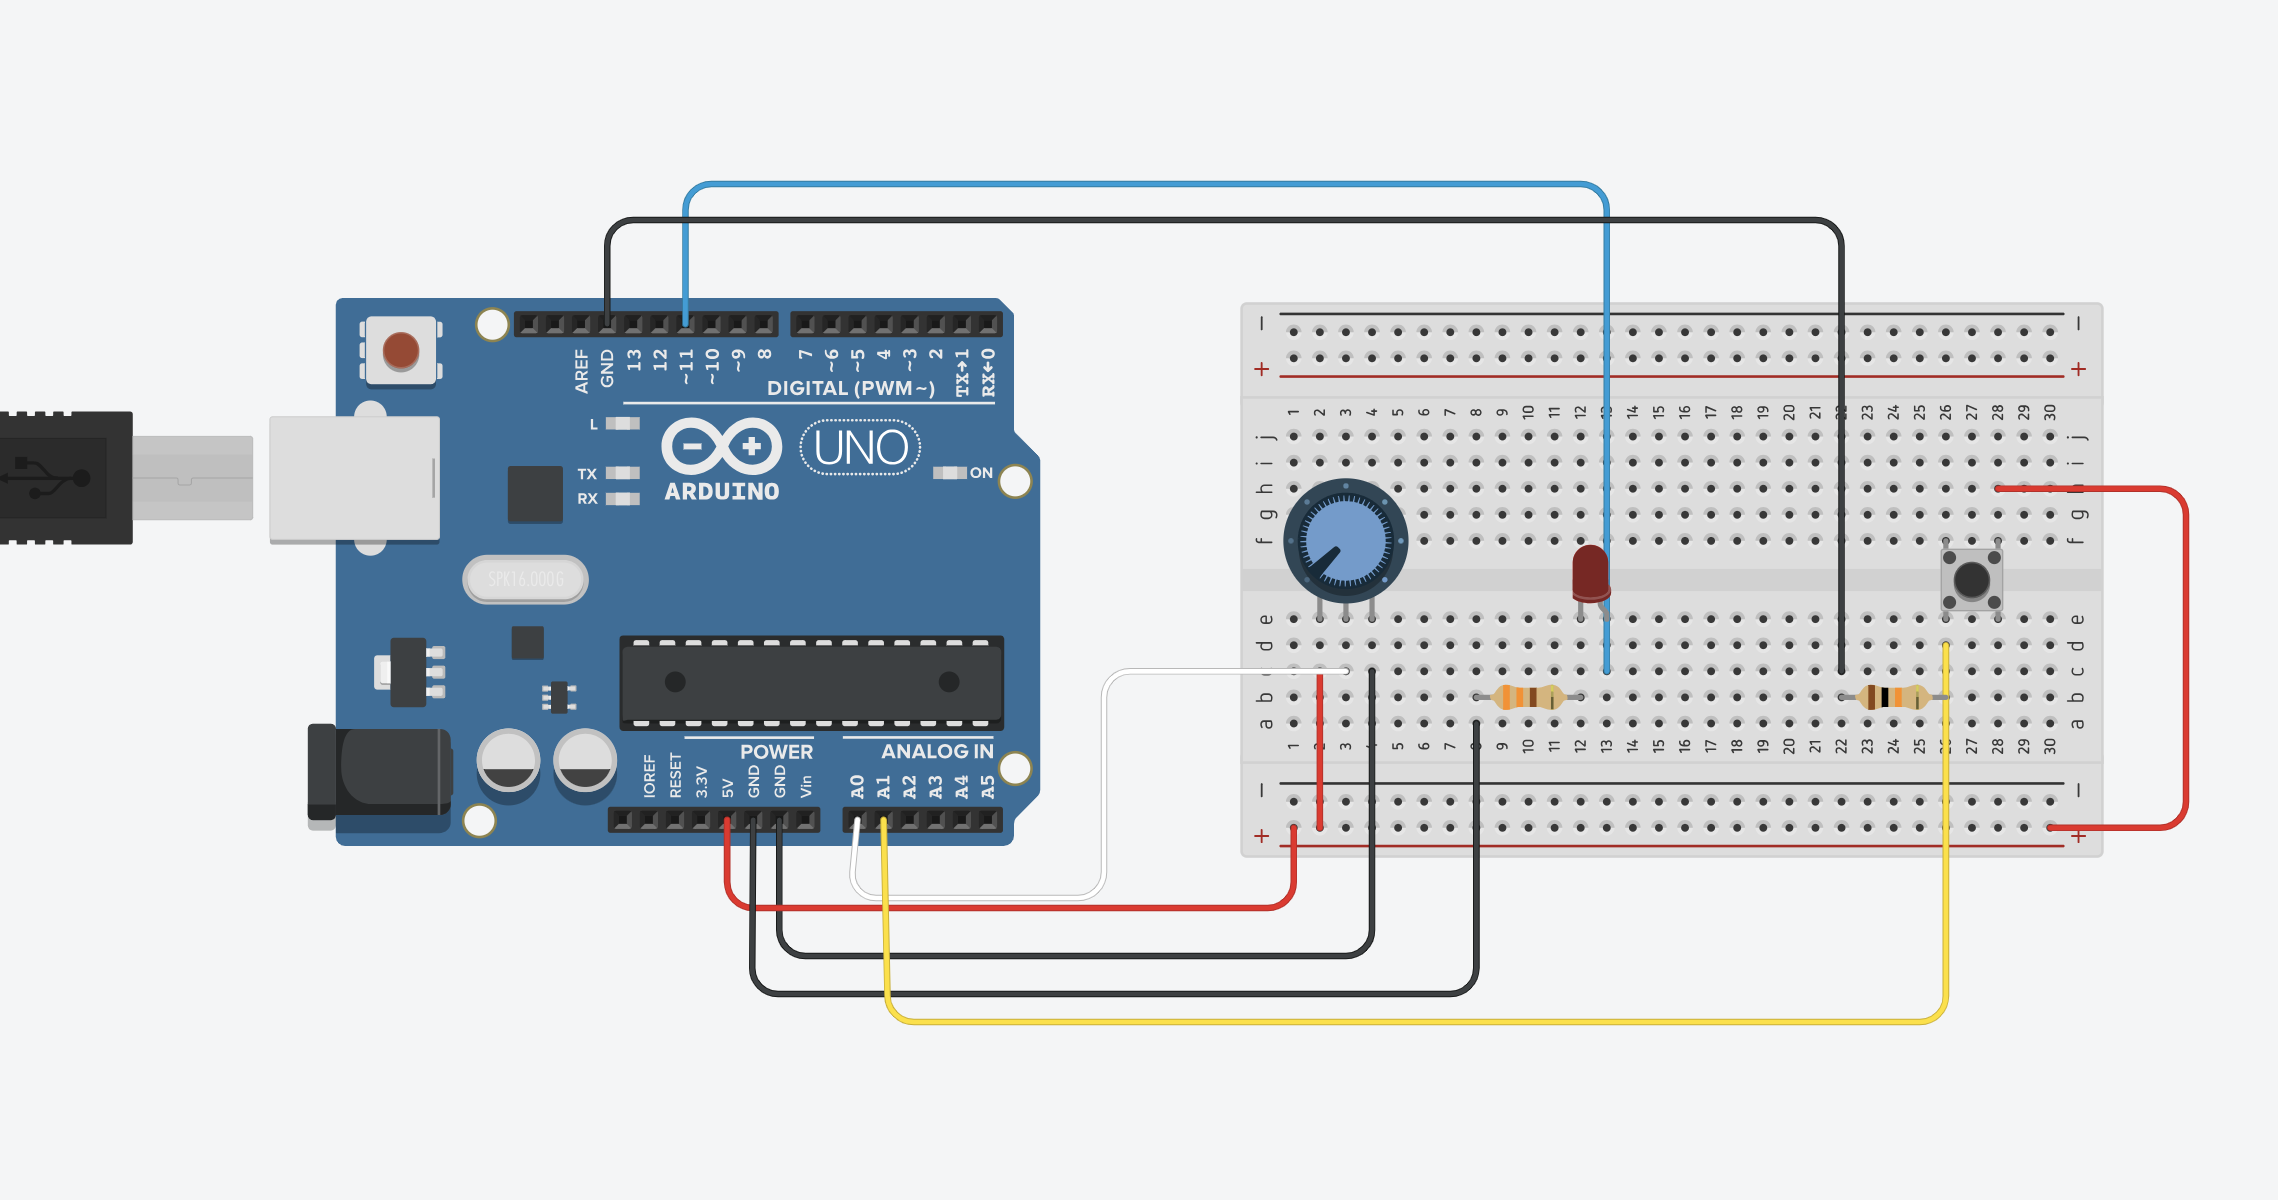
Schematic
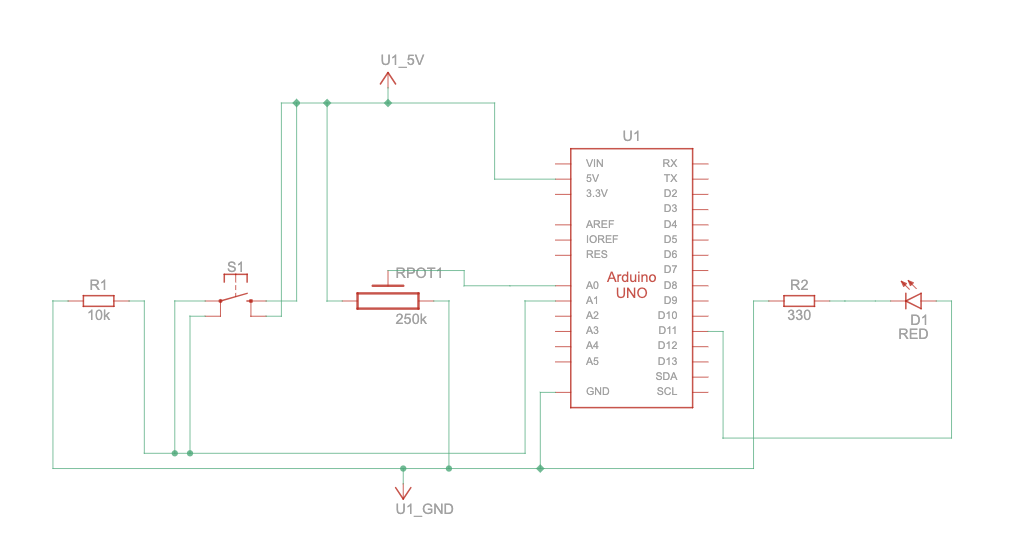
Circuit Diagram
P5.js Code
let hit = 0;  // whether the ball hit the ground
let reset = 0;  // whether Arduino sent a reset argument (a button press)

// Ball physics
let velocity;
let gravity;
let position;
let acceleration;
let wind; // wind direction is controlled by Arduino (potentiometer)
let drag = 0.99;
let mass = 50;

function setup() {
  createCanvas(600, 600);
  noFill();
  position = createVector(width / 2, 0);
  velocity = createVector(0, 0);
  acceleration = createVector(0, 0);
  gravity = createVector(0, 0.5 * mass);
  wind = createVector(0, 0);
}

function draw() {
  background('pink');
  applyForce(wind);
  applyForce(gravity);
  velocity.add(acceleration);
  velocity.mult(drag);
  position.add(velocity);
  acceleration.mult(0);
  fill(255)
  ellipse(position.x, position.y, mass, mass);
  if (position.y > height - mass / 2) {
    velocity.y *= -0.9; // A little dampening when hitting the bottom
    position.y = height - mass / 2;
    hit = 1;
  } else {
    hit = 0;
  }

  if (!serialActive) {
    console.log("Press Space Bar to select Serial Port");
  } else {
    //
    // console.log("Connected");
    if (reset == 1) { // if reset signal is sent and flagged (button press)
      reset = 0; // clear the flag

      // reset ball with some random mass
      mass = random(15, 80);
      position.x = width / 2;
      position.y = -mass;
      velocity.mult(0);
    }
  }
}

function applyForce(force) {
  // Newton's 2nd law: F = M * A
  // or A = F / M
  let f = p5.Vector.div(force, mass);
  acceleration.add(f);
}

function keyPressed() {
  if (key == " ") {
    // important to start the serial connection!
    setUpSerial();
  }
}

function readSerial(data) {

  //READ FROM ARDUINO HERE


  if (data != null) {
    // split the message
    let fromArduino = split(trim(data), ",");
    // if the right length, then proceed
    if (fromArduino.length == 2) {
      reset = fromArduino[0];
      wind.x = fromArduino[1];
    }


    //SEND TO ARDUINO HERE (handshake)

    let sendToArduino = hit + "\n";
    writeSerial(sendToArduino);
  }
}
Arduino Code
int buttonSwitch = A2;
int potentiometer = A0;
int ledOut = 11;

void setup() {
  Serial.begin(9600);
  pinMode(12, OUTPUT);
  digitalWrite(ledOut, LOW);  // in the case of reconnection while p5 is running
  // start the handshake
  while (Serial.available() <= 0) {
    Serial.println("-1,-1");  // send a starting message
    delay(300);               // wait 1/3 second
  }
}

void loop() {
  // wait for data from p5 before doing something
  while (Serial.available()) {
    int hit = Serial.parseInt(); // receives 1 argument, whether the ball hit the ground
    if (Serial.read() == '\n') {
      digitalWrite(ledOut, hit); // turn on LED if the ball is in contact with the ground (1 -> HIGH) turn off LED if not (0, -> LOW)
      int sensor = digitalRead(buttonSwitch); // read button
      delay(1);
      int sensor2 = analogRead(potentiometer); // read potentiometer
      delay(1);
      Serial.print(sensor); // button
      Serial.print(',');
      if (sensor2 < 512) { // potentiometer; depending whether the value is over or below half, direction of the wind is set
        Serial.println(1);
      } else {
        Serial.println(-1);
      }
    }
  }
}
Video