You must use at least one analog sensor (photoresistor, potentiometer, or distance measuring sensor)
Process:
What if you could play music without even touching the instrument!
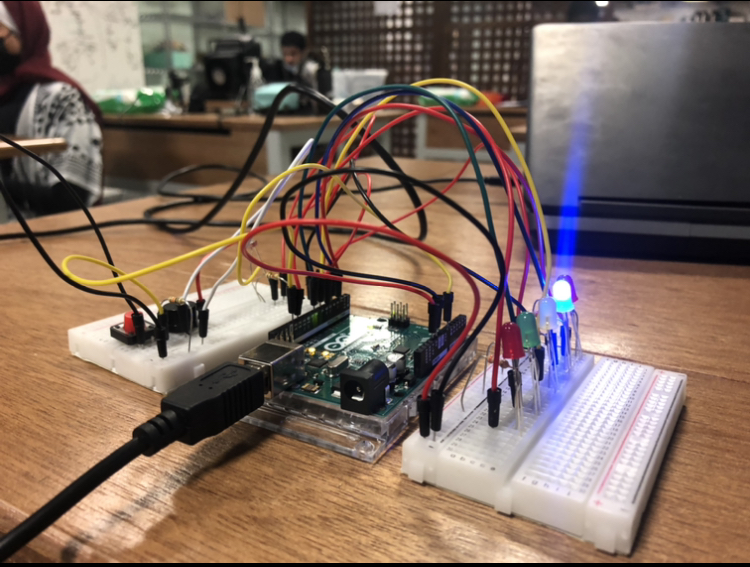
So our device uses a photoresistor to detect the amount of light around the system and uses that light to give different frequencies out of the buzzer to create a musical tone with some LED effect.
We started off with building a circuit for the photoresistor to detect the amount of light around the system. Then we divided that value into 5 different intervals for the LED. in each interval, a single led lights up indicating the note. We did the same with the buzzer. In the end, we added a switch to keep the device from switching on/off. Here’s a picture of our system:
So the current in the system first goes to the photoresistor to detect the light, which is mapped for the buzzer frequency (note), the led lights, and the duration of the notes. Which ultimately gets displayed as below:
For this week’s assignment, we started off with wanting to do something with the distance sensors. There’s something really cool about moving your hands in thin air and creating music.
We wanted to use the distance sensor to record the distance and convert that into musical notes and have lasers put in just for the aesthetics and as a guide for the player to know where to move. We took inspiration from the laser keyboard/bass featured in this video.
We soon realized that lasers were too complicated to integrate into the instrument as we would need some kind of smoke in the air to trace the path of the beam and that was a huge, complicated process to replicate on campus. So, we decided to work with just air.
For the instrument, we decided to have a one-octave scale and a button that would take digital input, which would shift the scale by an octave. We replicated the same thing with another Arduino so that we could play in harmony with different octaves. There’s also a button that acts like an on/off switch in the beginning and once the instrument is switched on, it acts as a momentary pause.
We had a few issues with balancing the tone() function from both the digital input of the push button and the input from the distance sensor, but it was some wiring issues, once that was sorted out, all was done.
We added a few lines of codes that would convert distances beyond a certain point to 0 so that we don’t hear any annoying noise when there is no object in front of the instrument.
Interestingly, what we achieved, in the end, sounded a lot like bagpipes.
Here are a few demos. The first one is just using one octave and the second one is by shifting octaves midway. It’s ‘The Lion Sleeps Tonight’:
Here’s the code:
#define echoPinC 12
#define trigPinC 11
const int BUTTON_PIN = 7; // Arduino pin connected to button's pin
const int BUTTON_PIN2 = 8;
# include "pitches.h"

String notes6[7] = {"C4", "D4", "E4", "F4", "G4", "A4", "B4"};

int notes[7] = {NOTE_C5, NOTE_D5, NOTE_E5, NOTE_F5, NOTE_G5, NOTE_A5, NOTE_B5};
int notesHigh[7] = {NOTE_C4, NOTE_D4, NOTE_E4, NOTE_F4, NOTE_G4, NOTE_A4, NOTE_B4};

long durationC;
int distanceC;

int playNote;

bool start = false;

void setup() {
  pinMode(trigPinC, OUTPUT);
  pinMode(echoPinC, INPUT);
  pinMode(BUTTON_PIN, INPUT_PULLUP);
  pinMode(BUTTON_PIN2, INPUT_PULLUP);
  Serial.begin(9600);
}

void loop() {

   int buttonState = digitalRead(BUTTON_PIN); // read new state
   int offState = digitalRead(BUTTON_PIN2);

  //switch on
   if (offState == LOW) {
    start=true;
   }

  if(start)
  {

    // put your main code here, to run repeatedly:
  digitalWrite(trigPinC, LOW);
    delayMicroseconds(2);
    digitalWrite(trigPinC, HIGH);
    delayMicroseconds(10);
    digitalWrite(trigPinC, LOW);
    durationC = pulseIn(echoPinC, HIGH);
    distanceC = durationC * 0.034 / 2;

    Serial.print("DistanceC: ");
    Serial.print(distanceC);
    Serial.print(" cm");
    Serial.print("mapped: ");

    int constrainedInput=constrain(distanceC, 1, 70);

    int mappedNoteC = map(constrainedInput, 1, 70, 0, 6);

  Serial.println(notes6[mappedNoteC]);

    if (buttonState == LOW) {
     Serial.print("button unpressed: ");


    // noTone(4);
    playNote = notesHigh[mappedNoteC];

    if(distanceC > 70){
     noTone(4);
    }

    }
    else
    if (buttonState == HIGH) {
     Serial.print("button pressed: ");
        playNote = notes[mappedNoteC];
    }

  //no note when button is triggered
    if (offState == LOW) {
       Serial.print("button unpressed: ");
       noTone(4);
    }
    else

    //when the button is not triggered play a note
      if (offState == HIGH) {
        tone(4, playNote);
      }

      //distances beyonf a point has no tone
      if(distanceC > 70){
        noTone(4);
      }

}

}
For this week’s assignment, Badr and I tried to build a simple musical instrument using a servo to emulate a simple drum and a buzzer to play a melody.
Drum:
We defined three different drum modes (beats) that can be looped over using a pushbutton. Every time the button is clicked, the drum moves to the next mode. Originally, we planned to use two servos (drums), but it turned out noisier than we thought, so we decided to use only one. To move the servos, we have used servo.write().
Millis():
To avoid using delay() which will affect the interaction, we have used Millis to set breaks. For that, we had to create an array to store the duration of the breaks, variables to store the elapsed time, and if conditions.
unsigned long curr = millis(); // store the elapsed time
bool played[] = {1, 0, 0, 0}; // boolean variables to control the modes
int period[]= {200, 150, 150, 200}; // Tempo of the servo (breaks)
int curr_prd=0; // keep track of the current break
Beats (Modes):
To alternate between the modes, we have used if/else conditions, boolean variables, digitalRead() to read the state of the push button and a prevButton variable to store the previous state.
// set the tempo for level 3
if (curr-prev>=period[curr_prd] && level2==0 && level3==1){
prev=curr;
// change the array parameters
if (played[0]==1){played[0]=0; played[1]=1;}
else if (played[1]==1){played[1]=0; played[2]=1;}
else if (played[2]==1){played[2]=0; played[3]=1;}
else if (played[3]==1){played[3]=0; played[0]=1;}
curr_prd=(curr_prd+1)%4;
}
// set the tempo for level 2
if (curr-prev>=period[curr_prd] && level2==1 && level3==0){
prev=curr;
// change the array parameters
if (played[0]==1){played[0]=0; played[1]=1;}
else if (played[1]==1){played[1]=0; played[2]=1;}
else if (played[2]==1){played[2]=0; played[3]=1;}
else if (played[3]==1){played[3]=0; played[0]=1;}
curr_prd=(curr_prd+1)%4;
}
// set the tempo for the default level
if (curr-prev>=period[curr_prd] && level2==0 && level3==0){
prev=curr;
// change the array parameters
if (played[0]==1){played[0]=0; played[1]=1;}
else if (played[1]==1){played[1]=0; played[2]=1;}
else if (played[2]==1){played[2]=0; played[3]=1;}
else if (played[3]==1){played[3]=0; played[0]=1;}
curr_prd=(curr_prd+1)%4;
}
// Move the servo
if (played[0]){servo_r.write(90);}
if (played[1]){servo_r.write(120);}
if (played[2]){servo_r.write(100);}
if (played[3]){servo_r.write(120);}
Buzzer:
We chose to play the tetris theme on the buzzer, and used the ultrasonic sensor to change the speed at which the melody is being played. The larger the values read by the sensor are, the slower the music will play.
To play the melody, we stored the convenient notes in an array (we got them online), then proceeded to calculate how long the note is using sizeof() and the tempo which is 160.
int tempo = 160; // Tempo of the song // Melody notes
int melody[] = { NOTE_E5, NOTE_B4, NOTE_C5, NOTE_D5, NOTE_C5, NOTE_B4, NOTE_A4, NOTE_A4, NOTE_C5, NOTE_E5, NOTE_D5, NOTE_C5, NOTE_B4, NOTE_C5, NOTE_D5, NOTE_E5, NOTE_C5, NOTE_A4, NOTE_A4, NOTE_A4, NOTE_B4, NOTE_C5, NOTE_D5, NOTE_F5, NOTE_A5, NOTE_G5, NOTE_F5, NOTE_E5, NOTE_C5, NOTE_E5, NOTE_D5, NOTE_C5, NOTE_B4, NOTE_B4, NOTE_C5, NOTE_D5, NOTE_E5, NOTE_C5, NOTE_A4, NOTE_A4, REST, NOTE_E5, NOTE_B4, NOTE_C5, NOTE_D5, NOTE_C5, NOTE_B4, NOTE_A4, NOTE_A4, NOTE_C5, NOTE_E5, NOTE_D5, NOTE_C5, NOTE_B4, NOTE_C5, NOTE_D5, NOTE_E5, NOTE_C5, NOTE_A4, NOTE_A4, NOTE_A4, NOTE_B4, NOTE_C5, NOTE_D5, NOTE_F5, NOTE_A5, NOTE_G5, NOTE_F5, NOTE_E5, NOTE_C5, NOTE_E5, NOTE_D5, NOTE_C5, NOTE_B4, NOTE_B4, NOTE_C5, NOTE_D5, NOTE_E5, NOTE_C5, NOTE_A4, NOTE_A4, REST, NOTE_E5, NOTE_C5, NOTE_D5, NOTE_B4, NOTE_C5, NOTE_A4, NOTE_GS4, NOTE_B4, REST, NOTE_E5, NOTE_C5, NOTE_D5, NOTE_B4, NOTE_C5, NOTE_E5, NOTE_A5, NOTE_GS5 };
// Calculate the duration of each note
int notes= sizeof(melody) / sizeof(melody[0]) / 2;
int note = (60000 * 4) / tempo;
int divider = 0, duration = 0;
// Calculate the duration of each note
int notes= sizeof(melody) / sizeof(melody[0]) / 2;
int note = (60000 * 4) / tempo;
int divider = 0, duration = 0;
Ultrasonic Sensor:
Depending on the distance measured by the sensor, the speed of the song is changing. For that, we used map() to modify it within a certain range. We also had to convert microseconds to cm.
// get the distance using the ultrasonic sensor
long duration, cm;
digitalWrite(9, LOW);
delayMicroseconds(2);
digitalWrite(9, HIGH);
delayMicroseconds(10);
digitalWrite(9, LOW);
duration = pulseIn(8, HIGH);
// convert microseconds to cm
cm = duration/29/2;
if (cm>20) {
cm = 20;
}
// map the distance form 80 to 150 to fit
cm = map(cm,0,20,80,150);
Challenges:
The biggest challenge we faced was getting the drum to work without using delay(). Using delay() would have affected the interaction with the button and sensor, so we used millis() instead. When we tried to implement the millis() solution, the drum’s playing started to become irregular and sometimes stopped working after some time. To fix this, we used arrays to keep track of the angles and timings of each angle change of the servo. The code started working properly after we introduced this fix and restructured the logic we used in the loop.
We also faced some issues with taping of our servo and stick coming loose occasionally while working on the project.
Code:
#include <Servo.h>
#include "notes.h"
Servo servo_r;
unsigned long prev=0; // variable to store the time
bool played[] = {1, 0, 0, 0}; // boolean variables to control the modes
int period[]= {200, 150, 150, 200}; // Tempo of the servo (breaks)
int curr_prd=0; // keep track of the current break
bool level2=0; // Mode 2
bool level3=0; // Mode 3
bool prevbutton=0; // store the previous state of the pushbutton
int prevnote = 0; // store the prev note
int currnote = 0; // store the current note
int tempo = 160; // Tempo of the song
// Melody notes
int melody[] = {
NOTE_E5, NOTE_B4, NOTE_C5, NOTE_D5, NOTE_C5, NOTE_B4,
NOTE_A4, NOTE_A4, NOTE_C5, NOTE_E5, NOTE_D5, NOTE_C5,
NOTE_B4, NOTE_C5, NOTE_D5, NOTE_E5, NOTE_C5, NOTE_A4,
NOTE_A4, NOTE_A4, NOTE_B4, NOTE_C5, NOTE_D5, NOTE_F5,
NOTE_A5, NOTE_G5, NOTE_F5, NOTE_E5, NOTE_C5, NOTE_E5,
NOTE_D5, NOTE_C5, NOTE_B4, NOTE_B4, NOTE_C5, NOTE_D5,
NOTE_E5, NOTE_C5, NOTE_A4, NOTE_A4, REST, NOTE_E5,
NOTE_B4, NOTE_C5, NOTE_D5, NOTE_C5, NOTE_B4, NOTE_A4,
NOTE_A4, NOTE_C5, NOTE_E5, NOTE_D5, NOTE_C5, NOTE_B4,
NOTE_C5, NOTE_D5, NOTE_E5, NOTE_C5, NOTE_A4, NOTE_A4,
NOTE_A4, NOTE_B4, NOTE_C5, NOTE_D5, NOTE_F5, NOTE_A5,
NOTE_G5, NOTE_F5, NOTE_E5, NOTE_C5, NOTE_E5, NOTE_D5,
NOTE_C5, NOTE_B4, NOTE_B4, NOTE_C5, NOTE_D5, NOTE_E5,
NOTE_C5, NOTE_A4, NOTE_A4, REST, NOTE_E5, NOTE_C5,
NOTE_D5, NOTE_B4, NOTE_C5, NOTE_A4, NOTE_GS4, NOTE_B4,
REST, NOTE_E5, NOTE_C5, NOTE_D5, NOTE_B4, NOTE_C5, NOTE_E5,
NOTE_A5, NOTE_GS5
};
// Calculate the duration of each note
int notes= sizeof(melody) / sizeof(melody[0]) / 2;
int note = (60000 * 4) / tempo;
int divider = 0, duration = 0;
void setup() {
Serial.begin(9600);
servo_r.attach(6); // Set the servo
pinMode(3, INPUT); // Set the button pinmode
pinMode(9, OUTPUT); // set the echo pin for the sensor
pinMode(8, INPUT); // set the pin for the sensor
}
void loop() {
// switch between the modes
  // default mode
  if (!prevbutton && digitalRead(3)==HIGH && level2==0 && level3==0){
    level2=1;
    period[0] = 200; period[1] = 150; period[2] = 150; period[3] = 200;
  }
  // mode 3
  else if (!prevbutton && digitalRead(3)==HIGH && level2==0 && level3==1){
    level3=0;
    period[0] = 300; period[1] = 300; period[2] = 300; period[3] = 300;
  }
  // mode 2
  else if (!prevbutton && digitalRead(3)==HIGH && level2==1 && level3==0){
    level3=1; level2=0;
    period[0] = 60; period[1] = 60; period[2] = 60; period[3] = 60;
  }
unsigned long curr = millis(); // store the elapsed time
// set the tempo for level 3
  if (curr-prev>=period[curr_prd] && level2==0 && level3==1){
    prev=curr;
    // change the array parameters
    if (played[0]==1){played[0]=0; played[1]=1;}
    else if (played[1]==1){played[1]=0; played[2]=1;}
    else if (played[2]==1){played[2]=0; played[3]=1;}
    else if (played[3]==1){played[3]=0; played[0]=1;}
    curr_prd=(curr_prd+1)%4;
  }
  // set the tempo for level 2
  if (curr-prev>=period[curr_prd] && level2==1 && level3==0){
    prev=curr;
    // change the array parameters
    if (played[0]==1){played[0]=0; played[1]=1;}
    else if (played[1]==1){played[1]=0; played[2]=1;}
    else if (played[2]==1){played[2]=0; played[3]=1;}
    else if (played[3]==1){played[3]=0; played[0]=1;}
    curr_prd=(curr_prd+1)%4;
  }
  // set the tempo for the default level
  if (curr-prev>=period[curr_prd] && level2==0 && level3==0){
    prev=curr;
    // change the array parameters
    if (played[0]==1){played[0]=0; played[1]=1;}
    else if (played[1]==1){played[1]=0; played[2]=1;}
    else if (played[2]==1){played[2]=0; played[3]=1;}
    else if (played[3]==1){played[3]=0; played[0]=1;}
    curr_prd=(curr_prd+1)%4;
  }
  // Move the servo
  if (played[0]){servo_r.write(90);}
  if (played[1]){servo_r.write(120);}
  if (played[2]){servo_r.write(100);}
  if (played[3]){servo_r.write(120);}
// read the state of the button
prevbutton = digitalRead(3);
// get the distance using the ultrasonic senor
long duration, cm;
digitalWrite(9, LOW);
delayMicroseconds(2);
digitalWrite(9, HIGH);
delayMicroseconds(10);
digitalWrite(9, LOW);
duration = pulseIn(8, HIGH);
// convert microseconds to cm
cm = duration/29/2;
if (cm>20) {
cm = 20;
}
// map the distance form 80 to 150 to fit
cm = map(cm,0,20,80,150);
if (curr-prevnote >= cm) {
prevnote = curr;
// play the note
tone(11, melody[currnote], duration*0.9);
// loop over the array
currnote = (currnote + 1) % 100;
}
}
Gopika was inspired by this video of a Coldplay performance, in which it appears like the band is playing music on lasers in the air. We decided we would try to make an “air guitar” in a similar style. We would use six ultrasonic distance sensors that acted like “strings” and buttons that acted like the frets on a guitar. However because ultrasonic distance sensors need a clock, and each Arduino board only has three, we were limited to how many distance sensors we could use. We ended up with two distance sensors, each controlled by two buttons.
Process:
We first built a circuit with the ultrasonic distance sensor to see what kind of ranges were measurable. Next, we added a buzzer to the circuit, and wrote code to play a note whenever a given distance was triggered. For example, between 0 and 60 cm, every 10 cm corresponds to one note.
We added control buttons to the circuit next, one of which turns the system on (starts detecting distance) and the other changes the octave. Each code had two arrays of notes, each a full octave, giving the buzzer access to two full octaves of notes. If the button is pressed, the higher octave is played, if the button is not pressed, the lower octave is played.
Challenges:
We had a lot of trouble wiring the buttons into the circuit. At first, they didn’t work at all, and pressing the button wasn’t even being detected. Next, the press would be detected, but it would lag the system so that no tone was played for a few seconds. Finally Gopika realized that we had wired the circuit incorrectly and the buttons finally worked.
Final Work:
See if you recognize the song:
And with the octave change:
Main Code:
#define echoPinC 12
#define trigPinC 11
const int BUTTON_PIN = 7; // Arduino pin connected to button's pin
const int BUTTON_PIN2 = 8;
# include "pitches.h"

String notes6[7] = {"C4", "D4", "E4", "F4", "G4", "A4", "B4"};

int notes[7] = {NOTE_C6, NOTE_D6, NOTE_E6, NOTE_F6, NOTE_G6, NOTE_A6, NOTE_B6};
int notesHigh[7] = {NOTE_C7, NOTE_D7, NOTE_E7, NOTE_F7, NOTE_G7, NOTE_A7, NOTE_B7};

long durationC;
int distanceC;

int playNote;

bool start = false;

void setup() {
  // put your setup code here, to run once:

  pinMode(trigPinC, OUTPUT);
  pinMode(echoPinC, INPUT);
  pinMode(BUTTON_PIN, INPUT_PULLUP);
  pinMode(BUTTON_PIN2, INPUT_PULLUP);

  Serial.begin(9600);
}

void loop() {
   int buttonState = digitalRead(BUTTON_PIN); // read new state
int offState = digitalRead(BUTTON_PIN2);

 if (offState == LOW) {
  start=true;
 }

if(start)
{

  // put your main code here, to run repeatedly:
digitalWrite(trigPinC, LOW);
  delayMicroseconds(2);
  digitalWrite(trigPinC, HIGH);
  delayMicroseconds(10);
  digitalWrite(trigPinC, LOW);
  durationC = pulseIn(echoPinC, HIGH);
  distanceC = durationC * 0.034 / 2;

  Serial.print("DistanceC: ");
  Serial.print(distanceC);
  Serial.print(" cm");
  Serial.print("mapped: ");

  int constrainedInput=constrain(distanceC, 1, 70);

  int mappedNoteC = map(constrainedInput, 1, 70, 0, 6);

Serial.println(notes6[mappedNoteC]);

  if (buttonState == LOW) {
   Serial.print("button unpressed: ");
  // noTone(4);
  playNote = notesHigh[mappedNoteC];

  if(distanceC > 70){
   noTone(4);
  }

  }
  else
  if (buttonState == HIGH) {
   Serial.print("button pressed: ");
      playNote = notes[mappedNoteC];
  }
if (offState == LOW) {
   Serial.print("button unpressed: ");
  noTone(4);
}
 else
  if (offState == HIGH) {
tone(4, playNote);
  }
  if(distanceC > 70){
    noTone(4);
  }
}
}
Rhythm and Eric are to make a musical instrument using at least one digital sensor(switch), and at least one analog sensor (photoresistor, potentiometer, or distance measuring sensor)
Idea
The piano is usually used to play two parts simultaneously. One musician plays all the chords and melody. Chords and melodies both work together to create rhythm and harmony. A chord is when three or more notes are played together at the same time whilst melody is when single notes are played individually in a pattern or sequence.
Then comes the Eureka moment! We can have the melody which is 8 switches holding the single notes (do re me fa so la ti do) and a chord which is a photoresistor that plays a melody using three or more notes.
Process
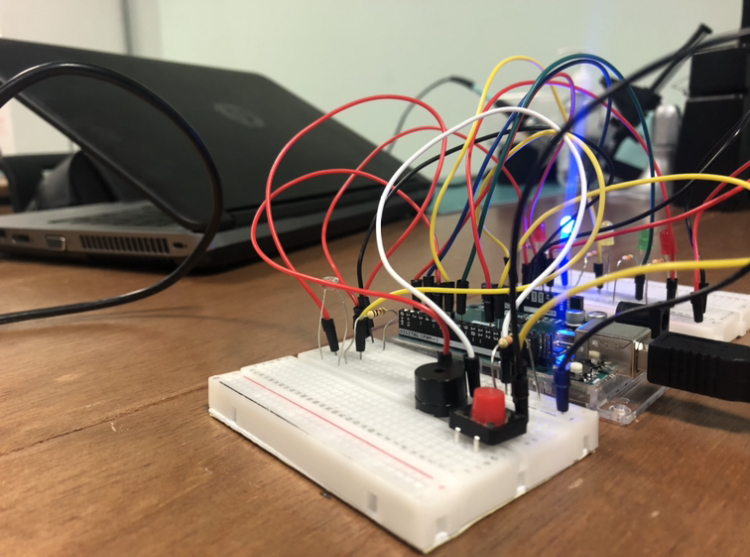
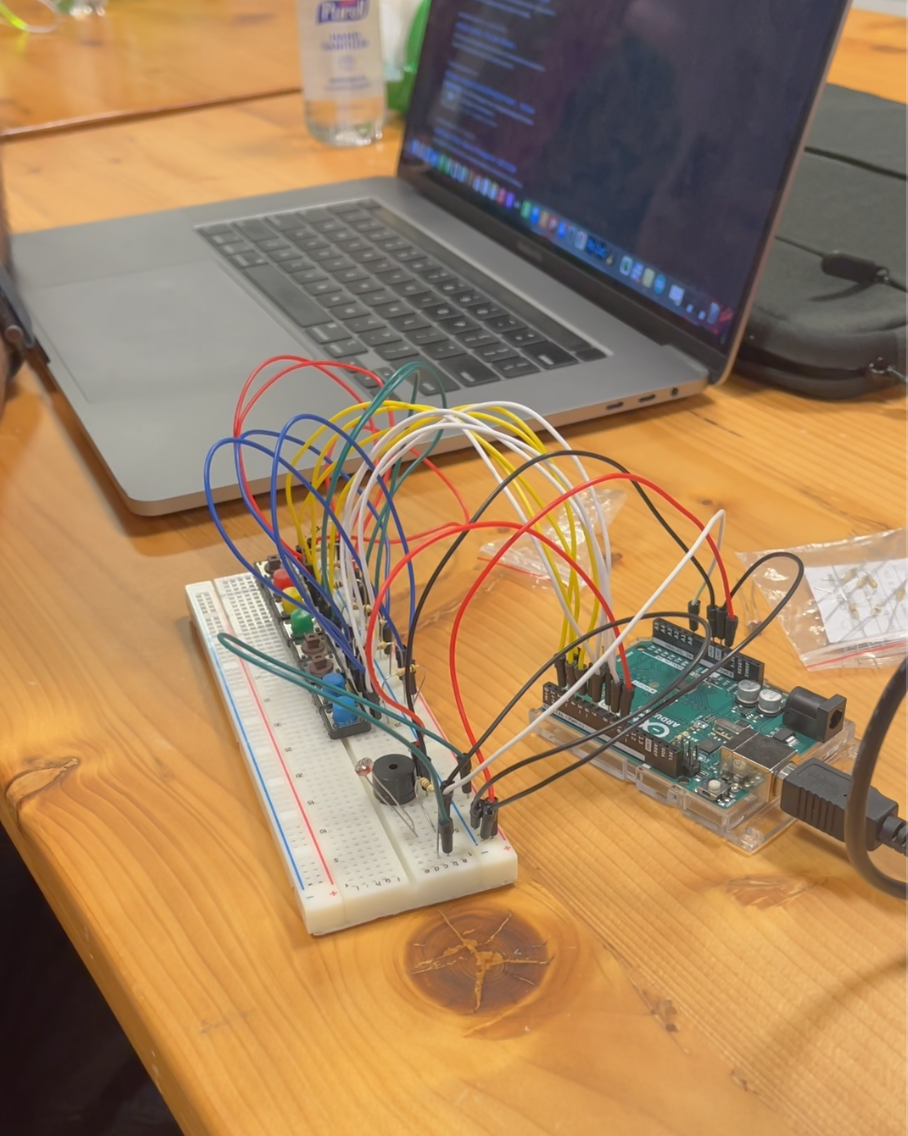
So the setup was done as described above, we had 8 switches connected in a row, a buzzer for sound, and a photoresistor. Each note above was connected to one switch. Data from the photoresistor was mapped to play a chord.
Final Work
Challenges
Our initial plan was to use 8 photoresistors and a switch but couldn’t figure how to connect the 8 photoresistors to Arduino. We experimented with the distance sensor as well but were getting a weird noise from the buzzer, we rechecked the connection and code but still couldn’t get it to work. We also had in mind to include drums but couldn’t get the buzzer to produce drum notes.
Code
-Main
#include "pitches.h"
int knobPin = A0;

int melody[] = {NOTE_C4, NOTE_D4, NOTE_E4, NOTE_F4, NOTE_G4, NOTE_A4, NOTE_B4, NOTE_C5, NOTE_D5, NOTE_E5};
int noteDurations[] = {4, 8, 8, 4, 4, 4, 8, 4, 8, 4};

int duration = 100

// notes and their respective buttons
const int Dobbutton = 2;
const int Rebutton = 3;
const int Mibutton = 4;
const int Fabutton = 5;
const int Solbutton = 6;
const int Labutton = 7;
const int Tibutton = 8;
const int Dotbutton = 9;

// initial status of buttons
int DobButtonStatus = 0;
int ReButtonStatus = 0;
int MiButtonStatus = 0;
int FaButtonStatus = 0;
int SolButtonStatus = 0;
int LaButtonStatus = 0;
int TiButtonStatus = 0;
int DotButtonStatus = 0;


void setup()

{

  Serial.begin(9600);
  pinMode(knobPin, INPUT);


  pinMode(Dobbutton, INPUT);
  pinMode(Rebutton, INPUT);
  pinMode(Mibutton , INPUT);
  pinMode(Fabutton, INPUT);
  pinMode(Solbutton, INPUT);
  pinMode(Labutton, INPUT);
  pinMode(Tibutton , INPUT);
  pinMode(Dotbutton, INPUT);
}

void loop() {
  int ldrStatus = analogRead(knobPin);
  int mappedValue = map(ldrStatus, 0, 1023, 0, 255);
//  Serial.println(mappedValue);


  // check for photoresistor value and play chord

  if (mappedValue > 200 ) {
    for (int i = 0; i < 10; i++) {
      int noteDuration = 1000 / noteDurations[i];
      tone(10, melody[i], noteDuration);
      int pauseBetweenNotes = noteDuration * 1.30;
      delay(pauseBetweenNotes);
      noTone(10);

    }

  }


  //read state of buttons
  DobButtonStatus = digitalRead(Dobbutton);
  ReButtonStatus = digitalRead(Rebutton);
  buttonMistatus = digitalRead(Mibutton);
  FaButtonStatus = digitalRead(Fabutton);
  SolButtonStatus = digitalRead(Solbutton);
  LaButtonStatus = digitalRead(Labutton);
  TiButtonStatus = digitalRead(Tibutton);
  DotButtonStatus = digitalRead(Dotbutton);


  if (DobButtonStatus == HIGH) {
    tone(10, dot, duration);
  }
  if (ReButtonStatus == HIGH) {
    tone(10, re, duration);
  }
  if (buttonMistatus == HIGH) {
    tone(10, mi, duration);
  }
  if (FaButtonStatus == HIGH) {
    tone(10, fa, duration);
  }
  if (SolButtonStatus == HIGH) {
    tone(10, sol, duration);
  }
  if (LaButtonStatus == HIGH) {
    tone(10, la, duration);
  }
  if (TiButtonStatus == HIGH) {
    tone(10, si, duration);
  }
  if (DotButtonStatus == HIGH) {
    tone(10, dot, duration);
  }


}
After a lot of thinking and research we decided we wanted to try something and we honestly didn’t know if it would work or not. Our initial Idea was to created some sort of drum set. We felt like it would be a cool challenge to take on! The idea is to have 6 pads attached to a board, and each pad creates a different sound or tone when you press on it.
First attempt:
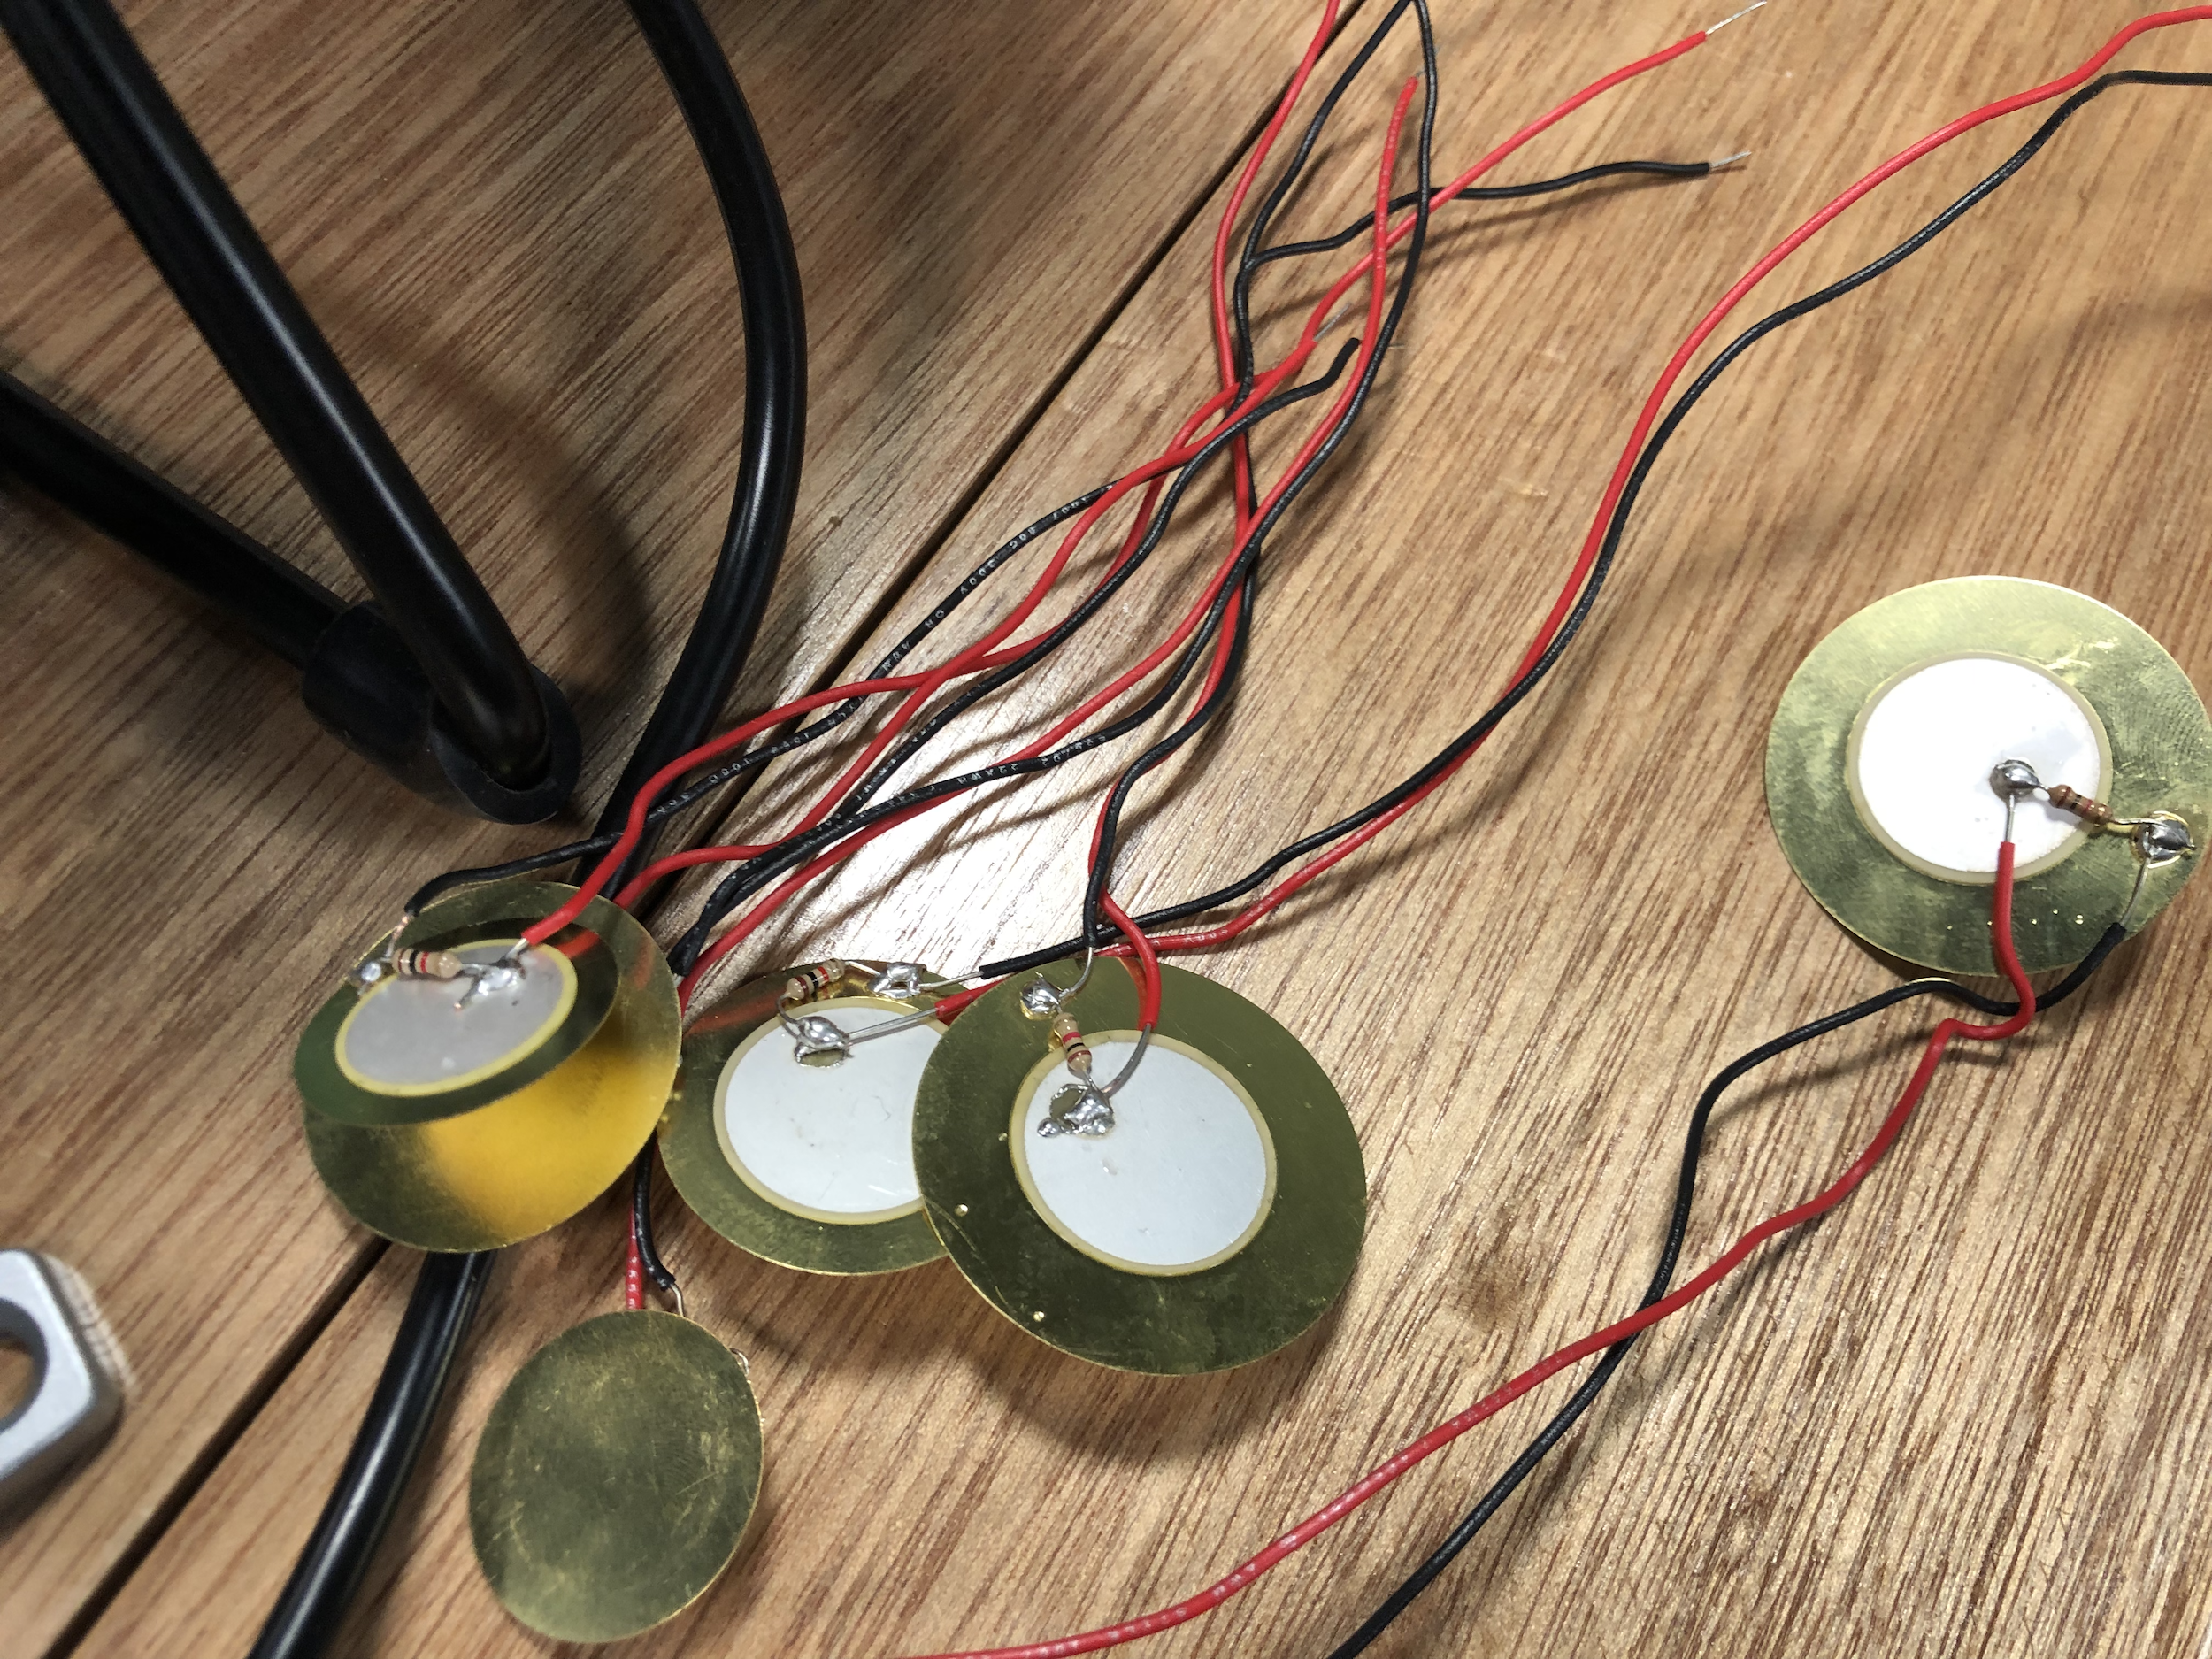
In our first attempt we started trying to create the “drums” using piezo buzzers. We assembled together a foam board with 6 pads, each with an piezo buzzer attached to it. We think we got a bit to courageous and we put together the whole instrument and it did not end up fully working. We believe the conceptualization and idea could work (it did work to a certain extent).
We think the reason why it didn’t work is because we wanted each pad to create a sound when we press on it. However, we believe the vibrations created by pressing on one of the pads to create the sound was also picked up by the other pads which made the buzzer go crazy. The serial monitor is what helped us get to that conclusion. We tried to fix it however, we did not have enough time to do so. Hence, we decided to switch it up a bit.
We met again, and decided to use force sensitive resistors instead. We reassembled the board and substituted the piezo buzzer with force sensitive resistors, we also added a layer of sponge in the middle between the board and the separate tabs. Each pad has a different tune when pressed on.
We then decided to use a button as our digital read, as a switch for Led lights that we added. The Leds only light up when you press on the pads. So the button switches the LEDS on and off but they only light up when we press on the tabs, if we press on the tabs when the button is off the LEDS won’t light up we we press on the tabs.
This video shows how the button is used:
Final touches:
Just to add some visual appeal to the board we decided to print out pictures off different drums to complete a drum set and stick them on each pad. Even thought the tunes don’t really sound like drums lol 🙂
Finally this our result!
#include "pitches.h"

const int inputPins[] = { A0, A1, 2, A3, A4, A5};
int inputs[6];
int threshold[] = {250, 900, 940, 960, 900, 750};
int leds[] = {2, 3, 4, 5, 6, 7};
bool flag = HIGH;
bool prev, curr;
const int buzzerPin = 13, button = 12;
long timer[6];

int notes[10] = {NOTE_C4, NOTE_D4, NOTE_E4, NOTE_F4, NOTE_G4, NOTE_A4, NOTE_B4, NOTE_C5, NOTE_D5, NOTE_E5};

void setup() {
  // put your setup code here, to run once:
  Serial.begin(9600);
  for (int i = 0; i < sizeof(inputPins); i++) {
    pinMode(inputPins[i], INPUT);
  }
  pinMode(button, INPUT);
  for (int i = 0; i < sizeof(leds); i++) {
    pinMode(leds[i], OUTPUT);
  }
  pinMode(buzzerPin, OUTPUT);

}

void loop() {
  if (curr == 1 && curr != prev) {
    flag = !flag;
    Serial.println("flag");
  }
  curr = digitalRead(button);
  for (int i = 1; i < 6; i++) {
    inputs[i] = analogRead(inputPins[i]);

    Serial.print(i + 1);
    Serial.print(" : ");

    Serial.print(inputs[i]);
    Serial.print(" ");

    if (inputs[i] > threshold[i]) {
      tone(buzzerPin, notes[i * 2], 500);
      if (flag) {
        digitalWrite(leds[i], HIGH);
      }
      else {
        digitalWrite(leds[i], LOW);
      }

    }
    else {
      digitalWrite(leds[i], LOW);
    }


  }
  Serial.println("");

  for (int j = 0; j < 6; j++) {

  }
  prev = digitalRead(button);
}