Little bit interactive drum


20150906_220238

You might not understand what I made (oh but look at the title of this post!) from the video and the photo, but that’s because it’s a model of the real product. So imagine the pen is a wood stick and the copper sheet is the main body of a drum, there we have a little bit interactive drum that lights up when a player beats the drum!

Alright, thank you for watching and/or reading.

Tableware–Chopsticks and Spoon

IMG_0001 IMG_0002

My circuit which I only added chopsticks and a spoon into is quite simple. To make the light on, we only need to make sure that the voltage assigned to the light will be around its rated voltage. In addition, having a loop is quite important.

We can’t use common switch, so we’ll try something new. At first, I was going to find something which is made of metal that can conduct electricity. Then I chose my necklace and used it as conductor in my circuit, however, the light was still off and it didn’t work at all. Maybe the necklace has a quite large resistance, which leads to the light does not have enough voltage to be on. Or the necklace’s material does not have a good conductive in the circuit.

The second time, I chose nail clippers. When I cut it, I thought the top of the nail clippers can be closed to form a loop, maybe it can be a part of my circuits. Nevertheless, the light will always be on when I use the nail clippers as a connection.

The third time, I had a very simple idea by using chopsticks and spoon. Luckily, they naturally became a close circuit with GREAT conductive ability.


Recycle!

So as to be caring, environmentally friendly citizens, my roommates and I have agreed to use a seperate trash bin for plastic. However, banana peels and remnants of humus kept landing in the recycling bin, despite my persistance in placing the ‘Plastic’ label back on it again and again. As the label proved to be an inefficient solution, I thought a warning light could solve the problem.

Although I was aiming for a light that goes up each time someone opens the trash can, I started out with a smaller project, a lunchbox. First, I fixed two small pieces of conductive fabric to the ends of two longer wires with conductive tape (so that each wire had one end with the fabric on it, and one end ‘open’). Then the conductive fabric parts were fixed to the back of the lunchbox so that they would touch when the box is opened (see video).

Happy that my idea works, I made two longer wires with conductive fabric at their ends and I soldered two long wires to the two ends of a LED for my trash bin. Having disassambled the bin, I fixed one of the fabric pieces on its bottom, and the other one at the end of the pedal (in a way that they would touch when the pedal is stepped upon).


The sound of the following footage is a happy accident, and not part of my work (unfortunately).

See the two circuits in the picture below.

im

Books!


I love reading, so the first thing that came to mind for the assignment was (naturally, of course) a booklamp! Nobody wants to use their filthy hands to press a darn button and turn on a lamp, so why not make it turn on automatically when you open the book? Voilà, the next great invention of the XXI Century. Thank me later, I’m busy getting my speech ready for when I pick up my Nobel Prize.

My first attempts consisted in a simple switch: close switch, turn on LED. Simple in paper. The idea was to have the opening motion of the book push two pieces together such that they touched (and closed the circuit) on the back of the book. But not even the aid of wooden sticks, string and magnetic tape was enough to make my vision come true, as it was hard to make both pieces actually touch each other. :c

Back to the drawing board. then, I remembered a little circuit Luis made while messing around paying attention in Wednesday’s class. In essence, it acted as a NOT logic gate: closing the switch would provide a path with least resistance, reducing the current flowing through the LED and turning it off. Problem solved (thanks, Luis!)

.2015-09-03 14.56.22

I built my switch over this concept: opening the book would open the switch, turning the LED on thanks to this makeshift NOT gate. By repurposing the wooden sticks and using some copper tape, I built a little structure on top of the book that would close the circuit as long as the book remained closed. I curled up the pieces of tape into circles such that the shape’s slight spring force would keep the two sides of the switch in contact. The rest is just regular wiring and a resistor.

2015-09-03 14.50.00

And this is the end result (at the bottom, because I can’t move videos around :c). Yay! 😀


Stranded

I am part of a subgroup of students known as the StudyAways (well we call ourselves that) and we compose of several NY students and Shanghai students. We absolutely love the campus and simply how everything is free. However, whenever we go on and on about what we love about this campus, there is always that “but” at the end of the sentence. The campus is in the middle of a desert in the middle of an island miles away from a city that we can see in the distance but never feel like we have easy access to. And although we have shuttles to take us to and fro, we find ourselves competing with other students and if any of our fellow StudyAways get late, they get left behind as we wave goodbye from the window. Most of us are used to our campuses being surrounded by vibrant places to visit and things to do that is only a walking distance away. Now before you say anything, I know there’s not much the University can do. Some may say that the shuttles are the University’s acknowledgement to the fact that there is a considerable distance from us and civilization. But it is one thing that stands out to a lot of us. Perhaps in the years to come, when Abu Dhabi becomes more developed and those museums are completed, the campus will be surrounded with people from all over the world and small businesses that don’t require us to take a shuttle so packed that we need to pull that awkward extra seat in the middle of the aisle down. When you look out your window and see sand for miles right outside the campus, just imagine what coffee shops, convenience stores, fresh food markets, pubs, creperies and other food places could take it’s place.

Key Bowl

Imagine this:

You’re coming home after a long day, and as soon as you enter you place your keys in a bowl by your door. But this is no ordinary bowl. The very second your keys touch the bowl, your lights turn on!

Well I’ve made something like that on a much smaller scale.

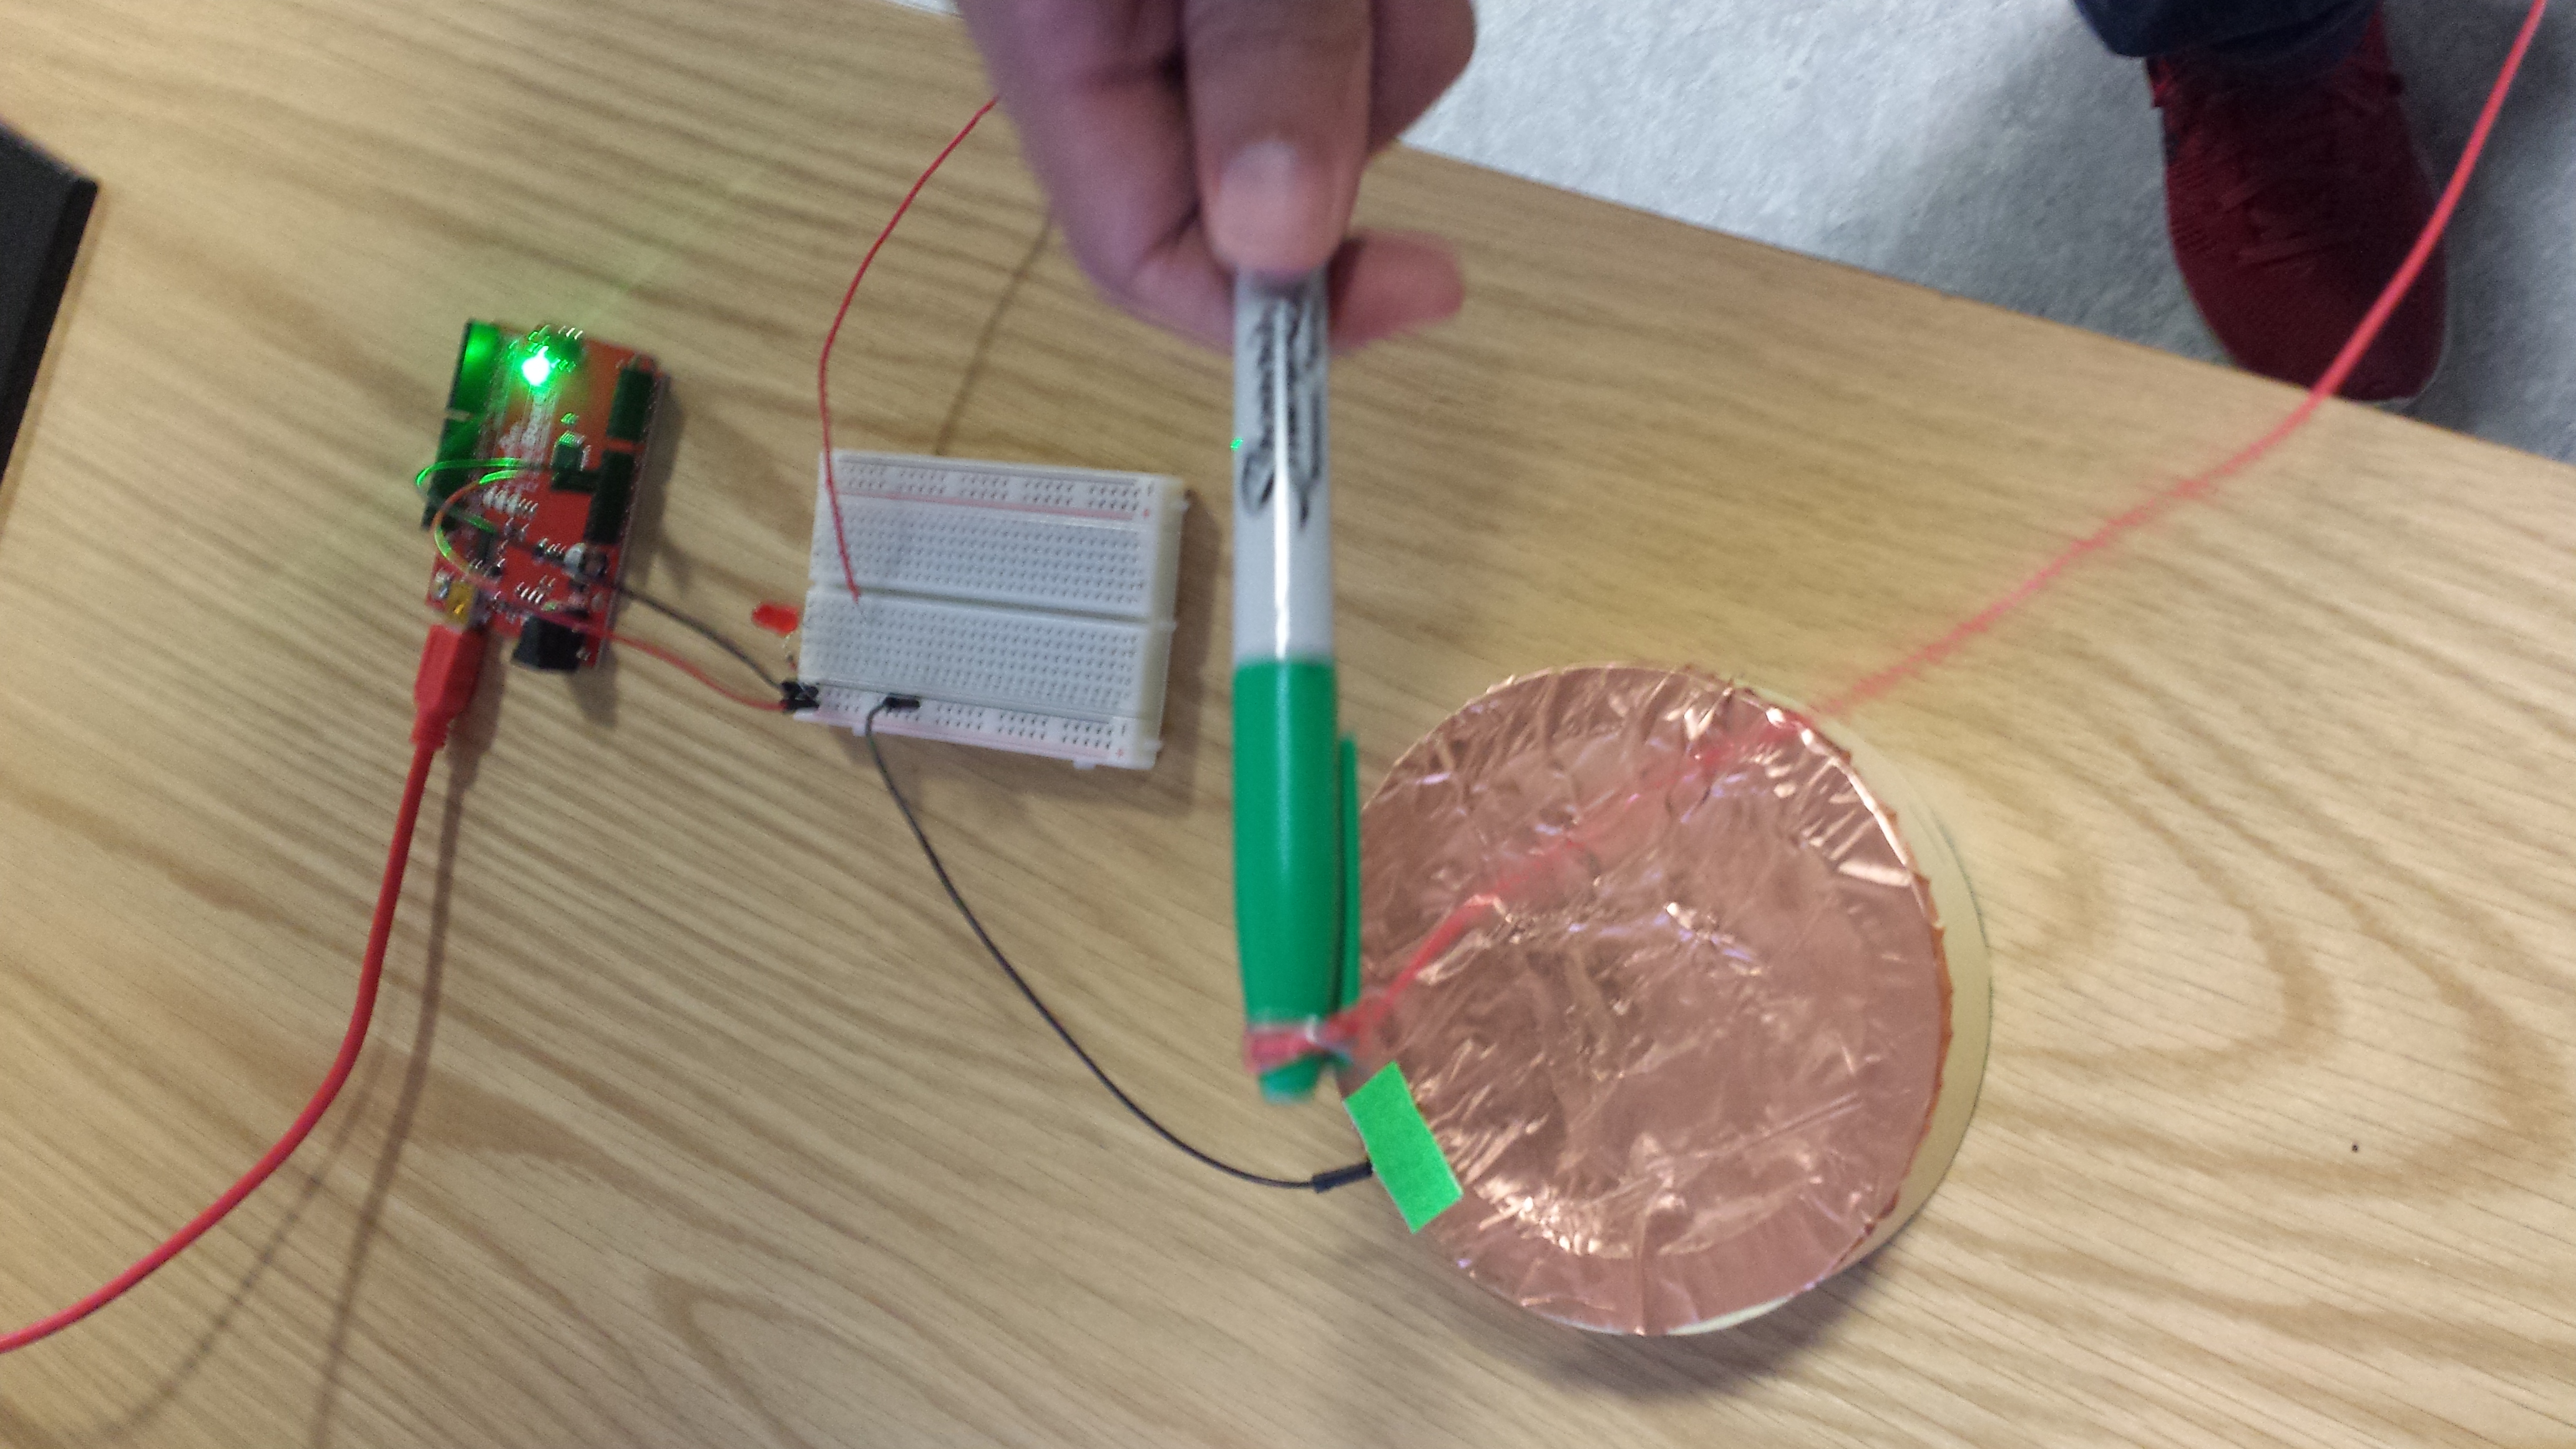
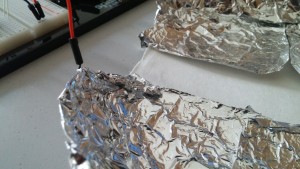
I’ve made a bowl that has nearly two conductive halves that, when connected with something that can conduct electricity, closes the circuit and turns on the LED. Kind of looks like this:

My Key Bowl

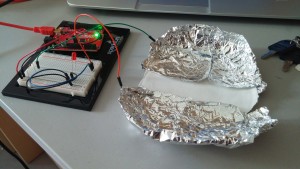
I know, not the fanciest looking bowl out there. But it works! And I can see it being useful to many people.

Here’s a video to prove it:

Update: The blue wire in the video was an extra unnecessary wire between the red wire and the LED. I have since removed it. Please ignore it as the following section does not acknowledge it. Thank you.

The way it works is actually very simple, and I’m sure you all could figure it out. But I’ll explain it anyways.

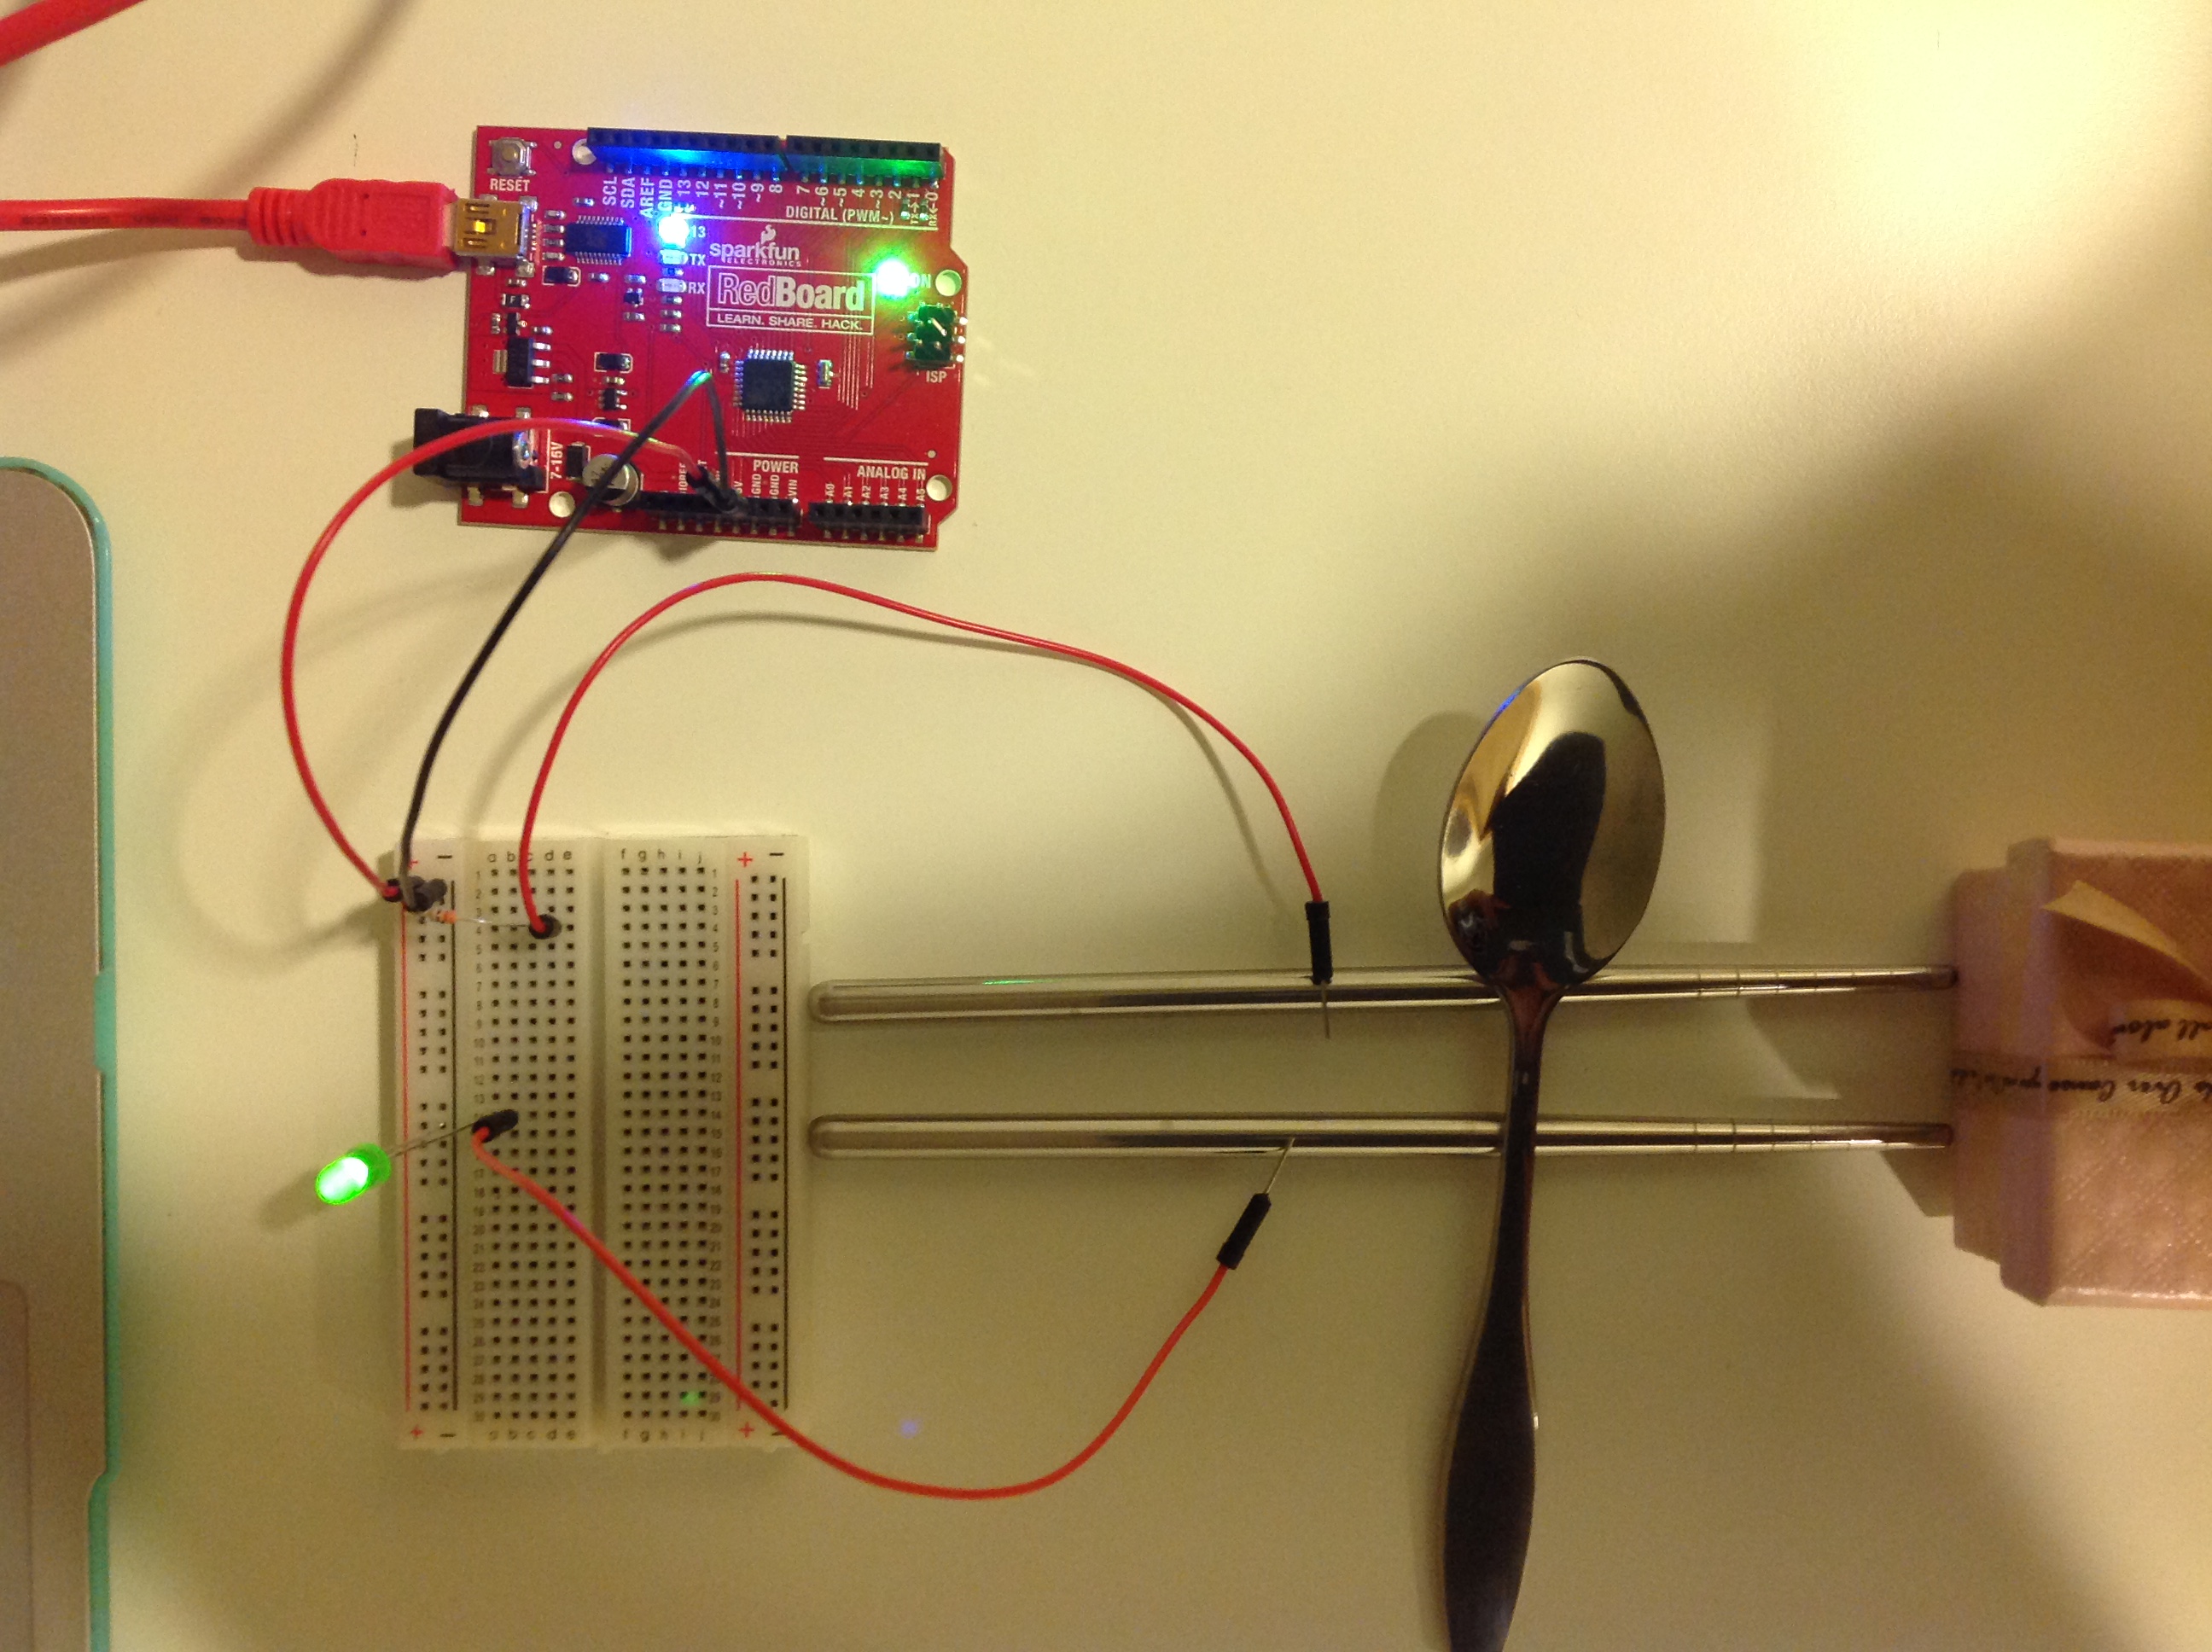
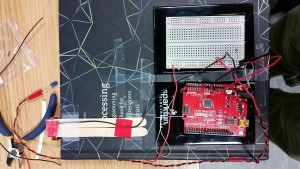
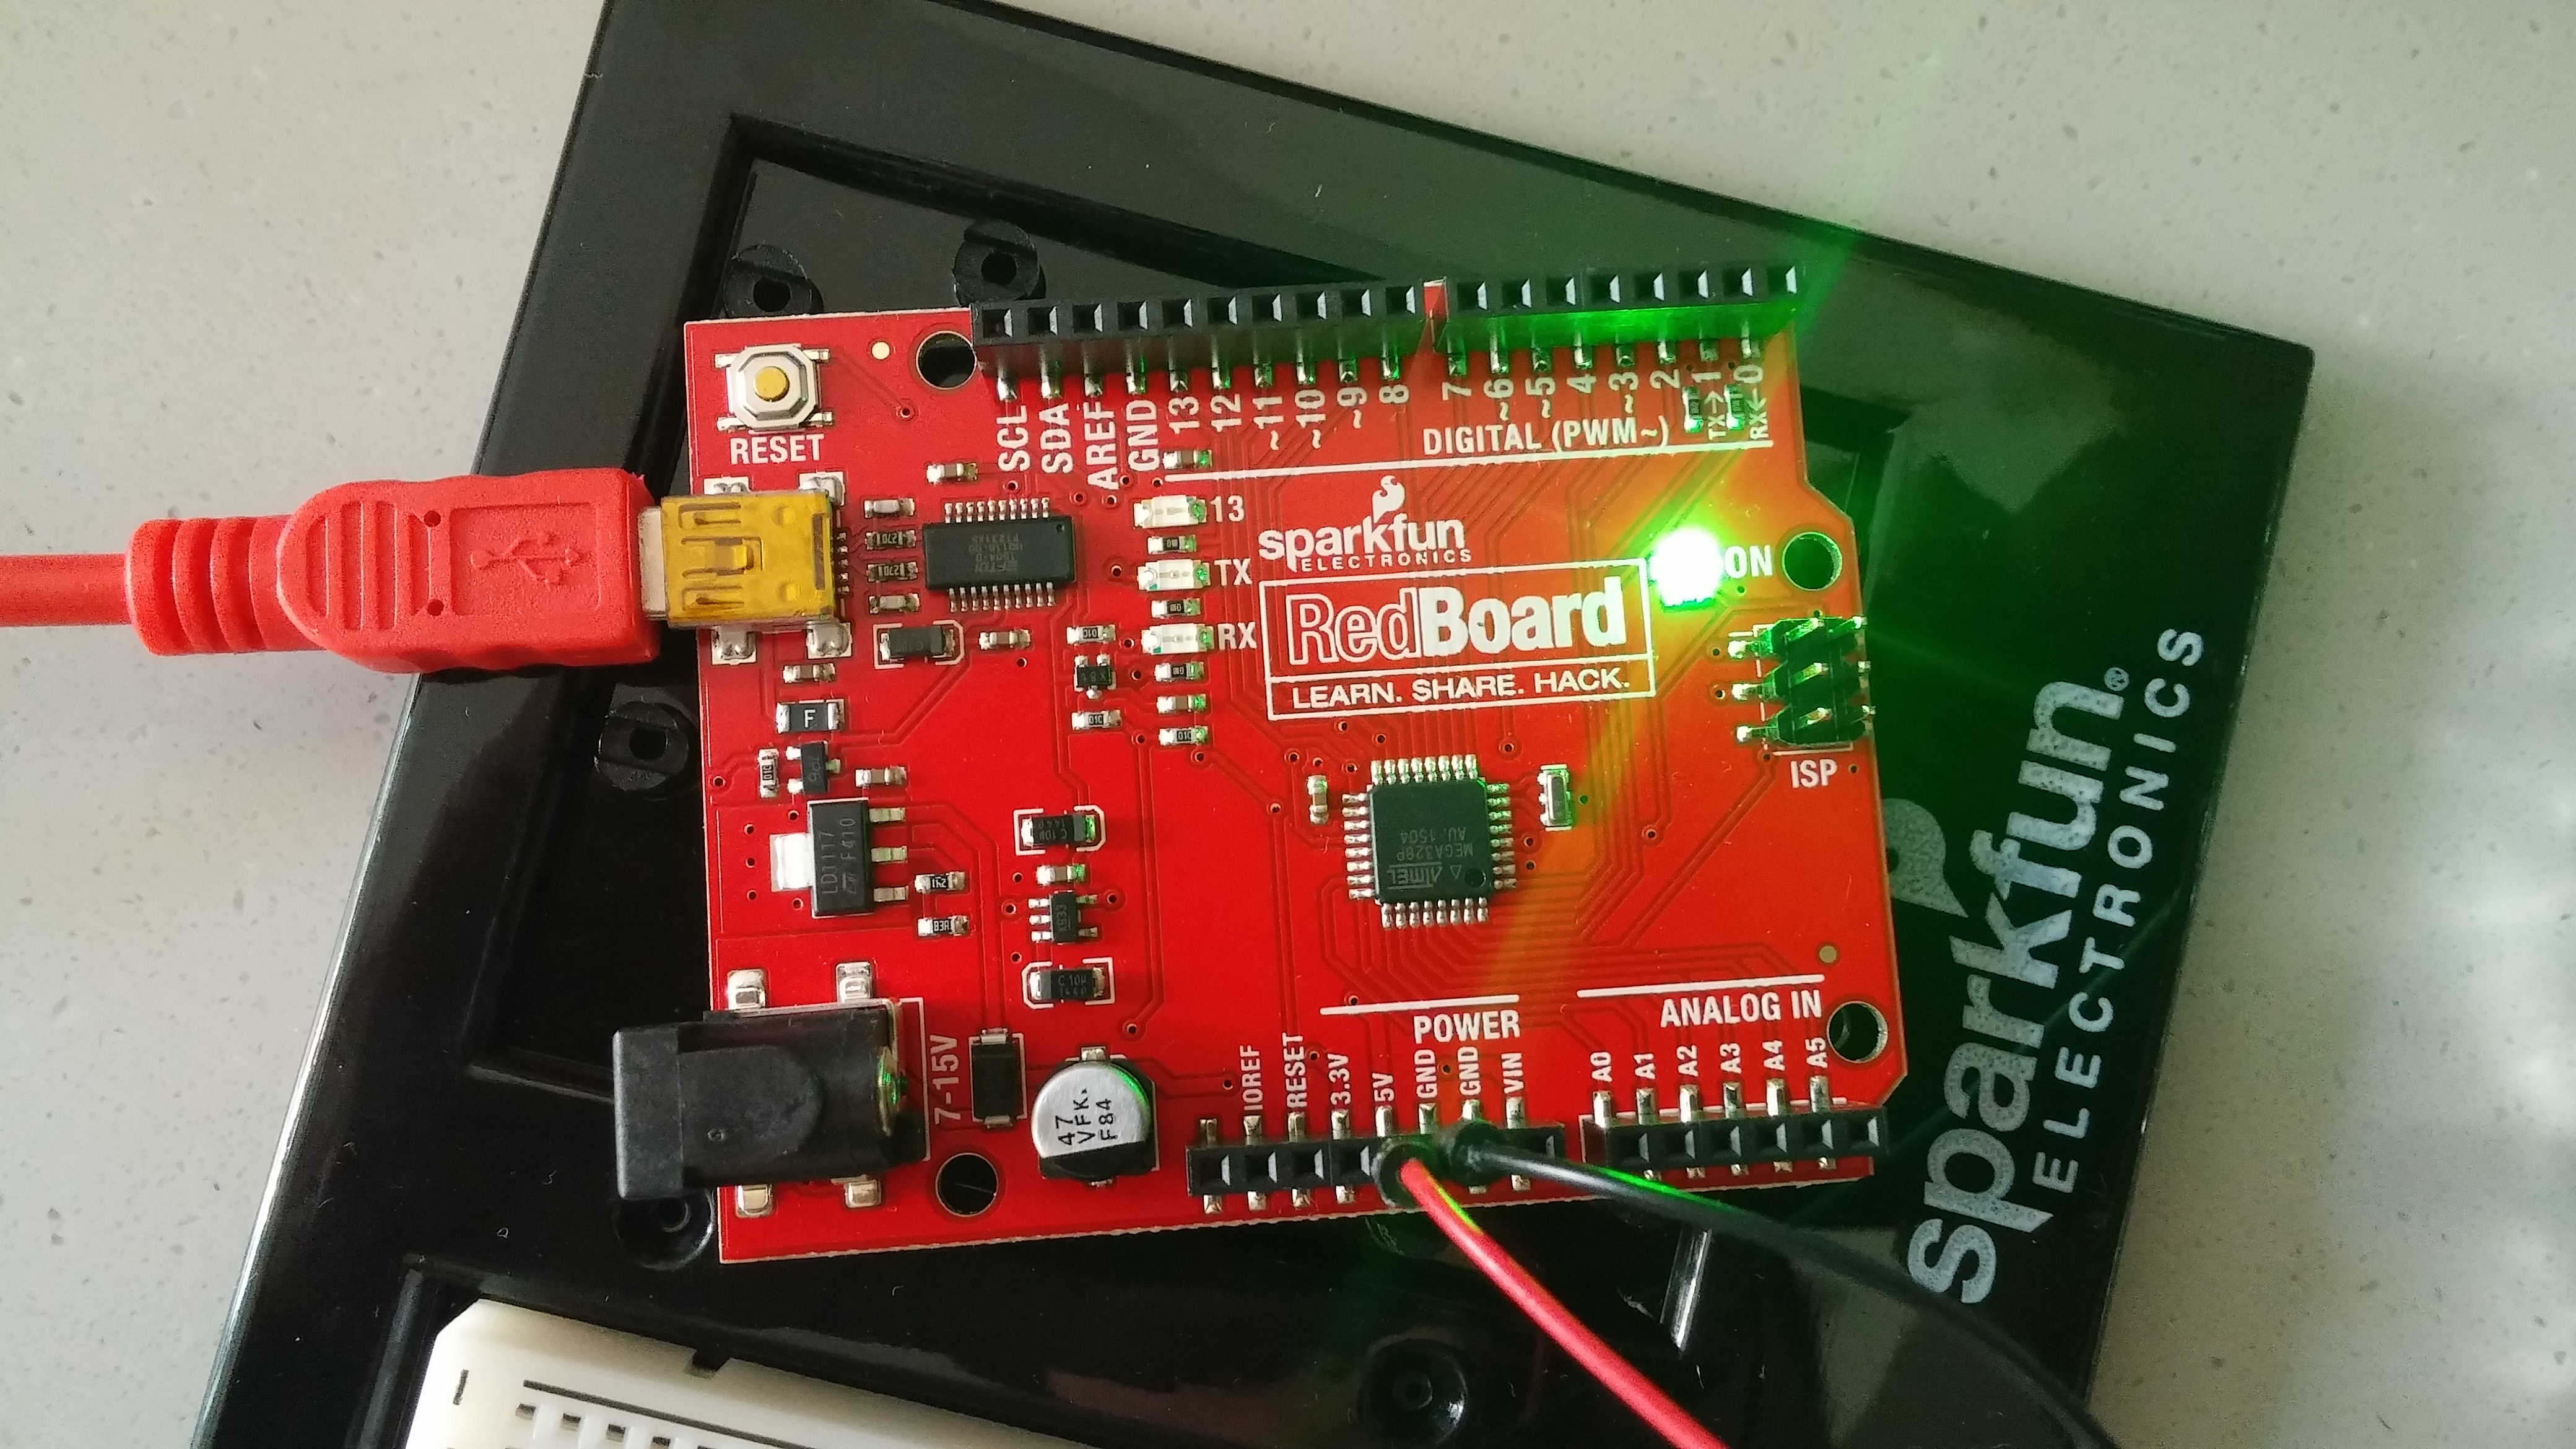
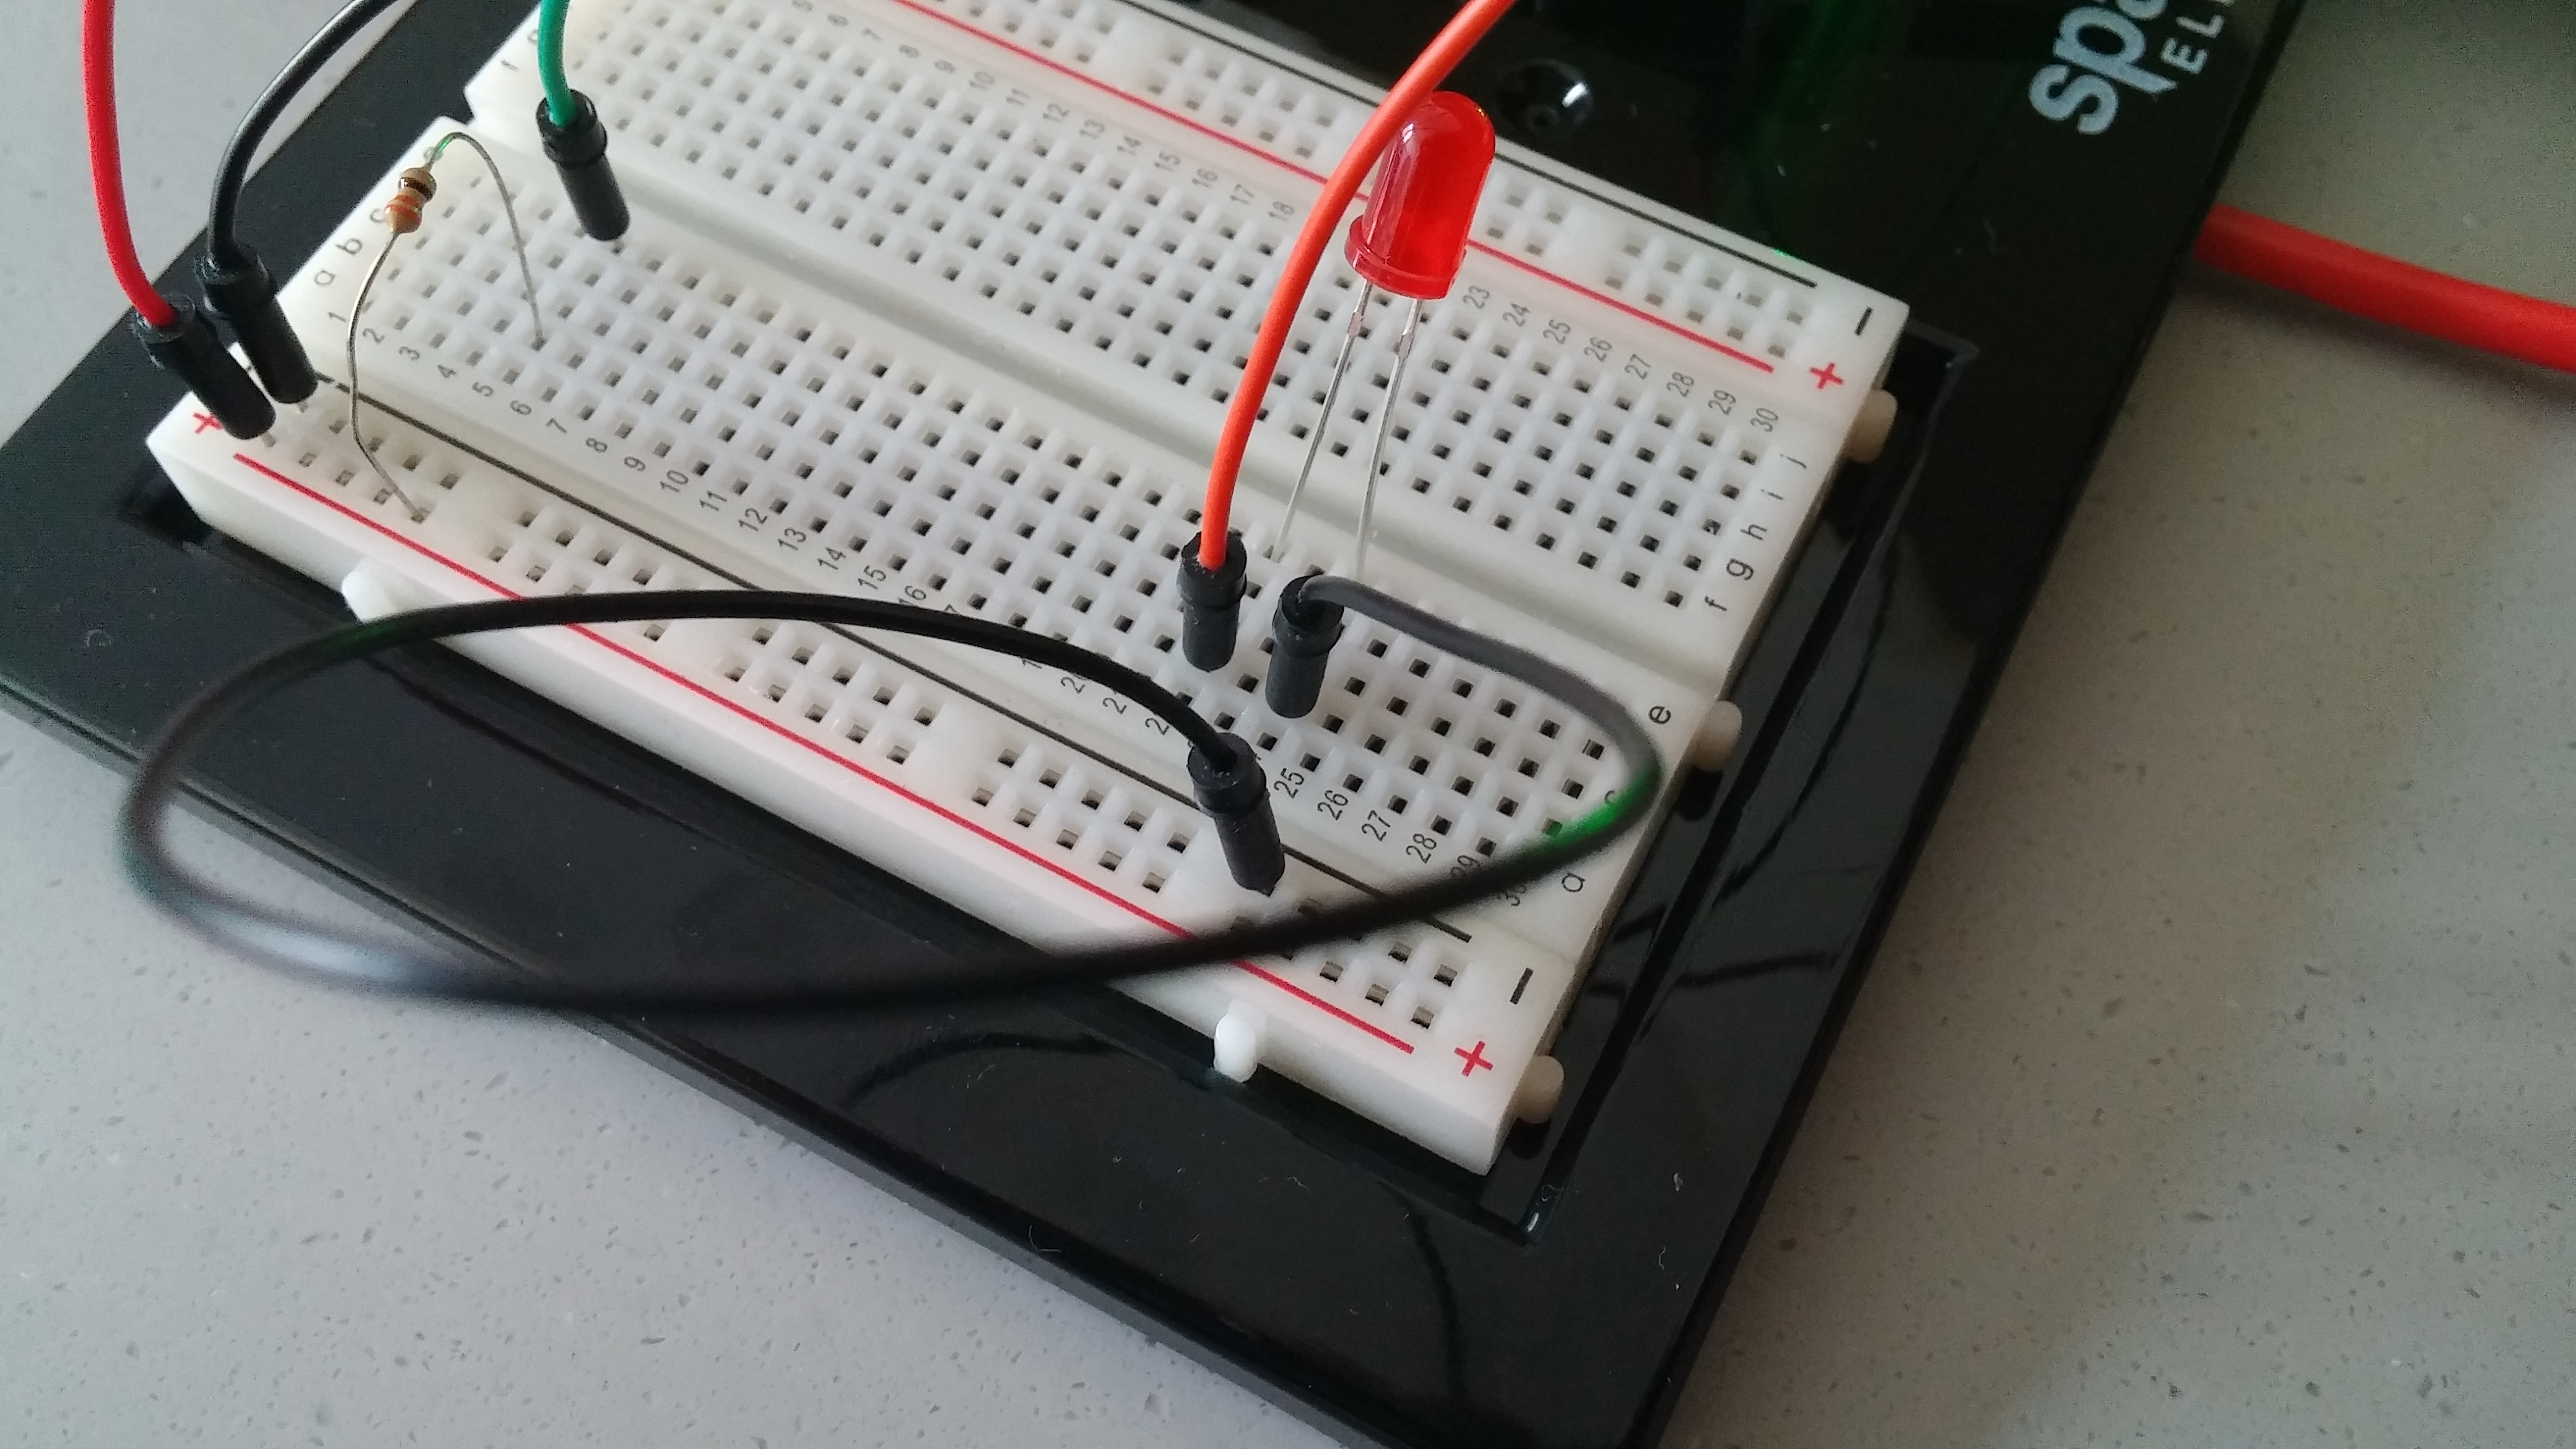
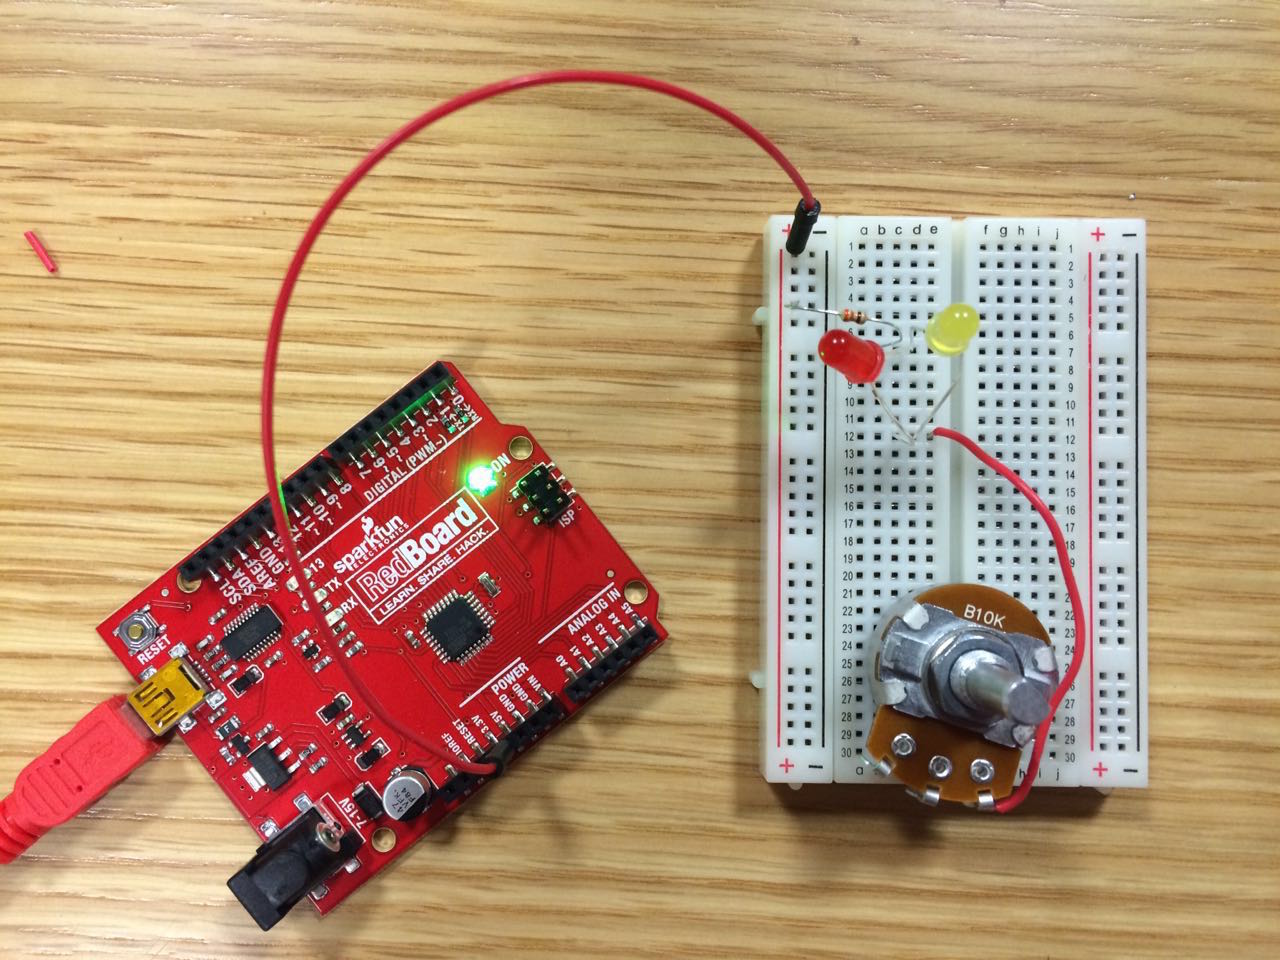
First things first, you set up the RedBoard and connect the power and ground wires.

RedBoard

2015-09-06 17.07.59


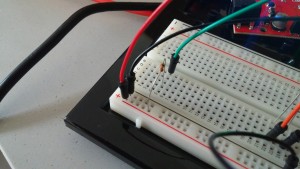
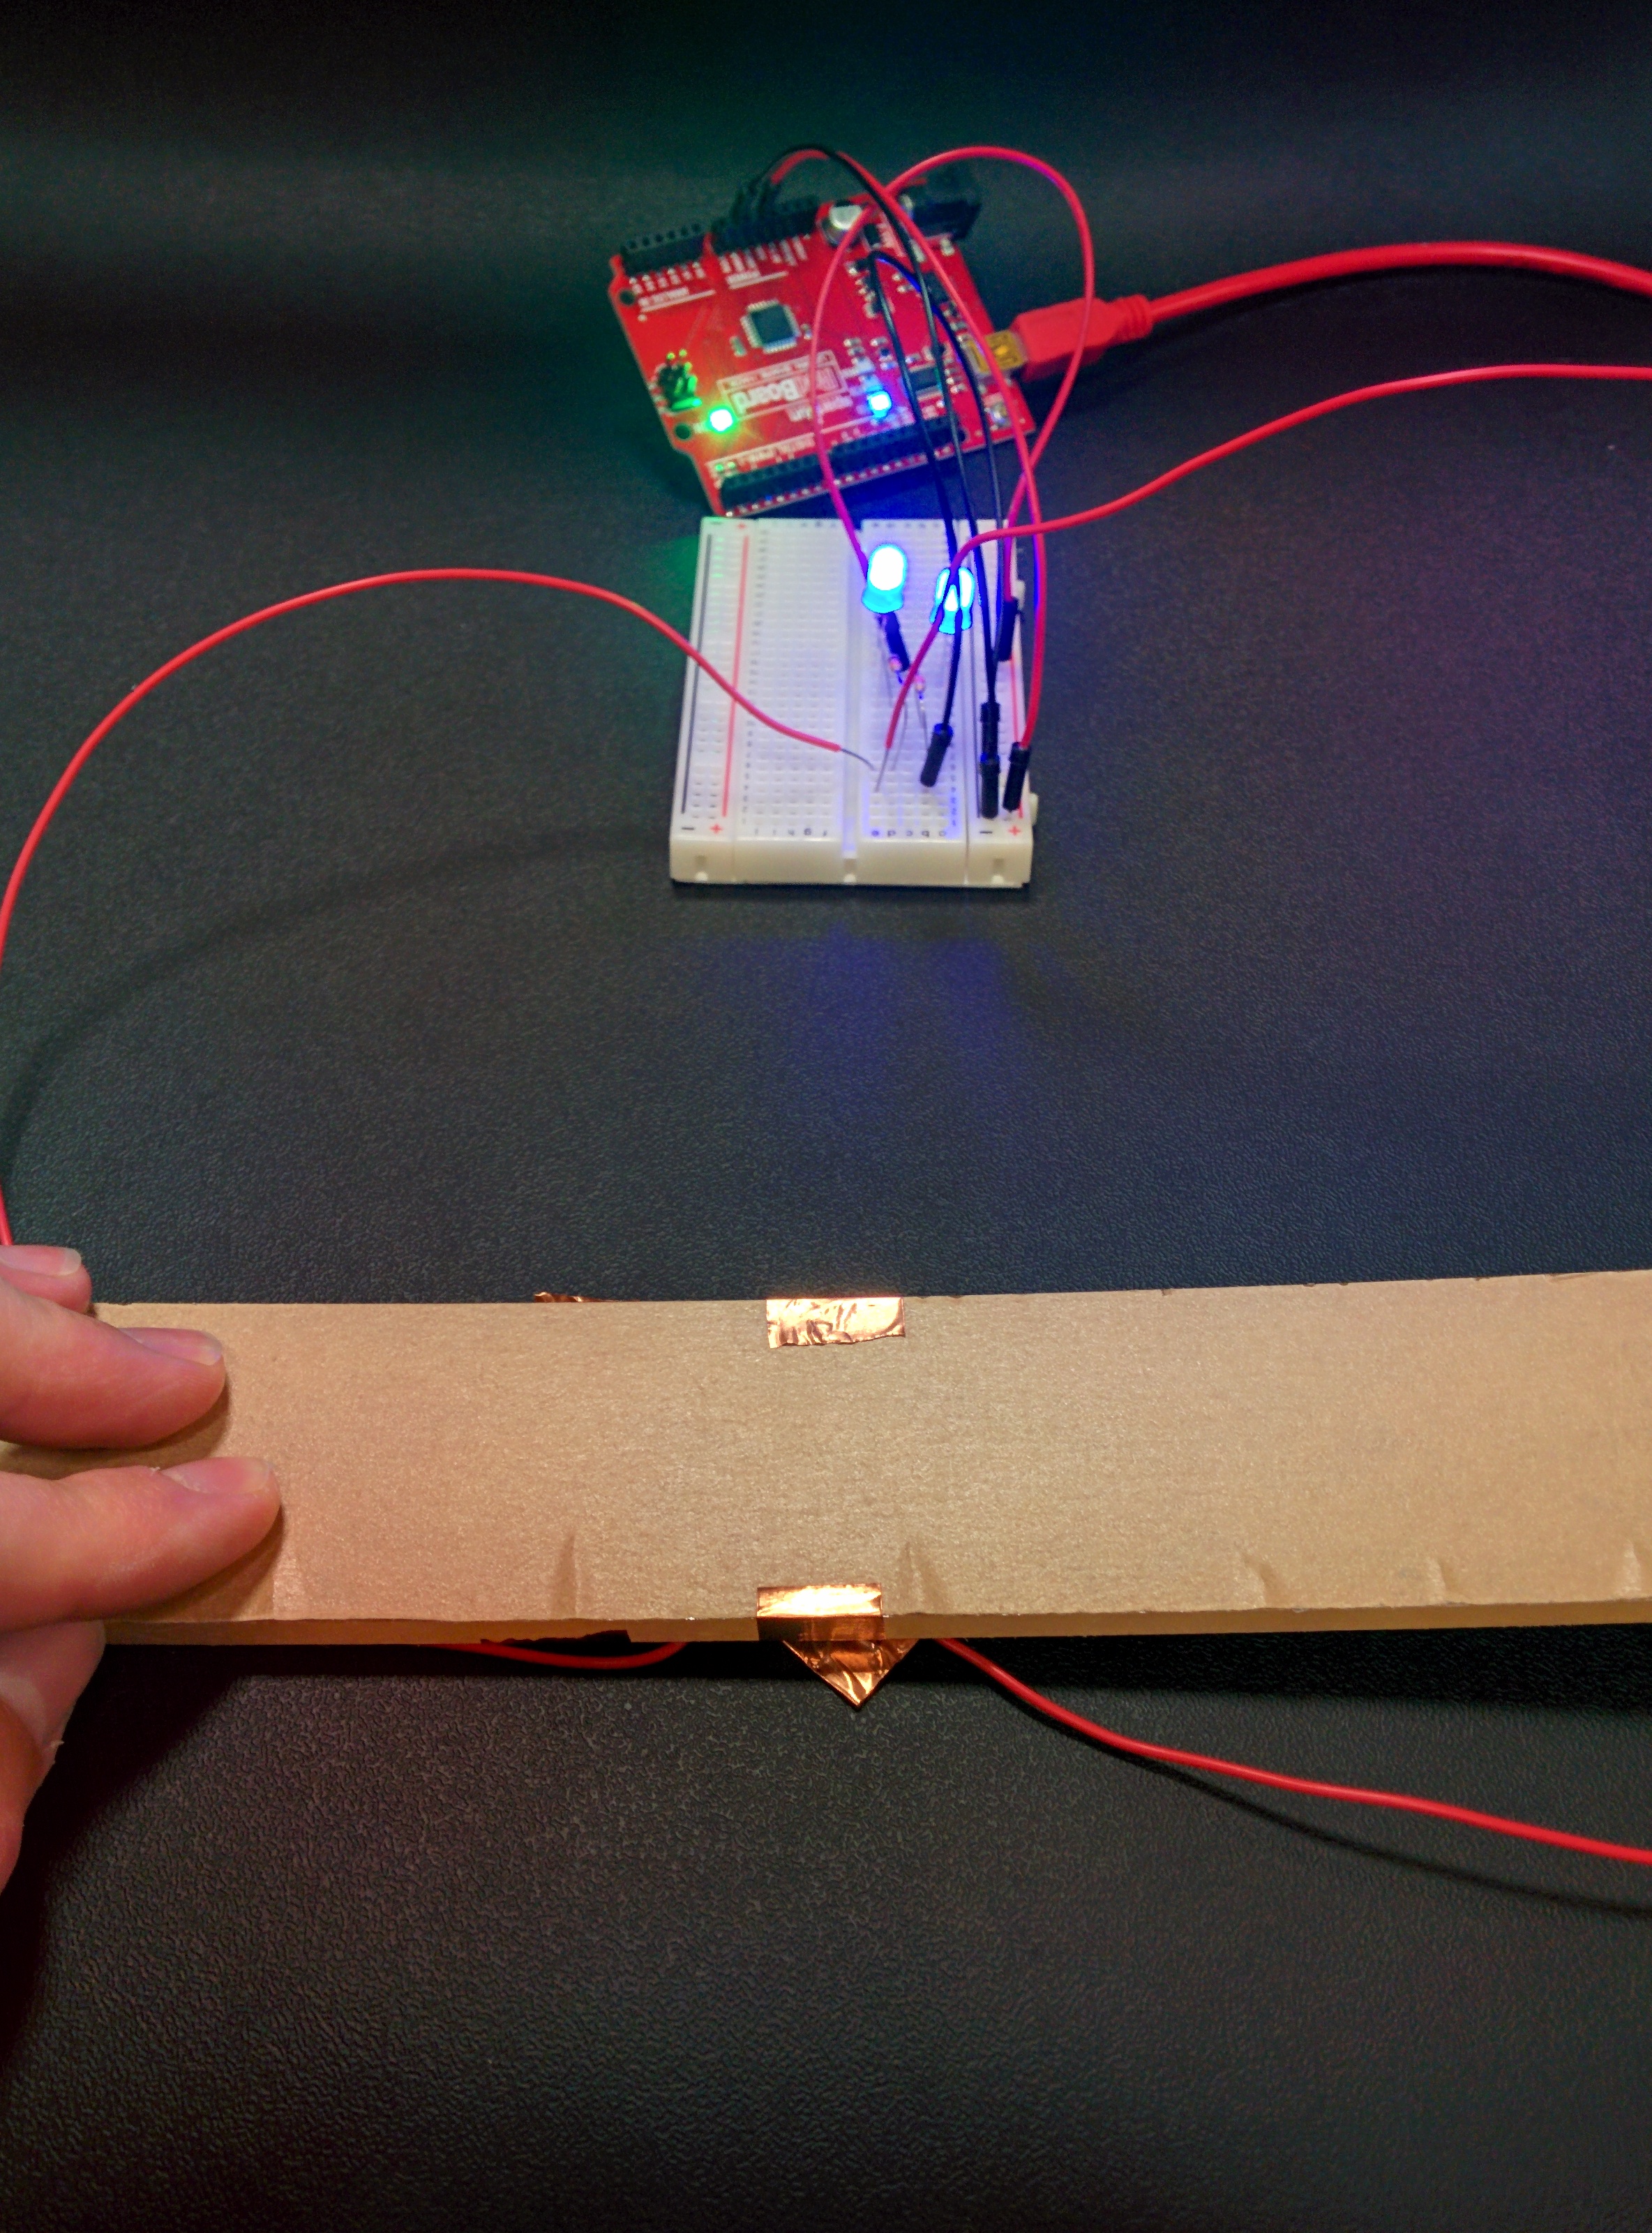
Then I place a resistor there to decrease the Voltage to the green wire which is connected to one half of the plate:

2015-09-06 16.48.23
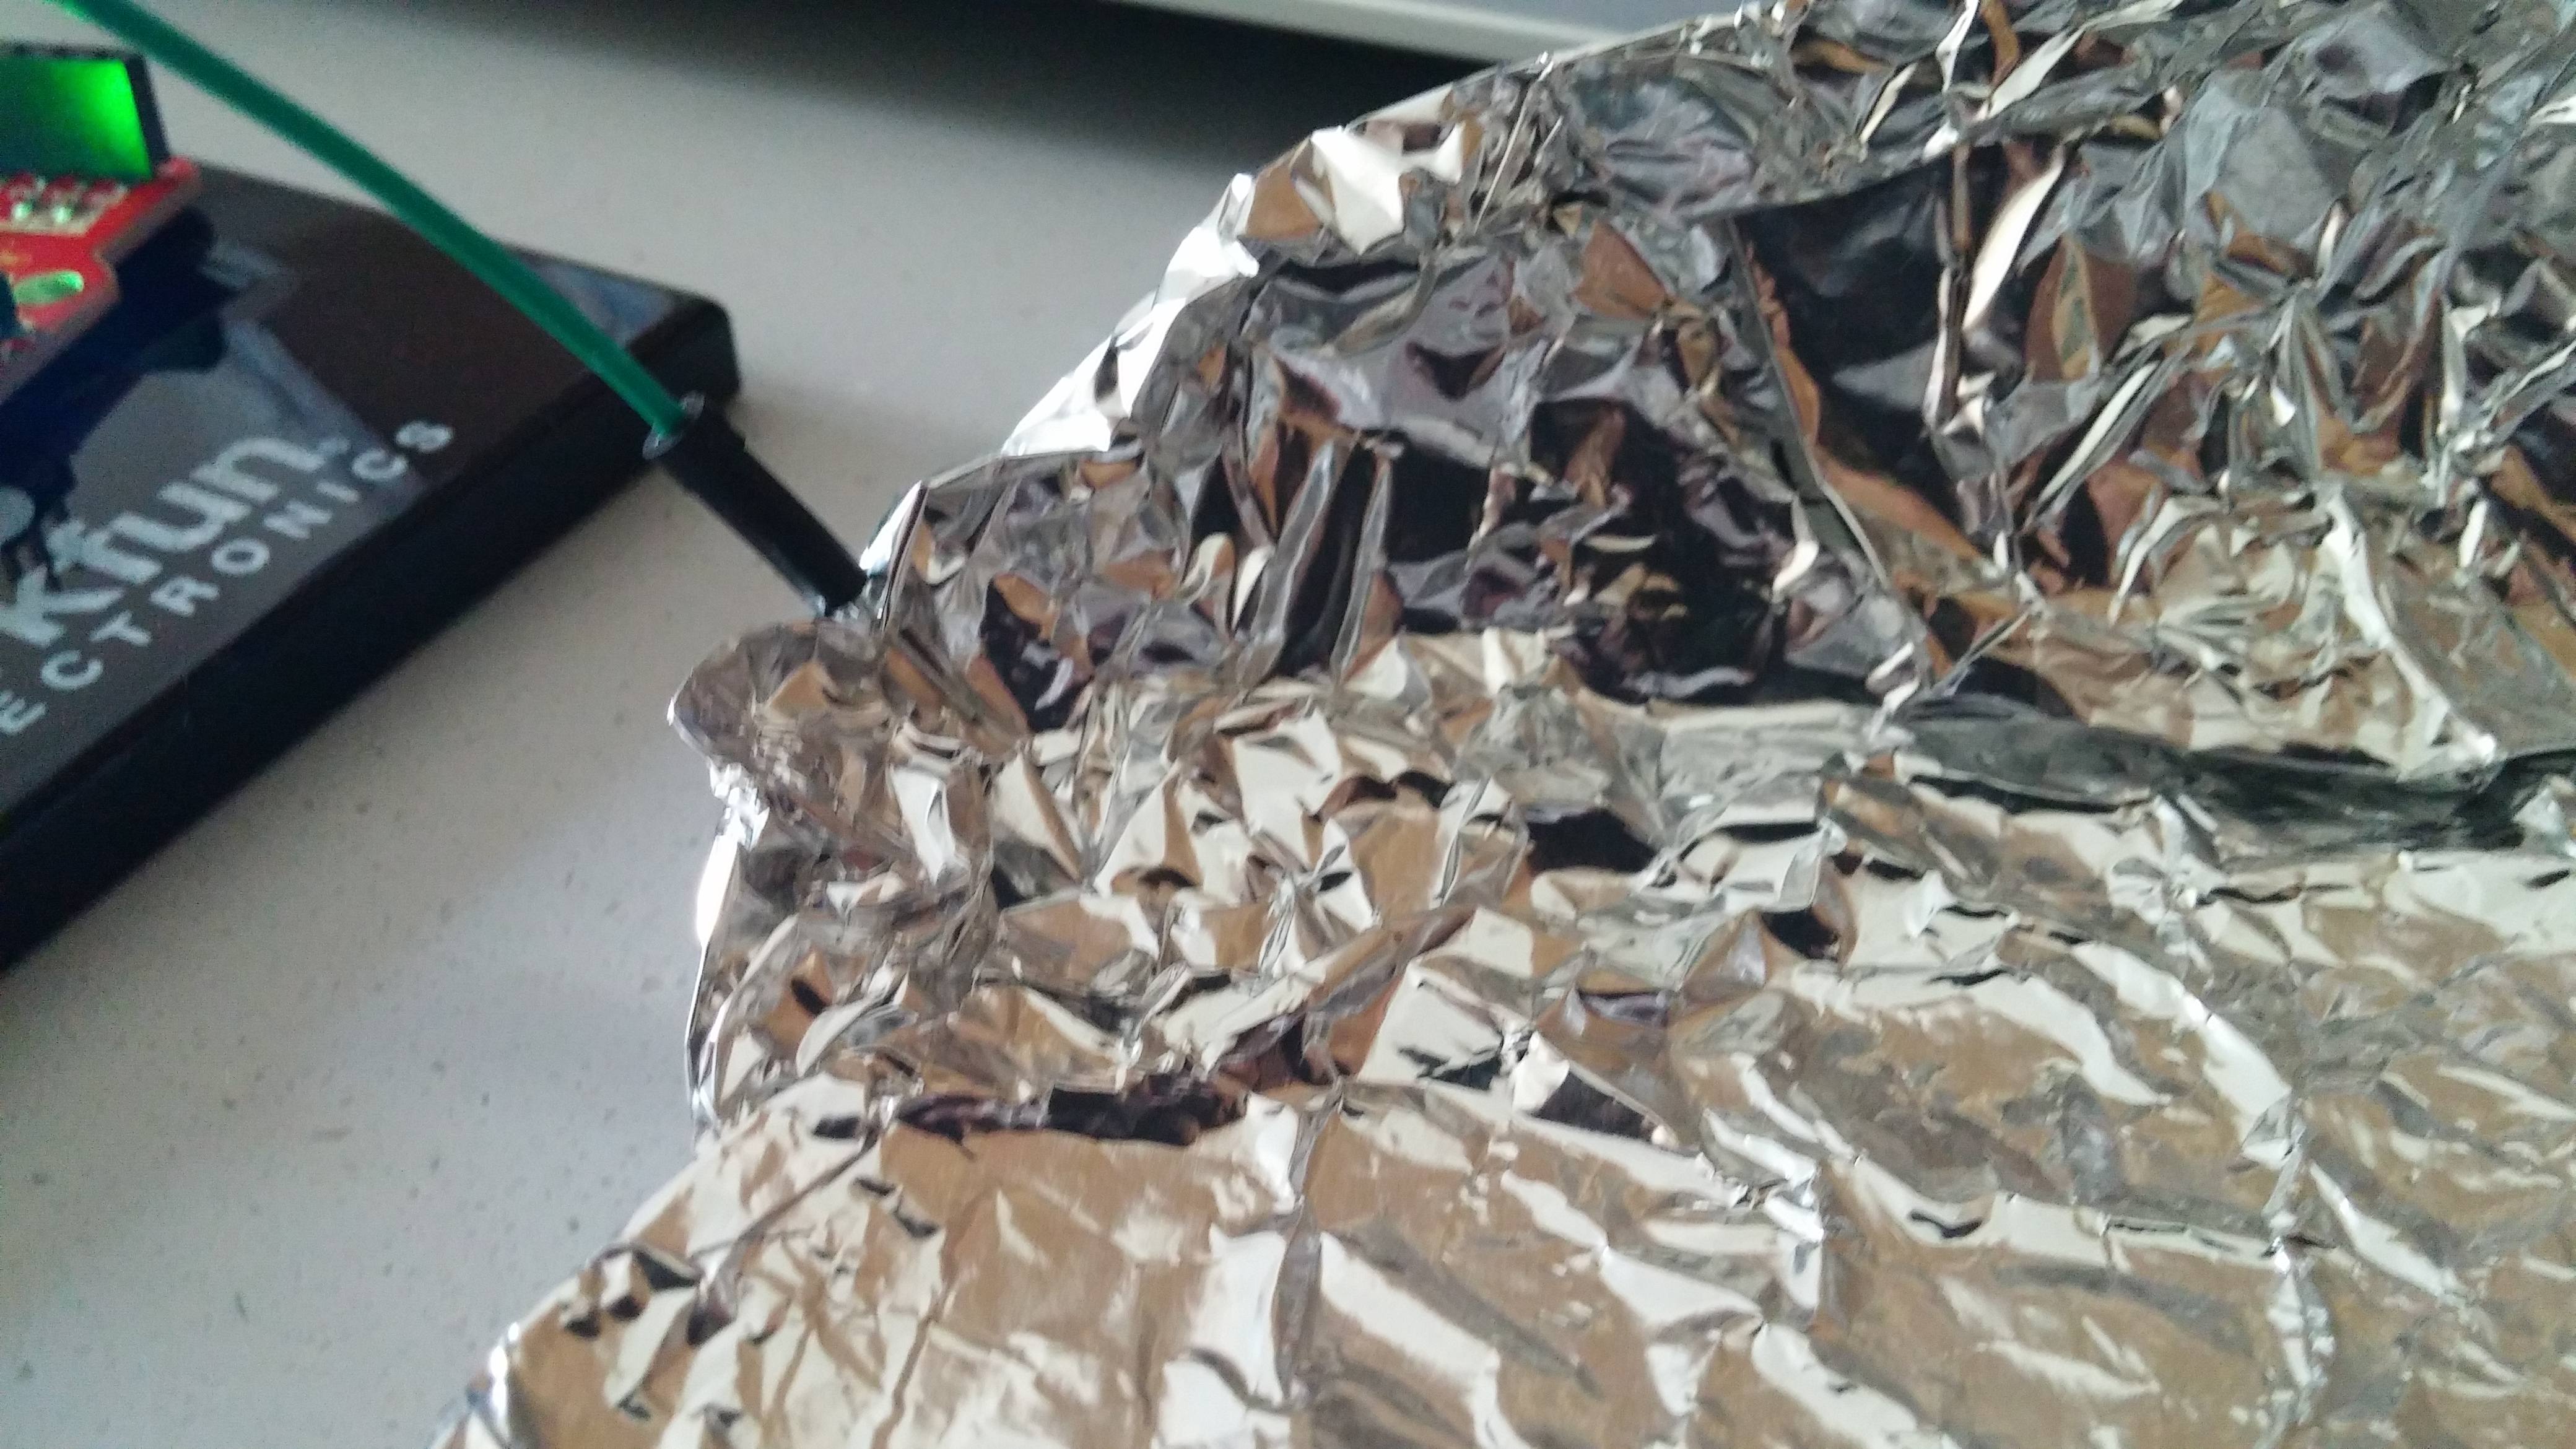
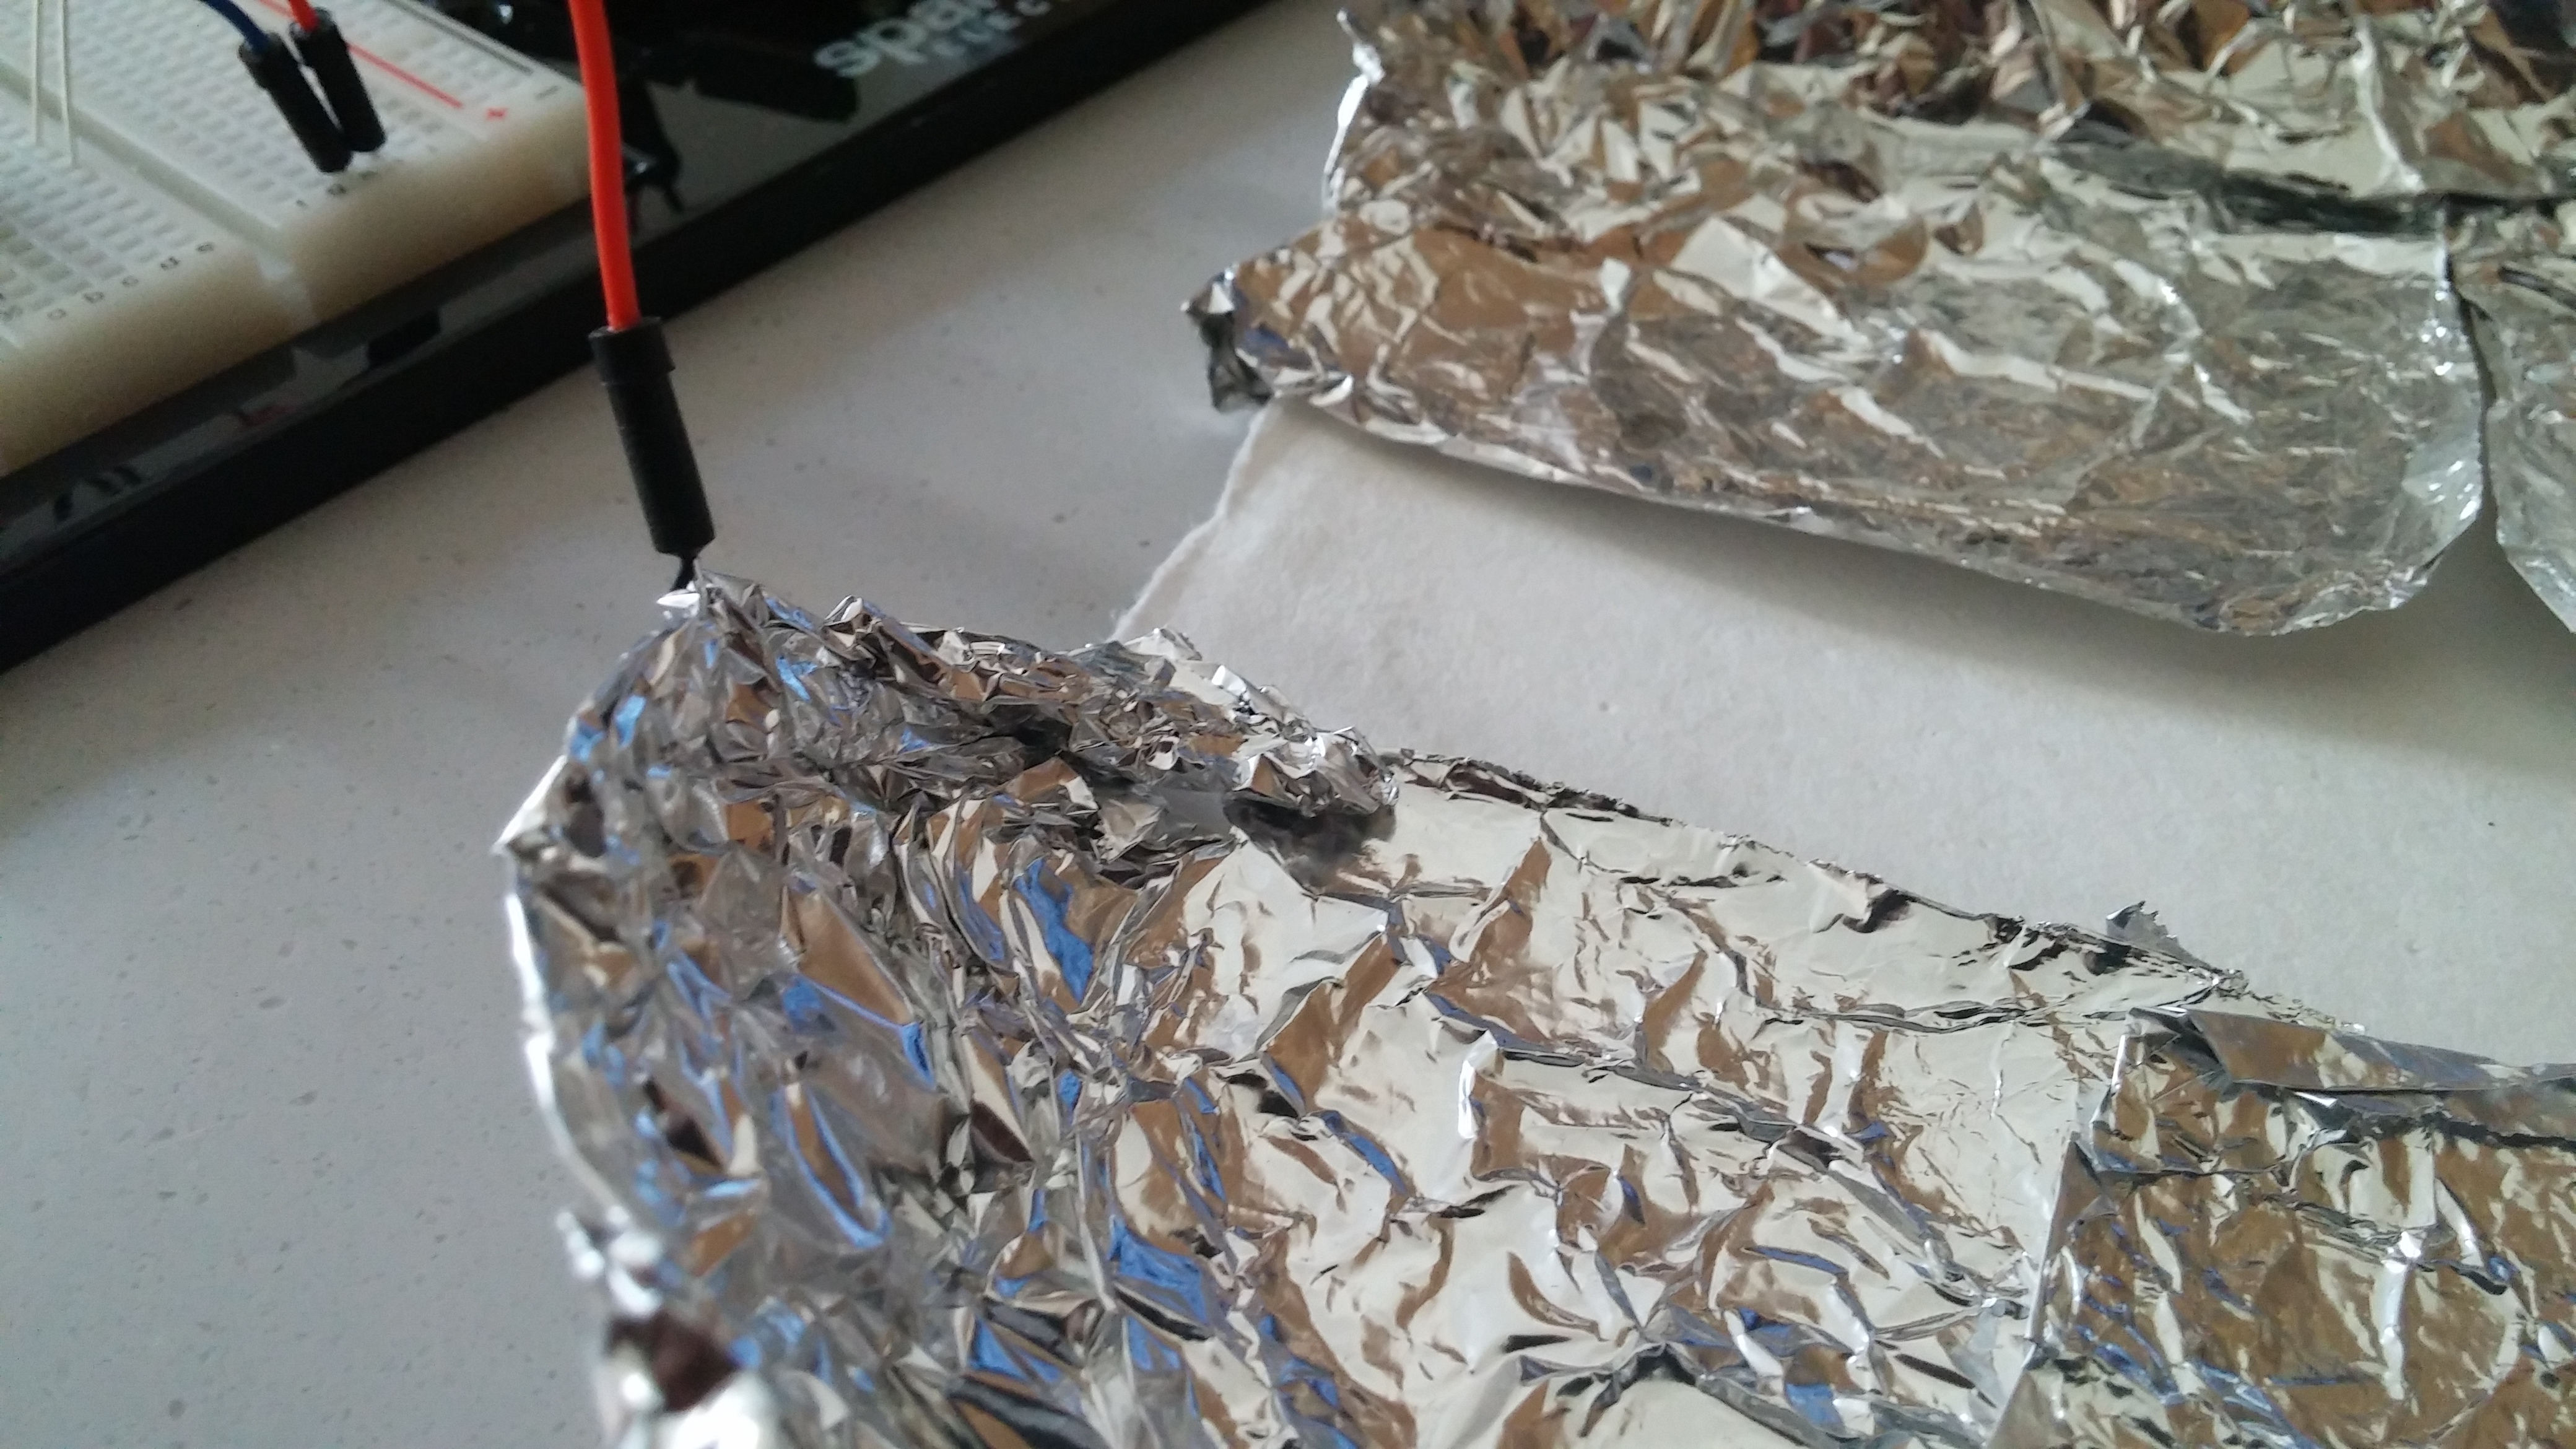
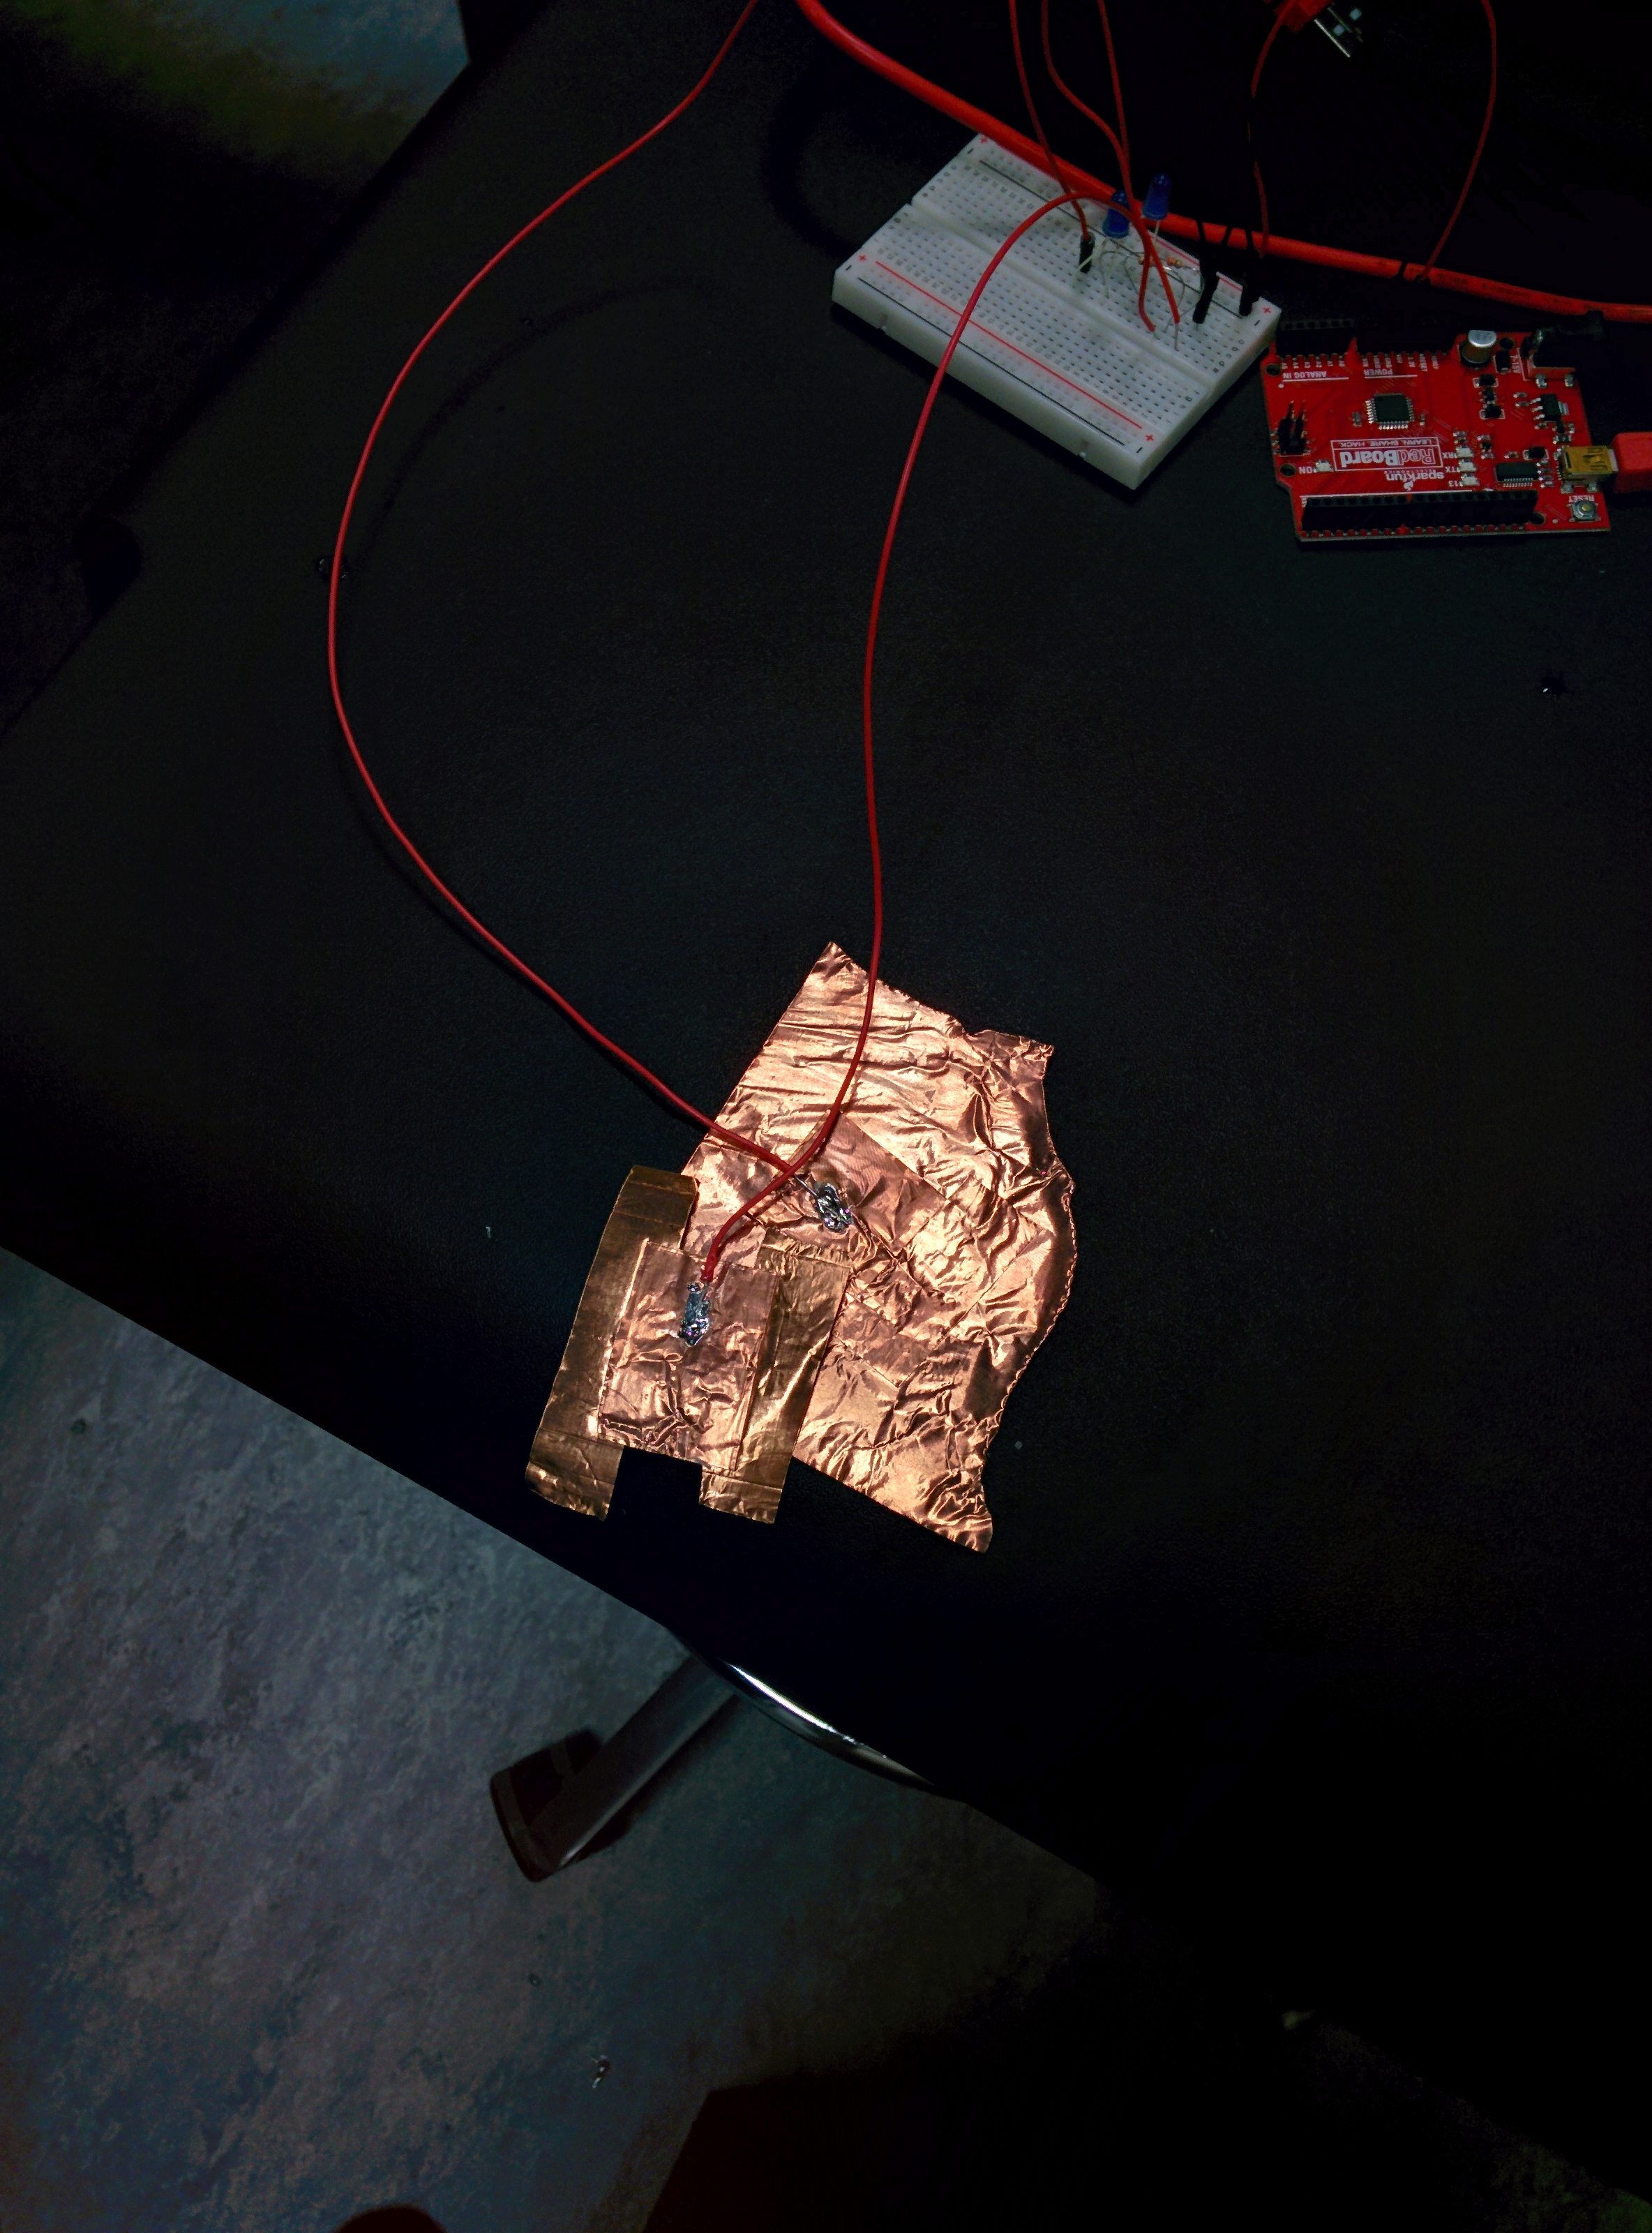
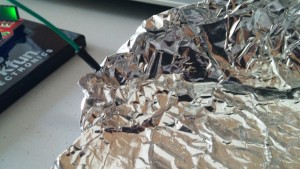
The Aluminum foil was the most versatile conductive material I could find, so it serves my purpose well. I left a gap in between the two aluminum foil halves so we are left with an open circuit that would need the keys (or any other conductive material) to close. The other half has a red wire that connects back to the bread board.

2015-09-06 16.48.39

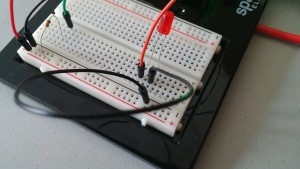
The red wire is hooked up to the same row where the LED is and continues to the black wire that connects to ground, indicating the end of our circuit.

2015-09-06 17.07.35

So all we really need for the Greenies to reach the party are the car keys. Give em the car keys and they get ballistic and immediately power up the LED.

Coin Domino

When I first saw the assignment, I thought about three ways of making a switch that doesn’t require the use of hands:

  1. Ride a bicycle over two metal panels on the ground and press them together.
  2. Make light-weighted, conductive material touch by blowing wind to them.
  3. Flip a coin, make it spin, and when it stopped use it as a conductor between two wires.

I never really tried the first idea primarily because I don’t have a bike. Then it would also be hard trying to find spare, large metal panels. Blowing wind to conductive material seemed more feasible, and I brought my wallet with some coins in it to the lab. I tried with flipping coins and had a lot of fun aiming them at a certain target. But my coins are hardly controllable once they left my hand… oops, does flipping a coin means the use of hand? I realised the third idea doesn’t meet the criteria of the assignment. After some thought, I decided to combine the second and third project by blowing to a Domino set of coins, making them touch to serve as a switch.

So first I set up the Redboard and breadboard, added a red and a yellow LEDs, and cut off two pieces of wires. Then I soldered one end of a wire to a potentiometer and placed them on the breadboard like this:

1.pic


The most difficult part was connecting another wire. I first tried to solder the wire with a coin. However, due to the high melting point of the coin, I couldn’t solder them together tight. Then I tried to solder with another small, light object that I randomly found in the lab. It still didn’t work well.


2.pic3.pic


After spending much time on soldering and not nailing it, I decided to simply go with tapes. I taped the end of the other wire to the first coin in my Domino and arranged all four coins.

6.pic


Finally I experimented a few times blowing wind to the first coin and making all four collapse. They seemed to touch alright, but not always fell to the right place and light up the LEDs. Playing with my coin domino was kind of fun though. Here’s one of the videos I made when the coins did the right job.

Coin Domino

There are definitely many ways of making this coin domino switch look and function better. Adding more coins and rearranging them, refining the connection of wire and coin, as well as using stuff other than the potentiometer could all help.

A Hole Puncher Switch

For this week’s assignment, I made a switch with the help of a hole puncher. The main idea is to use the metal cutting poles that cut the paper after you press the hole puncher. Here’s a link about how a hole puncher works in slow motion.

http://www.trumpf-machines.com/en/solutions/more-knowledge-for-the-best-production/punching-principle.html

Continue reading “A Hole Puncher Switch”

Project Dorothy

My setup is pretty basic: when I click my heels together, the light turns on.

I soldered the ends of two wires to two small pieces of conductible fabric. Those then are taped to the inside heels of my shoes. It worked on the first go, so this was a very smooth project. I am going to fiddle around to see what else I can do since this was fairly easy. Either way, here’s a video showing it work below. The overall circuit is completed on the breadboard, with two longer wires extended out from the power and resister and the light. Once the two wires connect, the switch closes the circuit. The conductible fabric was used in part to make the circuit easier to connect with more surface area, and also because I wanted to practice soldering (it was a messy job because the fabric melted as I was soldering (whoops)).

Bucket activated switch

First of all, the video of my switch working can be found here. Thanks to Mariko for filming the clip. My switch works as follows. A sheet of flexible material is suspended between two level structures. This spanning piece has a wire, soldered to a piece of copper tape fixed to the bottom. Underneath this there is another structure, at a lower level than the two holding the spanning piece, which has another wire/copper combo fixed to it. When the wire on the lower structure and the flexible span meet, they complete the circuit, making the lights turn on. Instead of pressing on the flexible sheet with my body, I instead placed a bucket on top of the spanning sheet and filled it up with water until the sheet flexed enough to complete the circuit. In practice, the two structures that held the spanning sheet were two tables in the IM lab. The third, lower structure was an adjustable height chair, and the spanning piece was a sheet of translucent plastic (covered on both sides with some paper covering) I found at one end of the lab.  Below are a few close-up pictures illustrating different parts of the setup. The first shows me pressing down on the plastic spanning piece, completing the circuit. The second shows the underside of the plastic spanning piece, and the chair mounted part of the circuit. The third shows off my sick nasty soldering skills. The fourth is the circuit diagram for this project I made using this Python module.

IMG_20150904_143023

IMG_20150904_143714

IMG_20150904_152121

IM_cicuit