
For my stupid pet trick, I made a woodpecker that pecks the phones. The concept is that the woodpecker does not like the phones because they make people anti-social. Here is the video of my product:
Category: [Old] Your Work
Randomly blinking lights
As always, the video of my project working can be found here. My project works as follows. A user is asked to put a pulse sensor on her finger. In her other hand, she presses a button, which turns on a minimum of one light, and a maximum of four lights. Above the lights on the panel are four switches. The user is not prompted to interact with these switches, but I’ve found, at least anecdotally, that he or she almost always will. These switches load on to a master probability distribution which determines how many lights will turn on. Each switch is associated with a function that takes some parameter and the user’s current pulse rate as arguments. The master probability function is the logistic function. The switches influence the logistic functions ‘k’ parameter, changing the shape of the function. Note that as pulse increases, the chance of turning on all four lights gets increasingly close to zero. Each of the lights is turned on once a preset threshold is met. For example, if the logistic function, evaluated at some randomly chosen point was above 0.47, then the first light would turn on. The thresholds are on a bit of a log scale, such that the 1st threshold is around 0.5, the second is around 0.75, the third is around 0.9, and the fourth is around 0.99.
Upon using my project, it seems clear that at least some of the switches influence how the lights turn on, but its unclear how the switches are related. Instead of directly adding terms to the master probability distribution, the switches influence the parameter that controls the shape of the master probability distribution. This means that the effect of the switches isn’t felt as strongly as directly adding terms. Luckily for me, the logistic function and the functions associated with each switch are relatively stable. This means that a small change in input results in a correspondingly small change in output.
Troubleshooting Arduino code is a little annoying for me because it’s more difficult to see what’s going on incrementally compared to Python. As such, I prototyped my master probability function, along with all the functions that load onto it with an iPython notebook (I guess it’s called Jupyter now). I found that the best way to select appropriate parameters for the loading functions was by using iPython’s interactive plotting ability. Once I had a good idea what these were, I hard coded them in my Arduino code.
The Pointless Machine!
Stupid Pet Trick. What is more stupid that a machine that is completely pointless? And what is more pointless than a Rube Goldberg machine designed solely to unplug itself?
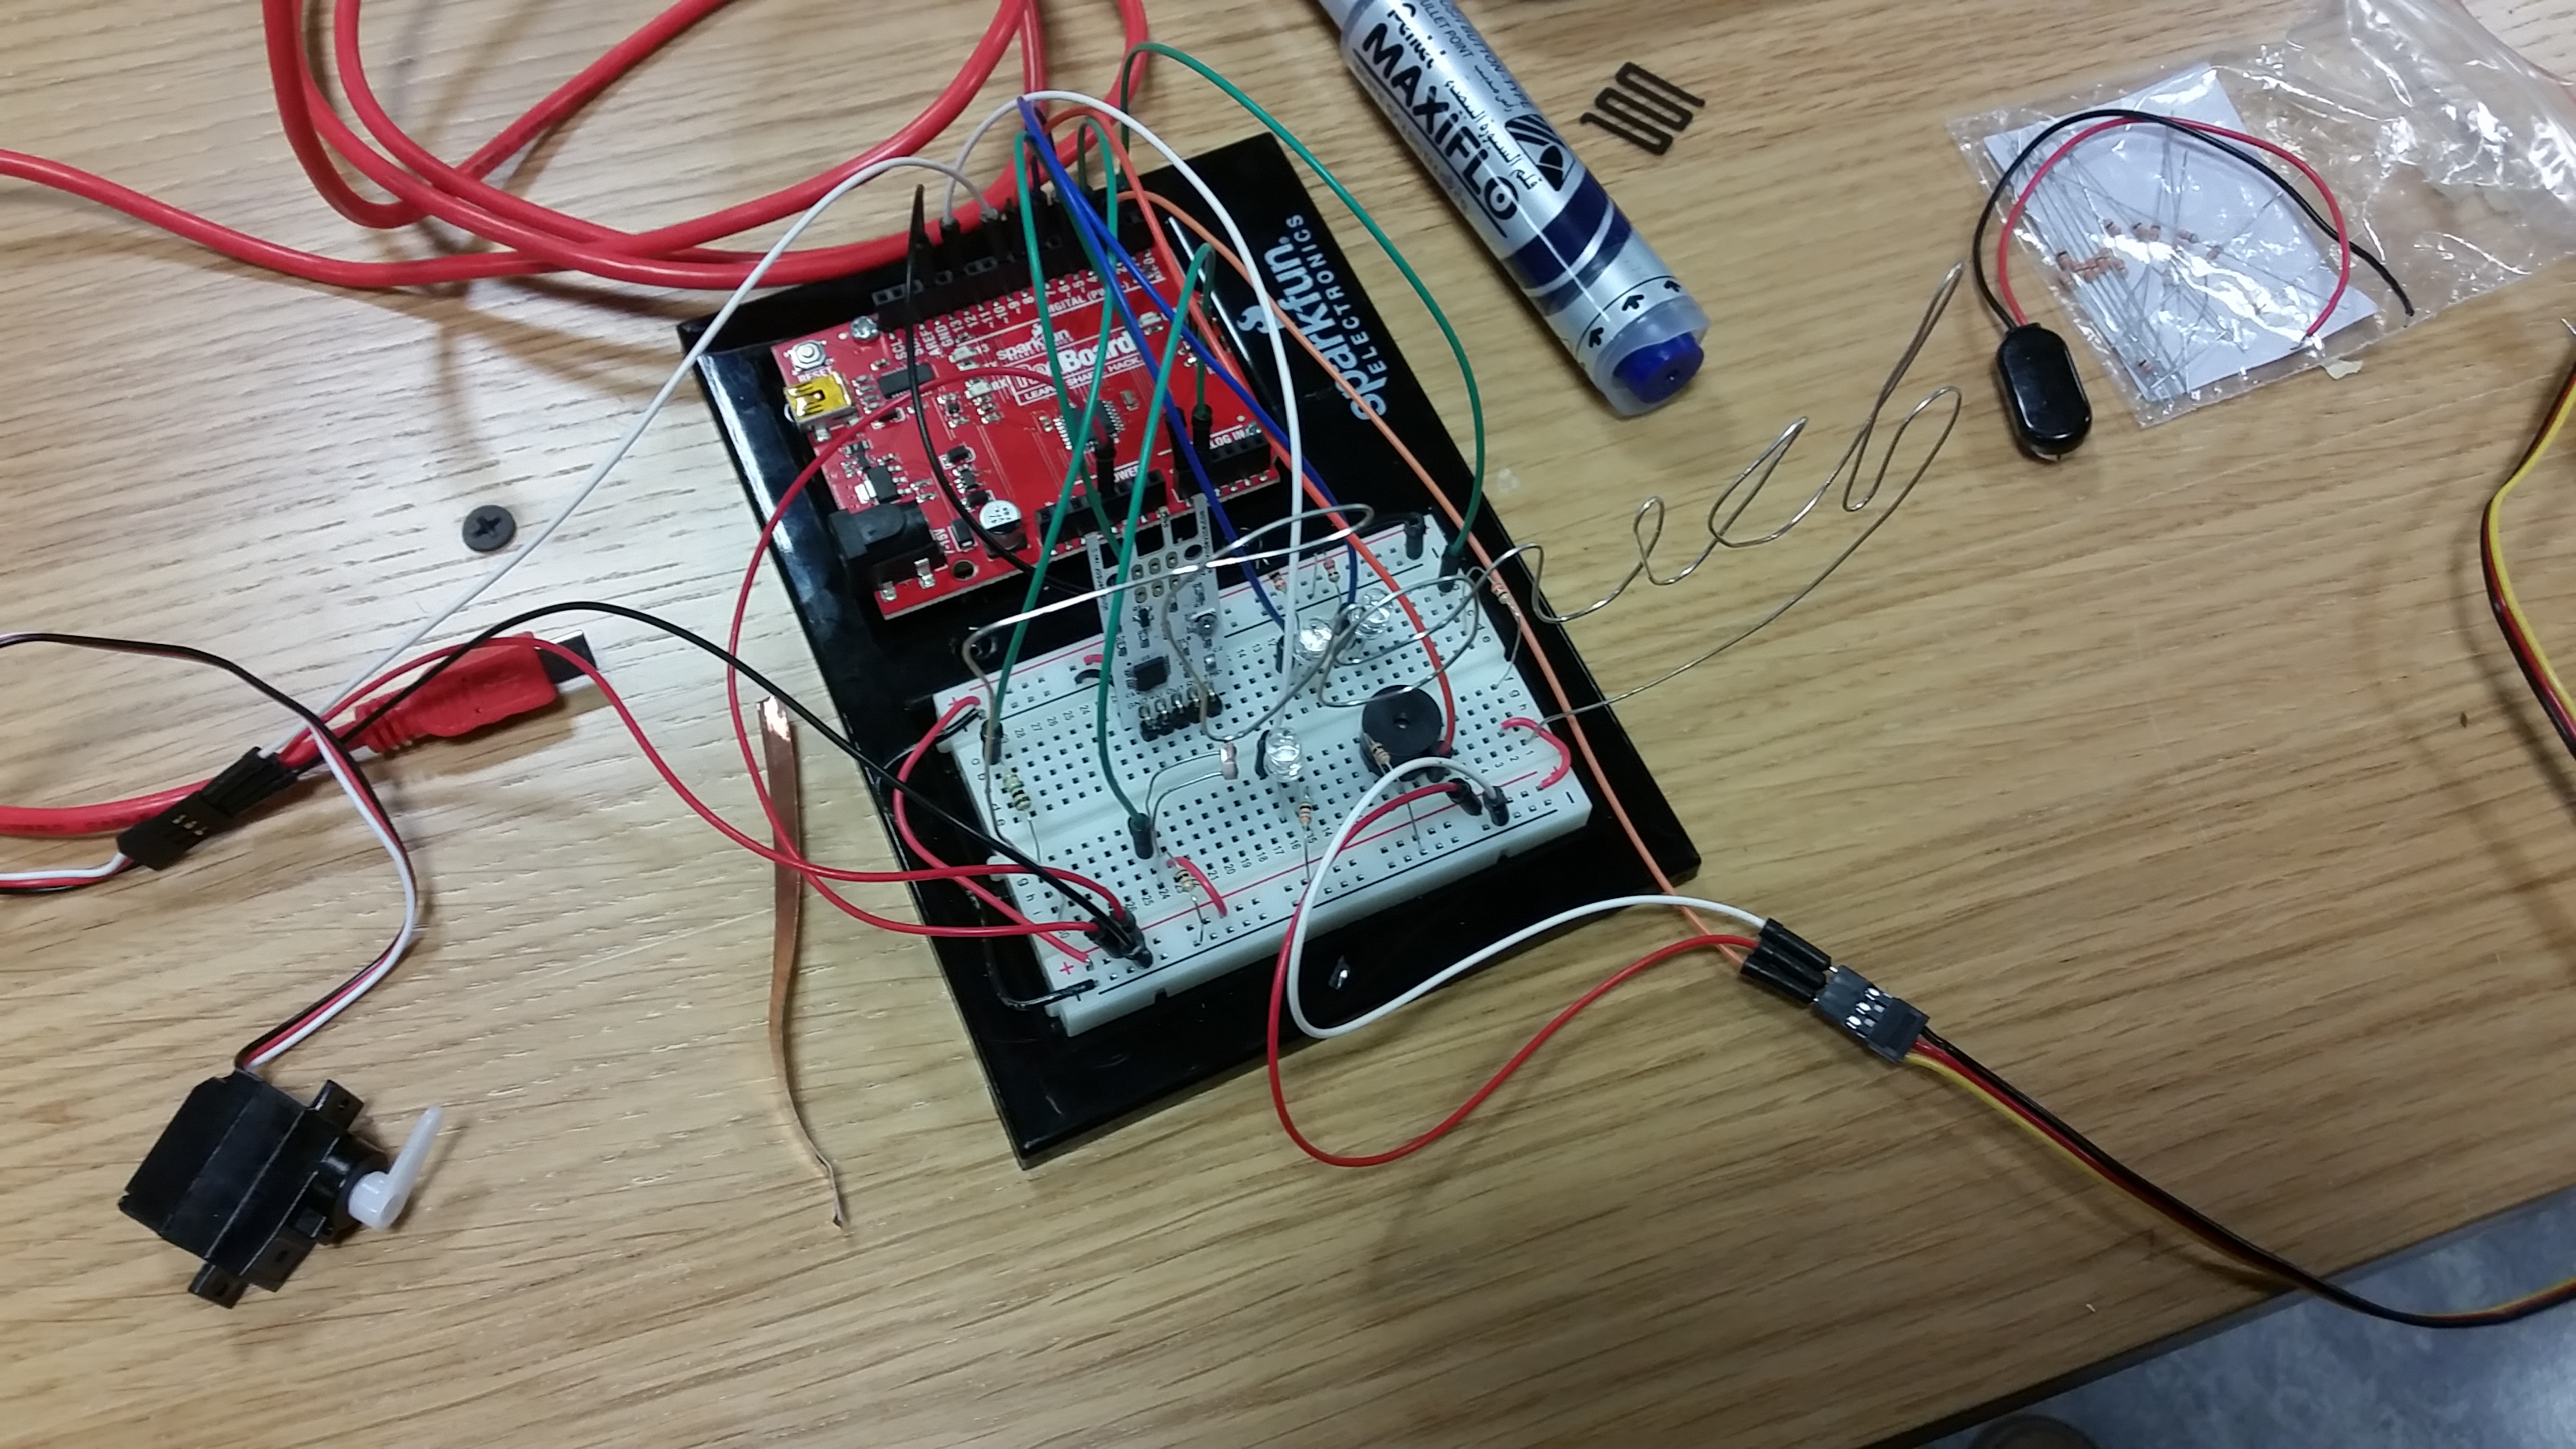
The first step was to choose the components of the chain reaction and test them:
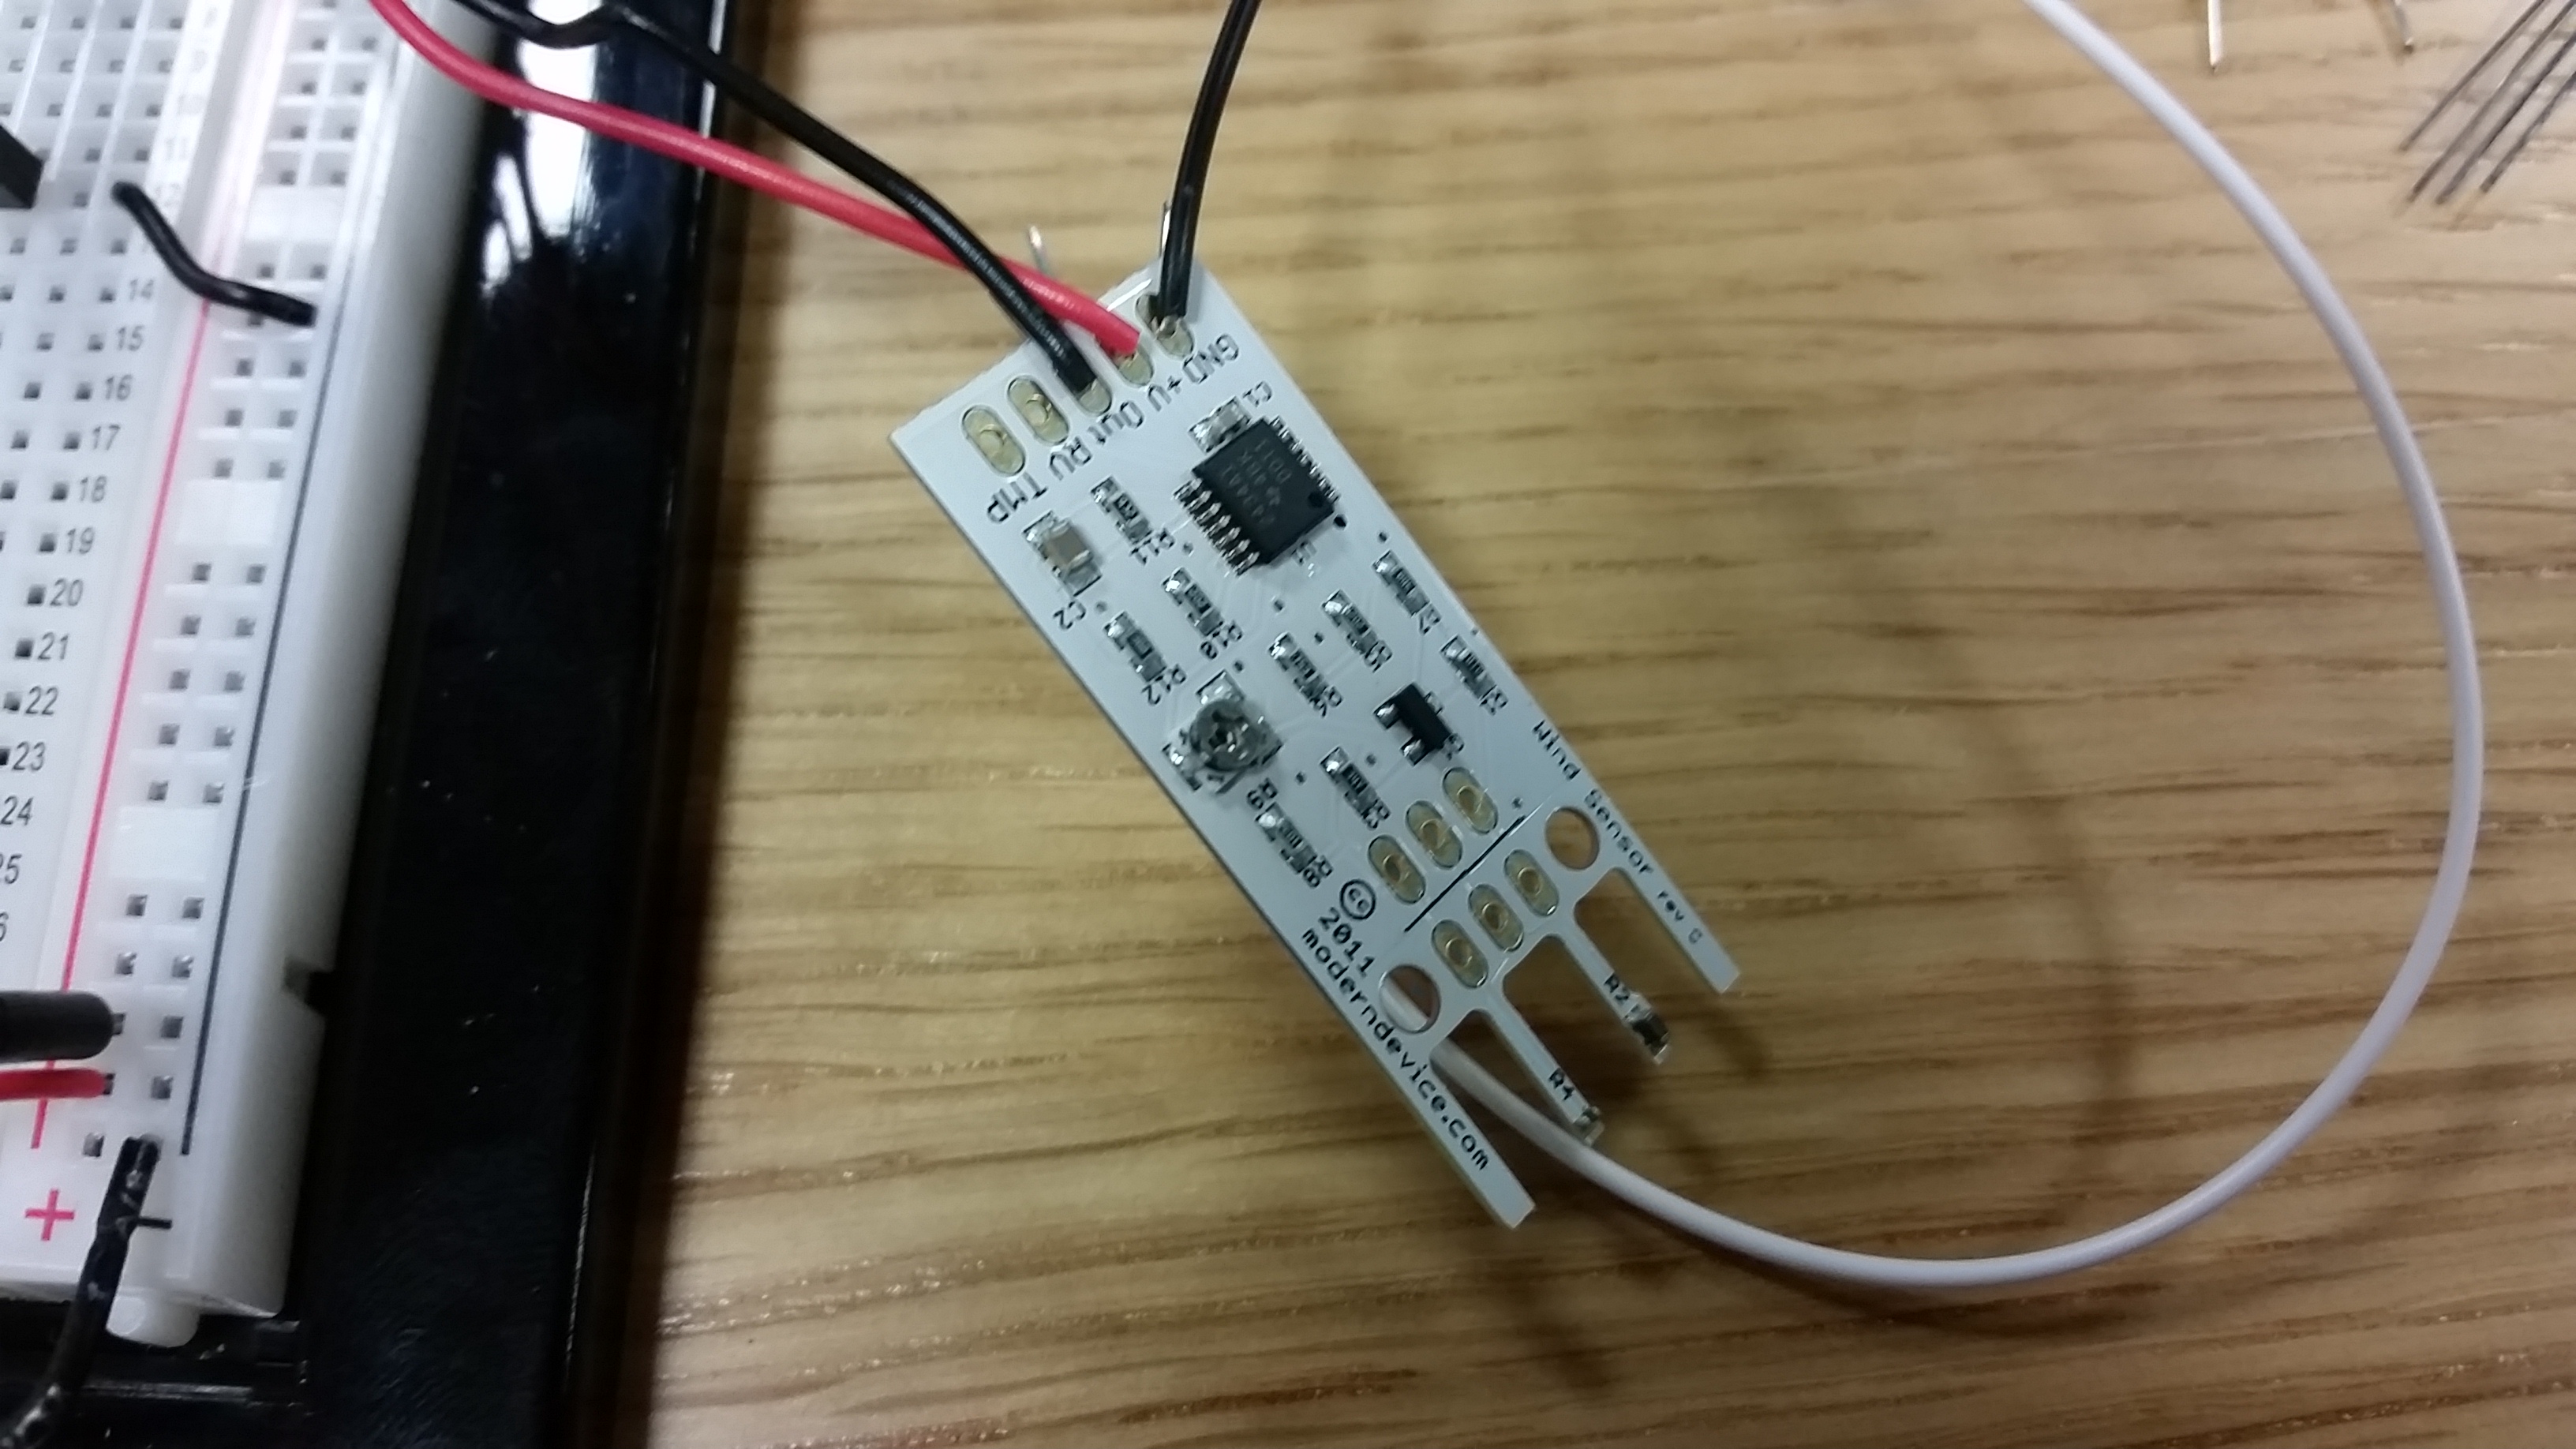
- Wind sensor: That little rectangle thing uses
magicphysics to measure the flow of wind around it. I decided to have a fan blow into the sensor at some point, so I tested the sensor to learn how to use it. The sensor needs three basic connections: power, ground and output. It doesn’t need resistors as it already has several built in. Just plug the output of the sensor into an analog input pin and voilà! I then added an ultra bright LED wuith a PWM output to test.

2. Photocell – I also chose to have light shone on to a photocell as a stem in the machine. I was considering covering up the photocell with a little box to block ambient light, but then I figured I might as well try calibrating the photocell taking ambient light into consideration. Turns out callibration is enough for the sensor to discern when an ultra-bright LED shines next to it, even with ambient light.

3. Capacitive sensor – Another new toy was the capacitive sensor. Using the example code, I tried my circuit to make sure it worked. Doing so I learned that the sensor area of the circuit should be between the fat resistor and the output pin. Due to the fat resistor gobbling up so much of the voltage, touching the circuit between the resistor and the sensor pin doesn’t really work. After that test, I connected a servo motor and wrote some code to control it with the capacitive sensor. It was great.
4. The final servo – Finally, I had to make sure I could actually unplug my creation with a servo. Turns out that the small servo included in our kits doesn’t have enough torque. Luckily, the bigger servos we have in the lab are powerful enough.
After testing, I just had to put everything together… and write aaaall the code, step by step. Just for fun, I used arrays to code some melodies to be played at different parts of the process (the switch() case statement helped out there). Most of the algorithm as handled by several while() loops. AND IT WORKED!
And then came part two of the project… actually building the thing. This time around, hradware was much more of a hassle than code. I brilliantly decided to build my Pointless Machine using 3D printed and laser cut pieces. Whuch was great. Except for the blood, sweat and tears that resulted from actually building the thing. And soldering. And then the capacitive sensor stopped working for no reason. And that was really infurating, which made me wish I had the foresight time to do a proper physical debug to sort that out.
But thankfully it worked in the end. Somehow. I have no clue how I fixed it. c:
BattleBot
BattleBot, my Stupid Pet Trick!
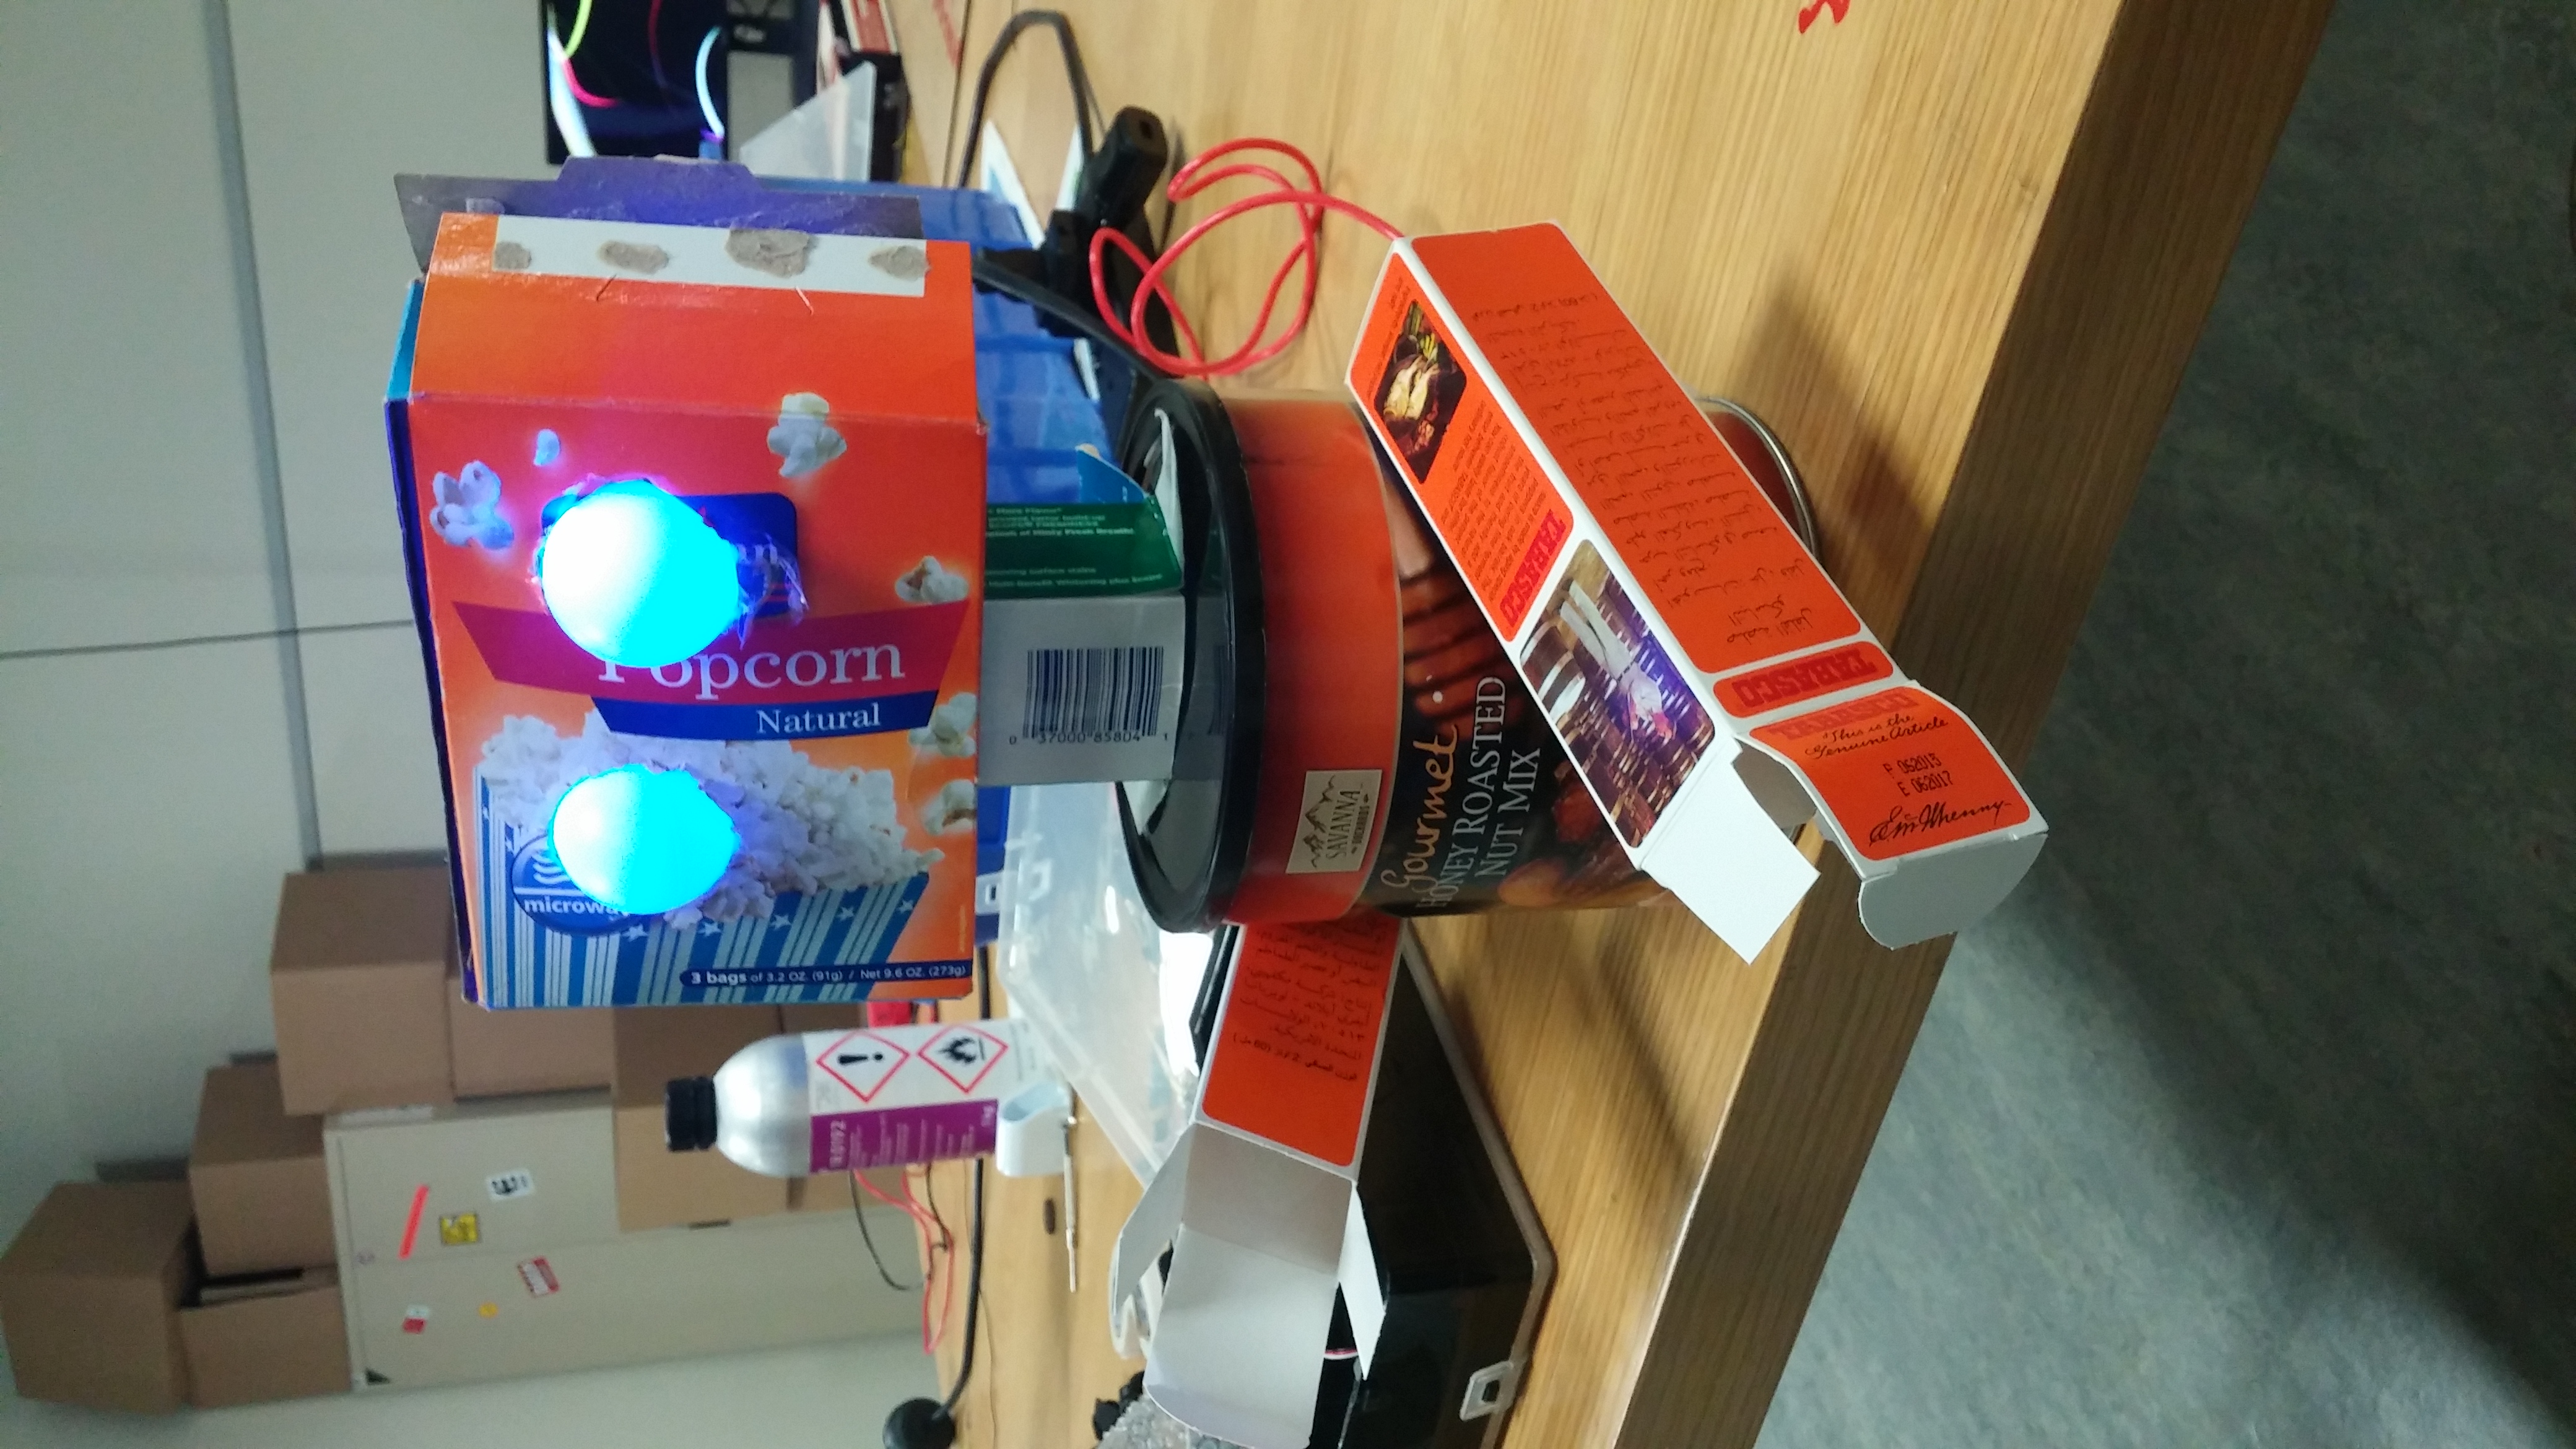 Destroyer of all, unless you have opposable thumbs and are stronger than an average cardboard box.
Paintboard
I started the stupid patrick with something rather different than what I actually made. I thought about using pulse sensor but ended up experimenting and using the conductive paint instead. Continue reading “Paintboard”
Listening to butterflies’ sound
I combined Arduino and paper arts together in this project. You can see four paper butterflies connected to four different -length wires are fixed by nails. When you use your finger to touch the heads of the nails on butterflies, the speaker connected to the work will make sound. When you touch different butterflies, the different sound you will get. You can also play on these different sounds to make your own butterfly song.
You can see the video here:Butterflies’ sound
Stupid Pet Trick
For the Stupid Pet Trick, I made an electric toothbrush whose movements are controlled by a touch sensor.
Martino
Martino is a robot that detects the pressure applied to his hand and outputs a response to yes or no questions by the user. I wanted to create a sort of character out of the Magic 8 ball idea, where the user interacts with this character to get a response. The pressure applied changes the output of the message too, so the harder someone presses, the more likely they’re going to get a negative response.
I actually used Martino all weekend with different friend groups, and we’d program different games and things and outputs with new sensors as well as randomized messages. The coding for this below is the simple Magic 8 ball trick with 11 responses based on the pressure of holding his hand. The coding itself is so basic that it can be easily manipulated for a much wider variety of cases, and I focused on keeping everything on the breadboard because it allows for a wider variety of opportunities with new analog inputs and changing the messages. By limiting the size, it was easier for me to bring Martino and change his functions in different scenarios.
I’m still developing the idea, because the soft potentiometer is unstable in its output ranges. I remapped the ranges to between 0 – 250, so the user is more likely to get a randomized response. I coded 11 messages in between increments of 25 in the range. Right now I’m also adding trials, so that after several trials, the answers become less informative if the user asks too many questions.
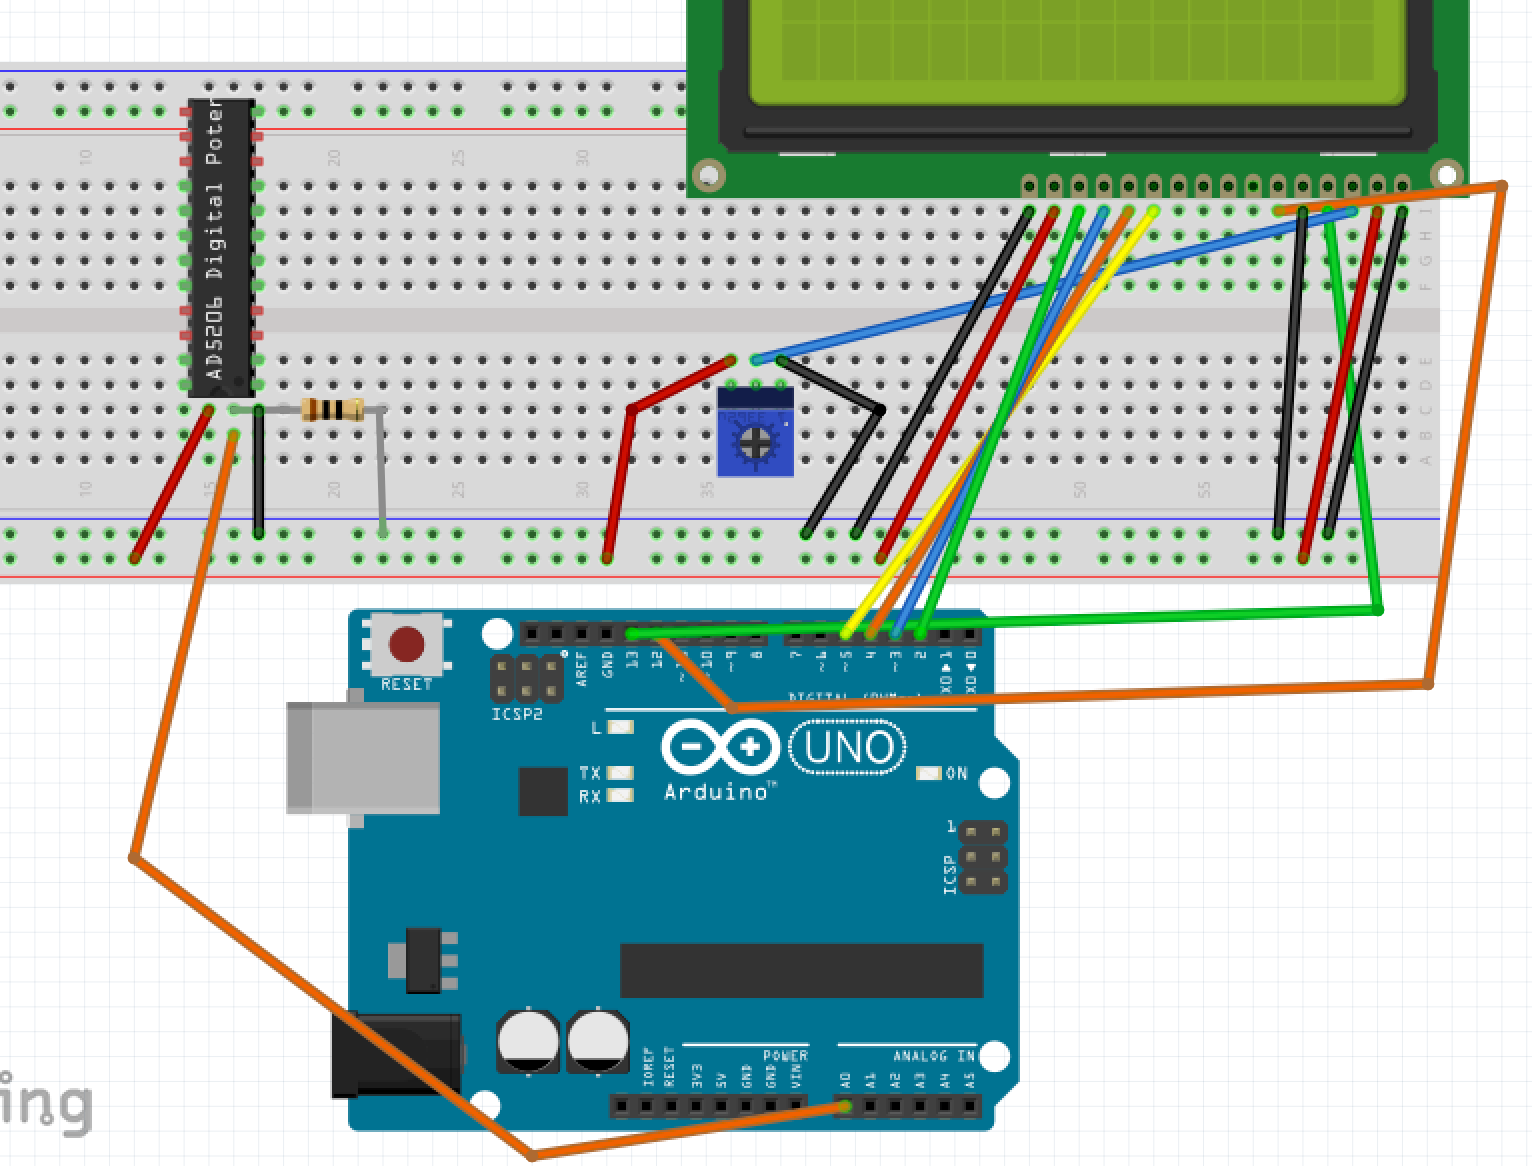
I added a potentiometer to adjust the brightness of the screen, and added the Liquid Crystal library into the coding to print out the messages. There’s a gap of 24 spaces in my messages in order for the message to print on both lines. I also have the delays to give the user time to ask the question before the answer is given. Below is a quick video, where I change the pressure when I’m holding Martino’s hand to change the output, and also the additional coding.
#include <LiquidCrystal.h>

LiquidCrystal lcd(12,11,5,4,3,2);
const int potentiometer = 0;
void setup() {
  // put your setup code here, to run once:
Serial.begin(9600);
lcd.begin(16,2);
}

void loop() {
  // put your main code here, to run repeatedly:
int pressure = analogRead(potentiometer);
pressure = map(pressure,0,1023,0,300);
delay(2000);
Serial.println(pressure);
delay(1000);

if (pressure < 25){
  lcd.print("Yes, obviously.");
  delay(25000);
  lcd.noDisplay();
}
if (pressure > 25 && pressure <50){
  lcd.print("Why do you wanna                         know?");
  delay(25000);
  lcd.noDisplay();
}
if (pressure > 50 && pressure <75){
  lcd.print("Call your mother                         and ask her.");
  delay(25000);
  lcd.noDisplay();
}
if (pressure > 75 && pressure <100){
  lcd.print("*shrugs*");
  delay(25000);
  lcd.noDisplay();
}
if (pressure > 100 && pressure < 125){
  lcd.print("It's worth a                            shot.");
  delay(25000);
  lcd.noDisplay();
}
if (pressure > 125 && pressure <150){
  lcd.print("#don'tcountonit");
  delay(25000);
  lcd.noDisplay();
}
if (pressure > 150 && pressure <175){
  lcd.print("Take a walk and                          try again");
  delay(25000);
  lcd.noDisplay();
}
if (pressure > 175 && pressure <200){
  lcd.print("Probably no...                           yeah no.");
  delay(25000);
  lcd.noDisplay();
}
if (pressure >200 && pressure <225){
  lcd.print("You ask dumb                            questions.");
  delay(25000);
  lcd.noDisplay();
}
if (pressure > 225 && pressure <250){
  lcd.print("You don't wanna                         know my answer.");
  delay(25000);
  lcd.noDisplay();
}
if (pressure > 250){
  lcd.print("...NO. Why would                        you even ask?");
  delay(25000);
  lcd.noDisplay();
}
}
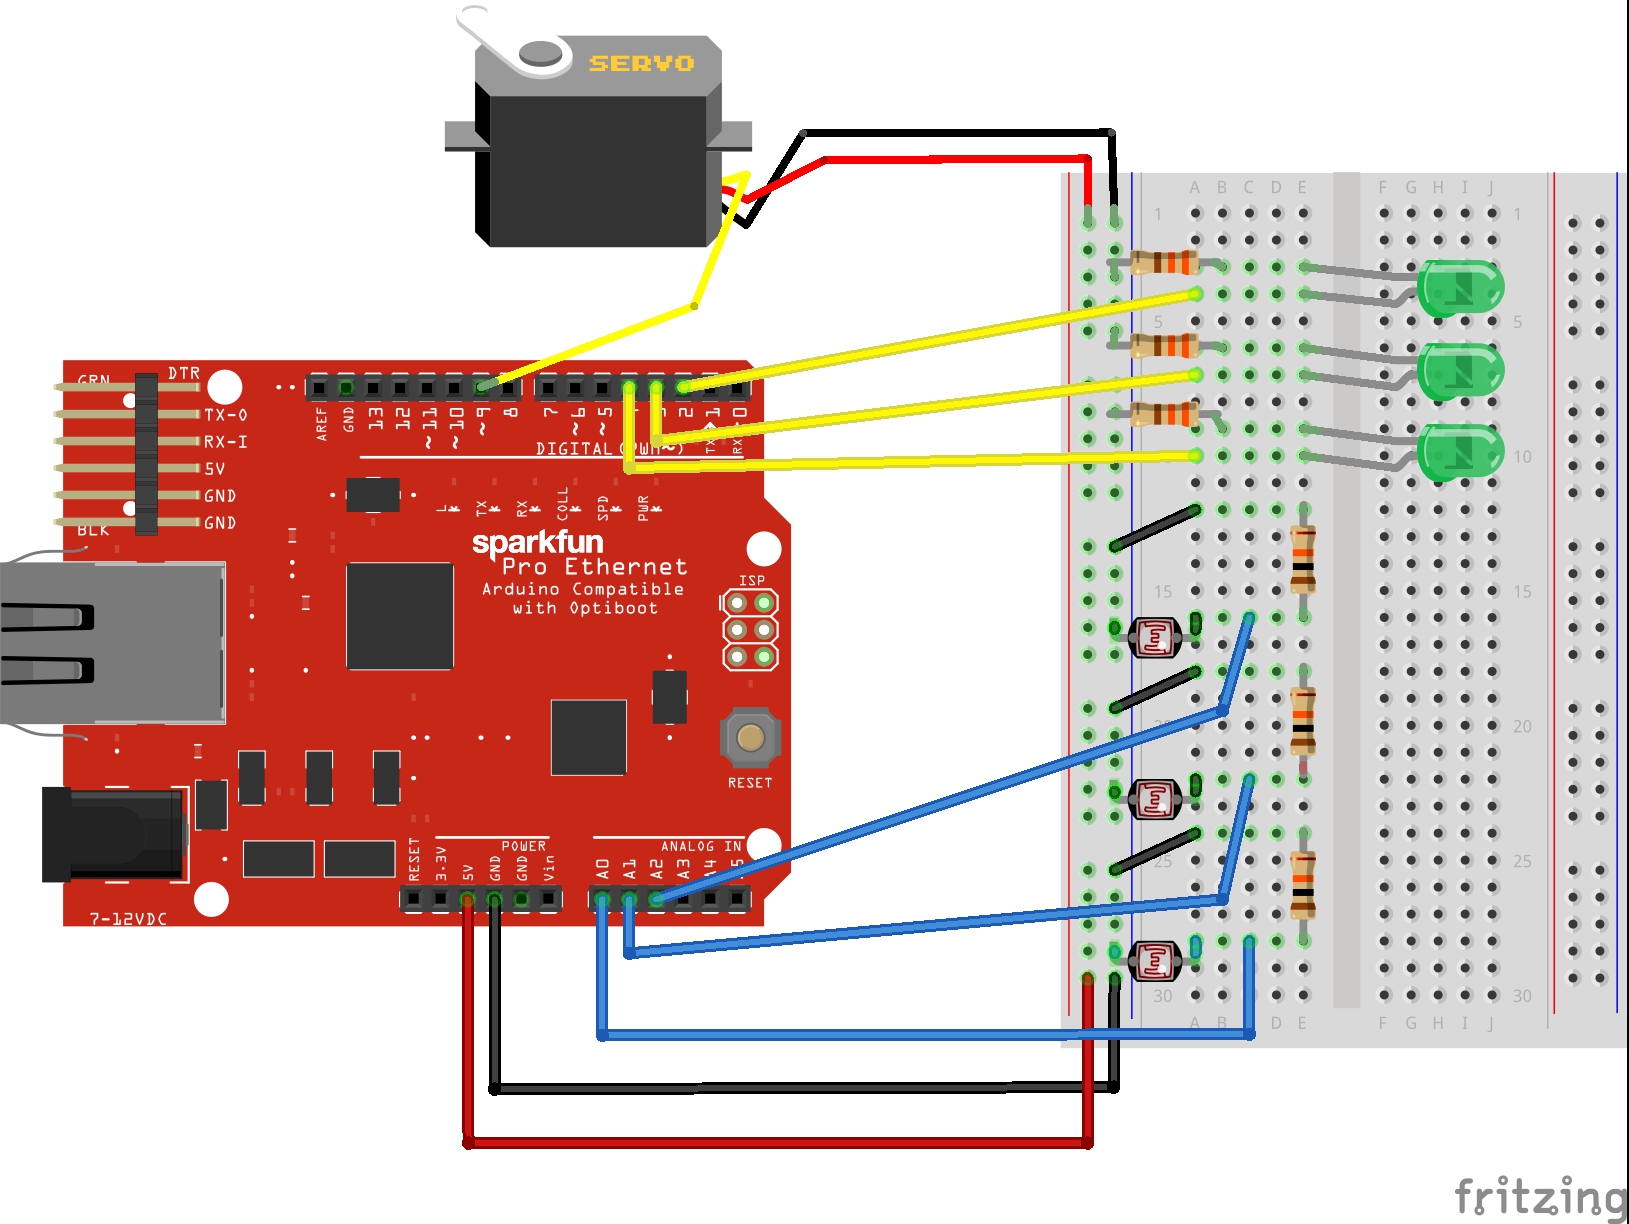
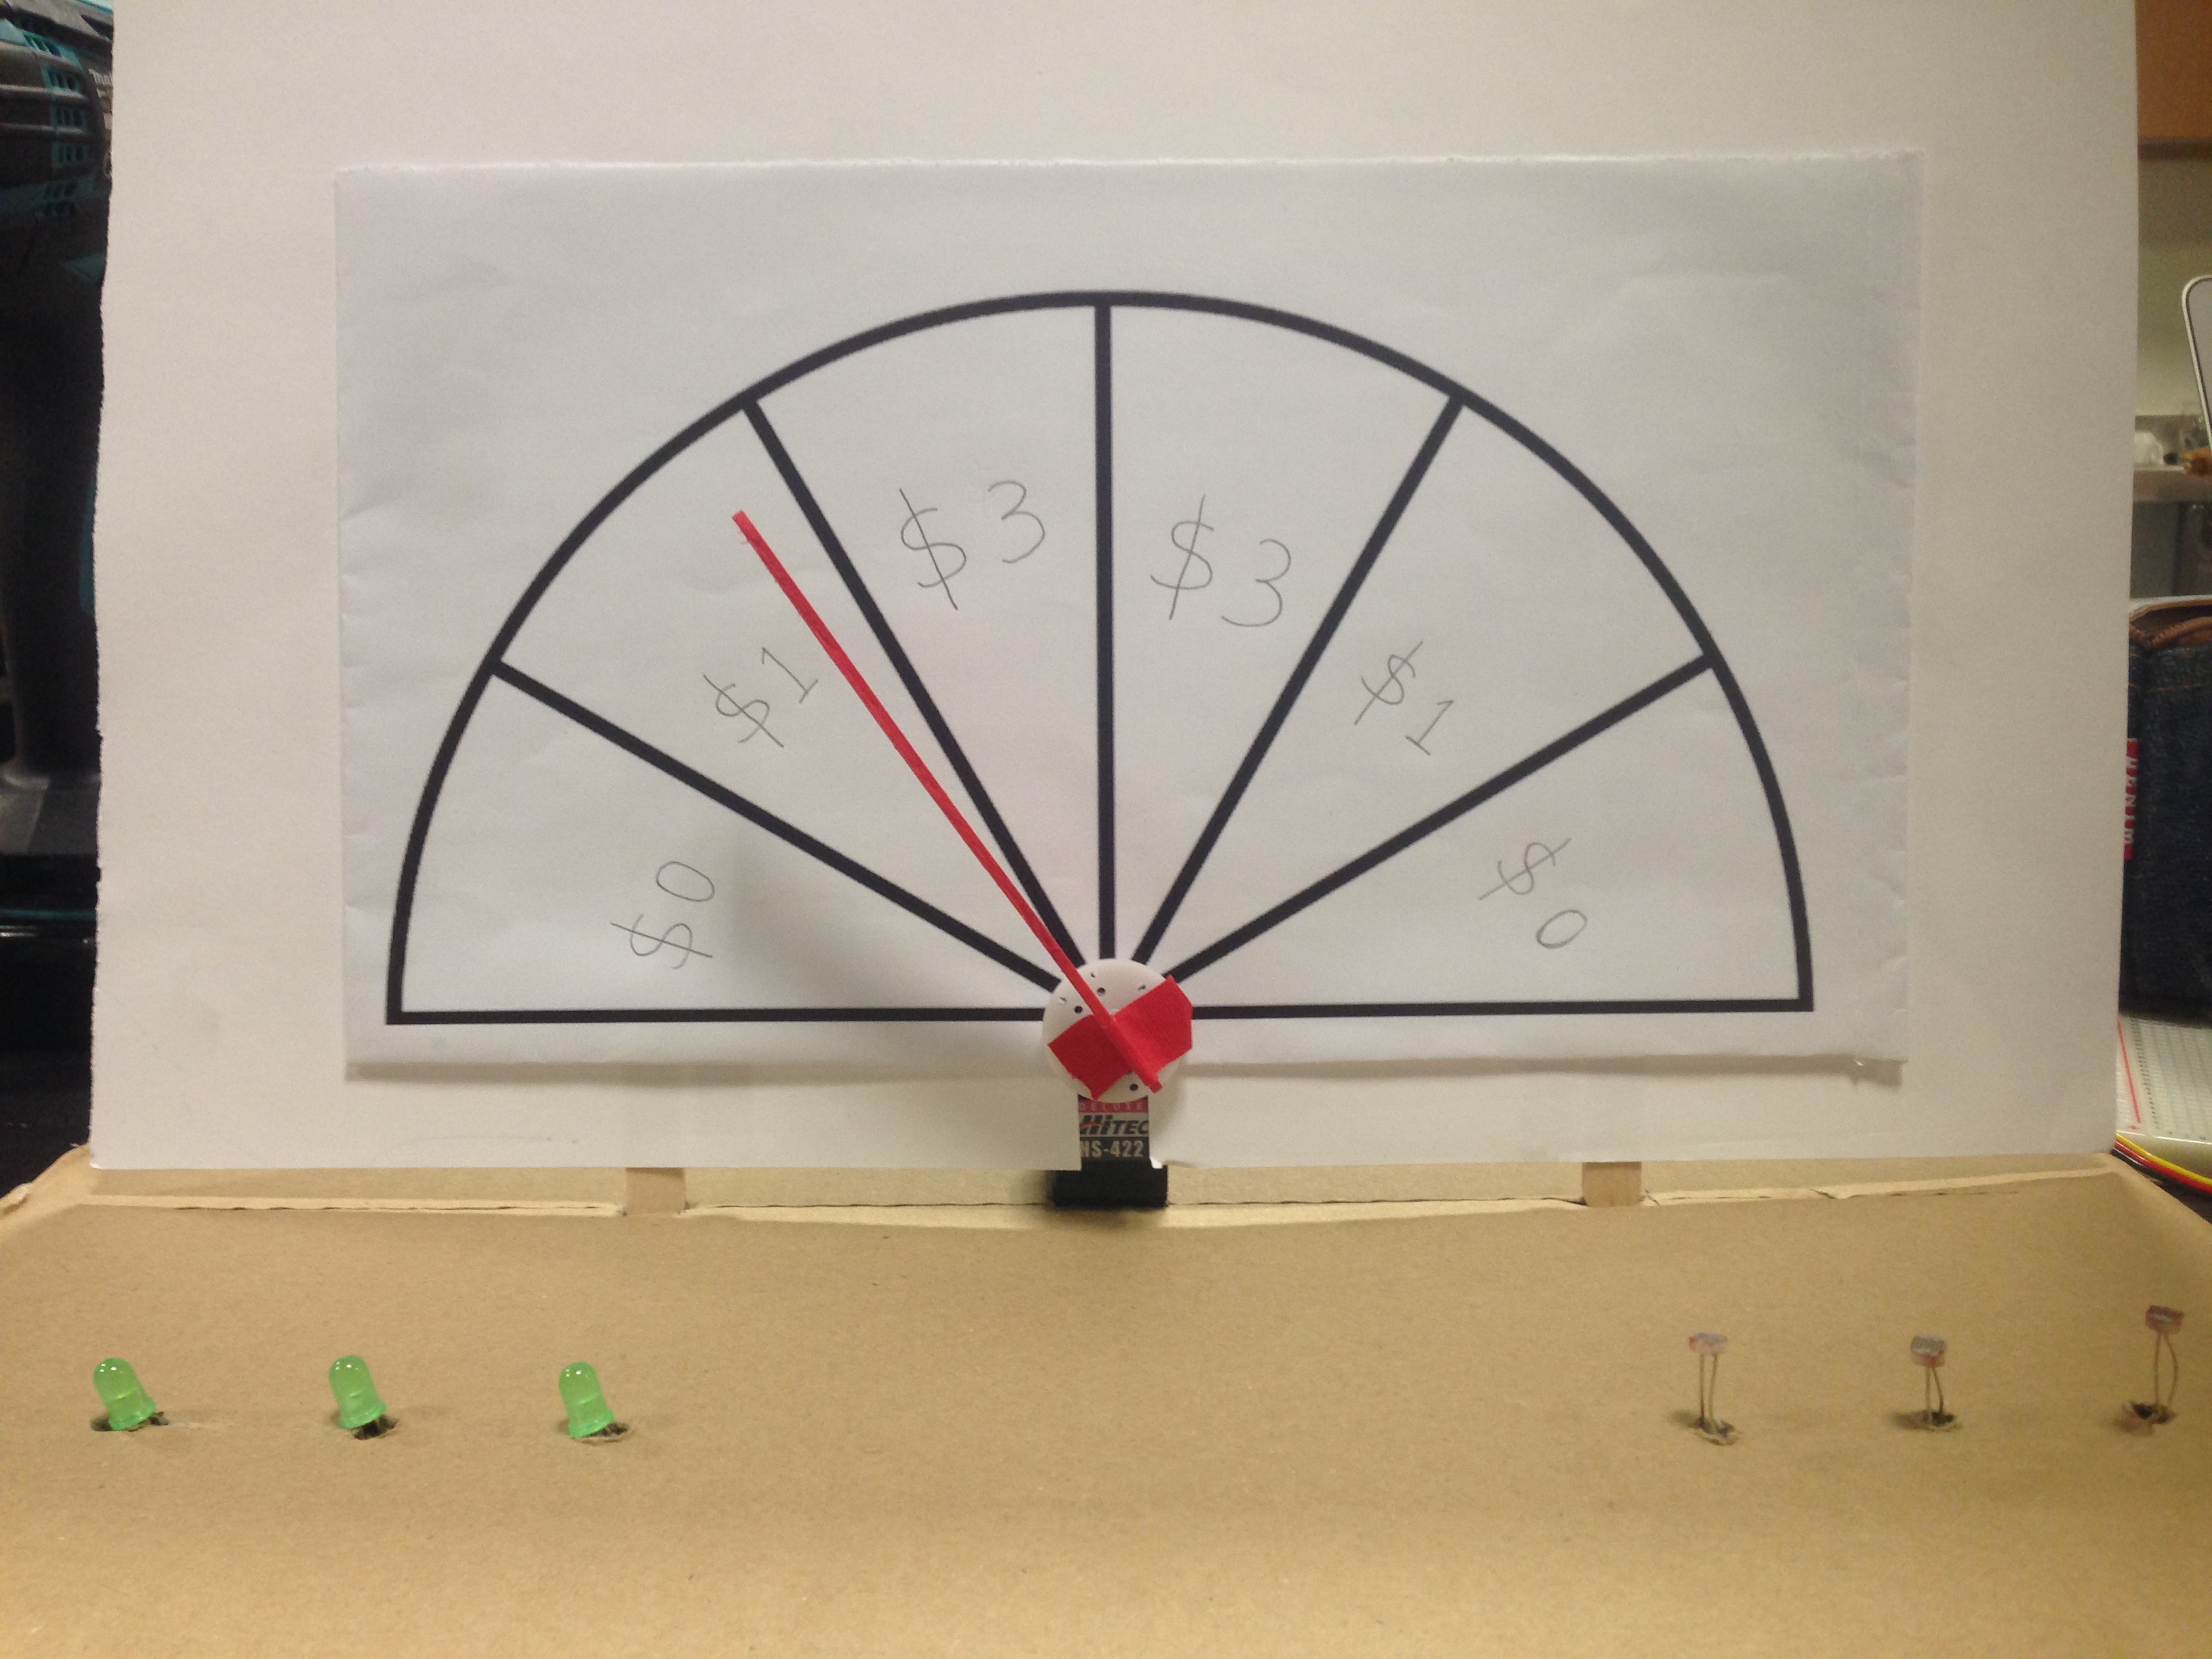
Prize Wheel
My stupid pet trick is similar to a prize wheel. The difference is that, instead of being a full circle, my prize wheel is a semi-circle, since the servo motor can spin for a maximum of 180 degrees. Depending on how much the user is willing to input, the speed of spinning and the time of spinning will be different. Here’s an illustration of my circuit for the prize wheel.
Love making machine
In my mind, love is just a matter of increasingly intense oscillatory motion until one reaches a breaking point. I don’t replicate the ‘increasingly intense’ part in my project, but I do try to replicate the oscillatory nature of love, and love making. If you can successfully make the sensor oscillate between two thresholds in a certain time, the lights will go off, providing that sweet sweet release we all lust for. If you can’t do it fast enough, a single light will flash suggestively. Rhythmic motion is the essence of love! I’ll post a video as soon as I get my phone in the IM lab.
The hardware part of this project was pretty simple to hook up, but figuring out the software side was a little trickier. My code is messy and not very impressive. I did use some arrays, and for loops to light up 4 lights, instead of doing each one individually. This is useful because I could put in more lights, and all I’d have to do is tell my script that I have more lights, and just throw the new pin number in an array. I wonder if I can iterate over arrays directly in Arduino, like in Python…