Final Project Documentation

Concept of Project

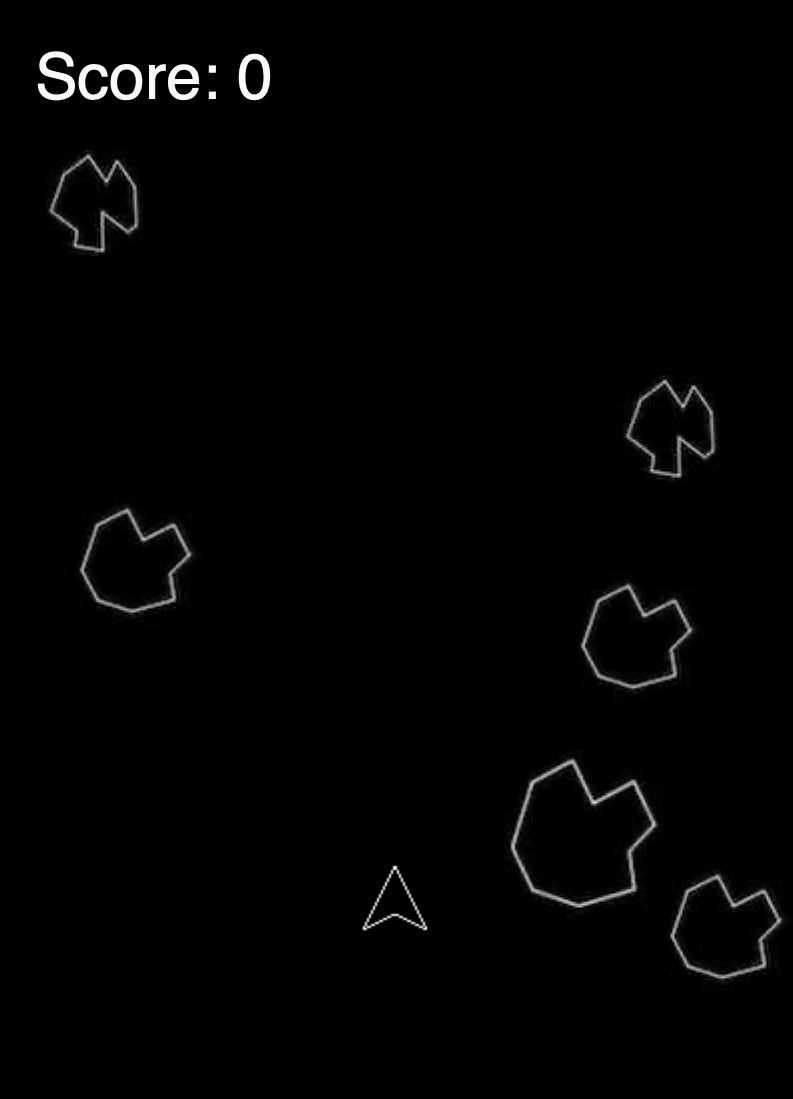
I decided for the final project to design a game that is very similar to the maze action video game, Pacman. Therefore, the main concept of my game is that there is a main character that looks like a green arc who tries to avoid the ghost enemies and eat circles, the more circles the character eats the more points he gets. The player will win the game if he or she can eat fifteen circles before bumping into one of the ghosts. On the other hand, if one of these ghosts catches the player before reaching a score of 15 circles eaten, then the player will lose the game.


I decided to create a game with this concept because I enjoyed playing Pacman as a kid and wanted to explore if I might be able to make a game that is very similar to my favorite childhood game. To make this project even more interesting, I decided to change some of the instructions of the normal Pacman game. If the main player eats a circle, the circle should change colors from yellow to red. Moreover, the main player can eat a circle more than one time.

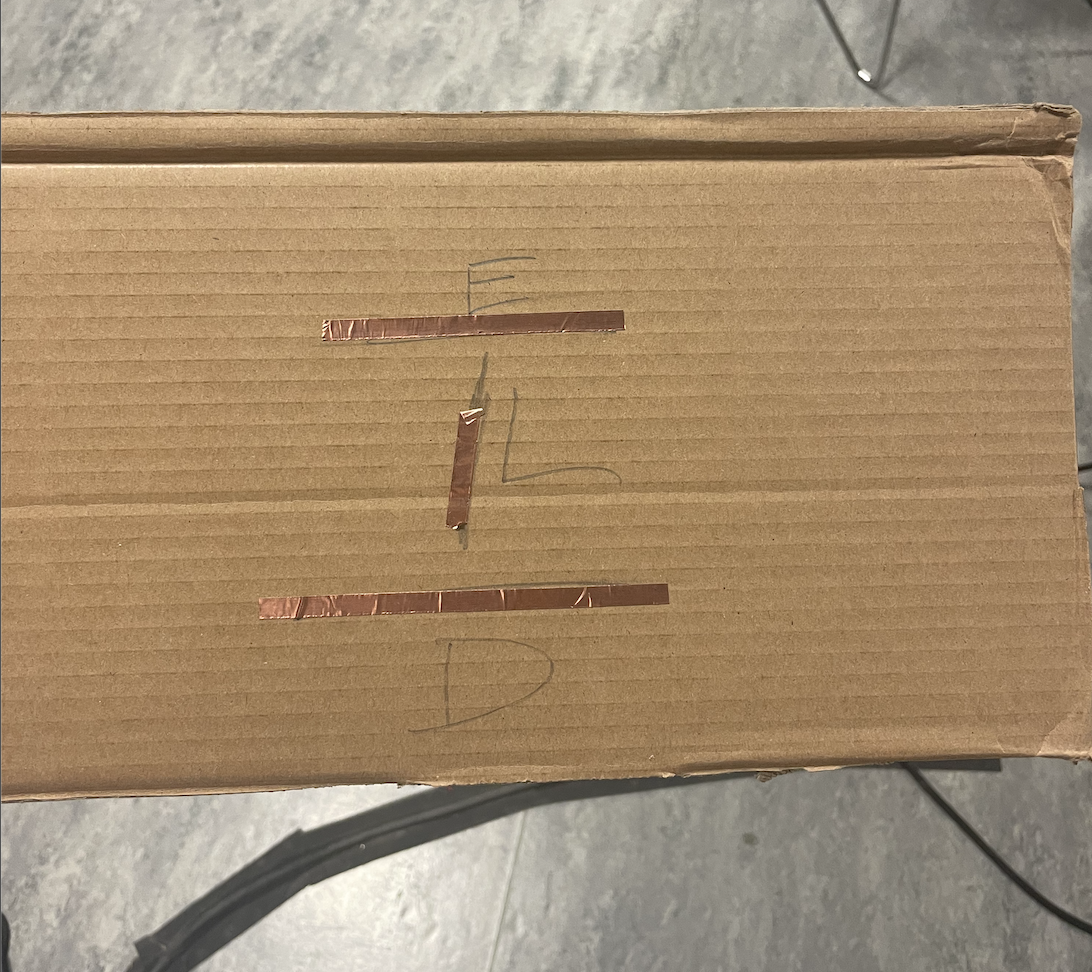
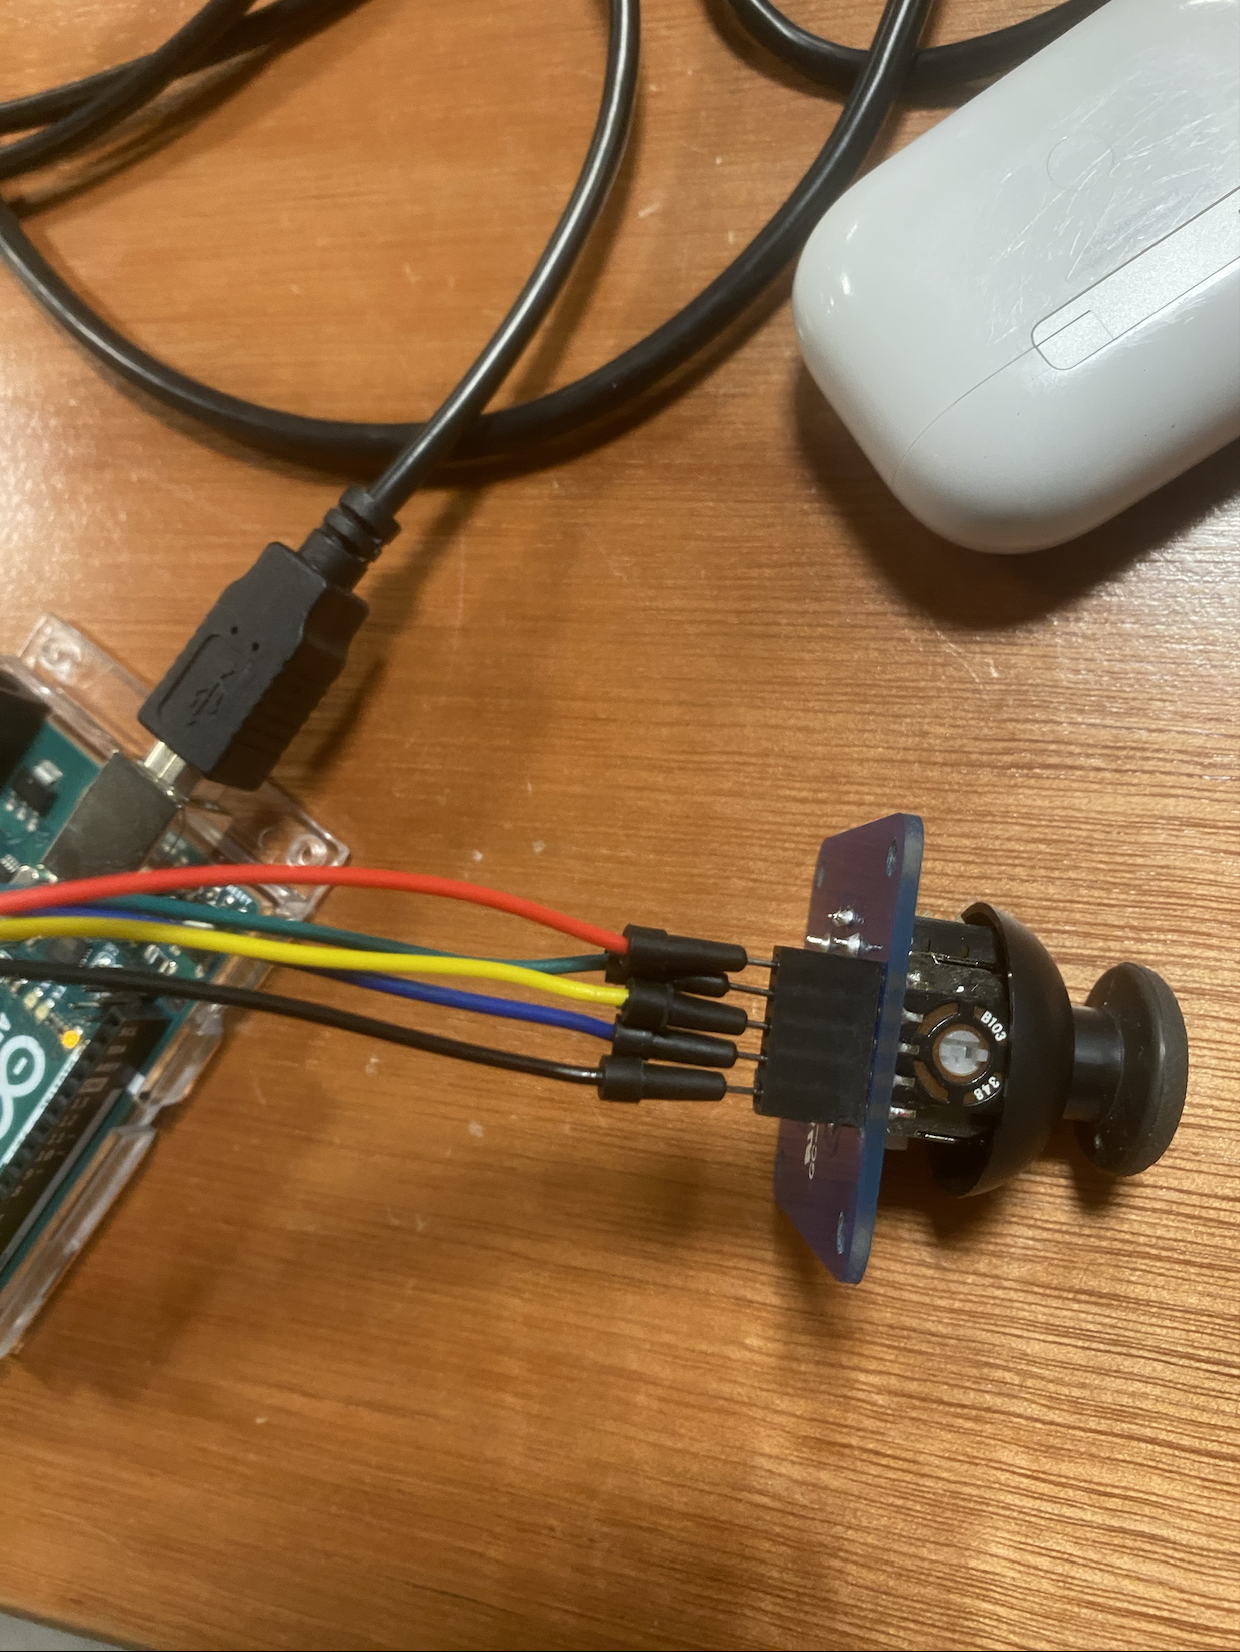
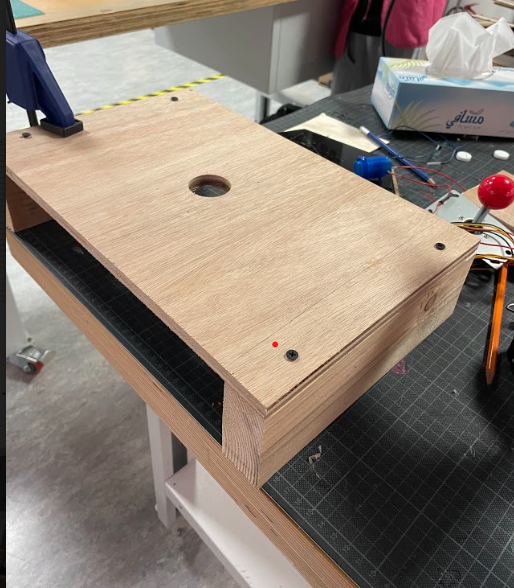
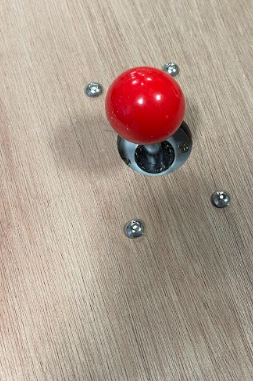
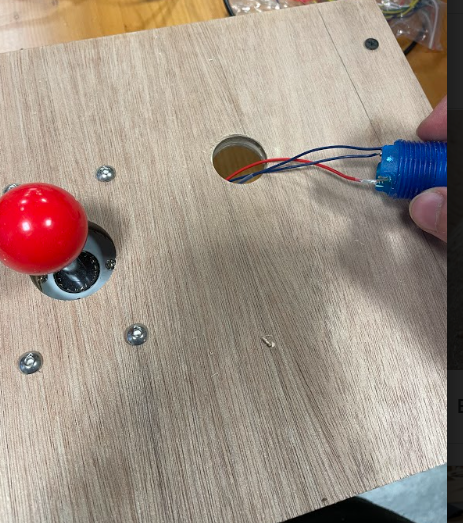
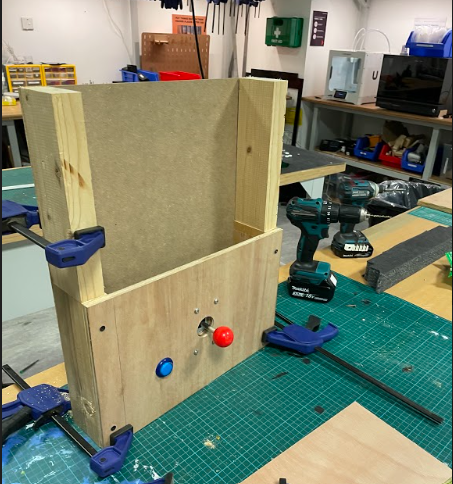
This design for the game was implemented in my midterm project. For the final project, I decided to add more stuff to this game and make it controllable using hardware devices. Therefore, I created a physical structure that contains the hardware devices which control the Pacman game. These devices mainly include a joystick and a button and you can see the final output in the video below.

Description of Interaction Design

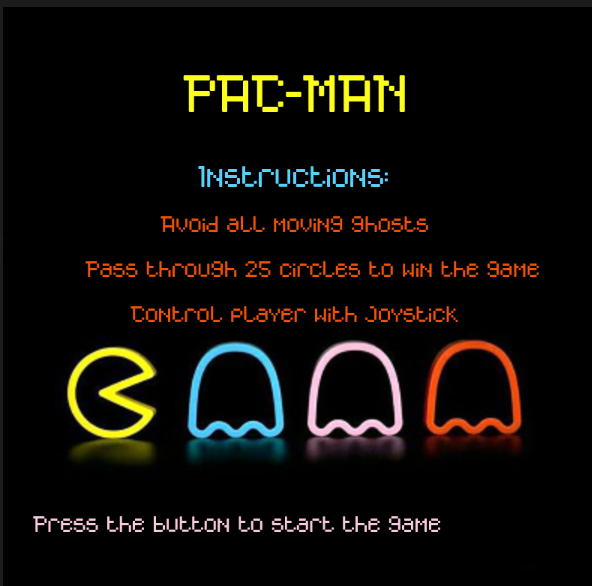
The interaction between the user and the game using hardware was done using mainly a joystick and a button. At first, the user will only see the main menu screen of the game that you can see attached below.

By pressing on the blue button that you can see in the image of the physical structure above, the user can start the game and move to the screen where the play screen of the game that you can see below.

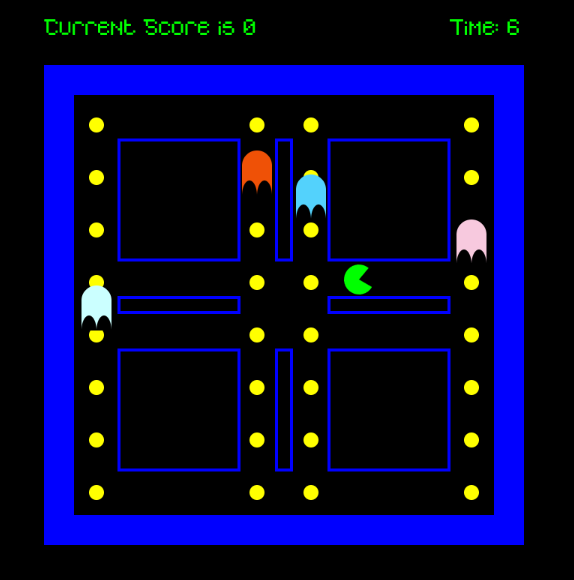
After that, the user can use the joystick to control the motion of Pacman in the game. By moving the joystick to the left PacMan will move to the left, while moving it to the right PacMan will move to the right, by moving the joystick forward PacMan will move up and by moving the joystick backward PacMan will move down. With this control of the PacMan motion the user can play the game easily and smoothly and enjoy one of the most famous classic arcade games. When the user win the game by reaching the score of 255 they will see the following screen

However, when the user loses the game they will see the following screen


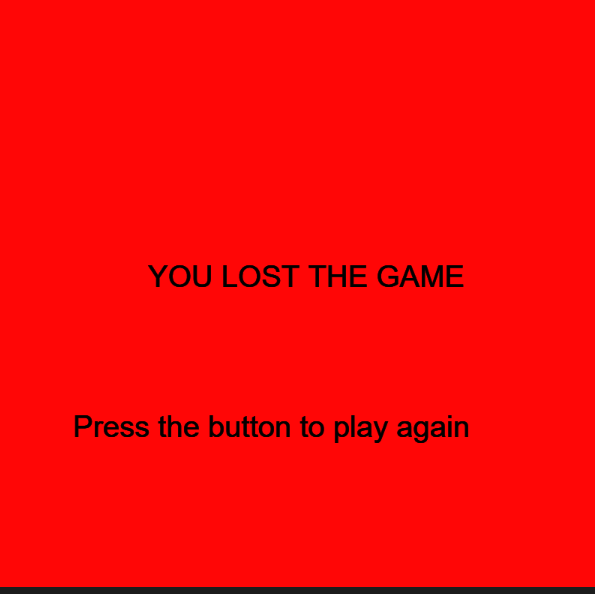
By just pressing the blue button the user will be able to restart the game again.

Description of Arduino Code

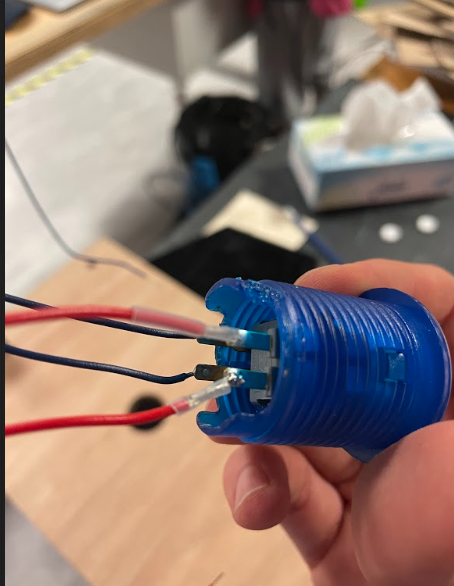
The Arduino code for my final project is designed to control the joystick and the button in my game. I initialized four different pins that the Arduino code will read based on the inputs from the joystick. This is because the joystick that I am using has five different wires. One wire is connected to the ground while the other four wires are responsible for detecting the motion of the joystick in four different directions, forward, backward, left, and right. Therefore as you can see in this section of my Arduino code I am reading the values of these four different pins in Arduino. I decided to use the pull-up resistor when defining these pins to ensure that the pins are all set to 1 whenever the switch is turned off.

void loop() {
  
  switchState=digitalRead(12);

  UP = digitalRead(upPin);
  RIGHT = digitalRead(rightPin);
  LEFT = digitalRead(leftPin);
  DOWN=digitalRead(downPin);
  
  Serial.print(UP);
  Serial.print(',');
  Serial.print(DOWN);
  Serial.print(',');
  Serial.print(RIGHT);
  Serial.print(',');
  Serial.print(LEFT);
  Serial.print(',');
  Serial.println(switchState);
  delay(100); // add some delay between reads
}

Furthermore, I read another value in the Arduino code which is the value of the blue button to determine the state of the switch at any time. After that, I print the values of the four joystick pins as well as the value of the blue button and separate them by commas to send them to p5.js. I added delay between the reads to ensure that there is no unnecessary errors due to fast reads.

Description of P5.js code

The p5.js code contains information about the pacman game. It contains four main states which are the main menu, play state, win and loss states. I showed images of these states above, and to move from one state to another I created a state machine. To come up with the pacman and ghosts in the game I used two different classes. Inside the pacman class I created some functions to draw the pacman, move the pacman and check if the pacman hits any of the boundaries that I draw on the screen.

To create the ghosts in the game I created another class called ghost, in this class I also created functions to draw the ghosts and place them in random positions and move them up and down. I also control the speed of the ghosts in this class. After that, I created a function that detects whenever the pacman hits one of the ghosts to detect when the user is supposed to move to the loss state. I show the code for calling these functions in the playscreen below.

  for (let k = 0; k < 4; k++) {
    ghost[k].moveEnemy();
    ghost[k].checkBounds();
    ghost[k].drawEnemy();
    //check if the main player will hit the enemy
    ghost[k].checkLossState(mainCharacter.xPos, mainCharacter.yPos);
  }
  //draw main character and call different functions of the class
  mainCharacter.drawPlayer();
  currTime = int((millis() - prevTime) / 1000);
  textSize(15);

  text("Time: " + currTime, 300, 30);

  mainCharacter.checkBoundsConditions();
  mainCharacter.movePlayer();
  mainCharacter.eatCircles();
  mainCharacter.displayCount();

  mainCharacter.checkWinningState();
}

Communication between Arduino and p5.js

P5.js should also read 4 different values from arduino which will be the UP position, DOWN position, LEFT position and RIGHT position. If any of these values is zero then in p5.js I will write if statements to move the pacman towards this direction. For instance, if UP is zero then pacman moves towards the up direction.

In addition to this, the p5.js program will read another value from Arduino which will be the current state of the blue button. If the button is pressed, then in the p5.js I can move from one game state to another. For example, if I am in the main menu screen and would like to move to the game screen then I can easily do this by just pressing the blue button.

As a result, in the Arduino part of my project, I will be writing to the serial the 5 different values that I want to send to p5.js which are the four different directions along with the switch state and will separate these values by commas so that they could be easily read in p5.js. I display below the finalized version of my game with sounds implemented in it.

What are some aspects of the project that you’re particularly proud of?

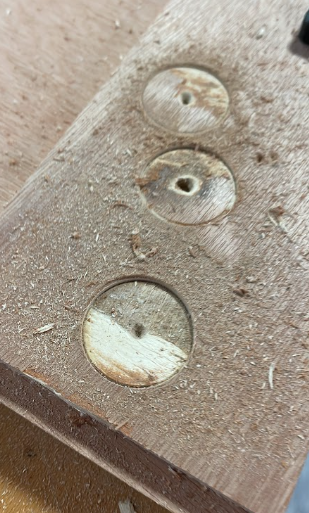
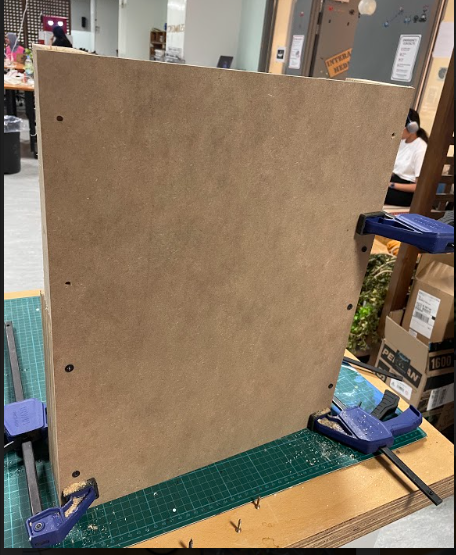
This project especially the hardware and the physical computing part of it was very challenging for me. I spent so much time drilling wood and connecting wooden pieces together, therefore I think that the most challenging part of my project is mainly building the physical structure to house the different hardware devices. Although it was not easy, I am very proud of the result that came out of it because I really like how it looks right now and you can see it in the video that I attached above. Furthermore, I discuss in detail how I came out with this output in my previous post which shows the progress towards my final project.

What are some areas for future improvement?

I believe that I could add more hardware stuff to the game in the future. I would be adding some indicators like LED lights that will display to the user their progress in the game. For instance, if the user needs 25 points to win the game, I will have 5 LED lights and each LED light will light up after the user obtains 5 points. So after the user get the 25 points, he will have the 5 lights all being on.

Furthermore, I would also like to improve more on the software part of the game. This will be done by making the yellow circles disappear when the user goes over them. This will avoid having a glitch in the game where the user can go over the same yellow circle multiple times and still win the game. Overall, I really enjoyed this project and believe that I learned so much from it. I hope I can design more creative things with this knowledge in the future.


Final Progress Almost there!!

My final is going Really well. I have finally been able to find the right balance of code that i needed thank to the help of Nouf and Jack. i had to add a stop command after every sound to make it not repeat itself

if (!serialActive) {
    text("Press Space Bar to select Serial Port", 20, 30);
  } else {
    text("Connected", 20, 50);
  }
  

   if (Contact2 ==1 && Contact3 ==0 && Contact4 ==0){
     if (Eaudio_played == 0)
       {
         Eaudio_played = 1
          Esound.play();  
       }
  }
  else if(Contact2 ==0 && Contact3 ==1 && Contact4 ==0){
    if (Laudio_played == 0)
    {
    Laudio_played =1;
    Lsound.play();
  }
  }
  else if(Contact2 ==0 && Contact3 ==0 && Contact4 ==1){
    if (Daudio_played == 0)
    {
    Daudio_played =1;
    Dsound.play();
  }
  }
  else{
    Eaudio_played = 0;
    Laudio_played = 0
    Daudio_played = 0
  Esound.stop();
  Lsound.stop();
  Dsound.stop();
  }
 }


All that i have left is building the actual  project which as the professor said was not as easy as i had expected. I started off with a base of cardboard like shown.

I then tested it out with the animals i build

I then spent the whole day on the lab working on my build( special thank to Ahmed the lab assistant) where i made a stage and a platform from my animals to go on. I was unfortunately too focused and forgot to take pictures. I had crocodile clips hanging from the stage but the professor told me to switch it to using nails and have copper tape to complete the circuit.

Work left    

I am yet to add the screws and add some design aspect after that i will hopefully be ready to present

Final Progress

I have my circuit ready with 2 buttons: one for start/restart & another for “collect”, and a potentiometer to inflate the balloon. I wanted to use a pressure sensor for blowing but the readings weren’t too sensitive to human blowing and it wasn’t too accurate. So, I decided to keep it simple and make it like an arcade game with hand interaction only. I edited my code to read the potentiometer values directly from Arduino.

while (Serial.available()) {
    int left = Serial.parseInt();
    int right = Serial.parseInt();
    if (Serial.read() == '\n') {
      digitalWrite(2, left);
      digitalWrite(5, right);
      int sensor = analogRead(A0); //potentiometer 
      delay(1);
      int sensor2 = digitalRead(7); //start button

The challenging part was having a steady serial connection from Arduino. I realized that it would go faster if there are equal number of data coming in and out of Arduino (even though I am not sending anything back to Arduino). I consider my project 80% done and hope to have more progress until the showcase.

Final Project Documentation

Game idea:
The Asteroids game is a classic arcade game that has been enjoyed by many people over the years. In this version of the game, you control a spaceship and must navigate through a field of asteroids, shooting them to destroy them and avoid being hit. The game is challenging and exciting, and the addition of the Arduino joystick adds a new level of interactivity. Working with p5js and Arduino was both fun and challenging. Combining these two technologies allowed me to create a dynamic game that could be controlled with a joystick.

Box:
Making the box for the joystick was a fun and challenging project. The first step was to gather the materials that I would need, which included wood, screws, and a joystick. I was fortunate to have a professor who was able to cut the pieces of wood to the right size, which saved me a lot of time and effort. Once the pieces were cut, I began the process of assembling the box. This involved screwing the pieces together and attaching the joystick. The process of attaching the joystick was complicated and took a lot of time, but it was rewarding to see the final product coming together. After the box was assembled, I decided to give it a coat of spray paint to make it look more polished and finished. This added an extra layer of protection to the wood and gave the box a more professional look. In the end, I was very happy with the way the box turned out. It was sturdy and well-constructed, and the addition of the joystick made it a perfect fit for my Asteroids game.

Implementation (p5js and Arduino):
Arduino code:

void setup()  
{
  Serial.begin(9600);
  pinMode(2, INPUT);
  digitalWrite(2,HIGH); 
  pinMode(A0, INPUT);
}

void loop() 
{
  int potVal = analogRead(A0);
  int buttonVal = digitalRead(2);
  Serial.print(buttonVal);
  Serial.print(",");
  Serial.print( potVal);
  Serial.println();
}


red – 5V
green – A0 (x-axis values)
yellow – A1 (y-axis values not used)
blue – 2 (button values)
black – GRW

p5js code:
These are the function used to connect the Arduino values with the game. The rest of the code is the one from my midterm project.

function makePortButton() 
{  
  portButton = createButton("choose port");
  portButton.position(10, 10);
  portButton.mousePressed(choosePort);
}

function choosePort() 
{
  if (portButton) portButton.show();
  serial.requestPort();
}
 

function openPort() 
{
  serial.open().then(initiateSerial);
 
  function initiateSerial() 
  {
    console.log("port open");
  }
  
  if (portButton) portButton.hide();
}
 
function portError(err) {
  alert("Serial port error: " + err);
}

function serialEvent() {
  
  let data = serial.readStringUntil('\n');

  try
  {
    values = split(data, ',');      
  }
  catch(err)
  {
    //print("NAN");
  }
  
}

function portConnect() {
  console.log("port connected");
  serial.getPorts();
}

function portDisconnect() {
  serial.close();
  console.log("port disconnected");
}
 
function closePort() {
  serial.close();
}


function controls2(x,y){

  if(!isNaN(y) && y!=2 && y > 0)
  {
     gamestatus = "running";
  }
  if (!isNaN(y) && y!=2 && y > 0)
  {
    makebullet(shooter.x,shooter.y);    
  }
  
}


function controls(x,y){
  
  if(!isNaN(y) && y!=2 && y > 0)
  {
     gamestatus = "running";
  }
  
    
  if(!isNaN(y) && y!=2 && fired == 0)
  {
    if(y>0)
     {
       makebullet(shooter.x,shooter.y);
       fired = 1;
     }
  }
  
  if(!isNaN(y) && y!=2 && fired != 0 && y == 0)
  {
    fired = 0;
  }
  if(x<340 && x>250)
  {
    rate = -2;
  }
  else if(x<250)
  {
    rate = -5;
  }
  else if(x>340 && x<680)
  {
    rate =0;
  }
  else if(x>680 && x<850)
  {
    rate = 2;
  }
  else if(x>850 && x<950)
  {
    rate = 5;
  }
  else
  {
    
  }
}

User experience:

Reflections and improvements:
Figuring out how to use p5js and Arduino together was not easy, but it was a rewarding experience. I learned a lot about programming and electronics as I worked on the project, and I was able to create a unique and engaging game. I am proud of the work that I put into the game, and I hope that others will enjoy playing it as much as I enjoyed making it. Overall, I am pleased with the final product of my Asteroids game. It is a fun and exciting game that is sure to provide hours of entertainment. The addition of the Arduino joystick makes it even more engaging, and I am glad that I was able to incorporate this technology into the game. I hope that others will enjoy playing it as much as I enjoyed creating it.

Final Project: progress update

Concept
Since last time I was not completely clear on the idea, I continued brainstorming. As a result, I came up with an idea that combines everything I had planned: a mini game with a winter (Christmas/New Year) theme and related to drawing. I will create a mini-game based on a fairy tale I was told as a child. I was told that at night in winter, Ayaz ata(Santa) and his magical assistants painted on the windows in the morning to delight children. Of course, these “patterns” on the windows do not appear by themselves, but when the weather is very cold, the windows freeze and there is a miracle of nature. To recreate this idea, I will use the potentiometer as a basis for random and free drawing. Through the potentiometer, the user will be able to control the step-size and feel themselves as a character of my childhood fairytale.

Here are the photos I was inspired by:
Frost on the window photo
Also, using p5js I will create a nice background which will include snow outside and snowflakes falling on the ground. I will add a window to my image and try to make something similar to this illustration.
Winter cozy window

I want my idea to be an interactive mini game where the user can draw his pattern and then save it. Inspiration: https://vividfax.itch.io/ceramic-flux
This game is about ceramic flux, where the user can draw anything on flux, then fire and be done with that. I like idea of adding a little bit more of interactivity.
Progress:
So far I have all basic things settled, everything works individually and needs to be put together.
* I made a base for my background:

To do this, I used my knowledge from past assignments about generative art and also briefly skimmed through TheCodingTrain youtube channel resources.
* Video video test
Arduino code:

void setup() {
// put your setup code here, to run once:
Serial.begin(9600);
}
void loop() {
// put your main code here, to run repeatedly:
int potentiometer = analogRead(A0);
int mappedPot = map(potentiometer, 0, 1023, 0, 30);
Serial.write(mappedPot);
delay(1);
}

P5:
The variable inData is used to manage the intervals in this code.The serial.on(“data”, serialEvent) line of code means that when there is new data sent through the serial connection, the serialEvent() function will be called. Inside this function, we update the inData variable to read the signal from the Arduino board. As the input type is a string, it needs to be changed to a number with inData = Number(serial.read()).

Next?
-develop more, connect all parts
-add some interesting things with LEDs for creativity
-play with bg in p5js

Final Project Progress

During the past week, I spent most of the time working on the physical structure of my project because this was the most confusing part for me and I did not have any experience with using wood and drilling stuff on wood. After going through a long process of cutting wood, drilling holes into the wood, then adding screws between wooden pieces using different drill bits, I was finally able to almost complete my physical structure and house the different devices inside my wooden building. In this blog I will demonstrate the different stages I went through to achieve the desired output.

The professor at first helped me with cutting three wooden pieces, one large piece that is placed on top of the two other pieces. After that, the professor also helped me in drilling a big hole in the middle of the wood to attach the joystick to it. Then I had to use the drill for the first time to drill four different holes on the sides of the big wooden piece and on the two other wooden pieces. To find the place where I am supposed to drill the holes I used a pencil and a ruler, then I used drill bits with size of 5mm to screw the 5mm screws in my wooden structure, I was able to get the following output from this step.

Then after that I was able to attach the joystick to this physical structure by using the four of the following type of bolts. I also attached nuts to these bolts to keep them in place. I tested the joystick after that and made sure that it is tightly fit in place.

After that I also wanted to make the game more interactive and decided to add a blue butto to allow the user to control the game. To add this button I had to solder stranded wires onto the button. Then I had to solder these stranded wires to solid wires so that I can attach them to the breadboard.

To add the blue button to my physical structure I had to drill another hole on top of my physical structure. However, I did not know how to do this because it was difficult to control the big drilling tip seen below and I was not getting the desired result as you can see in the next photo.

Then I decided to extend on this physical structure by adding another wooden piece alongside the current one to place my laptop on it. At first I added a wooden piece on the bottom to support everything and to ensure that the bread board and the arduino are supported, as seen below

I was finally able to extend my physical structure and now I have a place to put my laptop finally on. Therefore, my physical structure can support my game and I tested out the functionality of the game below, but could not use the sound of the game because there was an ongoing class at the same time.

Here is a link to the video:Demonstration of my game

Final Project Concept

Ideas:
I brainstormed for a while on what I could create using both arduino and p5js. My first idea was to add some changes to my game that I created for the midterm project. I wanted to control the movement of the player in the game with sensors and add some extra features controlled with the help of the arduino kit. The second idea was to draw using a joystick. I was inspired by this video: https://www.youtube.com/watch?v=jnZWHbsNSUk
Since I really like the idea of drawing with the interaction of P5js and Arduino, I plan to do something connected with sketching. Also, I want my project to have a winter atmosphere and the concept to be related to the upcoming holidays. For instance : https://markerplay.itch.io/yolka
To make my project more entertaining , I plan to make something like a game.The final version should include:
* Start/Finish Page
* Interactive background(probably will use experience from work with generative artworks in p5js)
* Sound
* Control from arduino with joystick/potentiometer/sensor/switch

Final Progress

Code

I am finally making progress with my code but it took too long to process and figure  out the bugs. it has been specifically tricky to get my full code on Arduino to understand my p5 code since i had to try many thing and innovate from things that we haven’t learned in class.

if (!serialActive) {
    text("Press Space Bar to select Serial Port", 20, 30);
  } else {
    text("Connected", 20, 30);
  }
  
   if (Contact2 ==1 && Contact3 ==0 && Contact4 ==0){
    Esound.play();
  }
      else if(Contact2 ==0 && Contact3 ==1 && Contact4 ==0){
        Lsound.play();
      }
      else if(Contact2 ==0 && Contact3 ==0 && Contact4 ==1){
        Dsound.play();
      }
 }
if (data != null) {
    // make sure there is actually a message
    // split the message
    let fromArduino = split(trim(data), ",");
    // if the right length, then proceed
    if (fromArduino.length == 3) {
      // only store values here
      Contact2 = fromArduino[0];
      Contact3 = fromArduino[1];
      Contact4 = fromArduino[2];
      // do everything with those values in the main draw loop
    }
hile (Serial.available()) {
    int Contact2 = Serial.parseInt();
    int Contact3 = Serial.parseInt();
    if (Serial.read() == '\n') {
      digitalWrite(2, Contact2);
      digitalWrite(5, Contact3);
      int lion = digitalRead(2);
      delay(1);
      int elephent = digitalread(3);
      delay(1);
      Serial.print(sensor);
      Serial.print(',');
      Serial.println(sensor2);
    }

Exterior 

I initially wanted to use wood to build the animals since it would have been easier but after having a talk with the professor i switched to a board that would have diffrent wires to connect the animal heads to. i went with origami animals after experimenting since they looked the cutest.

Future 

I just need to fully fix my code since i cant seem to find the right balance that is needed for the project

final project progress

name of the project: 

lcd game & shamsi calendar

final project finalized:

p5.js menu gives the user 3 options:

    1. display random quotes (farsi and english) on lcd
    2. display hijri shamsi date and time on lcd
    3. play a little game on the lcd – using the switch

arduino & P5 handshake:

p5.js will record user’s choice from the menu and sends it to arduino to be displayed on lcd.

p5 code can be found here.

demo:

what’s left:

i would like to make a little box to hold everything in. 

Progress Check (90%): Final Project: Hopping Ginger Bread Man

Disclaimer: the title is a little deceiving – I’m not 90% done (more like 60%) yet, but I’ll hopefully get there by the end of this week!

My initial outline of completing this project was finishing the physical constructing part (the Arduino) and then moving onto the coding (p5.js), but I ended up jumping between both of them instead.

Since my first very rough brainstorm post about my gingerbread man game, I’ve made a lot of adjustments, additions, and progress in general. In this post, I will report my progress by dividing it into two: the p5.js part and the Arduino part.

P5.js:

The game (only the coding part) that I have so far can be shown here.

For the coding part of my game, I consulted my good ol’ friend Daniel Shiffman’s “Chrome Dinosaur Game” tutorial that I found on his website (here’s the link). Thankfully, his tutorial didn’t encompass any groundbreaking new skills that I had no idea about, so it was mostly for me to review and refresh my memory because it’s been a while since I have coded games on p5.js. I also was able to get access to these two links (https://www.jsdelivr.com/?docs=gh and https://github.com/bmoren/p5.collide2D#colliderectrect), from which I got directory listing and learned about the function “collideRectRect” respectively. One thing that was particularly interesting/new for me was constructing the chimneys as obstacles and also animating the gingerbread man; it was fun to set up a movement for both the chimneys (along the x axis) and the gingerbread man (along the y axis), and control the level of jump, gravity, etc. I also couldn’t really find any chimney illustrations that fitted my vision, so I ended up drawing them and uploading the pictures myself.

I’d say my code highlights are adding animation/movement to the chimneys, which can be shown below:

class Chimney1 {
  constructor(){
    this.r = 120;
    this.x = width;
    this.y = height - this.r;
  }
  
  move(){
    this.x -= 3;
  }
  
  show(){
    image(chimney1Img, this.x, this.y, this.r, this.r);
  }
}

…and also constructing the collision between the gingerbread man and the chimneys, as shown below:

hits(chimneys) {
return collideRectRect(this.x, this.y, this.r, this.r, chimneys.x+20, chimneys.y, chimneys.r, chimneys.r);
}

These were some of the struggles I’ve faced with p5.js:

  • Adjusting the “collideRectRect()” function – it was hard to get the perfect measurement of both the chimneys and the gingerbread man’s image boundaries and set it so that the unnecessary empty spaces that surrounds the actual illustrations acted as the “collision points,” thus making it hard for the user to aim the gingerbread man’s jumping.
  • Constantly shifting + playing around with the “jump” function of the gingerbread man, as well as gravity.

Arduino:

Here are some sources that I’ve used to aid my process of making a physical game controller with Arduino:

link 1

link 2

Work I still have left to do:

Although I’m mostly done with the coding part, these questions still remain in my mind:

  • connecting arduino + p5js?
  • how to minimize the distance between gingerbread man and the chimneys before making it count as a “fail?”

…and here’s the list of things that I still need to do:

  • reset + start game
  • Arduino connection
  • building a physical game controller using Arduino

Sources used: 

Gingerbreadman image

Main game background image

Ending screen image 

Website where I downloaded all my audio clips from