Midterm Progress

Concepts I had throughout:

Working on my midterm, I had multiple ideas for games. I thought of the snake game, and flappy bird, and the bouncing ball game. While the idea for the program for all the games didn’t seem too difficult, I wanted to focus more on the game rather than choose based on difficulty. I thought the snake game was too common and it wouldn’t be unique and wouldn’t really mean anything to anyone. Next, flappy bird was actually pretty cool and I think doing its code would’ve exposed me to different types of functions from the reference in p5js and I liked that. However, I settled on the bouncy ball game, especially because I thought it relates to most of the content we covered throughout the course and I liked that because it helped me review everything we did so far. The bouncing ball was also a concept covered in the video tutorials by TheCodingTrain which was really helpful to me.

Coding Process

I started my program by brainstorming what functions and variables I would need. I figured out which functions I needed for my code and then planned in which order I would code them in, and where exactly I would use each variable. This really helped the whole programming process as it helped me organize everything and figure out where exactly the bugs I ran into are. Moreover, it helped me learn from my mistakes. (I cannot post my code progress because I am doing this after finishing the final product).

[Assignment 8] Water Switch

Concept

For this assignment, I have created an electrical switch that uses water to switch on and off. Unlike conventional mechanical switches that require us to use our hands, this switch uses water. As shown below, this switch has two wires that are taped to each other.


Without a conductive medium, i.e. water, in between them, electricity will not flow because air has high resistance. Only when both wires touch water, the circuit will be closed and LED will turn on. Shown below is a video of me turning LED on and off using this switch.

Reflection / Future Improvements

One advantage of this switch over other conventional switches is that resistors can be removed from the circuit. Since medium is required for the switch to operate, the medium itself can act as a resistor. By controlling the resistance of the medium (e.g. adding salt to water), user can freely control the brightness of the LED.

One of the many aspects of this switch to improve is finding a way not to make water droplets to remain on the wires even when they are removed from the water. Because water adheres to wires, I realized the LED will be on even when the wires are pulled off from the water. One possible solution to this would be making the gap between the wires larger, so water droplets on the wire cannot close the circuit.

Week 8: Unusual Switch

For my unusual switch, I instantly thought of a guillotine. It appealed to me because the words “hands-free” made me think of how guillotines kind of symbolize hands-free killing – you didn’t kill the person, you just put their head in a place where gravity would deliver a knife to deliver the final blow.

In the same way, my hands don’t actually connect the switch. I just lift the guillotine into a position from which gravity finishes the job.

First, I sketched out my design for the simple guillotine, with a place to insert someone’s “head” at the bottom and a smaller piece of cardboard with copper tape at the bottom to serve as the knife. Instead of someone’s neck, I would place the ends of two wires in the guillotine. When the “knife” hits the bottom, the copper tape conducts electricity and connects the two wires, completing the circuit.

Then, I started crafting. I found some copper tape and started tracing out pieces of cardboard. I decided to connect my pieces by intersecting them at cut slits, which would be cleaner and more stable than hot glue.

No description available.

From there, I cut the pieces out with a box cutter and assembled them.  My intial prototype looked great, but the knife would spin and go everywhere as it fell down. To remedy this, I added hot glue “tracks” to guide the path of the knife, added a cover that would ensure the knife fell in a straight line, and inserted two washers into the cardboard to make it heavier, and therefore fall in a more guillotine-like fashion.

No description available.

Just for fun, I made a little tombstone in front of which the LED lights up, so it kind of looks like a candle in front of a grave (probably of the person who died in the guillotine.) I embellished the guillotine with a little of my extra copper tape, hooked it up to the Arduino, and tweaked it until it worked.

I’m pretty happy with the finished product! The guillotine is sturdy, the “switch” works when the knife goes down, and the if you turn the audio of the video on, the slice of the knife sounds pretty compelling. In a future version, I might try to add a pulley system or a platform so that it’s even more hands-free (right now the video makes it look like it’s still responding to my hands), but for something small, portable, and mobile, I think this is great. I’m excited to do more fun stuff with Arduino!

No description available.

No description available.


Assignment 4: Tarek Nabih

Concept:

I had a project in mind: making sentences pop up on the canvas. So I tried making that But I got stuck in the part where I should formulate the sentence. Hence, I got peer help. Ayazhan Gabitkyzy’s code helped me a lot in figuring out what could be done and how to debug my code. There were even useless blocks of code that I realized after I have gotten Aya’s code help. I changed the word combination to predict more logical sentences. And I was pretty satisfied with the result.


Code:

let VERB1 = 0;
let WORD1 = 1;
let VERB2 = 2;
let WORD2 = 3;
let words = [];
let wordctr = 0;

let strings = [];

function setup() {
  createCanvas(600,600);
  background(153,0,0);
  strings = loadStrings("words.csv");
  
}

let csvRowNumber = 0;

function generatemessages(){
  let rand = int(random(0, 100));
  let rand2 = int(random(0, 100));
  if(rand % 7 == 0){
    if(rand2 % 3 == 0){
      if(rand2 % 2 == 0 && rand % 2 == 0){
          words[wordctr] = new sentences();
          words[wordctr].display();
          wordctr++;
        }
     }
  }
}

function displaymessages(){
  for(let i = 0; i < words.length; i++){
    words[i].display();
    if(words[i].y > height){
      words.splice(i,1);
      wordctr--;
    }
  }
}

function draw() {
//   generatemessages();
//   displaymessages();
  frameRate(3);
  if(wordctr > 30){
    clear();
    background(153,0,0);
    wordctr = 0;
  }
  generate_text();
  
  
}

function generate_text(){
  let singleRow = [];
 
  message = "I want to " ;
  singleRow = split(strings[int (random(strings.length))], ',');
  message += singleRow[VERB1];
  message+=" ";
  singleRow = split(strings[int (random(strings.length))], ',');
  message += singleRow[WORD1];


  message2 = "I don't want to " ;
  singleRow = split(strings[int (random(strings.length))], ',');
  message2 += singleRow[VERB2];
  message2+=" ";
  singleRow = split(strings[int (random(strings.length))], ',');
  message2 += singleRow[WORD2];
  

  fill(245,213,10);
  textSize(20);
  textFont('Georgia');
  
  let randnumber=int(random(1,3));
  if (randnumber==1){
    text(message,random(0,width-60),random(0,height-2));
    // return message;
    // text(this.message,this.x,this.y);
    wordctr++;
  }
  else if(randnumber==2){
    text(message2,random(0,width-60),random(0,height-2));
    wordctr++;
    // return message2;
    // text(this.message,this.x,this.y);
  }


}


class sentences{
  constructor(){
    this.x = 20;
    this.y = -20;
    this.message = generate_text();
  }
  
  display(){
    // this.tempo.remove();
    this.tempo = text(this.message,this.x,this.y);
    this.y+=20;
  }
  
}


Project:

Reflection:

I would love to make add effects to the text in the future like a shadow or make them move on their own.. or add an illustration by which instead of disappearing, the sentences by animation make another sentence.

I was wondering as well if the sentences can be more coherent and more logical. However, I feel like for that to take place there should be a use of AI or machine learning so that the sentences can make sense and will sound like it was written by a human not a machine.

Mid term project- Aayat Azim

Concept

What happens when you are swamped with work and all you can think about is the upcoming deadlines? You code your way out of it of course! For this assignment, I was fueled by the fascination I have always had with shooting games. And the enforced time during my injury allowed me to subtly “elevate” my game. I played with the underlying phenomenon of something that we go through on a daily basis and that is getting work done, be it creative or otherwise. And even though the task came with its fair share of challenges, the end result was a sweet surprise.

Here it is,

Workings of the Game

The game primarily consists of three main characters-the player (worker), the bullets (finished work), and the enemies (deadlines). These at first glance seemed like bland soup (even to me), but they got polished as I played around with my concept and the game progressed.  I started off simply by placing basic shapes on the screen and tweaking their movements. The player was initially an ellipse tracing the cursor and was changed into a loaded gif. Similarly, images were loaded and adjusted in the place of bullets and enemies that were circles and rectangles respectively.

Picking up from there, for each character, I initially coded functions. like this bullet and its draw function.

let bullets = [];

function setup() {
  createCanvas(400, 400);
}

function draw() {
  noCursor();
  background(220);
  rectMode(CENTER);
  let xc = constrain(mouseX, 15, 385);

  //   player position
  let player = { x: constrain(mouseX, 15, 385), y: height - 50 };
  circle(player.x, player.y, 25);

  drawBullet();
}

// function to draw bullets
function drawBullet() {
  for (let bullet of bullets) {
    bullet.y -= 10; // bullet moves up
    circle(bullet.x, bullet.y, 10);
  }
}

function mousePressed() {
  let bullet = {
    x: constrain(mouseX, 15, 385),
    y: 350,
  };
  bullets.push(bullet);
}

But later on, it seemed like a better choice to transform the program into an OOP as it allowed me to have a fixed set of operations on things, and as the code evolved I could add new things and attributes. I also went through a couple of resources to get a gist of how shooting games work wherein Dan Shiffman’s coding challenge on space invaders provided me with a broad idea about the concept that was being implemented in my code. The idea of loading various classes as separate p5js files in the main sketch was something remarkable that I picked up from this video that helped me to efficiently visualize and tidy my code.

Challenges

One of the portions of the code that took me some time to figure out was how to prevent the objects from trailing off of the screen. Finally, I added the constrain function as shown in the code below to fix the movement of my player as well as the bullets.

class Bullet {
  constructor() {
    let xc = constrain(mouseX, 45, 335)
    this.x = xc
    this.y = 350;
  }
class Player {
  constructor () {
    this.x = width/2;
    this.y = height - 50;
  } 
  
  display() {
     imageMode(CENTER);
    image(gif_player, this.x, this.y, 170, 170);
}
 move (){
   let xc = constrain(mouseX, 45, 335)
   this.x = xc
   this.x = xc + 5;
}

}

Secondly, creating a single object within OOP was relatively easy but I had to go back and forth while figuring out how to place an array of objects within OOP. The basic reference list on the main p5js website helped me in implementing it.

Moreover, this bit was among the bigger challenges that I encountered. After I had added the collision between my bullet and the enemy through splice to remove the abovementioned objects from their arrays, the enemies just stopped appearing on the screen. A setInterval function for spawning new enemies had to be added to fix this.

function setup() {
  createCanvas(400, 400);

  //   loop for player
  myPlayer = new Player();

  //  spawning new enemies
  setInterval(() => {
    enemies.push(new Enemy());
  }, random(500, 1000));
} // end of setup function

Lastly, it took me a while to place my entire game within game states. I initially began by assigning the game state as a variable and then added different values so that every time the game is played the game state functions get smoothly called. In a way, the entire game became a combination of functions and OOP wherein different object classes interacted with the game states within the code. And the entire draw function was just primarily coded to call the game states. But as the game ended, the start screen was not becoming visible without refreshing the page. By referring to the p5js code samples provided in the lecture notes I realized that I had to add a separate restart function to make it work.

function restartGame() {
  // Reset character position, lives, etc
  gameState = 0;
  enemies = [];
  bullets = [];
  score = 0;
}

function draw() {
  background(210);

  // game gtates and their functions defined and called
  if (gameState == 0) {
    startGame();
  } else if (gameState == 1) {
    playGame();
  } else if (gameState == 2) {
    finishGame();
  }
} // end of draw function
Reflections

In the future, I would also like to work with sound and loading different backgrounds for each screen. I am also a bit worried that after a certain point the generation of new enemies that are being pushed may become uncontrollable, especially when the program keeps running on the page, and for that, I would have to further think and code in functions such as framerate and millis. Nonetheless, this assignment genuinely gave me a chance to tap into the academic as well as the creative side of interactive media. It feels like a win-win.

Midterm Project – Sky Bounce Game

https://editor.p5js.org/merna.rakkad/full/kFdTOWJAb

Concept:

The concept of this game was to bring back a game I used to play as a child. I lost this game when I was young and couldn’t find it ever again, even after going to many lengths to find it. While the game I created isn’t exactly the same, it still reminds me of my childhood and brings back many childhood memories. Once I realized I could create a game on my own, this was the first thing I thought of and I was elated to start working on it.

As I grew up, I realized the specific game I played was probably deleted, and this made me want to attempt to recreate it to bring it back to other kids, and remind other young adults of our near childhood. The outcome did not exactly fully represent the game, but it is close enough and still brings me the same enjoyment I got as a child.

How it works:

The way this game works is basically a ball that bounces off a platform. If you miss the platform, you lose. As the game progresses, the speed of the ball increases and the platform gets smaller, making it harder and harder to win. The winning score is 12, since after 12, it becomes impossible to win as the platform will simply cease to exist.

I am proud of the OOP I used in this project because it is one of the things I struggle with the most.

Problems I ran into:

I ran into many bugs in this project, some that I even could not fix. For example, the sound I inputted into the game would not input, and the restart button would disappear based on whether the sound works or not. Moreover, sometimes the ball would not bounce or it would move in a straight line. These are bugs that happened randomly and are not consistent.

Midterm Project: final update

THE FINAL PRODUCT  

The link the code on the web editor can be found here here. I have also embedded the sketch below, although the game must be viewed in full screen on Chrome, with the Bookmarks tab hidden. I made this choice to have the canvas size this large so that the user could be fully immersed in the game. Since this isn’t one of those games that’s meant to be played to pass the time, I didn’t want a small canvas size and other tabs to distract from the experience. Of course, headphones with decent sound quality also enhance the experience.


CHANGES & SIMILARITIES FROM THE STORYBOARD 

Overall, the final product is very similar to the storyboard created in last weeks post, although some of the games have been modified. A theme that I wanted to establish from the start was an 80’s arcade aesthetic. The aesthetic is very nostalgic of the gameboy and nintendo games I used to play as a child, and because the game is sort of reflective of my life as an adoptee up until now, I think it is fitting. I wanted there to be lots of pixelated images, saturated colors, and sounds that are reminiscent of old computers. In terms of the story I was telling, I wanted the text to be informative and genuine so as to represent my experiences as authentically as possible, but still very personal  and quirky. I think I accomplished this  quite well.

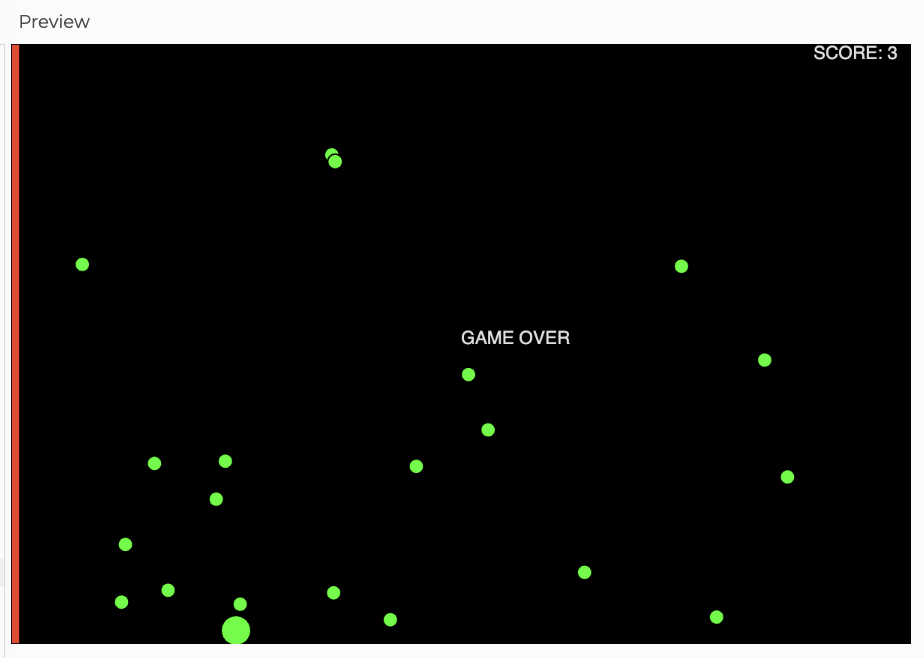
In terms of the actual games, I did make some changes in the final product. For the first chapter, I felt that the “lost treasure” analogy (explained on the mind map) was difficult to capture and more complex than I anticipated. Instead I decided to make a maze. In the second chapter, I still wanted to express the idea of mixing culture, but due to time constraints, I simplified the game that was intended to be a chasing game, where the blue monster is controlled by the user and the red controlled by the computer. Unfortunately, I was unable to make the red monster move on its own, so for now, it remains stationary while the user is able to move the blue monster freely. Finally, for the third chapter, I felt that the original game was too similar to the previous chapter. I began to think about the most important thing to represent, which was the idea of presenting differently to please others. Hence, I decided to make a dress up game where the user can dress up a chameleon with different accessories. The last chapter remained the same.

Although I had to simplify my original storyboard to fit with the time constraints of the project, I’m glad that I had to. It made me think about the power of simple but effective analogy, and challenged me to think of new ways I could show an aspect of my experience, rather than tell the user directly. I think with game design, it’s sometimes easy to forget that the user indeed can put pieces together themselves without the game having to explicitly show every part of the plot and meaning.

Finally, when it came to writing the text, I decided to divide the game by “chapters” rather than levels. Though subtle, I think this choice of diction makes a significant difference. Similarly, I avoid using language such as “you lost” or “you won,” as I think it breaks up the story and doesn’t allow for a smooth transition between one chapter and the next.

ESSENTIAL CODE 

Although the game has far too many lines to go into detail in this post, I will share some pieces of the code that I found essential to this entire process. For one, two classes that were reused many times were the Button and Sign class. The Button class allowed me to create buttons that played the next slide of text, switched to the next chapter (changing the game state in the process), replaying games, and more. The Sign class is what I used to place all of my text on screen. Because there were a lot of specifics involving margins, font color, and positioning, having a class to hold this information was helpful. The code for the two classes is shown below:

class Button{ 
  constructor(x, y, font_color,font_size, string, btn_w, btn_h){ 
    this.x = x; 
    this.y = y; 
    this.string = string;
    this.age = frameCount; 
    this.opacity = 255; 
    this.hover = false; 
    this.width = btn_w; 
    this.height = btn_h;
    this.font_color = font_color; 
    this.font_size = font_size; 
  }
  
  display() { 
    if (mouseX < this.x+this.width/2 &&
        mouseX > this.x - this.width/2 &&
        mouseY > this.y-this.height/2 && 
        mouseY < this.y+this.height/2){ 
      this.hover = true; 
    }
    else { 
      this.hover = false;
    }
    if (this.hover) {
      this.opacity = 100; 
    }
    else { 
      this.opacity = 255; 
    }
    
  //FILL OF BUTTON 
  //next buttons with gray center 
  if (game_state!=0 && game_state != 5 && game_state!=6 && game_state!=16 && game_state!=11 && game_state !=1 && game_state!=20){
    fill(180);
  }
  else { 
    noFill();
  }

  //STROKE OF BUTTON 
  if (game_state == 1 || game_state == 5 ||game_state == 0 || game_state == 20) { 
    this.font_color = color(255, 255, 255); 
  }
  else { 
    this.font_color = color(0,0,0); 
  }
  push(); 
  strokeWeight(2); 
  stroke(red(this.font_color),green(this.font_color), blue(this.font_color), this.opacity); 
  rect(this.x, this.y, this.width, this.height); 
  pop(); 
    
  //TEXT OF BUTTON 
  noStroke(); 
  if (game_state == 1|| game_state == 5 || game_state == 0 || game_state == 20){ 
    this.font_color = color(255, 255, 255); 
    fill(255, 255, 255, this.opacity); 
  }
  else { 
    this.font_color = color(0,0,0); 
  }
  textAlign(CENTER); 
  textSize(this.font_size); 
  fill(red(this.font_color),green(this.font_color), blue(this.font_color), this.opacity); 
  text(this.string, this.x, this.y, this.width, this.height); 
}

  
  mouse_over() {  
    if ((mouseX >=(this.x - this.width/2) && mouseX <=this.x+this.width/2) &&   (mouseY >= (this.y-this.height/2) && mouseY<=(this.y+this.height/2))) {
    return true; 
    }
  }

}

In the Button class, it has a variable named this.font_color, which changes depending on the current game state, so that it draws in black or white depending on the background. It also has a method called mouse_over(), which returns true if the mouse is inside the button. If true, a variable called this.opacity_changes, allowing the button to fade on hover.

class Sign{ 
  constructor(x, y, font_color, font_size, string, sign_w, sign_h) { 
    this.x = x; 
    this.y = y; 
    this.string = string;
    this.age = frameCount; 
    this.speed = 20; 
    this.font_size = 0; 
    this.width = sign_w; 
    this.height = sign_h;
    this.font_color = font_color;
    this.font_size = font_size; 
  }

  display(){ 
    push(); 
    rectMode(CENTER); 
    textFont('VT323');
    textAlign(CENTER);
    textSize(this.font_size); 
    noStroke(); 
    fill(this.font_color); 
    text(this.string, this.x, this.y, this.width, this.height);
    pop(); 
  } 
}

The Sign class is very similar to the Button class, containing all the same attributes, although the way the text animates is defined outside the class in the type() function.

The type() function was the most reused function of the entire program, and it really brought the entire game to life. Given that most of it is text based, adding a typewriting effect made it more visually interesting and immersive, forcing the user to slow down their reading speed to match the speed at which the text was appearing on screen.  The code is shown below:

function type(current, string) {
  if (current==0) { 
    start_typing(); 
  }
  if (current_char>= string.length-1){
    stop_typing(); 
  }
  let current_str = string.substring(0, current); 
  textSize(30);
  text(current_str, windowWidth/2, windowHeight/2, windowHeight-200-margin, windowHeight/3-margin);
  current_char +=random(0.1, 0.6);

Essentially, the function takes a string as its input and prints a substring of the string that increases with each successive frame, giving the illusion of typing. The substring starts with length 0 and ends at length string.length, incremented by the current_char variable. The curent_char variable is incremented in random values to give the appearance of natural typing.

CHALLENGES 

The most challenging part for me was understanding the concept of game states as a way to organize my code. In the beginning, I was writing the code for each game in separate files, and thought that keeping separate functions would be enough to organize the code. However, I experienced a lot of difficulty trying combine multiple sketches. After creating the global variable game_state, which was a numerical value that kept track of the current game_state, it was much easier to organize the code and have the program transition from one scene to another. For example, the draw() function simply consists of several if statements that say “when the game state is __ number, go to __ function”, where each function corresponded to a certain “scene” in the game, such as the winning screen to chapter 1, or the instruction screen for chapter 3. Also, the game_state could be changed almost only with the mouseClicked() function. Inside the mouseClicked() function, it deals with every button that is used in the program, and depending on what type of button is clicked, it increments or decrements the game state.


BORROWED CODE 

The only outside sources that were used in making this game was the algorithm used to make the maze, and the typing function. Of course, I adapted each of them slightly to fit my game. For example, the maze was built using a depth first recursive program made by The Coding Train, though it only generated the pattern and did not allow the user to actually move through the maze. The code that was used to allow the user to actually play the maze was completed on my own. Secondly, the original typing function that I found only worked with single strings, and I adapted this to fit with a list of strings, as well as display a new message with the click of a button.

The link to the maze algorithm can be found below:  https://editor.p5js.org/codingtrain/sketches/EBkm4txSA

The link to the typing effect can be found below:

https://editor.p5js.org/cfoss/sketches/SJggPXhcQ

IMPROVEMENTS  FOR THE FUTURE 

Of course, I would love to finish the second chapter so that the game is complete. I would also like to refine the code more. I recognize that as the process went on, I became lazy and hardcoded much of it. Editing it by adding some intermediary variables, making variable names more clear, and even reducing the amount of Button and Sign instances would make the code not only shorter, but more organized. Additionally, as brought up by my professor, using Javascript objects would be incredibly useful for this project. For example, I use two arrays: invader_keys and alien_keys, which are both arrays of 4 elements that store boolean values, each corresponding to an arrow key. Each arrow key is represented by the indexes of 0, 1, 2 and 3, which is very unclear and confusing to someone who doesn’t know the code.


Midterm Game

Concept:

I thought the snake game will be fun to implement – it is simple, fun, and can be done easily using OOP. It turned out to be a little more difficult than I expected it to be. Nevertheless, it was satisfying to implement a game I grew up playing 🙂

Challenges:

One of the most difficult parts was figuring out the algorithm for the movement of snake. It took me a lot of time. The way the algorithm works is that it the snake head (which is a class of itself) moves independently. It changes the direction based on the input key. The rest of the body of the snake is stored in an array. I run a for loop starting from the last index of the array and assign the last element’s x and y coordinate to the second last element. I do so until the second element’s x and y coordinate is equal to the first element’s values. Then I update the the first element’s values basis the position of the head for which I have 4 if conditions.

Another smaller issue I ran into was not being able to make a class which inherits from Arrays. I am not sure if that is possible in JS.

This is the bit on which I spent most of my time.

if(this.direction=="RIGHT"){
    for(let i=(g.arr.length)-1; i>1; i--){  //g is the snake head
        print("LOK");
        g.arr[i].row = g.arr[i-1].row;
        g.arr[i].col = g.arr[i-1].col; 
        g.arr[i].display();
    }
    g.arr[1].row = this.row+0.5;
    g.arr[1].col = this.col+0.5;
    g.arr[1].display();
    this.headimage;
}

else if(this.direction=="LEFT"){
    for(let i=(g.arr.length)-1; i>1; i--){
        print("LOK");
        g.arr[i].row = g.arr[i-1].row;
        g.arr[i].col = g.arr[i-1].col; 
        g.arr[i].display();
    }
    g.arr[1].row = this.row+0.5;
    g.arr[1].col = this.col+0.5;
    g.arr[1].display();
    this.headimage;
}
else if(this.direction=="UP"){
    for(let i=(g.arr.length)-1; i>1; i--){
        print("LOK");
        g.arr[i].row = g.arr[i-1].row;
        g.arr[i].col = g.arr[i-1].col; 
        g.arr[i].display();
    }
    g.arr[1].row = this.row+0.5;
    g.arr[1].col = this.col+0.5;
    g.arr[1].display();
    this.headimage;
}
else if(this.direction=="DOWN"){
    for(let i=(g.arr.length)-1; i>1; i--){
        g.arr[i].row = g.arr[i-1].row;
        g.arr[i].col = g.arr[i-1].col; 
        g.arr[i].display();
    }
    g.arr[1].row = this.row+0.5;
    g.arr[1].col = this.col+0.5;
    g.arr[1].display();
    this.headimage;
}
this.headimage;
this.row += this.vr; 
this.col += this.vc;

Other than that, the code is pretty much straightforward. There are 4 classes: SnakeHead, SnakeElements, Snake (initialises the game), and Food. I use function which calls the necessary class objects in a fucntion called restart which is called every time you click the canvas after losing. The game uses 3 pictures, 2 sounds, OOP, multiple shapes, on screen texts, and has a restart option.

Game: 

Reflections: 

It was a lot of fun to make, but I am unhappy with the aesthetics of the entire game. I also want to make it look a lot more smoother, but I’m not sure if my current algorithm will allow that. Another issue is that there is a possibility that the food can spawn at a location which is currently occupied by the snake – which can get slightly annoying. However, I learnt a lot and gained useful knowledge 🙂


Midterm Project- Tarek Nabih

Inspiration:

I came up with the game while thinking about my childhood games. Before starting to work on the project I kept brainstorming possible ideas that I can work on. One thing in particular that crossed my mind was to make the snake game as it was the main game that we all played on our Nokia devices when we were kids. But I noticed that a lot of people are doing it already so I changed my mind about the second option: “spaceship destroyer”. When I was a kid there was this well-known game in my community and among my friends, we called it “chicken.” In that game, there was this spaceship that was flying in the air and it was firing lasers at chickens while avoiding colliding with their eggs. Of course, it was way more advanced than that as it had multiple powerups and multiple levels and it seemed to have a story. However, I wanted to do something similar. And that’s when I decided to make the game I made. 


Challenges:

I think I experienced challenges in every step of coding that game. It all started with setting the size of the canvas. I think I overthought it as I was trying to find the perfect canvas size for the game. I ended up choosing a portrait-like canvas. 

Then I had a problem controlling the spaceship. The arrows were not doing the job. The spaceship’s movement was very weird. I tried multiple ways to make it smoother, but a lot of them didn’t work at first. I eventually found a good setup for the arrows. And I figured out a way to make it go to the right and appear from the left and vice versa to make the user experience smooth.

I think the biggest challenge was to make the bullets hit the rocks falling down. It was just going through it for hours without making any obvious thing at all. After hours of debugging, I figured out a way to make it the rock disappear when the laser hits it.

Code:

controlling the spaceship:

function keyPressed() {
  if(keyCode === ENTER){
     gamestatus = "running";
  }
  if (keyCode === UP_ARROW){
    makebullet(mainship.x,mainship.y);
  }
  if(keyCode === LEFT_ARROW){
    rate = -5;
  }
  if(keyCode === RIGHT_ARROW){
    rate = 5;
  }
  if(keyCode === BACKSPACE){
    rocks.splice(0,rocks.length);
    rocksctr = 0;
  }
  
  
}

function removeRocks(){
  rocks.splice(0,rocks.length);
  rocksctr = 0;
}


function keyReleased() 
{
  
  if (keyCode === RIGHT_ARROW || keyCode === LEFT_ARROW) 
  {
    rate = 0;
  }
  if(keyCode === ENTER){
     gamestatus = "running";
  }
  if(keyCode === BACKSPACE){
    rocks.splice(0,rocks.length);
    rocksctr = 0;
  }
  
}

Generating rocks:

function generaterocks(){
  let rand = int(random(0, 100));
  let rand2 = int(random(0, 100));
  if(rand % 7 == 0){
    if(rand2 % 3 == 0){
      if(rand2 % 2 == 0 && rand % 2 == 0){
          rocks[rocksctr] = new boulders();
          rocks[rocksctr].display();
          // console.log(rocksctr);
          rocksctr++;
        }
     }
  }
}

catching collisions and displaying rocks:

function displayrocks(){
  for(let i = 0; i < rocks.length; i++){
    rocks[i].display();
    // console.log(">",rocks.length);
    
    let temp = false;
    for(let j = 0; j < bullets.length; j++){
      if(bullets[j].didcollide(rocks[i])){
        temp = true;
        bullets.splice(i,1);
        numBullets--;
      }
    }
    
    if(mainship.didcollide(rocks[i])){
      rocks.splice(i,1);
      rocksctr--;
      gamestatus = "end";
      bomb.play();
    }else if(rocks[i].y > height || temp){
      rocks.splice(i,1);
      rocksctr--;
    }
  }
}

Main spaceship class:

class spaceship{
  constructor(){
    this.x = 200;
    this.y = 450;
    this.display();
  }
  
  display(){
    imageMode(CENTER);
    image(ship,this.x,this.y);

    this.move();
    this.checkboundries();


    imageMode(CORNER);
  }
  
  move(){
    this.x += rate;
  }
  
  checkboundries(){
    if(this.x > width){
      this.x = 0;
    }else if(this.x < 0){
      this.x = width;
    }
  }
  
  didcollide(other){
    if ( (this.x <= (other.x + other.width())) && (this.x >= other.x)) {
      if ((this.y <= (other.y + other.width())) && (this.y  >= other.y)){
        // print("Collision");
        return true;
      }      
      
    }
  }

}

The game:


Reflections:

Even though I faced several difficulties when creating the game and my original concept had to be modified, I am quite pleased with the outcome. Through making mistakes, I gained a lot of knowledge. I also discovered that it’s a pretty good approach to advance to break the problem into smaller challenges. I began the code with simple shapes before starting to add my assets, animation, point system, and other things. I examined the animation code independently and just inserted it once it began to move.

Assignment 3 – OOP

https://editor.p5js.org/merna.rakkad/full/fLiO5Qym8

Concept:

Coding using OOP was more difficult than I expected it to be, but with practice it ended up being as easy as the rest of the concepts. Learning OOP from scratch with no background in coding generally confused me a little because it was completely different and included many new functions and concepts, but doing this assignment helped me understand it; OOP felt very simple by the end of the assignment.

The concept of this program is simple, it is yet another artwork. I intended to make something that was visually pleasing and coordinated, and OOP helped me do that.

Using different creative names helps keep the code entertaining, for example when I used circir, that helped me store the different names and parts of the code in my head without being bored.

A problem I ran into was getting the constructors to work, my code kept crashing and the website would lag and I’d have to repeat the entire process again. After redoing the code though, I finally understood that my problem was with the syntax and I fixed it.