For this week, we decided to focus on the Processing side of things, since Arduino will only play a basic role in our project (control x and y positions using potentiometers).
research
When the two users’ paths meet on the screen in an area where they have something in common, a blooming effect gets triggered. (PS: Determining a commonality is done through comparing the answers to questions that are collected at the beginning of the program). This is the part we needed to do the most research on. We wanted to get some inspiration to figure out what the blooming effect should look like, and how it should work. We found two concepts that seemed interesting to us so far, and messed around with the code so that it would fit our project a bit better:
The first one draws fireworks, which we thought would be cool as it can represent a spark between the users if they have something in common. However, in the case that we end up choosing this effect, we are still trying to figure out how to make the fireworks stay displayed on the screen properly after the “animation” bit of it is over.
The second one is represented by the blooming of a flower. We added the option to add the number of “petals” so that we can see how different it would make the sketch look. We were also thinking of using this functionality to go along with how similar the answers of the users are. The possible answers for each of our questions are going to be: 1, 2, 3, 4, which signify how much you agree or disagree with the question. So we thought that the number of petals could increase the more the answers of the users are closer together. You can visualize this through this video:
What we got done
The first thing we wanted to make sure would work properly is the trace the users would leave when moving around the screen. In our final project, each user will have two potentiometers, one would control the x-position, the other will control the y-position, This allows them to move around and “draw” freely on the screen. Since hooking this up to Arduino will be fairly easy, for now, we are just using 4 keys on the keyboard to simulate this for each user. We wanted the current position of the user to be represented by a point that is fully opaque, and the trail it leaves behind it to be a bit more transparent. This took a lot of time for us to figure out but the solution turned out to be quite simple. All we needed to do was draw a black rectangle with the screen dimensions, that had a really low alpha value (3 in our case) each frame, i.e., in the draw loop.
The second thing we did was try to detect collisions between the traces of the two users. We did this by turning the screen into a grid. Every time a user crosses a square on the grid, a boolean for that user turns to True. If both the booleans for both users become True, then a collision is detected. For now, we are representing the collision by a big dot. But this will later be replaced by the blooming effect we mentioned earlier. To fix: One issue we still have with this, however, is that if the user’s path is between two squares of the grid (each half in a different square), two dots may be displayed to represent one collision. We are working on fixing this.
Finally, we also started working on our Question class. This will be a “template” for all of the questions we are going to include in the beginning of our program. We started to think about all of the variables that the class should have. Here is the current code for it, it’s just a start as most of our work on it was brainstorming and discussion:
class Question{
  //variables to store input answers
  int user1Answer;
  int user2Answer;
  //question location (corresponding to area on screen)
  int x,y;
  //question box dimensions (it could be something that we design and upload to processing(?))
  int w,h;

  String questionText;

  boolean user1Answered;
  boolean user2Answered;

  boolean sameAnswer;


  void displayQuestion(){
   rect(x,y,w,h);
   text(questionText,x+w/2, y+h/2);
   //rect();
   //rect();
   //rect();
   //rect();
  }
}
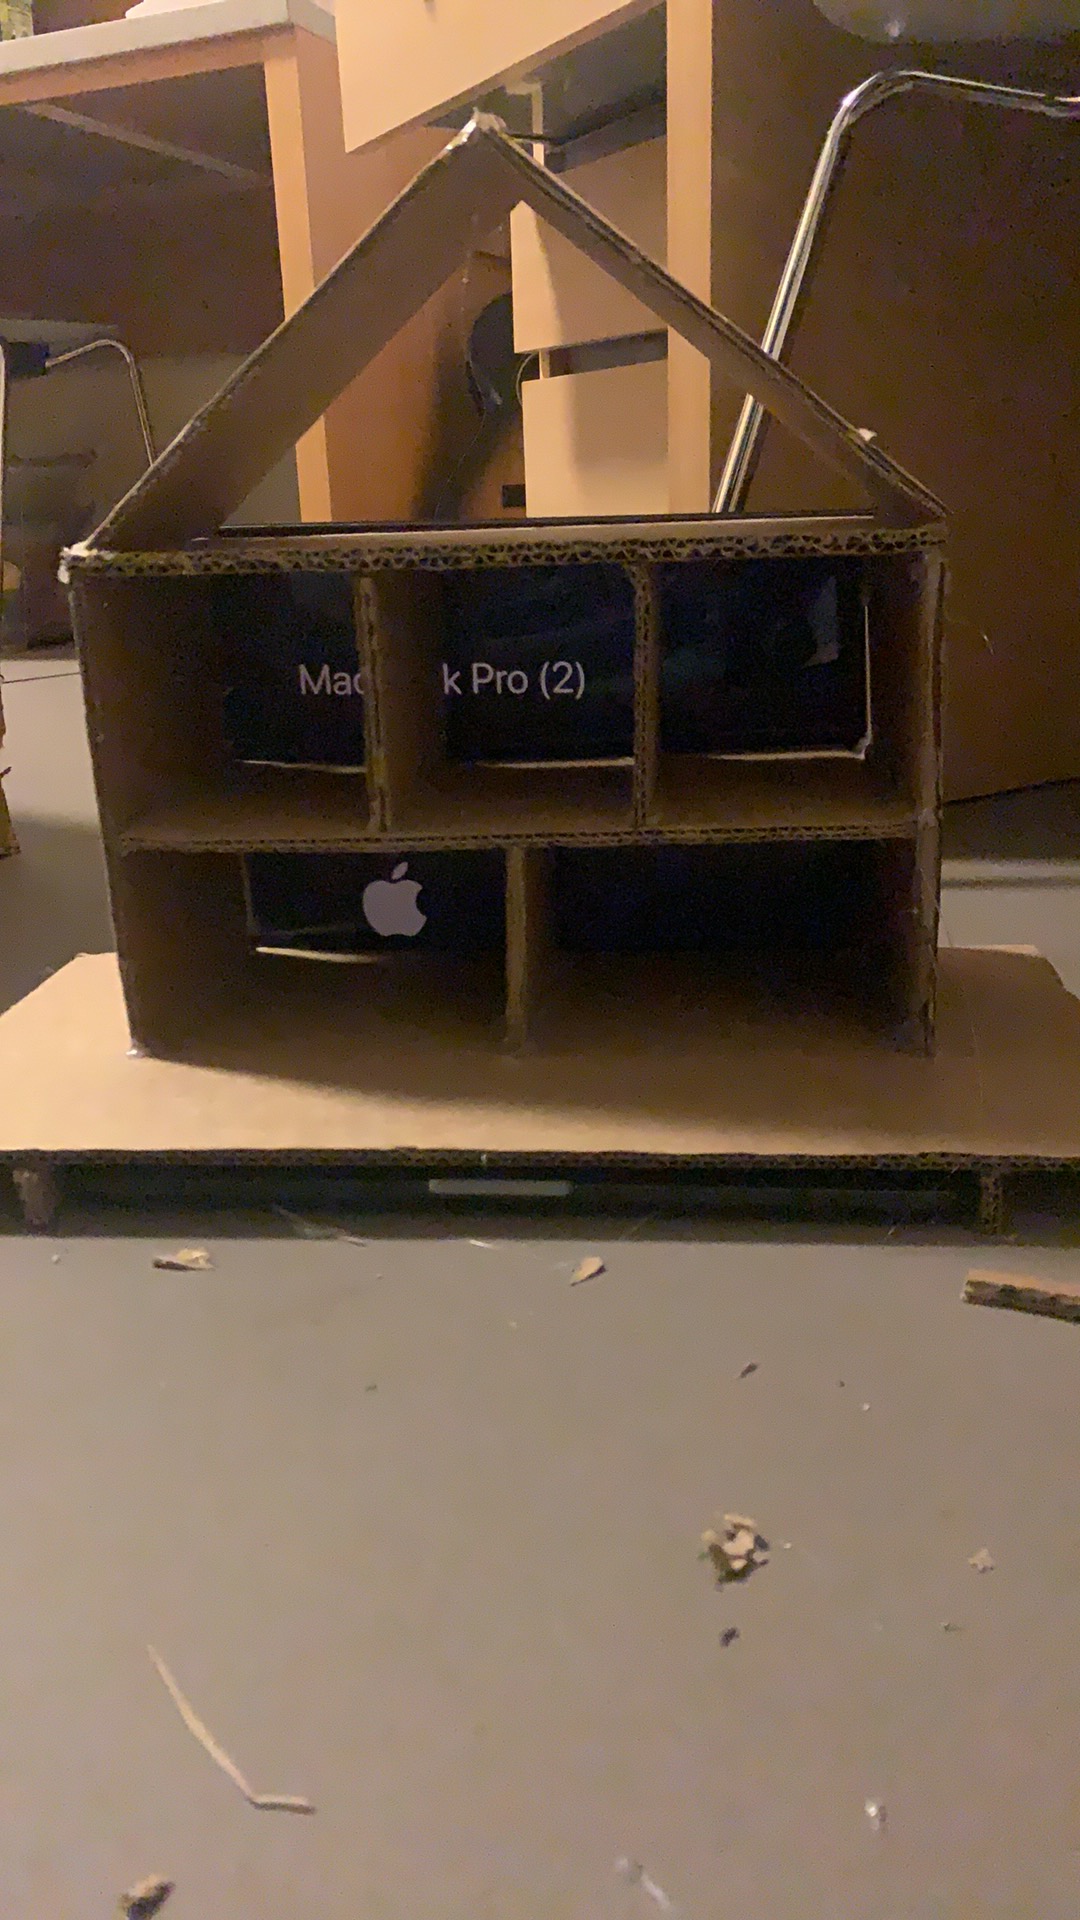
Right after Wednesday’s class last week, I bought a hot glue gun, and used the quarantine Blue Mart Cardboard box to start working on creating the dollhouse. This task was mostly fun, but a bit frustrating because the cardboard was so thick I needed a knife to cut most of it. Measuring all the pieces and getting straight lines with a knife were probably the most difficult parts.
I created the dimensions of the dollhouse so that the background of the rooms matched perfectly to the screen of my laptop. I also had to create a bit of a stand so that it didn’t rest on the laptop, and also fit in a way were it was perfectly centered without relying on the user to adjust it.
Next, Aayush and I discussed what each room could do, and what kind of interactivities we could incorporate. Here’s what we decided:
Bedroom: The background scenery changed from day to night
Game room: A small, interactive game starts (user can play)
Balcony: has a piano that plays music, scenery can change, as well as whether
Living room: A tv where a movie can play
Dining room: Food starts sizzling/ food is made/ kettle ..etc
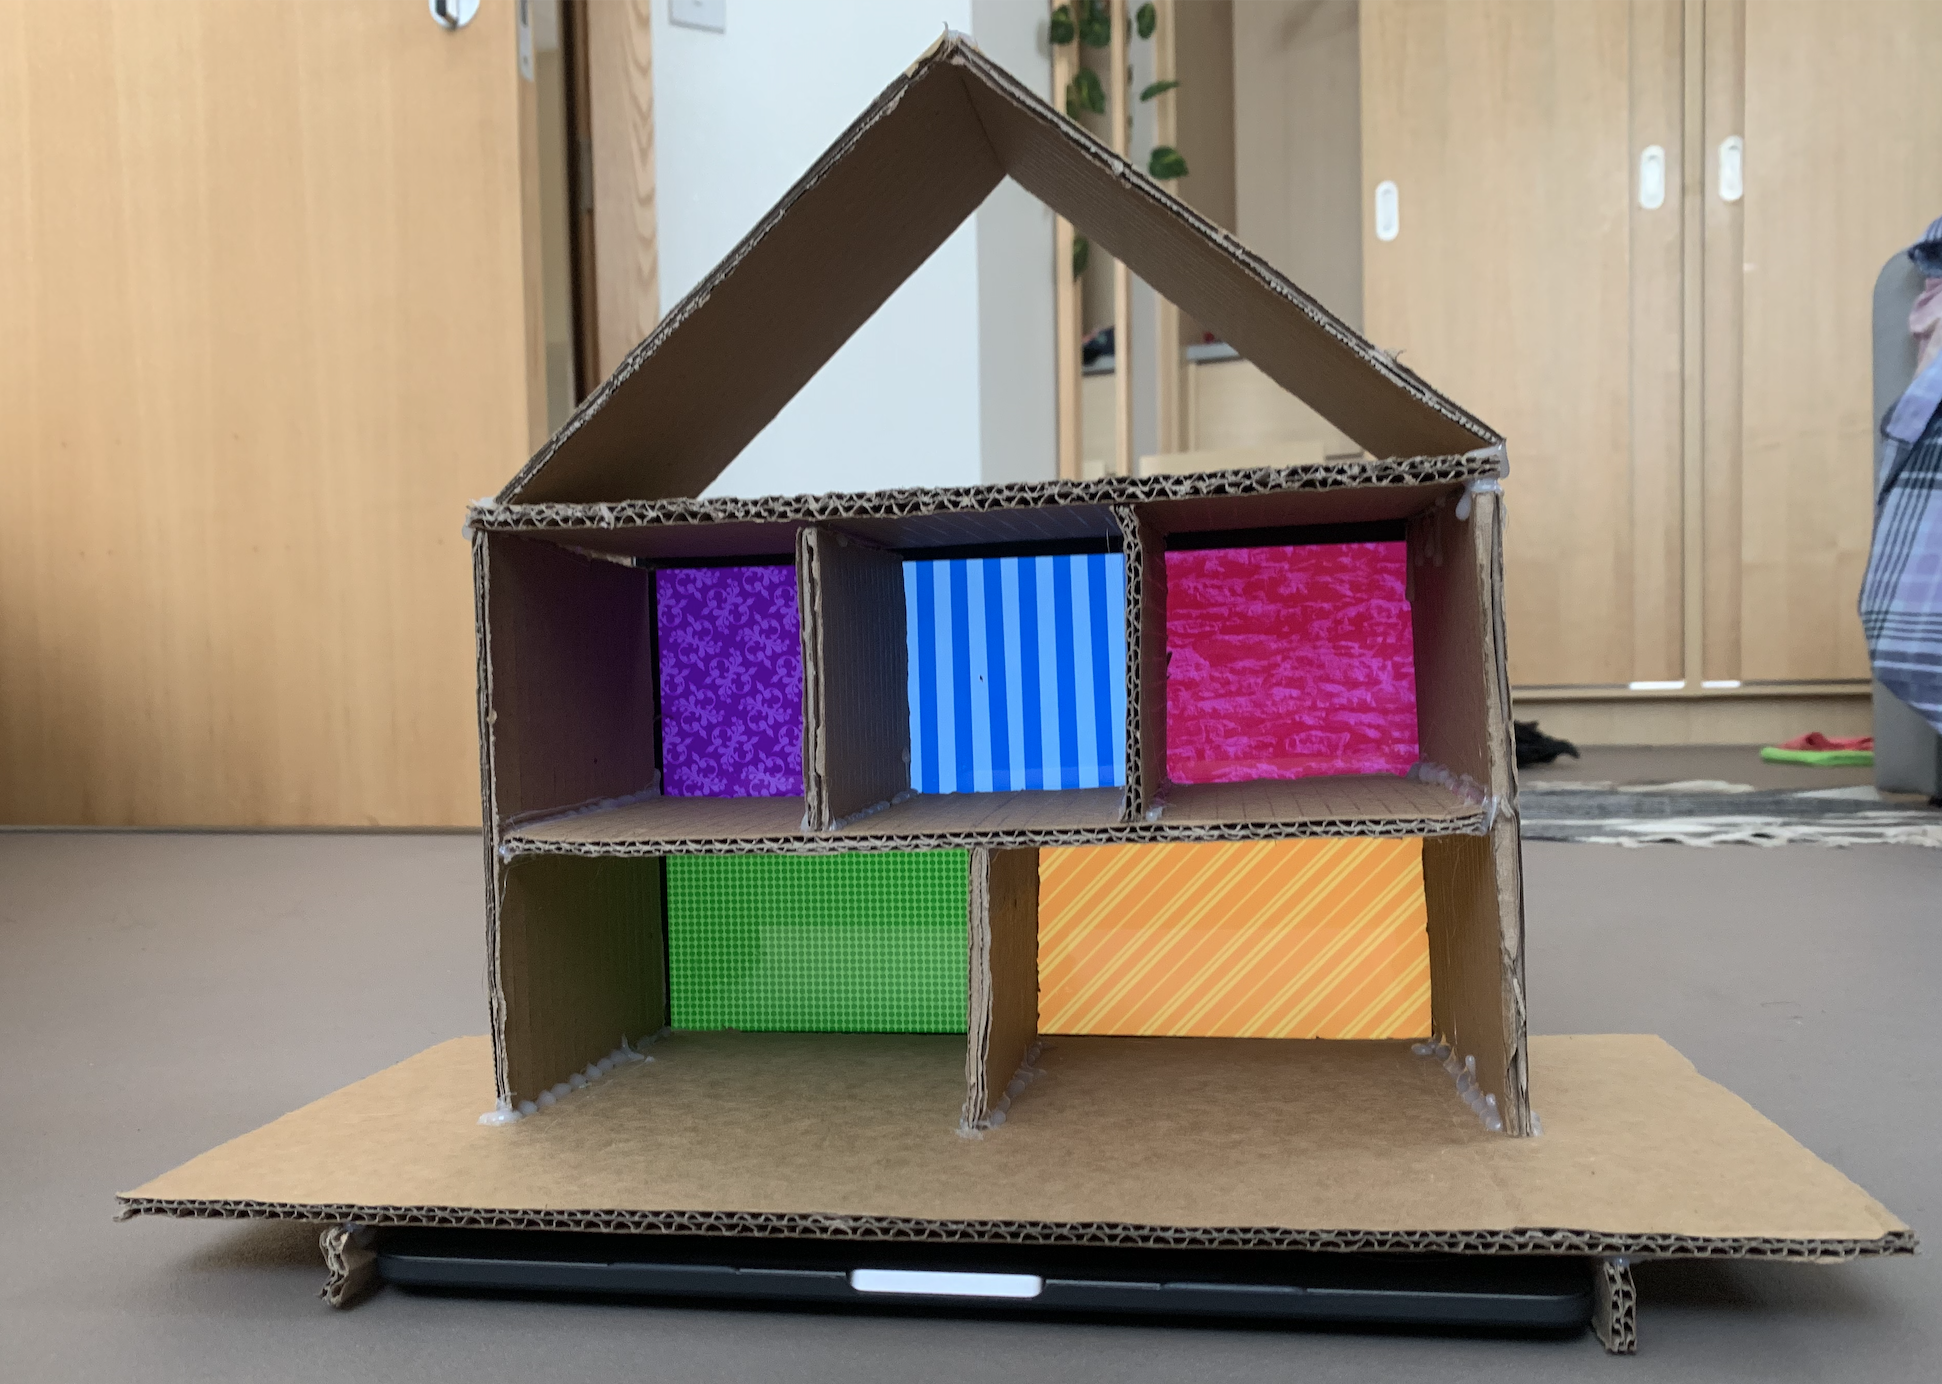
While Aayush created a prototype of the triggers of each room, I created simple ‘wallpapers’ of how the dollhouse may look. Here is what we have:
For clarification, this is what the dollhouse looks like in comparison to the laptop:
This week I thought about how to incorporate the physical components first into Arduino so that I can get the mechanisms working first before I go into creating a more artistic design.
I plan to create a keyboard like design of aluminum tape keys that resemble the piano keys. Each key is a capacitative sensor that also trigger a different musical note.
At the moment when the key is pressed, the duration of how long it is pressed will display an image on screen with the respective sound(synthesizer scale). Each key acts like a switch to activate the image.
For now the images on screen are simple to make sure it works first.
The composition of the visuals is the next part. Despite this being Phase 2 ,I managed to experiment on processing the different effects I can achieve with sound and shapes. These aren’t guaranteed to be used in the final version but it allowed me to familiarize myself with the minim library in processing.
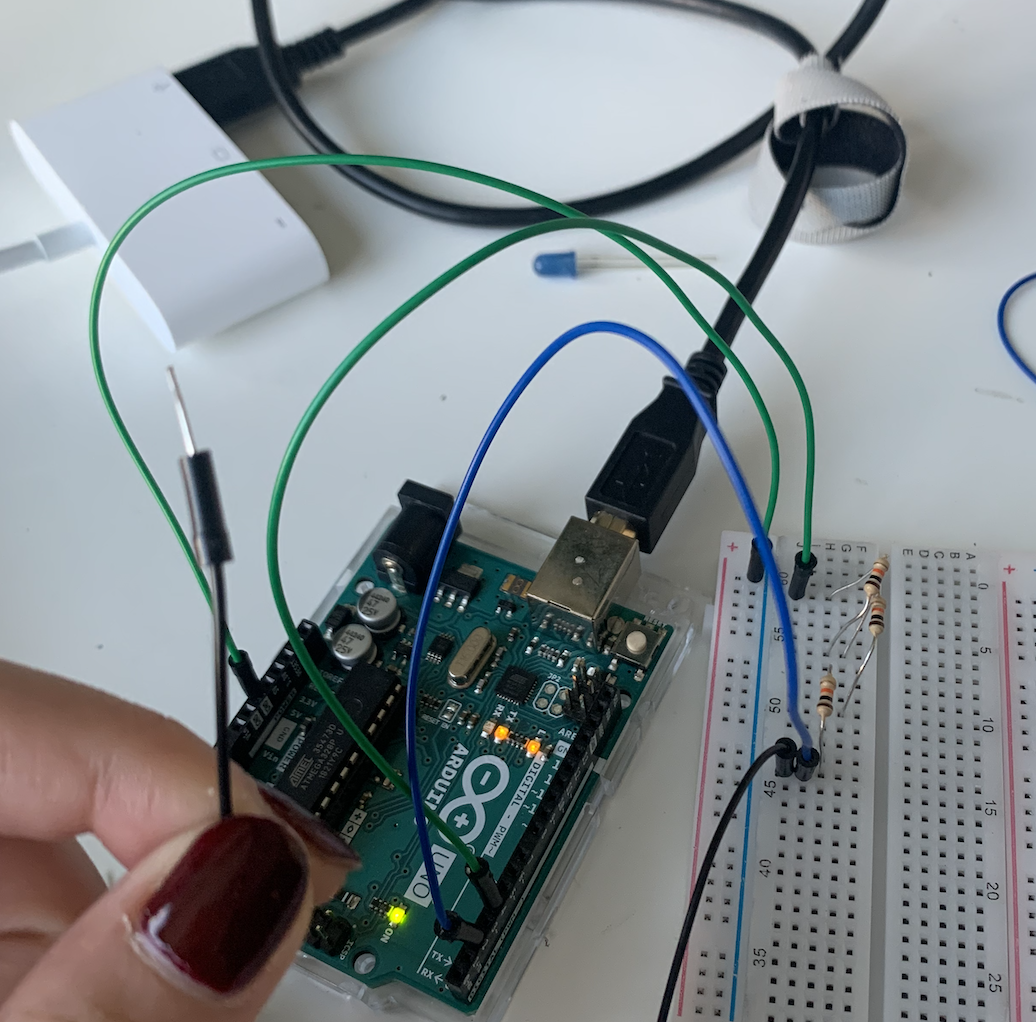
Troubles creating the capacitative sensor:
This was arguably a tricky part to fix because of the limited number of Ohms in our resistor, in order for a capacitive sensor to work you need a higher number, so after trial and error, I lined up the resistor in a series form and finally could get a reading from the serial port.
The black wire in my hand is the capacitive sensor
Screenshot from Max msp real time audio software that I am considering using with processing as a library exists for it. In this patcher image I created a synth with a virtual keyboard.
#include <CapacitiveSensor.h>

/*
   CapitiveSense Library Demo Sketch
   Paul Badger 2008
   Uses a high value resistor e.g. 10M between send pin and receive pin
   Resistor effects sensitivity, experiment with values, 50K - 50M. Larger resistor values yield larger sensor values.
   Receive pin is the sensor pin - try different amounts of foil/metal on this pin
*/


CapacitiveSensor   cs_4_2 = CapacitiveSensor(4, 2); // 10M resistor between pins 4 & 2, pin 2 is sensor pin, add a wire and or foil if desired

int ledPin = 12;
void setup()
{
  cs_4_2.set_CS_AutocaL_Millis(0xFFFFFFFF);
 // turn off autocalibrate on channel 1 - just as an example
  Serial.begin(9600);

}

void loop()
{

  long start = millis();
  long total1 =  cs_4_2.capacitiveSensor(30);


  //    Serial.print(millis() - start);        // check on performance in milliseconds
  //    Serial.print("\t");                    // tab character for debug windown spacing

  Serial.println(total1);                  // print sensor output 1

  //    Serial.print("\t");

  //  delay(10);
  // if (total1 > 0) {
  //    digitalWrite(ledPin, HIGH);
  //  }
  //  else {
  //    digitalWrite(ledPin, LOW);
  //  } worked to turn LED on

  // arbitrary delay to limit data to serial port
}
import processing.sound.*;
import ddf.minim.*;
Minim minim;
AudioPlayer song;
int spacing = 100;
import processing.serial.*;
Serial myPort;
int signal=0;
int border = spacing*2;
int amplification = 50;
int y = spacing;
float ySteps;
void setup() {
  printArray(Serial.list());
  String portname=Serial.list()[4];
  println(portname);
  myPort = new Serial(this, portname, 9600);
  size(800, 800);
  background(255);
  strokeWeight(1);
  stroke(0);
  noFill();
  minim = new Minim(this);
  song = minim.loadFile("song.mp3");
}
void draw() {
  if (signal>0) {
    song.play();
    float amplitude = song.mix.level();
    noStroke();
    fill(random(255), amplitude*155);
    int x = int(map(song.position(), 0, song.length(), 0, width/2));
    float frequency = song.mix.get(int(x))*spacing*amplification;
    ellipse(width/2, height/2, frequency, frequency);
  }
}

void serialEvent(Serial myPort) {
  signal=myPort.read();
}
Inspired by our initial idea and a long conversation with Aaron and among ourselves, we came up with a new concept.
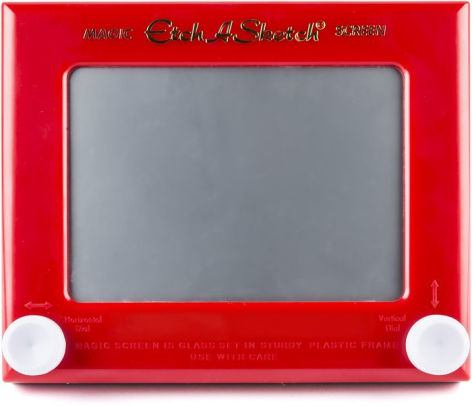
Our idea is to create a 2-person interactive generative art experience in which two people fill in a yes-no questionnaire about themselves, and then use an etch-a-sketch – like set up (two potentiometers) to generate a visualization of how alike they are and how much they have in common.
Arduino
Our Arduino will have two potentiometers per user as mentioned above to simulate the etch-a-sketch setup. One knob would control drawing on the x-axis, and the other would control drawing on the y-axis.
Etch-A-Sketch
Additionally, we will have three buttons. Two buttons for the yes-no questionnaire, and one to “save” the artwork so that the users can keep it afterward.
Processing
We’re thinking of mapping sections of the processing screen to correspond to different categories (e.g. hobbies, age…etc.), and then as the users make their way on the screen, they leave traces that reflect the data they gave us in the beginning. When two traces meet at a point that symbolizes something in common a more complex shape “blooms” there.
At this point, it feels a bit difficult to visualize what it will exactly look like as it will require a lot of experimentation and trial and error!
Experience
For now, we’re thinking of having it all on one processing screen. So the users alternate filling in the questionnaire, and then continue to generate the art. However, if we find that we satisfied all the other elements we’re thinking of, we might try to make it across two devices
For this week’s project, I wanted to use Arduino controls to refine what I did in my midterm. To refresh your memory, my midterm was a two-player game where the players ran around the map competing for candies. The game was ok, but the main bug was that I couldn’t have the two players moving at one time. This was due to the limitations of “Keypressed function”, as it wasn’t able to differentiate which player was pressing the keys.
By introducing Arduino into the game, I could simply create another “console” for player 2, so the player controls won’t be mixed up in the game.
Limitations
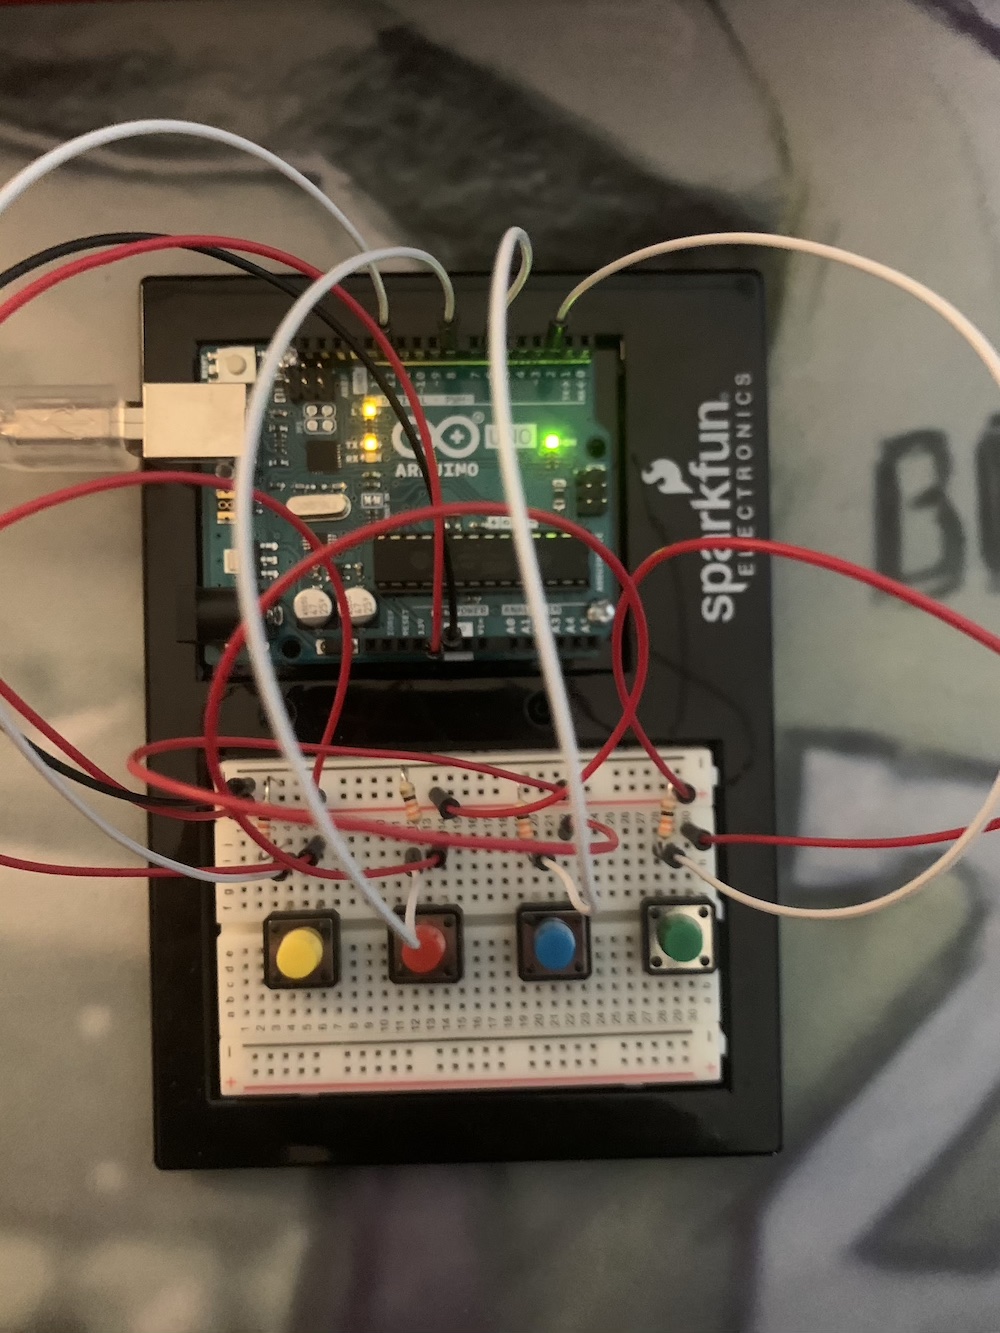
There were two limitations to using Arduino as a “console.” One is more obvious, which is the fact that the kit buttons aren’t that responsive, and aren’t really stationary. While I was playing the game with it, the buttons would slip off a lot of the times.
The second limitation is the problem of the breadboard. There are four buttons in the kit, so just enough for the four directions. However, the breadboard didn’t have the horizontal space to put an “up” and “down” button next to each other. As a compromise, I had to put the four buttons in a row, with the middle right being “up” and middle left “down”. Here is the final layout:
Challenges
The main challenge I ran into for this project was trying to integrate Arduino into my midterm project code. My midterm code was rather chaotic with a lot of functions, so it took a lot of time trying to piece together where the Arduino parts of the code would fit into the logic.
Full code
Arduino:
int button1 = 2;
int button2 = 12;
int button3 = 6;
int button4 = 8;

void setup() {
  // put your setup code here, to run once:
  pinMode(button1, INPUT);
  pinMode(button2, INPUT);
  pinMode(button3, INPUT);
  pinMode(button4, INPUT);
  Serial.begin(9600);
}

void loop() {
  int buttonState1 = digitalRead(button1);
  int buttonState2 = digitalRead(button2);
  int buttonState3 = digitalRead(button3);
  int buttonState4 = digitalRead(button4);
  char inByte=Serial.read();
  Serial.print(buttonState1);
  Serial.print(',');
  Serial.print(buttonState2);
  Serial.print(',');
  Serial.print(buttonState3);
  Serial.print(',');
  Serial.println(buttonState4);
}
Main Code:
PFont font;

import processing.serial.*;
Serial myPort;
boolean left = false;
boolean right = false;
boolean up = false;
boolean down = false;

import processing.sound.*;            //all the sounds in this game
SoundFile eat;
SoundFile die;
SoundFile music;

Ball b1;                              //initializing the two players
Ball b2;
PImage ninja, warrior, bg;
PImage[][] ninjawalk;
PImage[][] warriorwalk;
int ndirection = 0;
int wdirection = 0;
int nstep = 0;
int wstep = 0;
int speed = 5;

Candy[] candy;                        //initializing all the candy
int count;
color chosen;
int livecount = 0;                    //how many edible candy there are

boolean go = false;                   //start game value

void setup() {
  size(1200, 800);
  bg = loadImage("bg.jpg");

  printArray(Serial.list());
  String portname=Serial.list()[3];
  println(portname);
  myPort = new Serial(this,portname,9600);
  myPort.clear();
  myPort.bufferUntil('\n');

  //sounds
  eat = new SoundFile(this, "eat.mp3");
  die = new SoundFile(this, "die.mp3");
  music = new SoundFile(this, "music.mp3");
  music.loop();

  //slicing the two sprite sheets for player 1 and 2
  ninja = loadImage("ninja.png");
  ninjawalk = new PImage[4][3];
  int w = ninja.width/3;
  int h = ninja.height/4;
  for(int iy = 0; iy < 4; iy++){
    for(int ix = 0; ix<3; ix++){
      ninjawalk[iy][ix] = ninja.get(ix*w, iy *h, w, h);
    }
  }
  warrior = loadImage("warrior.png");
  warriorwalk = new PImage[4][3];
  int ww = warrior.width/3;
  int wh = warrior.height/4;
  for(int wy = 0; wy < 4; wy++){
    for(int wx = 0; wx<3; wx++){
      warriorwalk[wy][wx] = warrior.get(wx*ww, wy *wh, ww, wh);
    }
  }
  //use this function to restart the game
  reset();
}

void draw() {
  menu();
  if (go == true){
    begin();
  }
}

void serialEvent(Serial myPort){
  String s=myPort.readStringUntil('\n');
  s=trim(s);
  if (s!=null){
    int values[]=int(split(s,','));
    if (values.length==4){
      println(values);
      if (values[0] == 1){
        right = true;
      }
      else if (values[0] == 0){
        right = false;
      }
      if (values[1] == 1){
        left = true;
      }
      else if (values[1] == 0){
        left = false;
      }
      if (values[2] == 1){
        up = true;
      }
      else if (values[2] == 0){
        up = false;
      }
      if (values[3] == 1){
        down = true;
      }
      else if (values[3] == 0){
        down = false;
      }
    }
  }
}

//this function restarts the game from the gaming interface directly
void reset(){
  float unit = 200;
  b1 = new Ball(width/4, height - 20, 1);          //player 1 character
  b2 = new Ball(width*3/4, height - 20, 2);        //player 2 character

  int wideCount = width / int(unit);               //calling the candies, initializing different candy colors
  int highCount = (height*3/4) / int(unit);
  count = wideCount * highCount;
  candy = new Candy[count];
  int index = 0;
  color[] colors = new color[6];
  colors[0] = #FF0011;
  colors[1] = #BA00FF;
  colors[2] = #2500FF;
  colors[3] = #00FFE8;
  colors[4] = #00FF01;
  colors[5] = #FFAF00;
  chosen = colors[int(random(0,5))];
  for (int y = 0; y < highCount; y++) {
    for (int x = 0; x < wideCount; x++) {
      candy[index++] = new Candy(x * unit + unit/2, y * unit + unit/2, 20, 20, colors[int(random(0,5))]);
    }
  }

  for (Candy candy : candy) {                      //counting how many edible candies there are to know the win condition
    if (chosen == candy.c){
      livecount ++;
    }
  }

  for (int i =0; i<count;i++){                     //candy speed initializing
     candy[i].xSpeed = random(-2,2);
     candy[i].ySpeed = random(-2,2);
  }
}

//this is the starting menu
void menu(){
  background(bg);
  fill(255);
  font = createFont("BreatheFire-65pg.ttf", 60);
  textFont(font);
  textAlign(CENTER);
  text("CANDY RUSH \n even heros like candy", width/2, 185);
  font = createFont("Georgia", 40);
  textFont(font, 30);
  text("This is a two player game. Ninja and Warrior wants to take a break \n on their quest, so they are going to catch candy. Some candies are \n poisonous, and only the candy indicator can tell you which candies are edible. \n The first player to catch all the edible candy wins. \n NINJA: WASD, WARRIOR: direction keys", width /2, 370);
  stroke(0);
  fill(0);
  rectMode(CENTER);
  rect(width/2, 680, 200, 72);
  fill(255);
  textFont(font, 60);
  font = createFont("BreatheFire-65pg.ttf", 42);
  textFont(font);
  textAlign(CENTER);
  text("PLAY", width/2, 700);
  if (mouseX>=(width/2 - 100)  & mouseX<=(width/2 + 100) & mouseY>=650 & mouseY<=720){
    stroke(255);
    noFill();
    rect(width/2, 680, 200, 72);
    if (mousePressed){
        go = true;
    }
  }
}

//this is the game starting function. the actual game is ran here
void begin(){
  background(bg);
  textSize(24);
  text(b1.score, width/4, height - 50);
  text(b2.score, width*3/4, height - 50);

  //calling candy functions
  for (Candy candy : candy) {
    candy.display();
    candy.collision();
    candy.update();
    candy.checkEdges();
  }

  //this is the candy indicator
  stroke(0);
  fill(chosen);
  ellipse(width/2, height - b1.diameter, b1.diameter, b1.diameter);

  //calling character functions
  b1.display();
  b1.move();
  b2.display();
  b2.move();
  checkwin();
}

void checkwin(){
  if (livecount == 0){                      //win condition
    for (Candy candy : candy) {
      candy.xSpeed = 0;
      candy.ySpeed = 0;
    }
    rectMode(CENTER);
    if (b1.score > b2.score){
      fill(0);
      rect(width/2, height/2, width, height);
      fill(255, 255, 255);
      textSize(32);
      text("Ninja Wins! \n (Press r to restart)", width/2, height/2);
    }
    else if (b2.score > b1.score){
      fill(0);
      rect(width/2, height/2, width, height);
      fill(255, 255, 255);
      textSize(32);
      text("Warrior Wins! \n (Press r to restart)", width/2, height/2);
    }
    else if (b2.score == b1.score){
      fill(0);
      rect(width/2, height/2, width, height);
      fill(255, 255, 255);
      textSize(32);
      text("Tie! \n (Press r to restart)", width/2, height/2);
    }

    //restart button
    if (keyPressed) {
       if (key == 'r' || key == 'R') {
          reset();
       }
    }
  }
}
Player Class:
class Ball {

  float x;
  float y;
  float diameter;
  int score;
  int player;
  int w = ninja.width/3;
  int h = ninja.height/4;
  int ww = warrior.width/3;
  int wh = warrior.height/4;

  Ball(float tempX, float tempY, int tempPlayer) {
    x = tempX;
    y = tempY;
    diameter = 45;
    score = 0;
    player = tempPlayer;
  }

  void display() {
    imageMode(CENTER);                                    //displaying player 1
    if (player == 1) {
      image(ninjawalk[ndirection][nstep], x, y, w, h);
    }
    if (player == 2) {                                     //displaying player 2
      image(warriorwalk[wdirection][wstep], x, y, ww, wh);
    }
  }

  void move() {
    if (player == 1) {
      if (keyPressed) {
        if (key == 'w' || key == 'W') {
          y = y - 5;
          ndirection = 0;
        }
        if (key == 'a' || key == 'A') {
          x = x - 5;
          ndirection = 3;
        }
        if (key == 's' || key == 'S') {
          y = y + 5;
          ndirection = 2;
        }
        if (key == 'd' || key == 'D') {
          x = x + 5;
          ndirection = 1;
        }
        if (frameCount%speed == 0) {
          nstep = (nstep + 1) %3;
        }
      }
    }

    if (player == 2) {
      if (up == true) {
        y = y - 5;
        wdirection = 0;
      }
      if (left == true) {
        x = x - 5;
        wdirection = 3;
      }
      if (down == true) {
        y = y + 5;
        wdirection = 2;
      }
      if (right == true) {
        x = x + 5;
        wdirection = 1;
      }
      if (frameCount%speed == 0) {
        wstep = (wstep + 1) %3;
      }
    }
  }
}
Candy Class:
class Candy {
  float x;
  float y;
  float w;
  float h;
  float xSpeed, ySpeed;
  boolean caught = false;
  color c;

  Candy(float tempX, float tempY, float tempW, float tempH, color tempC) {
    x = tempX;
    y = tempY;
    w = tempW;
    h = tempH;
    c = tempC;
    xSpeed = ySpeed = 0;
  }

  void display() {

    ellipseMode(CENTER);
    if (caught == false){
      fill(c);
      ellipse(x, y, w, h);
    }
  }

  //collision function for when players catch the right and wrong candy
  void collision() {
    if ((b1.x - b1.w *3/4 < x && x < b1.x + b1.w*3/4) & (b1.y - b1.h*3/4 < y && y < b1.y + b1.h*3/4)){
      if (c == chosen){
        x = -50;
        y = -50;
        caught = true;
        b1.score ++;
        livecount --;
        eat.play();
      }
      else if (c != chosen){
        b1.x = width/4;
        b1.y = height - b1.diameter;
        die.play();
      }
    }
    if ((b2.x - b2.w*3/4 < x && x < b2.x + b2.w*3/4) & (b2.y - b2.h*3/4 < y && y < b2.y + b2.h*3/4)){
      if (c == chosen){
        x = -50;
        y = -50;
        caught = true;
        b2.score ++;
        livecount --;
        eat.play();
      }
      else if (c != chosen){
        b2.x = width*3/4;
        b2.y = height - 20;
        die.play();
      }
    }
  }

  void update(){
    x += xSpeed;
    y += ySpeed;
  }

  void checkEdges() {
    if (y>(height*3)/4) {
      ySpeed = -ySpeed;
    }
    if (y<0) {
      ySpeed = -ySpeed;
    }
    if (x>width) {
      xSpeed = -xSpeed;
    }
    if (x<0) {
      xSpeed = -xSpeed;
    }
  }
}
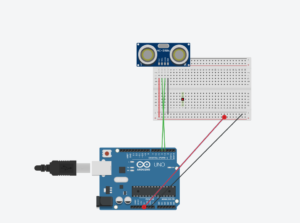
I wanted to create the popular game Flappy Bird, but using the distance sensor and my hand to control the movement of the bird.
PROCESS:
I started by creating an array of rectangles that formed at a distance apart, and at random heights. For some reason, this was my most frustrating part because I didn’t realise how quickly I could forget Java. Eventually figured out how to move the screen, and the ball, to make it seem like the bird was moving.
ARDUINO:
This was the first time I was using the Distance sensor so it took me some time to understand it, but some research and help from my peers did the trick. Once I kept experimenting using my hand, I constrained the results to a distance I thought seemed appropriate, which was between 1 and 10 inches. After that, I connected the Arduino and processing using the sendBytetoProcessing example and was happy to have found that process easy for me.
FINAL TOUCHES:
I added a collision if statement, to end the game, and also added some fun graphics to have the game seem more fun!
OBSTACLES:
I couldn’t manage to get the bird to mimic my hand movements exactly, The bird seemed to keep bouncing. I played around a lot with constrain, mapping, time, and framerate, but am still not sure what exactly the issue is. I would love some insight if anyone knows!
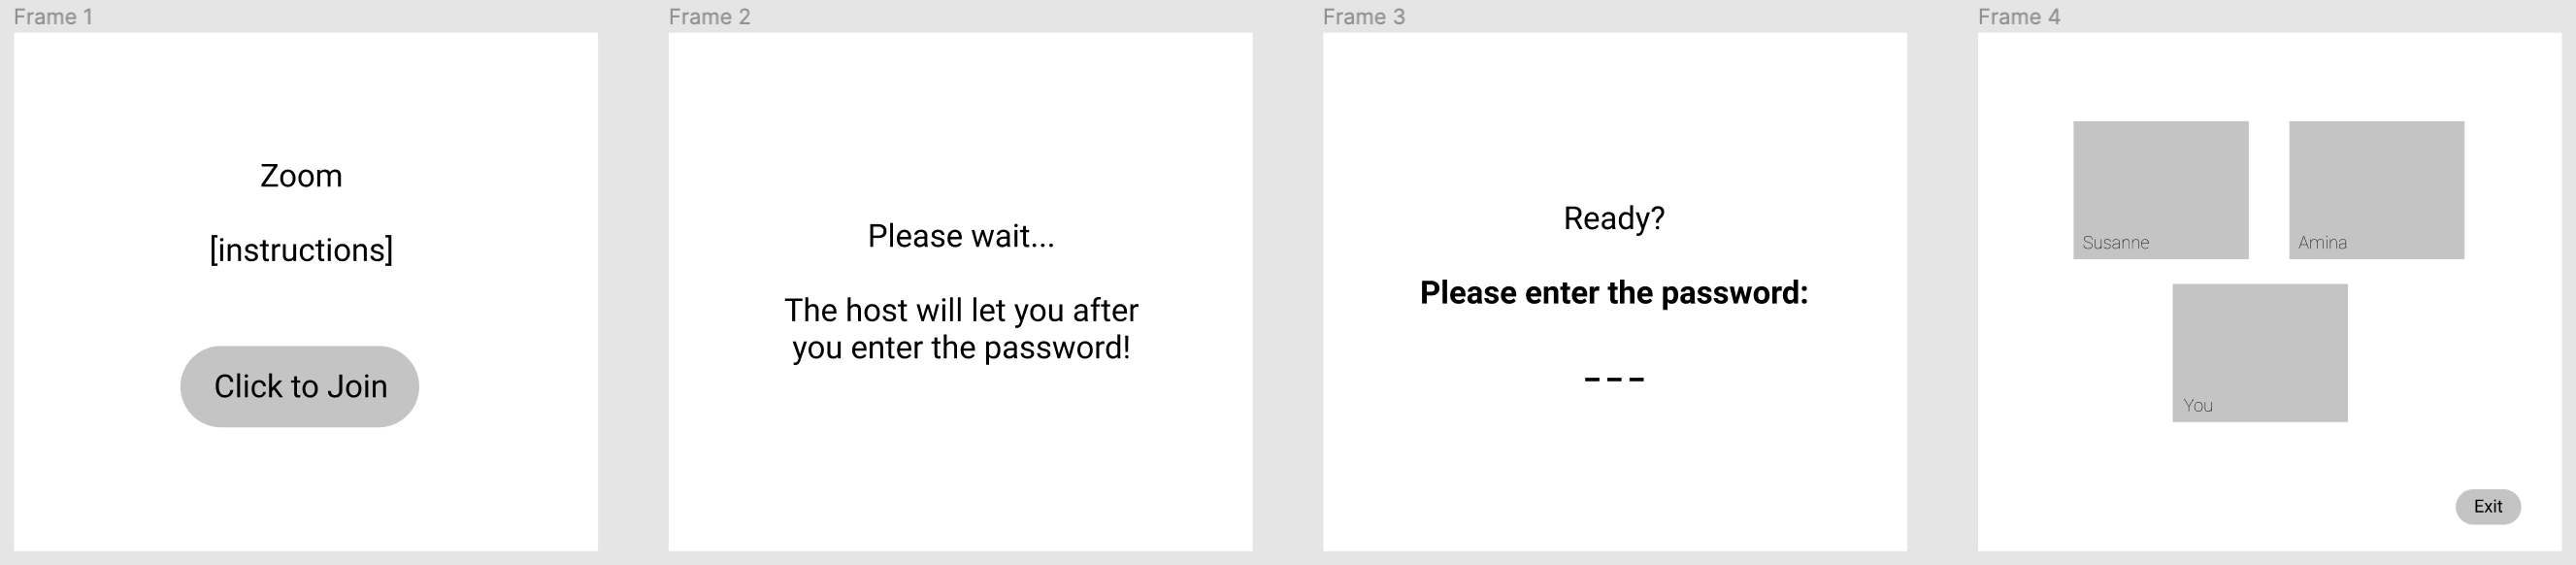
Feedback during our class discussion and wire framing helped us finalize a clear plan for our Zoom game in which the player has to repeat a specific LED and sound pattern through button input in order to join the Zoom meeting in which prerecorded version of Amina and Susanne will be waiting.
+++Communication between Arduino & Processing🔄💻🔈🎶+++
STEP 1
Processing: Start with the “Main Menu” / “Log Into Zoom” screen. Send a message to Arduino if the game has started.
Arduino: Turn on if there is a specific message from Processing received. Play a specific tone once and blink with green LED to indicate the start of the game.
STEP 2
Processing: Player clicks game start button, sound effect for click. Then redirect to the window saying “The password pattern is playing. The meeting host wants to test your memory. You can enter the meeting after you repeat the pattern.”
Arduino: Play the right combination with tone() and corresponding LED colors. After this, send a message to Processing indicating the end of the password.
STEP 3
Processing: After receiving the end signal from arduino, redirect to the “input” window and prompt the user to enter the password using the buttons on Arduino.
Arduino: Start to take input from the user and send the combinations to Processing. Provide immediate feedback to the user by playing corresponding button sounds and turning the corresponding light color. Send input if the “enter” button was pressed.
STEP 4
Processing: Keep checking for input from Arduino until the right combination is entered. If the input is wrong, keep asking for it. If the input is right, redirect to the “Zoom Meeting”.
Arduino: If the wrong combination is entered, play a specific sound and turn the LED to red light. If the right combination is entered, play congratulating sound and turn the green light to indicate the end of the game.
+++Wire frames💻📐🎨+++
+++Next steps📝+++
We want to explore the option of bringing in real time camera input to have the players video appear in Frame 4 alongside our prerecorded videos. Daniel Shiffman seems to have a good tutorial on that topic.
Amina will start with Arduino, specifically exploring the format in which button input is read and sent when the player repeats the pattern password.
Susanne will start with Processing and design the different scenes of the game.
So as usual, being the indecisive person I am, I have no clue what I will be doing for the final project. I have some random ideas as to what I can do so far:
Idea 1:
Building some kind of trivia for a TV show like How I Met Your Mother, where questions pop up and you answer using the buttons and a yellow bulb signifies waiting for response, a blue one blinks when you answer, and at the end a green one. According to your answers, the screen tells you which character you are most similar to.
Idea 2:
Building some kind of spike ball representing COVID-19 where each spike when clicked would bring an output of sound, picture, or data of a country/ worldwide.
Idea 3:
Connect 4 game on screen played by 4 buttons representing each position.
Idea 4:
Obstacle course game on screen where you move using buttons and collect power-ups to overcome challenges. Could be a multiplayer race between 2 players.
For my final project, I plan to do a “ghost busting” device. The device would include an Arduino layout and a laptop. When there’s a “ghost” caught, the laptop would display the type of ghost caught, its nature (malicious/neutral/friendly), and instructions on how to dispose of it. The way the player would dispose of the ghost would include a certain set of actions on the arduino.
Inspiration
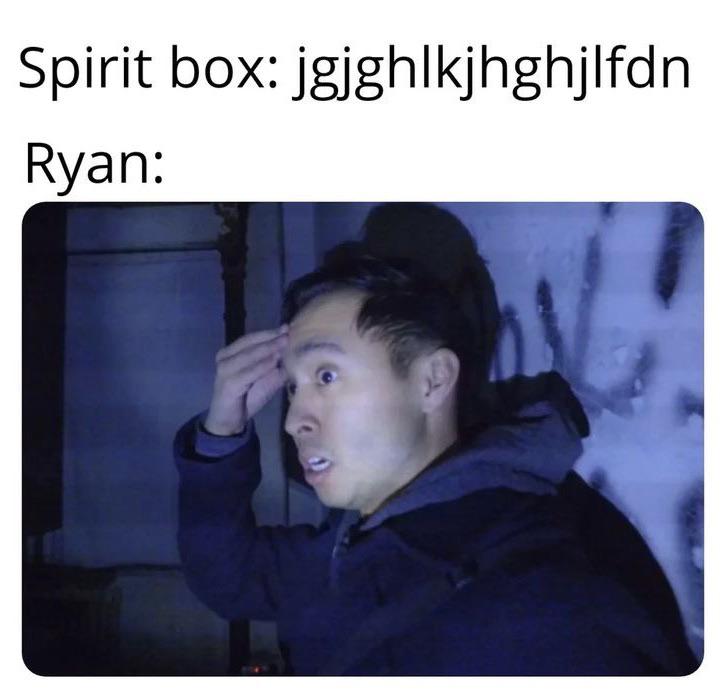
For this idea, I was inspired by watching BuzzFeed unsolved 😅. The hosts Ryan and Shane use this device called a spirit box. When they turn the box on, it makes a screeching noise produced by switching channels (radio channels I think?) at a rapid pace. It’s believed that this way, the ghosts would be able to “communicate” through the white noise. Something like this:
Since I need to have some form of communication between the Arduino and processing for this project, I thought I might make an “upgraded” spirit box that consisted of a laptop as well.
Specifics
Arduino components:
Sensing department
Photoresistor
The lower the brightness of the room, the likelier for there to be a ghost
Ultrasonic distance sensor
The closer the player is to a wall or corner, the likelier for there to be a ghost
Piezo disk
The sound changes based on the situation. No ghost is a sound, each type of ghost has a sound. (malicious has a more scary sound, friendly is more meme sound)
Hands-on department
Buttons and knob
For the players to interact with after encountering a ghost.
Arduino-Processing Communication:
The photoresistor and the ultrasonic sensor will send two data values to processing, and processing will have a function that interprets the data. The chance of a ghost popping up will correlate with these data values.
For the piezo disk, the Arduino will have four sounds coded in. (No ghost, three other types). According to the situation, processing sends a message to Arduino to play which sound.
For the hands-on department, three sets of instructions will have been coded into the Arduino. According to the situation, Processing sends a message to Arduino for which set of actions is required.
I am still torn between a few ideas in my mind… But the idea I am leaning towards the most at the moment is the following:
Idea:
An arcade game. The setting of the game is in the space amidst a space war. ‘You will have to defeat the alien spaceships by using the laser beams on your vessel to protect the earth.’
Arduino-side:
The player will be able to maneuver the player using 2~3 push buttons (for items and miscellaneous skills) and a potentiometer.
Processing-side:
The visual of the game will contain a working sprite of a spaceship, background image of the space, images of the bullets, alien spaceships, items, etc. The game will contain different levels. The screen won’t convert on different levels, but rather there will be a display of level numbers and the difficulty of the game will increase. Might include a level consisting a different theme for fun.
I will update this post if my idea/plan changes overtime.
After Monday’s class and having listened to other friends’ ideas, I thought to myself, ‘I do not necessarily need to make a game do I…?’.
So I decided to switch to a different topic. I am still not 100% sure about the idea so I expect to have my final project idea more tailored by the end of today’s class.
New idea: A radar turret. I would like to make a rotating turret using arduino, with an ultrasonic sensor attached to a servo, in order to create a scouting(?) surveillance sensor. I would like to use processing to display any objects that are recognized by the sensor to alert the user monitoring the environment.

 as using the Distance sensor so it took me some time to understand it, but some research and help from my peers did the trick. Once I kept experimenting using my hand, I constrained the results to a distance I thought seemed appropriate, which was between 1 and 10 inches. After that, I connected the Arduino and processing using the sendBytetoProcessing example and was happy to have found that process easy for me.