Feed No Face 2.0: Final Documentation

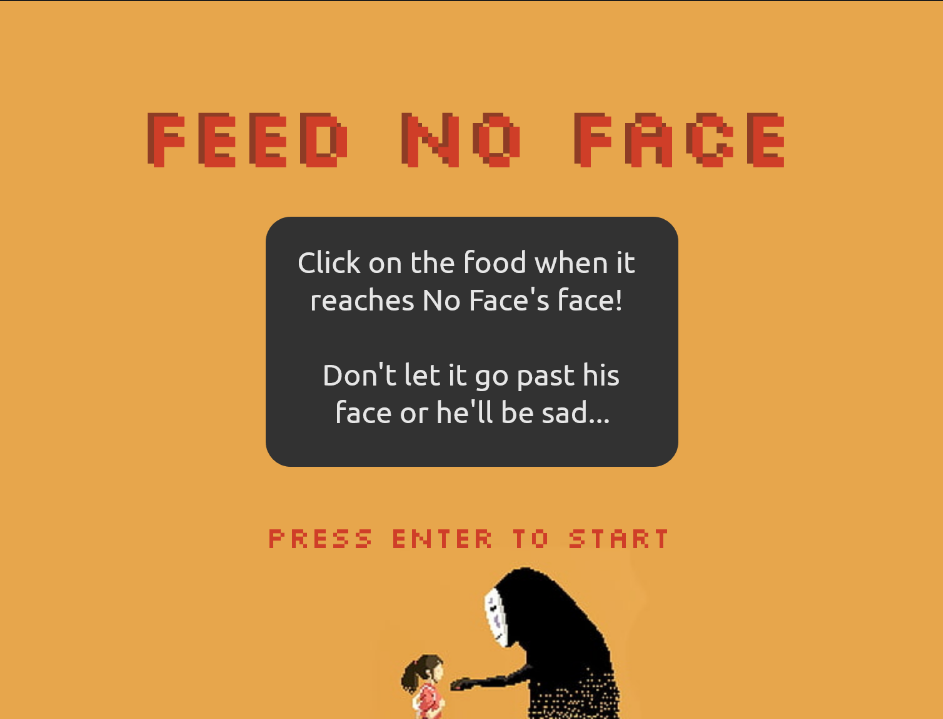
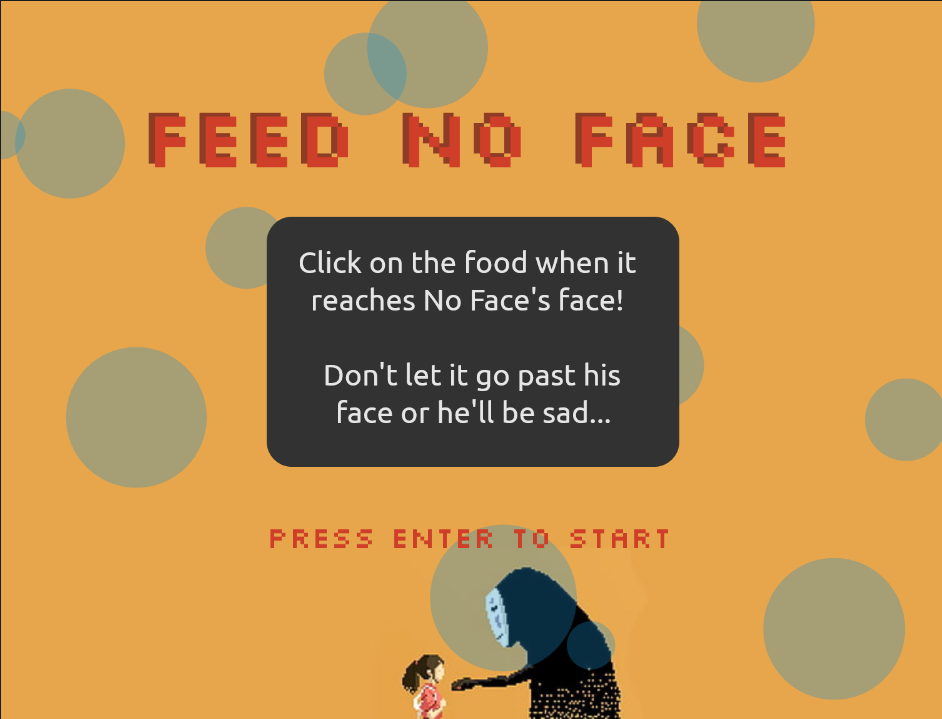
This is the final documentation for Intro to IM! Here is the link to the p5.js sketch with the Arduino code. For my final project, I decided to change it from Live Fruit Ninja to Feed No Face 2.0, which built on top of my midterm project. At first I wanted to do something different from my midterm, but during the process of making Live Fruit Ninja I lost interest and felt like the concept was pretty similar to my midterm project anyway. In the end, I feel like it was a good decision to go back to my midterm because I had a lot of fun improving the project and adding the physical components. So here are the steps to reaching the final product of my project.

Interaction Design: Physical Components

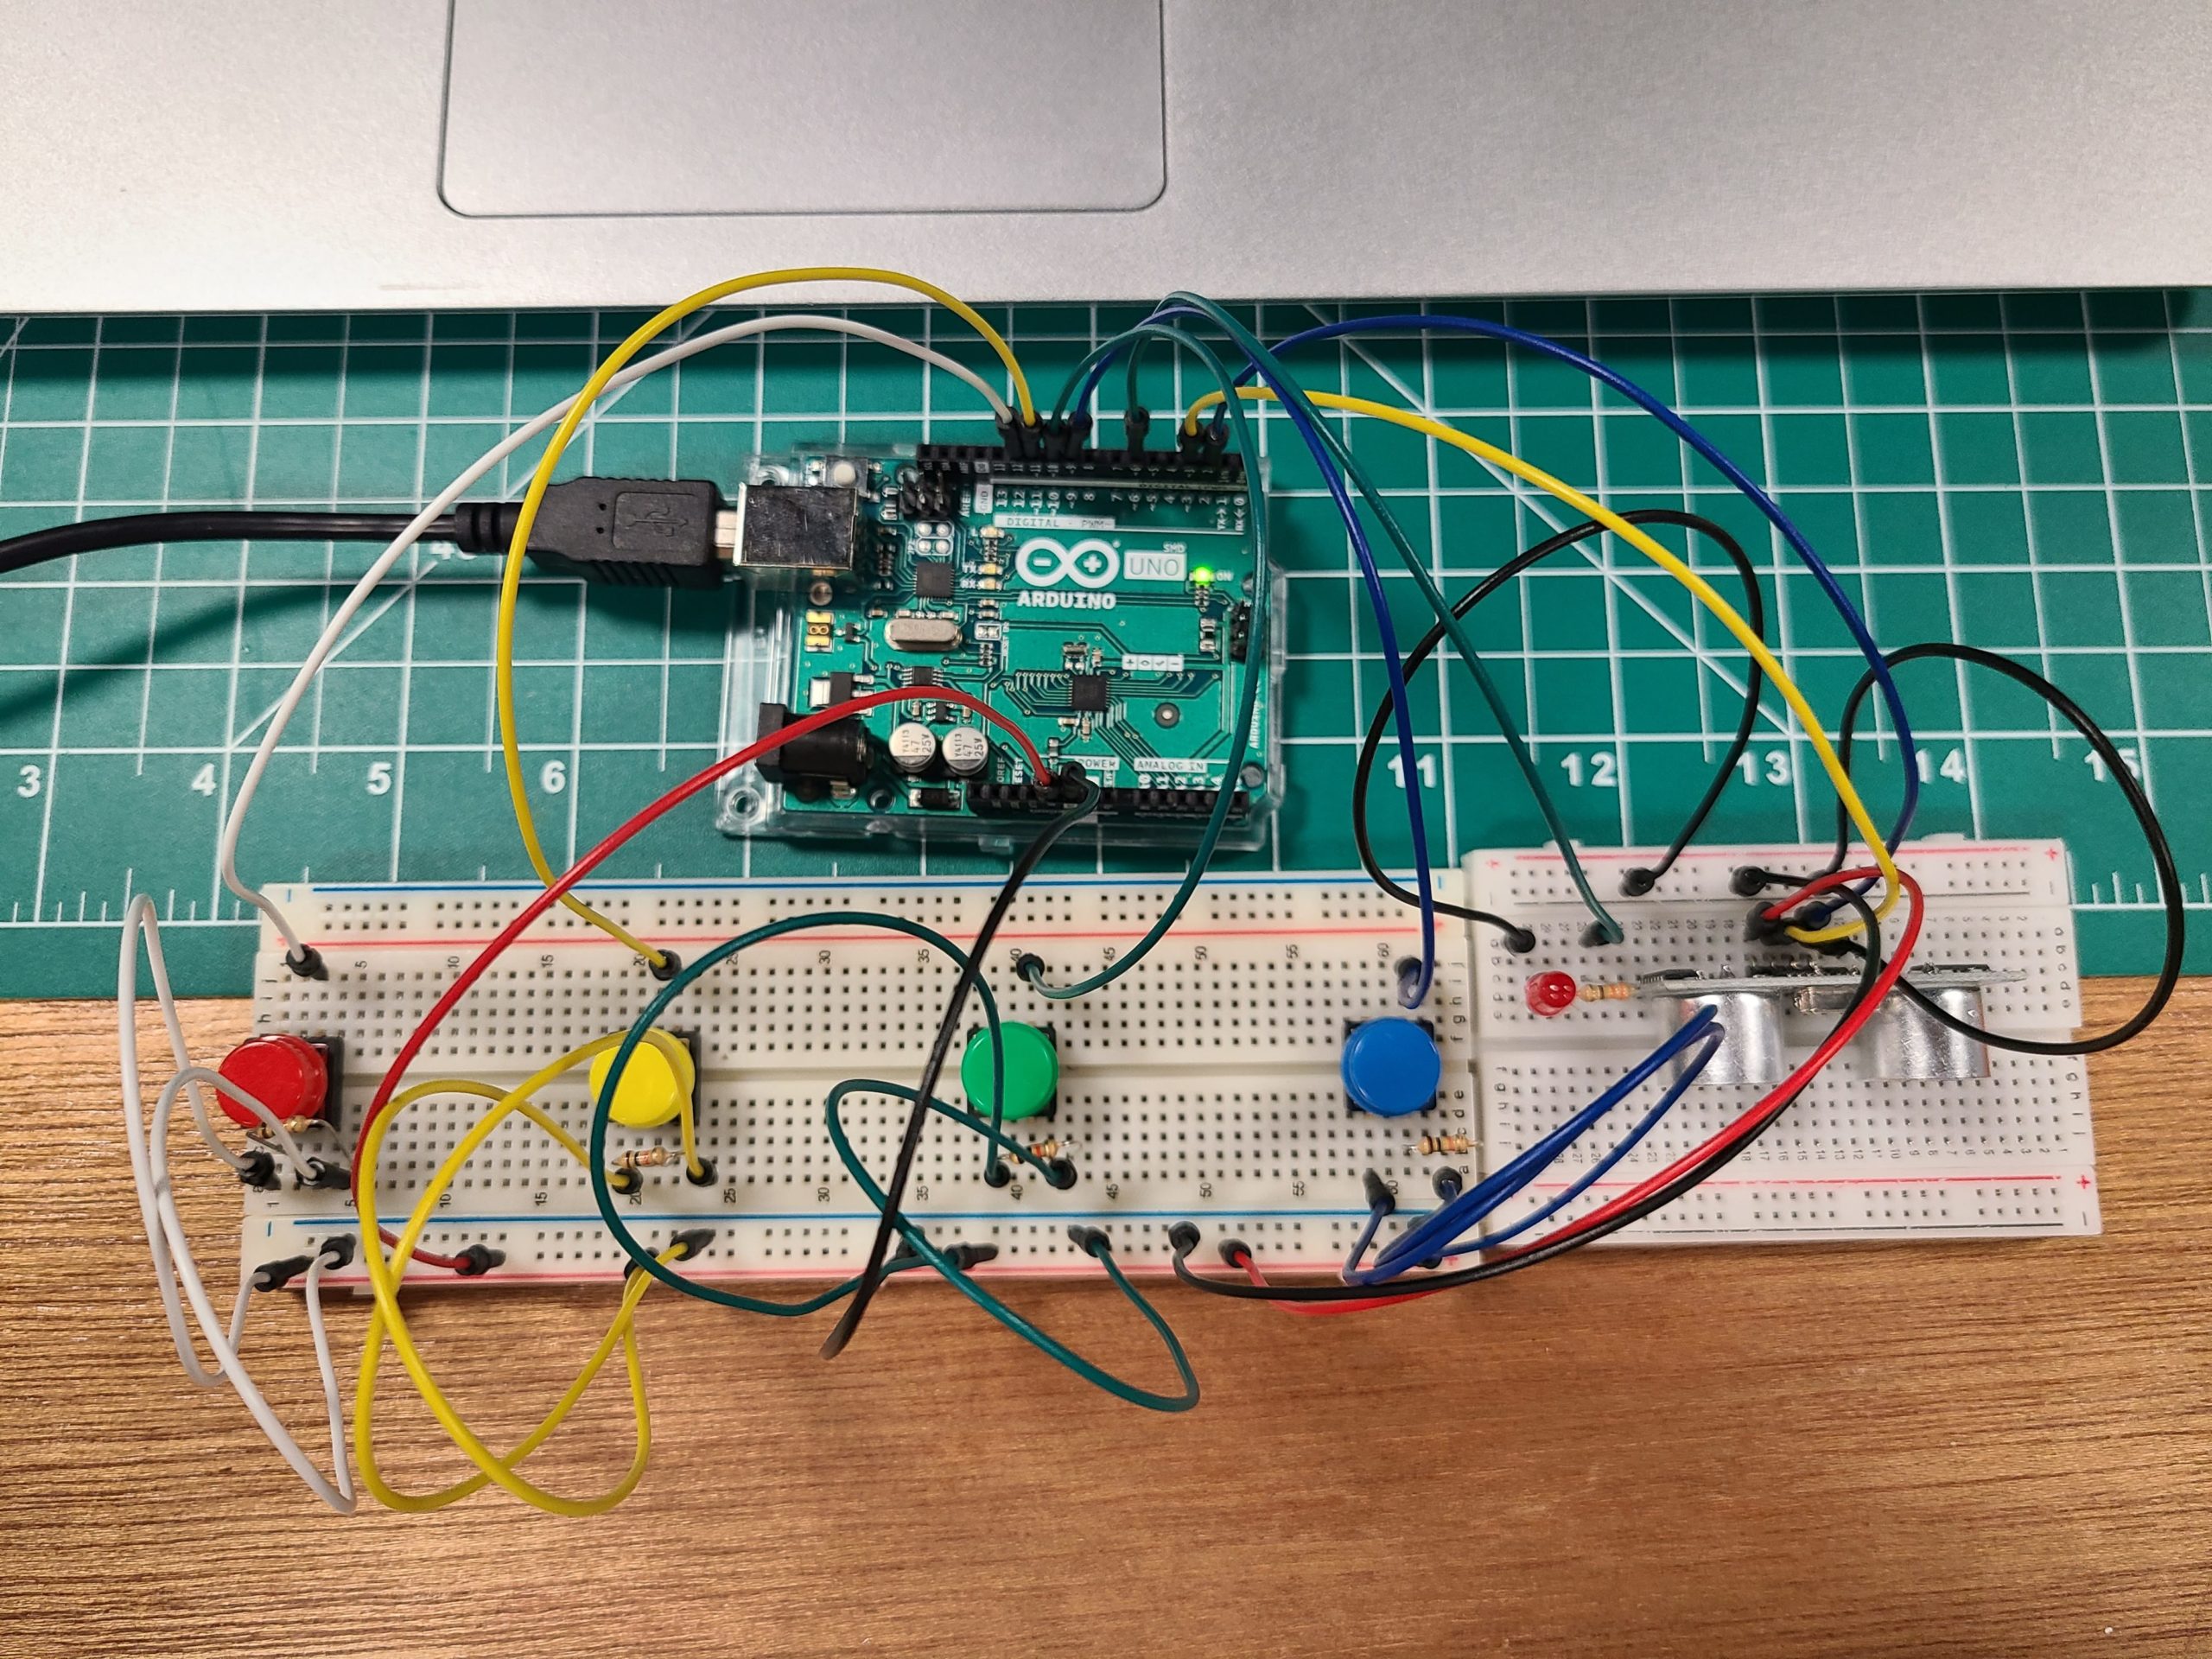
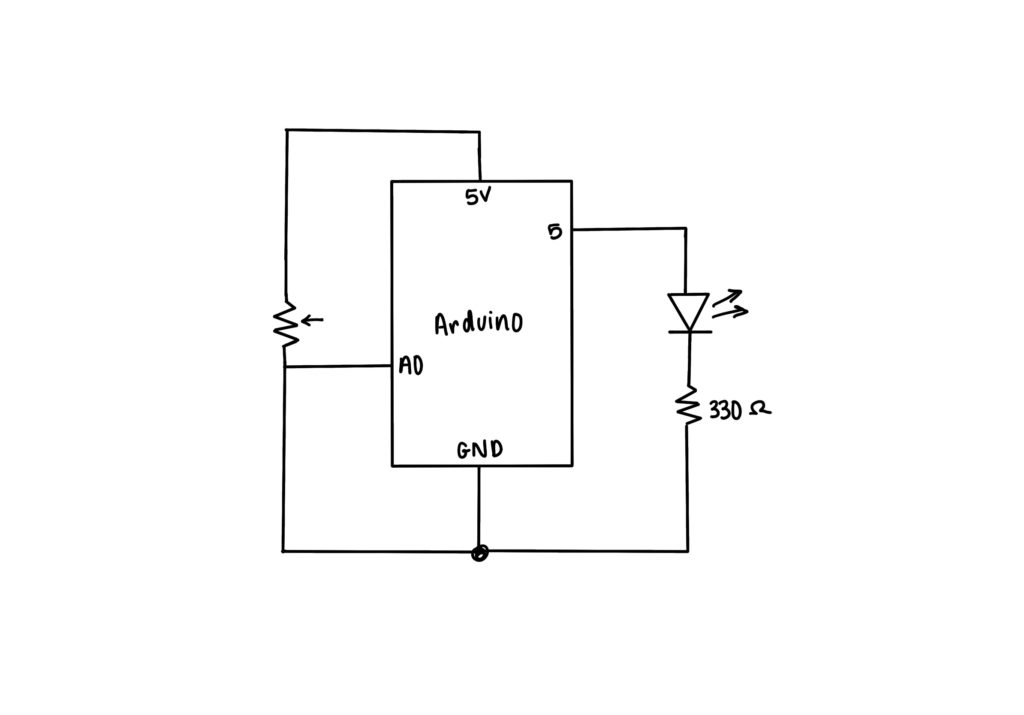
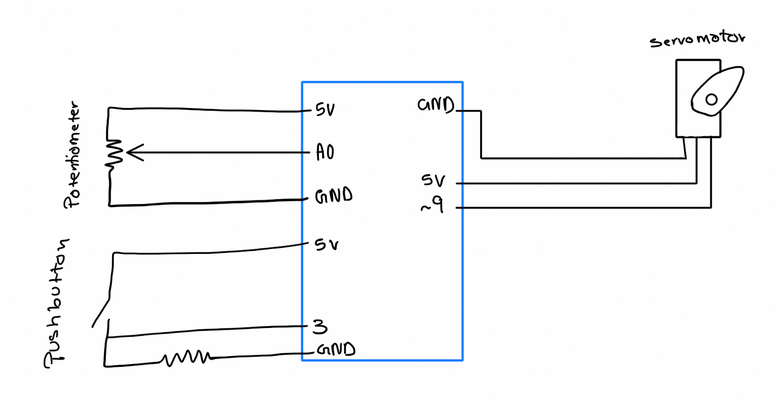
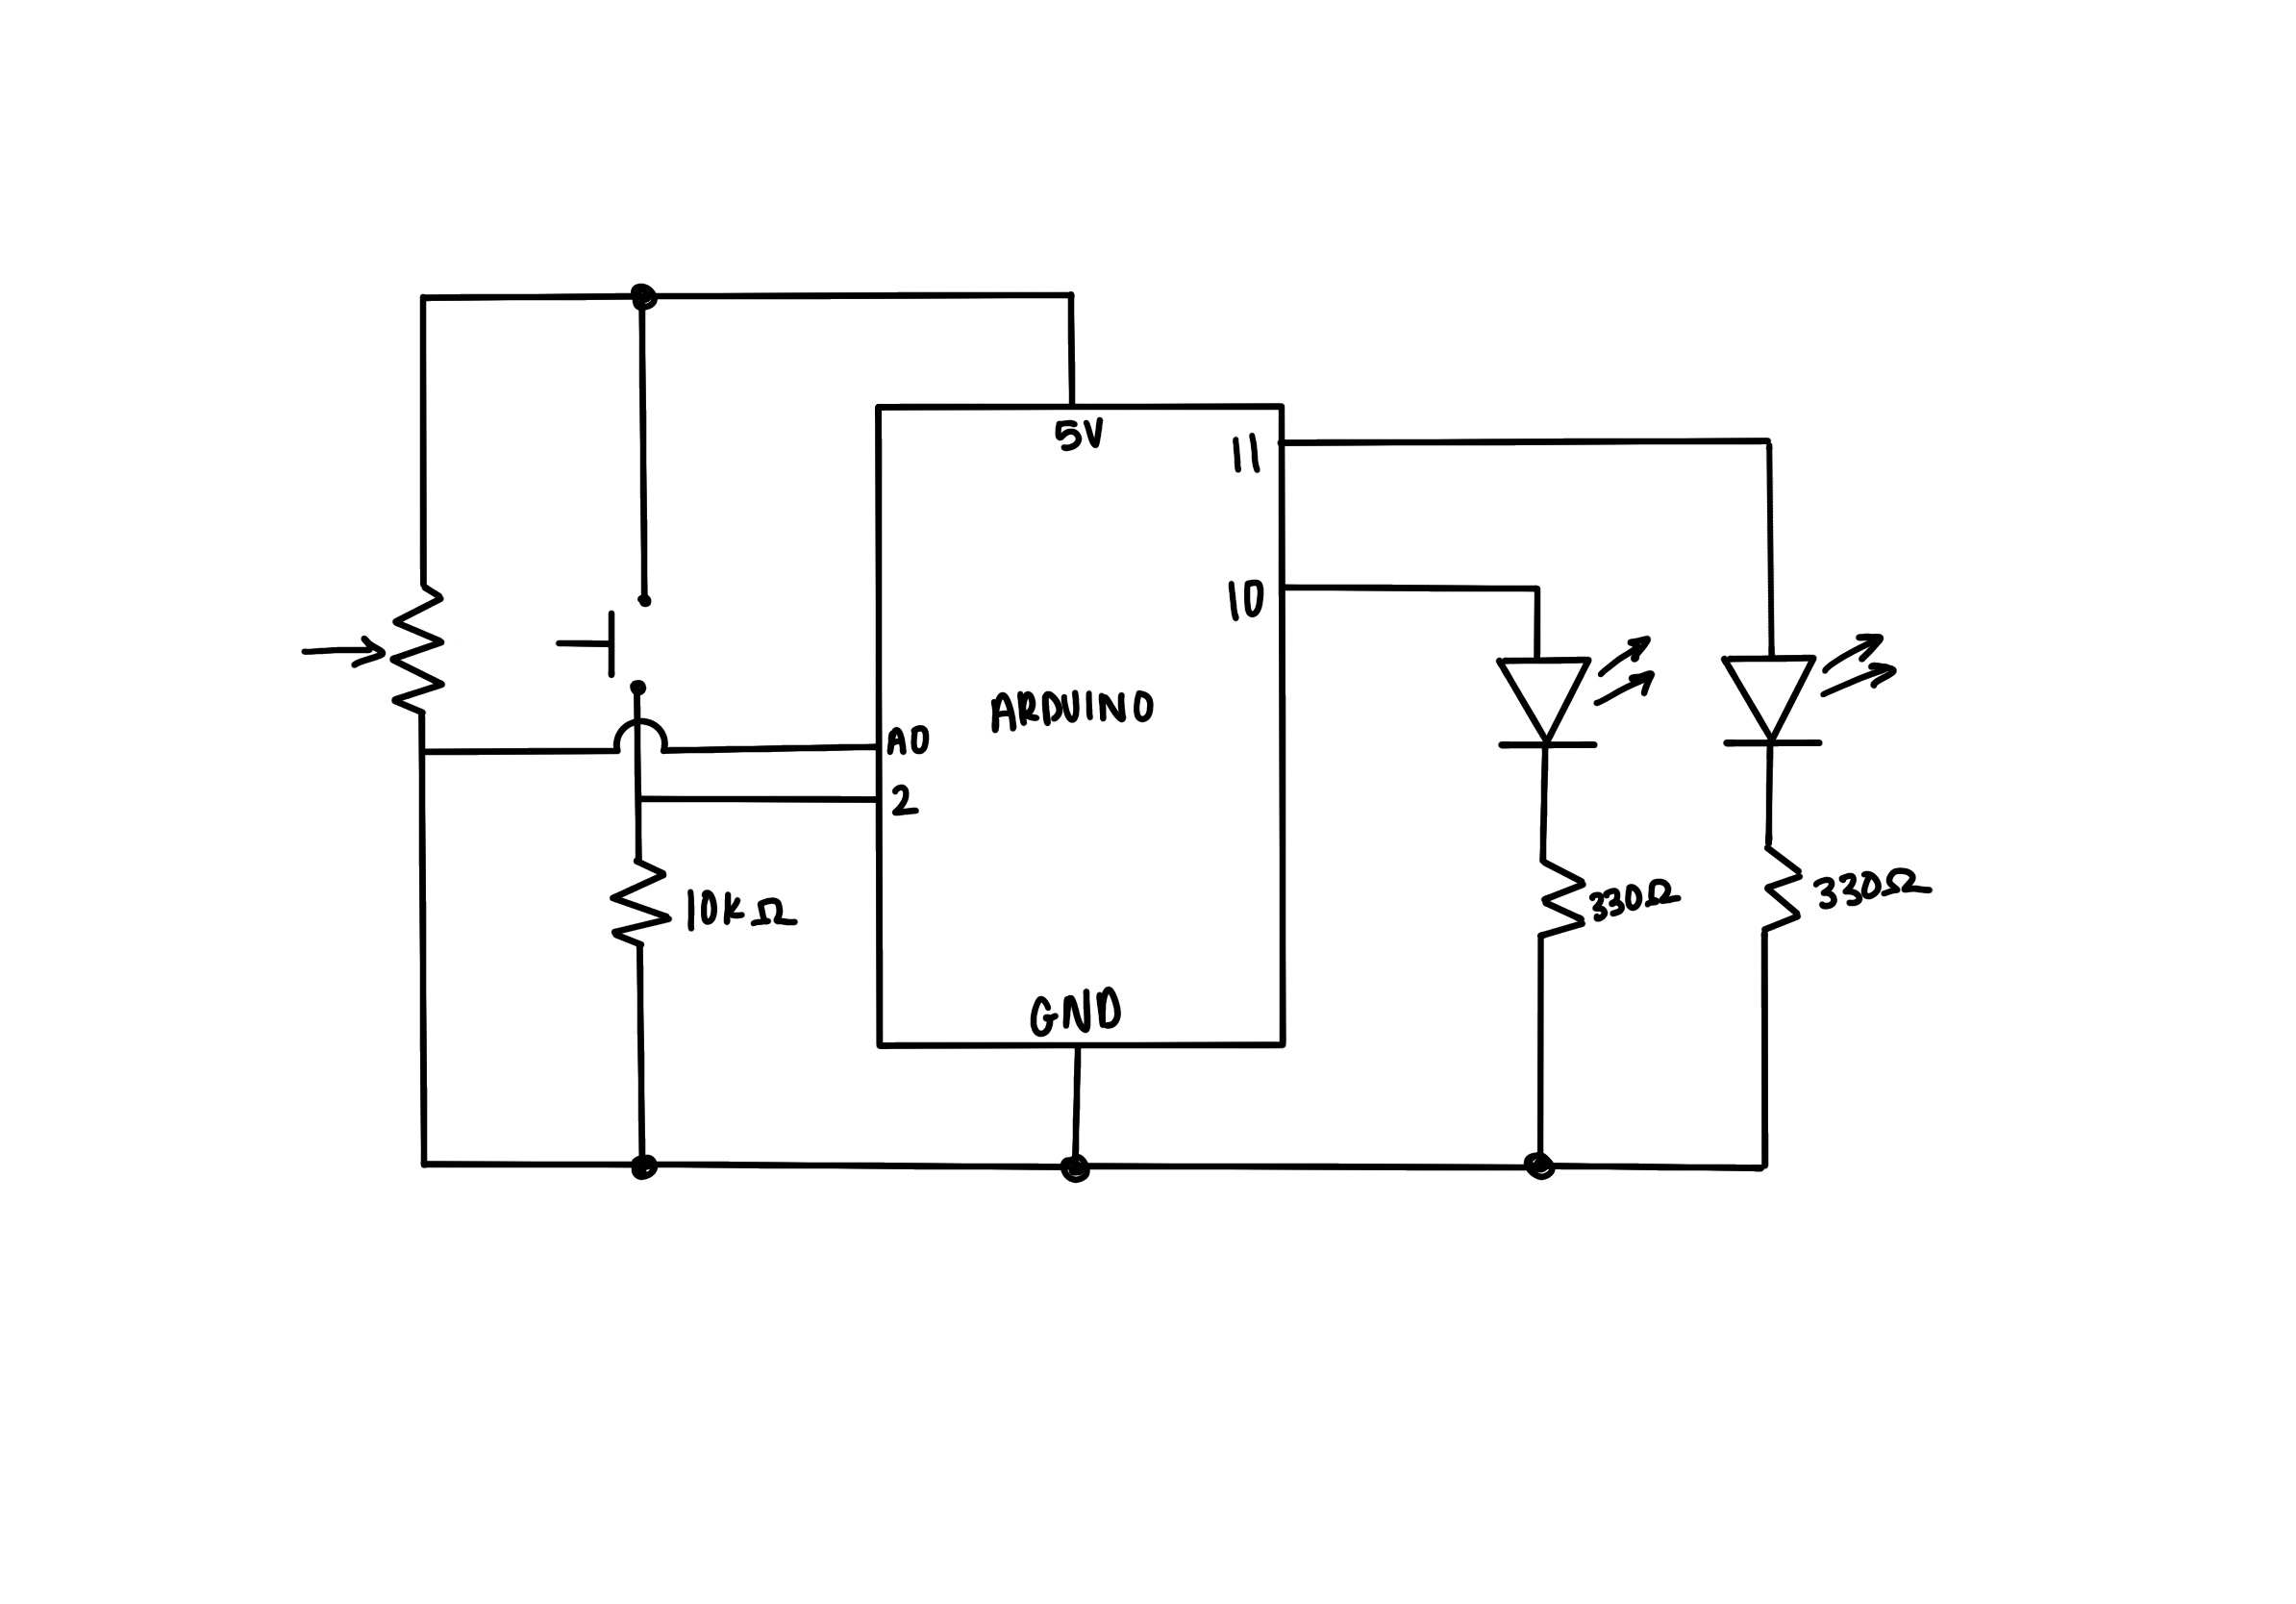
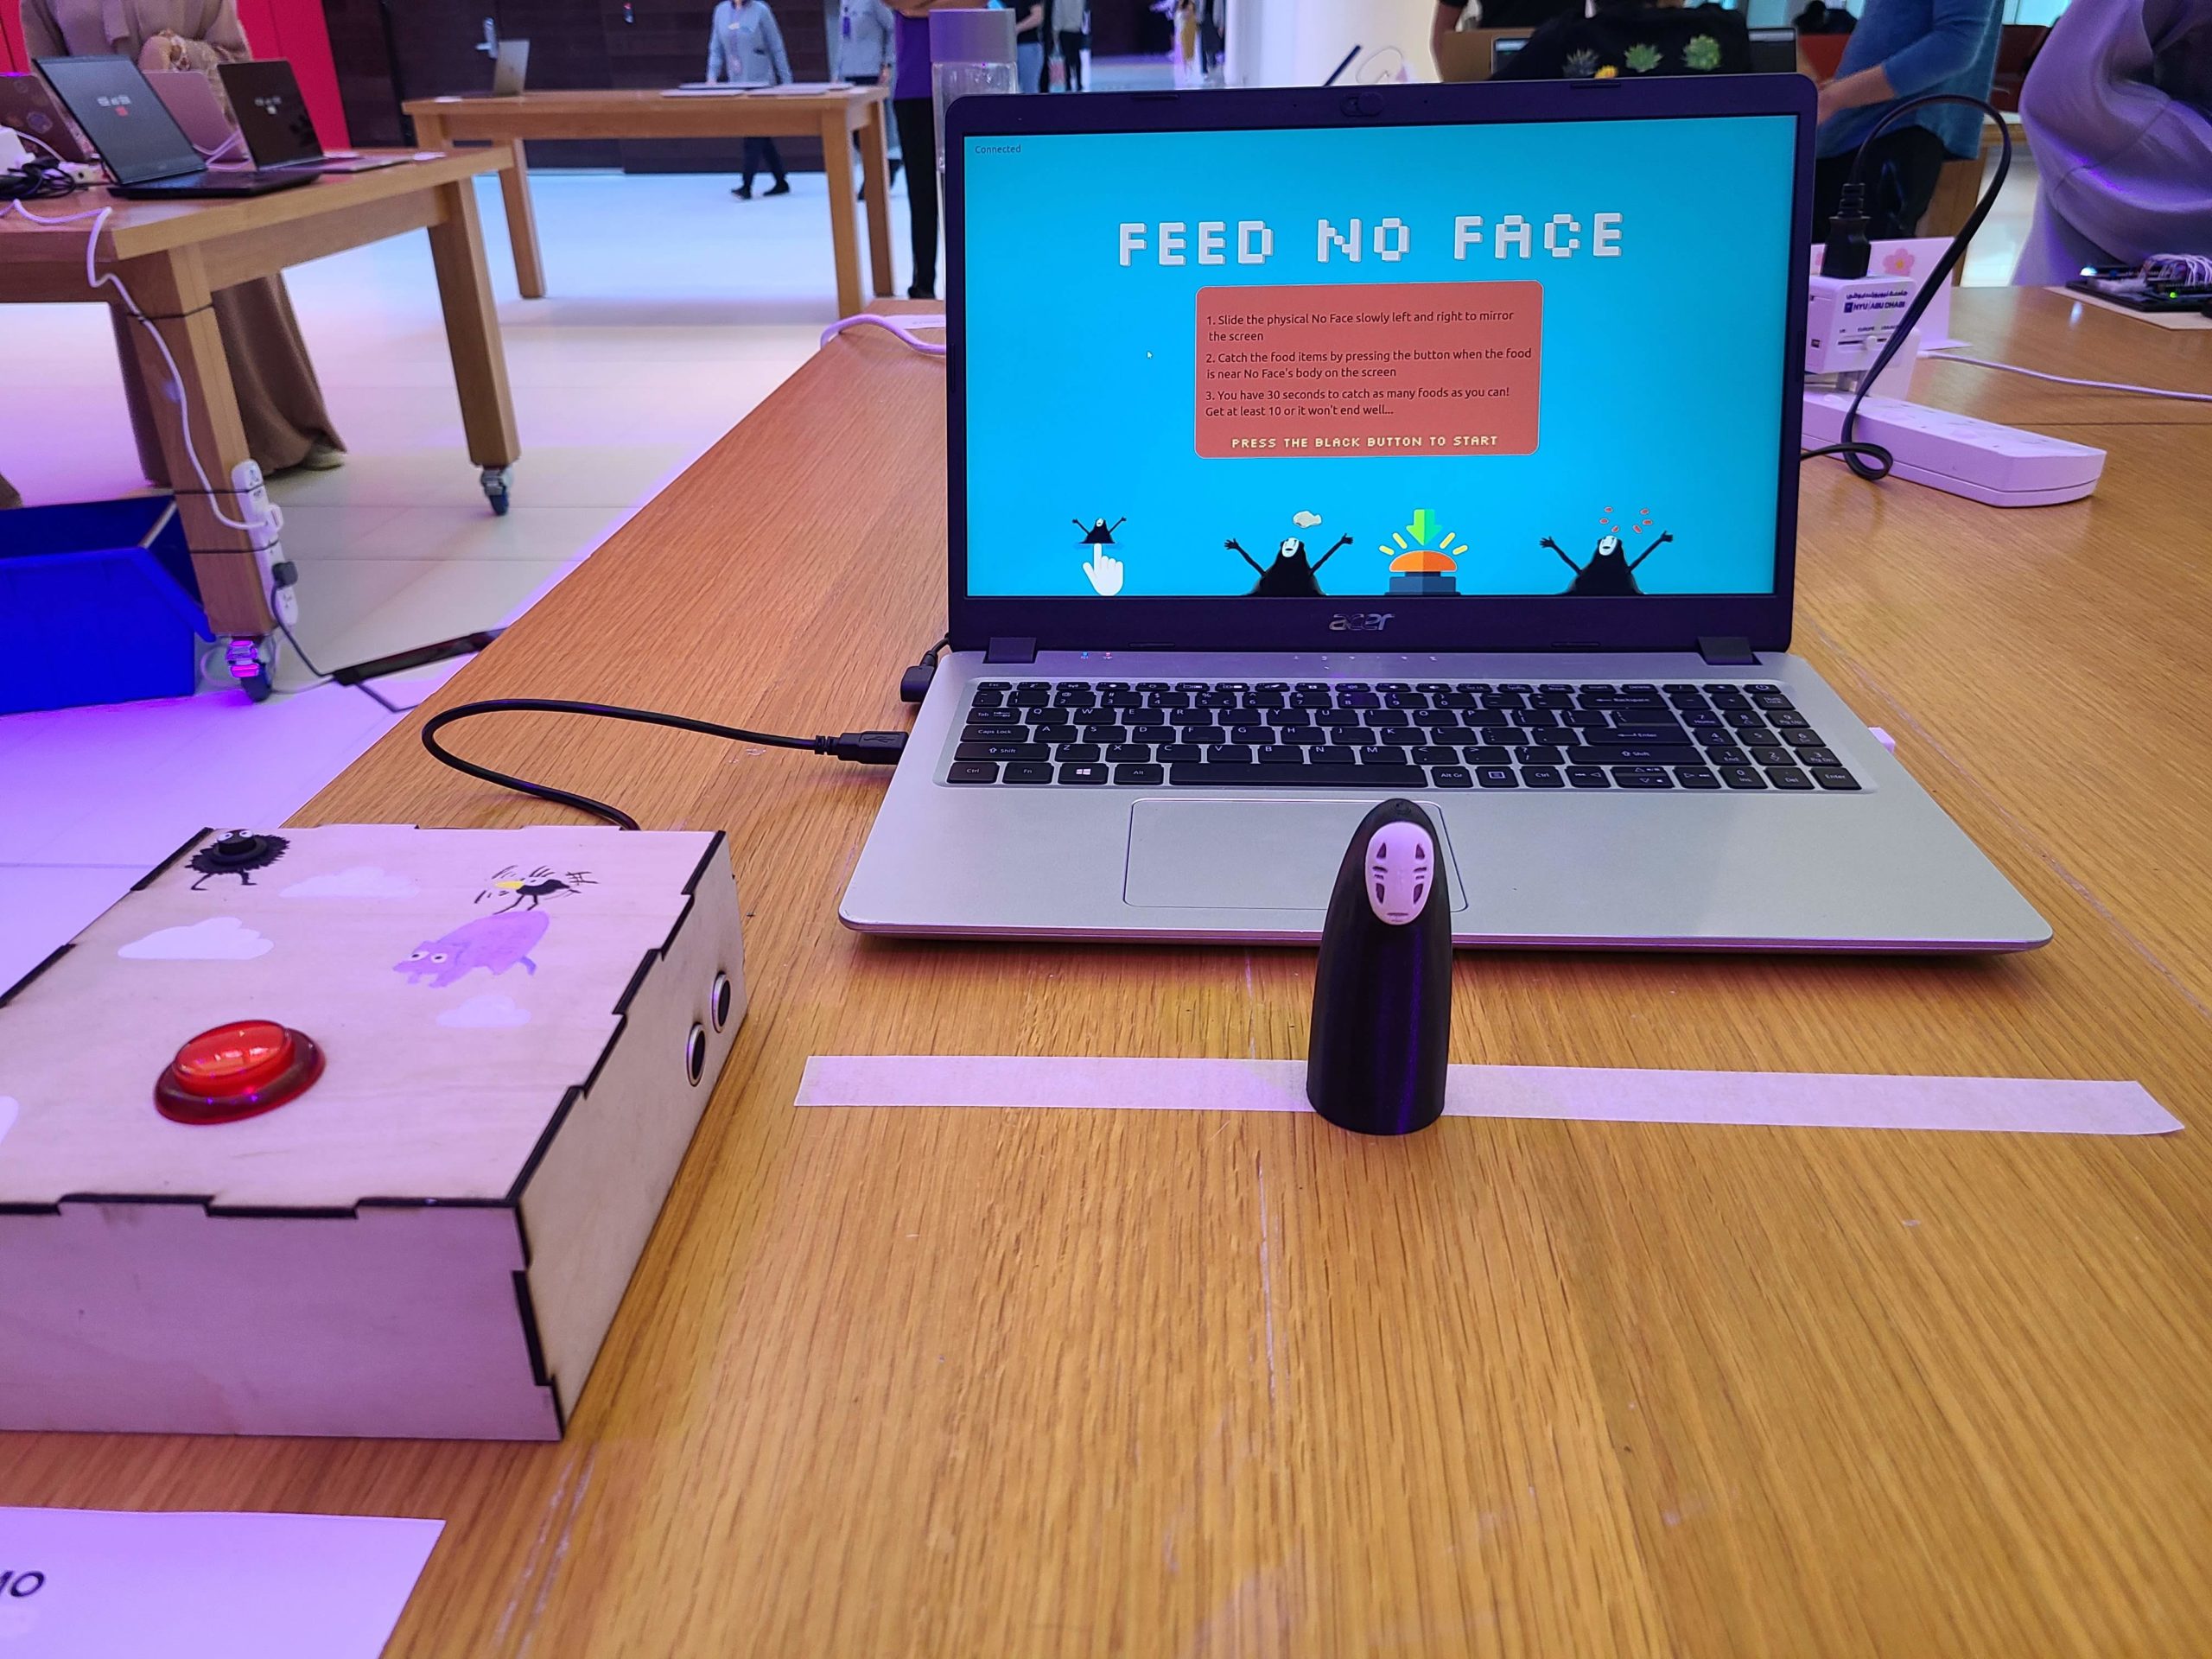
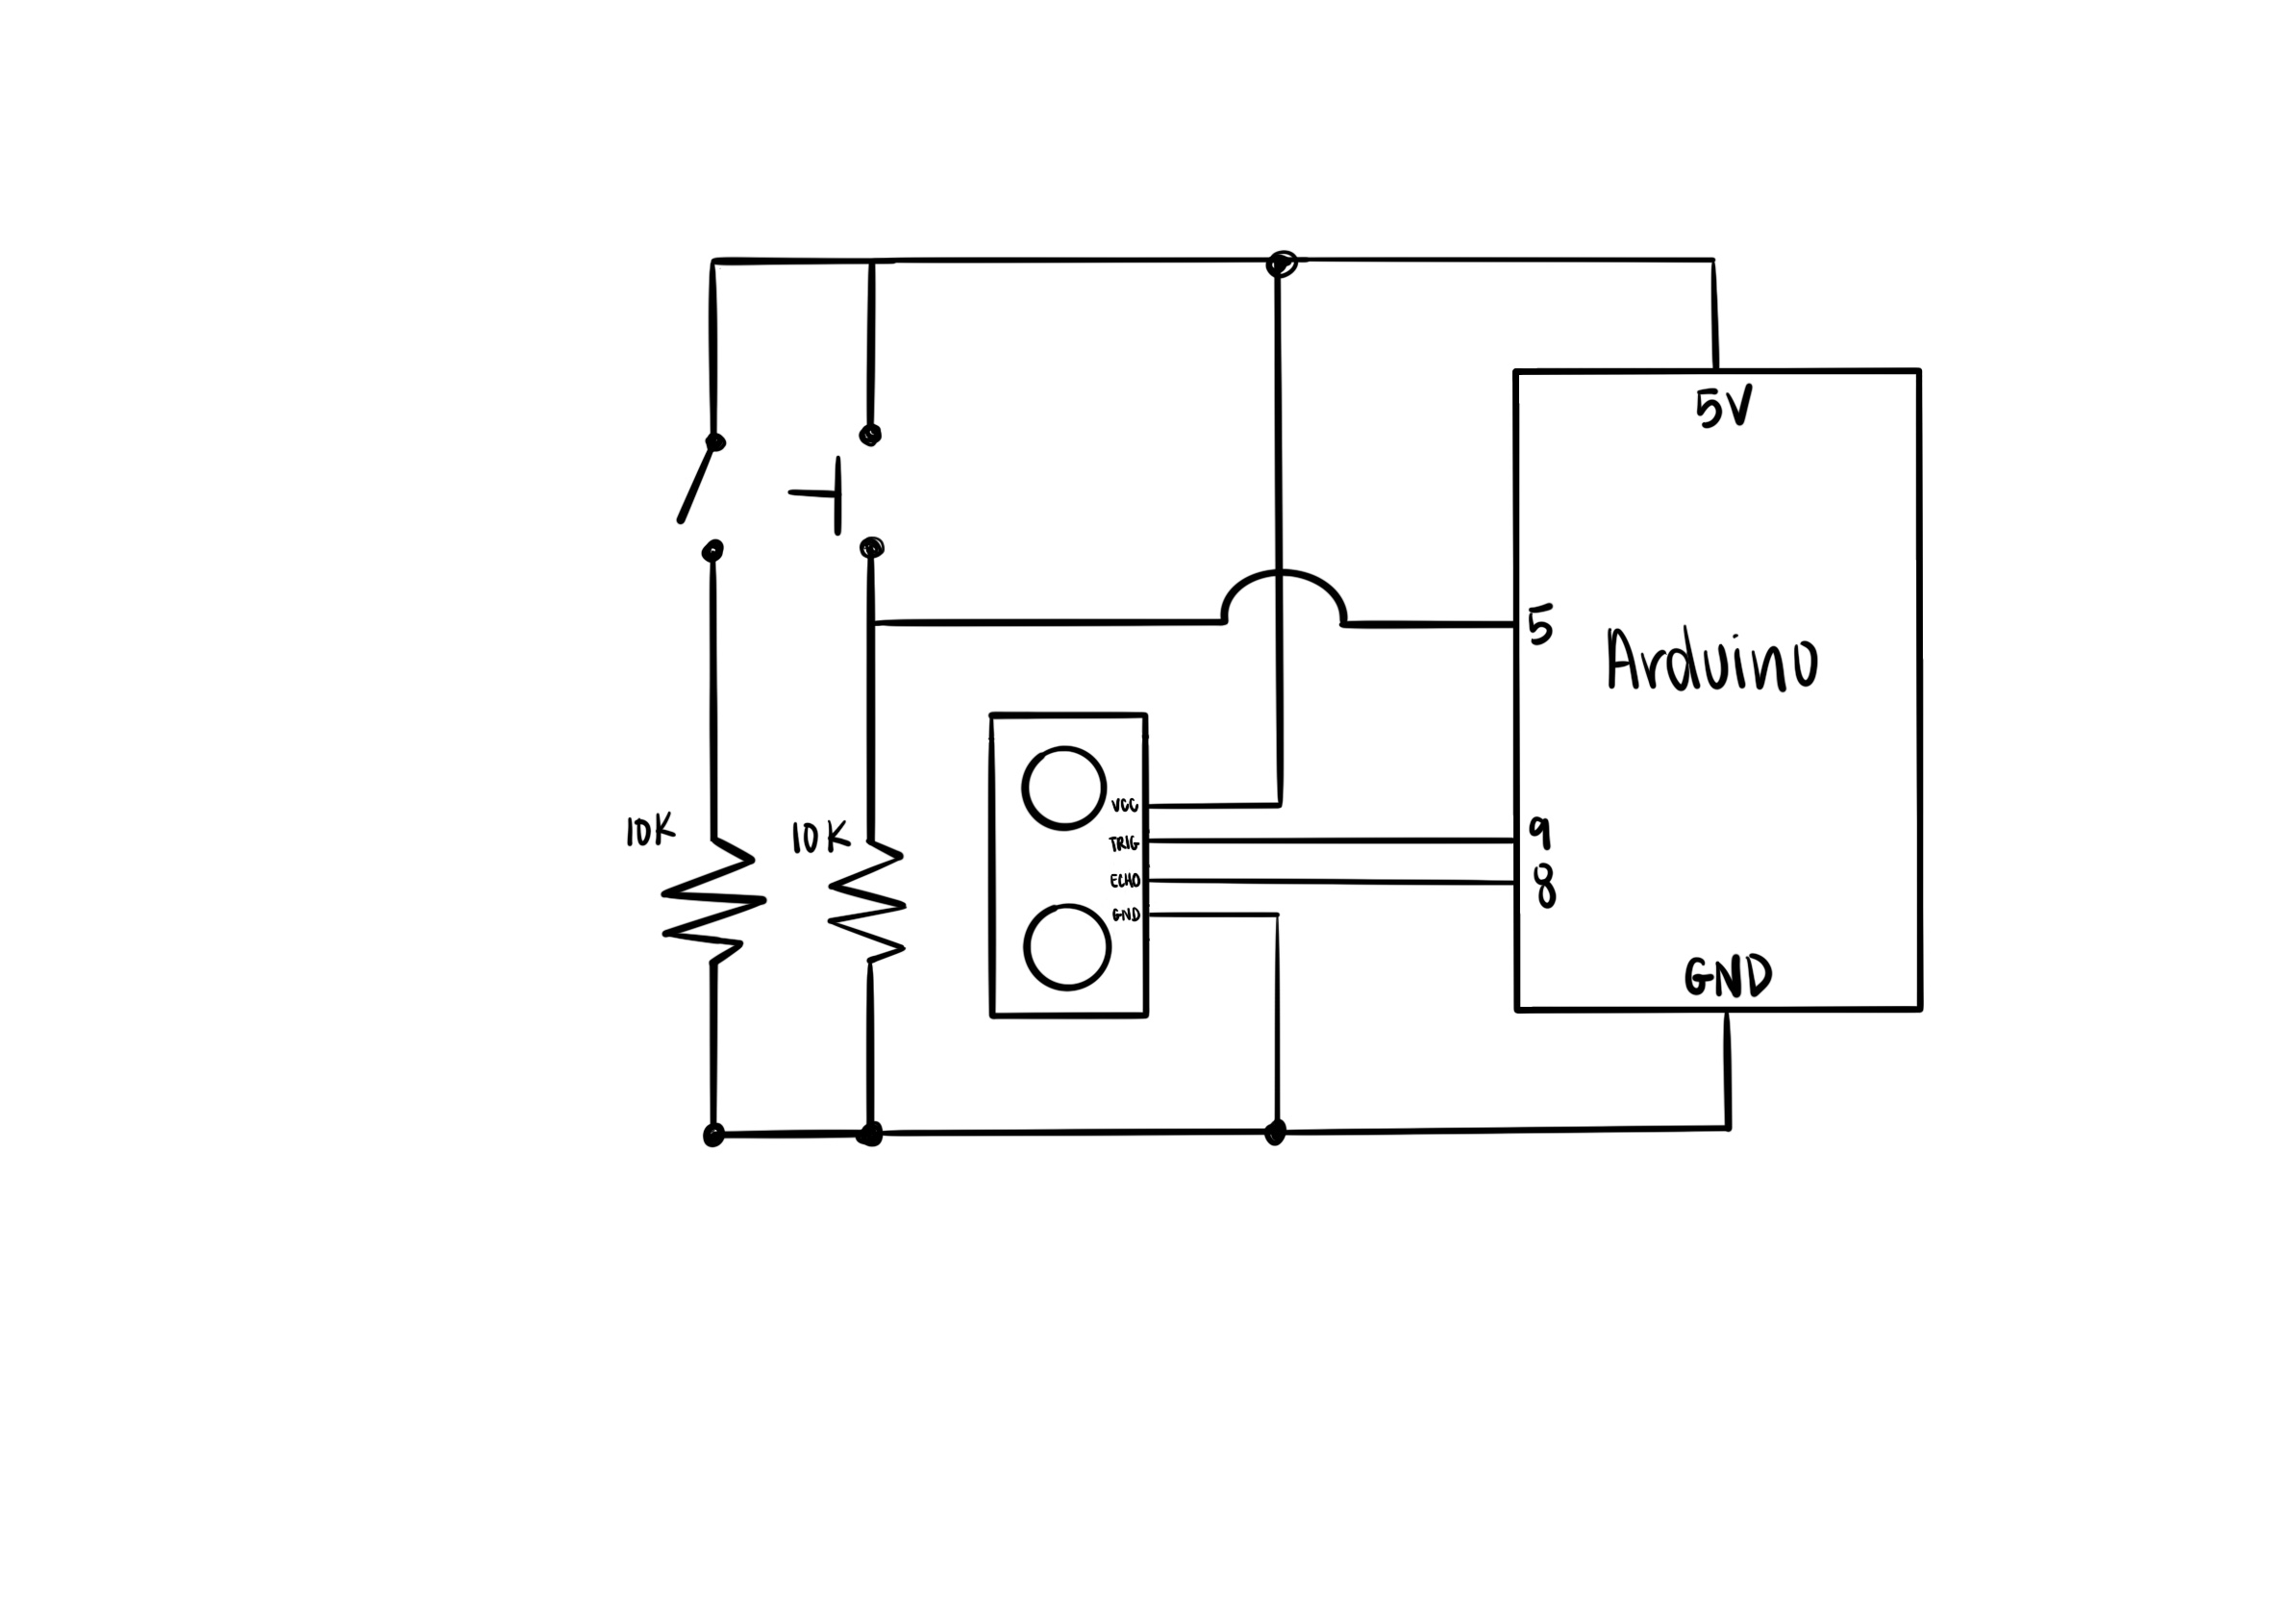
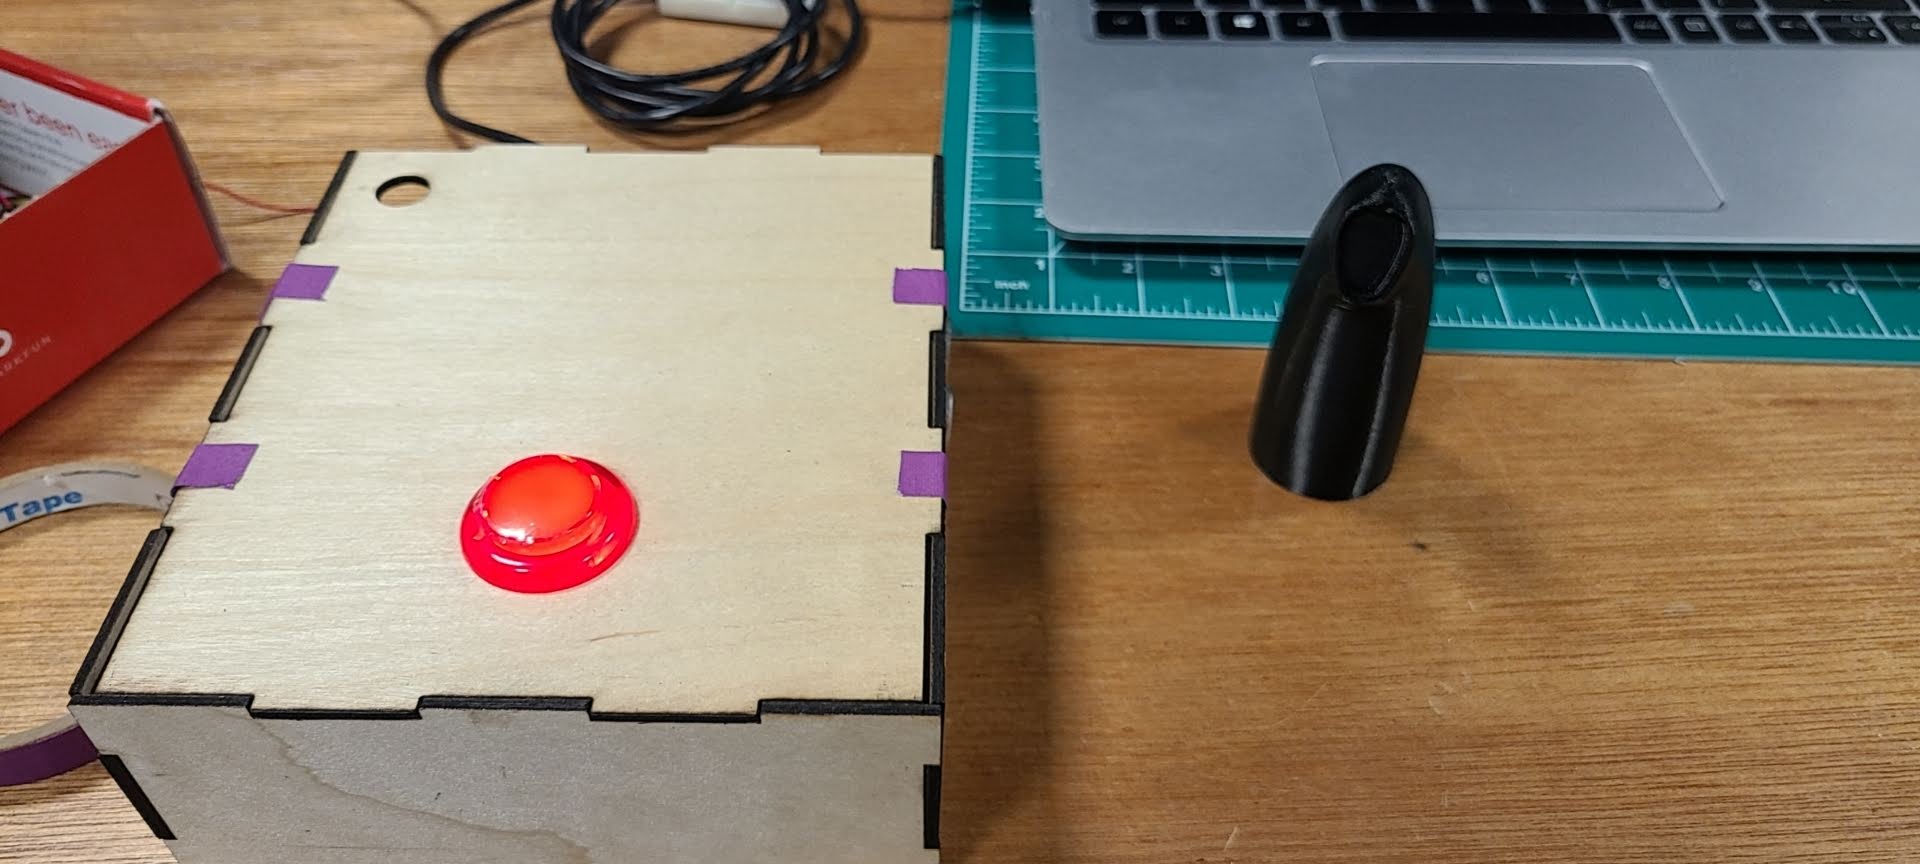
For the physical components of my project, I had two buttons: one main arcade button to eat the food that is falling on the screen and a lock switch to start/restart the game. I also used the distance sensor to get the measurements of the physical character and mapped it to the character on the screen. Here is the schematic of my circuit:

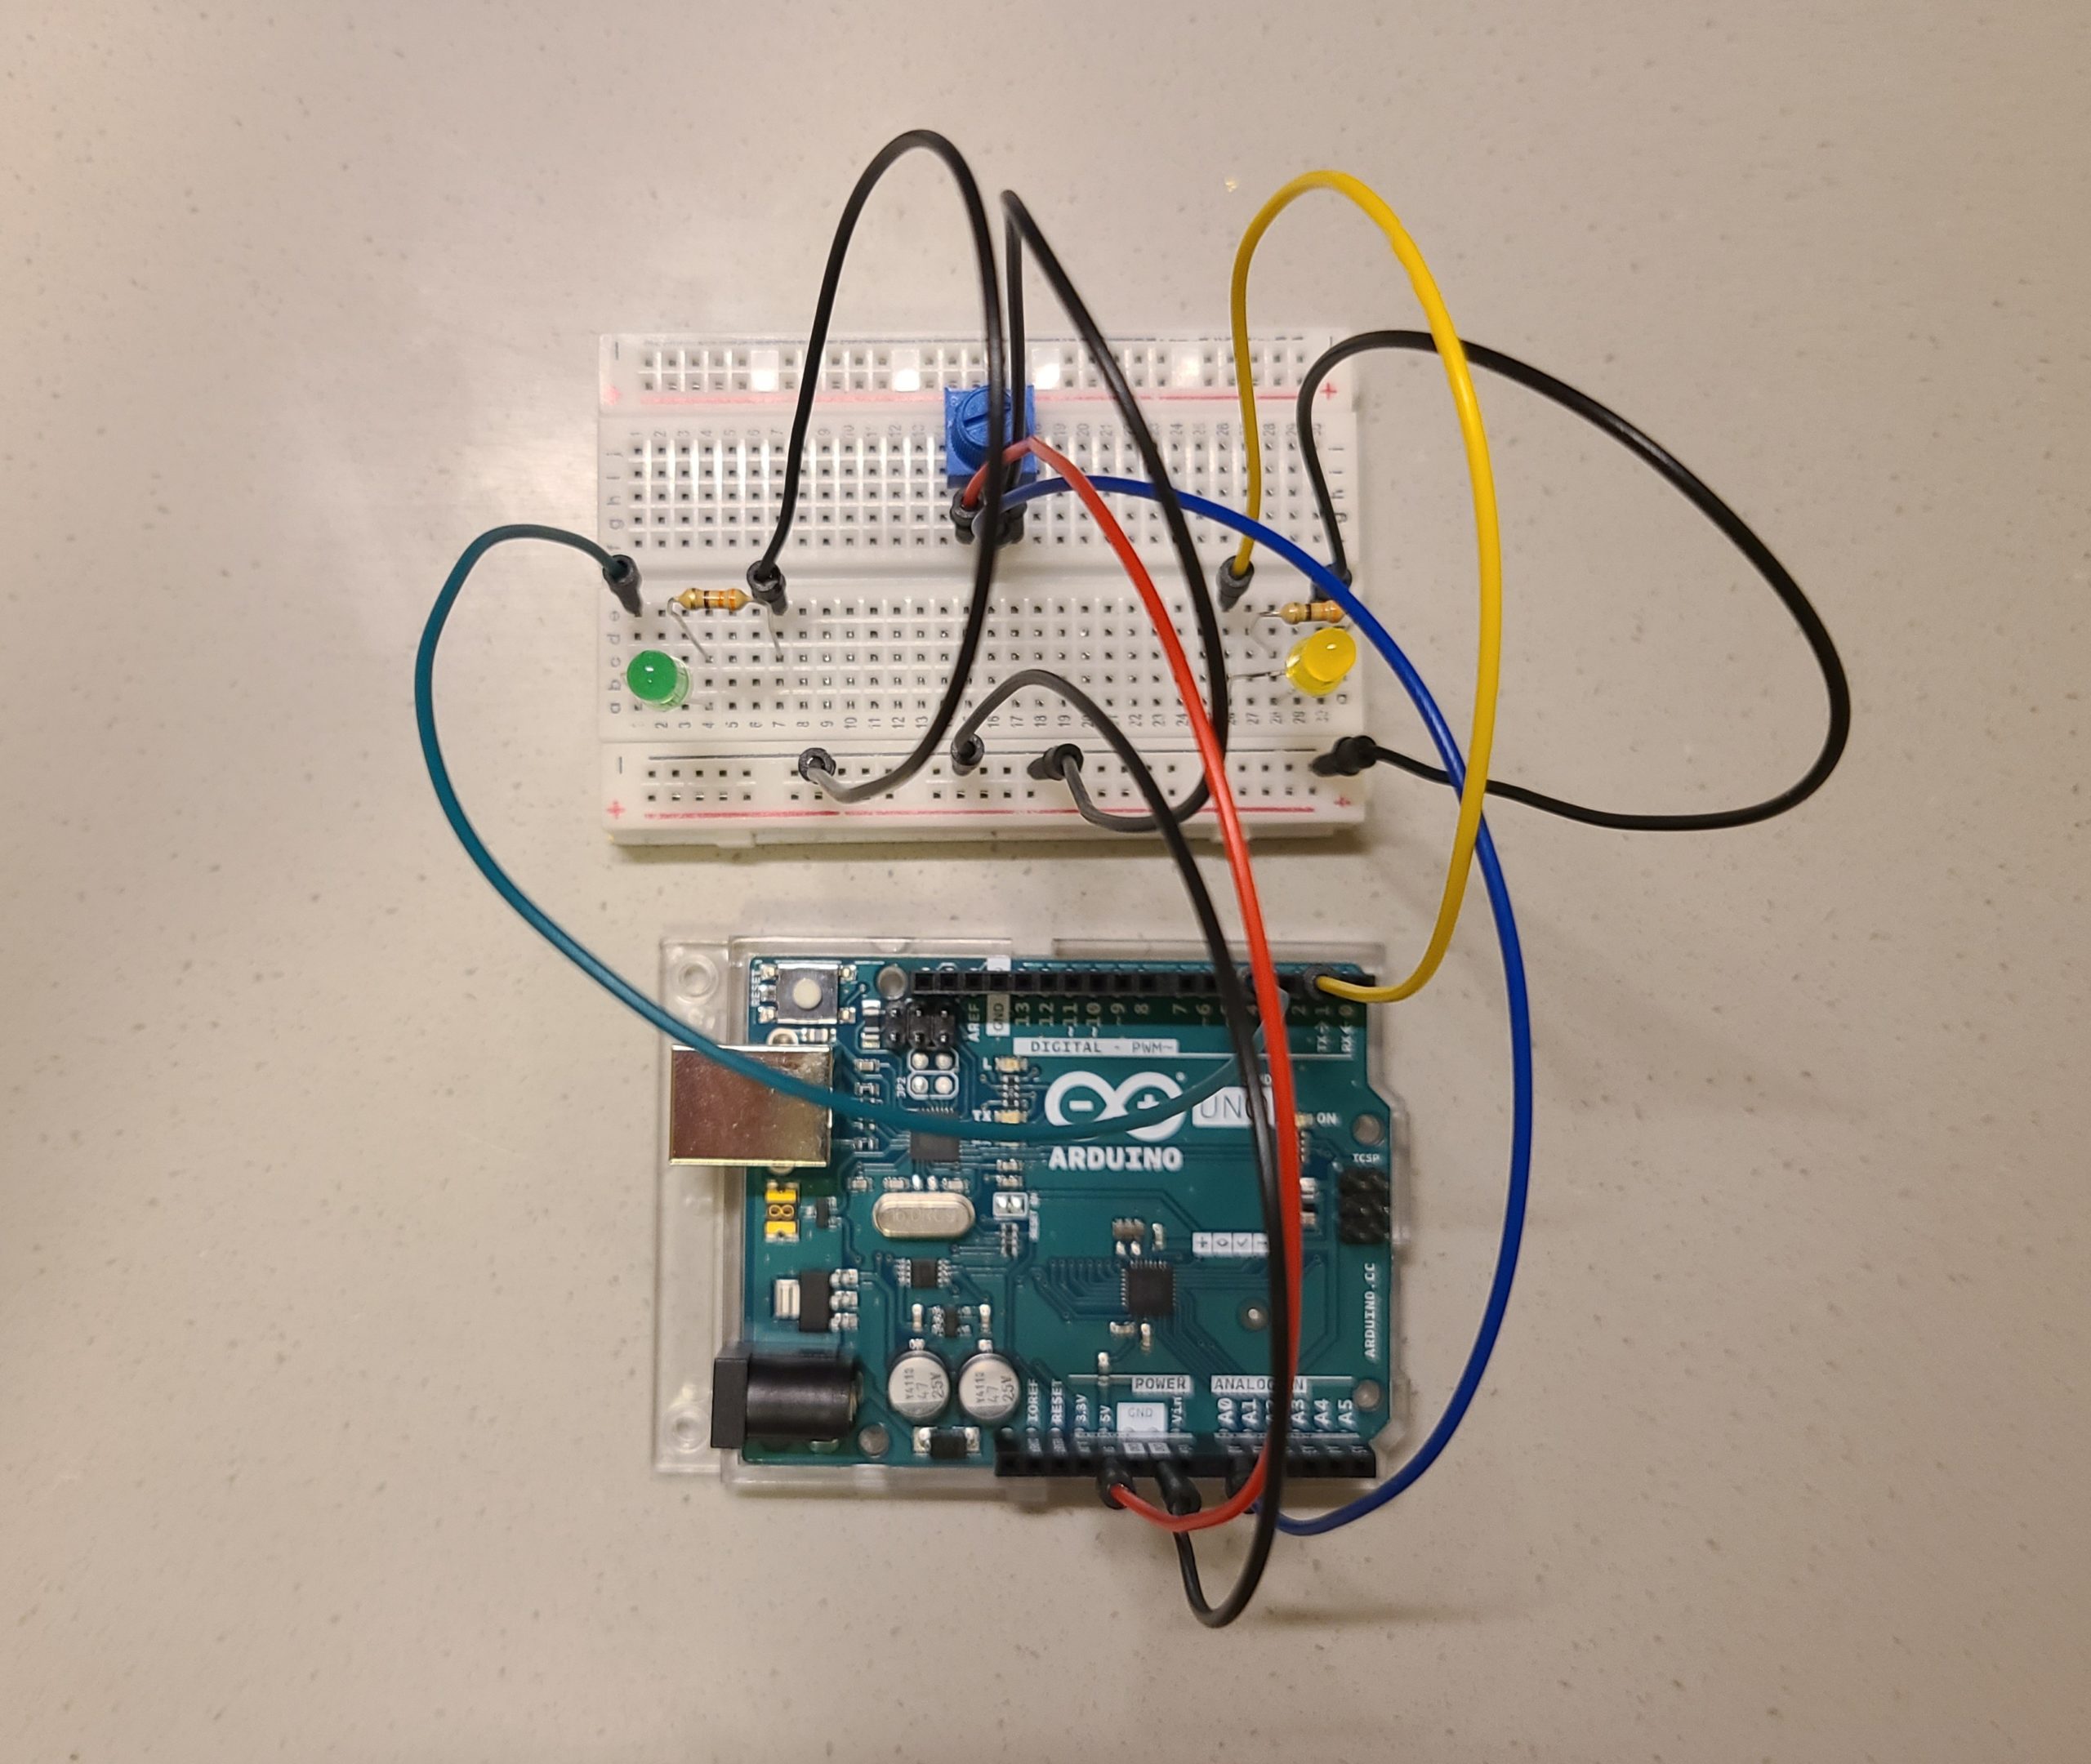
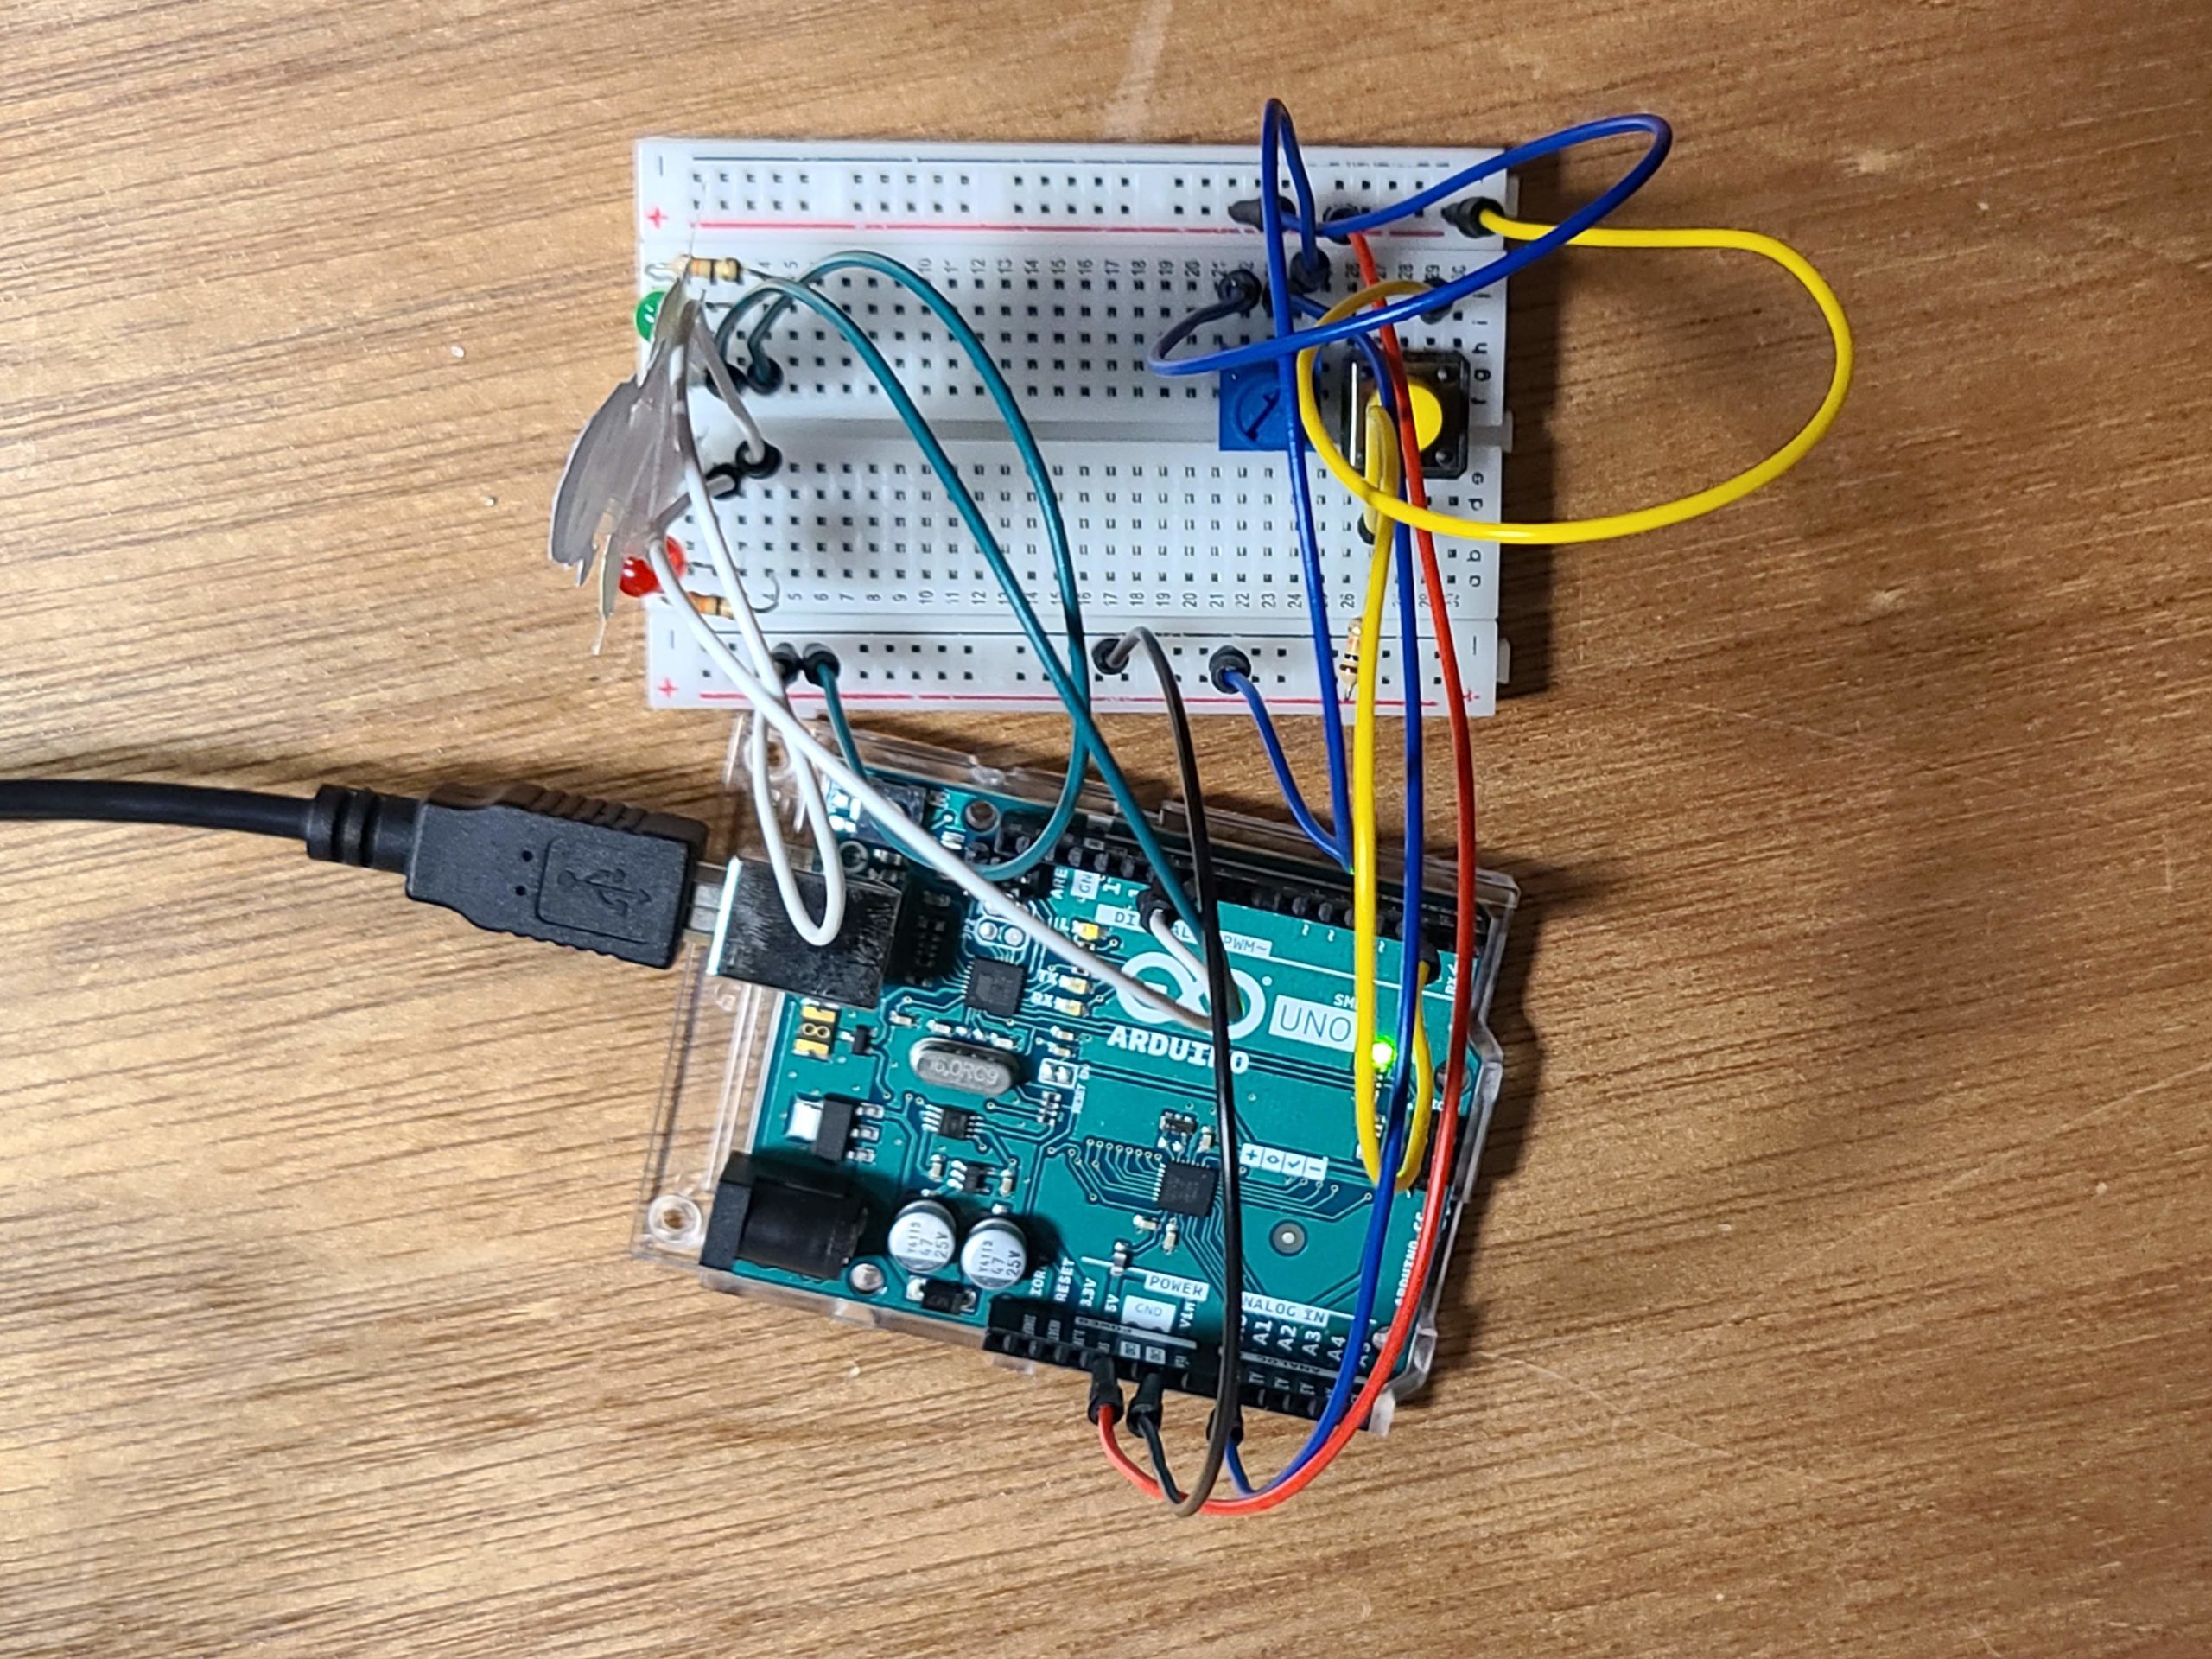
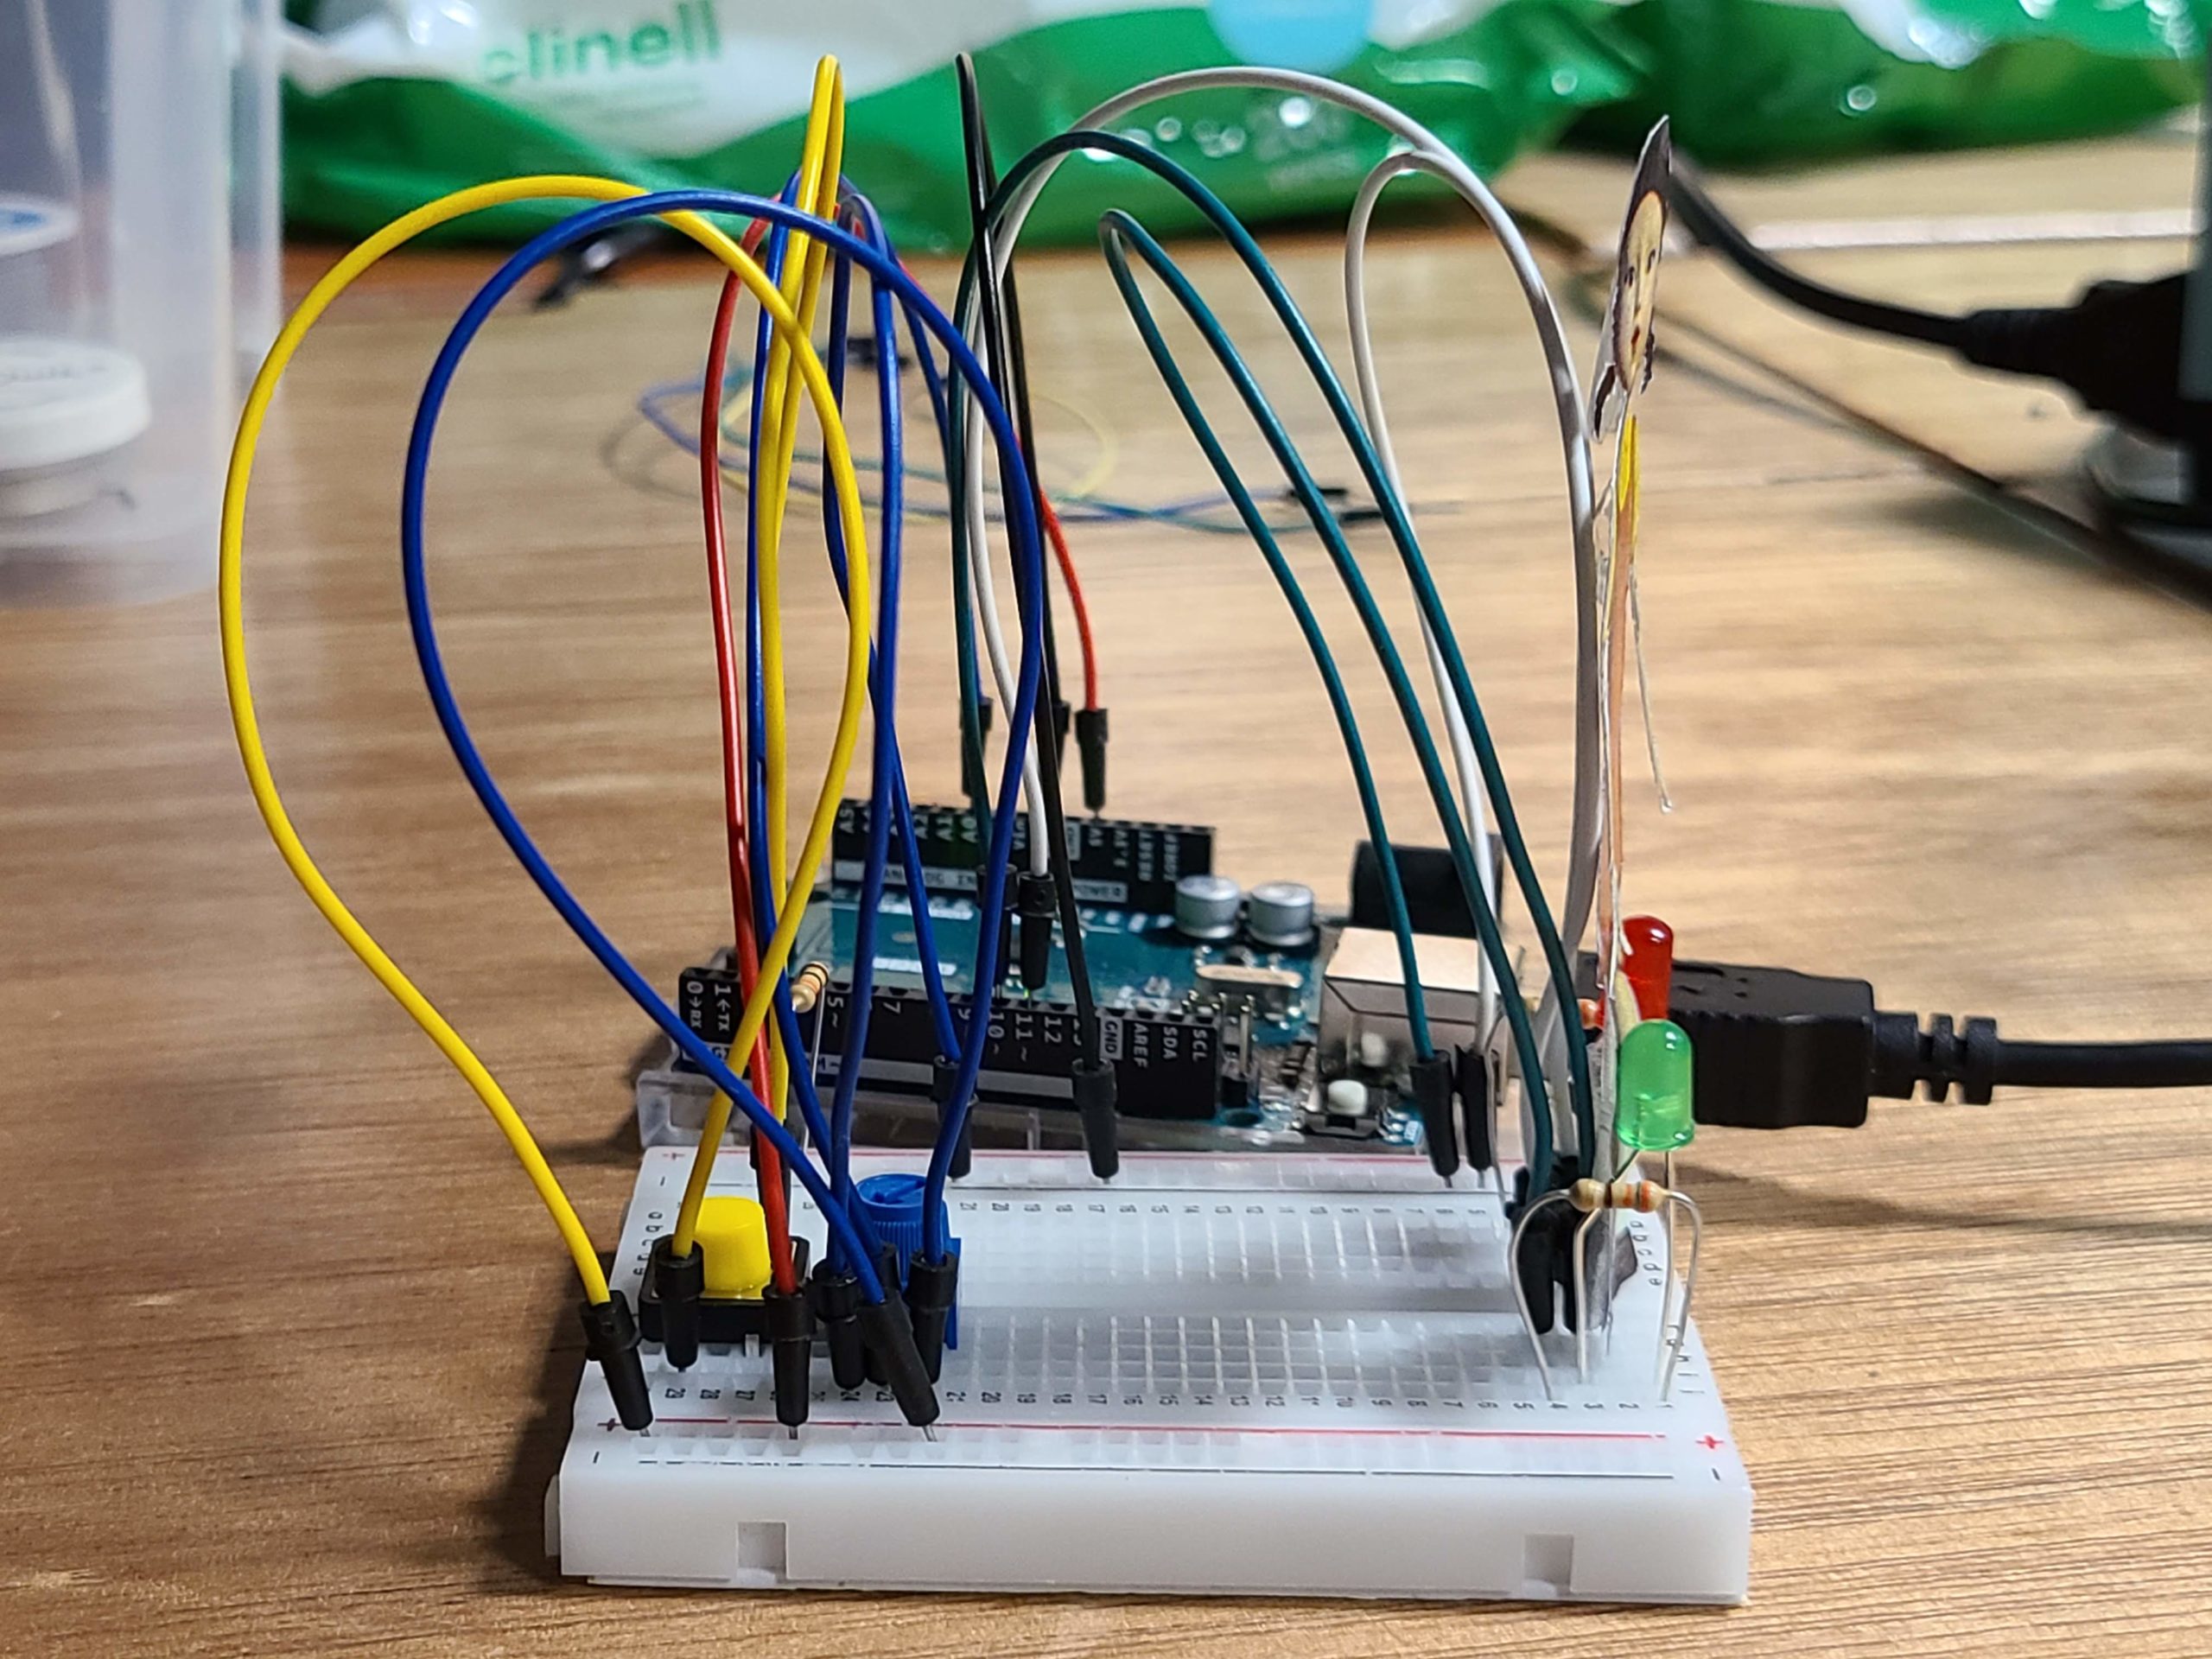
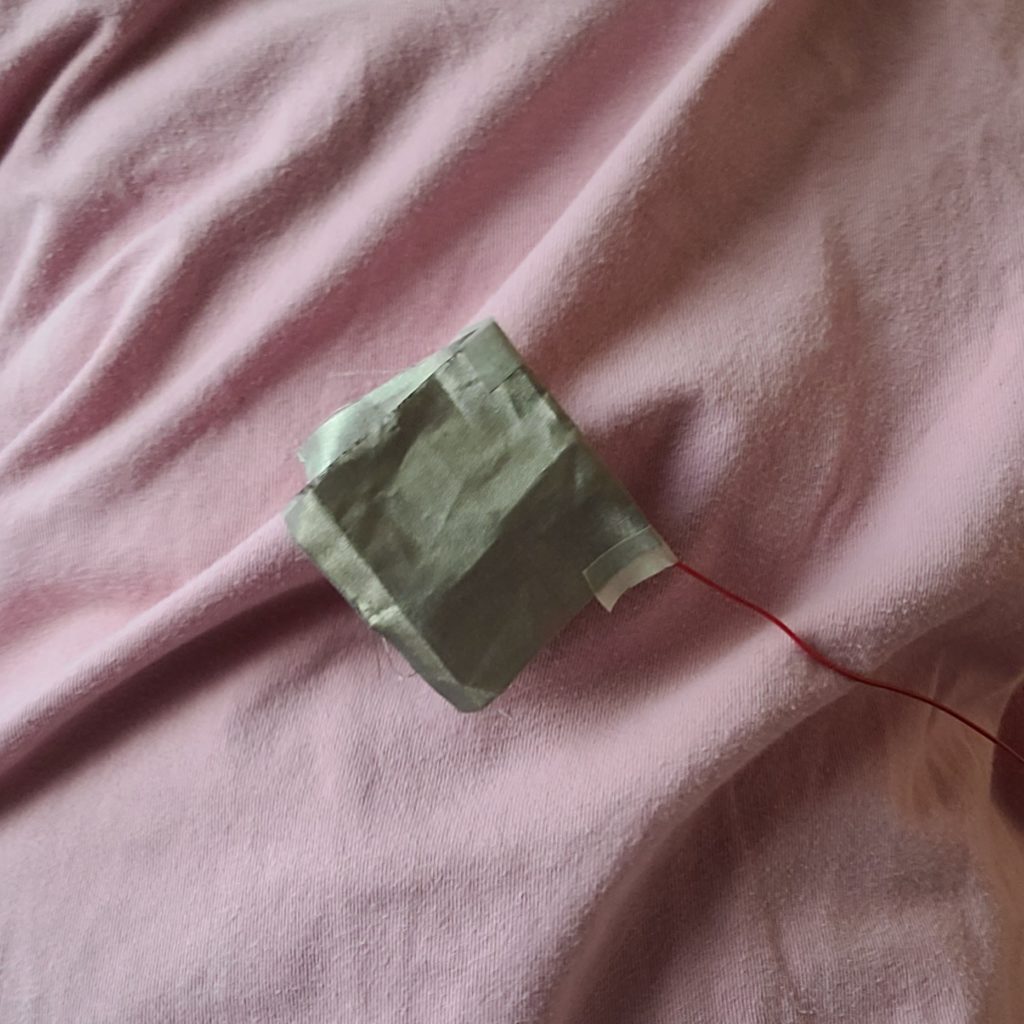
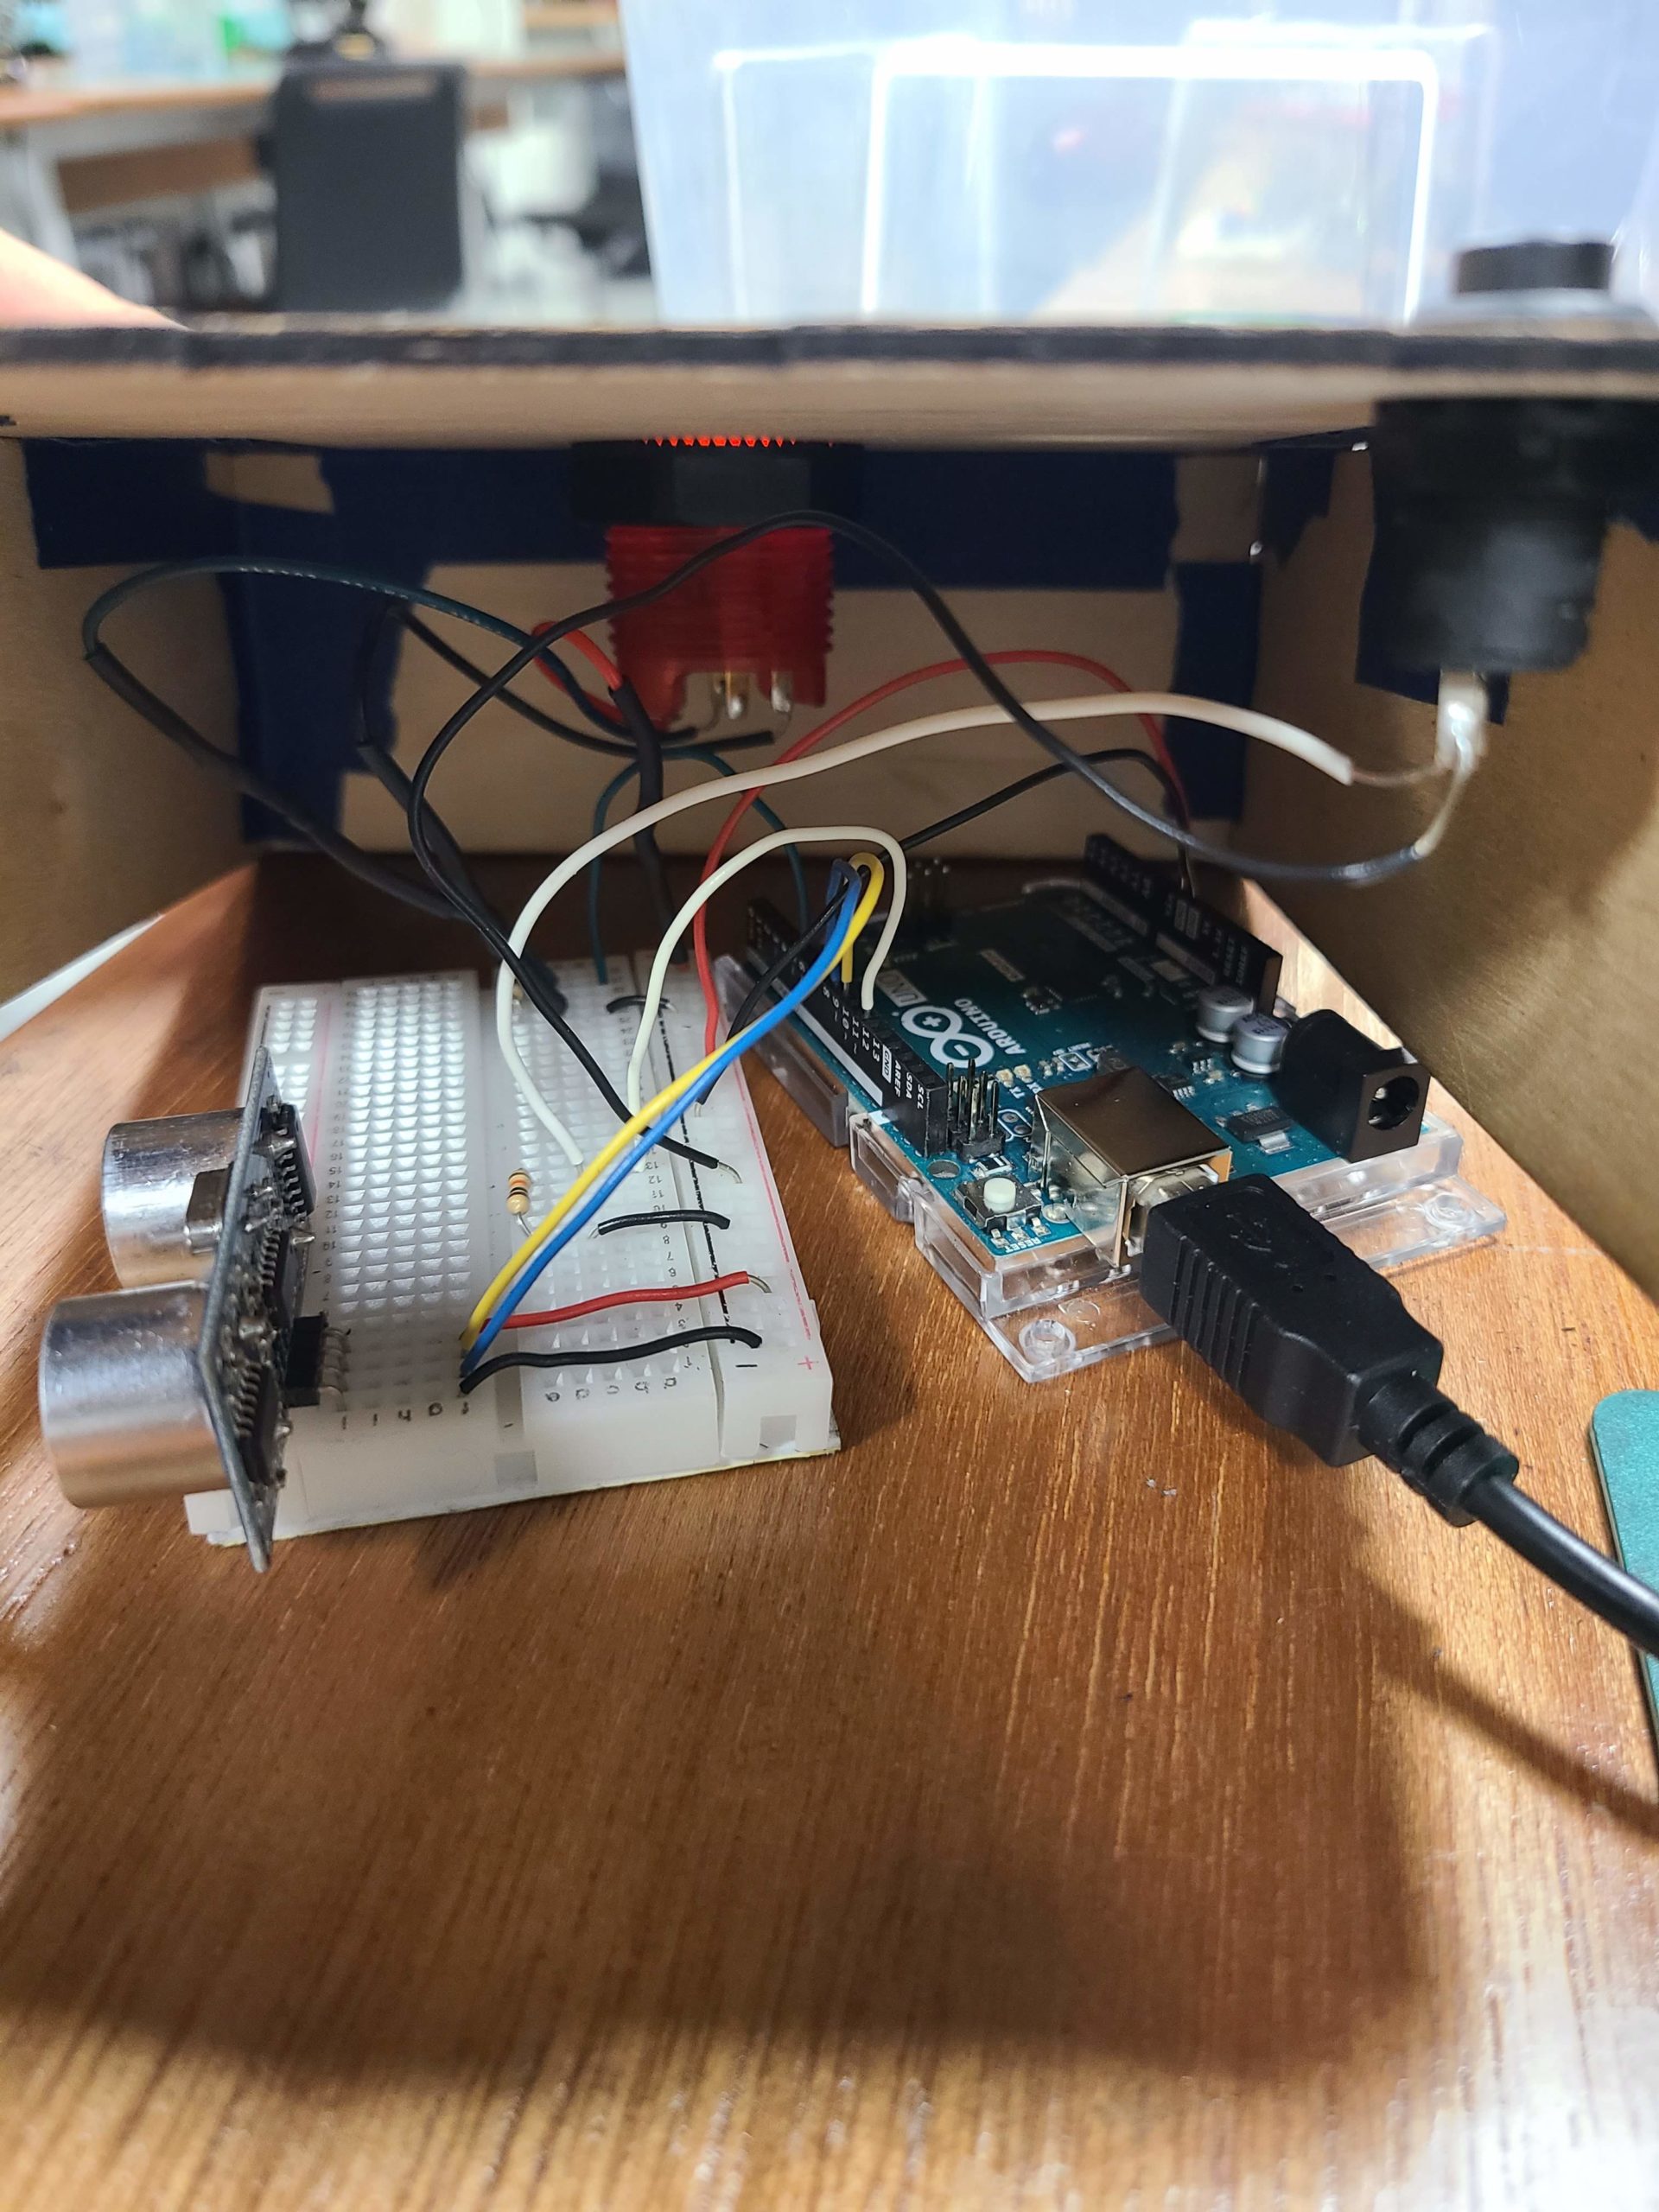
During the process of building this, I spent the most time soldering the panel buttons. At first, I just had everything on a breadboard and didn’t use a lock switch for the start/restart of the game. This made it a lot simpler to build, since I was planning on having everything on the breadboard and just using that. But then I decided to create a case for the Arduino and breadboard, which meant incorporating the arcade button. The arcade button was a better interaction compared to the small push button, but I struggled with the wiring for quite some time. Basically, the soldering wasn’t really an issue, but it was getting the wires to be the correct length. Since my box wasn’t completely assembled, I guessed for the length of the wires. It was too long at first, so I kept trimming until it was too short, which meant I had to resolder it. The next time I used stranded wires, which took some time to figure out how to solder the solid core to stranded. When I wired everything up it ended up like this:

I quickly realized that the button wasn’t actually wired correctly, and that it was actually printing 0 and 1s randomly. Professor pointed out that my resistor wasn’t connected to anything (this always happens!). I revisited by schematic (and also consulted my dad who works with electronics).

So the first issue was that I soldered to the wrong pin: since the arcade button has one pin for LED and one for the switch, I had to make sure which one was which using a multimeter. Unfortunately, I was unlucky and soldered the LED pin instead of the switch, which was why it wasn’t working. This also explains why the LED was always on even though I didn’t code it. Another issue was with my wiring: I just connected the switch wire directly to the pin in the Arduino rather than closing the circuit by connecting it into the breadboard and then into the Arduino (this is where the schematic really came in handy!).

Now for the lock button, I struggled a lot with this as well. Since the arcade button has three pins, the two pins confused me. Turns out it doesn’t need a ground pin, I could just connect it through the resistor, and the two wires were one for 5v and one for the Arduino pin.

Everything wired together with the case

The distance sensor was straight forward since I decided not to solder it and just keep it in the breadboard. However, I probably made the wires too short because in the last hour of the IM Showcase it stopped working and people were very confused as to why the character wasn’t moving. I realized that it was because one of the wires broke from the breadboard and another one was connected to the wrong pin. I should’ve realized to check the circuit when nothing was changed from the code side.

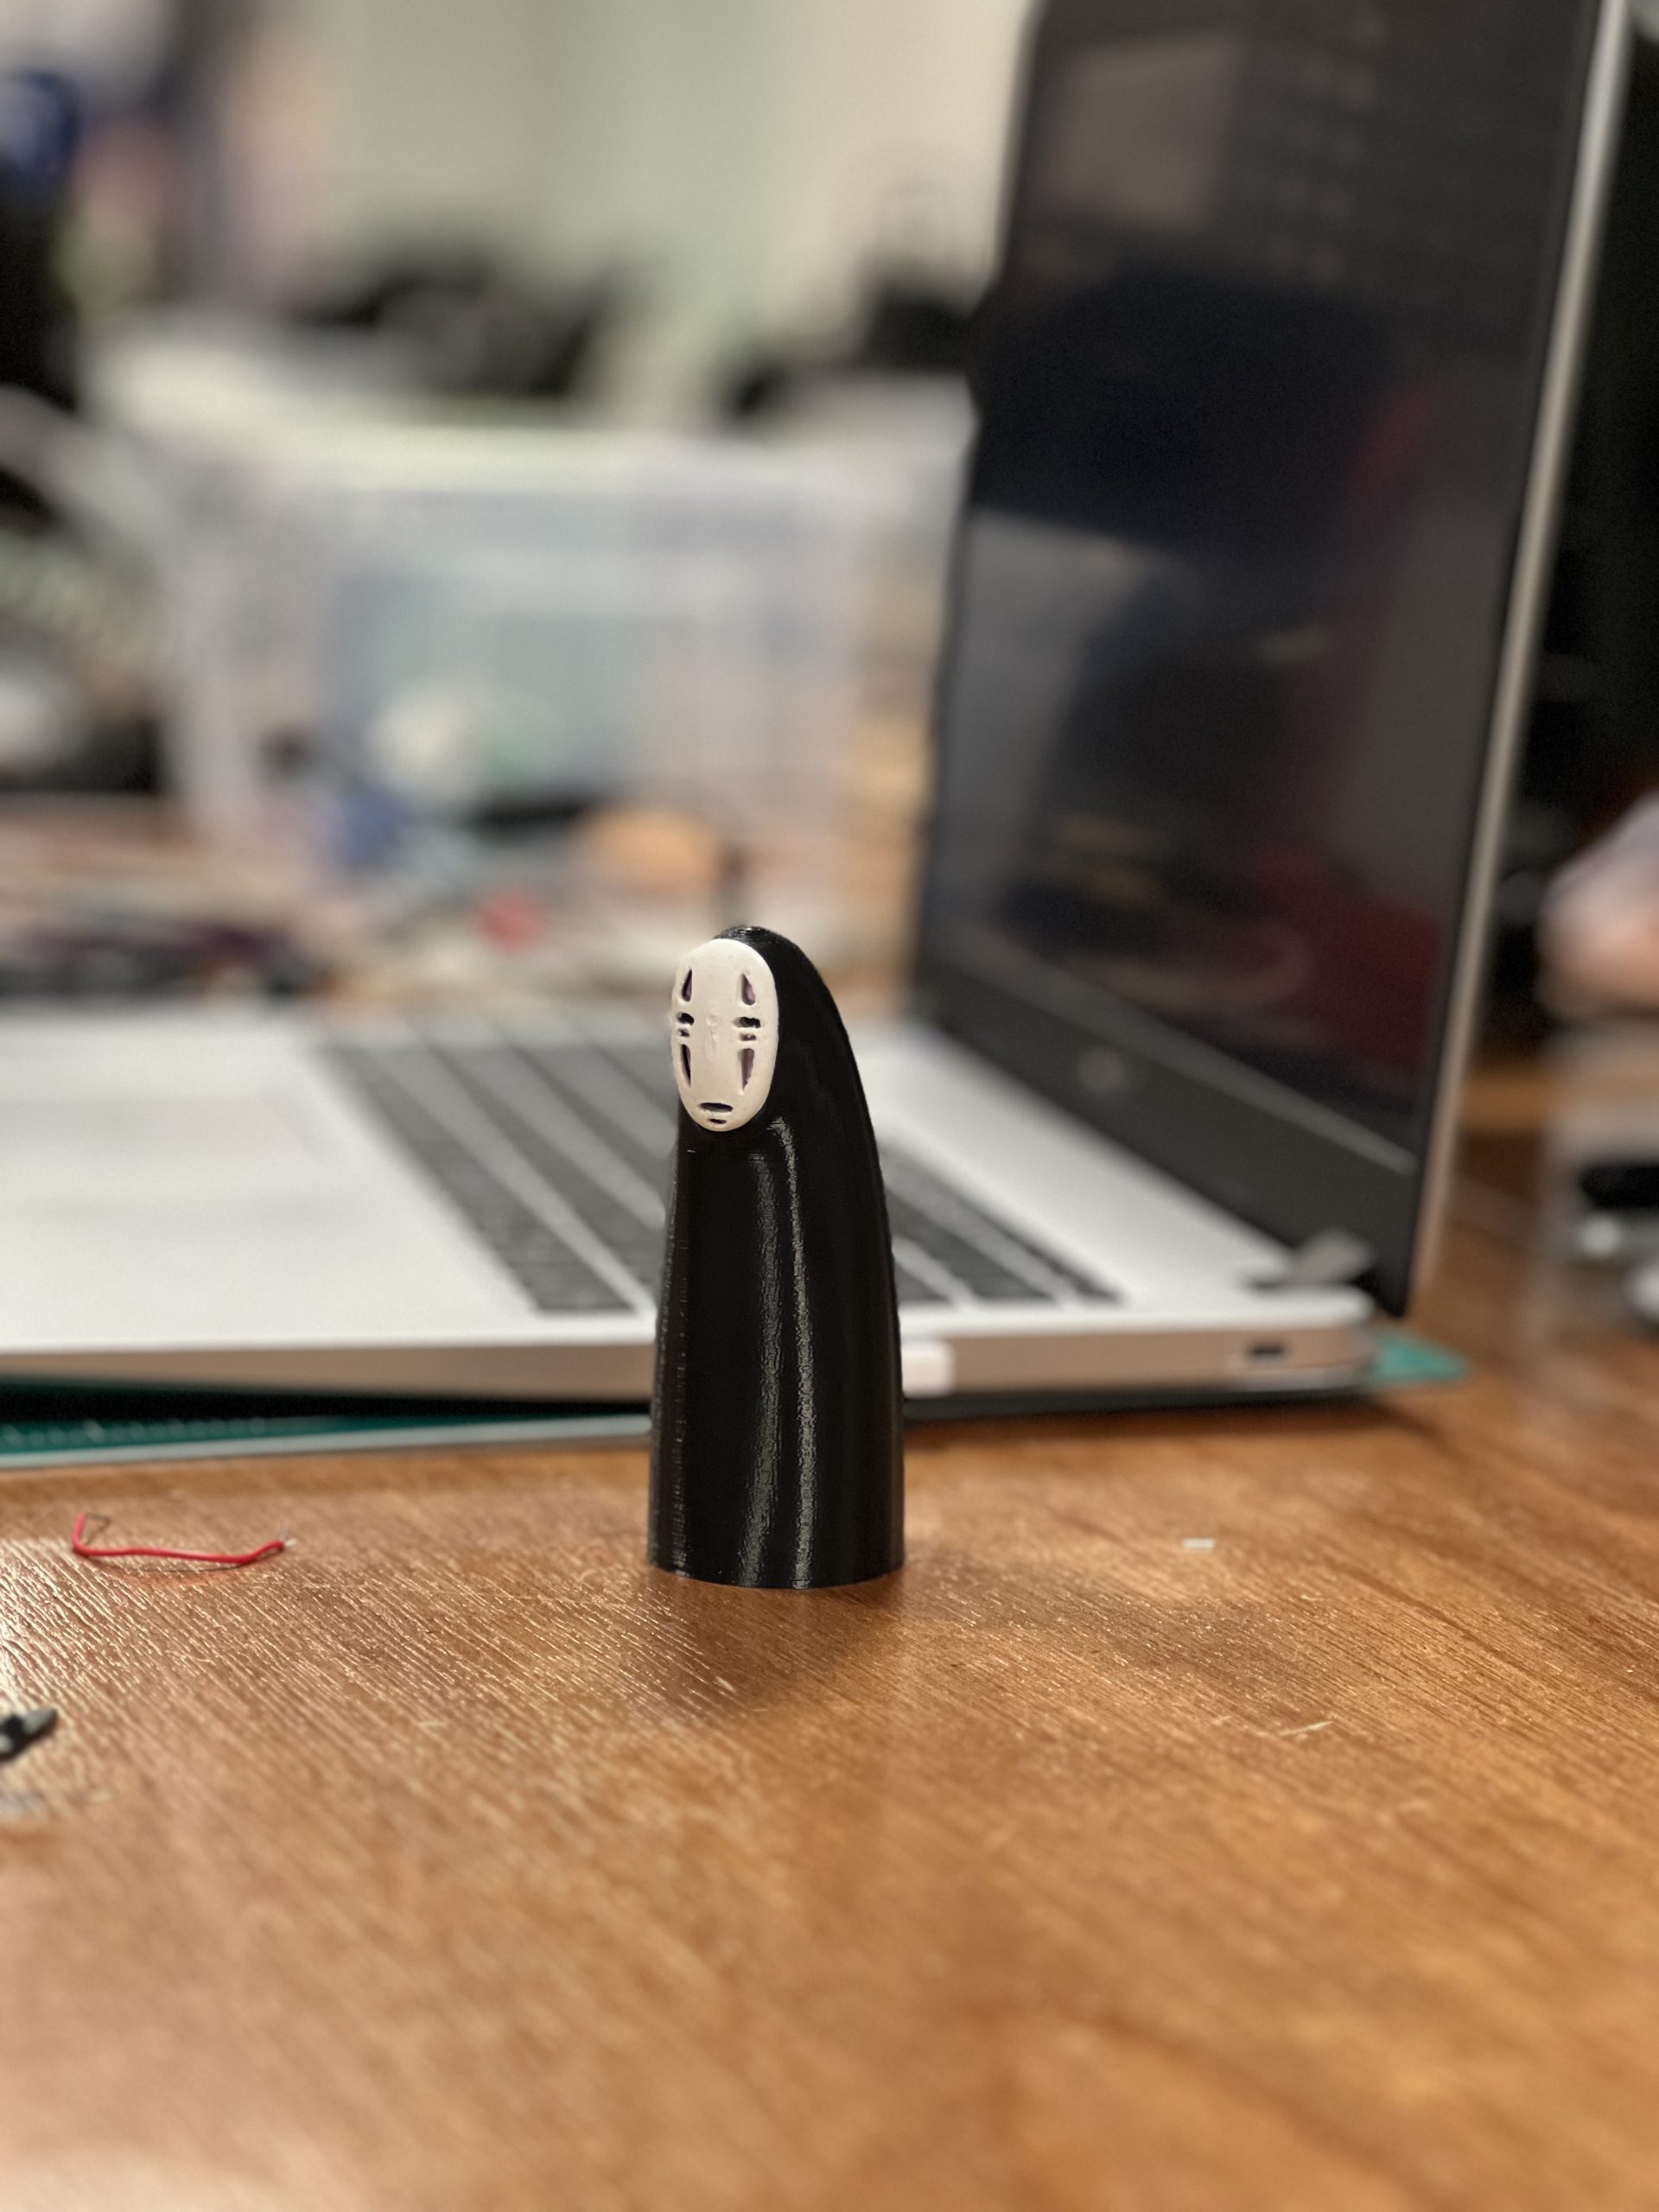
For the physical character, I was originally going to make it out of cardboard but I remembered that there’s a great website called Thingiverse with other people’s 3D model creations, which meant that I could use it as well. I did have some minor issues with printing the mask, since it didn’t completely finish printing or it wouldn’t print at all, but I figured out that it was because I tried combining the two files into one print. Other than that, 3D printing was straightforward.

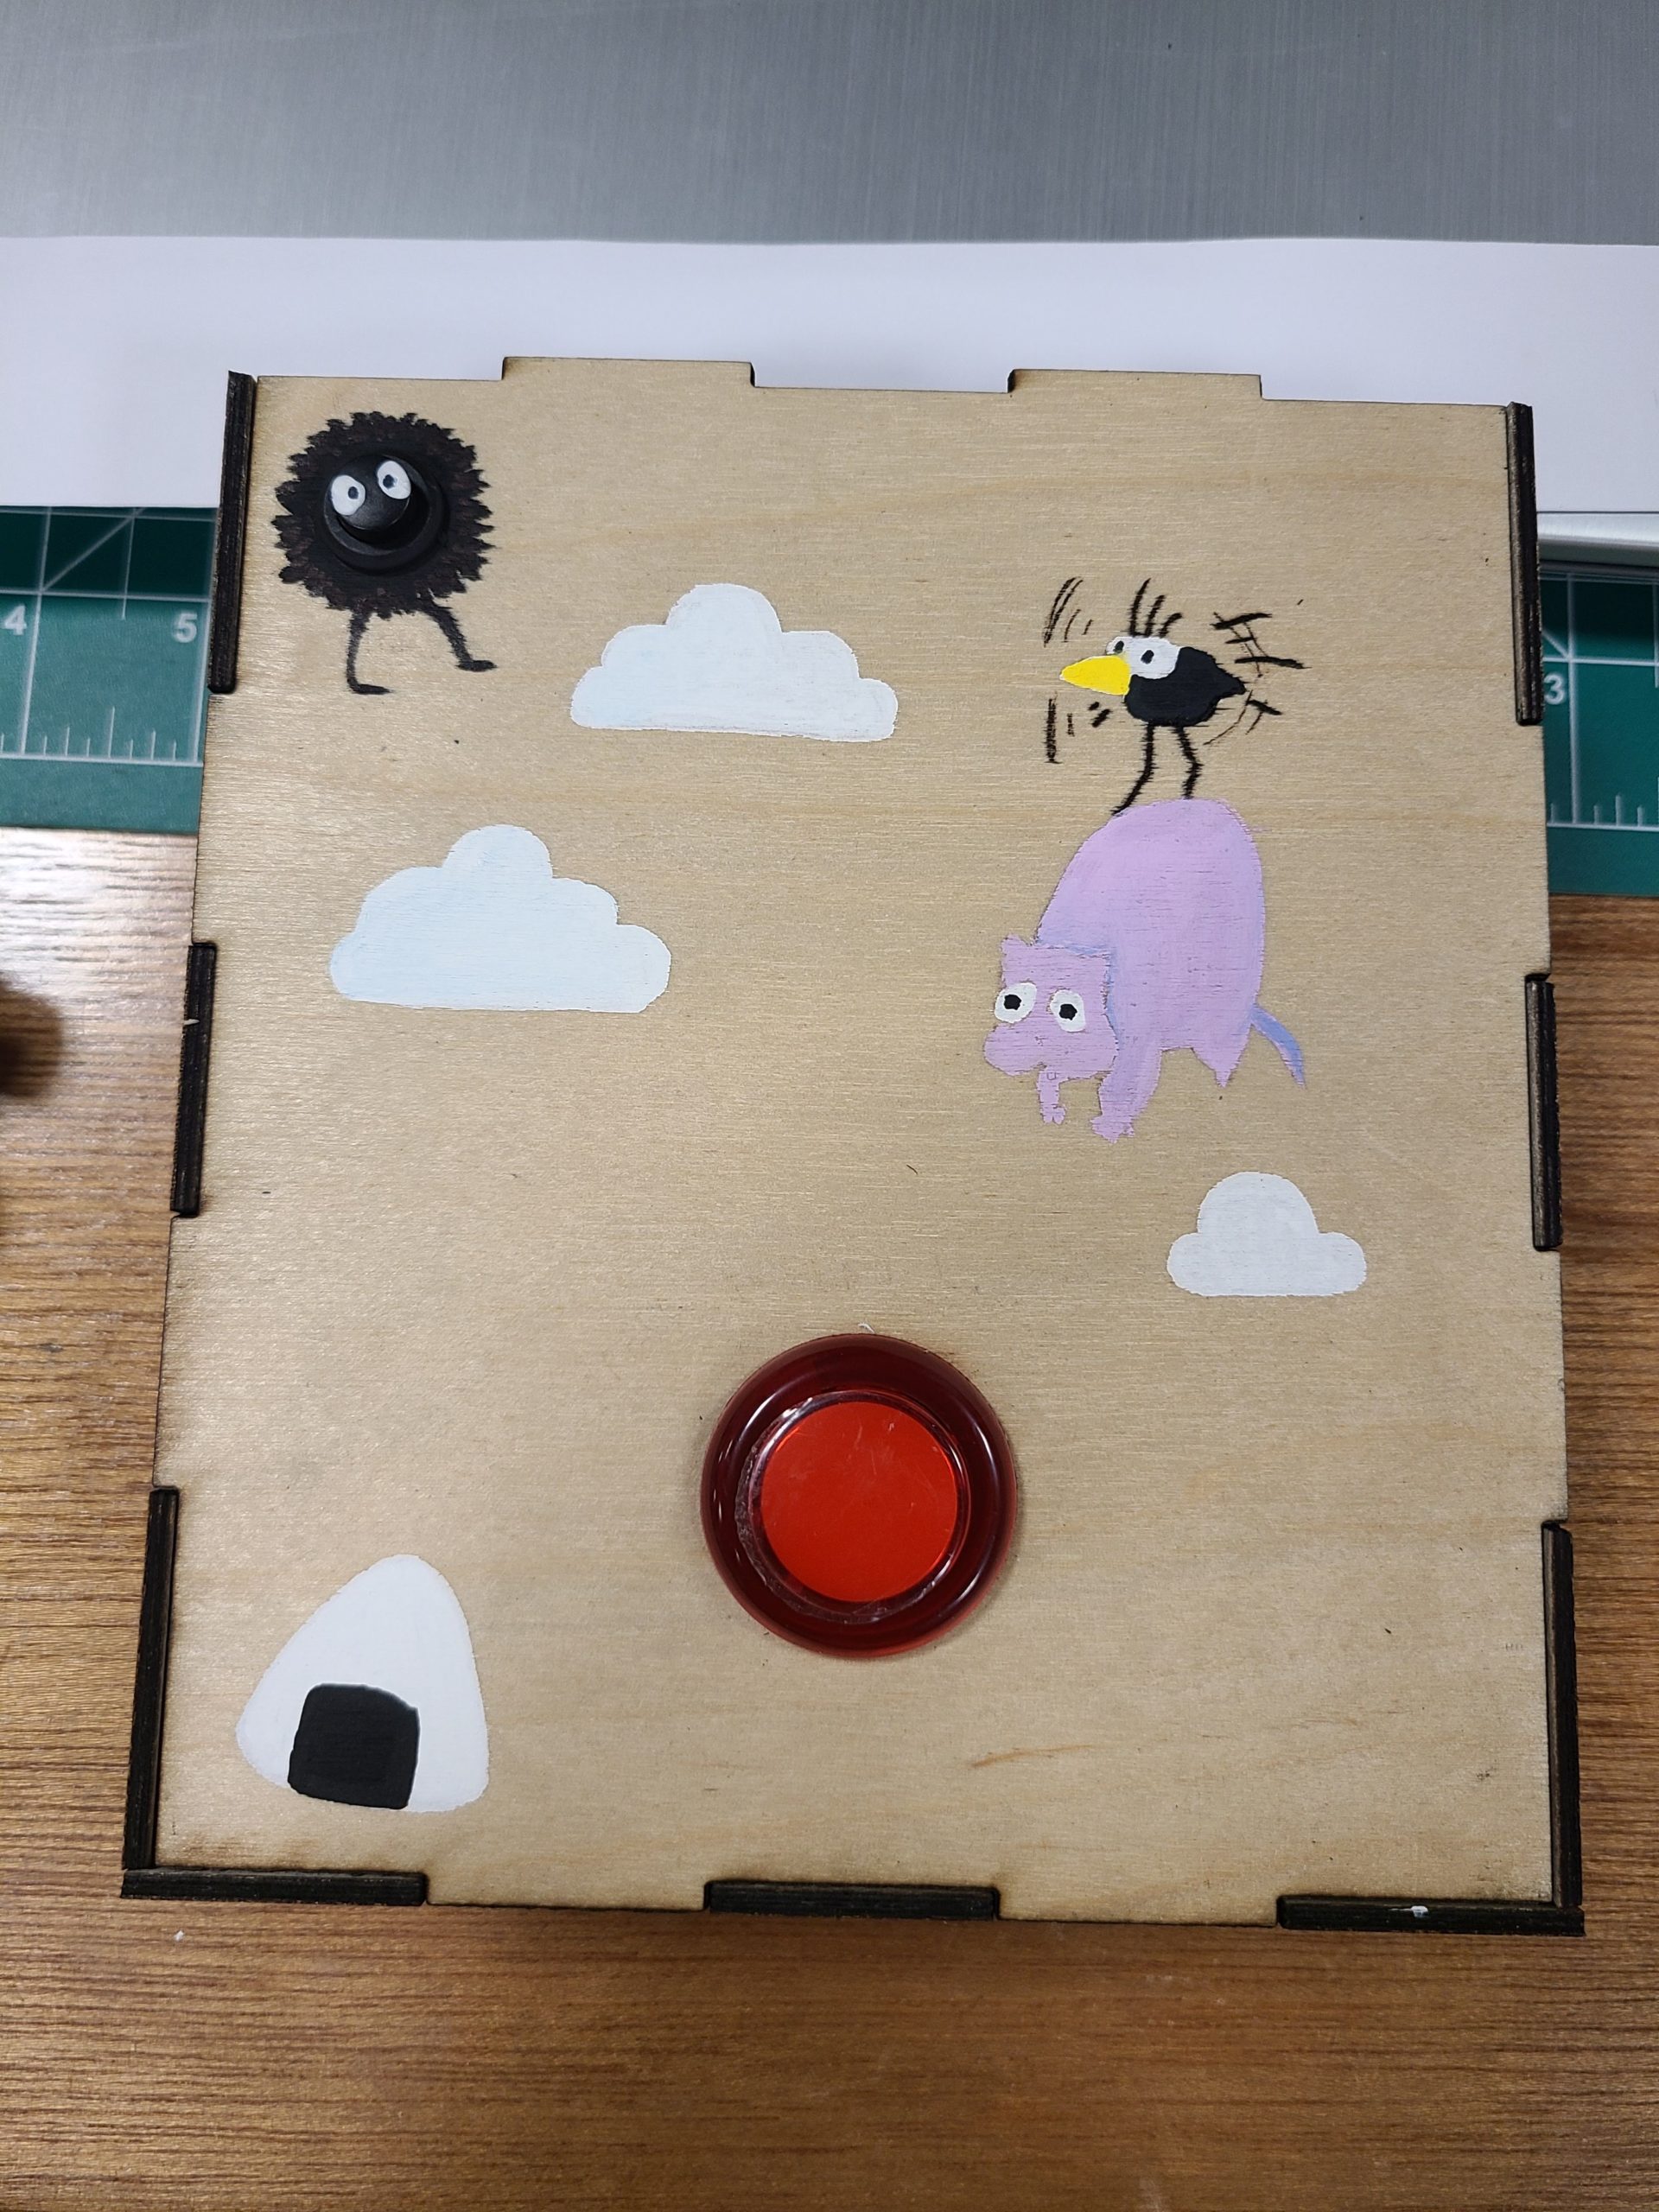
Finally for the case, I decided to laser cut it, but I realized I made it too small which made it difficult to fix the circuit. That’s also probably why I didn’t realized it was the wire that broke and caused the distance sensor to not work anymore. I also took a few tried to adjust the height for the holes for the distance sensor and I wish I made the holes a little smaller because the sensor kept sliding out.

Code: Arduino, p5.js, and Communication Between

p5.js Code

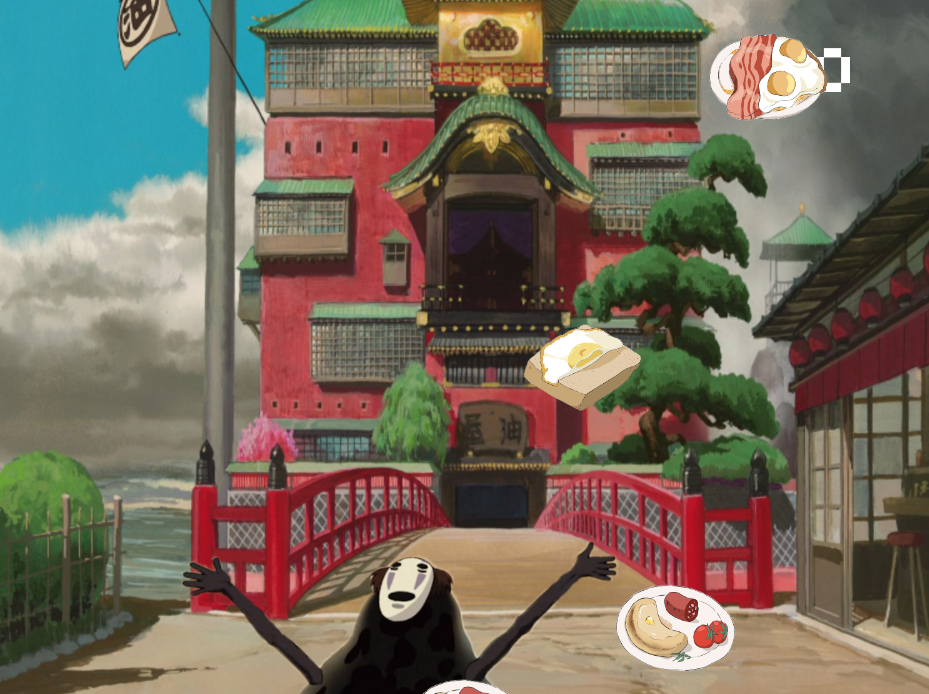
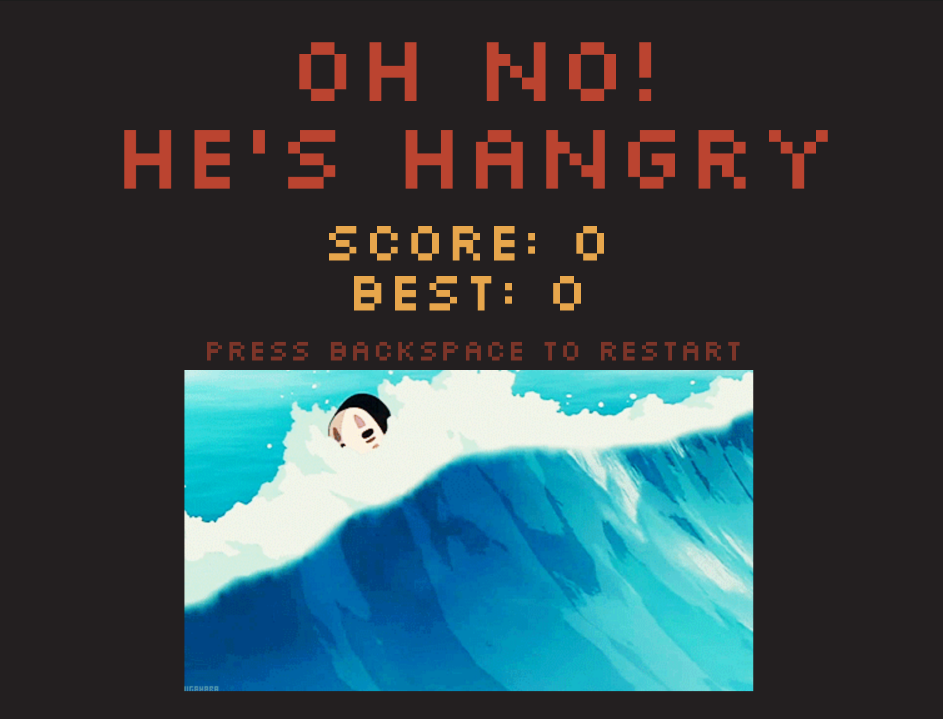
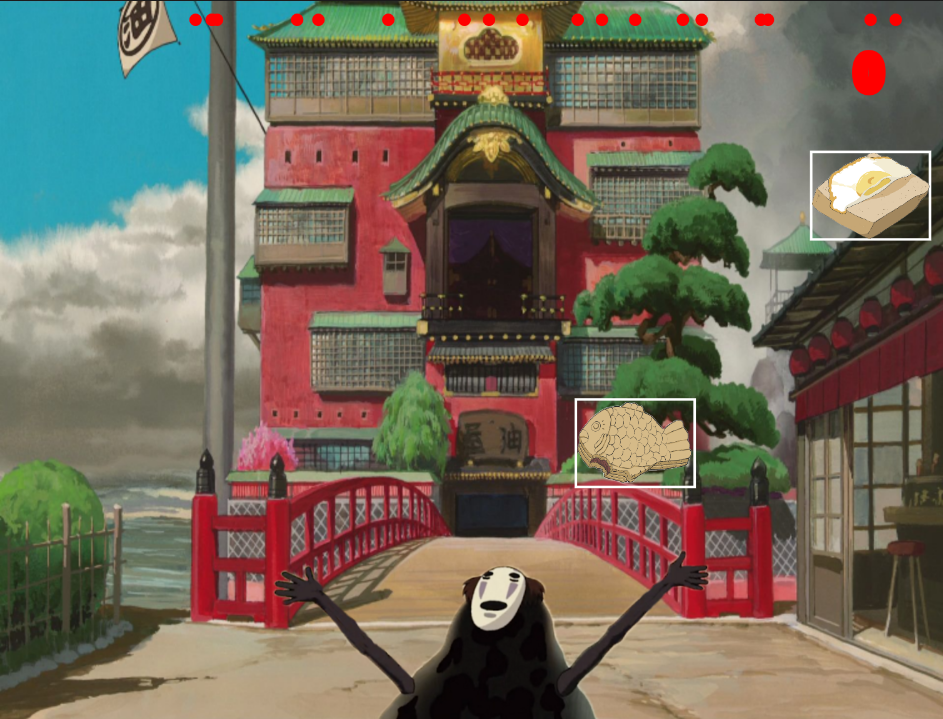
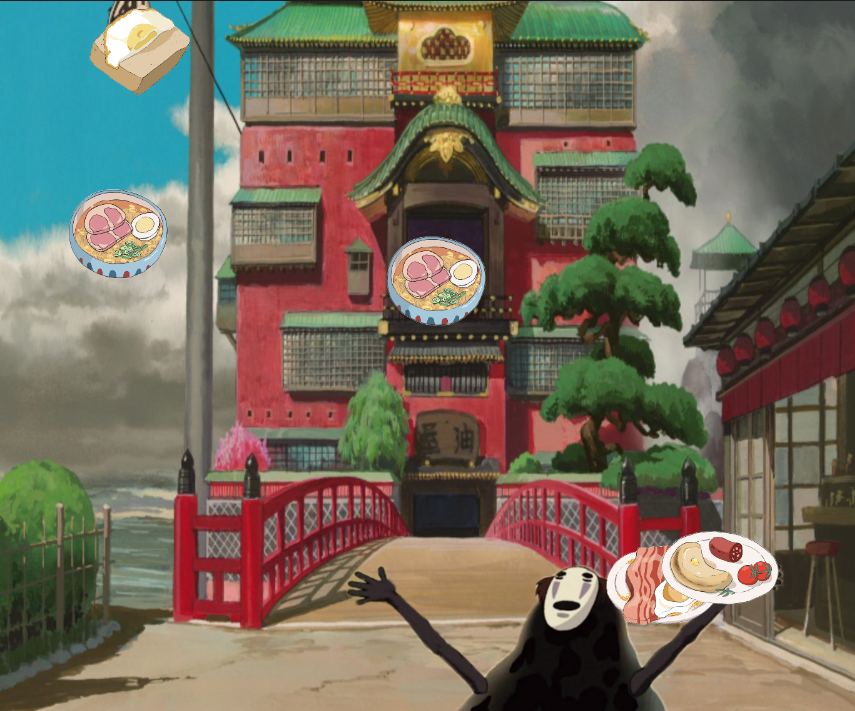
Since I was using my midterm project for the final project, there wasn’t much to do on the p5 sketch side. The only edits I made were changing the game mechanism (catch the food) and the concept of the game. Instead of dying after missing one food item, the player has 30 seconds to catch at least 10 foods or they will get a “bad” ending. Therefore, I had to implement two ending screens and a timer.

function countdown() {
  if (frameCount % 60 == 0 && timer > 0) {
    timer--;
  }
  fill("red");
  text(timer, 30, 80);

  if (timer == 0) {
    gameState = "end";
    timer = 30;
  }
}

The timer was pretty straightforward: since the there are 60 frames for every second, I used the modulus to get the remainder and decrement timer. When I first used this and restarted the game, it went directly to the end page and I realized that I forgot to reset the timer to 30 seconds again.

I also had to experiment with the distance between the character and the food, since the catch is no longer using the mouse position.

Arduino Code

As for the Arduino side, the trickiest part was definitely getting the distance sensor to have smoother readings (thanks professor for helping with that!). I looked at a bunch of examples, but the one that worked for me was using the average and discarded any readings outside the range of 5-40 cm. This worked pretty well compared to when there was no smoothing, but there were some times where the distance sensor would get a readings that aren’t accurate, for example it would go from 15 to 20.

total = total - readings[readIndex];
  readings[readIndex] = distance;
  total = total + readings[readIndex];
  readIndex = readIndex + 1;

  if (readIndex >= numReadings) {
    readIndex = 0;
  }

  average = total / numReadings;

  if (average >= 5 && average <= 42) {
    //    Serial.print("Distance: ");
    //    Serial.println(average);
    //    Serial.println(" cm");
    currentAverage = average;
    delay(1);
  }

The communication between Arduino and p5.js was also kind of difficult, since the serial print sometimes didn’t work. For example, p5 wouldn’t get the data but that’s because I forgot to do println for the last one.

Conclusion: What I’m Proud Of and Future Improvements

Some improvements are definitely needed. As I was showing my project, a lot of people tended to press the black button to catch the food rather than the red button. Also, sometimes the character would overlap with the food and the player would press the button, but the food wouldn’t be eaten, so I would need to continue experimenting with the distance. For the physical character, some people wouldn’t really slide it across the line, so in the future I would maybe have to create a platform with the line concave in so you could only move it in that space.

Overall, I’m really happy with how my project turned out! I wish I got more pictures of people playing the game during the showcase, but I will remember it for as long as I can. It’s so fun to see how people interacted with my game and hear the things they had to say about it. While I did have a lot of ups and downs, I’m proud of how the physical components actually turned out. I was really trying to avoid soldering, but for the sake of a good user experience I overcame that and soldering is actually kind of fun. I really enjoyed focusing on the physical aspect of my project and spending less time with the coding aspect.

Thank you for the great semester and amazing first IM showcase! Thank you so much for having me this semester and I hope to come back some day :’)) Shukran!!


Feed No Face 2.0: User Testing

I did a few user tests throughout the making of my project, but unfortunately I only have one video.

During the user testing process, I noticed that some people were confused where to move the physical character. So for my final design, I decided to add a line to guide the user where to move the character. Additionally, since I tested it before smoothing the distance sensor, people were confused by the movement of the character. Additionally, some people thought that by moving the character to the position of the food item, it will automatically eat it. So I will need to either use a bigger button (which will be a better user experience) or make the instructions more clear.

Here is one video that I took of the user testing:

(At some point I made my friends test it so much that they were basically a master at the game)

Final Project Update: Half-Live Fruit Ninja

To be honest, I still don’t have a super clear idea of what I want to do with my project because I keep changing my mind, but currently I have the bare minimum elements working. For my project, I want to create a live version of Fruit Ninja, a classic mobile game that requires finger swiping interactions. For the live version, I will be using 4 different colored buttons, each button corresponding with the color of the fruit that appears on the screen. For example, if a red fruit shows up, the player should press the red button.

So far I have one of the 4 buttons working, just to test, but it doesn’t work the way it’s supposed to. It took me quite a while to figure out how to do the serial communication, but I realized that I need to send to Arduino the same amount of data that I want to receive on p5 (at least that’s what worked). At first I was only sending one thing, because technically I don’t use any information from p5 yet), but when I was receiving Arduino data it wasn’t working.

Physical Components

The physical components for my project are 4 buttons, a distance sensor, and one LED. The LED lights up when the distance is less than 10 cm. One thing I noticed is that the LED does not light up as bright sometimes when using the distance sensor, whereas when I used it to test if the buttons worked it was very bright (the testing was all in one program). So this is something to think about, because I tested both analog and digital write.

Screen/Digital Components

Here is a link to my work in progress p5 code. As I said earlier, I tested just the red button. Good news is that it removes the fruit when it is pressed, but the difficult thing to figure out is 1) how to remove only one fruit when it is pressed and 2) remove the fruit that corresponds with the button color. When I figure out these two issues, the rest of the project is mainly fine tuning.

I am still debating on whether or not I should add the distance sensor or not now. One idea that I came up with is to mark the floor where the player should stand and give then a “sword” to hit the buttons with. That will maybe make the game more challenging and eliminates the distance sensor.

Things I still need to work on:

    • Getting the color of the button to correspond with the color of the fruit.
    • Remove one fruit at a time when pressing a button.
    • Distance sensor to create an invisible barrier (maybe?).
    • Animate the fruit to look like it’s being thrown.
    • Aesthetics (but this is the very last thing to worry about).


Final Project Preliminary Concept: Live Fruit Ninja

While brainstorming, I was trying to recall what interactive projects I’ve interacted with and enjoyed. I feel like key components that draw me personally to a project are the outcome, music, and how the body is used in the project.

My preliminary idea for the final project is to take the classic 2000s mobile game, Fruit Ninja, and make it live. If you’re not familiar with Fruit Ninja, it’s a timed game where the player has to slice as many fruits as they can using their finger(s). There are combos, bombs, and special fruits in the game, but to keep it relatively simple for implementation I will probably just have the player be able to slice one fruit at a time.

The physical component will be instead of the player using just their finger, they will use their whole body. For instance when they see a fruit coming, they will have to slice it using their arms. This might use the distance sensor. Another possible idea is to have multiple buttons, one representing each fruit, scattered around so the player will have to move to get the button.

I’m not sure if I will stick to this idea, but for now live Fruit Ninja will be what I’m going for.

Assignment 8: In-Class Exercises


[In collaboration with Maryam]

Here is the actual physical circuit and schematic we used for all three exercises. The actual physical circuit has two LEDs, one at pin 2, but it wasn’t illustrated because it wasn’t used, it was just there for testing purposes.

Exercise 1: Ellipse

Here is the link to the full code. It uses professor Sherwood’s  example “Webserial Handshake” code, except it includes this line:

ellipse(map(rVal, 0, 1023, 0, 600), 300, 200, 300);

which maps the rVal to the x-position of the ellipse. Since the rVal reads from the Arduino, the ellipse x-position also changes as the sensor is being used. We used a potentiometer to control this.

Exercise 2: LED Brightness

Here is the link to the full code. At first we tried using up and down arrow keys, but we changed it to mouse click and then the mouseX position. So, for this exercise, we controlled the brightness of the LED using the mouseX position, where we mapped it to the values for the LED:

LEDBrightness = map(mouseX, 0, width, 0, 255);

We wanted it to be changing constantly, like how a potentiometer changes the LED constantly, but it didn’t work out that way. We tried printing the values and it turns out that the mouseX value is sent to the Arduino only once, so it doesn’t always get sent. However, when printing the LEDBrightness, it is constantly being checked.

Additionally, another version we tried was using the left and right halves of the canvas to change the brightness by using mouse input. The left side would make the LED dimmer, whereas the right side was the full brightness. This was used as a way of simplifying the program. The issue we ran into with this method was that the LED would be full brightness when clicking the right half, but when clicking the left half it would barely light up, even when the value for left was the same as the right value.

Exercise 3: Gravity Wind with Potentiometer and LED

Here is the link to the code. The code for this exercise uses Professor Mang’s example and the gravity wind example from Professor Sherwood with a few modifications. Firstly, there are boundaries set so the ball does not go out of the canvas. This is the code that checks if the ball bounces and then the LED will light up:

if (position_.y > height - mass/2 - mass) {
    if (velocity.y > 1) {
      serial.write(255);
    }
  }

It checks if the position of the ball hits the bottom edge of the canvas. It also checks if the ball is still bouncing based on the velocity.

And this is the code from the Arduino side for the LED:

serialRead = Serial.read();
analogWrite(ledPin, serialRead);

Since we just used serial.write() in p5, when we Serial.read() it takes the value in the serial write (which is 255) and we use that to write to the LED.

As for the potentiometer that controls the wind, here is the code for it in p5:

wind_strength = 5;
new_wind = map(inData, 0, 255, -wind_strength, wind_strength);
print("this is indata", inData);
wind.x = new_wind;

It maps inData, which reads from Arduino and maps the values to wind strength, which changes the x-position.

Here is a video of it working:

Assignment 7: Music Machine by Nouf and Vivianna

Our idea for the musical instrument was to use sounds that the servo motor created rather than incorporating the piezo buzzer. So, we decided to try and recreate a gumball machine and the sound it makes when the gumballs fall out of the machine.

The Physical Design Process

We built the structure using a box, water bottle and cardboard. We then prepared the servo motors and prepared a cardboard piece to act as a ball stopper to control the amount of balls that fall through the hole.

We attached the servo motor and started testing out the servo motor with balls made from different materials to see what sound they made. We also decided to create two ramps for the balls to slide on to make more sound. As for the materials, we used pipe-cleaners, paper, and marbles. We found that the marbles made the best sound and rolled nicely down the ramp. The paper balls made a decent sound, whereas the pipe-cleaners were almost silent when they fell.

Different materials used for the ball

Here is the final version of the physical components:

And here is the schematic of our circuit:

Some things that didn’t work out as expected…

Our initial plan was to have the balls fall down one by one, but that didn’t work as expected. The balls either fell together when the ball stopper opened, or they would get stuck even when the stopper opened. When they do fall down, most of the time they wouldn’t roll down the ramps as intended. Usually, the balls would fall to the side, fall straight down, or when it does fall on the slide it wouldn’t roll all the way down and it would get stuck on the ramp. In this case, the marbles worked best since they were smooth spheres, but the marbles also had the problem with falling to the side. Additionally, at first we wanted the stopper to open and close continuously after one button press, but currently it just does the cycle once and you have to keep pressing the button for the continuous opening and closing.

The Coding Process

For implementing the sensors, we decided to use a push button and potentiometer. We used the button to control the servo motor, which either blocks or unblocks the hole where the balls fall out of. When it is open the balls fall out, and when it is closed the balls are stopped. To do this we used 2 if statements that checked if the button is clicked once, in which case the lever is opened, and if the button is clicked again then the lever is closed again.

 if(clicks%2 == 0)
 {
   pos = 0;
 }
 else{   
   if (pos <= 70)
   {
     pos += servoSpeed;
   }
}
 
myServo.write(pos);
delay(100);  

Another variation of code was to have one press do both the opening and closing of the ball stopper. This was the code we used:

if (buttonState == 1){
   for (pos = 0; pos <= 160; pos += servoSpeed) {
      myServo.write(pos);             
      delay(15);                       
   }
   for (pos = 70; pos >= 0; pos -= servoSpeed) {
      myServo.write(pos);              
      delay(100);               
   }
  } else if (buttonState == 0) {
    myServo.write(70);
    delay(15);
  }

This is the link to the full code

We experimented with the delay, and the number for the position of the servo motor. If we made the delay longer, the servo motor would take longer to reach the position. Moreover, since the potentiometer controls the speed of the servo motor, when the potentiometer is at the maximum number, the servo motor moves faster, but since the delay is longer it doesn’t seem as fast. When the delays were all set to 15 and the potentiometer was at the maximum, the servo motor didn’t sweep the full amount (i.e. it didn’t complete the number of degrees in the for loop). While this was experimental, we ended up liking the sound it created and the movements of it.

Finally, here are a few different videos of our music machine!

This one is the first code, where one press opens and the other press closes it:


This one all the delay amounts are the same. We didn’t experiment with the potentiometer for this version, but the sound was nice:


This one has one long delay:


And this final one we tested with just marbles and shortened the long delay, which was in the previous video:

Assignment 6: Analog and Digital Sensors

For this assignment, I thought of the game “Red light, Green Light”.  That also made me think of the Squid Game doll. Truthfully, I never watched Squid Game, but it was super viral and popular last year.

The Circuit and Code

As Professor pointed out in class, I had everything super close on my breadboard. I did this for organizational purposes, but it ended up being the wrong choice because it was a bit difficult using the potentiometer (I rearranged it later but I didn’t take a new picture).

I tried drawing the schematic of my circuit:

Basically I wanted to simulate Red Light, Green Light. So when the push button is pressed, the green light will go on first for a certain amount of time, which is determined by the potentiometer. Then the red light will go on and turn off after a random number of milliseconds.

int randomNumber = random(2000, 5000);
  int buttonState = digitalRead(PUSH_BUTTON);
  int potValue = analogRead(POT_PIN);
  int blinkSpeed = map(potValue, 0, 1023, 1000, 10000);

  // buttonState refers to the push button value; if it is pressed, it is HIGH (or 1)
  if (buttonState == HIGH) {
    digitalWrite(GREEN_LEDPIN, HIGH);
    digitalWrite(RED_LEDPIN, LOW);
    delay(blinkSpeed);
    digitalWrite(GREEN_LEDPIN, LOW);
    digitalWrite(RED_LEDPIN, HIGH);
    delay(randomNumber);
    digitalWrite(RED_LEDPIN, LOW);
  }

It’s a really simple program and I want to make it a longer and more randomized game. But this is what I have so far:

I made some adjustments to the program to make the LEDs turn on and off continuously, rather than once when the button is pushed. I got the code from this website, which explains how to turn a push button into a toggle switch. So in this version of my code, the LEDs turn on and off continuously. The speed at which they turn on and off is dependent on the potentiometer. The issue with this one is that it never stops, it just stays on the red LED unless you push the button again. This code does work better as a game, but there’s still a lot of room for improvement.

if (previousButtonState == 0 && currentButtonState == 1){
    if (LEDState == 0){
      digitalWrite(GREEN_LEDPIN, HIGH);
      digitalWrite(RED_LEDPIN, LOW);
      delay(blinkSpeed);
      digitalWrite(GREEN_LEDPIN, LOW);
      digitalWrite(RED_LEDPIN, HIGH);
      delay(blinkSpeed);
      LEDState == 1;
    }
    else{
      digitalWrite(GREEN_LEDPIN, LOW);
      digitalWrite(RED_LEDPIN, HIGH);
      LEDState = 0;
    }
  }
  
  previousButtonState = currentButtonState;
  delay(100);

Here is the video of how it works with the additional code:

Future Improvements

Again, I want to add more to this code, which involves randomizing which color is first and making it a longer game. Currently, I hard coded green to go first and then red goes, with the delay time determined by the potentiometer. It would also be cool if the first press of the button was starting the game, and then the next button press is stopping the game.

Assignment 5: Creative Switch

The brainstorming process took longer than the creating of the switch. It’s really hard to think of a switch that doesn’t require using your hands at all. I kept thinking of ideas that indirectly used my hands, which I felt like is still considered a switch that uses my hands. For example, one idea I had was opening my water bottle will be switch the light on, but this meant using my hand to push the button of my water bottle to open it. Another idea I had was a hair clip, but again it required my hands to put the clip in my hair. I also thought of using earrings, but it was a bit complicated to get the switch connection.

As I was trying to figure out what to do for my switch, I realized that I spend so much time just sitting and tinkering with ideas. So why not create a switch that takes advantage of sitting?

Once I got the idea, the process of creating it didn’t take too long. I found conductive fabric in the IM lab and decided to use it (note: it is surprisingly conductive because I got shocked twice holding the wire and fabric with my bare fingers). I just used tape to tape one end of the wire against the chair and one on my back. It’s kind of ridiculous, but it works! I tried to position it so that the LED lights up only when you sit with your back straight against the chair. So my idea for this switch is to help make your posture better, since I’m guilty of having bad posture as I’m staring at my laptop.

Here is the video of the switch in action:


Midterm Project – Feed No Face!

Here’s the link the the editor and to the full screen game
Concept

My midterm project concept is based on a Studio Ghibli film called Spirited Away. The movie is about a girl named Chihiro who enters an abandoned amusement park because she lost her parents in the midst of moving homes, only to find her parents turned into pigs. There was one particular scene in the movie where No Face, a spirit side character, is fed by the workers, so I decided to use this scene as inspiration for my game.

No Face feasting

The concept is a game where you, as the character No Face from Spirited Away, have to eat all the food that appears on the screen. The trick is that you can only eat it when it reaches the height of the character, so clicking above will not count. If one food reaches the bottom of the canvas and you fail to click it, the game will end. Below are the three states of the game: the start/instruction screen, the actual game, and the game over screen.

How it Works
class Food {
  constructor() {
    this.xPos = random(50, width - 80);
    this.yPos = -20;
    this.xSize = 95;
    this.ySize = 70;
    this.xCenter = this.xPos + (this.xSize/2); // Midpoint formula
    this.yCenter = this.yPos + (this.ySize/2); 
    this.food = random(foods);
    this.speed = random(2,4);
  }
  
  rainingFood() {
    this.yPos += this.speed;
    this.yCenter += this.speed; // Since the y-position is moving down the screen, the center position also has to move in order for the distance to be accurate
  }
  
  // Mouse Interactions with Objects (The Coding Train):
  // https://www.youtube.com/watch?v=TaN5At5RWH8
  checkFoodEatenAt(mousePosX, mousePosY) {
    
    // Finds the distance between the mouse position and center of the food
    let d = dist(mousePosX, mousePosY, this.xCenter, this.yCenter);
    d = round(d);
    
    if(this.yPos >= 440) { // Can only eat when the food reaches the height of the character
      if(d < this.xSize/2 || d < this.ySize/2) { 
        eatSound.play();
        return true;
      }
    } else {
      return false;
    }
  }
  
  missedFood() {
    if(this.yPos > height) { // If it goes off the screen it's game over
      gameState = "end";
    }
  }
  
  show() {
    image(this.food, this.xPos, this.yPos, this.xSize, this.ySize);
    
    // For debugging the food click
    // noFill();
    // stroke(255);
    // strokeWeight(2);
    // rect(this.xPos, this.yPos, 95, 70);
    // stroke("Red");
    // strokeWeight(10);
    // point(this.xCenter, this.yCenter);
  }
}

The main part of the game is clicking on the food, essentially eating it. The food appearing and disappearing is done in a class called Food, which is assigned to an array. A new food is pushed into the array based on the frameCount remainder. The falling effect is done simply by adding to the y-position of the food with a speed variable.

The tricky part was figuring out how to remove the food and check if the mouse clicked on the food. Professor Shiloh suggested that I use a method that is specifically made for removing elements in an array, which I had not thought of at first. That got me thinking, so I searched for the method, which wonderfully enough, The Coding Train had videos on how to remove items in an array as well as how to check if the mouse clicked on an object.

Before watching the video, I knew I had to use dist() to figure out if the cursor is within the object, but I struggled a lot with that. It also didn’t help that since I scaled the images, the x and y position was all scaled as well (I put it in push() and pop(), but the numbers were still in the thousands). The Coding Train example used a circle to figure out the distance, but for my code I used a rectangle.

To walk through the whole process of figuring out the distance, I first drew a rectangle that was roughly the same size as the foods. I tried using the sizes to get the center of the rectangle, and to get that point I needed to use the midpoint formula. If I know the size, I only need one x-y point for the formula. After getting the center point, I can use dist() and do the if condition.

The first issue was the scaling, which I mentioned earlier. This made the x-y position insanely large, because I was multiplying it to account for the scale. So I ended up removing the scale and hard coded the size of the food. While I was lucky that the image didn’t get distorted, I feel like this isn’t really the best approach, but it works better than scaling.

The next issue I encountered was that even though my code should technically work, when I clicked on the food it didn’t disappear. So I drew a point at the center of the food “rectangles” to get a clearer picture. Lo and behold, turns out the points were just being drawn at the top and they don’t move down. This seemed like such a silly error because of course I should have realized that if the y-position is changing then I need to change the y-position of the center point as well.

All the center points (red) just stay at the top because I’m not adding the speed variable to it as well.

After figuring out how to click and remove the food, completing the rest of my project was mostly smooth sailing. All that was left was fine tuning the instruction and game over screens and implementing sound. I did, however, have another laughable problem while creating my instruction screen: basically, I wanted to create random ellipses in the background so it didn’t seem as empty. Since random changes constantly, I put noLoop() in my for loop, but I also surround it with a push() and pop() thinking that it would only noLoop() the for loop. So after finishing the instruction screen, I tested out the game, but realized that it no longer goes to the play mode. I spent a while trying to figure out why it wouldn’t go to the next screen anymore even though it registered me pressing “Enter”. I did eventually have a eureka moment and realized it was the noLoop(), which was a very trivial error that could have been avoid.

The ellipses that ended my program and made me confused for 30 minutes
Conclusion – What I’m Proud of and Future Directions

On a brighter note, I am quite proud of how the game turned out. My biggest struggle is honestly what I’m most proud of because I managed to make it work. I also really like how the play mode and game over screens turned out in terms of design (the instruction screen could still use some work). I actually took the No Face image in the play mode from an image that had a background, so I had to Photoshop it. For the food images it was all one image with a white background, so I also had to remove the background for that and crop into each food image. As for the music choices, Studio Ghibli films always have great music, but honestly the soundtrack for Spirited Away weren’t “game” material. So I decided to go for 8bit sounding music, even though the game isn’t 8bit, but I feel like it makes it sound more like a game soundtrack. Also a side note: the sound effect when you click on a food is basically the only sound No Face makes in the movie.

I did a few user tests and the main issue I ran into was people not reading the instructions. One of them has never played games, so she was very confused with what to do. The other user tester thought it was catching the food by moving the character, not clicking on the food. These are a few things that I need to consider if I continue to work on this in the future. Additionally, other things I want to work on in the future are fixing the instruction screen and adding lives instead of ending it at just one food missed.

Overall, I really love how my project turned out and it was super fun to create. Print() everything and drawing every detail is your best friend when it comes to debugging (but it’ll cause the program to lag if you do too much)!  And finally, I highly recommend watching Spirited Away, if you haven’t already : ).


Midterm Progress

Here is the link to game

Originally, I was going to do a game similar to i-Spy, but I wasn’t happy with that idea. So I decided to stick to a Studio Ghibli theme and do something like related to the movie Spirited Away. In the movie, there is a character called No Face who goes to the bathhouse and eats a lot of food. So I thought it would be a fun idea to recreate that by making it rain food and have the player try to catch the raining food by controlling No Face. The things I need to for this game to work are:

    • Mouse click to catch the food and make it disappear
    • A counter to keep track of the score
    • Game states (title screen, game playing, and game over)
    • Restart and exit game buttons
    • Food “raining”
    • The character No Face for the player to control
    • Adding sound effects and background music

There might be more things I need to add, but this is the general idea. So far I have playing mode, the character, and the food raining. I still need to work on how No Face will catch the food, the counter, and the different states of the game.

Code Highlight
// From The Coding Train Flappy Bird Coding Challenge:
// https://editor.p5js.org/codingtrain/sketches/FtBc2BhHM
for(let i = addFoods.length - 1; i >= 0; i--) {
  addFoods[i].rainingFood();
  addFoods[i].show();
}

// A new food is pushed every time the frameCount is divisible by 50 or 100
if(frameCount % 50 == 0) {
   addFoods.push(new Food());
} else if(frameCount % 100 == 0) {
  addFoods.push(new Food());
}

// print(frameCount);

I used Object Oriented Programming for the food so I can add food images to the canvas based on the frame count. This code snippet I got from a Coding Train video, which was super helpful for my game.


for (let i = 0; i < 5; i++) {
    foods[i] = loadImage("Assets/food" + i + ".png")
}

Another part that I want to highlight is this chunk of code, which is my favorite hack. It’s such a smart and efficient idea to loop through the images by using the same name for the food images.

Future Directions

Since this is a progress check, I still have a lot to work on. For instance, making this an actual game where the food can be eaten and there’s an end. It will be a challenge, but hopefully I can figure it out. I was thinking of adding another object that can injure the character and take away points or lives, but I’m going to stick with figuring out how to catch the food first.