User Testing

User Testing:

To conduct user testing, I had Moeez and Sanjana play my game in its initial state, and they provided me with valuable feedback, which I incorporated into my project. Initially, my game required the user to wait for the flower to reach the bottom of the screen and overlap with the corresponding flower image at the bottom. Sanjana suggested changing the game concept to flower catching and increasing the speed, which I agreed to as it adds excitement. I also initially made my game with a fixed speed throughout but Moeez recommended starting with a slower speed and gradually increasing it to allow users to get accustomed to it. To further enhance the user experience, I plan to add on-screen messages, such as “wrong flower pressed” and “good job!” to make the game more interactive.

Video:

https://youtube.com/shorts/7kJ7MyrLNME


Final Project

Project: Petals and Harmony

Concept

My project aims to provide a simple and engaging activity for elderly individuals who may face difficulty attending physiotherapy sessions. The game is nature-themed and involves a flower-catching game set in a forest or garden, accompanied by a calming fairyland-like musical background. This relaxing environment is designed to calm the nerves, similar to a physiotherapy session.

As the game progresses, flowers appear one at a time from a distance and move closer to the player, creating an enjoyable challenge that encourages individuals to exercise their hand-eye coordination and mobility.

Implementation

For my project, I utilized four pressure sensors as analog sensors to capture input from the user’s four fingers. The sensors provided data within a range of 0 to 1023. However, to ensure that a “press” was distinguished from a mere touch, I set a threshold range for the boolean values. If the sensor reading exceeded 500, the boolean value was set to true.

I created four boolean variables, one for each sensor. These variables were set to true when the sensor reading was above 500, and false otherwise. Only when the user pressed the correct pressure sensor, the moving flower appeared and the next flower appeared on the screen.

To create a realistic flower movement effect, I attempted to simulate the appearance of flowers approaching from afar. At first, I considered having the flowers move in four rows, similar to piano tiles. However, I found that manipulating the size and movement angle of the flowers was more effective in achieving the desired effect. With this approach, I was able to create the impression that the flowers were coming closer from a distance.

This is the code that helps me achieve this effect:

angle = radians(126);
image(img,start_x,start_y,size,size);
start_x += speed * cos(angle);
start_y += speed * sin(angle);
size = map(start_y, 466, height, 10, 110);

I calculated the specific angle value to each flower, allowing me to manipulate the x and y coordinates independently. To adjust the size of the flowers, I utilized the map function. Specifically, when the value of the start_y coordinate (the y-coordinate of the flower) was 466, the size of the flower was set to 10. Similarly, when the y-coordinate reached the end of the canvas (i.e., height), the size of the flower was set to 110 using the same ratio.

My p5.js project features a main page that showcases the game’s title along with a slogan, as well as two buttons: “Start” and “Instructions.” The instructions section provides a comprehensive guide on how to play the game and includes information on how missed flowers will be displayed at the end of the game. Once the user has gone through the instructions, they can then proceed to start the game.

In the top left corner of the game’s interface, there is a fullscreen button that allows the user to enter or exit fullscreen mode. Since my game is in a vertical orientation, I centered the printing of the game’s background images, while covering the rest of the canvas with a plain colored background.

Arduino Code:

const int pressureSensor0 = A0;
const int pressureSensor1 = A1;
const int pressureSensor2 = A2;
const int pressureSensor3 = A3;
// the setup routine runs once when you press reset:
void setup() {
  // initialize serial communication at 9600 bits per second:
  Serial.begin(9600);
  pinMode(pressureSensor0, INPUT);
  pinMode(pressureSensor1, INPUT);
  pinMode(pressureSensor2, INPUT);
  pinMode(pressureSensor3, INPUT);
}

// the loop routine runs over and over again forever:
void loop() {
  // read the input on analog pin 0:
  int sensorValue0 = analogRead(pressureSensor0);
  int sensorValue1 = analogRead(pressureSensor1);
  int sensorValue2 = analogRead(pressureSensor2);
  int sensorValue3 = analogRead(pressureSensor3);

  // print out the value you read:
  //Serial.print("(");
  Serial.print(sensorValue0);
  Serial.print(", ");
  Serial.print(sensorValue1);
  Serial.print(", ");
  Serial.print(sensorValue2);
  Serial.print(", ");
  Serial.println(sensorValue3);
  //Serial.println(")");

}

P5js Implementation:

Areas I am particularly proud of

I am incredibly proud of creating my first interactive game. In the past, I had made games, but they were never as engaging as this one, which uses a glove to take input from the user. This gave a whole new level of interactivity to the project, making it more engaging and immersive. It reminded me of our in-class discussions, where we talked about the importance of direct input from the user. By using not just visual but touch senses to control the success of the game, I was able to create a unique experience for the player. It was exciting to see my vision come to life and to be able to share it with others. I learned a lot during the process, and I’m looking forward to continuing to explore the possibilities of interactive game development in the future.

Future Improvements

In the future to make the game more engaging and interactive, I am considering adding a multiplayer mode. This would provide an opportunity for players, particularly older individuals, to play with their friends rather than playing alone. I believe that a multiplayer game would instill feelings of healthy competition, making the gameplay even more exciting and encouraging players to keep coming back to the game.

Week 12: Final Project Proposal

While searching for ideas, the music glove for hand therapy caught my attention, which inspired me to recreate my own version using Arduino and Processing. With the knowledge gained in class about music and sound production, Arduino switches, and creating interactive screens using P5js, I plan to create an interactive musical glove that allows users to control sound production and play music through hand gestures. This would also encourage hand movement

A few years ago, my grandfather suffered from a paralysis attack after which one side of his body lost the ability to move. Despite the challenges he faced, he was able to restore his mobility through physiotherapy and exercise. Considering this, I believe that an accessible hand glove could be immensely valuable for elderly individuals with blood pressure-related conditions. Such a device could provide a portable and convenient means of conducting regular physiotherapy sessions within the comfort of one’s own home.

Processing

Similar to piano tiles I will make a screen on p5js which will randomly ask the user to make different hand poses and click the button on different finger tips. The button should be clicked within the time and when the corresponding button is overlapping with the moving tile. The number of hits will be recorded on screen along with the total time of the hand therapy session. A specific note will be played for each hand pose to allow the glove to produce a specific tune/ melody during the session.

Arduino

I am planning to use regular buttons stuck on the tips of the four fingers and operating them with the use of thumb. Alternatively, I may opt for a more convenient sensor such as a pressure sensor that can be easily integrated onto the glove while ensuring user comfort. Upon pressing the buttons, the switch state will be relayed to the processing system, which will remove the corresponding tile. If the user presses the wrong button, an error message will be displayed on the screen. If the user is slow to press the button, a message stating “slightly late” will appear. Successful hits will be met with encouraging messages displayed on the screen.

Arduino + p5js in class exercises (Saamia and Khadija)

Exercises

Exercise 1:

For our first exercise, we used a light sensor as the analog input value for the movement of the ellipse on the p5js screen. The rVal from Arduino is used to plot the x coordinate of the ellipse.

p5js code:

//exercise 1 p5js
let rVal = 0;
let alpha = 255;

function setup() {
  createCanvas(640, 480);
  textSize(18);
}

function draw() {
  
  if (key == " ") 
  {
    // important to have in order to start the serial connection!!
    setUpSerial();
  }
  
  // one value from Arduino controls the background's red color
  background(map(rVal, 0, 1023, 0, 255), 255, 255);

  // the other value controls the text's transparency value
  fill(255, 0, 255, map(alpha, 0, 1023, 0, 255));

  if (!serialActive) 
  {
    text("Press Space Bar to select Serial Port", 20, 30);
  } else 
  {
    ellipse(rVal/2,240,100,100);
  }
}

function keyPressed() {
  if (key == " ") 
  {
    // important to have in order to start the serial connection!!
    setUpSerial();
  }
}

// This function will be called by the web-serial library
// with each new line of data. The serial library reads
// the data until the newline and then gives it to us through
// this callback function
function readSerial(data) {
  ////////////////////////////////////
  //READ FROM ARDUINO HERE
  ////////////////////////////////////

  if (data != null) 
  {
    // make sure there is actually a message
    // split the message
    let fromArduino = split(trim(data), ",");
    // if the right length, then proceed
    if (fromArduino.length == 2) 
    {
      // only store values here
      // do everything with those values in the main draw loop
      
      // We take the string we get from Arduino and explicitly
      // convert it to a number by using int()
      // e.g. "103" becomes 103
      rVal = int(fromArduino[0]);
      alpha = int(fromArduino[1]);
    }
  }
}

Arduino Code:

//exercise 1 arduino

void setup() {
  Serial.begin(9600); 
  pinMode(LED_BUILTIN, OUTPUT);
// start the handshake
  while (Serial.available() <= 0) 
{
    Serial.println("0,0"); // send a starting message
    delay(300);            // wait 1/3 second
  }
}
void loop() 
{
  // wait for data from p5 before doing something
    while (Serial.available()) 
{
    digitalWrite(LED_BUILTIN, HIGH); // led on while receiving data

  // Read sensor value
  int sensorValue = analogRead(A0);
   Serial.print(sensorValue);
  // Map sensor value to screen width
  int screenValue = map(sensorValue, 0, 1023, 0, 800);

  // Send mapped value to p5.js
  Serial.println(screenValue);
  delay(50); //    for stability
}
digitalWrite(LED_BUILTIN, LOW);
}
Exercise 2:

In the second exercise, we implemented a slider to adjust the brightness of an LED using Arduino. The current position of the slider, accessed through slider.value(), was stored as the variable “brightness”, and subsequently transmitted to Arduino as the new brightness level for the LED.

p5js Code:

//exercise 2 p5js

let brightness;
function setup() 
{
  createCanvas(640, 480);
  textSize(18);
  slider = createSlider(0, 255, 0); 
  slider.position(85, 140);
}

function draw() 
{
  if (!serialActive) 
{
    text("Press Space Bar to select Serial Port", 20, 30);
  } 
else 
{
    text("connected", 20, 30);
    brightness = slider.value();
  }
  brightness = slider.value();
  //readSerial();
  if(mouseIsPressed)
{
    readSerial();
  }
}

function mouseIsPressed()
{
  readSerial();
}

function keyPressed() {
  if (key == " ") 
{
    // important to have in order to start the serial connection!!
    setUpSerial();
  }
}
function readSerial(data) 
{
    console.log(brightness);
    let sendToArduino = brightness+"\n";
    writeSerial(sendToArduino);

}

Arduino Code:

//exercise 2 arduino

int ledpin = 5;
void setup() {
  // Start serial communication so we can send data
  // over the USB connection to our p5js sketch
  Serial.begin(9600);

  // Outputs on these pins
  pinMode(ledpin, OUTPUT);

  //Blink them so we can check the wiring
  digitalWrite(ledpin, HIGH);
    delay(200);
  digitalWrite(ledpin, LOW);

  // start the handshake
  while (Serial.available() <= 0) 
{
    Serial.println("0");
    delay(300);
  }
}

void loop() {
  // wait for data from p5 before doing something
  while (Serial.available()) 
{
    int brightness = Serial.parseInt();

    if(Serial.read() == '\n')
{
      //Serial.println(brightness);
      analogWrite(ledpin, brightness);
    }
    analogWrite(ledpin, brightness);
  }
 
}
Exercise 3:

For this last exercise, we used an ultrasonic sensor to sense the distance and use this variable to change the wind movement in the p5js movement of the ball. The data values of the sensor ranged from 0 to around 3000 and therefore for any value below 1000 the wind blew from left to right and if the value was above 1000 wind and the ball moved towards the left.

p5js Code:

//p5js exercise 3
//declare variables
let velocity;
let gravity;
let position;
let acceleration;
let wind;
let drag = 0.99;
let mass = 50;
let value = 1401;

function setup() 
{
  createCanvas(640, 360); //create canvas
  noFill();
  position = createVector(width/2, 0);
  velocity = createVector(0,0);
  acceleration = createVector(0,0);
  gravity = createVector(0, 0.5*mass);
  wind = createVector(0,0);
}

function display()
{
  text("Press Space Bar to Start Serial Port", width/2 - 109, height/2 - 5);
}

function draw() {
background(255);
if (serialActive) //if the serial is active
{
  applyForce(wind);
  applyForce(gravity);
  velocity.add(acceleration);
  velocity.mult(drag);
  position.add(velocity);
  acceleration.mult(0);
  ellipse(position.x,position.y,mass,mass);
      if (position.y > height-mass/2) //if the ball touches the bottom
      {
      velocity.y *= -0.9; // A little dampening when hitting the bottom
      position.y = height-mass/2;
      }
}
else //if serial not active
  {
  fill(0);
  display();
  }
}

function applyForce(force)
  {
  // Newton's 2nd law: F = M * A
  // or A = F / M
  let f = p5.Vector.div(force, mass);
  acceleration.add(f);
  }

function keyPressed()
{
  if (key==' ')
  {
  setUpSerial();
  }

if (keyCode == UP_ARROW) //if up arrow is pressed
  {
  mass=random(15,80);
  position.y=-mass;
  velocity.mult(0);
  }
}

function readSerial(data) //call back function
{
let sendToArduino = value + "\n"; //sends value to Arduino with \n added
writeSerial(sendToArduino); //write to Arduino
  if (data != null) //if some information is received
  {
  console.log(data);
    if (data < 1000) //if the distance is less than 1000
    {
    wind.x = 1; //the wind blows to the right
    }
    else if (data > 1000) //if the distance is more than 1000
    {
    wind.x = -1; //the wind blows to the left
    }
  }
}

Arduino Code:

//exercise 3 arduino code
int value = 0;
const int trigPin = 7; //trig pin of Sensor
const int echoPin = 13; //echo pin of Sensor
int distance = 0; //distance data from sensor

void setup()
{
Serial.begin(9600); // Start serial communication at 9600 baud

//set the sensor pins as output and input 
pinMode(trigPin, OUTPUT);
pinMode(echoPin, INPUT);

while (Serial.available() <= 0)
{
  Serial.println(1400);
}
}

void loop()
{
//wait for p5js
while (Serial.available())
{
sensorReading(); //reading data from sensor
value = Serial.parseInt(); //parsing from the serial written data from p5js
}
}

//to read the sensor and find distance
void sensorReading()
{
//Send a short low pulse
digitalWrite(trigPin, LOW);
delay(2); //delay to avoid complications
digitalWrite(trigPin, HIGH); //sends a high pulse for 10 microseconds
delay(10);
digitalWrite(trigPin, LOW); //turn off the ping pin
distance = pulseIn(echoPin, HIGH); //Measure the duration of the ultrasonic pulse and calculate the distance
Serial.println(distance); //print the serial from distance
}

Video:

Teammate: Khadija Khalid


Musical Instrument: Light Sensitive Tabla

Idea:

Khadija and I created a unique version of the tabla, a pair of hand drums commonly used in traditional South Asian music.

The Tabla: Paired Drum of South Asia - Center for World Music

Initially, we thought of recreating the same instrument with the use of pressure sensor resistors but then we decided to make it light-sensitive. Our vision was to make the tabla come alive with an ethereal quality, allowing it to be played not by hand, but by the interaction of light. It was an interesting and fun project that resulted in a unique musical instrument.

Code:

#include "pitches.h"

//==========First resistor=============
int photoPin1 = A0;
int speakerpin = 7;

int melody[] = {

  NOTE_G4, NOTE_A4, NOTE_G4, NOTE_F4, NOTE_D4, NOTE_F4, NOTE_G4,
  NOTE_G4, NOTE_A4, NOTE_G4, NOTE_E4, NOTE_D4, NOTE_E4, NOTE_F4,
  NOTE_F4, NOTE_G4, NOTE_F4, NOTE_D4, NOTE_C4, NOTE_D4, NOTE_E4,
  NOTE_E4, NOTE_F4, NOTE_E4, NOTE_D4, NOTE_C4, NOTE_D4, NOTE_E4,
  NOTE_G4, NOTE_G4, NOTE_G4, NOTE_A4, NOTE_G4, NOTE_F4, NOTE_D4, NOTE_D4
};
//==========Second resistor=============
int photoPin2 = A1;
int speakerpin2 = 4;
int melody2[] = {

  NOTE_G4, NOTE_F4, NOTE_D4, NOTE_G4, NOTE_D4, NOTE_F4, NOTE_G4,
  NOTE_G4, NOTE_D4, NOTE_E4, NOTE_G4, NOTE_C4, NOTE_E4, NOTE_G4,
  NOTE_G4, NOTE_G4, NOTE_F4, NOTE_A4, NOTE_G4, NOTE_D4, NOTE_D4,
  NOTE_E4, NOTE_E4, NOTE_A4, NOTE_F4, NOTE_E4, NOTE_C4, NOTE_F4,
  NOTE_G4, NOTE_F4, NOTE_G4, NOTE_A4, NOTE_D4, NOTE_E4, NOTE_D4, NOTE_F4
};

void setup() {
  pinMode(speakerpin, OUTPUT);
  Serial.begin(9600);
}

void loop() {
  //====================First Speaker
  int lightRaw = analogRead(photoPin1);

  int light = map(lightRaw, 0, 700, -12, 35);

  if (light > 0 && light<33) 
  {
    tone(speakerpin, melody[light], 500);
  }
  else if(light == 35 || light < 33){
    noTone(speakerpin);
  }
  //===================Second Speaker
  int lightRaw2 = analogRead(photoPin2);

  int light2 = map(lightRaw2, 0, 700, -12, 35);

  if (light2 > 0 && light2<33) 
  {
    tone(speakerpin2, melody2[light2], 500);
  }
  else if(light2 == 35 || light2 < 33){
    noTone(speakerpin2);
  }

}

Process:

Initially, we began the project by connecting a single light sensor to a speaker. The main challenge we encountered was mapping the readings from the light sensor to play the correct melody from an array of notes. During the process of setting these thresholds, we decided to make the instrument turn off in bright conditions and start playing sound when the light sensor was covered by a hand in dimmer conditions. This approach created a similar hand action to that of hitting the tabla with the hand, resulting in a more authentic and natural playing experience.

After the initial phase, we decided to expand our project by adding another light sensor to take readings of the surrounding light. However, we faced a challenge when we realized that the changes in light conditions on the two light sensors were not being accurately reflected by the single speaker we were using. To solve this issue, we decided to divide the instrument into two separate speakers, with each speaker connected to one light sensor individually. This allowed for more distinct and clear sound production based on the readings of each light sensor.

Circuit:

Demo:

Week 9: A – Blue, B – Yellow, C – Green, D – Red

Idea:

In high school, I remember having O-level exams with 40 Multiple Choice Questions and each MCQ had 4 options to choose from. In class, everyone was supposed to work on their paper for a set amount of time after which the teacher would one by one say the correct answer out loud. The problem started when in a class of 30 energetic students the teacher’s voice was reduced to a mere muffle. The other issue was the confusion between the option ‘B’ and ‘D’ which sounds so similar that a clarification of ‘B for Ball’ and ‘D for Dog’ was always followed. This gave me the idea to make a 4 LED structure that can be used to communicate the correct answer for each MCQ one by one. The teacher can click the corresponding number of times and display the correct option and then follow it with an explanation of the respective MCQ.

Code:

int buttonPin = 7;
int LED1 = 13;
int LED2 = 12;
int LED3 = 11;
int LED4 = 10;
int initial = 0;
int lastState = 0;
int buttonState = LOW;


void setup()
 {
  // put your setup code here, to run once:
  pinMode(13, OUTPUT);
  pinMode(12, OUTPUT);
  pinMode(11, OUTPUT);
  pinMode(10, OUTPUT);
  pinMode(7, INPUT);
}

void loop() 
{
  // put your main code here, to run repeatedly:
  buttonState = digitalRead(buttonPin);
  if (buttonState == HIGH)
  {
    delay(500);
    buttonState = digitalRead(buttonPin);
     if (buttonState == LOW) //when pressed move to next led
     {
      initial = lastState + 1;
     }
  }
  else 
  {
    delay(100);
  }
  
    if(initial == 1) //first time blue is lit up
    {
      digitalWrite (13, HIGH);
      digitalWrite (12, LOW);
      digitalWrite (11, LOW);
      digitalWrite (10, LOW);
      lastState = 1;
    }
    else if(initial == 2) //second time yellow is lit up
    {
      digitalWrite (13, LOW);
      digitalWrite (12, HIGH);
      digitalWrite (11, LOW);
      digitalWrite (10, LOW);
      lastState = 2;
    }
   else if (initial == 3) //third time green is lit up
   {
      digitalWrite (13, LOW);
      digitalWrite (12, LOW);
      digitalWrite (11, HIGH);
      digitalWrite (10, LOW);
      lastState = 3;
   }
    else if (initial == 4) //fourth time red is lit up
    {
        digitalWrite (13, LOW);
        digitalWrite (12, LOW);
        digitalWrite (11, LOW);
        digitalWrite (10, HIGH);
        lastState = 4;
    }
    else //all LEDs off
    {
        digitalWrite (13, LOW);
        digitalWrite (12, LOW);
        digitalWrite (11, LOW);
        digitalWrite (10, LOW);
        lastState = 0;
    }

}

Video:

Unusual Switch

For this assignment, I created a switch by attaching a pair of scissors to two wires. To improve the conductivity of one wire, I attached a copper foil to it to increase its surface area. I set up a circuit with two LEDs arranged in parallel to ensure they have the same level of brightness.

This type of switch can serve as a means of detecting when a user or player cuts an object. By counting the number of times the LED lights up, the switch can detect how many times the scissors were opened and closed.

.


Midterm Project – Memory Card Game

Concept:

Introducing my latest creation – a memory card game with a unique twist! As one of the most popular games enjoyed by people of all ages in various forms, I wanted to put my own spin on it by incorporating a theme that I feel passionately about – food. The result is a game that is both fun and engaging and adds a personal touch that sets it apart from other versions.

I aim to showcase Pakistani Cuisine through this game, which shares similarities with cuisines from neighboring countries such as Nepal, India, and Sri Lanka. The increasing globalization has led to a rise in the popularity and recognition of desi food. Through this memory game, I hope to introduce players to lesser-known dishes that they may not have come across before. As a result, the unique names of these dishes will stay with them for a long time.

Final Outcome:

Game Code:

Following is the code for the game:

let numMatches = 0; //to see if all matches found and game ends
let numTries = 0; //counter to keep track of counts
let delayStartFC;
//10 card image variables
let card1;
let card2 ;
let card3;
let card4;
let card5;
let card6;
let card7;
let card8;
let card9;
let card10;
//array variables for image of cards and tiles etc
let faces = [];
let flippedTiles = []; 
let tiles = [];
let selected = [];
let possibleFaces;
let startgame;
//variables for images and sounds
let backgroundImage;
let instructionsImage;
let endImage;
let mymusic;
let flipsound;
let clicksound;
let flipSide;
let gameState; //to enter different stages: instructions, game, end
let NUM_COLS = 4;
let NUM_ROWS = 5;
function preload() 
{
  //loading all images and sounds
  flipSide = loadImage("back.jpg");
  card1 = loadImage("card1.jpg");
  card2 = loadImage("card2.jpg");
  card3 = loadImage("card3.jpg");
  card4 = loadImage("card4.jpg");
  card5 = loadImage("card5.jpg");
  card6 = loadImage("card6.jpg");
  card7 =  loadImage("card7.jpg");
  card8 = loadImage("card8.jpg");
  card9 =  loadImage("card9.jpg");
  card10 = loadImage("card10.jpg");
  startgame = loadImage ("startgame.png");
  backgroundImage = loadImage ("game.png");
  instructionsImage = loadImage("instructions.png")
  endImage = loadImage("end.jpg");
  mymusic = loadSound('Baisara-Beera-Kalpana-Patowary-Papon (mp3cut.net).mp3');
  flipsound = loadSound ('Card-flip-sound-effect-1.mp3');
  clicksound = loadSound('mixkit-game-click-1114.wav');
}

function setup() 
{
  // Set up canvas and other initialization tasks
  createCanvas(600, 700);
  gameState = 'start';
  mymusic.loop(); //stays on throughout
  frameRate(120);
}

class Tile 
{
     constructor(x, y, face) 
    {
      this.x = x;
      this.y = y;
      this.size = 100;
      this.face = face;
      this.isFaceUp = false;
      this.isMatch = false;
    }
    draw ()
    {
      //draws back if not face up otherwise the image of food
      if (this.isFaceUp)  
          image(this.face, this.x, this.y, this.size, this.size);
      else 
          image(flipSide, this.x, this.y, this.size, this.size);
      
      //black outline of the tiles
      stroke(0);
      strokeWeight(3);
      noFill();
      rect(this.x, this.y, this.size, this.size,5);
    }
  
    isUnderMouse(x,y)
    {
      //checks if when clicked the tile is under the mouse
        return x >= this.x && x <= this.x + this.size  && y >= this.y && y <= this.y + this.size;
    }
}
//function to randomly shuffle the array of tiles with 2 copies each
function shuffleArray(array) 
{
    let counter = array.length;
    // while there are elements in the array
    while (counter > 0) 
    {
        //selecting a random index
        let index = Math.floor(Math.random() * counter);
        // decrementing counter
        counter--;
        //swap last element with it
        var temp = array[counter];
        array[counter] = array[index];
        array[index] = temp;
    }
}
function draw() 
{
  if (gameState == 'start')
  {  
        //displaying image for background of game
        image(startgame, 0,0,600,700); 
        //start button
        let c = color('#FF69B4'); 
        fill(c);
        noStroke();
        circle(302.5, 350, 112);
        fill('black');
        textSize(20);
        textStyle(BOLD);
        text('Start', 280, 355);
  } 
  else if (gameState == 'instructions')
  {
    //instruction page is an image I made from canva
    image(instructionsImage,0,0,600,700);
  }
  else if (gameState == 'beingSet')
  {
    //this is just done once when the start button is clicked 
    faces = [card1, card2, card3, 
             card4, card5, card6, 
             card7, card8, card9, 
             card10]; //storing all images into array
    // making an array of 2 cards and then randomising
    possibleFaces = faces.slice(0);
    for (let i = 0; i < (NUM_COLS * NUM_ROWS) / 2; i++) 
    {
        // Randomly pick one from the array of remaining faces
        var randomInd = floor(random(possibleFaces.length));
        var face = possibleFaces[randomInd];
        // Push twice onto array
        selected.push(face);
        selected.push(face);
        // Remove from array
        possibleFaces.splice(randomInd, 1);
    }
    shuffleArray(selected); //shuffling the array
    
    // Creating a Tile object for each card
    for (var i = 0; i < NUM_COLS; i++) 
    {
        for (var j = 0; j < NUM_ROWS; j++) 
        {
            var tileX = (i * 100) + 55+ (i*30);
            var tileY = (j * 100) + 70 +(j*17);
            var tileFace = selected.pop();
            tiles.push(new Tile(tileX, tileY, tileFace));
        }
    }
        // Changing the game state to 'playing'
    gameState = 'playing';
  }
  else if (gameState == 'playing') 
  {
    // Displaying the background image
    image(backgroundImage, 0,0,600,700);
    // Checking if enough time has passed since the last card flip
    if (delayStartFC && (frameCount - delayStartFC) > 25) 
    {
        // Hiding the flipped cards that are not matches
        for (let i = 0; i < tiles.length; i++) 
        {
          if (!tiles[i].isMatch) 
              tiles[i].isFaceUp = false;
        }
// Resetting the flippedTiles array and delayStartFC variable
        flippedTiles = [];
        delayStartFC = null;
     }
    
    // Drawing each tile on the canvas
    for (let j = 0; j < tiles.length; j++) 
        tiles[j].draw();
   
    // Checking if the game is over
    if (numMatches == tiles.length/2)
        gameState = 'end';
} 
  else if (gameState == 'end')
  {
    image(endImage, 0,0,600,700);
    let c = color('#d90166');
    fill(c);
    noStroke();
    //play again button
    circle(302.5, 350, 112);
    fill('black');
    textSize(15);
    textStyle(BOLD);
    text('Play Again', 266, 355);
    textSize(20);
    //diplaying the tries as a score for game
    text("You found them all in " + numTries + " tries!", 146,488);
    } 
  
mouseClicked = function() 
{ 
  if(gameState == 'start')
    {
      //checking ditance between click and start button 
      let distance = dist(mouseX, mouseY, 302.5, 350);
      if (distance < 112/2) 
        {
          //play click sound
          clicksound.play();
           gameState = 'beingSet';
        }
    // checking distance between click and instructions button
      if (mouseX>220 && mouseX<380 && mouseY>500 && mouseY<540)
        {
          clicksound.play();
          gameState = 'instructions';
        }
    }
  else if (gameState == 'playing')
  {    
    //loop through all the tiles
    for (let i = 0; i < tiles.length; i++) 
      {
          let tile = tiles[i];
          if (tile.isUnderMouse(mouseX, mouseY)) 
          {
  // Check if the tile can be flipped (only if less than 2 tiles are flipped and the tile is not already face-up)
              if (flippedTiles.length < 2 && !tile.isFaceUp) 
              {
                  tile.isFaceUp = true;
                  flipsound.play();
                  flippedTiles.push(tile); //adds to flippedtiles array
                  if (flippedTiles.length === 2) 
                  {
                      numTries++; //increments the tries counter
                      if (flippedTiles[0].face === flippedTiles[1].face) //if they match
                      {
                          flippedTiles[0].isMatch = true;
                          flippedTiles[1].isMatch = true;
                          flippedTiles.length = 0; //empties flipped array because match found
                          numMatches++;
                      }
                      delayStartFC = frameCount;
                  }
              } 
          }
      }
  }
  else if (gameState == 'instructions')
    {
      //clicking the startgame button
      if (mouseX > 149 && mouseX < 449 &&
      mouseY > 600 && mouseY < 615)
        {
          clicksound.play();
          gameState = 'beingSet';
        }
    }
  else if (gameState == 'end')
    {
      //clicking restart button 
      let distance = dist(mouseX, mouseY, 302.5, 350);
      if (distance < 112/2) 
        {
          clicksound.play();
         gameState = 'start';
        }
    }
};
}

Process:

Initially, I developed a tile class and successfully displayed the tiles on the screen using the draw function in my program. Although the game was functional, I encountered challenges when attempting to change the game state from the starting page to the playing and end pages. To overcome this hurdle, I referred to the coding examples provided by Professor Mang for changing the game state. However, I had to modify my code to make it compatible with the “if-else” loops used to change the game state. I eventually decided to categorize my game states further and added a new category called “beingSet”, which is only called once before the game begins.

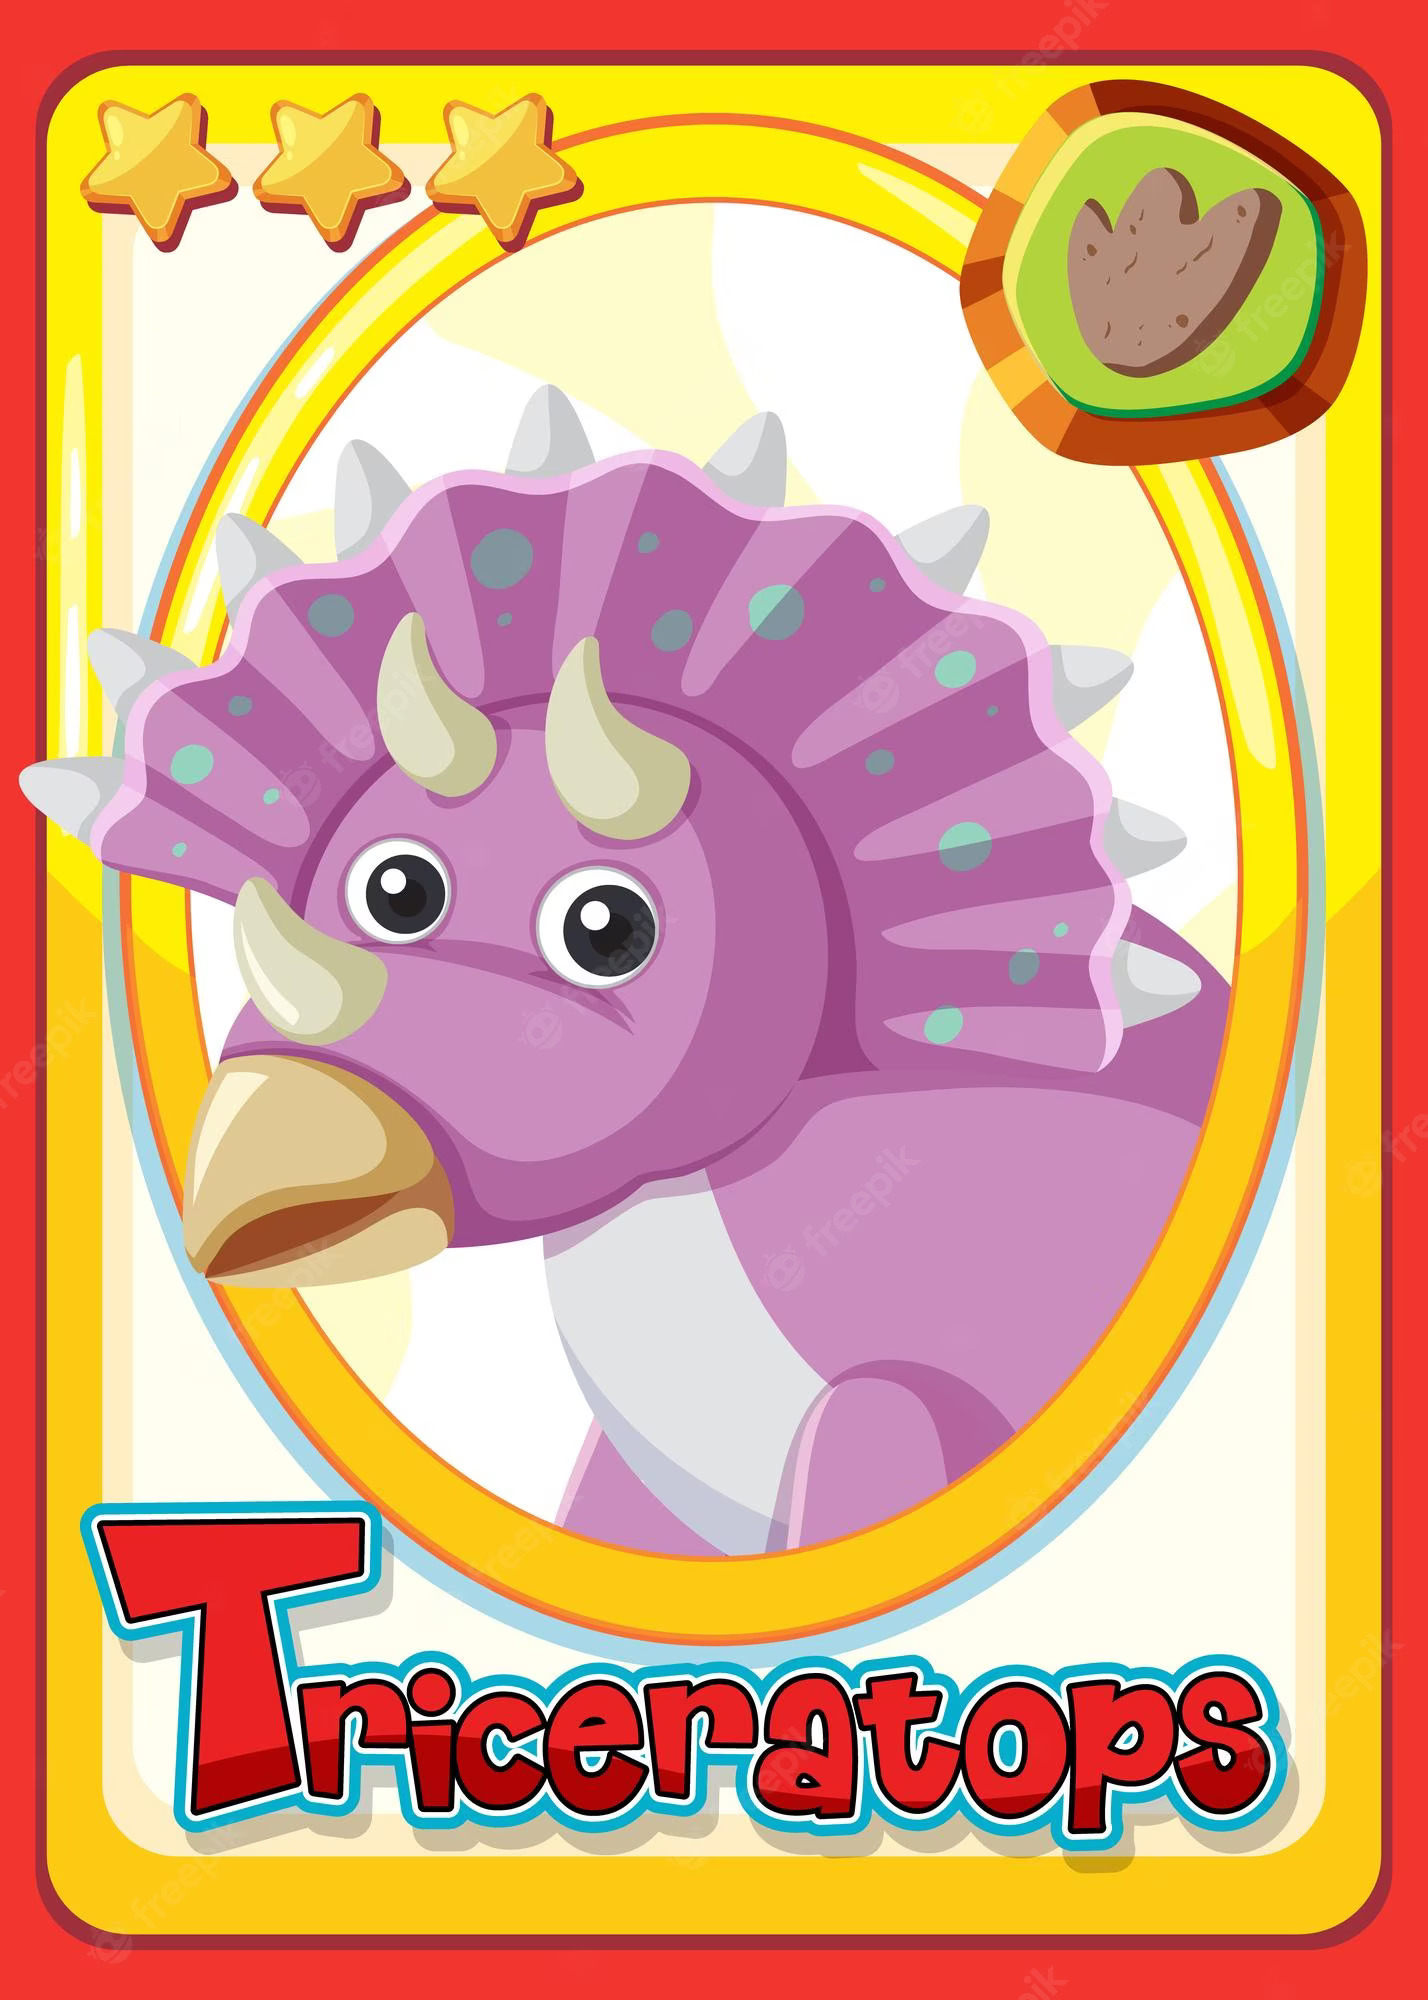
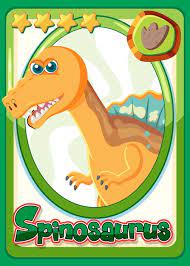
During my coding process, I encountered another obstacle while creating cards for my game using Canva. Initially, the cards included an image, the name of the dish, and a brief description. However, due to the limited dimensions of my game’s canvas, the description on the cards was difficult to read, and it also compromised the visibility of the dish’s name. As a result, I had to recreate all the cards without the description. Despite my efforts, I was disappointed that I could not include the descriptions on the cards.

previously made cards:
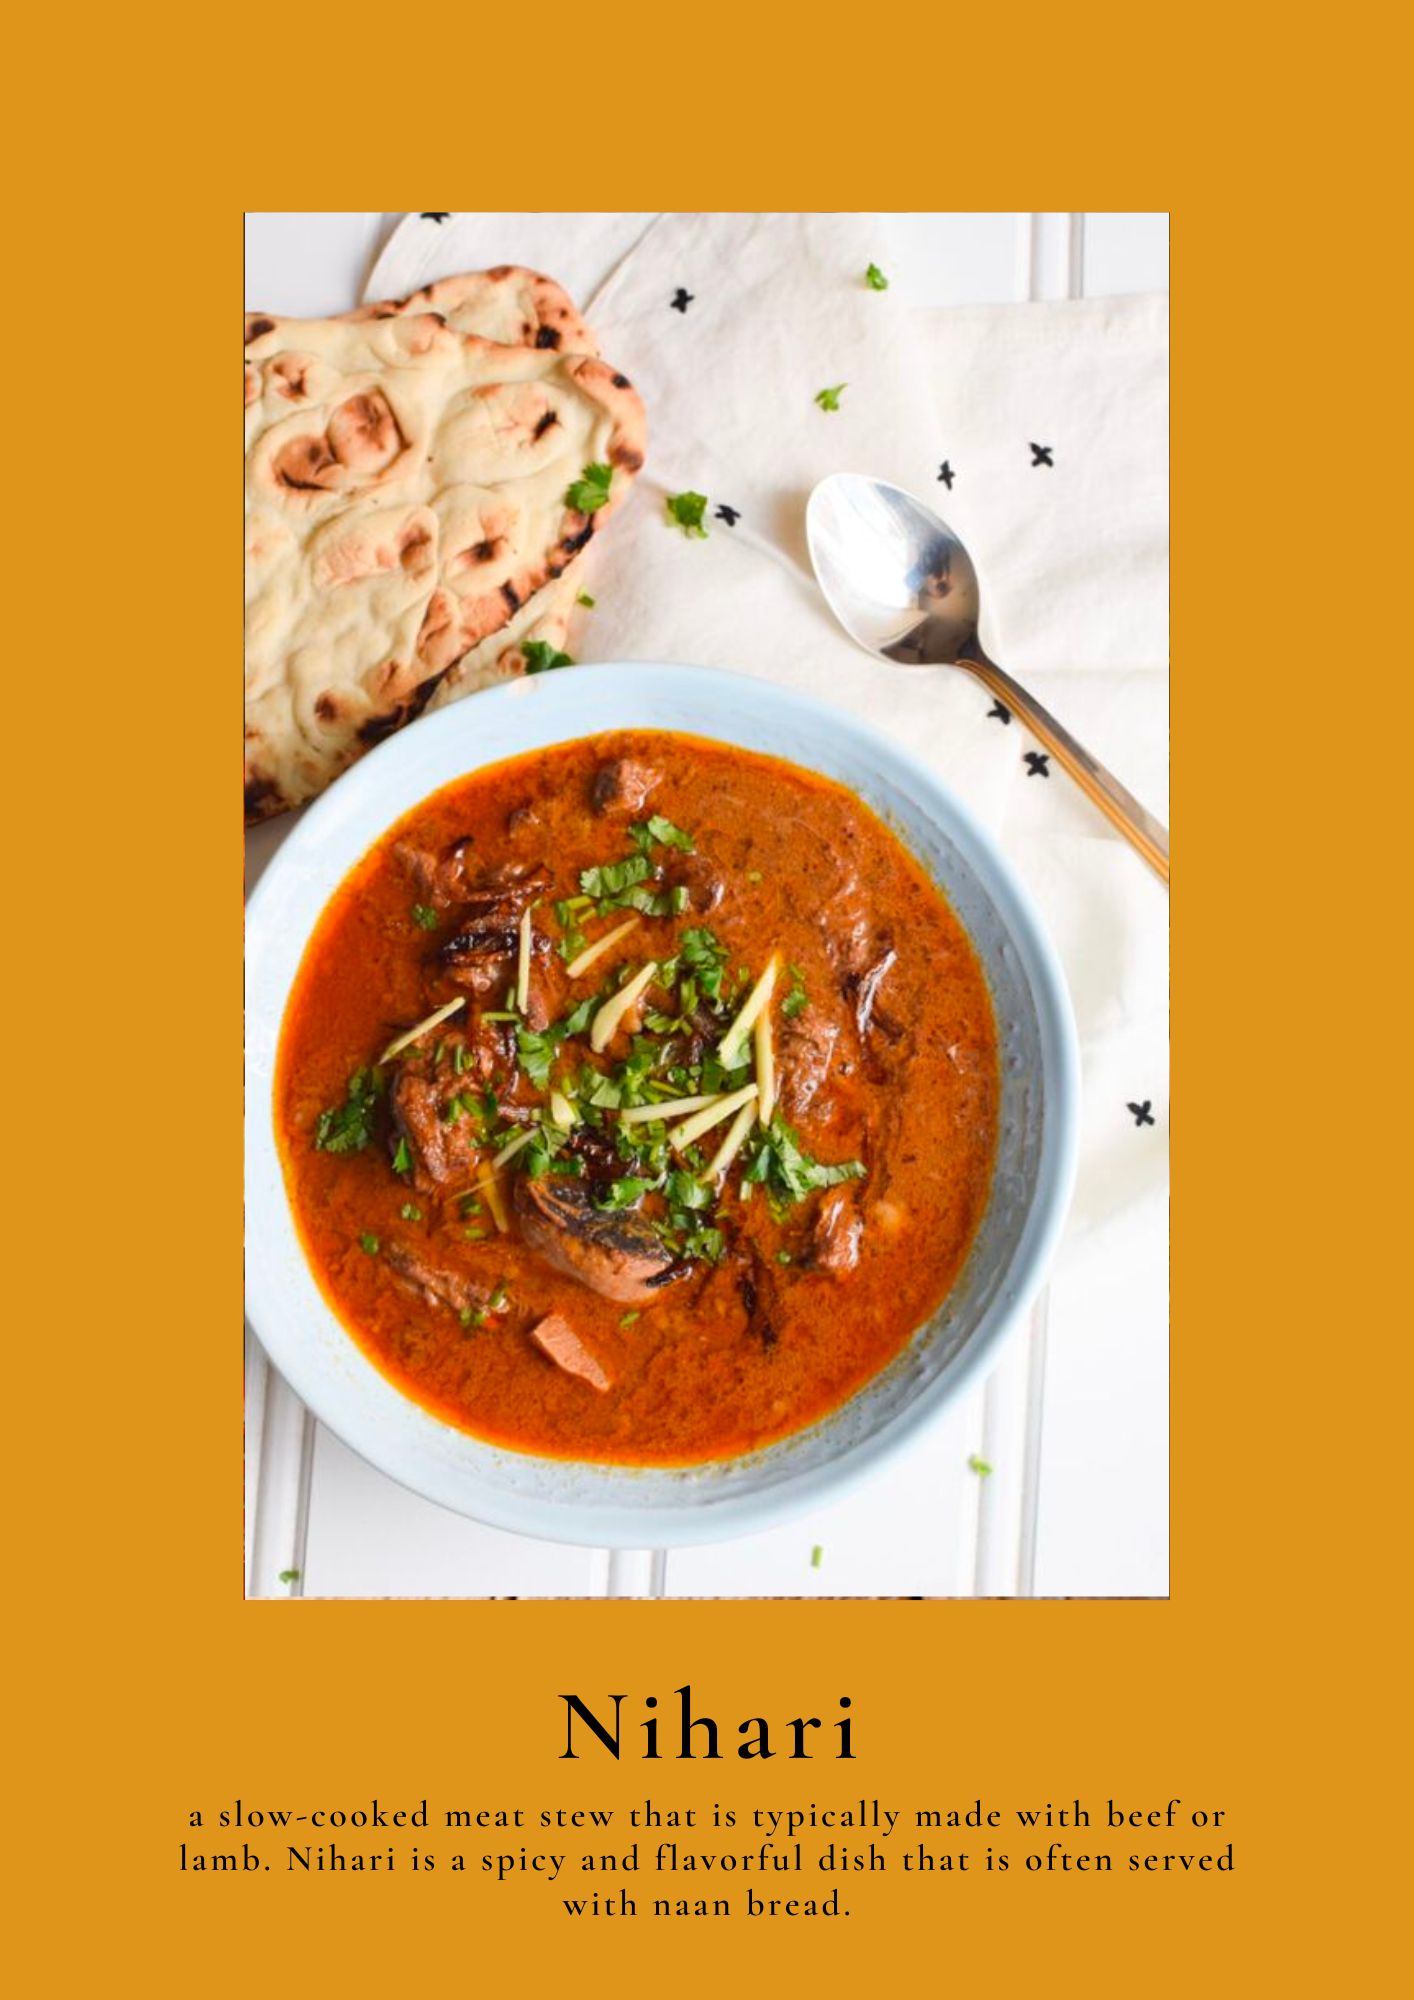
final card: 

I just solved another issue in my game a few minutes ago by adding a single line of code:

frameRate(120);

This line of code significantly improved the performance of my game. Previously, as the game progressed towards the end, it would slow down. However, with the addition of this line of code, my game’s speed increased, making it more challenging and an actual test of memory for the players. Nevertheless, I need to investigate why the cards take longer to flip over towards the end, despite the game starting at a normal speed.

Future Improvements:

While I am immensely proud of my game, there is always room for improvement. One area that could be enhanced is by adding a menu with the description of every dish. This could be introduced as an introductory section, where players click on a button and are taken to a menu with forward and back buttons to navigate through an array of images. This would give players the opportunity to familiarize themselves with the dishes, the details of the dish, and the corresponding images before they start playing. This would not only enhance the players’ overall gaming experience but also provide a fun and interactive way to learn about Pakistani cuisine.

Mid Term Proposal: Memory Card Game

Idea:

Thinking of what to make for my mid-term project I decided on the memory card game which I used to play a lot as a child.

Memory Match Game at Lakeshore Learning

The game consists of picture cards in pairs shuffled randomly and the player clicks to flip one card at a time trying to find all the pairs in as few clicks as possible. The game will continue as long as the player finds all the pairs. I will include a timer alongside and use it as a way to give ranks to the player in the end and also keep a record of the highest score in an array which would compare the time to other times the game was played and a record time would be marked as the highest score. The game will constitute 2 levels. The beginner level will have 6 pairs while the intermediate level will have 10 pairs of cards to match.

For sound I will implement the card flip sound and a light background music to get the player in a cheery mood during the game. Moreover, I will also include a glow or light shake when the mouse hovers over the card yet to be chosen. The theme of my card is animated dinosaurs and these are a few card images I’ll be using for my game.

I am still working on my code, specifically on the card class which includes variables like, position of the card on the canvas, isFlipped boolean value, isMatched, the width and height of each image and the image variable to store the card image.


Assignment 4: Fish Histogram

Overview

Since I have past experience working with CSV files,  I decided to utilize them again for this assignment. After careful consideration, I chose to create a bar graph, or more specifically, a histogram, as it is an effective way to visualize and compare data. Despite the CSV file containing multiple variables, I found it more appropriate to focus solely on the weight of the fish (which serves as the y-axis variable for my bar chart) in order to ensure a clear and concise representation of the data, rather than presenting a cluttered array of variables. I loaded the lines in the CSV file into the array of strings as taught in class and then continued to make separate arrays for storing the names and weights of the fish from the specific rows in the CSV file.

The Data file I chose had a total of 161 fish data but I limited it to 10 fish being represented at a time which were randomly chosen and changed to another set of 10 randomly chosen fish from the data file with the help of a mouse click.

Final Output

Concluding Remarks

I am happy to incorporate more animation into this assignment compared to my previous ones. Additionally, I also added a water bubbling sound effect to enhance the interactivity of the project. However, I am aware that there is room for improvement in terms of the accuracy of the data representation. Specifically, I believe I could provide more detail regarding the weight unit and markings on the y-axis to create a more precise depiction of the data, rather than solely relying on the height of the bars.