For the Intro to IM final project, I will be working with Susanne to build an integrated device utilizing Arduino and Processing.
💡 idea
The idea was inspired when Susanne mentioned “something visual about our connection or memory; something that relates us not being in the same location.” So, we decided to recreate the environment of logging into a Zoom meeting and entering the meeting’s password. The key feature of this project is to make the process accessible, by including both sounds and light.
🛠 how it will work
The password will be entered by the user using a computer keyboard to the graphical user interface, and during the typing process, different sounds and lights on Arduino will play. If the password combination is right, a congratulating tone will ring and the user will be let into the meeting.
I had a really fun time exploring the serial communication between Arduino and Processing this week! My project was inspired by the R, G, B color mapping on Arduino buttons, and without further ado, let me explain what I did.
💡 idea
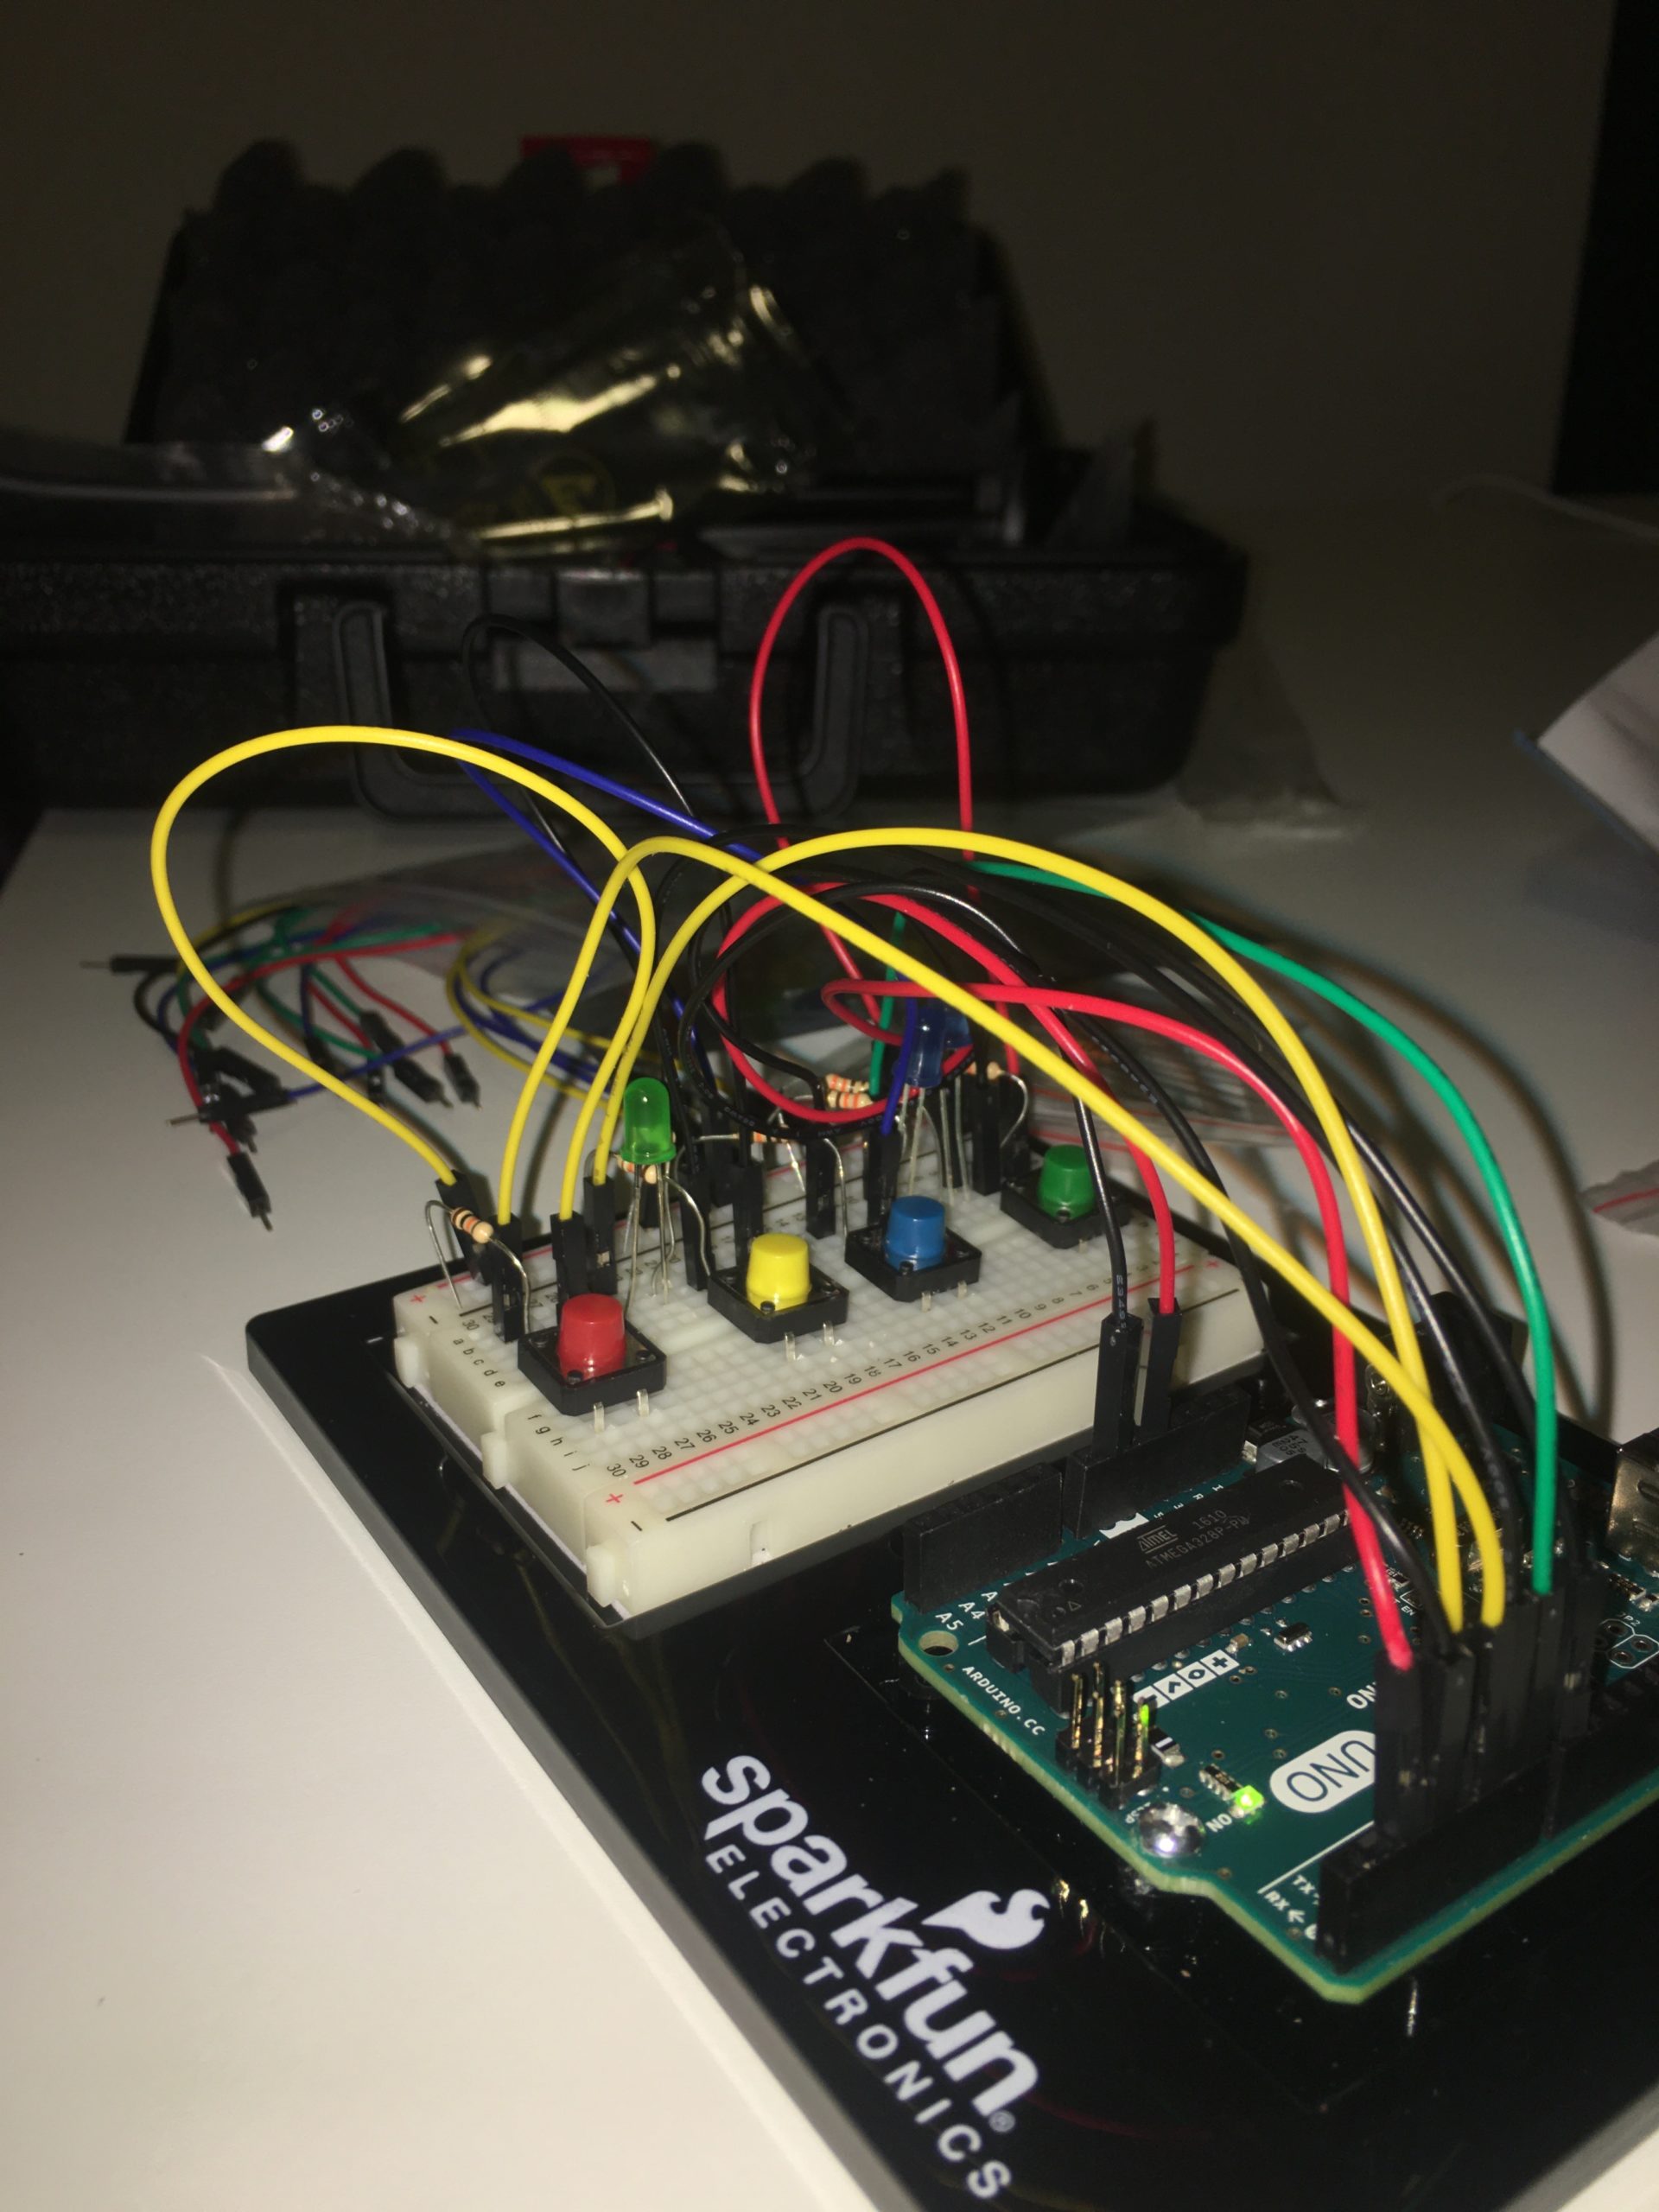
I wanted to figure out a way, in which I could use my Arduino as a joystick for the Processing game. I started off with some LEDs and a potentiometer, but then decided that I would like to try something different than what we did in class last Wednesday. After that, I wired three buttons on the breadboard, and the colors of the buttons immediately reminded me of the (R, G, B) color mapping. I decided to create a movement game and use my buttons as a joystick for moving whatever I have in my Processing console.
When a player starts the Processing sketch, they will see a rectangle on the console, and whenever each button is pressed, the rectangle changes color and moves to a particular side of the screen. The player’s score increments if the rectangle “hits” the side of the screen.
🛠 process
One of the main challenges while implementing this game was to figure out a way to transfer multiple serial communication bits into Processing. At first, I thought I would create an array of bits that occur while pressing the buttons. However, as I was exploring this idea it seemed like I was overcomplicating it, and then I just tried sending a different type of serial message each time a different button is pressed. For example, if the red button is pressed, I send “1”; if the blue one is pressed, I send “2”, and so on.
After reading this serial communication from my Processing, I created a boolean variable to track which button is pressed. For each boolean variable, I then created corresponding code lines to run throughout the game to move the rectangle. When the rectangle reaches the end of the screen, it reappears on the console, and the game continues until they eventually get tired of playing 😅. Right now, there is no way to stop or restart the game without closing the program, but it could be something to think about as a next step.
🎲 demo
Arduino code:
int buttonR = 2;
int buttonB = 4;
int buttonG = 7;
int prevRState = 0;
int prevGState = 0;
int prevBState = 0;

void setup() {
  // put your setup code here, to run once:
  pinMode(buttonR, INPUT);
  pinMode(buttonG, INPUT);
  pinMode(buttonB, INPUT);

  Serial.begin(9600);
}

void loop() {
    // getting digital communication from buttons
    int buttonRState = digitalRead(buttonR);
    int buttonGState = digitalRead(buttonG);
    int buttonBState = digitalRead(buttonB);

    // read if the buttons are pressed
    int valueR = digitalRead(buttonR);
    int valueG = digitalRead(buttonG);
    int valueB = digitalRead(buttonB);

    // output for debugging
    Serial.print(valueR);
    Serial.print(valueG);
    Serial.print(valueB);

    if (buttonRState == 1 && prevRState == LOW){
      // send values if buttons are pressed
      Serial.write(valueR);
    }

    if (buttonGState == 1 && prevGState == LOW){
      // send values if buttons are pressed
      Serial.write(valueG+1);
    }

    if (buttonBState == 1 && prevBState == LOW){
      // send values if buttons are pressed
      Serial.write(valueB+2);
    }

    // track button states
    prevRState = buttonRState;
    prevGState = buttonGState;
    prevBState = buttonBState;
}
Processing code:
import processing.serial.*; // importing from library
Serial port; // creating a serial port object

int numBtns = 3;  // number of buttons
int locX, locY;  // position of each rectangle
int rectW, rectH; // width and height of each rectangle
int value = 0; // passed value
boolean isRed, isGreen, isBlue = false; // keep track of colors
int numCollide; // keep track of collisions

void setup(){
  size(500, 500);
  rectMode(CENTER);
  locX = 250;
  locY = 250;
  rectW = 100;
  rectH = 100;
  numCollide = 0;
  //printArray(Serial.list()); // debugging
  port = new Serial(this, Serial.list()[1], 9600); // initializing the port
}

void draw(){
  background(255);

  // initializing the game
  rect(locX, locY, rectW, rectH);
  displayScore();

  // green mode
  if (isGreen == true){
    rect(8, 250, rectW-80, height);
    locX-=5;
  }

  // red mode
  if (isRed == true){
    rect(490, 250, rectW-80, height);
    locX+=5;
  }

  // blue mode
  if (isBlue == true){
    rect(250, 10, width, rectH-80);
    locY-=5;
  }

  // start again
  reStart();
}

void serialEvent(Serial port){
  // reading from the port
  value = port.read();
  // change to red
  if (value == 1){
    fill(255, 0, 0);
    isRed = true;
    isBlue = false;
    isGreen = false;
  }
  /// change to green
  if (value == 2){
    fill(0, 255, 0);
    isRed = false;
    isBlue = false;
    isGreen = true;
  }
  // change to blue
  if (value == 3){
    fill(0, 0, 255);
    isRed = false;
    isBlue = true;
    isGreen = false;
  }
}

// restart each time the rectangle is caught
void reStart(){
  if (locX==-rectW || locY == -rectH || locX == width+rectW){
    numCollide++;
    locX = 250;
    locY = 250;
  }
}

// display the instructions and the score
void displayScore(){
  textAlign(CENTER);
  push();
    textSize(16);
    fill(0);
    text("Press any arduino button to start!", width/2, height-100);
  pop();
  push();
    textSize(32);
    fill(0);
    text("Score: " + numCollide, width/2, height-50);
  pop();
}
This week’s assignment was, by far, the most difficult one for me. Not because it required a lot of coding or wiring, but because pushing myself mentally to plan and execute something completely unfamiliar was tough! But I am proud that I did it, despite taking some time to make it work. So, let’s see what I got here.
💡 idea
The idea was to use a switch, an LED light, and a potentiometer to produce some kind of sound altogether to create a musical instrument.
🛠 process
After getting all of the circuit elements, I started to experiment with sounds. I wired my button and wrote the code so that every time I press it, one particular sound plays. Then, I wired a potentiometer and connected it to the LED through the code so that the lighting changes with the potentiometer values. I later added the sounds so that they begin to play whenever the LED is on. The whole system can be turned off by pressing the switch.
The primary challenge was to make sure that the tone() is producing clean notes and not just noise. I guess this depends more on the frequency and duration of the sound, but in the beginning, some of my sounds were like noise. I was able to overcome this by adding delay() and reducing the duration of each sound.
I was talking a bit about the mental challenge at the beginning of the post, and for me personally, it was believing in the idea thathardware and circuits can produce sound! I was struggling for about two days because I couldn’t come up with the idea, but then it finally hit me after some trial and error!
For now, the musical instrument is fairly simple, and the next steps would probably be adding some interactivity – perhaps adding different sounds as the potentiometer values change or adding a non-switch button to add more sounds.
For this week, I had to visit a lot of external resources to finally grasp what is analog input/output and how is it different from digital input/output. Things finally started to click in my head after reading this definition on NYU ITP web page:
“While a digital input to a microcontroller can tell you about discrete changes in the physical world, such as whether the cat is on the mat, or the cat is off the mat, there are times when this is not enough. Sometimes you want to know how fat the cat on the mat is.”
Honestly, why all textbooks/videos/websites can’t explain concepts in this simple manner? 😄
I really like how all of the hardware stuff we are building has applications in real world that I can immediately think of: electricity switches, temperature sensors, etc. etc. Not to say that software isn’t applicable — it is just easier for me to remember engineering applications that we encounter in real life than, say, games.
Anyways, I am a bit digressing here, so let’s get into my homework circuit.
Complete Circuit
⚡️ idea
The idea behind was inspired by the air conditioning and heating system inside different cars. Usually, there is one LED light that turns on if the heater is on and another LED light turns on if the AC is on. So I have used a temperature sensor for the analog input/output communication, two LED bulbs + one button for digital input/output.
🛠 process
I have read quite a bit of documentation and watched some LinkedIn learning videos to finally understand how Arduino analog works.
First off, I almost burned my temperature sensor, xD. After I plugged everything in and ran my script for the first time, I started smelling something weird — and oh boy, it was a temperature sensor! Gladly I was quick to find out and immediately plugged everything out. Turns out I messed up the leg-connection to the 5V and the ground, which has caused this whole trouble.
After a bit of debugging, I was able to connect and read the temperature values. By the way, none of this would have been implemented had I not referred to this documentation on voltage and temperatures. It was super confusing, but apparently we have to manipulate voltage values in order to get the most precise measurements of temperature!
🎥 result
The most fun part was making it all work inside the script:
int analogPin = A0;
float voltageOut;
float temp;
int analog;
int LED1 = 7;
int LED2 = 8;
int button = 4;
int buttonState = 0;
boolean flag = 0;
boolean prevState = 0;

void setup() {
  // put your setup code here, to run once:
  pinMode(LED1, OUTPUT);
  pinMode(LED2, OUTPUT);
  pinMode(button, INPUT);
  Serial.begin(9600);
  analogReference(DEFAULT); // specify that I have 5 volts
}

void loop() {
  // calculating temp
  analog = analogRead(analogPin);
  buttonState = digitalRead(button);
  temp = (((double)analog/1024)*5-0.5)*100;

  // track the values on serial
  Serial.print("Current Temperature: ");
  Serial.println(temp);
  delay(500);

  // if button is pressed, run the program
  if (buttonState == 1 && prevState == LOW){
    flag = !flag;
  }

  // if button is pressed, turn on
  if (flag){

    // "heater" is on
    if (temp >= 26){
    digitalWrite(LED1, HIGH);
    digitalWrite(LED2, LOW);
    }

    // "AC" is on
    else {
      digitalWrite(LED1, LOW);
      digitalWrite(LED2, HIGH);
    }

  }
  // turn off
  else {
    digitalWrite(LED1, LOW);
    digitalWrite(LED2, LOW);
  }

  // track button state
  prevState = buttonState;
}
Some of the challenges I faced was making a code run only when a button is pressed and turn everything off when the button is pressed the second time. I have spent about an hour trying to debug when I realized that I was missing the “else”-snippet when the flag is off. But now it works! 🥳
This is to let everyone know that – thanks to Aaron’s help last week – I managed to fix the scoring glitch that I had in my game!
My game logic was missing a lot of elements here and there, which resulted in a massive bug that crashed the whole game.
Fixing a few functions inside the main class and adding id tracking variables and array in mousePressed() helped to resolve this issue.
void mousePressed() {
  // play sound
  click.play();
  for (int i=0; i<cards.length; i++) {
    // only flip cards over if there are less than 2 flipped
    if (amountFlipped<2) {
      // only flip if the card hasn't been flipped
      // and also hasn't been matched (just to be safe)
      if (!cards[i].flipped && !cards[i].matched) {
        // check which card got clicked
        if (cards[i].checkClicked()) {
          // we've flipped it now so increase the amount that have been flipped
          amountFlipped++;
        }
      }
    }
  }
}

// check the IDs of the flipped cards
void checkIDs() {
  // make sure we have two flipped
  // (already checked in mousePressed to make sure we're not counting matched cards)
  if (amountFlipped == 2) {
    // we need to keep track to make sure we check two cards
    // this index does that (we already made sure it's only two just above)
    int thisIndex = 0;
    for (int i=0; i<cards.length; i++) {
      // if the card is flipped, AND is NOT matched
      if (cards[i].flipped && !cards[i].matched) {
        // get that card's ID and its index
        ids[thisIndex] = cards[i].id;
        whichCard[thisIndex] = cards[i].index;
        // increment our local index
        thisIndex++;
      }
    }
    // if we have something for both cards (otherwise one would be -1)
    if (whichCard[0]>=0 && whichCard[1]>=0) {
      // if they match set to matched and increase score
      if (ids[0] == ids[1]) {
        cards[whichCard[0]].matched = true;
        cards[whichCard[1]].matched = true;
        score++;
        if (score == numCards/2){
           scene = 2;
        }
      } else { // otherwise trigger the timer and reset things back to -1
        cards[whichCard[0]].triggerTimer();
        cards[whichCard[1]].triggerTimer();
        ids = new int[]{-1, -1};
        whichCard = new int[]{-1, -1};
      }
      // always reset the amountflipped back to 0 so we can start again
      amountFlipped = 0;
    }
  }
}
3 hours ago I was sitting in front of my Arduino kit and was absolutely terrified: What on Earth do I do with all these lights and buttons?!!
After a couple of YouTube tutorials and going back to our class recording, I slowly figured out where all these wires go, how to connect a button, and an LED light.
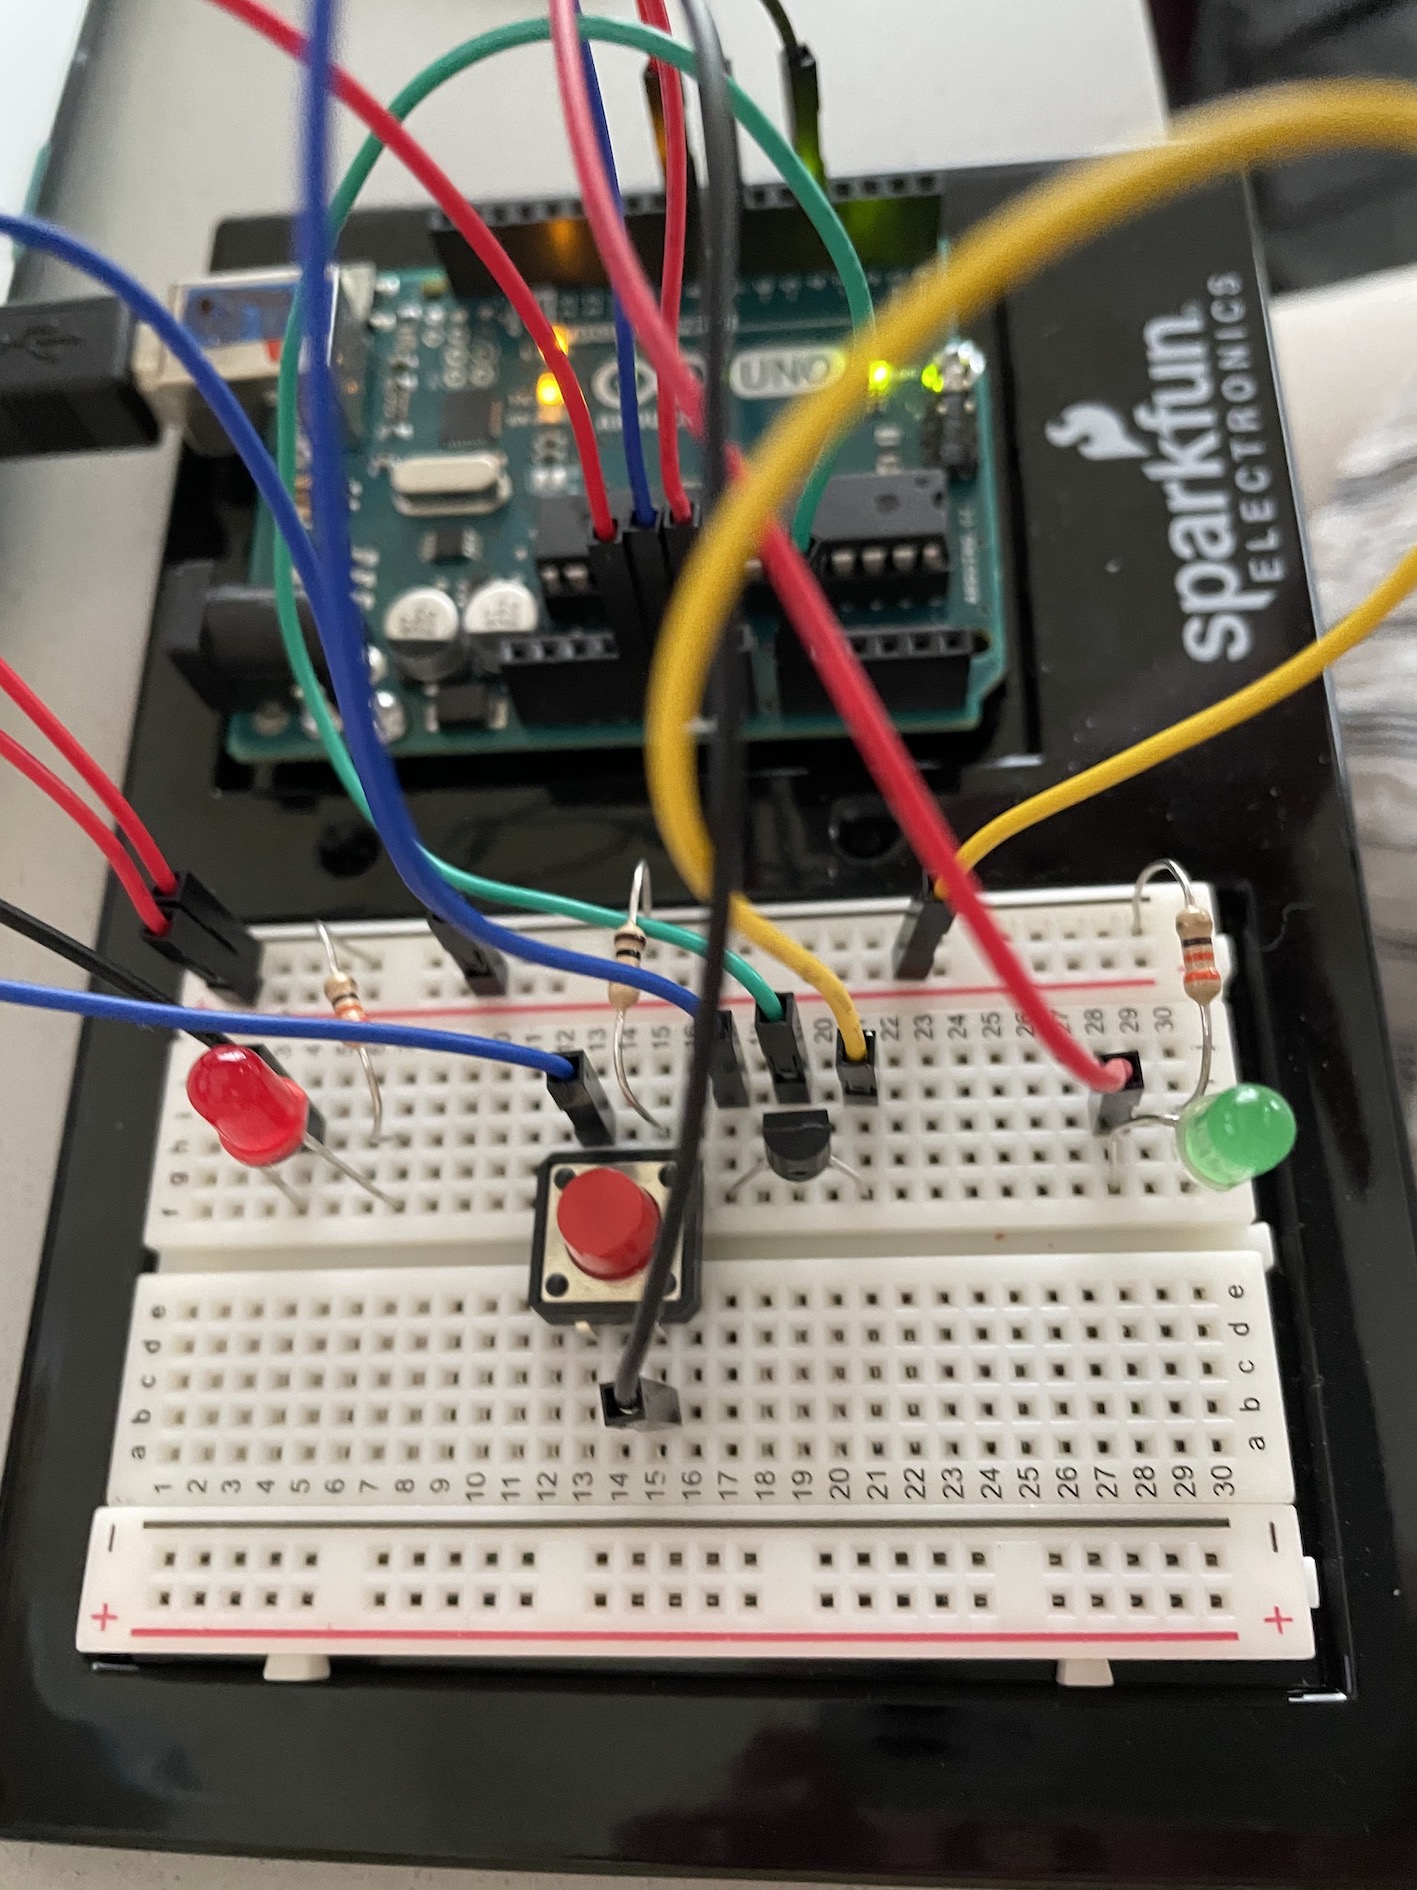
Soo…I managed to get a circuit of 4 buttons and 3 LED lights (let’s call them B1, B2, and G):
button #0 does not trigger anything,
button #3 triggers two lights – B1 and G,
button #2 triggers B1,
button #1 triggers G.
If you may have noticed, B2 cannot be triggered by pressing on any of the single buttons, so there has to be some trick around this! Your task is to figure out which and trigger all three lights at the same time (preferably with a minimum number of buttons pressed).
The solution is to press button #0 and #1 simultaneously to trigger B2 and G, and then press button #3 to trigger B1.
Amina’s Arduino
Here is the code:
// declare pins and buttons
int ledPin1 = 2;
int buttonPin1 = 3;

int ledPin2 = 4;
int buttonPin2 = 5;

int ledPin3 = 7;
int buttonPin3 = 6;

int buttonPin4 = 8;

void setup() {
  // put your setup code here, to run once:
  pinMode(ledPin1, OUTPUT);
  pinMode(buttonPin1, INPUT);
  Serial.begin(9600);

  pinMode(ledPin2, OUTPUT);
  pinMode(buttonPin2, INPUT);
  Serial.begin(9600);
}

void loop() {
  // green light
  int buttonState1 = digitalRead(buttonPin1);
  Serial.println(buttonState1);
  digitalWrite(ledPin2, buttonState1); // HIGH = 1 or true

  // green light
  int buttonState2 = digitalRead(buttonPin2);
  Serial.println(buttonState2);
  digitalWrite(ledPin2, buttonState2);

  // blue light
  int buttonState3 = digitalRead(buttonPin3);
  Serial.println(buttonState3);
  digitalWrite(ledPin3, buttonState3);

  // blue and green
  int buttonState4 = digitalRead(buttonPin4);
  if (buttonState4 == buttonState1)
    digitalWrite(ledPin1, buttonState4);
}
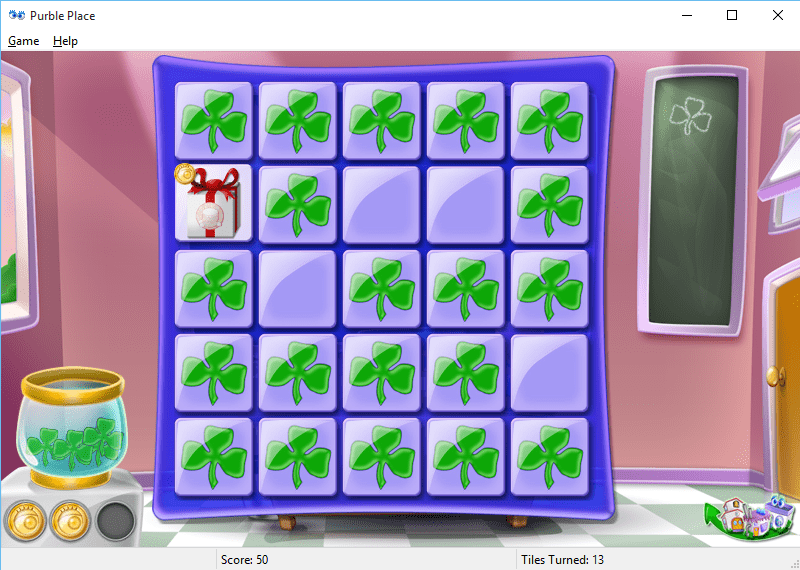
When I was a child, I used to play this memory game that comes by default on every Windows 7 machine:
Memory Game, Windows
Hence the inspiration for my project.
Process
October 13, 2020.
Today marks the first day of my *official* work on the midterm project. I came up with an idea last week – the Card Memory Game. For now, I am doing some UI research to see what type of interface I would like to create for my staring page. I haven’t started my work yet, but I know for sure that I want to include some buttons and sounds. Today I also implemented a function for my button to check if it is being hovered over:
// check if the mouse is over the button
  boolean isHover(){
    if(mouseX <= rectX+rectWidth/2
      && mouseX >= rectX - rectWidth/2
      && mouseY <= rectY + rectHeight/2
      && mouseY >= rectY - rectHeight/2)
      return true;
     else
       return false;
  }
October 14, 2020.
Keeping up the consistency! Worked on the Welcome UI scene, included some text instruction placeholders, built the button, and figured out how to move between the scenes (has some bugs, will improve next time).
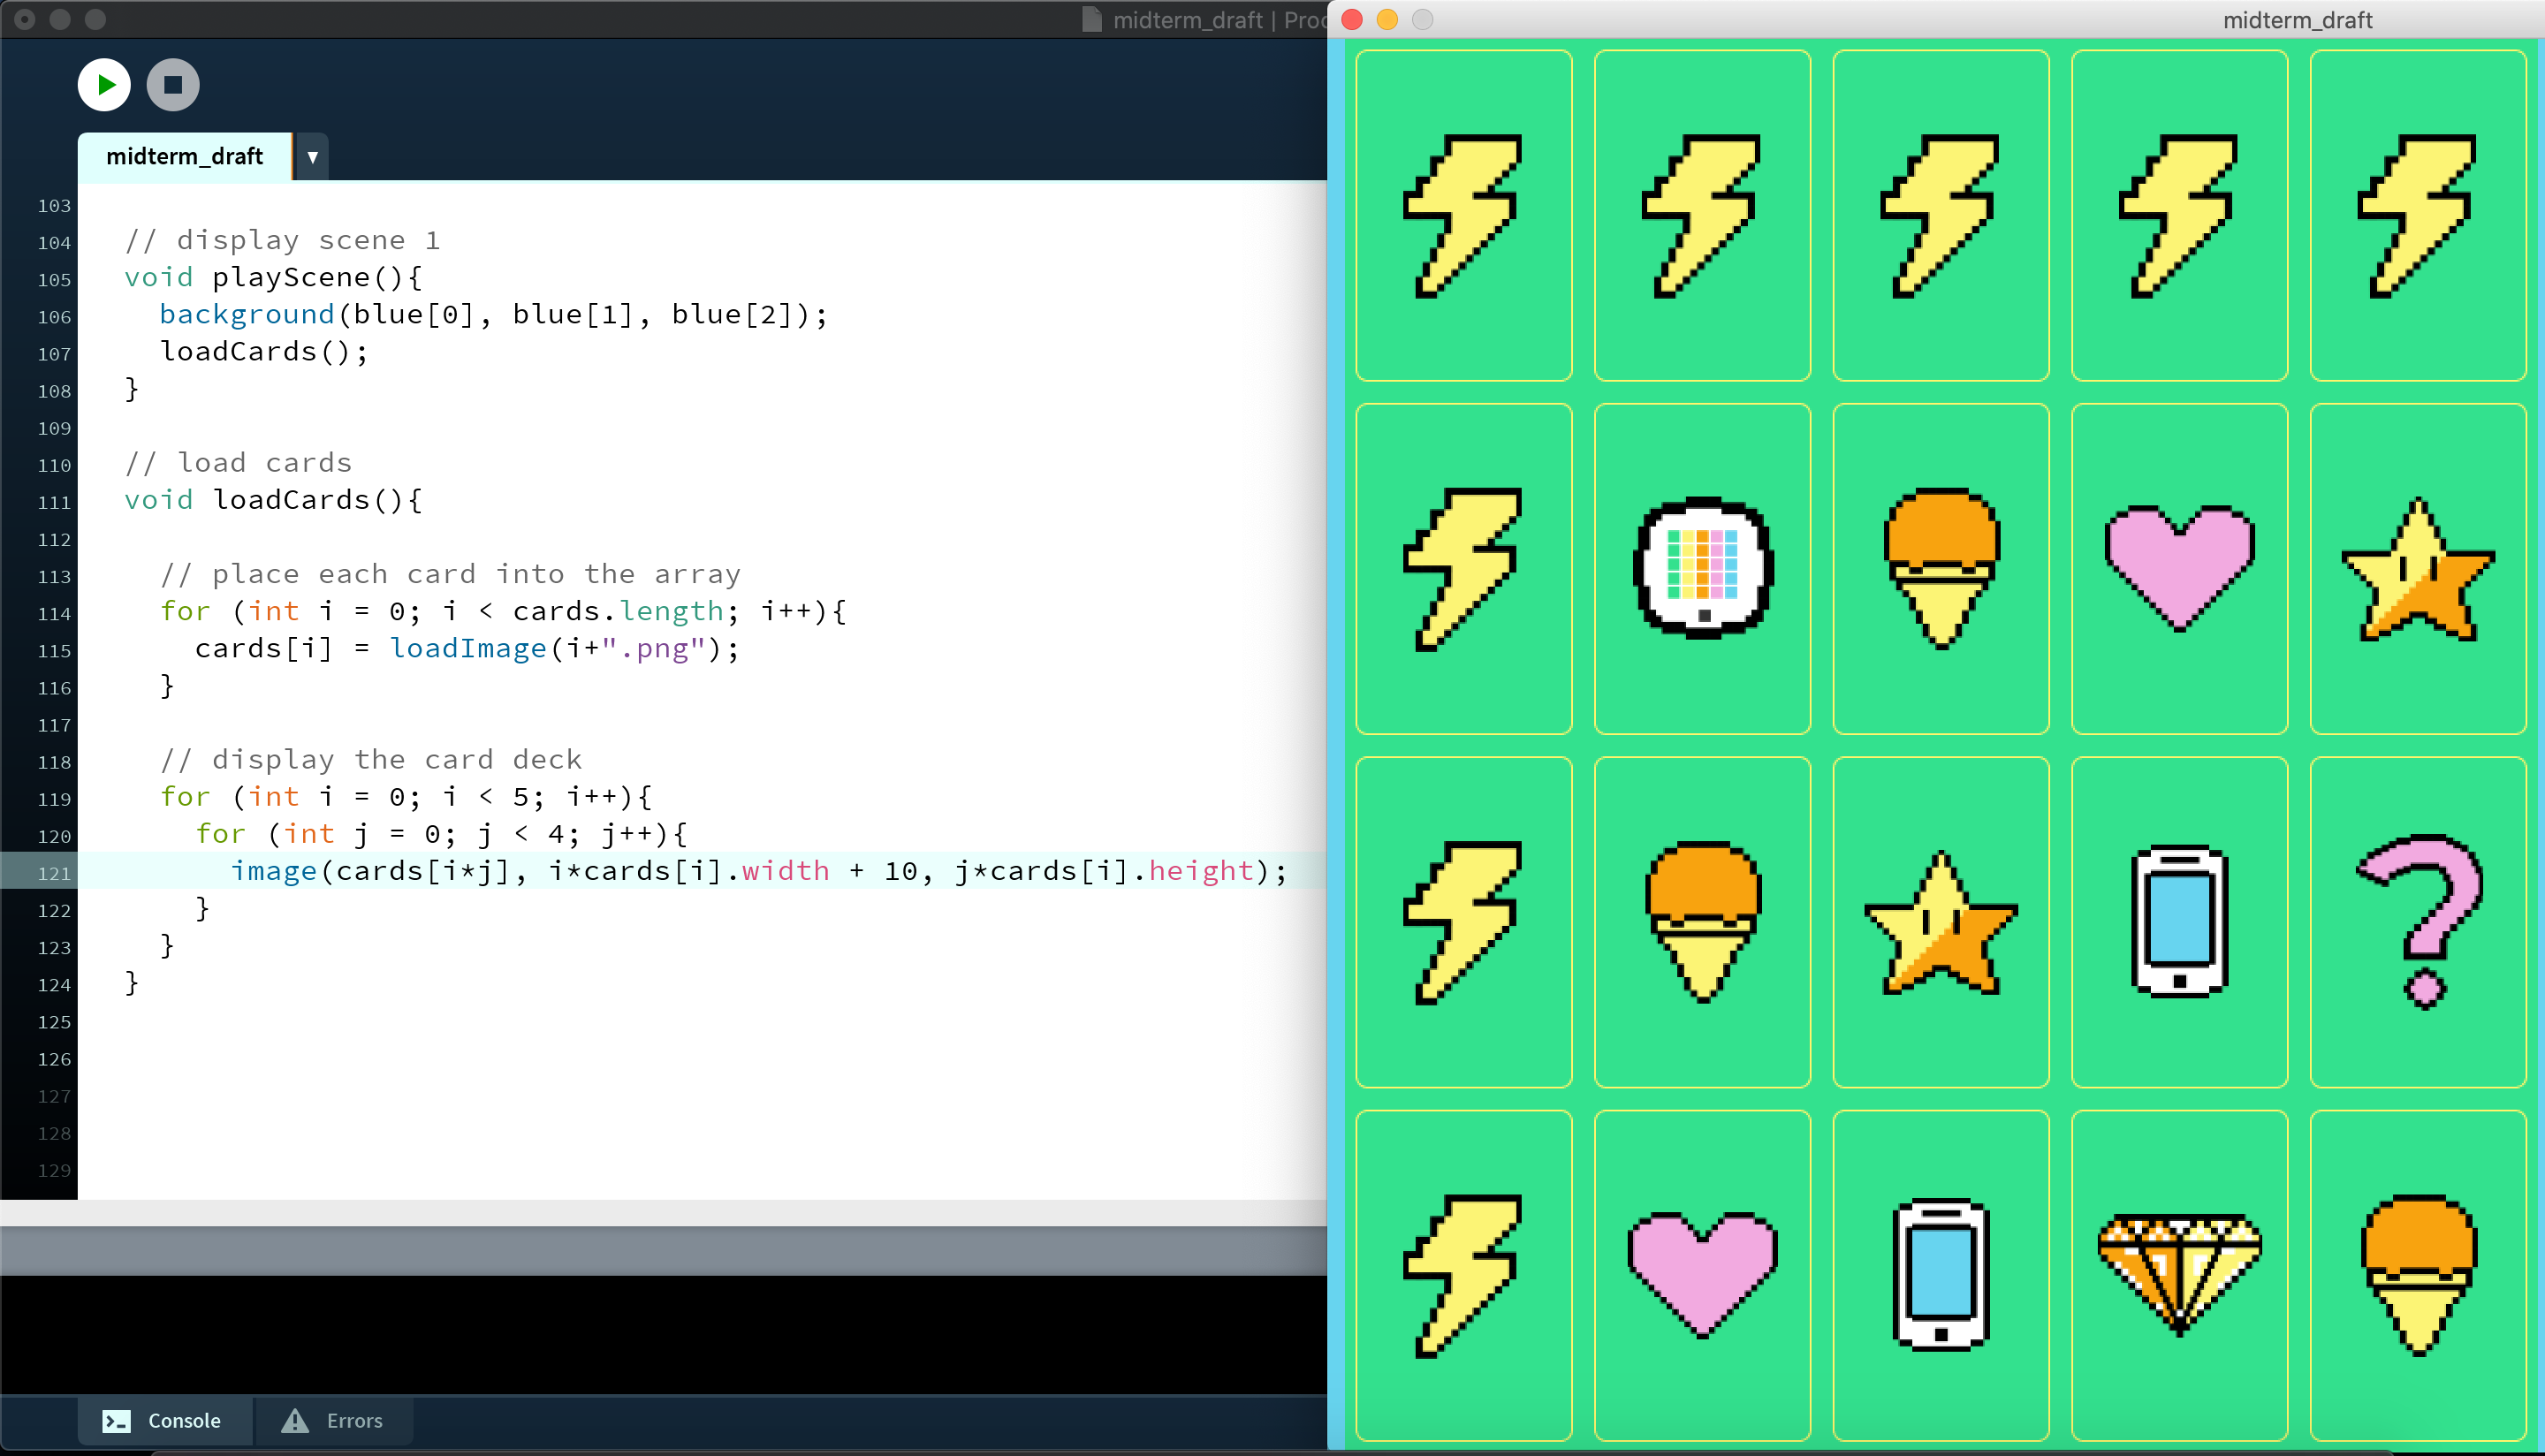
October 16, 2020.
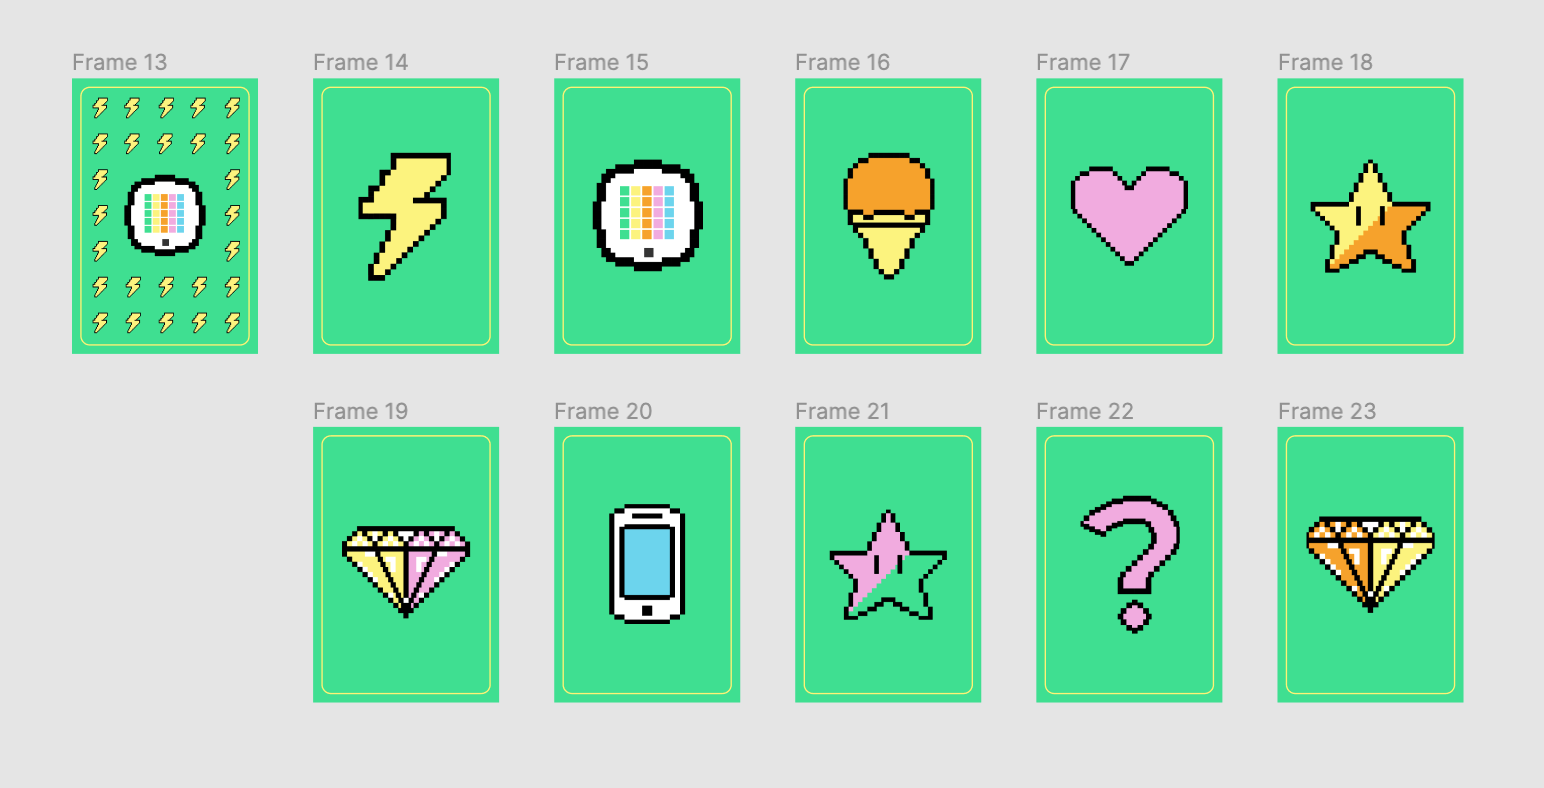
Fixed the function to switch between the scenes, designed the cards and made the cover for them. Created a function to load the card images into the array and display them in the second scene.
Making cards in Figma. Emoji design credits: imagiLabs.com
October 17, 2020
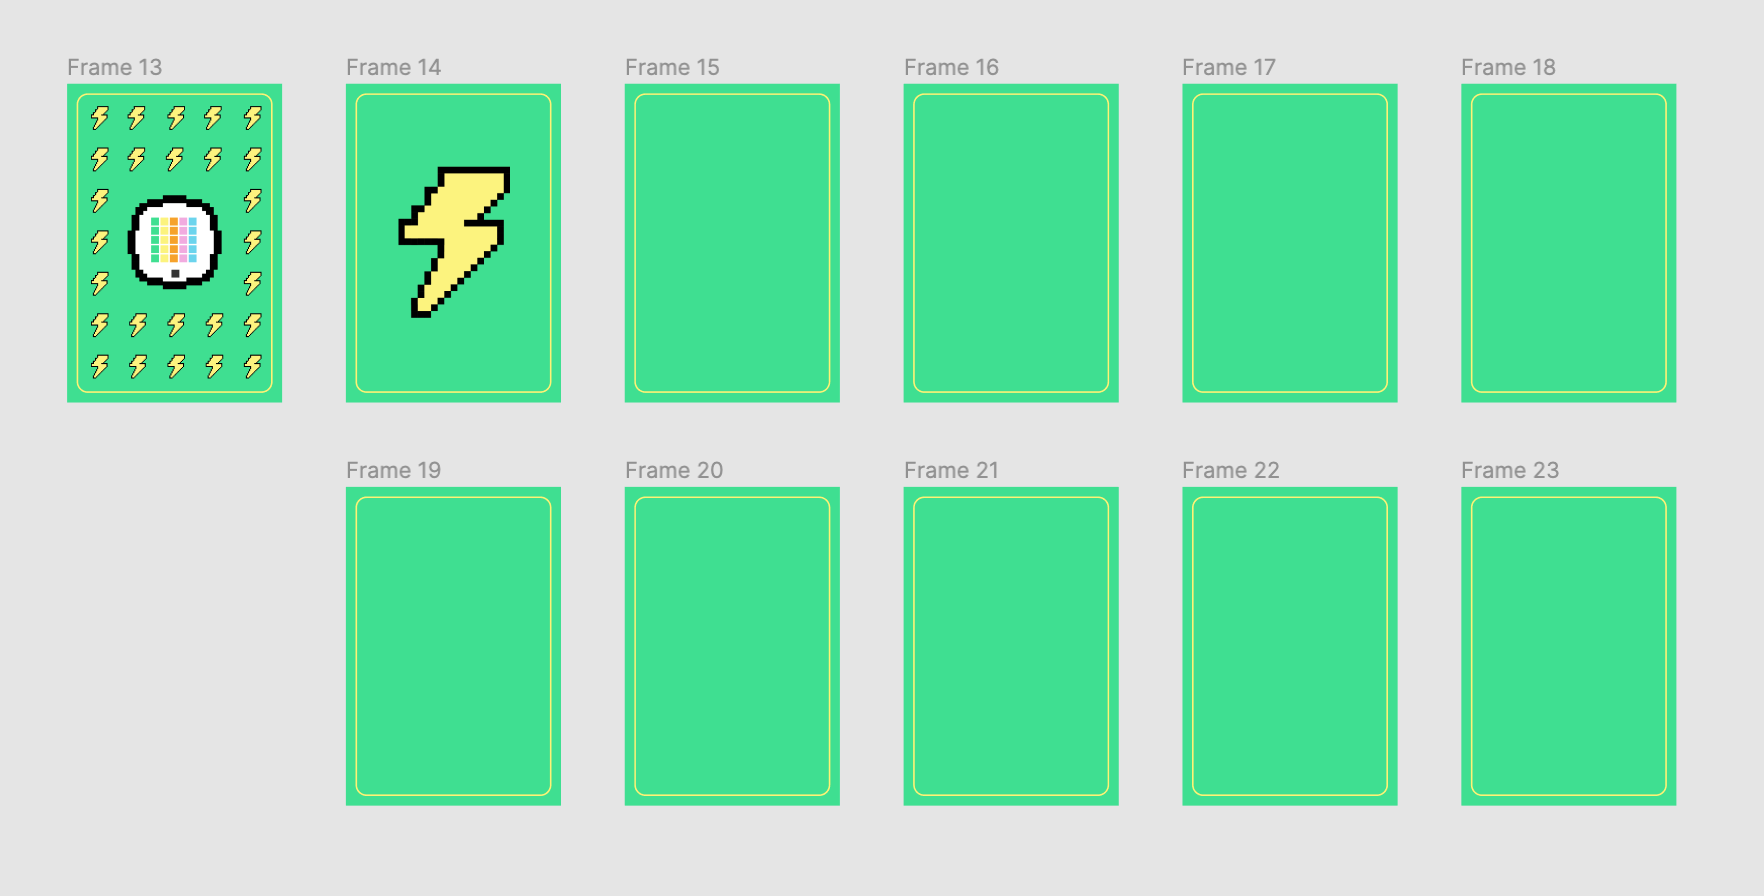
D e b u g g i n g
Debugging improper card deck display
<…>
October 26th, 2020.
Well, a lot of time has passed since my last update, but I was fixing the code here and there in the meanwhile. A few challenges during those few days was fixing the score to display on the screen properly (which I got fixed, yay!), displaying and shuffling the card deck properly (resolved!), storing the card flips (not resolved), and working out the complete logic of the game.
Final Notes
I believe it is worth mentioning that I got tremendous help along the way from Professor Aaron (thank you!), Professor Discord and Professor Google (xD). There were many things that I had to look up online, for example, the list shuffle method.
Does my program work perfectly now? No. Did I learn something new in the meanwhile? YES. Before embarking on this assignment, I had no clue how to switch between the game scenes, use lists and manipulate Java arrays dynamically. While my game still cannot count the score and flip the cards the way it is supposed to, I have learned that asking for help and needing some time to build a good code is normal and does not equal failing.
Demo
I have done the majority of the code, but have a tiny hidden bug somewhere that crashes the whole game. I suspect that happens somewhere between passing each card’s value and comparing selected cards, but I will investigate this further and am determined to make it work! Unfortunately, this might not happen on time for the showcase, but it will happen in the next few steps. For now, enjoy the code & demo:
// v0.4 24.10.2020
// importing sound
  import processing.sound.*;
  SoundFile click;

// v0.3 21.10.2020
// moving everything into class
  int margin = 3;
  IntList imageIndex = new IntList();
  int[] flippedCard;

// v0.2 17.10.2020
// Outputting the card deck

// v0.1 16.10.2020
// Creating different scenes + images

  // set the scene
  int scene, score;
  int numCards = 20;
  //PImage[] cards = new PImage[numCards];
  Card[] cards = new Card[numCards];
  PImage[] images = new PImage[numCards];
  PImage cardCover;

// v0.1 14.10.2020
// Creating the text instructions

  PFont font;
  String instructions_1, instructions_2, instructions_3, instructions_4, btn_start, btn_quit;
  int fontSize = 50;

// v0. 13.10.2020
// Creating a button

  // defining colors as [r,g,b] arrays
  int[] pink = {242, 170, 224};
  int[] green = {51, 225, 142};
  int[] orange = {248, 163, 15};
  int[] blue = {103, 212, 239};
  int[] yellow = {255, 244, 108};

  // defining shape coordinates
  float rectX, rectY, rectWidth, rectHeight;

  void setup(){
    size(1100, 800);
    rectMode(CENTER);
    click = new SoundFile(this, "clickSound.wav");
    scene = 0;

    // setting the button coordinates
    rectX = width/2;
    rectY = height/2;
    rectWidth = 170;
    rectHeight = 80;

    // setting the text
    push();
      fontSize = 40;
      instructions_1 = "Welcome!";
      instructions_2 = "You are presented a deck of cards.";
      instructions_3 = "Your task is to flip and match every one of them.";
    pop();

    btn_start = "START";
    btn_quit = "QUIT";
    font = createFont("VT323-Regular", fontSize);
    textFont(font);

    // setting flipped cards to null
    flippedCard = new int[2];
    score = 0;

    // load cards once
    loadCards();
  }

  void draw(){
    background(green[0], green[1], green[2]);
    // display scenes
    if (scene == 0){
      displayMenu();
    }
    if (scene == 1){
      playScene();
      //displayScore();
    }
    if (scene == 2){
      playWin();
    }
  }

  // display the UI scene
  void displayMenu(){

    // create a button
    push();
      noStroke();
      if(isHover())
        fill(yellow[0]-20,yellow[1]-20,yellow[2]-20);
      else
        fill(yellow[0],yellow[1],yellow[2]);
      rect(rectX, rectY, rectWidth, rectHeight);
    pop();

    // place instructions
    textAlign(CENTER);
    fill(0);
    text(instructions_1, width/2, height/6);
    text(instructions_2, width/2, height/6+80);
    text(instructions_3, width/2, height/6+120);
    text(btn_start, width/2, height/2+12.5);
    push();
      textSize(22);
      text("Intro to IM, Fall 2020", width/2, 3*height/4);
    pop();
  }

  // check if the mouse is over the button
  boolean isHover(){
    if(mouseX <= rectX+rectWidth/2
      && mouseX >= rectX - rectWidth/2
      && mouseY <= rectY + rectHeight/2
      && mouseY >= rectY - rectHeight/2 && mousePressed){
      scene = 1;
      return true;
    }
     else
       return false;
  }

  // display scene 1
  void playScene(){
    background(blue[0], blue[1], blue[2]);

    // show the cards
    for (int i =0; i<numCards; i++){
      cards[i].displayCards();
    }
    push();
      textSize(60);
      text("Score: " + score, width-200, height/2);
    pop();
  }

  // load cards
  void loadCards(){

    // store all the cards in the image array
    for (int i = 0; i < numCards; i ++) {
      images[i] = loadImage(i+".png");
      imageIndex.append(i);
    }

    // initialize counters
    int counter = 0;
    int index;

    // initialize a deck matrix
    for (int i = 0; i < 5; i++) { //i = x
      for (int j = 0; j < 4; j++) {//j = y
        index = i + j * 5; // width is 5
        cards[index] = new Card(i*(margin+images[i].width), j*(margin+images[i].height), images[imageIndex.get(counter)], index);
        counter++;
      }
    }

    // shuffle images
    imageIndex.shuffle();
  }

  // flip the cards
  void mousePressed(){

     // add sound
     click.play();

     for (int i = 0; i<numCards; i++){
       cards[i].flipCard();

        if (flippedCard[0] == -1){
          flippedCard[0] = cards[i].value;
        }

        else{
          flippedCard[1] = cards[i].value;
        }
        // compare flipped cards
        if (flippedCard[0] != -1 && flippedCard[1] != -1){
          if (flippedCard[0] == (flippedCard[1] - 10) || flippedCard[0] == (flippedCard[1] + 10)){
            score++;
             // check for win
             if (score == numCards/2){
               scene = 2;
            }
          // flip cards back if they don't match
          else {
            cards[i].isFlipped = false;
          }
          // reset the storage array
            flippedCard[0] = -1;
            flippedCard[1] = -1;
          }
        }
      }
    }

  // display the win scene
  void playWin(){
     background(pink[0], pink[1], pink[2]);
     text("You have matched them all!", width/2, height/2-200);
     push();
      noStroke();
      if(isHover())
        fill(yellow[0]-20,yellow[1]-20,yellow[2]-20);
      else
        fill(yellow[0],yellow[1],yellow[2]);
      rect(rectX, rectY, 2*rectWidth, rectHeight);
    pop();
    text("Play Again?", rectX, rectY+10);
    score = 0;
    // reset the cards
    for (int i = 0; i < numCards; i++){
      cards[i].isFlipped = false;
    }
  }

class Card {
  PImage card;
  PImage cover;
  int locX, locY, value;
  int cardWidth = 135;
  int cardHeight = 200;
  boolean isFlipped = false;
  int numFlipped = 0;
  boolean isMatched = false;

  Card(int _locX, int _locY, PImage _card, int _value){
    locX = _locX;
    locY = _locY;
    card = _card;
    cover = loadImage("cover.png");
    value = _value;
  }

  void displayCards() {
    // display cover if not flipped
    if (!isFlipped && !isMatched){
      image(cover, locX, locY);
    }
    else {
      image(card, locX, locY);
    }
  }

  // debugging
  void displayValue(){
    print(value);
  }

  void flipCard(){
    if(mouseX <= locX+card.width
      && mouseX >= locX
      && mouseY <= locY + card.height
      && mouseY >= locY){
       isFlipped = !isFlipped;

       // count every time the card is flipped
       numFlipped++;

       // reset the counter when 2 cards are selected
       if (numFlipped == 3){
         isFlipped = !isFlipped;
         numFlipped = 0;
       }
    }
  }
}
Since the start of the class, I have been really struggling with practicing Processing consistently – I would usually start my homeworks 1-2 days in advance and not practice much outside of class hours. But this week is very special: I started working on the weekly assignment 4 days in advance and have even taken some time to practice geomerative* and come up with the midterm idea! 🥳 So here I am, typing this post on a Saturday afternoon (edit: publishing on Sunday though). Enjoy!
Introduction
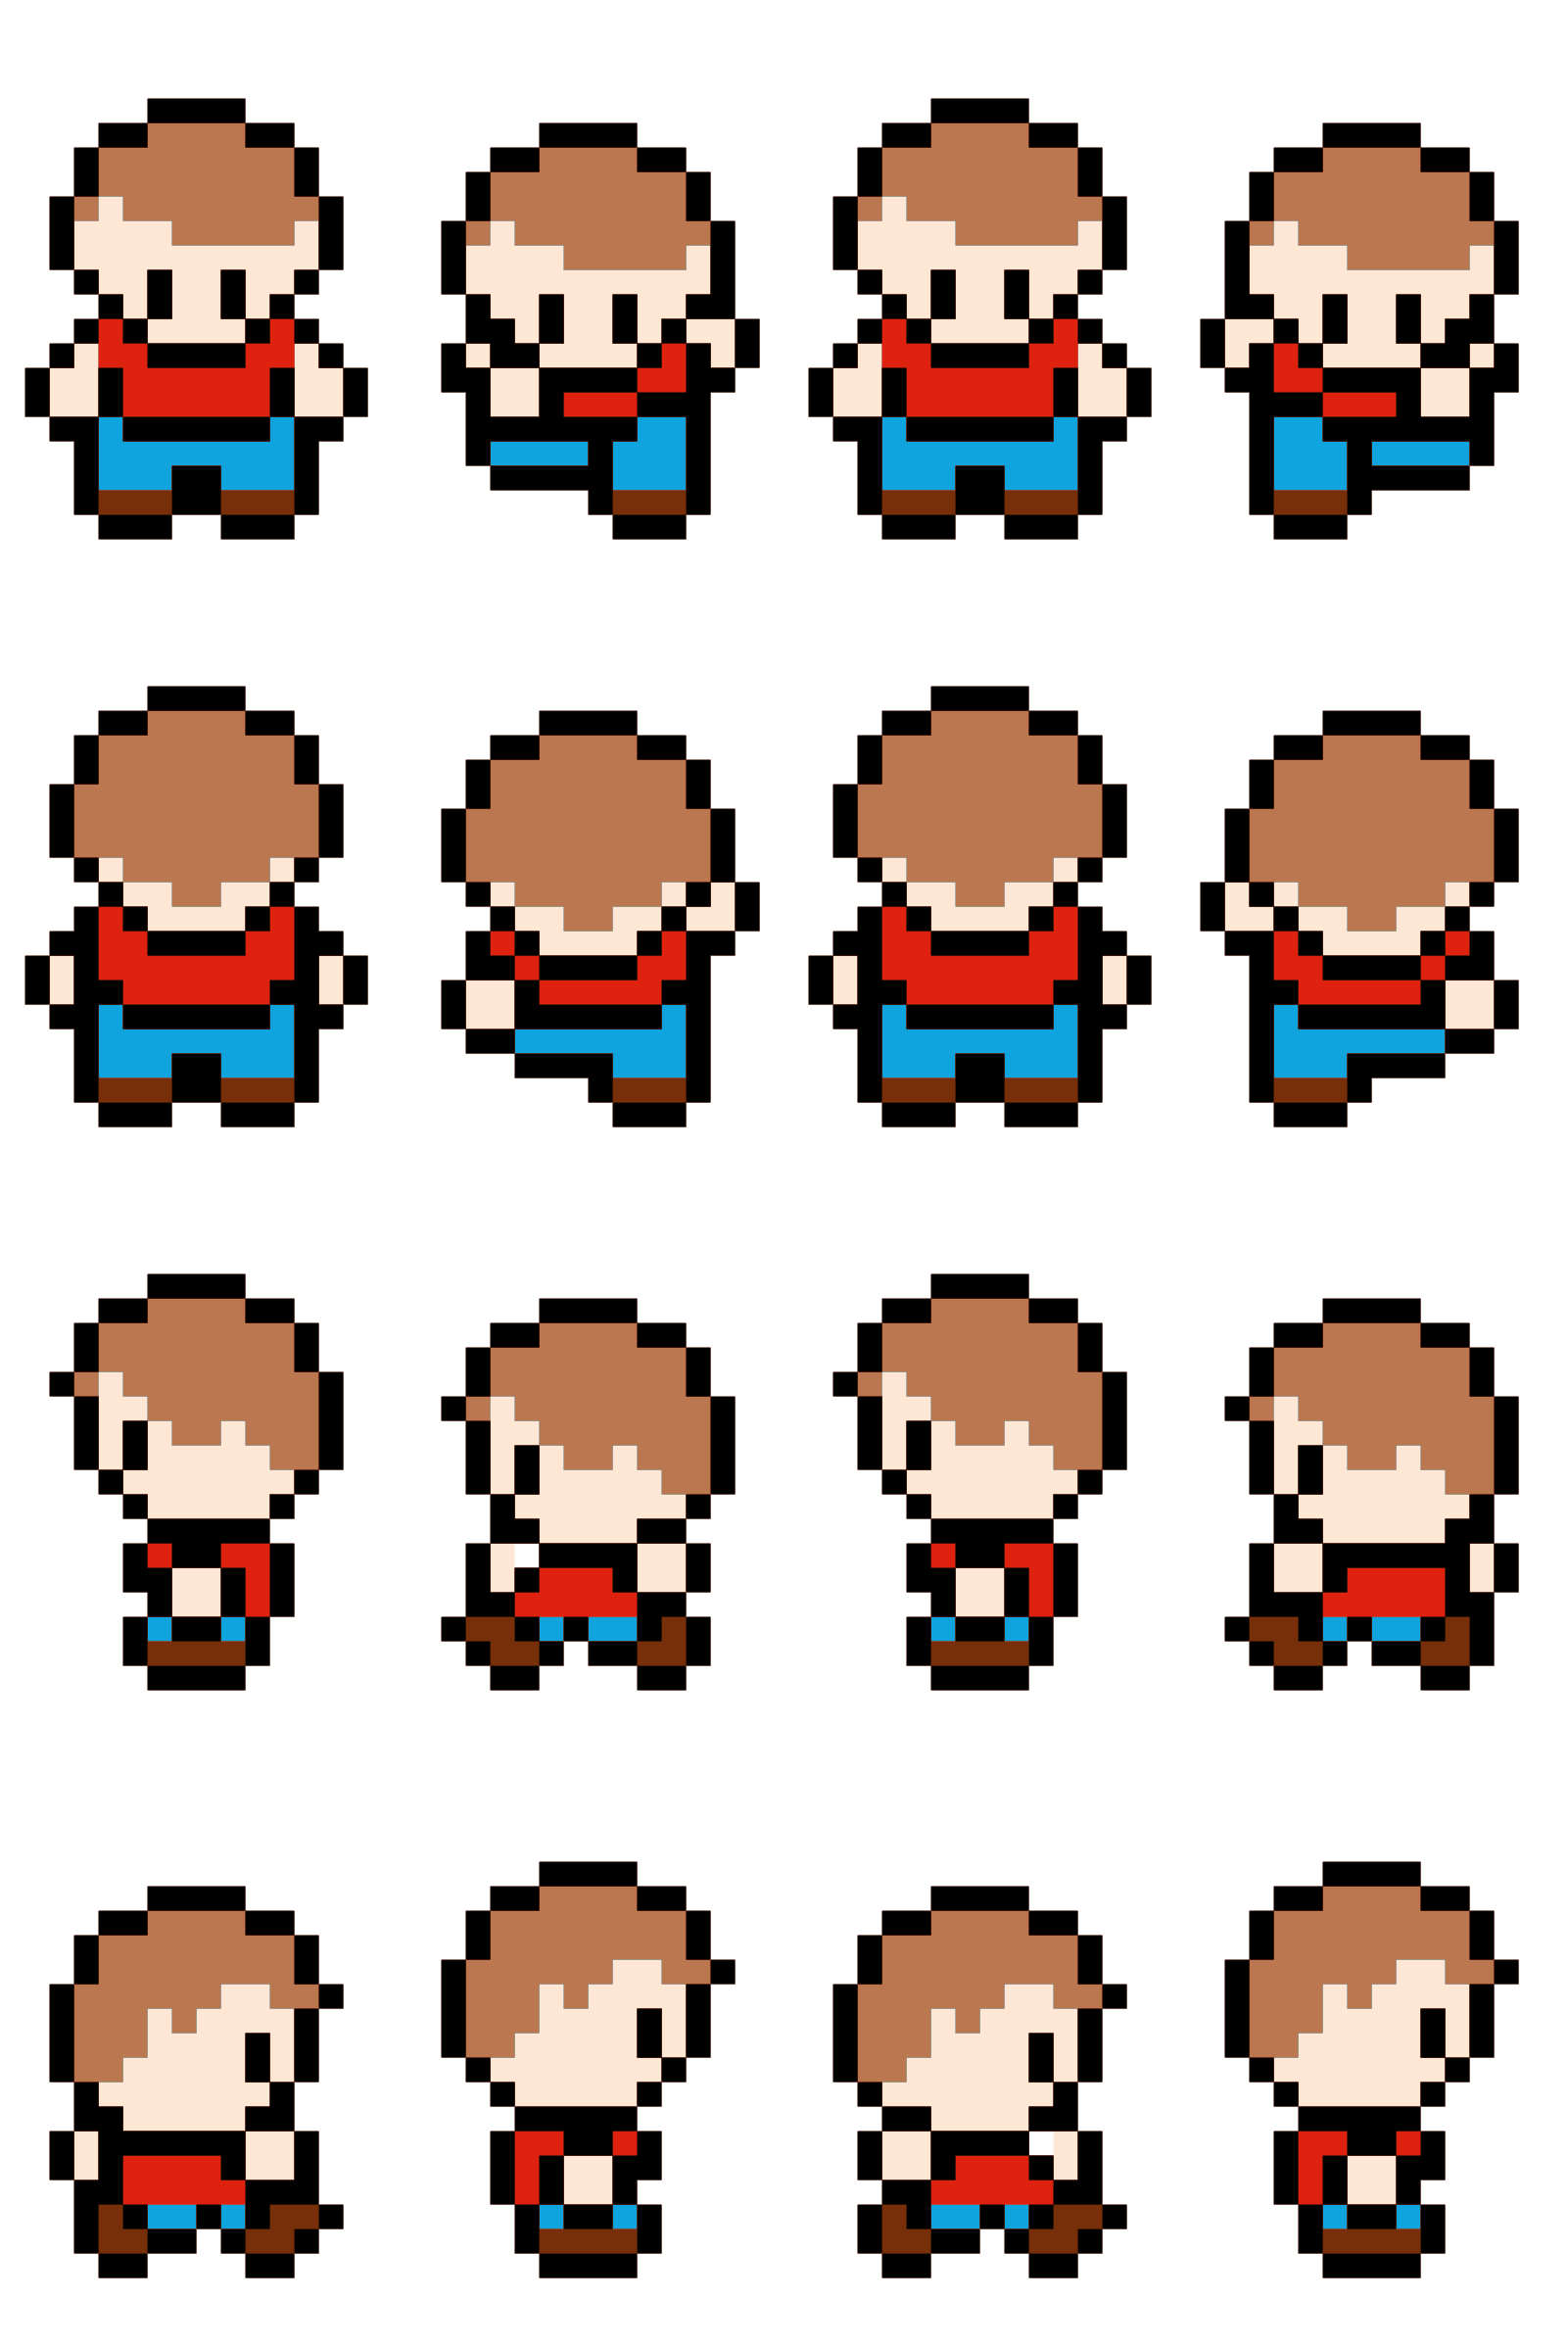
Fascinated by last week’s spritesheet example, I could not resist using this idea for my assignment. General idea was to make a small game with a moving character catching objects – diamonds in this case. After browsing the web, I have downloaded this pixelated Mario (?) image and cropped it in Photoshop as it wasn’t a PNG.
Mario Spritesheet
Process
Milestone 0: learning how to use the spritesheet. I have re-visited the class example and have carefully studied it to understand what is going on behind the code. And especially this – confusing at first – part:
// loops through each step and returns to image 0 after reaching image 3
    if(frameCount%speed==0){
      step = (step+1)%col;
    }
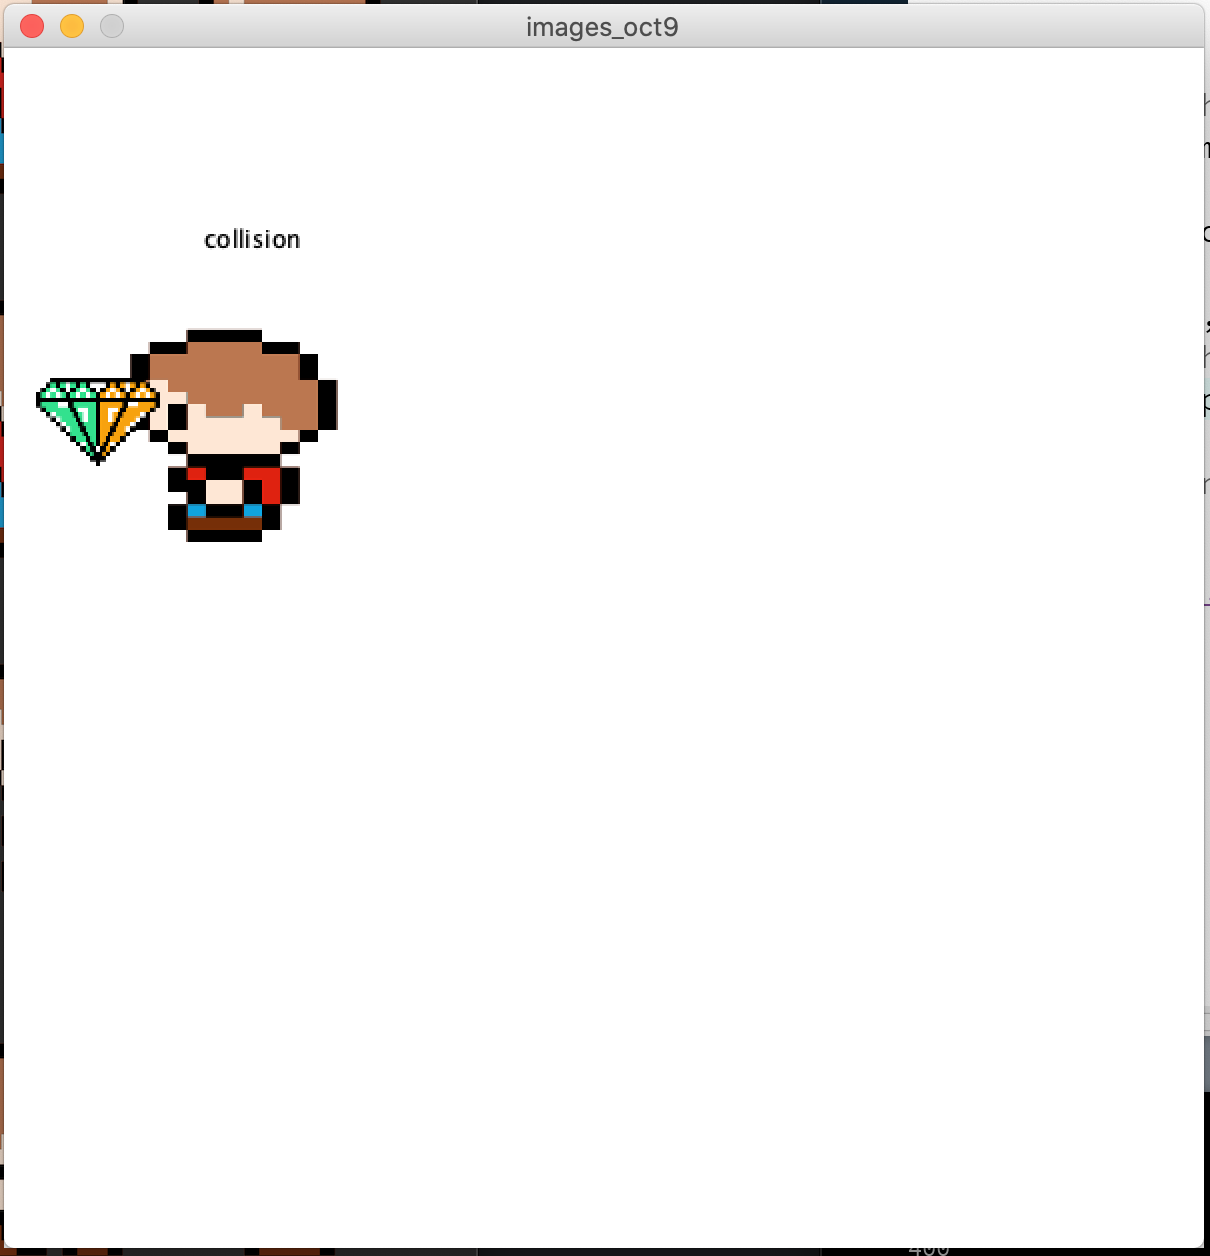
Milestone 1: placing the diamond and building a collision detection function. It took me a good day (coding on and off) to figure out what is going on wrong with my collision detection function. Oh, I have repeated the same mistake as I did when building the OOP assignment! 😅 Good thing now I finally know how to detect collision between two rectangular objects:
// Mario right corner > diamond left AND Mario left corner < diamond right
  if ((posX + person.width/16) > diamondX && posX < (diamondX + diamond.width/4) && (posY+person.height/16) > diamondY && posY < (diamondY + diamond.height/4)){
Milestone 2: collision detection debugging – spritesheet’s width and height. OK, the function was built, BUT it didn’t work out the way I wanted it to. I took all of the creative debugging ways I had in mind and just started printing out line by line what the function is doing…After a few coordinate manipulations, it FINALLY hit me that I am uploading my spritesheet in the original size and then I manually resize the image without providing the new size coordinates to my collision function. So, after fixing the sizes I thought that the problem was fixed…Not quite!
Milestone 3: The spritesheet’s dimensions aren’t perfect! 🤦♀️😅 After fixing the sizes in Processing I actually went to the original image to see what might be wrong – and there it was: there were a lot of blank spaces between spritesheet’s movements that counted towards the current image’s width and height. Yay, now I finally understand what is happening in my program!
Milestone 4: Beautifying the program. After the main logic of the program was done, I decided to add some functions, such as counting and displaying the score, checking for win, and checking borders for Mario’s movement around the screen.
Epilogue
I actually never thought that building small games can be this fun and … actually simple? Definitely am proud for working consistently on this throughout the week and can also see some room for improvement (see milestone 3 and demo – there is a moment when Mario catches a diamond despite being a few pixels away from it xD)
Result
Code:
PImage diamond;
PImage person;
PImage[][] movement;
PImage background;
PFont font;

int direction = 1;
int step, score = 0;
int posX, posY;
int diamondX, diamondY;
int speed = 5;
int row = 4;
int col = 4;
int currentWidth, currentHeight;
String textScore = "Score: ";

void setup(){

  // output window
  size (600, 600);

  // define font
  font = createFont("VT323-Regular", 40);
  textFont(font);

  // get images
  diamond = loadImage("diamond.png");
  person = loadImage("person.png");
  background = loadImage("background.png");

  // place each direction in 2-dimensional array
  movement = new PImage[row][col];

  // divide each step according to each step's dimenstions
  currentWidth = person.width/row;
  currentHeight = person.height/col;

  // place each step into the right location
  for(int posY = 0; posY < 4; posY++){
    for(int posX = 0; posX < 4; posX++){
      movement[posY][posX] = person.get(posX*currentWidth, posY*currentHeight, currentWidth, currentHeight);
    }
  }

  // always start with these coordinates
  posX = 0;
  posY = height-person.width/8+50;

  // dimanod location
  diamondX = (int)random(width-diamond.width-100);
  diamondY = (int)random(height-diamond.height-100);

}

void draw(){

  background(255);
  image(background, 0, 0, width, height);

  // place the character onto the board
  image(movement[direction][step], posX, posY, width/4, height/4);

  // move the character
  movePerson();
  checkBorder();

  // place the diamond
  image(diamond, diamondX, diamondY, diamond.width/4, diamond.height/4);

  // check for collision
  detectDiamond();

  // display score:
  displayScore();

  // check for win
  checkWin();
}

// move the character
void movePerson(){

  // activate if key is pressed
  if(keyPressed){

    // move DOWN
    if(keyCode == DOWN){
      // select the corresponding row
      direction = 0;
      // animate the steps to go DOWN in the y-dir (increase)
      posY+=speed;
    }

    // move UP
    if(keyCode == UP){
      // select the corresponding row
      direction = 1;
      // animate the steps to go UP in the y-dir (decrease)
      posY-=speed;
    }

    // move LEFT
    if(keyCode == LEFT){
      // select the corresponding row
      direction = 2;
      // animate the steps to go LEFT in the x-dir (decrease)
      posX-=speed;
    }

    // move RIGHT
    if(keyCode == RIGHT){
      // select the corresponding row
      direction = 3;
      // animate the steps to go RIGHT in the x-dir (increase)
      posX+=speed;
    }

    // loops through each step and returns to image 0 after reaching image 3
    if(frameCount%speed==0){
      step = (step+1)%col;
    }
  }
}

// needs some bug fixing
void checkBorder() {

  // return from the left
  if (posX >= width) {
    posX = -currentWidth;
  }

  // return from the right
  if (posX+currentWidth < 0) {
    posX = width;
  }

  // return from the bottom
  if (posY+currentHeight < 0) {
    posY = height;
  }

  // return from the top
  if (posY > height) {
    posY = -currentHeight;
  }
}

// check for the image collision (diamond collection)
void detectDiamond(){

  // Mario right corner > diamond left AND Mario left corner < diamond right
  if ((posX + person.width/16) > diamondX && posX < (diamondX + diamond.width/4) && (posY+person.height/16) > diamondY && posY < (diamondY + diamond.height/4)){

    // increment the score
    score++;

    // replace diamond
    diamondX = (int)random(width-diamond.width-100);
    diamondY = (int)random(height-diamond.height-100);
  }
}


// display the score
void displayScore(){
  push();
    fill(0);
    text("Score: " + score, width-180, 40);
  pop();
}

void checkWin(){
  if (score == 5) {
    background(103, 212, 239);
    push();
      textAlign(CENTER);
      fill(random(255), random(255), random(255));
      textSize(100);
      text("You WON!", width/2, height/2);
    pop();
  }
}
For this assignment, I chose to display the text in the Processing window.
My initial idea was to create a string of letters that would appear in the window and move in some interesting way. After watching some YouTube tutorials and browsing the Processing forum, my first attempt to create the letter-objects that would appear in a typewriter effect, move around some arbitrary curve and then “find home” miserably failed (I am still not too sure why, but my best-educated guess is because I had a hard time with passing polar coordinates and translating them to regular coordinates).
From the second try, my goal was to create a string of letters that would be placed around the circle and would move around it if the mouse is pressed. To add some fun to it, I decided to place another string inside the circle, and make it change the size in a noise-like pattern, also when the mouse is pressed. This appeared to be more realistic and feasible with my skills, so I just went for implementing this with my code.
The most challenging part appeared to be the math: finding the arclength, placing each letter and making sure the spacing is right, and doing the whole polar coordinates thing.
Here’s the code:
String myText = "hello, I am...";
String anotherText = "Movement!";
PFont font;
float radius = 100;
float x, arclength, angle, move, t;

void setup(){
  size (340, 680);
  font = createFont("Calm", 64);
  textFont(font);
  textAlign(CENTER);
  smooth();
}

void draw(){

  background(0);

  x = 10;
  arclength = 0;

  circles();

  // Place the bigger circle
  translate(width/2, height/2);
  noStroke();
  ellipse(0, 0, radius*2, radius*2);

  push();
    fill(0);
    textSize(50+t);
    text(anotherText, 0, x);
  pop();

  for(int i=0; i<myText.length(); i++){

     // Place the next letter
    arclength += textWidth(myText.charAt(i))/2;
    angle = 5*PI/4 + arclength/radius + move;

    push();
      translate(radius*cos(angle), radius*sin(angle));
      rotate(angle+PI/2);
      text(myText.charAt(i), 0, 0);
    pop();

    // Place the next letter
    arclength += textWidth(myText.charAt(i))/2;

  // Move the string if the mouse is pressed
    if (mousePressed){
      move += 0.0082;
      t += random(-0.5,0.5);
    }
  }

}

// Make a background of color-changing circles
void circles(){
  for (int i = 0; i < 50; i++) {
    push();
      fill(random(200,250), random(200,250), random(200,250));
      ellipse(random(width), random(height), radius/10, radius/10);
    pop();
  }
}
After watching some of the Coding Train’s (Dan Shiffman) YouTube tutorials on OOP, I took my inspiration for the game from this purple rain. Except that instead of the falling droplets I decided to make falling balls of random colors, and the whole trick of the game is to catch all of them with a net.
I started by creating a class for the ball object, along with the functions to initialize the objects, make them fall, create a net, and check if the ball is caught by the net.
One of the things that I was not too sure about is whether I should have had my net as a separate class or a part of the Ball class. I chose to go with the latter, because it allowed me to have functions inside of one class that checked the position and the catch:
My second challenge was to connect the keyPressed() function to the class for the net to move. I was a bit confused about whether to make it a part of the class functions or let it be a function outside the class, so I started to experiment. Being a part of the Ball class, the function did not work properly when I pressed the necessary keys, so I let it be outside the class. However, that chunk of code still seems a bit inefficient to me so far:
void keyPressed() {
   if (keyPressed) {

    for(int i = 0; i < balls.length; i++){
      if (key == 'a'){
        balls[i].posX -= 100;
      }

      if (key == 'd'){
        balls[i].posX += 100;
      }
     }
   }
}
One of my main intentions for this game was to display the score, which is calculated based on the number of balls caught, on the console. However, I still could not figure out the best way to do it:
print(balls[i].score);
There is room for improvement in this code, so I hope to figure out by the end of the week!
// Declare the object class
class Ball {
  float radiusX, radiusY, locX, locY;
  color ballColor;
  int score;
  float posX, posY;
  float netWidth = 250;

  // Constructor
  Ball () {
    radiusX = 50;
    radiusY = 50;
    locX = random(10, width-10);
    locY = random(height);
    ballColor = color(random(255), random(255), random(255));
    posX = width/2;
    posY = height-10;
  }

  // Make the object
  void makeBall() {
    fill(ballColor);
    stroke(1);
    ellipse(locX, locY, radiusX, radiusY);
  }

  // Updating location of the object
  void falling() {
    locY += 1;

    if (locY > height+radiusY/2) {
      locY = -radiusY*2;
    }
  }

  // Make the net
   void makeNet() {
    fill(0);
    rectMode(CENTER);
    rect(posX, posY, netWidth, radiusX);
  }

  // Check if the object is in the net
  void checkNet() {
    if (locX + radiusX >= posX
    && locX + radiusX <= posX + netWidth
    && locY + radiusY == posY) {
      locX = -200;
      score++;
    }
  }
}


// Initialize an array of objects
Ball[] balls;


void setup(){
  size(1280, 720);
  // Put objects in the array
  balls = new Ball[10];
  for(int i = 0; i < balls.length; i++){
    balls[i] = new Ball();
  }
}

// Display and run the game
void draw(){
  background(255);
  for(int i = 0; i < balls.length; i++){
     balls[i].makeBall();
     balls[i].falling();
     balls[i].makeNet();
     balls[i].checkNet();
     print(balls[i].score);
  }
}

// Move the net if the keys are pressed
void keyPressed() {
   if (keyPressed) {

    for(int i = 0; i < balls.length; i++){
      if (key == 'a'){
        balls[i].posX -= 100;
      }

      if (key == 'd'){
        balls[i].posX += 100;
      }
     }
   }
}