Interactive Demogorgon: Abigail & Ahmed Final Documentation

Concept & Design

Initially, we wanted to create a simple art project using multiple servos to control panels. That was very short-lived. Our concept slowly went from a simple interactive art piece that looked pretty to an interactive monster called a Demogorgon from the Netflix series Stranger Things. We wanted to make something interesting that could catch users’ attention longer than an art piece. Since our Demogorgon was not going to necessarily be a game with a winning or losing outcome, we still had to figure out ways to make it more interactive. We took our assigned reading: Emotion & Design: Attractive Things Work Better by Don Norman into consideration and decided that in order to convey what we wanted we needed to make the Demogorgon come to life and make it something that is interesting to look at in addition to the code and interact itive component. To make both the interactive component and the Demogorgon fit nicely together, we decided to use certain scenes of the show to inspire the movements. In the show, the protagonist Eleven defeats a Demogorgon by putting her hand up since she has the ability to manipulate living beings however she wants through her hands. This inspired us to make it so the user is able to open the Demogorgon face flaps we build as their hand gets closer to them through a distance-measuring sensor. As we went along with our project, we realized how ambitious we were with our concept and simply tried our best to make it happen.

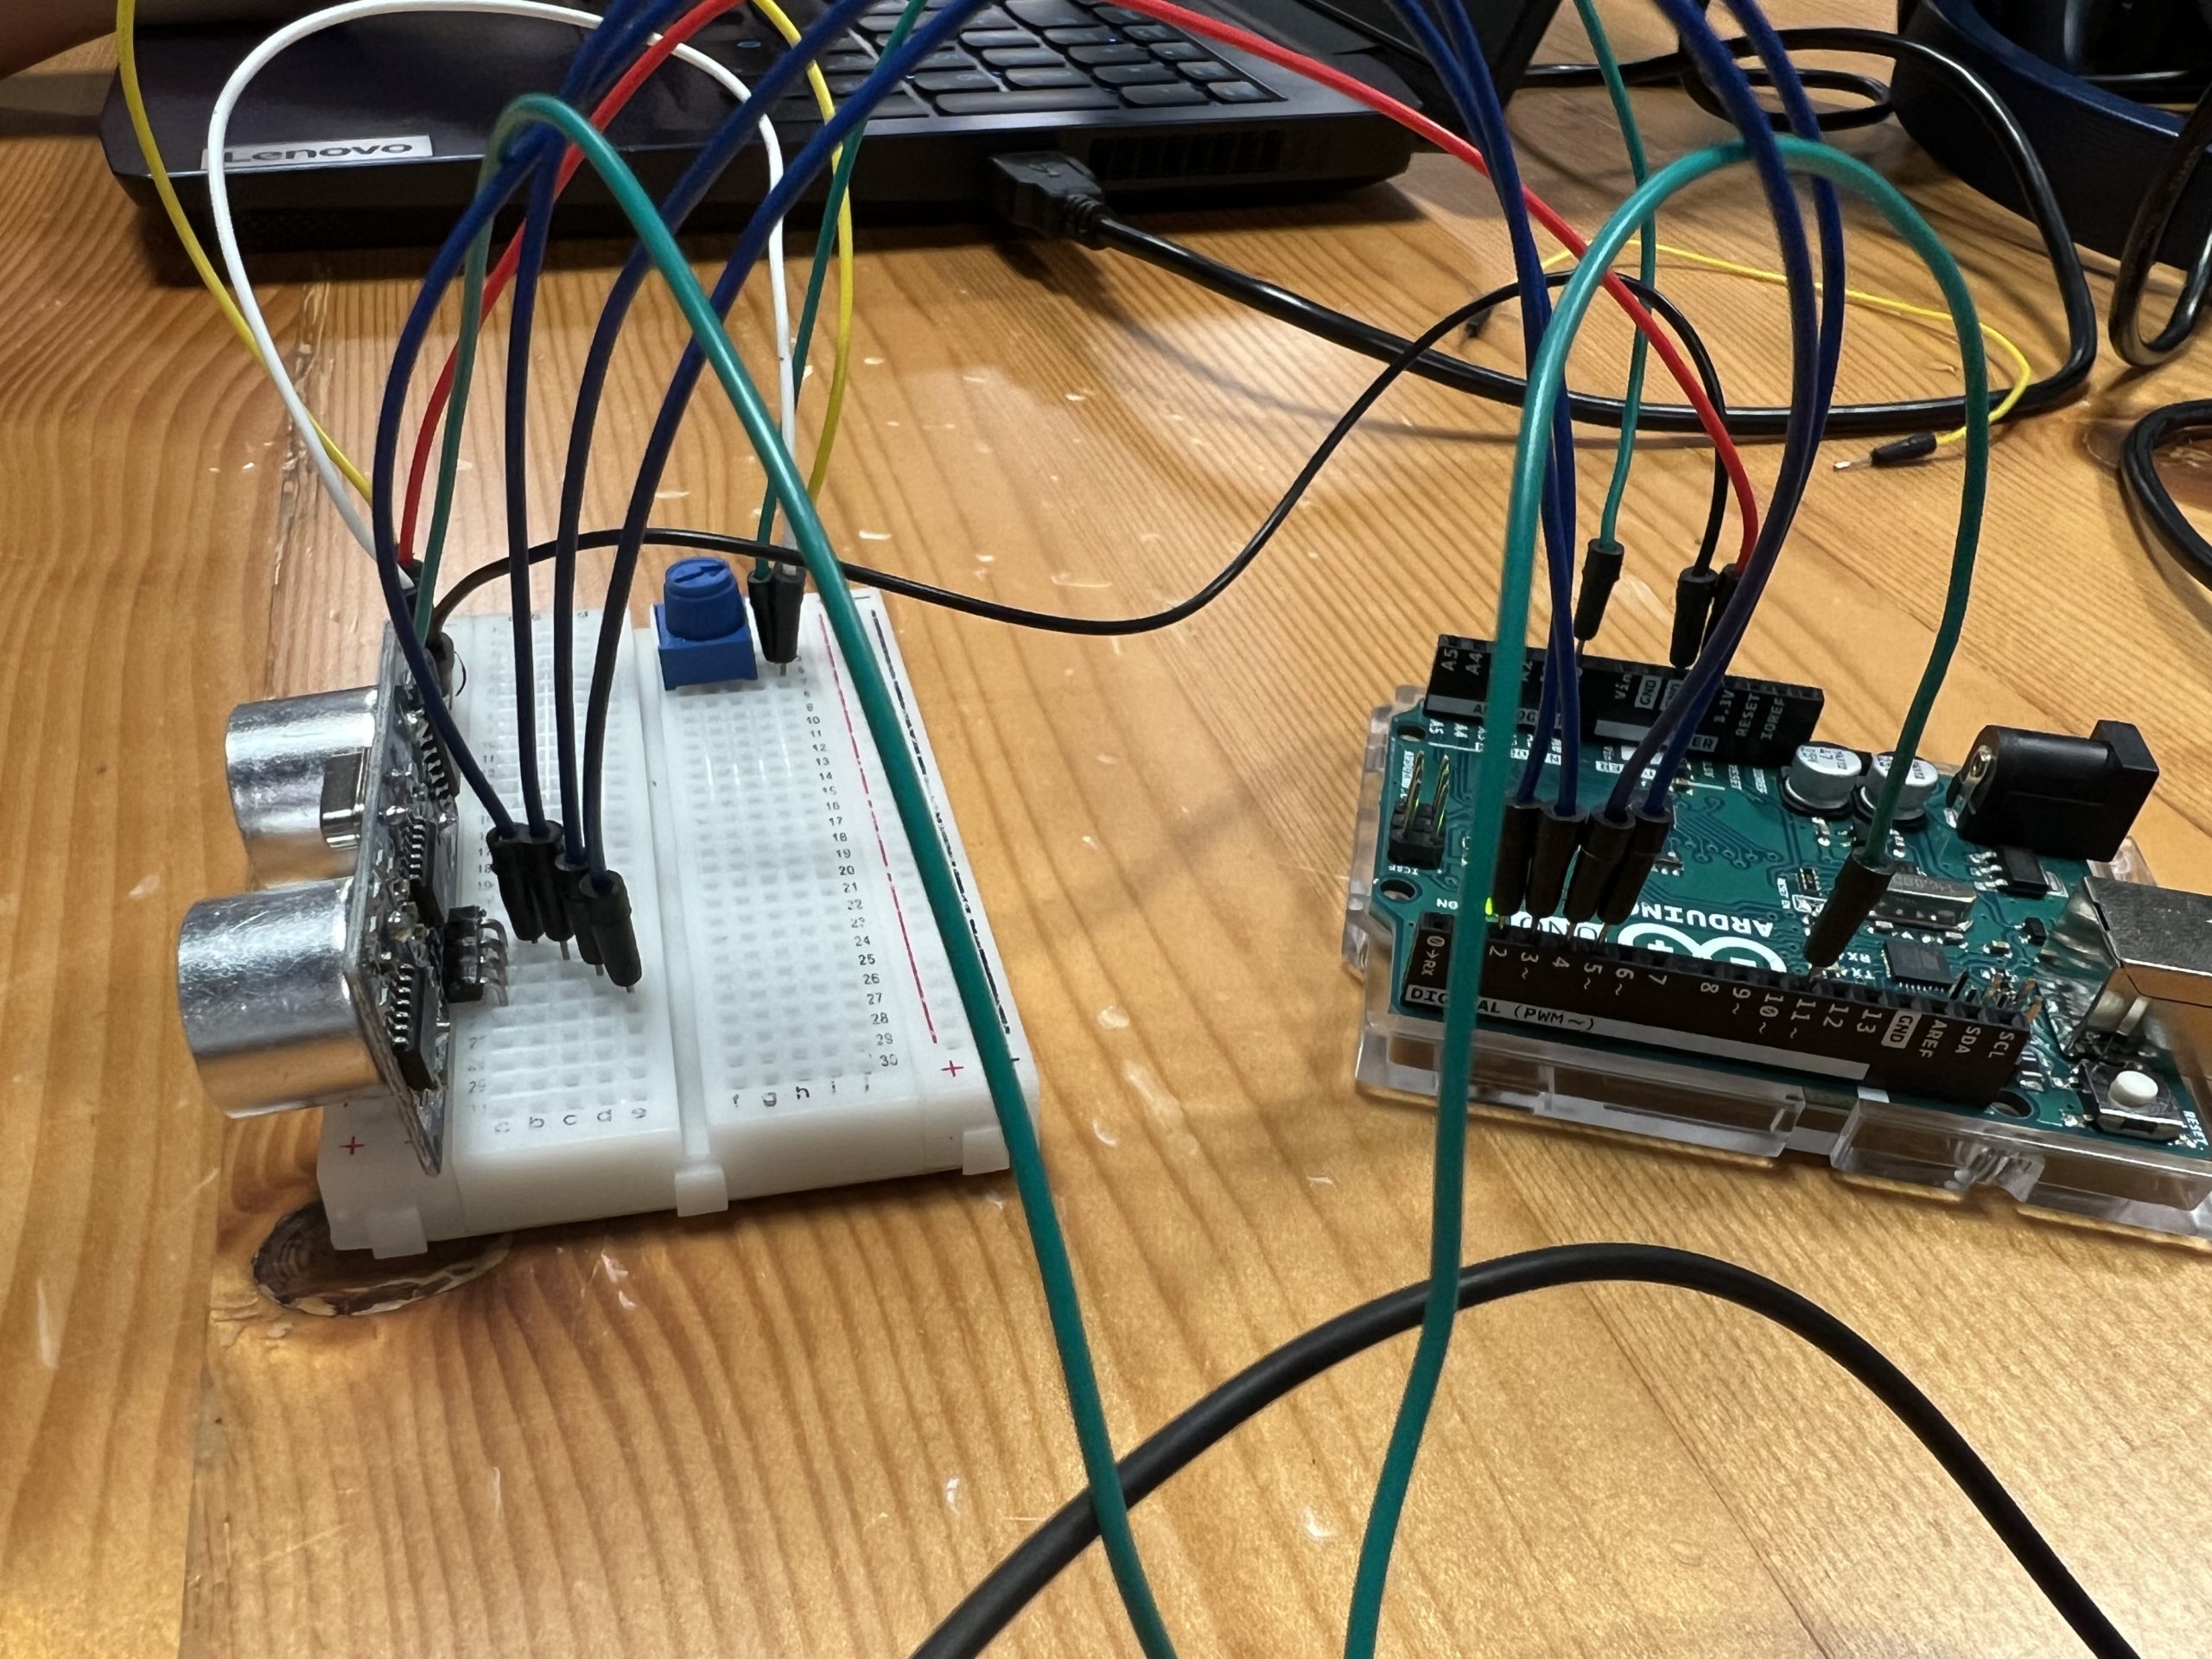
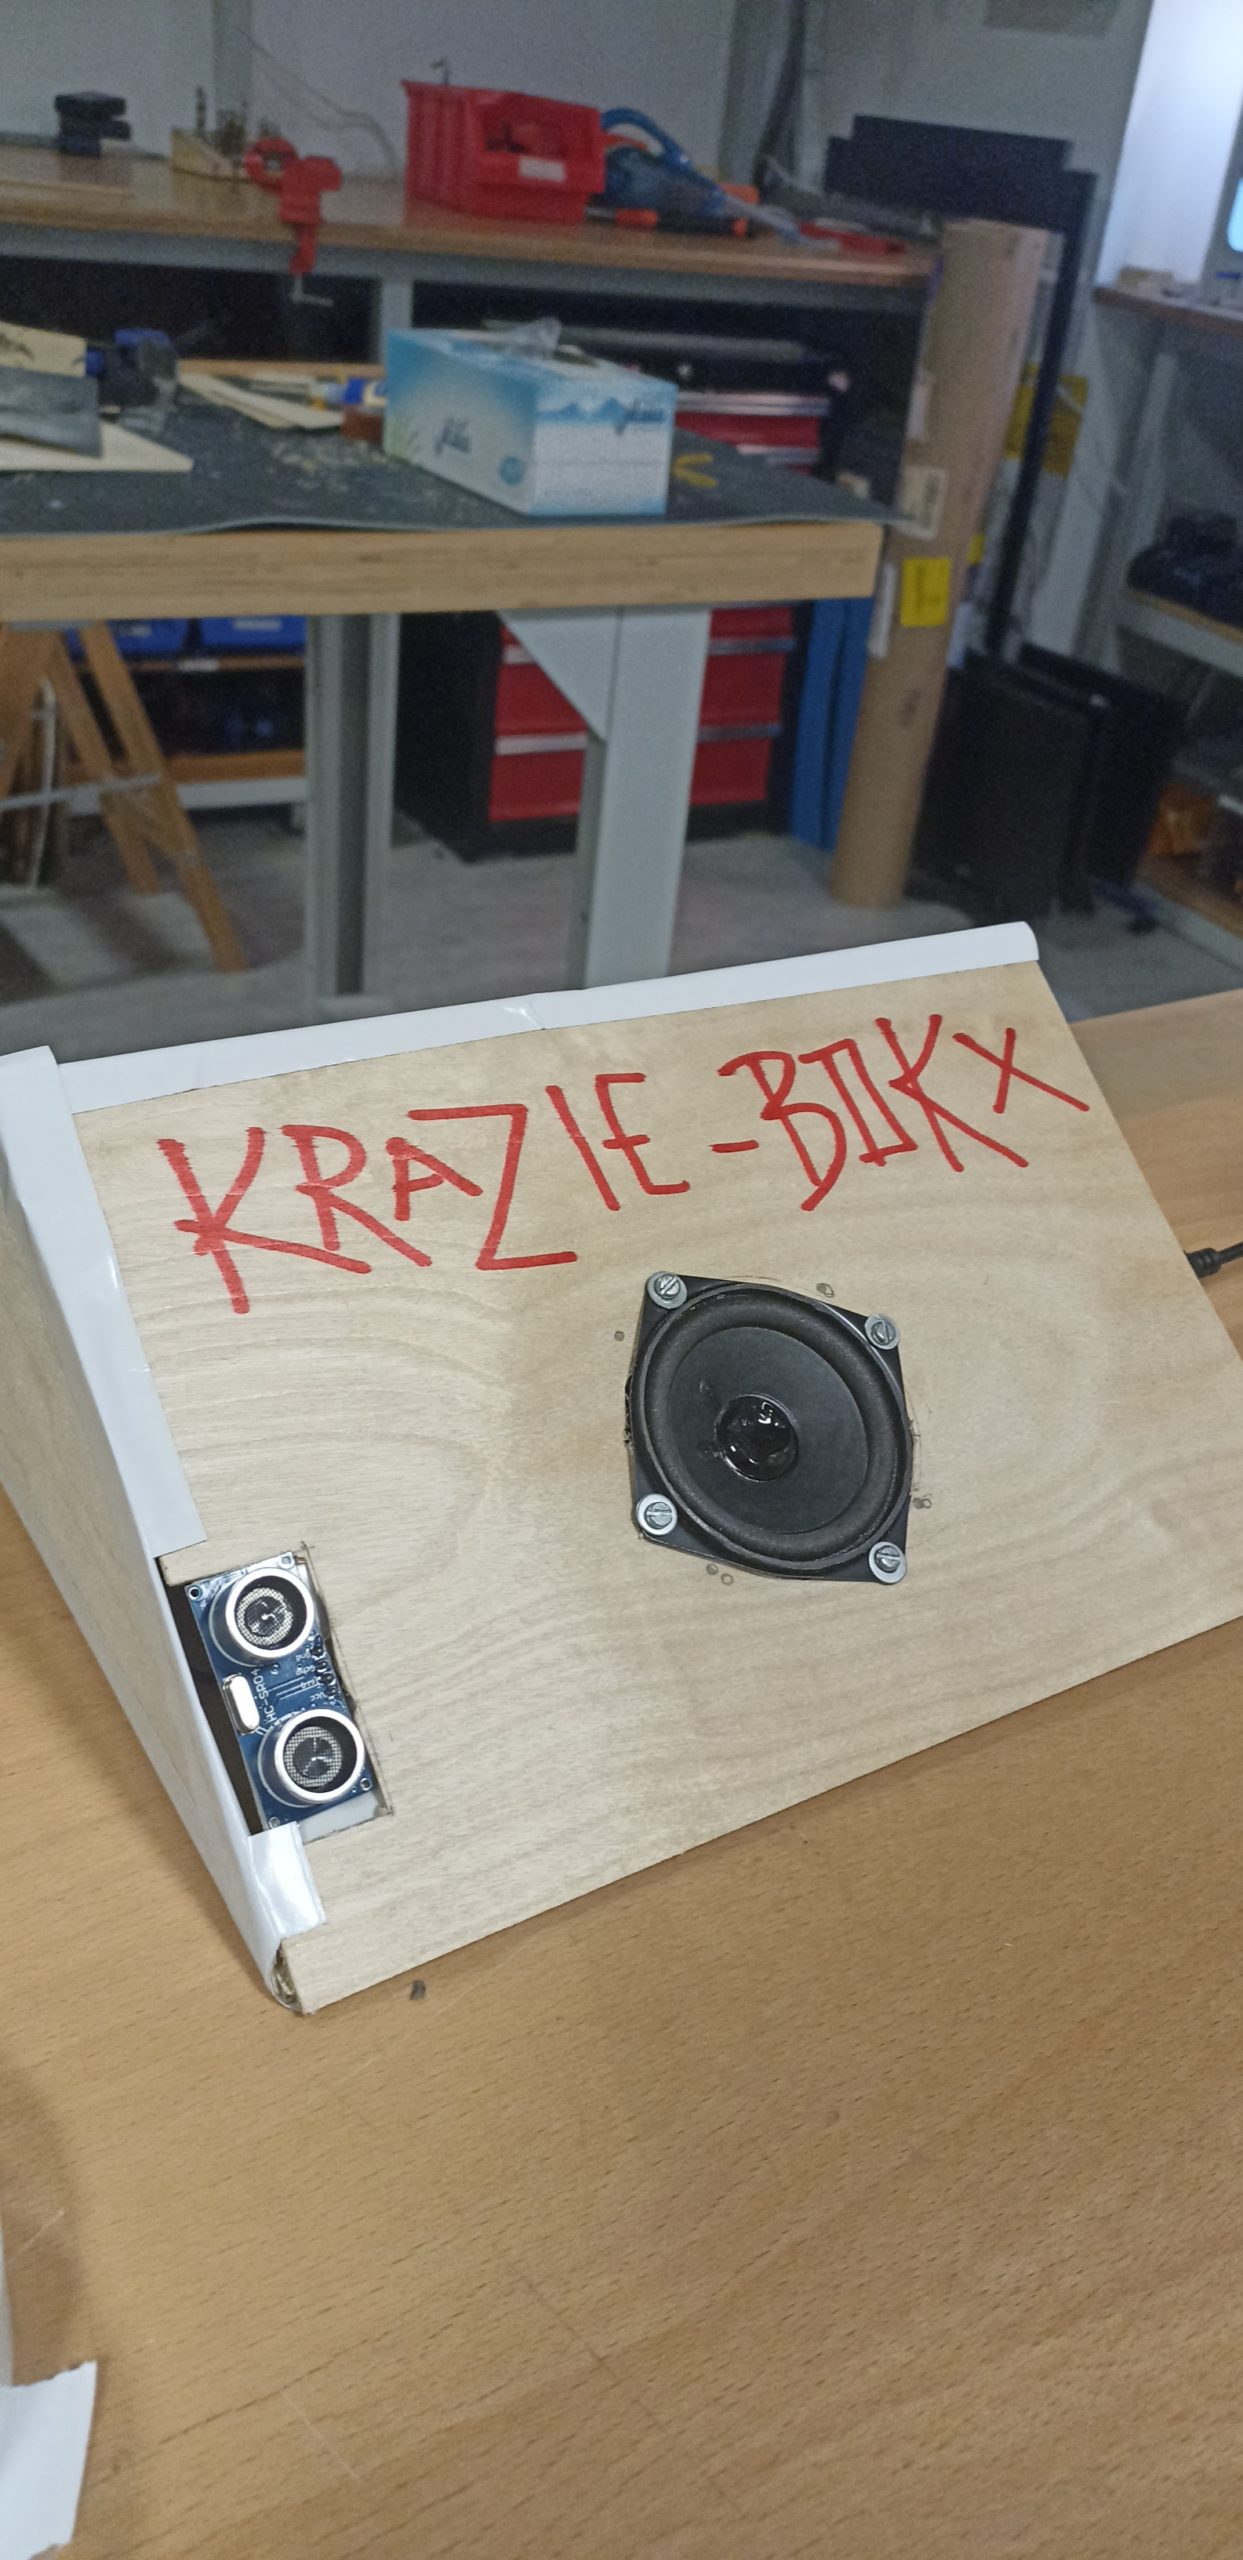
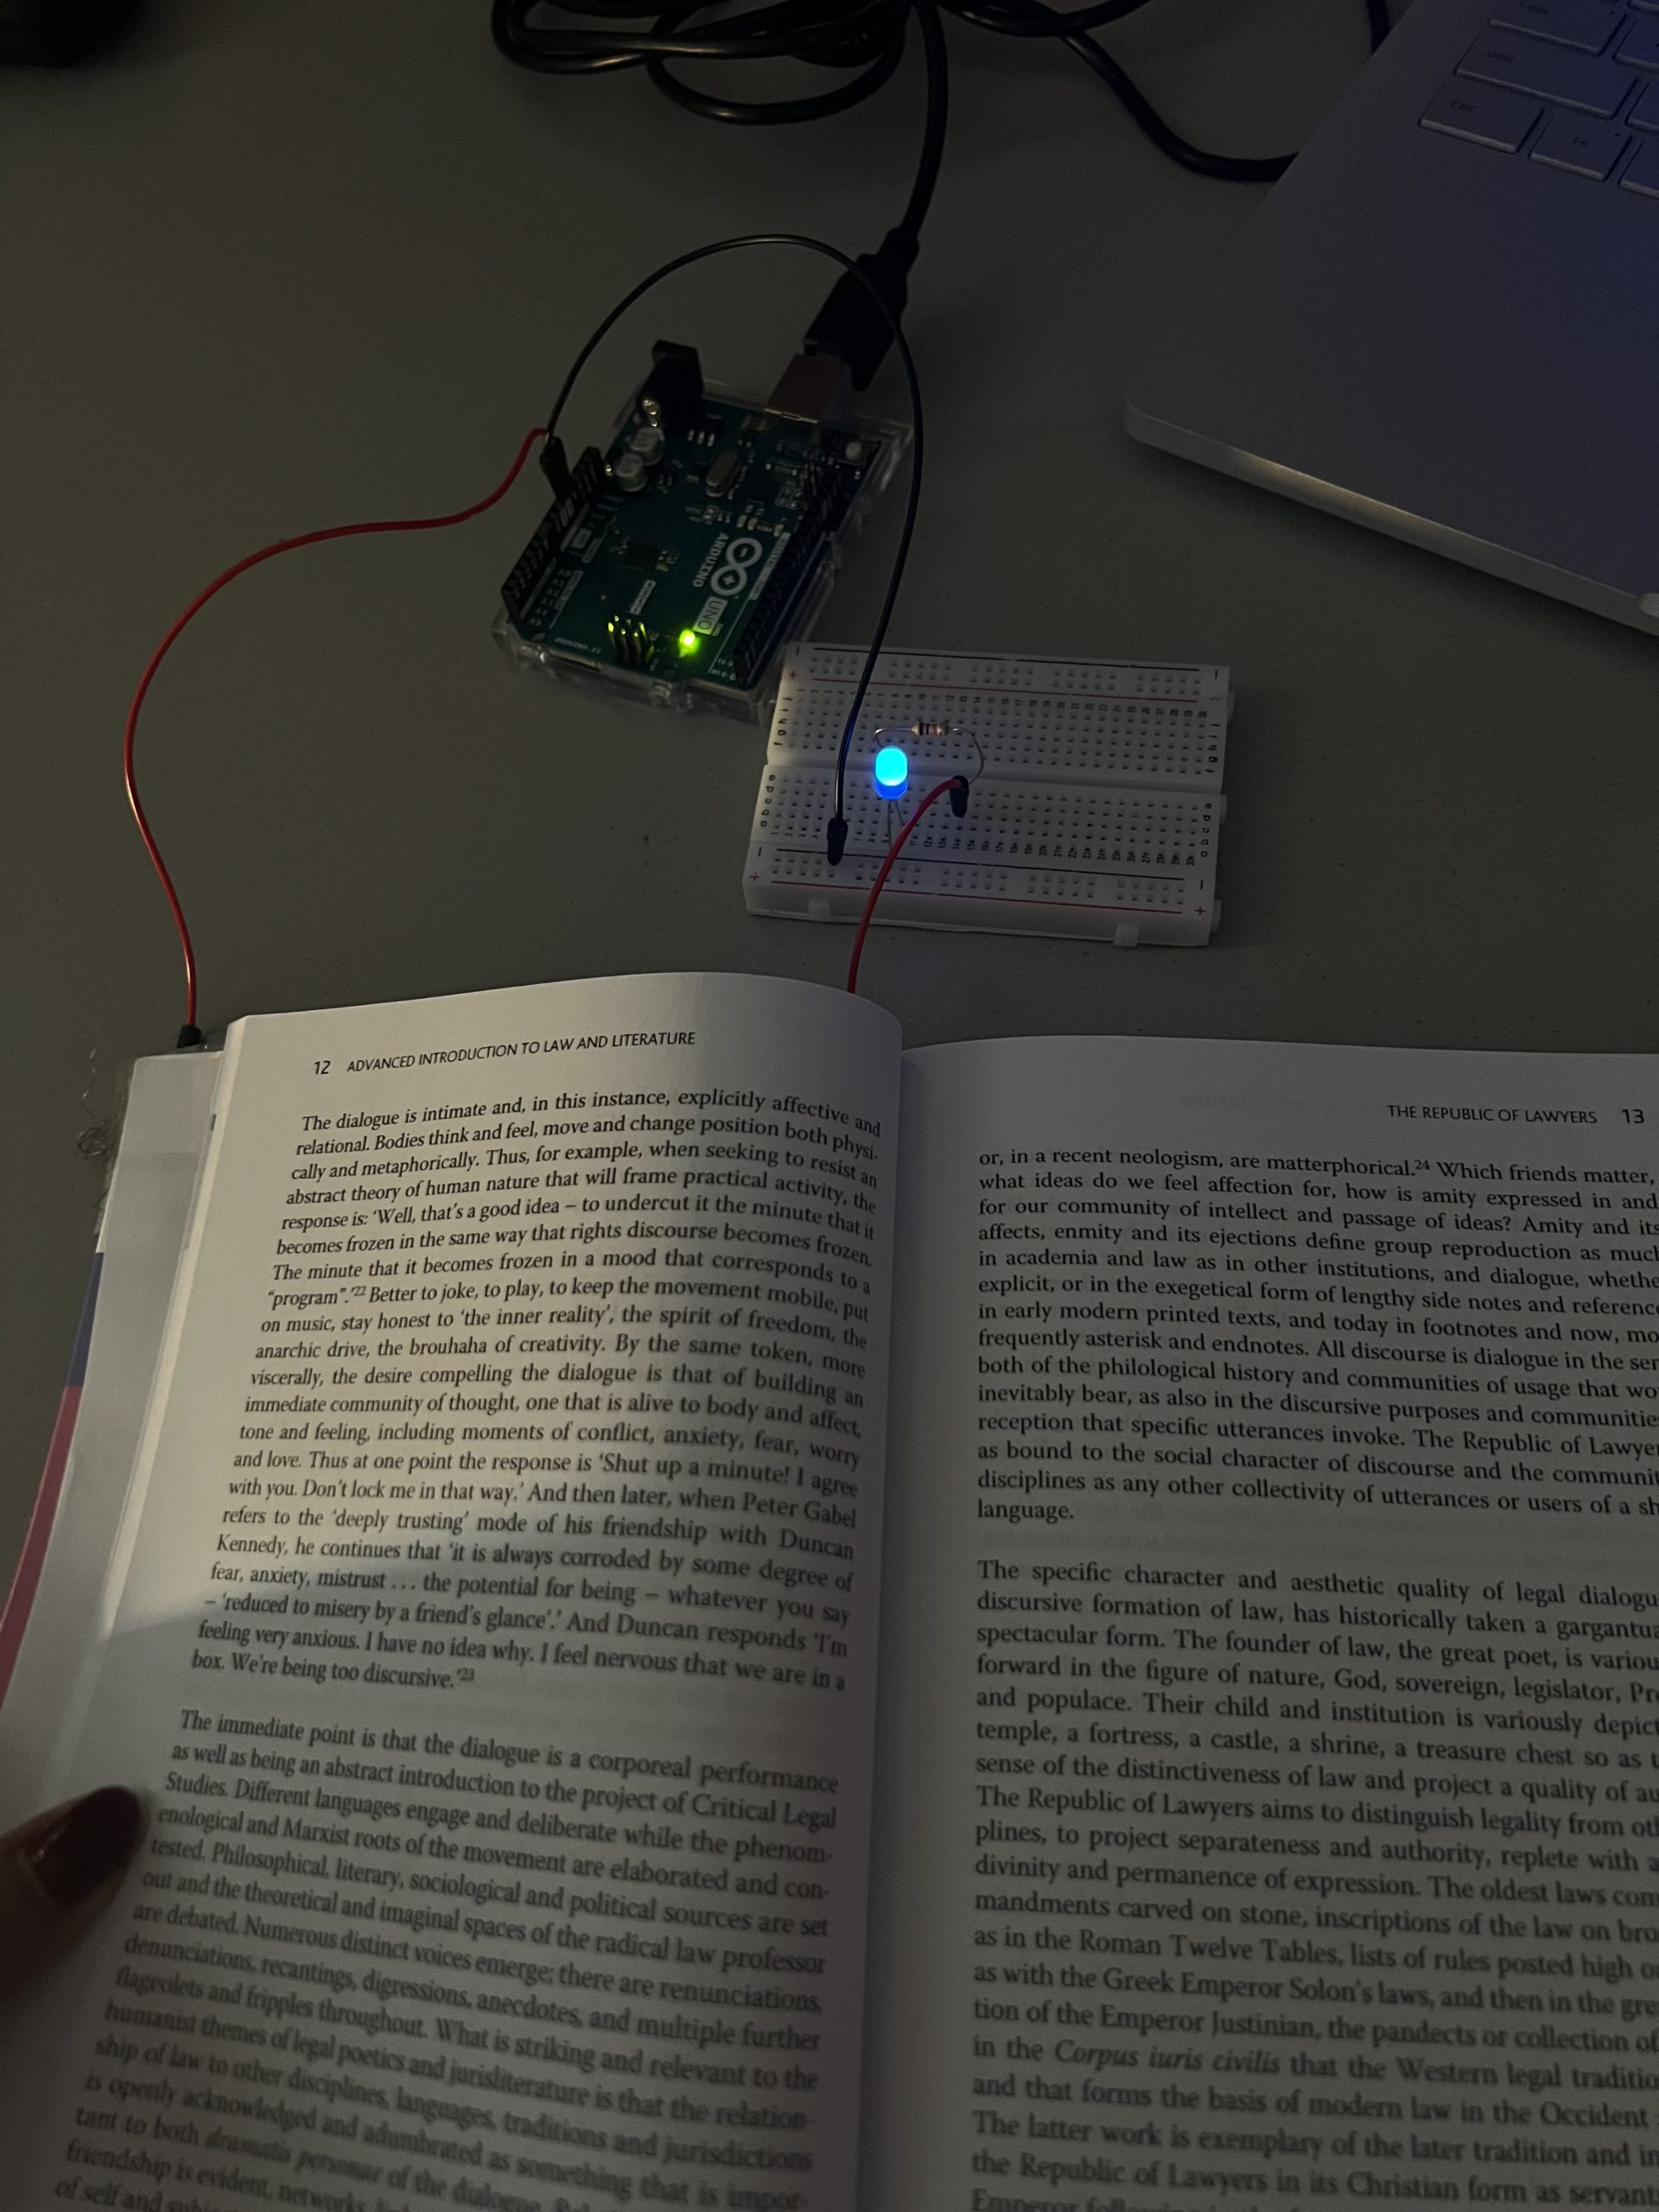
For our project, we used the ultrasonic distance measuring sensors, LED lights, flex sensors, 3-d printing, cardboard, wood, acrylic, and paint. Though we went through a lot of hiccups including but not limited to spending hours soldering cables we ended up not using, one of us going into isolation because of COVID-19, short circuits, and re-thinking our concept a few times… we kind of did it.

Interaction Design

Physical

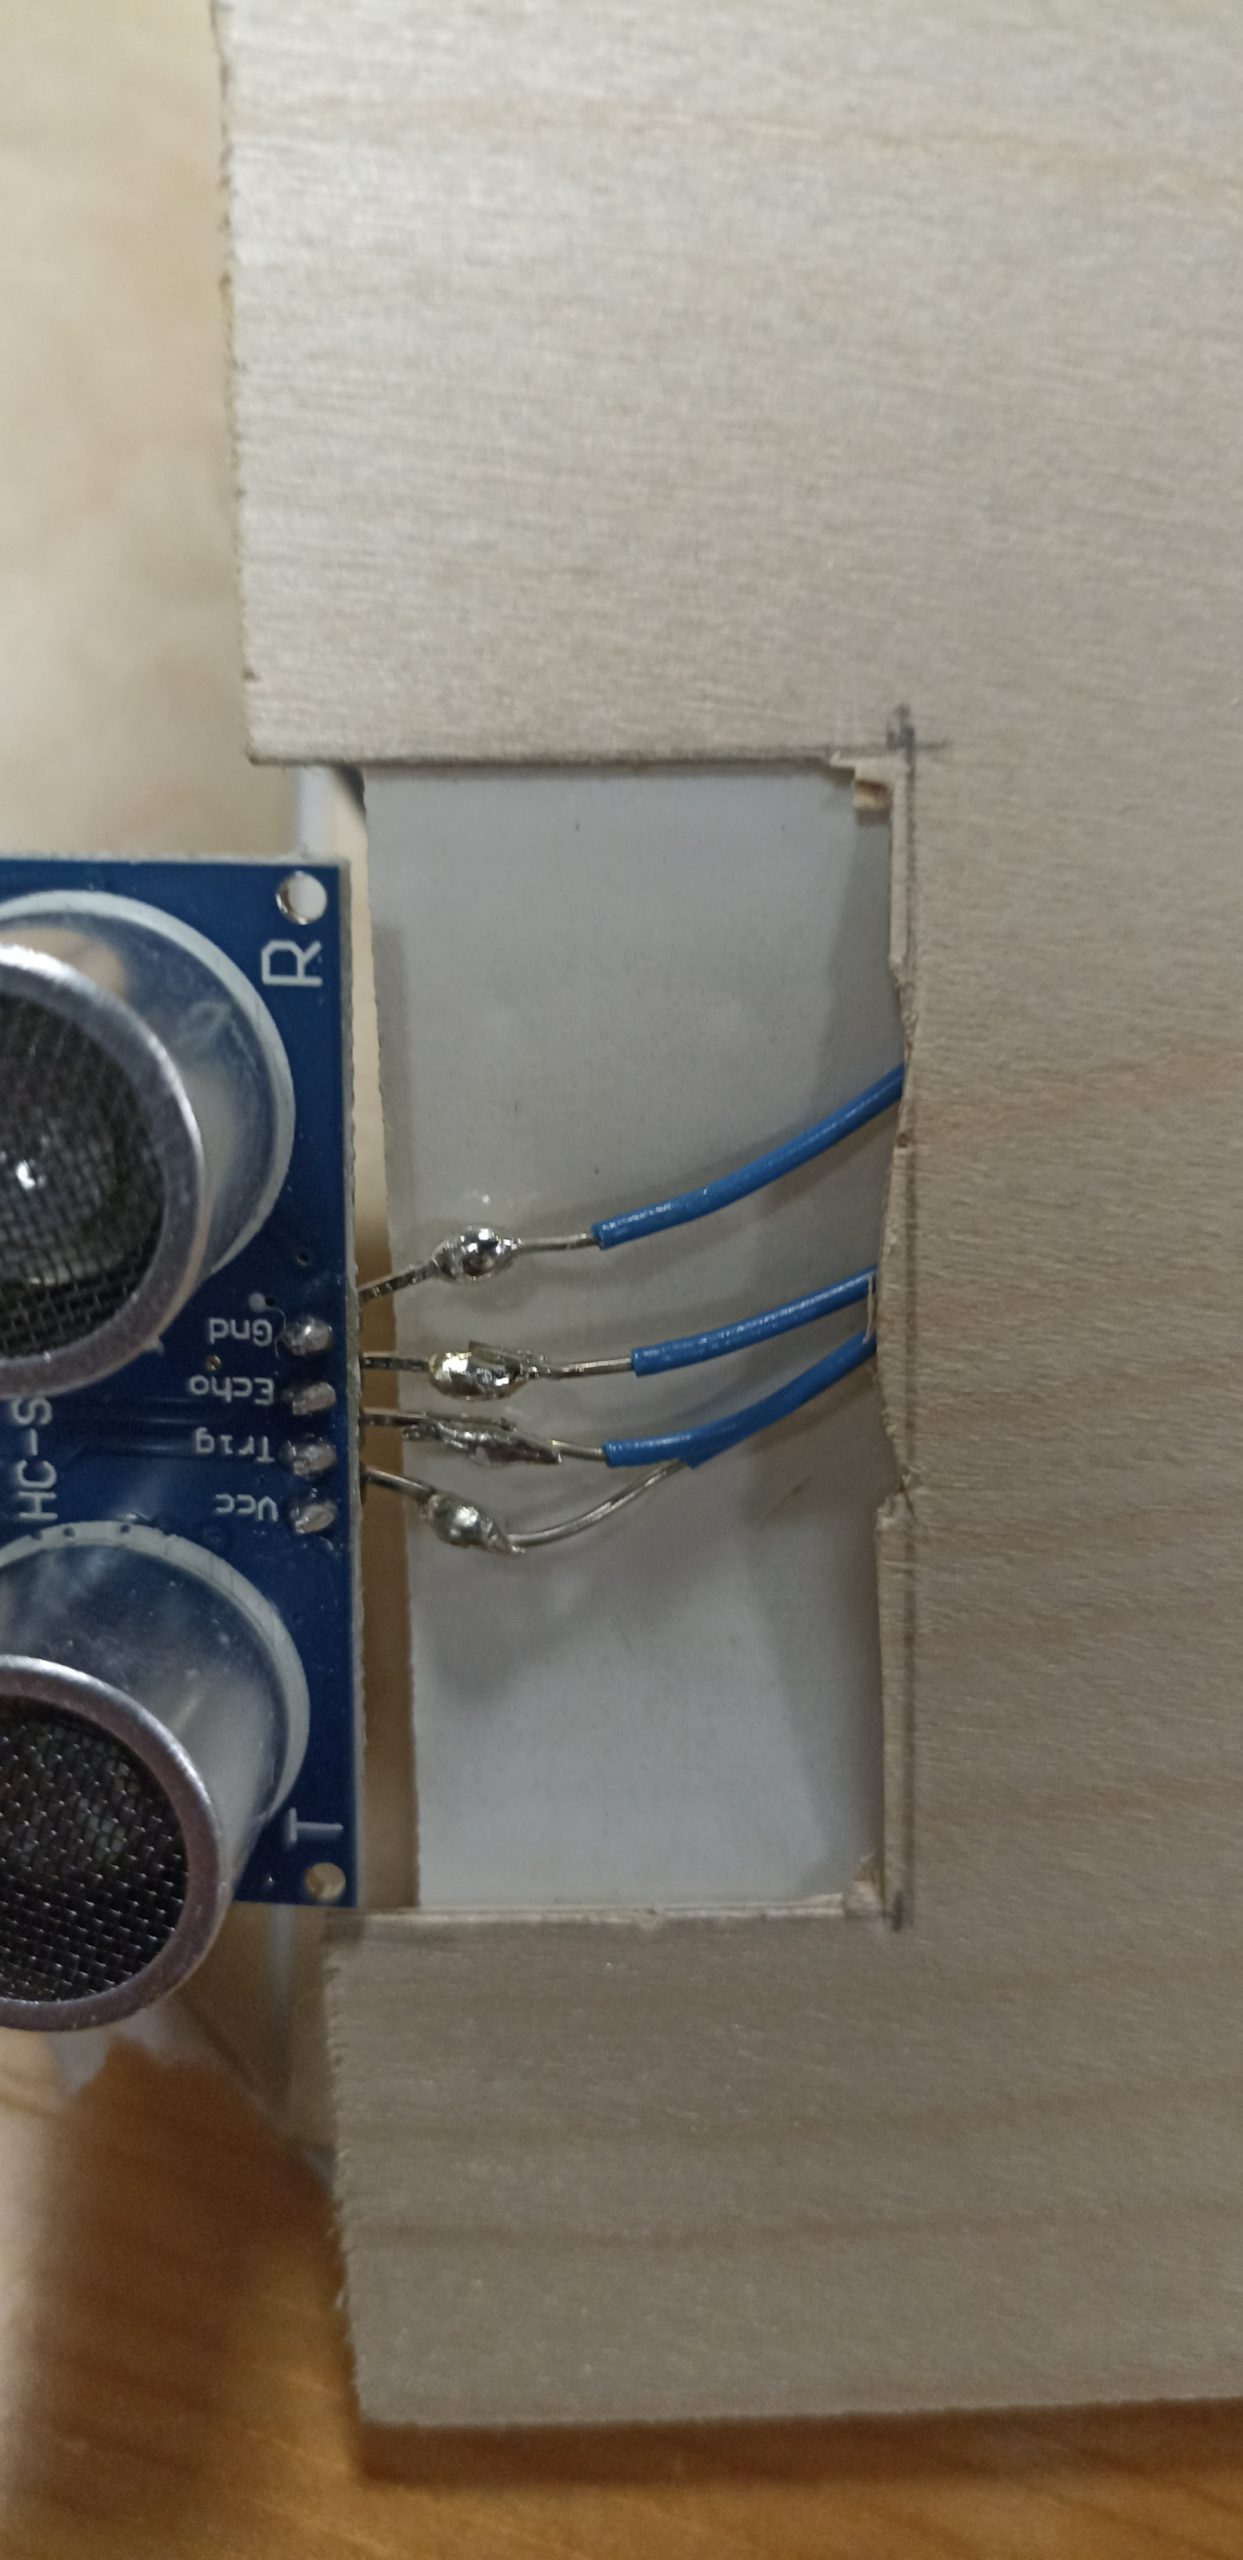
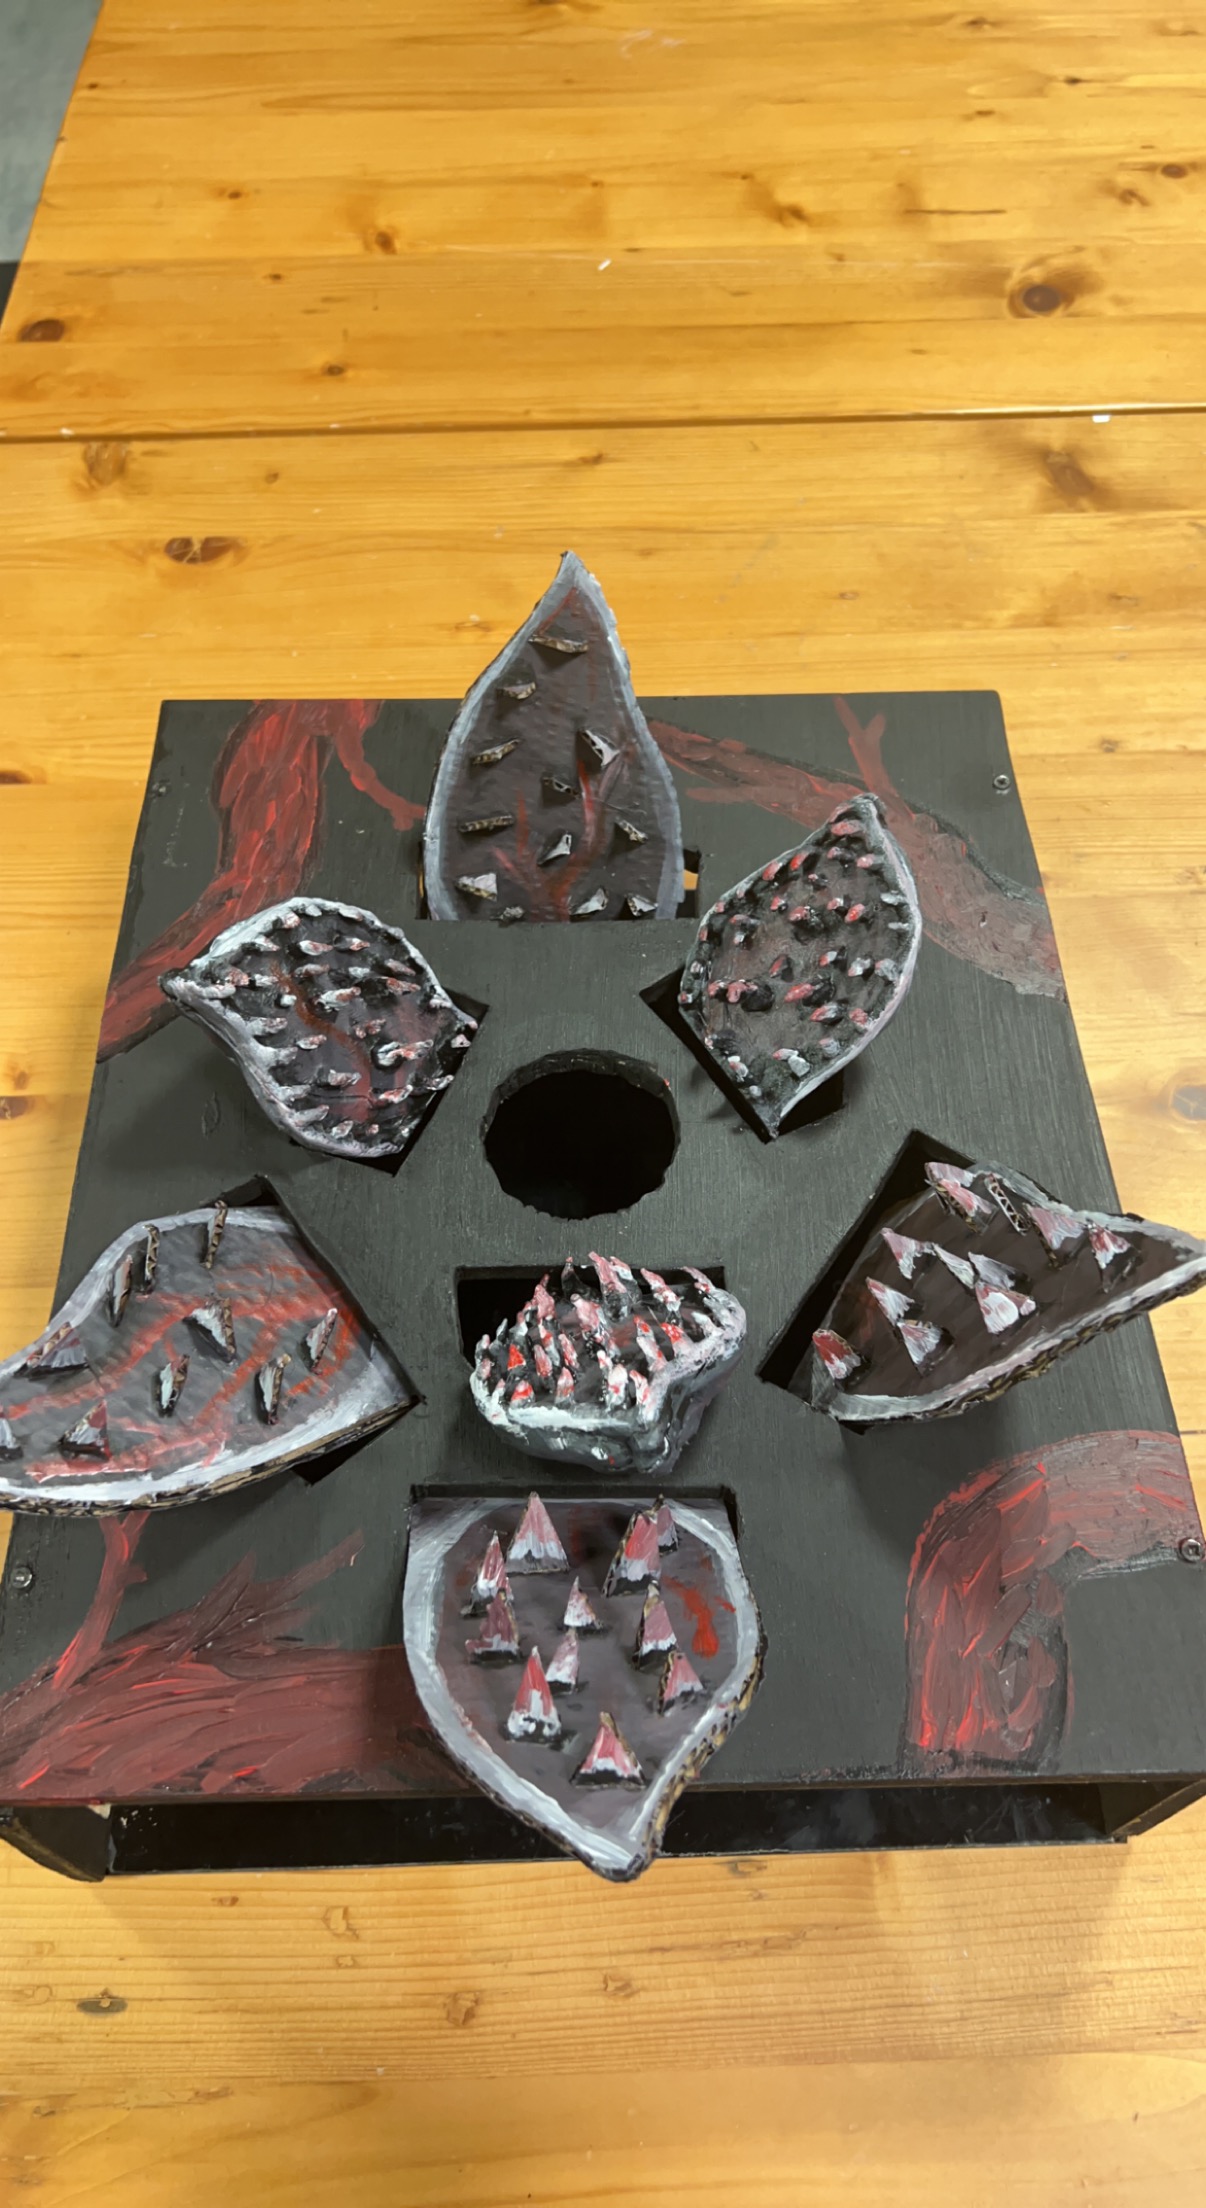
This was a very time-consuming aspect of project, especially since we really wanted it to make look as much as a Demogorgon’s head as possible with what we had. The wood that was available to us was pretty thick and we knew we had to cut holes in it to make openings for the 3-d printed and handmade Demogorgon flaps so it was going to take a long time to cut the wood and put everything together. Luckily, the woodshop was nice enough to let us borrow a Jigsaw so even though it was still a tedious process of drilling two holes where we wanted one hole for the flap to be and then using the Jigsaw to go in and follow the outline, it made it go a lot faster. We did this process seven times. For the flaps of the Demogorgon, at first, we 3-d printed three of them but it was taking a long time so for the last four we decided to build them out of cardboard for time’s sake. The 3-d printed ones still looked pretty cool though and definitely added an appeal to it, in our opinion. Plus, the different materials fit the Demogorgon vibe. We painted and added red and white for the skin tone. We also had to make longer cables to reach the Demogorgon flaps when our Arduino port is hidden beneath the box/head.

Arduino Code

Our Arduino code controlled the flex sensors, server motors, and ultrasonic measuring sensor. The sens0rs were mapped to values from 0 to 180 and then output at different rates depending upon the configuration. The output rates helped stabilize the servo motors which were prone to jittering.

We used some sources for these pieces:

  1. Ultrasonic sensor controlling servos
  2. Flex sensors controlling servos

Code for the servo motors with Ultrasonic sensor:

// Clears the trigPin condition
digitalWrite(trigPin, LOW);
delayMicroseconds(100);
// Sets the trigPin HIGH (ACTIVE) for 10 microseconds
digitalWrite(trigPin, HIGH);
delayMicroseconds(100);
digitalWrite(trigPin, LOW);
// Reads the echoPin, returns the sound wave travel time in microseconds
duration = pulseIn(echoPin, HIGH);
// Calculating the distance
distance = duration * 0.034 / 2; // Speed of sound wave divided by 2 (go and back)
// Displays the distance on the Serial Monitor
distanceMapped = map(distance, 0, 70, 22, 180);
distanceMapped=constrain(distanceMapped, 30, 180); //this allows the output to stay between the constraints. without this it goes up to like a few thousand for some reason

int distanceMappedforOuter = distanceMapped + 10; // the outer petals will open wider, to give a flared look

myOuterServos.write(distanceMappedforOuter);
delay(75);
myInnerServos.write(distanceMapped);
delay (75);

Code to control servos with the Flex Sensors:

int OutsideFlexValue;
int InnerFlexValue;

int servoPositionInside;
int servoPositionOutside;

OutsideFlexValue = analogRead(OutsideFlexPin);
// delay(15); //adding slight delays to make it stable

InnerFlexValue = analogRead(InsideFlexPin);
// delay(15);

servoPositionOutside = map(OutsideFlexValue, 170, 500, 0, 180); // need it to rest at a midwards position
servoPositionOutside = constrain(servoPositionOutside, 0, 180);
// int round10(int servoPositionOutside);

servoPositionInside = map(InnerFlexValue, 100, 360, 0, 180);
servoPositionInside = constrain(servoPositionInside, 0, 180);

// servoPosition = constrain(servoPosition, 45, 180); //for the servos that go beyond 180

myOuterServos.write(servoPositionOutside);
delay(75);
myInnerServos.write(servoPositionInside);
delay(75);


To reduce jittering the following line of code was added to constrain the servo motors from going beyond set parameters.


distanceMapped = map(distance, 0, 70, 22, 180);
distanceMapped=constrain(distanceMapped, 30, 180); //this allows the output to stay between the constraints. without this it goes up to like a few thousand for some reason

p5.js Code

Our p5.js code focused on the screen that the user would see and use to interact with our Demogorgon. We used the game state and included a starting screen followed by an introduction and instruction screen. We realize not everyone may know what a Demogorgon is or have watched Stranger Things, so we made it feel an arcade game you would go up to, get an introduction and instructions for, and start playing around with it whether or not you fully grasp the inspiration behind it.

There was an issue that we couldn’t quite figure out. After adding the second sound, the audio would start glitching after a while. At first, we thought it was just the sound so we tried it out with different sounds but no luck. When we decided to search if there was a solution or if the code was wrong, we found a thread from 2020 that discussed how the newest versions of p5.js have audible distorted effects on Chrome and there is no fix yet. The audio just keeps getting distorted and eventually the window shuts down and you have to refresh the page.

The p5js code can be accessed on Abigail and I’s p5js sketches directory on the p5js website.

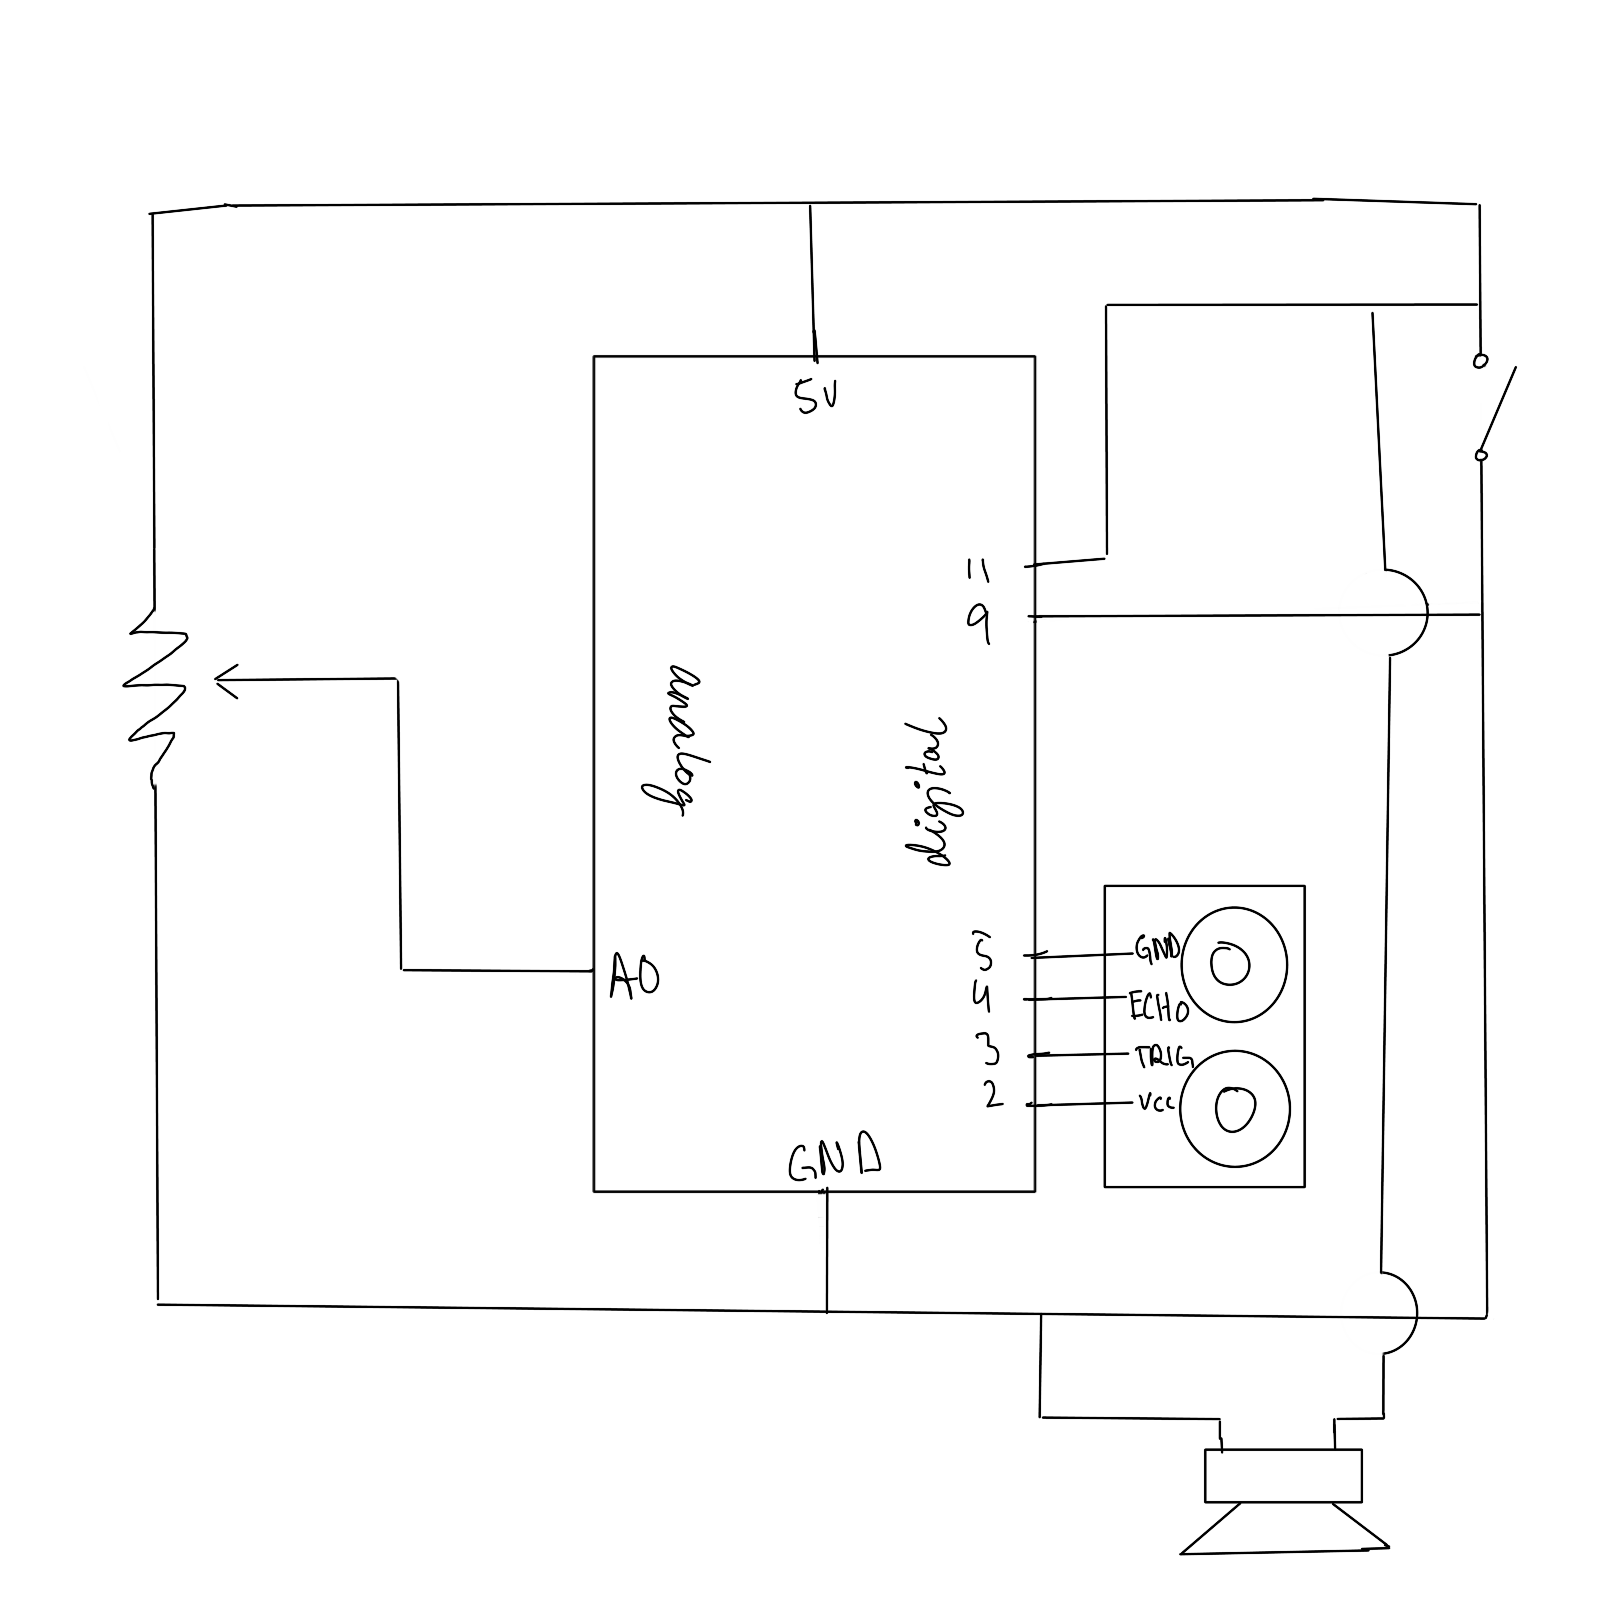
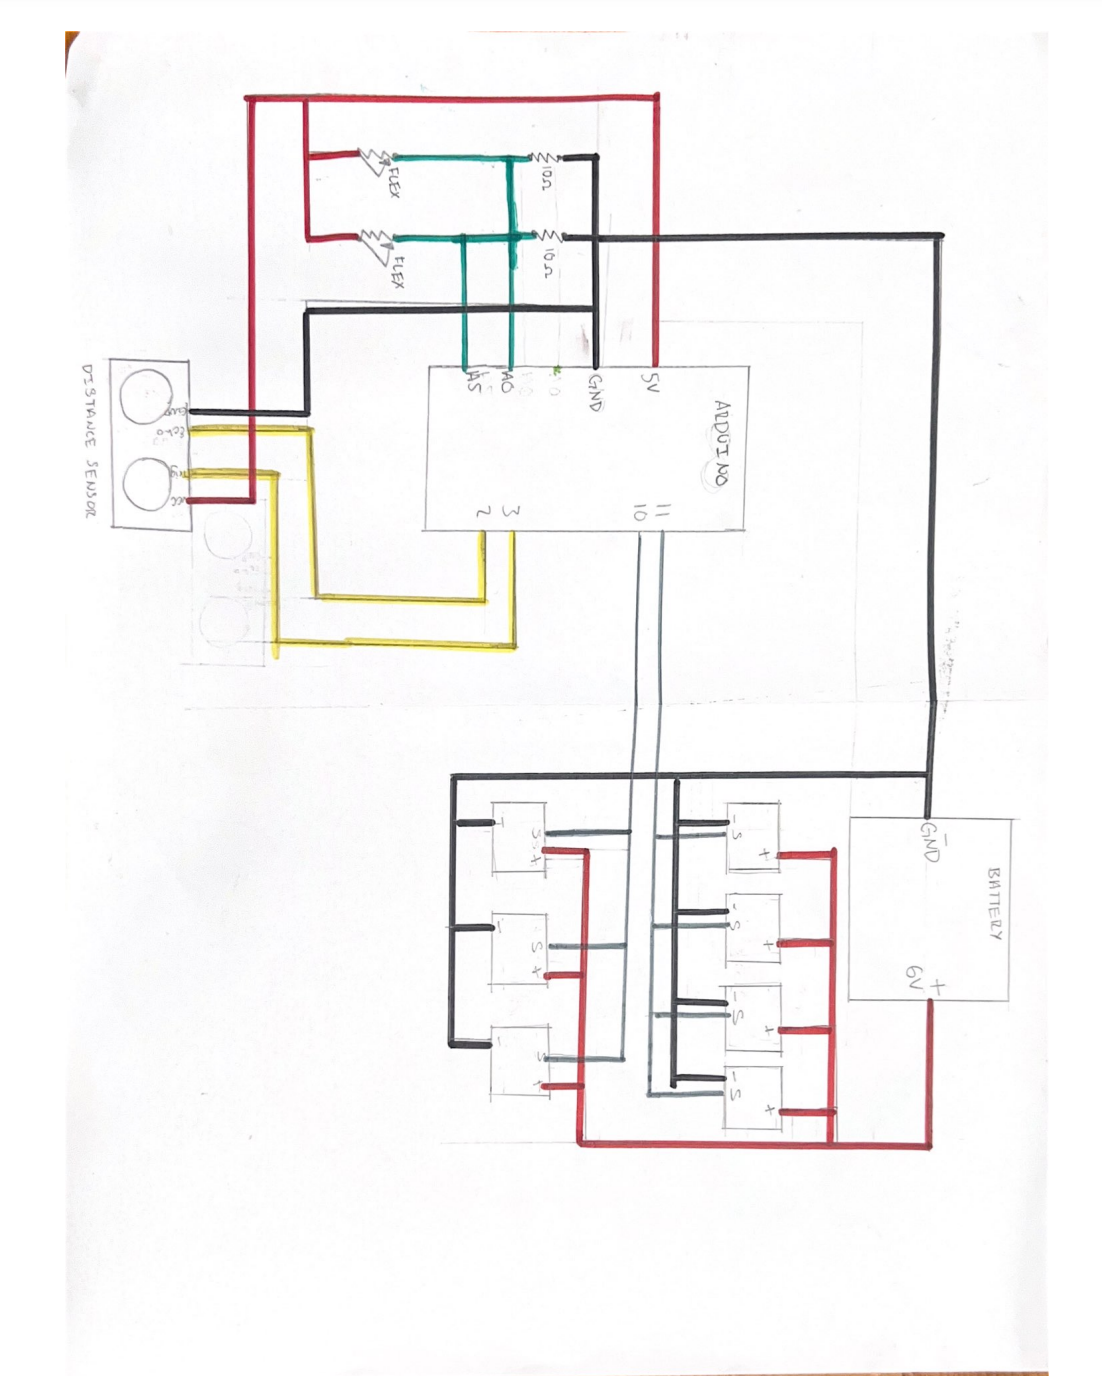
Circuit Diagram for the Project:

Since our project was rather complicated and needed a lot of cables, we decided to draw a schematic for it.

Problem(s) 🙁

Though we knew what needed to be communicated between the Arduino and p5.js, it worked only sometimes. The problems started when we started off by checking out the Arduino MEGA from the IM Lab and tailoring our code to it. However, since we got an extension past the last day to return items to the IM Lab due to reasons neither of us could control, we had to switch back to the Arduino we received in our kit. For some reason what we had did not work after that and we had to figure out why. We switched up the code again but only some parts of it would work and only sometimes as p5.js kept shutting down and the serial connection kept disconnecting. We tried to ask for help through friends and Facebook groups. No one was able to help us though and as we ran out of time we accepted our fate. The Demogorgon beat us (sorta).

Some testing and progress videos:

Testing the Flex sensors interfaced with the servo motors:

Testing the ultrasonic distance sensor interfaced with the servos:


Problems that we ran into and how we tried to solve them:

  1. The first problem we ran into pretty early on was a jittering in the servo motors that could not be controlled. The jittering would make the servos move even when the code was not running. After some debugging, we realized that the problem originated with the 5v supply on the main board, and switching the servos to an external power source would reduce it. It could be made smoother by adding another earth wire connected to one of the unused GND pins
  2. Another problem we ran into was the 3d printing of some of the parts. The models we had used were pulled off the internet and were supposed to be printed within a few hours but the first 3 iterations were all just a mess of melted filament since the model would move around. After consulting the lab assistants we realized scraping the surface of the building area of the printer solved the issue immediately.
  3. A bug that we ran into while working on the Arduino-p5js serial communication was that the communication would halt and spout an error ‘Failed to open serial port’. We realized that this could be fixed most of the time by closing the serial monitor on the IDE. However, at one point it persisted despite restarting, and according to some forums, it was a problem with incompatible drivers that plague computers with versions of windows later than 10.
  4. Another bug that we ran across that caused us the most trouble was that the p5js terminal would not work or crash periodically after adding sound effects that were to be played on the terminal. We could not find a viable solution for this problem.

Future Improvements:

  • I think we focused on Professor’s warning that the physical component was going to take a really long time too much. Our concept depended a lot on being appealing to the audience so we wanted to make sure we made our Demogorgon look really good and spooky. However, I think we spent so much time on it considering the limited time we had that we did not think about how buggy the code would be considering everything we were trying to make it do at once.
  • Figure out a more stable way for communication between p5js and Arduino.
  • Use a stable operating system that causes least amounts of problems with regards to drivers
  • Use a stable search engine to run p5js smoothly

Reflection:

Overall, this project was an interesting one for us.  I never would have thought that I would attempt to do something like this when I started this class. I am very proud of our physical component, our creativity, and our perseverance despite the non-stop obstacles that kept coming our way whether they were from our code or life events.

I was able to build the physical component, cutting everything with the jigsaw, putting it together, initiated the 3-d printing process, and painted it.  I was actually very proud of myself for getting my hands dirty with the jigsaw and being able to use it. It felt good to use my hands to build something instead of beating my brain into figuring out code. I also drew the schematic and helped build most of the p5.js code. I soldered all of the server motor cables together to make them reach our Demogorgon and made sure to take pictures of our progress throughout the time we were working on the project.

Though I never learned to like coding while taking this class, it was definitely a learning experience. When I did get things on my own and processed what was going on, it felt really rewarding! This class was very different than what I am used to but I very much enjoyed learning something other than Political Science and Law. It was a great class and it was amazing seeing what my classmates who know this stuff well build and code.

Arduino code:

Link

Week 12 Final Project Progress – Ahmed & Abigail

For this final project, I will be working with Ahmed as a group. We decided to go with our initial idea of making an interactive art piece. However, we considered what Professor Shiloh advised us during class when we shared our idea and started thinking about how we can make it more interactive and not lose the attention of our audience in 5 seconds. Before we started thinking more creatively, we were set on just making an art piece inspired by graphic art. Ahmed’s first post on this concept is linked here.

The art piece looks as if you are looking from above into a room filled with interactive walls. This digital art interacts with the user through mouse or sound control. Initially, we just wanted to replicate this same idea using p5.js and Arduino and make it come to life with materials in the IM Lab.

However, after taking into consideration what Professor Shiloh told us, which was that it would only keep the user entertained for a maximum of five seconds and need to come up with a way to make it more engaging, we did just that.

First, no more boring colorful blocks that look like walls. To be more aligned with our initial theme of depicting a living, breathing, organisms that reacts to different inputs, we have a more specific theme now: Stranger Things. If you are not familiar with stranger things, below is a trailer to season 1.

There are 4 seasons of stranger things now. The monsters that the group of kids fight are living, breathing organisms of some kind. The main things you and the user need to know is that one of the monsters on the show is called a Demogorgon. Below is a picture. The picture shows how it looks when it’s head is closed versus when it is open.

Closed Head vs Open Head (middle guy)

It kinds of looks like a very scary version of the Venus Flytrap plant.

At first, we were thinking of a plant/nature theme where we would depict some type of garden or collection of ferns or Venus Flytraps interacting with each other. It would have been more on the pretty nature side of things, but we thought Stranger Things could spice things up a little. We started looking for inspiration and we found this 3-D printed Demogorgon. We will only 3-D print the head and it would sit upright on the board we built. We plan on having the heads open and close as the user interacts with them through different mediums.

3-D printed Demogorgon. Inspiration.

Our interactive Demogorgon project will include speakers playing ominous music, flex sensors, an ultrasonic sensor, and big flaps of the monster’s head being controlled with Servo motors. Using these components, the user will be able to interact with the living, breathing Demogorgons and have a little fun with them.

To make the whole project even more immersive we created a narrative behind the Demogorgon and the user being able to choose to interact with it as the protagonist or the antagonist.


Description of Arduino program will do with each input and output and what it will send to and/or receive from P5

Using Adruino, we will be controlling the Servo Motors, and checking for any analog inputs from the flex and ultrasonic sensors. The sensor values are mapped to (0, 180) using the following section of code:

  OutsideFlexValue = analogRead(OutsideFlexPin);
  delay(15); //adding slight delays to make it stable

  InnerFlexValue = analogRead(InsideFlexPin);
  delay(15);

  servoPositionOutside = map(OutsideFlexValue, 24, 48, 45, 180);  // need it to rest at a midwards position

// int round10(int servoPositionOutside);

  servoPositionInside = map(InnerFlexValue, 24, 48, 45, 180);


It will send out a signal to the p5js program every time it hits a pre-determined threshold value. The out-sent value is to let the P5Js code know to play a growling sound along with the petals opening wide.

Description of what the P5 program will do and what it will send to and/or receive from Arduino

In order for the user to control or choose the interaction they would like to have with the Demogorgon, we will use p5.js. We will display an instruction screen followed by a digital button screen where the user can select presets and change between modes. For instance, the user will be able to choose between using the flex sensors with the glove or with the ultrasonic distance sensors to have different interactions with each.

From arduino it will receive the aforementioned serial communication to let it know when to play certain sounds.

Future Improvements:

  1. Need to work on the mechanical aspect of the project more. The initial testing has shown that the servo motors cannot be used with a large armature due to force constraints.
  2. Need to streamline the code to reduce input delay


Sources We Used for Inspiration and Resources:

  1. For the fonts: https://www.dafontfree.net/play-regular/f157734.htm
  2. For the coin animation: https://gifer.com/en/gifs/coin
  3. For the background music:
  4. For the Flex-Servo control: https://www.youtube.com/watch?v=iNmdfKcG9E0

Problems and Solutions:

  1. The main problem we had from the start was that there was a lot of interference from the 5v pin on the Arduino which was causing the motors connected in parallel to jitter even when they were not being activated. We tried changing wires, changing components, making the digital pins far away as possible, and even using a different board but none of it worked.

Solution: The solution as the professor suggested was to use a separate battery to operate the servos with only digital PWM pins being connected to the board itself. This reduced the jitter to negligible.

Some Progress Pictures:

Preliminary flex component testing: flexsensor

A demonstration of the fitted component moving:

Progress Pictures Google Drive link

Serial Communication Exercises Collaboration with Ahmed

In collaboration with Ahmed 

Exercise 1

Make something that uses only one sensor  on Arduino and makes the ellipse in p5 move on the horizontal axis, in the middle of the screen, and nothing on Arduino is controlled by p5

p5.js


Arduino

void setup() {
  Serial.begin(9600); // initialize serial communications
}
 
void loop() {
  // read the input pin:
  int potentiometer = analogRead(A0);                  
  // remap the pot value to fit in 1 byte:
  int mappedPot = map(potentiometer, 0, 1023, 0, 255);
  // print it out the serial port:
  Serial.write(mappedPot);
  //Serial.println(mappedPot);
  // slight delay to stabilize the ADC:
  delay(200);                                            
}


Exercise 2

Make something that controls the LED brightness from p5:

p5.js

Arduino

void setup() {
 Serial.begin(9600); // initialize serial communications
}
void loop() {
 if(Serial.available()) {
   digitalWrite(LED_BUILTIN, HIGH); // led on while receiving data
 
   int light = Serial.read();
   Serial.println(light);

   // the led is connected to digital pin 3 with pwm
   analogWrite(3, light);
 }                                         
}


Exercise 3

Take the gravity wind example and make it so every time the ball bounces one led lights up and then turns off, and you can control the wind from one analog sensor.

p5.js

Arduino

int potentiometer = A0;
int serialRead = 0;

void setup()
{
  Serial.begin(9600);
  pinMode(3, OUTPUT); //the led is connected to 3 pwm digital
}
 
void loop() 
{
  while (Serial.available() > 0) 
  {
    serialRead = Serial.read();
    analogWrite(3, serialRead); //the led is connected to 3 pwm digital
  }

  int mappedPotentiometer = map(analogRead(potentiometer), 0, 1023, 0, 255); 
  Serial.write(mappedPotentiometer);                                            
  delay(200);
}

Video

Ahmed & Abigail Final – Interactive Artwork: Fern Plant Robot Instrument Thing

Concept & Brainstorming
          So for our project, we wanted to do something artistic. The idea we have comes from the following piece of computer graphic art: Interactive Walls. The artwork is graphic and based on the software Max, but we thought it would look great if implemented with servo motors and multicolored panels in real life. The panels will be mounted to servo motors and be multicolored to look aesthetically pleasing. The panels can be made out of acrylic material or something lighter like thin plywood or cardboard. Due to restrictions of the Arduino Uno, we will only be able to use a maximum of 12 panels for our interactive artwork.
Concept visualization and further explanation can be found in Ahmed’s post
Functionality
      We want the panels to depict a living, breathing, organism that reacts to different inputs; touch, noise, and input controls on a mounted panel. The artwork will have two speakers that will create a surround sound effect and output predetermined responses to different stimuli. The control panel for the artwork will have a few buttons that will change modes. Modes can be an ambient mode that makes predetermined patterns, music mode which will make the artwork react to music playing, and a touch mode that will allow the audience to touch the artwork and have it react to their inputs.
Additional Information
We also found the following code that may help us during the production of this project: Audio Reactive Program
Interactive Walls
www.behance.net

Assignment 7: Ahmed and Abigail’s Music Device

Concept

Honestly, we had some trouble brainstorming for this assignment at first. We weren’t sure what instrument to create or mimic and how. However, after watching a video about the theremin we decided to make an instrument that would react to the distance between our hands and some sensor. We also wanted to recreate the drone of old midi modulating synths.

For that, we needed to use an ultrasonic distance finder and the HC-SR04 sensor in our kit was perfect for that. Also, we wanted to be able to control the itch of the sound being produced so we used a potentiometer for that. We decided to use a speaker available at the IM lab, a switch, and an enclosure to build the whole project.


Brainstorming:

While looking for inspiration and knowledge necessary for implementing our idea we came across the following youtube video that outlined how to make a simple ‘instrument’ using an ultrasonic distance sensor:

Musical Instrument Using Arduino + Ultrasonic Distance Sensor

This video allowed us to build a device that could convert distance measurements into different musical notes.

After this, we used some other sources to understand better the use of ultrasonic distance sensors and also how to integrate switches and potentiometers into the circuit:

Arduino Potentiometer – Complete Tutorial

Ultrasonic Sensor HC-SR04 with Arduino Tutorial

Process & Code

For the code, it was a bit difficult to figure out how to use the ultrasonic range finder at first. We had to figure out how to convert time to distance since the sensor needs to listen for a pulse from an object to return and the returning pulse is proportional to the distance of the object from the sensor. Luckily, we found exactly what we were looking for in a tutorial on the internet. However, it was calibrated for a few meters instead of a few inches. We needed something that was more sensitive and produced a different set of frequencies. We decided that we would do that by reducing the maximum distance to a few inches and increasing the sensitivity. We also tweaked the code to put the speaker in a continuous loop instead of just beeps to give us a more synth-esque sound.

The sensor itself was difficult to calibrate but after referring to the aforementioned sources we were able to discover some useful functions like the delayMicroseconds() and microsecondstoInches()

// The ping is triggered by a HIGH pulse of 2 or more microseconds.
// Give a short LOW pulse beforehand to ensure a clean HIGH pulse:
pinMode(3, OUTPUT);// attach pin 3 to Trig
digitalWrite(3, LOW);
delayMicroseconds(2);
digitalWrite(3, HIGH);
delayMicroseconds(5);
digitalWrite(3, LOW);
cm = microsecondsToCentimeters(duration);

For the potentiometer, we added the following code to make it emit certain frequencies of sound depending on the position of the knob:

int potVal= analogRead(potentiometerPin);
int speakerVal = potVal * 5 ;
Serial.println((String)potVal + " -> " + (String) speakerVal);
tone(speakerPin, speakerVal );

Below is our initial setup:

after hooking it up to the speaker this is what it sounded like:

However, we were still missing a key feature of the assignment which was a button to control the sound output. For that, we used the following simple line of code to detect whether the signal output from the switch was HIGH or not:

buttonState = digitalRead(buttonPin);
  if (buttonState == HIGH)

If this statement was held true, it would continue the loop that would initialize the ultrasonic distance sensor and then output a sound signal depending on the position of the hands.

To connect the wires to the button and the ultrasonic distance sensor we had to solder the wires to ensure a strong and secure connection:

The circuit diagram of the final circuit:

Final project:

The look of the final project assembled:

Reflection and Difficulties:

This project was a lot of fun for both of us. We both learned some important information about using distance sensors and the inbuilt functionality of Arduino IDE that helps make a lot of information processing very easy as a programmer. We also had to solder which was a new experience and allowed us to gain important hands-on knowledge in building practical circuits. Some of the difficulties we faced included code optimization and building usable circuits.

We also learned the importance of top-down development in building circuits; we used a multitude of resources and examples and our own creativity to create circuits with a lot of unnecessary parts. After tinkering and experimenting we were able to streamline not only our circuit to be as simple as functionally possible while losing no part of the usability.

With complex circuits, we discovered that cable management was very important and some of our components were regularly shorting. to reduce this effect we used tape and insulators but it was still far from perfect. Additionally, we could have used heat-shrinking insulating wraps to create better insulation.

Also, we had trouble using the buttons available in the kit because they were pushing buttons and not permanent switches. The fix was super easy thankfully and only required replacement parts that we found in the lab.

Assignment 5: Switch

Concept

For this assignment, I wanted to make my switch useful and involve it in something I do. I read and write a lot for my Political Science & Law and Society classes, so I chose to use a book to make my switch work. I borrowed some conductive fabric from the IM Lab, my Advanced Introduction to Law and Literature, and my Arduino kit, and got to work.

I decided that I wanted to use an LED light to light up the pages once the book is opened so that the reader is able to read in the dark. However, I obviously knew the LED light we have in our kits is too small, so when looking at the images and video below imagine a bigger and brighter light.

Implementation

Images

Video

Link (Video was too big to upload on post)

https://drive.google.com/file/d/1cYJXPSOgu55uT1rVhsz7reBrLLZ8t_bc/view?usp=sharing

Reflection

I found this assignment pretty fun to do besides the fact that it didn’t do what I wanted to do which was light up the pages. But, with a bigger and brighter light it would have worked out. For future improvements I’d have to find a way to take into consideration when the reader flips the pages or doesn’t have the book open all the way like it is needed for this switch to work.

Midterm Documentation – Final Part

Save the Zombie!

Overall Concept

For my midterm, I decided to recreate the google dinosaur game that pops up whenever you try to go on a google web browser without a connection to the internet. In the dinosaur game, there is a dinosaur, cacti, and a simple background containing moving clouds. The game prompts the player to use their keyboard keys to make the dinosaur jump over the cacti as the cacti randomly enter the canvas. If the player does not press the key or presses it at the wrong time, the dinosaur will collide with the cacti and the game ends. To goal of the game is to avoid as many cacti as you can. To keep the player intrigued with the game, the game displays the player’s score and their high score.

I find that it is a very simple but engaging game. The purpose of it is very user-oriented since it allows the player to do something while they wait for their internet to connect again.  I also decided to go with this concept because it looked simple and achievable for me. In the beginning I was exploring other games that I used to play when I was a kid, but I thought dress-up and restaurant games would be too complicated. To make it my own, I decided to go with a Halloween theme since we are in October, I love Halloween, and I am going to miss the Halloween decoration from home. I did change a few things as I was creating the game in terms of the narrative and how the player would win. Instead of having a high score, I made it so that the player has to reach a certain number of jumps in order to save the zombie from a pumpkin attack.

Technical Decisions & Game Design

It is important to note that I took inspiration from Dan from The Coding Train on YouTube. He made a video replicating the dinosaur game with his own twist that included different images and controlling the character using the player’s voice. I decided to omit the voice control portion, but used his code as my base code. I knew I still needed to add other parts to meet the midterm requirements such as on-screen text, sound, the start screen, and a way to restart the game without restarting the program.

The start screen with instructions

My Zombie game includes the start screen, the game scene, and two different end screens depending on whether the player saves the Zombie from a pumpkin attack or lets him die (again). Using Dan’s code as my base code, I also had to change a few things. For example, his game used noLoop() to stop his sketch completely. He also continuously drew the pumpkins because he had no need to restart the game. I used the class sample code by Professor Mang that showed how to restart the game and implemented it into my code. I found out that because I did this, I also had to change how the pumpkins would show up in the game. To do this I created a pumpkin array and an if statement that said if the gameState == “playing” is true and the chance of adding a new pumpkin is random is also true, then a new pumpkin is created. I was proud that I was able to integrate the code into a base code that I changed, it really forced me to go through the code and understand every single part in order to figure out what parts go together. It was almost as if I was solving a puzzle.

I also wanted to end the game in a certain way instead of having the player make the Zombie jump as many times as they can. To do this I decided to create a storyline. In this game, the player is trying to save the Zombie from getting attacked and killed (again) by the pumpkins. In order to do this, the Zombie needs to avoid (jump over) the randomly generated pumpkins 10 times. I chose this number randomly.

Walking zombie with a cheat circle
Problems I Ran Into & Improvements

Even though I used a base code, I ran into so many tedious issues. I appreciate what coding does and admire everyone who is able to think like a coder, however I think I find it almost as scary as some aspects of Halloween. I mentioned in my second part of my documentation that I had trouble with just loading an image, I think that issue was probably the issue I took the longest on. It was not the correct path and I simply replaced the Zombie image with one that was not in a sprite sheet. I also struggled in integrating new code in an already existing code, mainly because I obviously did not make it and I had to take time to really familiarize myself with it in order to put the puzzle pieces together. Once I did familiarize myself with it though, I was able to figure out where everything else is supposed to go.

Another issue I had was that at first I did not include circles on top of the character images. However, that made the user experience difficult because even though the Zombie itself would not touch the pumpkin, I am guessing the background of the image did. This would cause the game to end even though the player didn’t know that the images touched since you visually couldn’t see that. To solve this I decided to add circles over the images to clearly define the borders and help the player better calculate when to press the space bar. I call it the cheat circle since it makes it really useful to jump at the right time and save the Zombie. Overall, I am glad I was able to combine what we have learned so far into a simple version of the dinosaur game that represents one of my favorite holidays.

Midterm Documentation Part 1 – Idea

Inspiration

This midterm project involves making a game, and though I love playing games and find a lot of them to be very impressive, the idea of creating one myself is very scary. To play it safe, I knew I wanted to make something simple yet fun enough for other people  to at least play when they’re really really bored. At first, it was hard to think of games that didn’t involve various elements that I was not familiar with or would require a lot of time that I do not have right this moment. I started thinking of online games I used to play on the computer when I was little. I then remembered coolmathgames.com. It gave me flashbacks to when I would be in my computer class and we would go on coolmathgames.com whenever we would get “free time” and had nothing else to do. I started exploring the games.

I found these relatively simple games:

  • https://www.coolmathgames.com/0-curve-ball-3d?utm_content=CTA_Top_Picks#immersiveModal
  • https://www.coolmathgames.com/0-run-3

I also remembered I used to play a lot of dress-up games, but I thought it would be too complicated to use or create a lot of the objects needed to dress up a figure so I abandoned that idea. I was favoring the idea of run 3 and wanted to look at more examples. A friend actually reminded me of the Google dinosaur game that pops up whenever a user attempts to navigate the google browser  offline. I inserted it below.

In order to add my own twist to it, I decided to go with a Halloween theme since we are in October and I am going to miss celebrating Halloween at home.  Below is a more detailed thought process related to the project requirements in terms of my own dino game.

  • Can be one or more players
    • One player; Jack O’ Lantern character
  • Must include
    • At least one shape
      • Obstacles for Jack to jump over or go under (or both?)
      • Background: dark, full moon, clouds
    • At least one image
      • Jack
    • At least one sound
      • Sound whenever he jumps or crashes into something. Game over sound? Background music?
    • At least one on-screen text
      • Instructions in the beginning
      • “GAME OVER”
    • Object Oriented Programming
  • The game must start with a screen giving instructions, and must wait there until a button or key (your choice) is pressed
    • “Jack is trying to escape pumpkin carving season. Press space to start running! Don’t get caught or else RIP Jack :(“
  • After the game is won or lost, there must be a way to restart the game without closing and restarting the program
    • button? automatic restart to the instruction page?

Future Improvements

I have not started my code yet, but that is for part II, which will then lead to the final part. I look forward to creating my own version of this game and learning along the way.

Assignment 4: Data Visualization

Concept

For this assignment, I chose to try and do either a line or bar graph based on a set of data. I retrieved a data set from datahub.io, it was a data set showing the mean global temperate yearly from 1880 to 2016. I referenced the class example, The Coding Train, and various other YouTube videos to help me.

Code Highlight

let dataMin, dataMax = 0;

function minMax() {
  for (let i = 0; i < numRows; i++) {
    if (table.getNum(i, 1) > dataMax) {
      dataMax = table.getNum(i, 1);
    }
  }
  dataMin = dataMax;
  for (let i = 0; i < numRows; i++) {
    if (table.getNum(i, 1) < dataMin) {
      dataMin = table.getNum(i, 1);
    }
  }

  print("max value " + dataMax + "min value " + dataMin); // checks if finding the min and max value works
  
}

This part of my code finds the maximum and minimum average global temperature. To make sure it worked, I printed the max and min value.

Image

No image 🙁

// IIM Michael Shiloh
// October 4, 2022 Assignment 4 Data Visualization
// Abigail Mata-Hernandez

// Description: This code attempts to create a data visualization about annual global temperature means in celcius from 1880 to the present. My goal is to create either a line or bar graph showing the how the global temperature changes over time.

// I chose this data set randomly from https://datahub.io/core/global-temp

// Inspiration: Class, The Coding Train,

let table;
let numRows, numCols;
let date = [];
mean = [];
let diagramX, diagramY; // x and y coordinates

function preload() {
  table = loadTable("annual_csv.csv", "csv", "header");
}

function setup() {
  createCanvas(400, 400);
  background(220);

// print(table); // check if loads table

  numRows = table.getRowCount();
  numCols = table.getColumnCount();

//print("rows:" + numRows + "cols;"+ numCols) check number of rows and columns

// load data

  for (let r = 0; r < table.getRowCount(); r++) {
    date[r] = table.getString(r, 0);
    mean[r] = table.getNum(r, 1);

// print(date[r] + " " + mean[r]) check if I get the date and mean, the date  points needed on the graph
    
  }

  // const name = table.getString(r, "Source");
  // const year = table.getNum(r, "Year");
  // const x = random(0, width);
  // const y = random(0, height);
  // text(name, x, y);
  // console.log(name);
  // the above code was a different attempt at drawing the graph using a different way but I did not understand it and stopped
  
  minMax(); //minMax function found below
}

function draw() {
  background(240);
  
  diagramX = width/2;
  diagramY = height/2;
  
 // When I tried to actually use the points to visualize the data is when I got stuck. I tried to follow videos such as https://www.youtube.com/watch?v=hokTcLVtZs8 but it was very different than what I was doing
  
}


let dataMin, dataMax = 0;

function minMax() {
  for (let i = 0; i < numRows; i++) {
    if (table.getNum(i, 1) > dataMax) {
      dataMax = table.getNum(i, 1);
    }
  }
  dataMin = dataMax;
  for (let i = 0; i < numRows; i++) {
    if (table.getNum(i, 1) < dataMin) {
      dataMin = table.getNum(i, 1);
    }
  }

  print("max value " + dataMax + "min value " + dataMin); // checks if finding the min and max value works
  
}

It wasn’t until I got to the actual data visualization part where I had trouble. The code before attempting to draw the line or bar chart had already taken me quite some time, more than I would have liked. I thought however that because I already loaded and figured out how to get some values, it would be easier to get the rest of the values I needed and plot them on a line graph. I know there is a solution which is why I kept trying, but I kept failing.

Reflection

I don’t think looking at just examples or videos is helping me. I tend to try and do almost the exact same thing as the examples, but the code that I had made on my own from what I understand is obviously too different to fit into what the examples do. I plan on taking more time to practice coding outside of the assignments assigned.

Assignment 3 Object-Oriented Programming

Concept

I have yet to break through my creative side and struggled to think of something to create that was outside the box, literally. I ended up looking up examples of generative art on Google. Most of the examples ended up scaring me with their complexity, so I revised my search by adding the word “simple” in the end and saw the image below. I thought it would be relatively easy considering I’d only use square() , but I knew that to make it interesting I’d have to figure out how to use color to make less simple. For the first time I felt confident on the coding part, but little did I know that I was going to struggle with color and it was going to be yet again, another very simple art piece. After going over the class lecture notes and watching numerous The Coding Train Videos I began creating my artwork using the object-oriented programming we had learned.

Abstract Embossed & Random Square & Rectangle Shape, Digital Generative Art for Web Page. Stock Illustration - Illustration of background, artwork: 114881811
dreamstine.com
Code

Below is the the class portion of the code. It is pretty straight forward, I have a constructor, a display function, and a sizeChange function for the squares. As explained in my comment, I failed to successfully have the color of the squares change gradually. The more I looked at videos from The Coding Train and random examples online, the more I confused myself so I decided it was best to accept that I am understanding object-oriented programming, but not yet how to implement colors and cool variations of them.

class Square {
  constructor() {
    // width x,y
    this.w = 10;
    this.x = random(0, width);
    this.y = random(0, height);
  }

  sizeChange() {
    this.w *= 1.01; //makes the square one percent bigger
    if (this.w > height / 2) {
      this.w = height / 2;
    } // if it reaches a certain w, it stops there
  }

  // I wanted to have the color slowly change to different colors in each square, but the more I tried, the squares would either be all white or I would get an error code. I forgot and didnt' save any that code but I stopped trying and just used one color instead

  display() {
    rectMode(CENTER);
    fill("#32a6a8"); // used color picker on google
    square(this.x, this.y, this.w);
  }
}


Final Image

Future Improvements

In future assignments, I’d like to teach myself more about how I can incorporate color in my work. I believe it would make a simple piece of art with a simple piece of code more intriguing and eye-catching regardless of its simplicity. I did like that I took my time in trying to understand the code itself, though simple, it was the first time I was confident that it would work before I ran it. Though I do think I should run it regardless and accept failure as part of the process as well.