Week 10-Sound, Servo motor, Mapping

For our group assignment, we built a simple digital musical instrument using an Arduino board. Our project was inspired by the children’s song Mary Had a Little Lamb, and we recreated the melody using four push buttons for four of the notes, C, D, E and G respectively. Each button acts as a digital sensor, triggering specific musical notes when pressed. The tones are played through a mini speaker connected to the Arduino, allowing the tune to be heard clearly. This created a very basic piano-style interface, with each button mapped to one of the notes in the song.

In addition to the buttons, we used a potentiometer as our analog sensor. This allowed us to control the frequency of the sound in real time. As the knob is turned, the pitch of the notes changes slightly, giving the player the ability to customize how the melody sounds. We mapped the frequency from 500-1000 Hz for this. It made the experience more interactive and demonstrated how analog inputs can add expressive control to digital systems. We also added some labels to the buttons so that it would be easier to play the music.

As for problems or challenges, we didnt really have any specific problems with the circuit other than loose wires or something which was fixed after debugging and checking again. Something we understood from working together is that having two different perspectives helps a lot in solving problems and finding ideas.

We see a lot of potential for expanding this project in the future. One idea is to add a distance sensor to control volume based on hand proximity, making it even more dynamic. Another would be adding LEDs that light up with each button press to provide a visual cue for the notes being played. We’re also considering increasing the number of buttons to allow more complex songs, and possibly adding a recording function so users can capture and replay their melodies.

It was a fun and educational project that helped us better understand the relationship between hardware inputs and interactive sound output. It was exciting to bring a classic tune to life through code, sensors, and a mini speaker!

The code:

const int buttonPins[4] = {3, 5, 8, 9}; // buttons

//frequency for each button
int frequencies[4] = {262, 293, 330, 392}; //C, D , E , G notes
int potValue = 0; //to store potentiometer value

void setup() {
//initialising buttons pins
for (int i = 0; i < 4; i++) {
pinMode(buttonPins[i], INPUT_PULLUP);
}

//for debugging
Serial.begin(9600);

//speaker pin for output
pinMode(12, OUTPUT);
}

void loop() {
//read the potentiometer value
potValue = analogRead(A0);

//map the potentiometer value to a frequency range 500-1000
int adjustedFrequency = map(potValue, 0, 1023, 500, 1000);

//for button and the corresponding note
for (int i = 0; i < 4; i++) {
if (digitalRead(buttonPins[i]) == LOW) { // Button is pressed (LOW because of INPUT_PULLUP)
tone(12, frequencies[i] + adjustedFrequency);
Serial.print("Button ");
Serial.print(i+1);
Serial.print(" pressed. Frequency: ");
Serial.println(frequencies[i] + adjustedFrequency); //serial monitor
delay(200);
}
}

//to stop the tone when buttons arent being pressed
if (digitalRead(buttonPins[0]) == HIGH && digitalRead(buttonPins[1]) == HIGH &&
digitalRead(buttonPins[2]) == HIGH && digitalRead(buttonPins[3]) == HIGH) {
noTone(12);
}
}

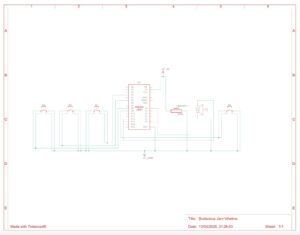
systematic diagram:

the video:

https://drive.google.com/drive/u/0/folders/1Kk2lkQgoAyybXSYWVmY2Dog9uQVX_DMq


the video of the potentiometer usage:

https://drive.google.com/drive/u/0/folders/1Kk2lkQgoAyybXSYWVmY2Dog9uQVX_DMq


week 10- reading response

  1. interaction design

This reading really made me think about how much we’ve limited ourselves by relying so heavily on screens. It reminded me that our hands are capable of so much more than just tapping and swiping. I never really paid attention to how much we use our sense of touch in daily life until this made me look around and notice. It pushed me to question why future technology isn’t making more use of the abilities our bodies already have.

  1. response

Reading the responses helped me see that the original rant wasn’t just about complaining, it was a wake-up call. I liked how the writer defended their points and stayed focused on encouraging better research and thinking. It made me realize that we don’t always need to have the full solution to speak up. Sometimes pointing out a problem clearly is the first and most important step in fixing it.

Week 10 – Reading Response

While reading A Brief Rant on the Future of Interaction Design, I didn’t really expect it to be this focused on hands. But the author makes a pretty solid point: for all our futuristic tech, we’re still weirdly okay with staring and tapping at flat glass rectangles all day. It’s kind of wild how little we think about how limited that is compared to what our hands are actually capable of.

What really stuck with me was the idea that “Pictures Under Glass” is basically a transition phase. We’re so used to touchscreens that we’ve stopped questioning whether they’re actually good. The essay really challenges that, and it’s kinda refreshing. It reminded me of how good tools should feel natural, like when you’re making a sandwich and your hands just know what to do without you even thinking about it. You don’t get that with a tablet or phone. You’re just poking at digital buttons.

I also liked how the author ties this all back to choice. Like, we’re not just being dragged into a touchscreen future, we’re choosing it, whether we realize it or not. That part made me think about design more like storytelling or world-building. We’re shaping how people live and interact, and that’s a big deal.

Overall, it was a fun read with a strong message to stop settling for tech that dulls our senses. Our bodies are way more capable than what current interfaces allow, and maybe the real futuristic thing would be tech that actually lets us do more and not less.

—————————————————————-

Reading the follow-up article helped me better understand where the author was coming from. It’s not just a complaint about modern tech, it’s a call to action. He’s not saying the iPad or touchscreen interfaces are bad. In fact, he even says they are revolutionary. The point is that we shouldn’t stop there. Just because something works now doesn’t mean it can’t be better.

What really stood out to me was the idea that technology doesn’t just evolve on its own. People make choices on what to build, what to fund, what to imagine. If we don’t invest in more expressive, physical ways to interact with computers, we’re basically choosing a future where everything stays flat and glassy.

I also liked how the author handled the voice interface discussion. Voice has its place, commands, quick info, etc. but when it comes to creating or understanding complex things, it falls short. You can’t sculpt a statue or sketch a design with just your voice. Some things require our hands, our bodies, our sense of space.

That quote from the neuroscientist about touch and brain development was super eye-opening. It made me think about how much we take our sense of touch for granted, especially when using digital devices. In the end, the response made the original rant feel less like a critique and more like an invitation to dream a little bigger about what our future tech could be.

Week 10 : Musical Instrument

For this week’s assignment, we were tasked with using Arduino to create a musical instrument. Working in pairs, Areeba and I decided to create a piano based on the tone() function we had explored earlier in class. In our project, we wanted each button switch to correspond to a different note from a piano, so that it could be “played”.

We were asked to use both an analogue and digital component for the assignment; while the digital component was simple enough with the buttons, we decided to use a pontentiometer as our analogue component, and used it to control the pitch of the notes being produced by each button.

The components we used were:

  • Arduino Uno
  • Breadboards
  • Jumper cables
  • 10k Ohm resistors
  • Push buttons
  • 5V speaker

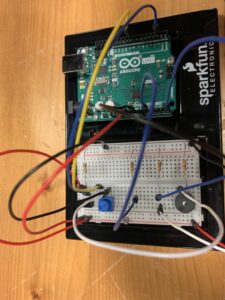
Here is an image of our project, and the schematic:

Our code:

#include "pitches.h"

const int potPin = A0;          // Potentiometer on A0
const int buzzerPin = 8;        // Speaker on D8
const int buttonPins[] = {2, 3, 4, 5, 6, 7, 9, 10}; // C4-C5 buttons
const int baseNotes[] = {NOTE_C4, NOTE_D4, NOTE_E4, NOTE_F4, NOTE_G4, NOTE_A4, NOTE_B4, NOTE_C5};

void setup() {
  for (int i = 0; i < 8; i++) {
    pinMode(buttonPins[i], INPUT); 
  }
  pinMode(buzzerPin, OUTPUT);
}

void loop() {
  static int potValues[5] = {0};
  static int potIndex = 0;
  potValues[potIndex] = analogRead(potPin);
  potIndex = (potIndex + 1) % 5;
  int octaveShift = map(
    (potValues[0] + potValues[1] + potValues[2] + potValues[3] + potValues[4]) / 5,
    0, 1023, -2, 2
  );

  // Check buttons 
  bool notePlaying = false;
  for (int i = 0; i < 8; i++) {
    if (digitalRead(buttonPins[i]) == HIGH) { // HIGH when pressed (5V)
      int shiftedNote = baseNotes[i] * pow(2, octaveShift);
      tone(buzzerPin, constrain(shiftedNote, 31, 4000)); 
      notePlaying = true;
      break;
    }
  }

  if (!notePlaying) {
    noTone(buzzerPin);
  }
  delay(10);
}

Videos of our project:

Playing Happy Birthday

Adjusting the Potentiometer

A challenge we faced was definitely our lack of musical knowledge. Neither Kashish or I are musicians, and as such, we had to do a lot of research to understand the terminology and theory, such as the notes, and how to adjust the octave using the potentiometer. We then also had to figure how to reflect these findings within our code.

Overall though, we had a great time making this project, and then executing our idea.

Week 10: Instrument

Concept

Our musical instrument is based off a combination of a both a mechanical and digital noise machine–controlled with a surprisingly satisfying potentiometer that allows us to modify the beats per minute (BPM), and a button that changes the octave of our instrument. We had fun with the relationship between the buzzer and our mechanical servo which produces the other noise, where the two are inversely proportional! In other words,  as the BPM of the buzzer increases, the servo slows down! And vice versa.

Figuring out the right code combination was a bit tricky at first, as we first made the mistake of nesting both the servo trigger and the buzzer tone in the same beat conditional. This meant that we fundamentally could not separate the motor from the buzzer tones. To resolve this, we ended up using two triggers–a buzzer and a motor trigger–which both run independently.

The code below shows how we ended up resolving this problem. Once we implemented this fix, we were able to celebrate with our somewhat perplexing instrument, that requires the user to complement the buzzers various beeping with the servos mechanical changes.

// --- 3. Perform Actions based on Timers ---

// --- Action Group 1: Metronome Click (Buzzer) ---
if (currentMillis - previousBeatMillis >= beatInterval) {
  previousBeatMillis = currentMillis; // Store the time of this beat

  // Play the click sound
  tone(BUZZER_PIN, currentFreq, CLICK_DUR);

  // Print beat info
  Serial.print("Beat! BPM: ");
  Serial.print(currentBPM);
  Serial.print(" | Freq: ");
  Serial.print(currentFreq);
  Serial.print(" | Beat Interval: ");
  Serial.print(beatInterval);
  Serial.println("ms");
}

// --- Action Group 2: Servo Movement Trigger ---
if (currentMillis - previousServoMillis >= servoInterval) {
  previousServoMillis = currentMillis; // Store the time of this servo trigger

  // Determine Target Angle
  int targetAngle;
  if (servoMovingToEnd) {
    targetAngle = SERVO_POS_END;
  } else {
    targetAngle = SERVO_POS_START;
  }

  // Tell the servo to move (NON-BLOCKING)
  myServo.write(targetAngle);

  // Print servo info
  Serial.print("Servo Trigger! Target: ");
  Serial.print(targetAngle);
  Serial.print("deg | Servo Interval: ");
  Serial.print(servoInterval);
  Serial.println("ms");

  // Update state for the next servo trigger
  servoMovingToEnd = !servoMovingToEnd; // Flip the direction for next time
}


Week 10: Reading Response

I found the author’s in both articles quite intriguing–agreeing almost immediately as he went into his argument. There is undoubtably something about the way we interact with physical objects in the real world that is missing from our digital interfaces.

A great example of this for me is my handy-dandy pen and paper notebook. It’s a small notebook, perhaps 5 inches in diagonal length, which I have not been able to divorce myself from since I started using it over two years ago. For me, there’s something unique and unparalleled about writing things with a physical pen that’s–well–enjoyable! An when I take notes on a computer in a Google doc, or a text file, something just feels off to me! I often opt to take physical notes, then suffer the laborious task of transferring them to the digital world–all so I can retain my physical experience.

My note-taking tendencies made me immediately connect with the author’s argument. The interfaces we are currently considering for the future do seem quite dull, and underwhelming even! I want interfaces that I genuinely enjoy using, that provide sensory responses in my hands, and feel as ergonomic as the physical objects we interact with every day.

Reading reflection-week 10

Reading A Brief Rant on the Future of Interaction Design honestly made me pause and look around at all the tech I use every day. The author’s frustration really hit home, especially the part about how everything has become a flat screen with no real feedback. It reminded me of how awkward it feels to use a touchscreen on a stove or in a car just to do something simple, like turn down the heat or change the music. Those actions used to be so quick and intuitive. I think the author has a point—we’ve lost touch with how things feel. It’s like we’re designing for appearances now, not for actual human comfort. I didn’t feel like he was biased in a bad way he just seemed passionate, like someone who really cares about how design affects everyday life.

What stuck with me most was how much we’ve adapted to poor interaction design without even noticing. I catch myself getting used to frustrating interfaces all the time, and this reading made me realize we shouldn’t have to settle for that. It made me wonder: what would technology look like if we designed it based on how our bodies naturally move and react? That question stayed with me after I finished reading. It also raised another thought—how do we balance innovation with simplicity? Just because something’s high-tech doesn’t mean it’s better. I think future designers, myself included, need to remember that. This reading didn’t completely change my beliefs, but it definitely sharpened them.

Week 10 – Reading Response

These readings were very eye-opening in some regards, but I also felt that they were a bit closed-off in others. With our many discussions on what it means for something to be well-designed, we have had to start thinking about our works beyond just their function. Now we are bringing physiology into the equation on top of the prior psychological aspects. I have some idea of how miraculous the human body is and how much work it takes to try and replicate the simplest of actions via technology, but the examples posed about how we use our hands painted a much more intimate picture than I had considered. For example, I might think about how I struggle to play FPS games on a controller whereas several of my friends can’t stand using a mouse and keyboard. The broader significance of tactile feedback would be largely lost in that simple case, let alone the discussion on how input devices might look in 20 years.

Speaking of, I was much more uncertain about how we might work towards this brighter future. This post from 2011 has plenty of thoughts on the matter, but the landscape has changed greatly since then. For example, a good portion of the reading focuses on how touchscreens fall flat of delivering the true experience, but I would argue that many people feel more comfortable with an e-book than a real one, especially so for the younger demographic that grew up with a tablet in hand. The discussion of voice also seems rather shortsighted in hindsight, given that Siri first released in 2010 and was shortly followed by Alexa in 2014. Nowadays you can even push voice-based systems to the point of live-translating speech or leaning on LLMs to achieve goals in the realm of creating and understanding. Lastly, on the subject of brain interfaces, I felt that the author was a bit too pessimistic about things. Companies like Neuralink still fall short today, but they can be hugely impactful for people that can’t rely on their bodies. I can definitely agree that nature is the ultimate inventor, but I don’t think that brain-computer interfaces should be disregarded out of fear that we will all end up forsaking the real world. Either way, with the rate that certain technologies have progressed over the past few years, it’s hard to even imagine what direction interfaces might evolve in.

Week 10 – Instrument

Description:

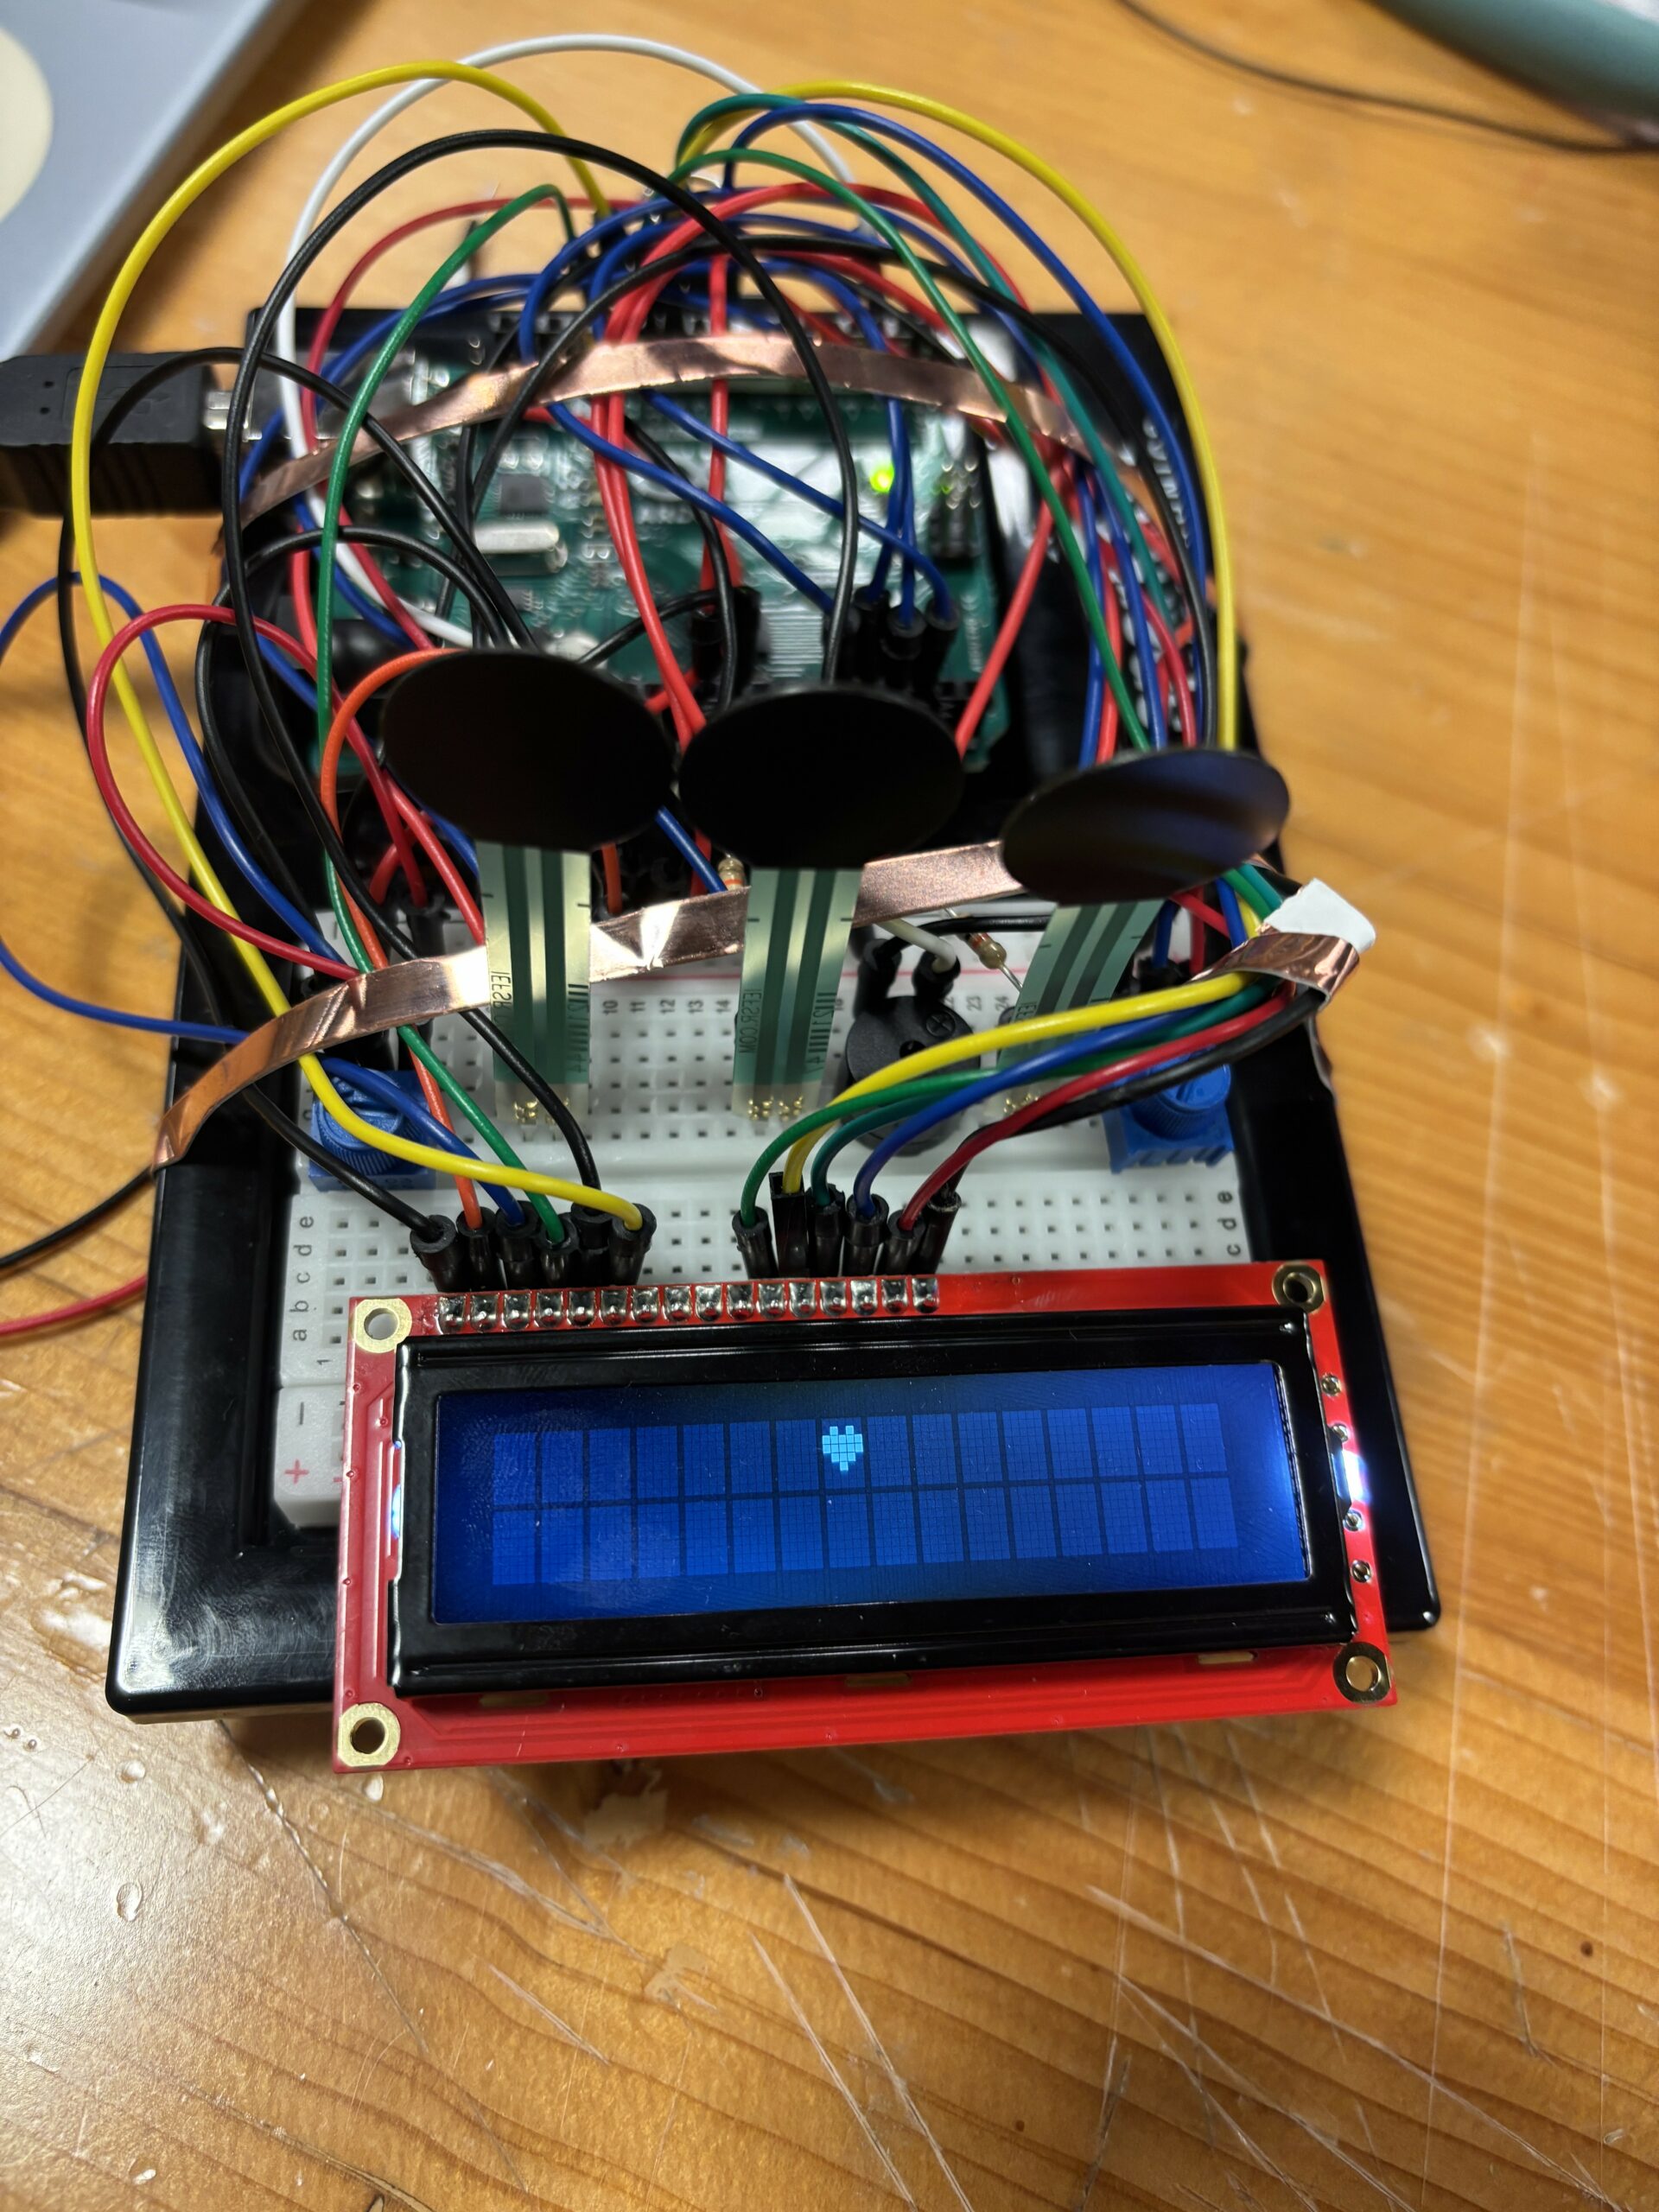
Oyun and I decided to create a musical instrument using force sensitive resistors (FSR) that reminded us of drumpads. There are 3 resistors in total, and each represents a different octave. Moreover, if you touch multiple at the same time you again get different octaves. There are different combinations you can try, totaling to 7 altogether. These FSR are used as digital inputs in this case, but we have a potentiometer that moves you along the scale within each octave. By turning the potentiometer, you get the full range of an octave, and by touching the FSR, you get different octaves. We also use an LCD screen to visually represent what you’re playing. Each octave has its own symbol/emoji on the screen and depending on the note you’re playing, the emoji slides across the screen. The higher the note, the farther across the screen it slides.

Video Demonstration:

video demonstration

Image of circuit:

Difficulties:

At first, we wanted to use the FSR as analog inputs and attempted many ideas of using it, but ended up on this method of using them as digital inputs because we liked that you can make different combinations. The FSR reminded us of drumpads, which is why we chose them. We also tried soldering the FSR to wires to make them easier to connect to the breadboard, but that ended up taking way too long, so we just stuck them directly to the breadboard.

We ended up using many wires and at some point, our breadboard became a bit overcrowded, and there was one time when we didn’t realize that one of the resistors was connected to 5V instead of GND.

To detect whether or not someone touched the FSR at first, we checked whether or not the reading was above 0, but realized quickly that even without touching the FSR, it was rarely ever 0. It teetered on values just above 0, so we instead used a threshold of 100.

Another huge problem we encountered in one of our past ideas was using multiple speakers at the same time. We were going to have each FSR correspond to their own speaker, but found out that the tone function doesn’t allow for multiple outputs.

Code Snippets:

Printing the custom emojis:

// make some custom characters:
byte Heart[8] = {
0b00000,
0b01010,
0b11111,
0b11111,
0b01110,
0b00100,
0b00000,
0b00000
};
// LCD screen
if (lastPotInd != potInd) {
  lcd.clear();
}
lcd.setCursor(potInd, 0);
lcd.write(byte(melodyInd));

2D array of notes:

int melody[7][12] = {
  {NOTE_C1, NOTE_CS1, NOTE_D1, NOTE_DS1, NOTE_E1, NOTE_F1, NOTE_FS1, NOTE_G1, NOTE_GS1, NOTE_A1, NOTE_AS1, NOTE_B1},
  {NOTE_C2, NOTE_CS2, NOTE_D2, NOTE_DS2, NOTE_E2, NOTE_F2, NOTE_FS2, NOTE_G2, NOTE_GS2, NOTE_A2, NOTE_AS2, NOTE_B2},
  {NOTE_C3, NOTE_CS3, NOTE_D3, NOTE_DS3, NOTE_E3, NOTE_F3, NOTE_FS3, NOTE_G3, NOTE_GS3, NOTE_A3, NOTE_AS3, NOTE_B3},
  {NOTE_C4, NOTE_CS4, NOTE_D4, NOTE_DS4, NOTE_E4, NOTE_F4, NOTE_FS4, NOTE_G4, NOTE_GS4, NOTE_A4, NOTE_AS4, NOTE_B4},
  {NOTE_C5, NOTE_CS5, NOTE_D5, NOTE_DS5, NOTE_E5, NOTE_F5, NOTE_FS5, NOTE_G5, NOTE_GS5, NOTE_A5, NOTE_AS5, NOTE_B5},
  {NOTE_C6, NOTE_CS6, NOTE_D6, NOTE_DS6, NOTE_E6, NOTE_F6, NOTE_FS6, NOTE_G6, NOTE_GS6, NOTE_A6, NOTE_AS6, NOTE_B6},
  {NOTE_C7, NOTE_CS7, NOTE_D7, NOTE_DS7, NOTE_E7, NOTE_F7, NOTE_FS7, NOTE_G7, NOTE_GS7, NOTE_A7, NOTE_AS7, NOTE_B7}
};

Mapping potentiometer value to an array index:

potInd = map(potReading, 0, 1000, 0, 12);

Logic for changing the octaves using FSR combos and selecting correct array index:

// all 3
if (fsrReading1 > 100 && fsrReading2 > 100 && fsrReading3 > 100) {
  melodyInd = 5;
}

Future Improvements:

Next time, we want to find a way to make the FSR lie flat on a surface so touching them feels more intuitive and more like a drumpad. We can also try controlling different factors about the sounds like the volume. We can also make the note progressions more predictable so that users can go through different notes more easily and play an actual song.

Week 10 – Musical Instrument

Design:
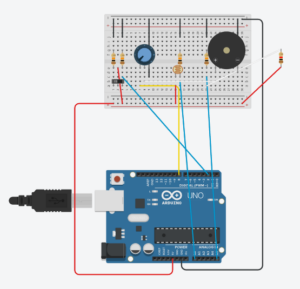
I used a slide switch as the digital sensor, and a potentiometer + photometer as the analog sensors. The slide switch was originally just an on/off switch, but now allows the instrument to switch between two modes (which currently shifts the octave).  The potentiometer acts as a volume control, while the photometer provides an additional input towards the tone frequency.
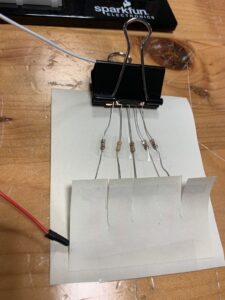
The physical component is a simple sort of keyboard made from paper and copper tape. It works by passing current through one of five different resistors (1k, 10k, 100k, 470k, 1m) and using analogRead() to identify which key was pressed. The five keys correspond to the notes A4/5 through E4/5. The initial steps of wiring the circuit and writing the code were fairly painless, which was not the case for converting it into its final result. I think it definitely suffered from my lack of ability with music as well as arts and crafts.

Diagram:

Code:

/*
  Musical Instrument
*/

#include "pitches.h"

// // Global Variables
const int LIGHT_PIN = A0;
const int TOUCH_PIN = A5;
const int MODE_PIN = 2;
const int SOUND_PIN = 8;
int low[] = {NOTE_A4, NOTE_B4, NOTE_C4, NOTE_D4, NOTE_E4};
int high[] = {NOTE_A5, NOTE_B5, NOTE_C5, NOTE_D5, NOTE_E5};


void setup() {
  Serial.begin(9600);
  pinMode(LIGHT_PIN, INPUT);
  pinMode(TOUCH_PIN, INPUT);
  pinMode(MODE_PIN, INPUT);
  pinMode(SOUND_PIN, OUTPUT);
}

void loop() {
  // // Read digital/analog
  int modeVal = digitalRead(MODE_PIN);
  // Serial.println(modeVal);
  int lightVal = analogRead(LIGHT_PIN);
  // Serial.println(lightVal);
  int touchVal = analogRead(TOUCH_PIN);
  Serial.println(touchVal);
  
  // // Choose note based on touch input
  // 1k = 932
  // 10k = 512
  // 100k = 92
  // 470k = 20
  // 1m = 8
  int x; int mapped;
  if (touchVal < 4) {noTone(SOUND_PIN); return;
  }
  else if (touchVal < 16) {x = 0;}
  else if (touchVal < 64) {x = 1;}
  else if (touchVal < 128) {x = 2;}
  else if (touchVal < 768) {x = 3;}
  else if (touchVal < 1024) {x = 4;}
  // Serial.println(x);

  // // Choose high/low range based on mode
  int note;
  if (modeVal) {
    note = low[x];
    mapped = map(lightVal, 400, 1200, 0, 2500);
  }
  else {
    note = high[x];
    mapped = map(lightVal, 400, 1200, 2500, 5000);
  }
  // // Play sound
  tone(SOUND_PIN, note);
}