intro
For my midterm project, although the Object Life Sim project seems promising to me, I do not have much idea for furthering it, and I’d rather incorporate a higher degree of interactivity in this project. Therefore, I would like to integrate the elements that appeared in my previous attempts – both conceptually and technologically – into a new game. And for this progress report, I will start with composing a standard game design documentation and then touch on the technical difficulties and that of the desgin-wise.
game design documentation
1. Game Overview
Title: Motion Ships
Concept:
Motion Ship will be a space-themed action game where players control a spaceship using head movements detected via a webcam. Navigate through space environments, combat obstacles, and achieve high scores through maneuvering and sound-activated attacks.
2. Game Structure
2.1. Game Flow
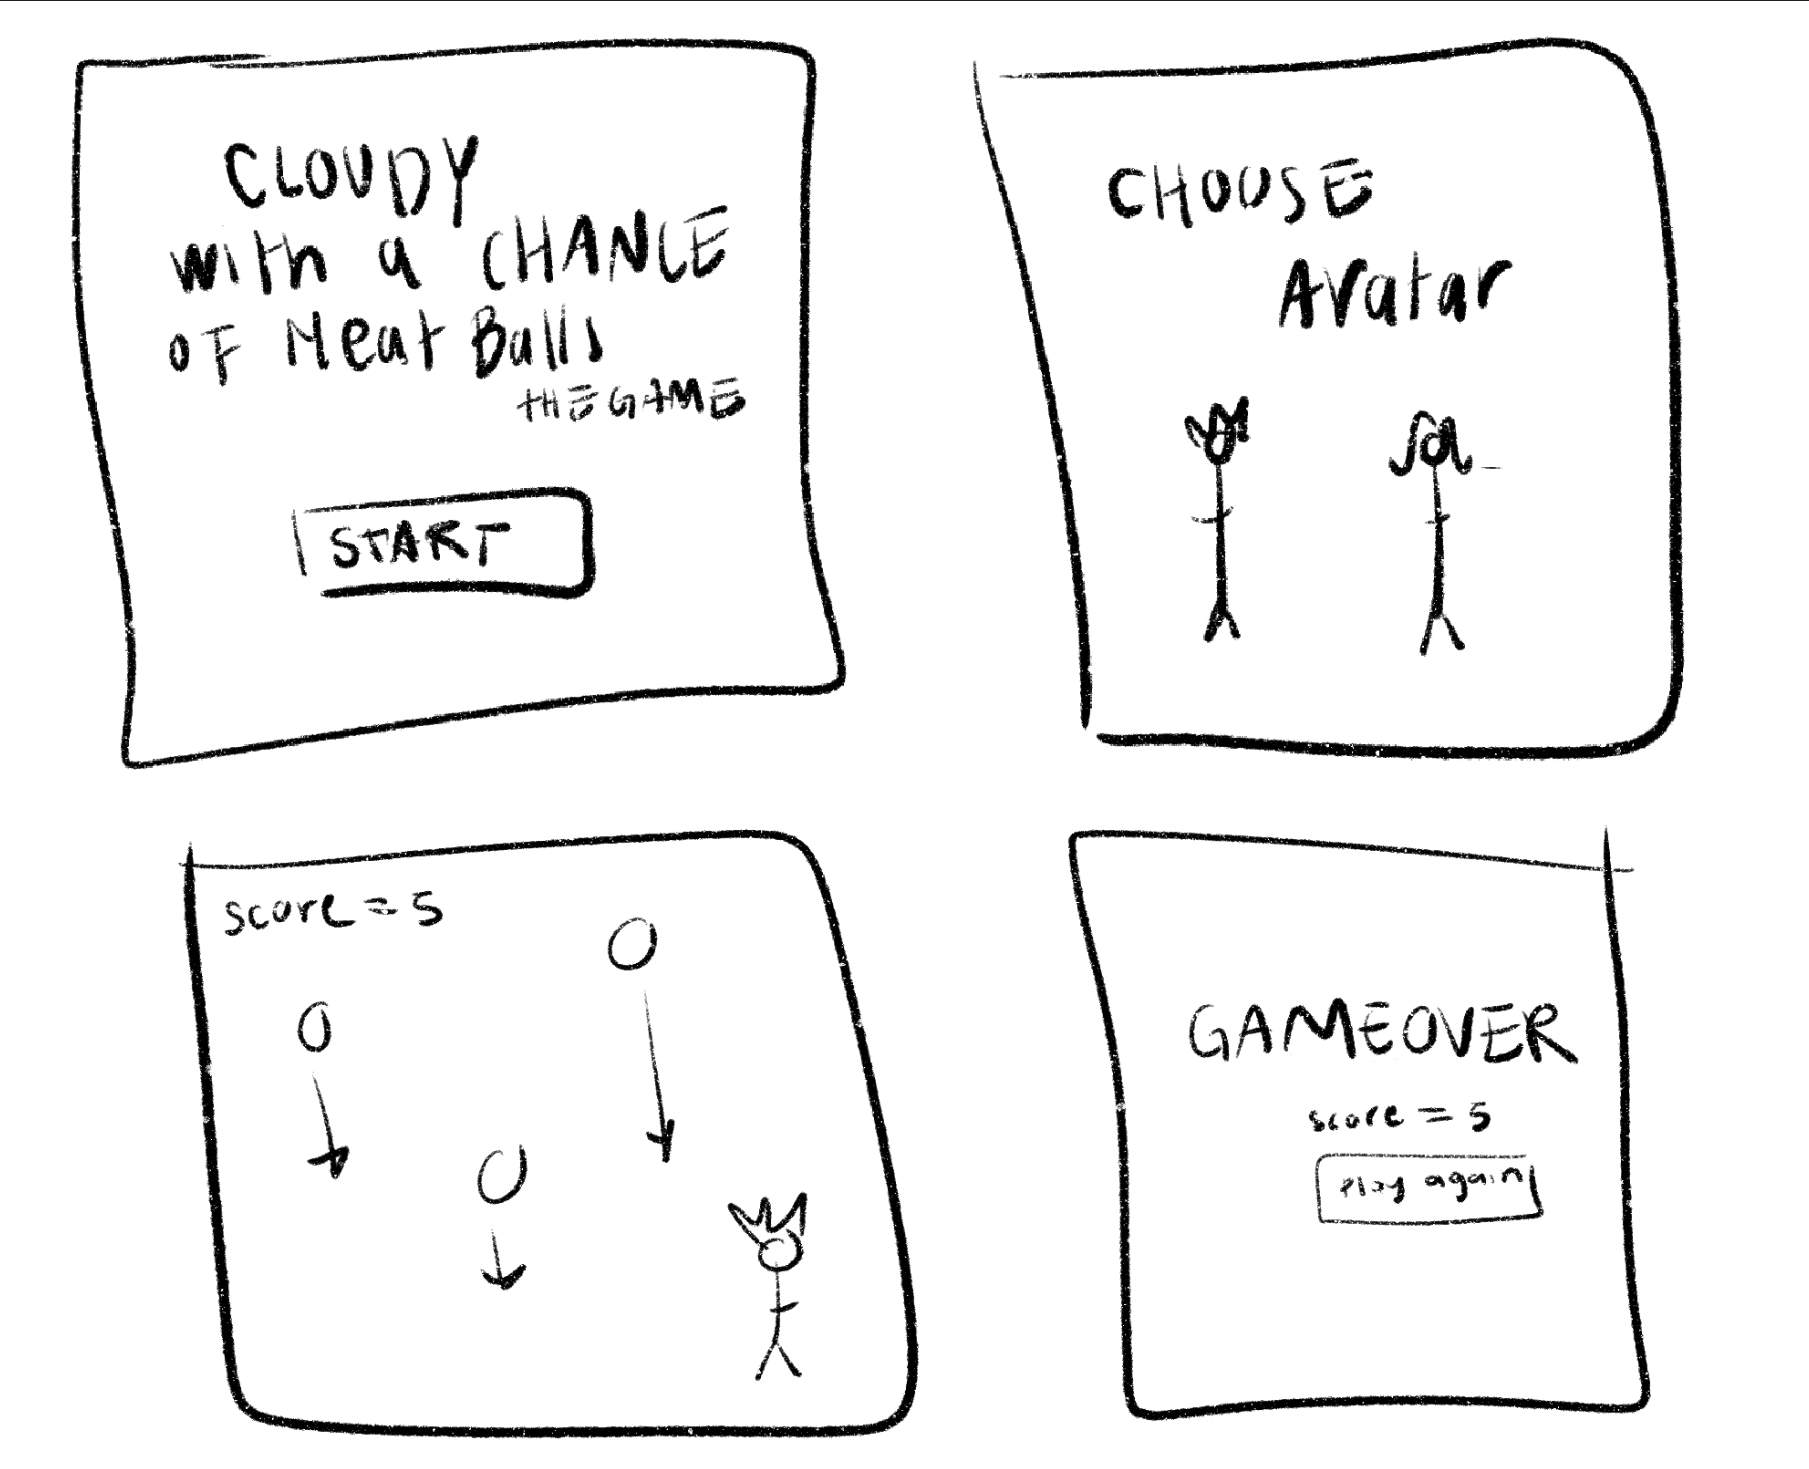
- Start Screen
- Configuration Menu
- Gameplay
- End Screen
- LoopBack or Exit
3. User Interface
3.1. Start Screen
Title Display: “Motion Ships”
Introduction: “Control the spaceship with your head.”
Prompt: “Press any key to start.”
Functionality: Waits for any key press to transition to the Configuration Menu.
3.2. Configuration Menu
Customization Options:
Spaceship Selection: Choice between two spaceship models.
Background Selection: Choice among four distinct battle backgrounds.
Controls:
Selection Interface: Allows players to select their preferred spaceship and background before starting the game.
Functionality: After configuration, initiates gameplay.
3.3. End Screen
Score Display: Shows the player’s final score.
Functionality: Offers players the choice to restart or modify settings post-game.
4. Gameplay Mechanics
4.1. Player Controls
Input Methods:
Webcam-Based Head Movement Detection: Controls spaceship movement along the X and Y axes.
Sound Input Detection: Monitors ambient sound levels to trigger beam launches.
Control Scheme:
Movement: The spaceship moves along the X and Y axes based on the player’s head position detected by a face-detection machine learning model.
Rotation: The spaceship rotates in real-time to mirror the direction of movement, simulating realistic aircraft maneuvers.
4.2. Player Character
Spaceship Model:
Formats Supported: 3D .obj files.
Positioning:
Fixed Z-Axis: The spaceship remains on a fixed plane along the Z-axis.
Dynamic X and Y Axes: Movement is controlled via head tracking.
Energy System:
Energy Meter: Displayed on the bottom-left of the screen, indicating available energy.
Energy Consumption: Firing laser beams depletes the energy meter.
Energy Recovery: Collecting energy ores replenishes the energy meter based on the ore’s size.
4.3. Movement Mechanics
Forward Motion:
Illusion of Movement: The spaceship appears to move forward by keeping its Z-position fixed while other objects move towards the spaceship.
Relative Speeds: All in-game objects move at a base speed relative to the spaceship’s “forward” movement. Objects capable of independent movement have their own speed vectors in addition to the base speed.
4.4. Combat Mechanics
Attacking:
Weapon: Laser beams automatically launched based on ambient sound levels.
Trigger Mechanism:
Sound Input Detection: Continuously monitors the player’s microphone input.
Threshold-Based Activation: When the ambient sound level exceeds a predefined threshold, the spaceship automatically fires laser beams.
Laser Behavior:
Trajectory: Beams travel along the negative Z-axis from the spaceship’s X and Y positions when launching.
Energy Cost: Each launched beam consumes a small amount of the spaceship’s energy.
Feedback Indicators:
Visual Cue: Brief animation or flashing effect indicating that a beam has been fired due to sound input.
Energy Indicator: Real-time update of the energy meter showing depletion upon beam firing.
4.5. Obstacles and Enemies
4.5.1. Meteoroids
Appearance: Rock-textured spherical objects.
Behavior: Typically remain fixed relative to the background.
Size Variation: Random sizes within predefined limits.
Interactions:
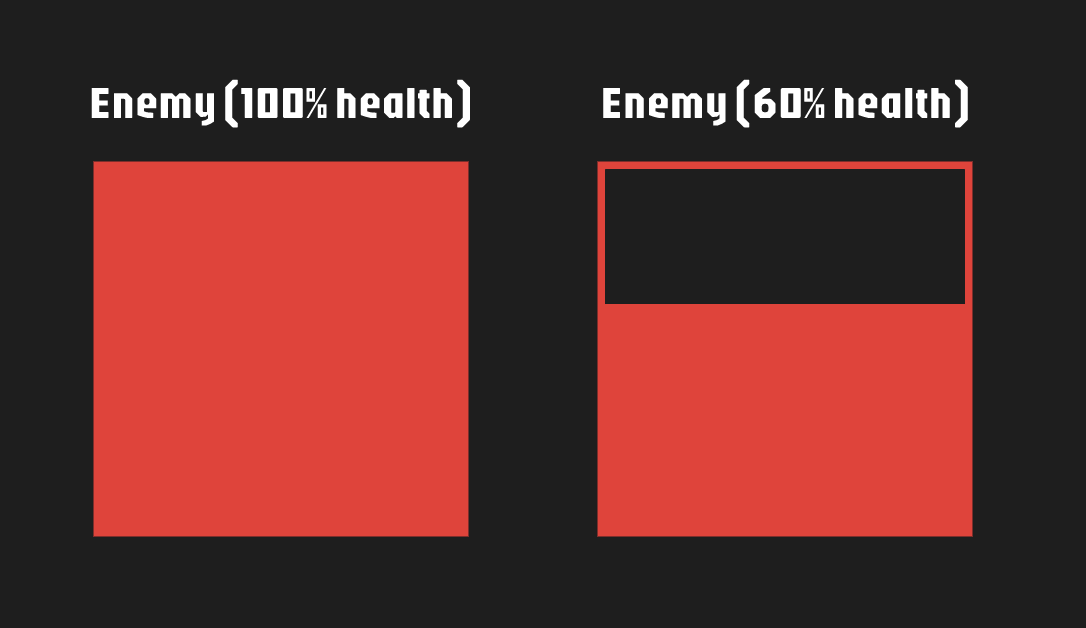
Destruction: Requires a number of laser hits proportional to size to be destroyed. Upon destruction, the meteoroid shakes briefly before disappearing.
Collision: If a meteoroid collides with the player’s spaceship, both are destroyed, resulting in game over.
4.5.2. Energy Ores
Appearance: Crystal-textured spherical objects.
Behavior: Typically remain fixed relative to the background.
Size Variation: Random sizes within predefined limits.
Interactions:
Destruction: Requires a number of laser hits proportional to size to be destroyed. Upon destruction, the energy ore shakes briefly before disappearing, and the player’s energy is replenished based on the ore’s size.
Collision: If an energy ore collides with the player’s spaceship, both are destroyed, resulting in game over.
4.5.3. Enemy Ships
Appearance: Alternate spaceship models not selected by the player during configuration.
Behavior: Dynamic movement across all X, Y, and Z axes relative to the base speed. Change direction randomly every few seconds.
Collision Avoidance: Actively avoid colliding with other objects except the player’s spaceship.
Interactions:
Destruction: Requires a number of laser hits to be destroyed. Upon destruction, the enemy ship shakes briefly before disappearing.
Collision: If an enemy ship collides with the player’s spaceship, both are destroyed, resulting in game over.
4.6. Object Spawning and Lifecycle
Spawn Mechanics:
Spawn Rate: Objects spawn at regular intervals.
Spawn Probability:
Meteoroids and Enemy Ships: Equal likelihood.
Energy Ores: Lower likelihood compared to meteoroids and enemy ships.
Despawn Conditions:
Objects are removed from the game once their actual Z-position surpasses the camera’s Z-position by a specified distance, ensuring optimal performance and resource management.
5. Environment and Visual Design
5.1. Backgrounds
Selection: Players can choose from four distinct battle backgrounds during the configuration phase.
Parallax Effect: Backgrounds subtly move in response to the spaceship’s movement to create a dynamic and immersive living space effect.
Camera Perspective: Fixed camera position to maintain consistent player orientation.
5.2. Lighting
Position: Fixed behind the camera.
Effect: Illuminates all objects within the 3D space, ensuring visibility and depth perception.
5.3. Graphics
3D Models:
Spaceships: .obj models for both player and enemy ships.
Obstacles: Spherical models for meteoroids and energy ores, with varying textures based on type (grey for meteoroids, green for energy ores).
Animations:
Destruction Effects: Shaking animations upon object destruction before removal.
Movement Animations: Smooth transitions and rotations for moving objects.
6. Technical Specifications
6.1. Technology Stack
Machine Learning Integration: Utilize a face-detection library (ml5.js) for webcam-based head movement tracking.
Sound Processing Library: Integrate a sound analysis library (p5.sound) to process and analyze ambient sound levels for beam activation.
6.2. Performance Considerations
Object Management: Efficient spawning and despawning of objects to minimize memory usage and ensure smooth gameplay.
Collision Detection: Algorithms for real-time detection between laser beams and obstacles/enemies, as well as between the player’s spaceship and other objects.
6.3. User Input Handling
Face Detection: Implement real-time face and head movement tracking for responsive spaceship control through webcam access.
Sound Threshold Detection: Continuously monitor ambient sound levels to trigger beam launches when thresholds are met through microphone access.
7. Additional Features and Considerations
7.1. Scoring System
Score Incrementation: Points awarded based on actions such as destroying obstacles, collecting energy ores, and surviving over time.
High Score Tracking: Persistent tracking and display of the highest score achieved across game sessions.
7.2. Audio
Background Music: Ambient space-themed music to enhance immersion.
Sound Effects:
- Laser Firing: Audio cues when beams are launched.
- Destruction: Sounds for destroying objects.
- Collisions: Impact sounds for collisions leading to game over.
- Game Over: Sound indicating the end of the game.
7.3. Accessibility
Instructions: Clear in-game instructions or tutorials to guide new players on using head movements and sound inputs for control.
Visual Indicators: HUD elements like energy meters and score displays designed for clarity and ease of reading.
Adjustable Sensitivities: Allow players to adjust head movement and sound input sensitivities to accommodate different playstyles and environments.
8. Implementation Notes
8.1. Sound-Based Beam Launching
Calibration: Provide an initial calibration phase where the game adjusts the sound input threshold based on the player’s environment to prevent unintended beam firing.
Feedback Mechanism: Visual and audio feedback when beams are launched due to sound input, helping players associate their actions with in-game events.
potential challenges
1. Real-Time Face Detection and Head Movement Tracking
Real-time video processing and face detection can be computationally intensive, leading to lag or reduced frame rates. SO, implementing throttling mechanisms to control the rate of face detection processing could be conducive to overall efficiency.
2. Sound Input Detection and Processing
Differentiating intentional sound inputs (e.g., biu-biu-biu voice command) from ambient noises to trigger beam launches without false positives may need amplitude-based or frequency-based thresholding. It might be helpful to establish a continuous record (RMS, LUFS, etc.) before gamplay to calculate a based noise level.
3. Collision Detection in 3D Space
3D collision detection would be more complex and resource-intensive than 2D that I used in previous projects, especially with multiple moving objects and interactions. The potential solution could include:
- Early Exit Strategies:
Implement early exit conditions where collision checks are skipped if objects are too far apart to interact, conserving resources.
- Simplify Collision Shapes – Axis-Aligned Bounding Boxes (AABB):
For certain objects, AABB can offer a balance between simplicity and collision detection accuracy.
4. Object Spawning and Lifecycle Management
Without proper management, the continuous spawning of objects can lead to memory leaks and degraded performance over time, while the spawn rate and probability are important to maintain a balanced difficulty without overwhelming players or underutilizing game mechanics.
Therefore, adjusting spawn rates and object probabilities dynamically based on the player’s score or progression can be used to maintain engaging and balanced gameplay.
demo version
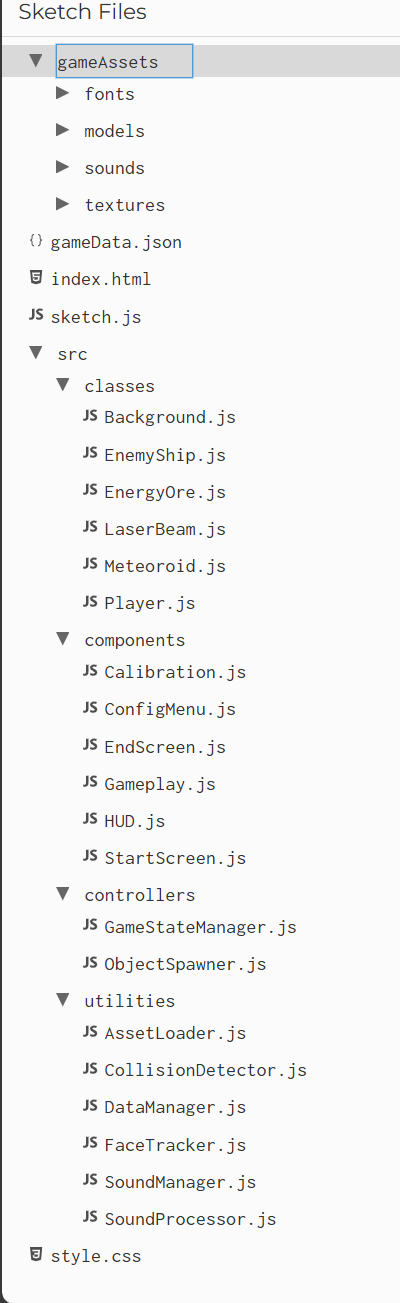
With all that said, I developed an early demo version without fine-tuning the parameters and visual effects.

Fundamentally, the first two technical difficulties are tackled in this stage, while the rest is untouched. Personally speaking, as this project expanded in scale, I learned about the game design structure and built highly object-oriented programming with code as specialized as possible.