Mid Term Proposal: Memory Card Game

Idea:

Thinking of what to make for my mid-term project I decided on the memory card game which I used to play a lot as a child.

Memory Match Game at Lakeshore Learning

The game consists of picture cards in pairs shuffled randomly and the player clicks to flip one card at a time trying to find all the pairs in as few clicks as possible. The game will continue as long as the player finds all the pairs. I will include a timer alongside and use it as a way to give ranks to the player in the end and also keep a record of the highest score in an array which would compare the time to other times the game was played and a record time would be marked as the highest score. The game will constitute 2 levels. The beginner level will have 6 pairs while the intermediate level will have 10 pairs of cards to match.

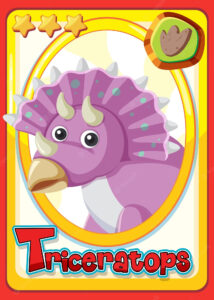
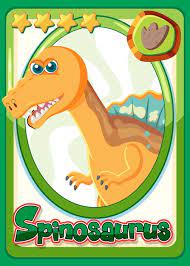
For sound I will implement the card flip sound and a light background music to get the player in a cheery mood during the game. Moreover, I will also include a glow or light shake when the mouse hovers over the card yet to be chosen. The theme of my card is animated dinosaurs and these are a few card images I’ll be using for my game.

I am still working on my code, specifically on the card class which includes variables like, position of the card on the canvas, isFlipped boolean value, isMatched, the width and height of each image and the image variable to store the card image.


Midterm Project Progress – Rocket Rendezvous

The concept

The concept of this game is basically have a rocket fly up in the sky and eventually leave the earth’s atmosphere and go to other planets. There will be several horizontal bars on the rocket, and a line moving across the rocket. Whenever the line reaches the green bar, the user must click quickly. Based on how close the line is to the green bar and how well the user timed their click, the rocket will get a velocity boost.

The Current Implementation

I have tried several implementation by now, and faced several dead ends. In the beginning, I tried to make the rocket fly across the background, or keep the rocket stagnant and make the background move “downwards”.  But going to other planets and showing the whole game space would be difficult. Eventually, I ended up with the approach that I will draw the whole game space out first. I am doing this by making my canvas really long (500,5000). This means my rocket itself will be very tiny compared to the rest of the drawing. Then, I will play around with the Camera function available in p5js. The camera will be focused into the rocket at launch, and as it flies up, the camera will slowly zoom out. This way all the gamespace is already loaded into the game, and the camera will show different parts of it to the user.

Here is the initial game space that I have created till now.

function setup() {
  createCanvas(500, 5000);
  frameRate(10)
}

function draw() {
  background(0, 0, 30); // Set the background color to a dark blue

  // Draw shiny stars randomly across the canvas
  for (let i = 0; i < 1000; i++) {
    fill(255, 255, 255, random(100, 255)); // Set the fill to a slightly transparent white
    noStroke();
    ellipse(random(width), random(height), random(1, 5)); // Draw a small ellipse at a random location with a random size
  }

  // Draw a semicircle at the bottom of the canvas and a light blue glow
  noStroke();
  fill(0, 200, 255)
  arc(width/2, height, 200, 200, PI, TWO_PI); // Draw a semi-circle at the bottom of the canvas
  stroke(0, 200, 255, 50); // Set the stroke color to a light blue with low opacity
  noFill();
  strokeWeight(5);
  arc(width/2, height, 215, 215, PI, TWO_PI); // Draw a slightly larger semi-circle on top to create a glow effect
}

Possible Challenges

This is the first time I will use the camera feature in p5js and thus making sure the game play is smooth while using the camera will definitely pose some challenges. I might face more issues when implementing the line moving into the green bar on the rocket feature, as I am still not sure what will be the best way to approach this, such as should the rocket and the green bar be separate object or not, or how will I move a line across a moving rocket which is in a moving frame. All these different moving parts will be difficult to manage for sure.

Midterm Proposal – Naz

For my midterm project, I was inspired by “Everything is Temporary” by Joe Pease. You can find the link to the work he has done here:

In order to capture the same feeling that the video gave me, the temporariness of the surroundings, combined with the life going on in its own chaotic and messy way, even if we engage, if we don’t, and even if we try to. This temporary feeling is everpresent, when the weird realization hits us at a party, in a room of friends, and on the shore sitting at the edge of Saadiyat or being in the view of a beautiful mountain.

Therefore, I will be creating an interactive artwork where there will 3 rooms (as of now) with the following compositions. There will be available actions to the user which they will be briefed on before being put inside the room. The idea is to allow the user to have a set of actions, while the output of those actions not being what they wanted or tried to achieve at all, hence achieving the temporary feeling by highlighting our powerlessness in the outcomes of our choices.

Room 1: The rave

(room created through pattern making in p5js)

I basically want a room that is loud and chaotic with the sensory overload of voices and visuals in this room. The visuals will be produced by p5js using shapes and color contrast with respect to a black background, with the sound being outsourced from the internet. The user will be allowed to use right, left, up, and down arrows to go to any area of the screen. Depending on the area the user moves to on the screen the visual and sound will get amplified or toned down but never disappear.

Room 2: The home

(room created by a background of a picture)

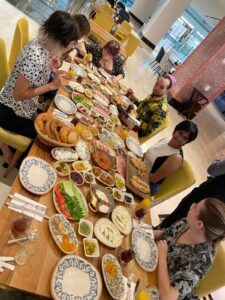
I want to capture the chaos of home, where at one point the self seems to be disintegrating and lose its meaning in the face of the community. For this room, I will be using a picture that is dear to me (not the one provided here) in which all my friends are hanging out in my room in a chaotic manner. The user will be given the option to be able to “speak” (printing words on screen) however the voice of chattering will be exponentially rising as more attempts to speak are made, in which the users “seem” to be drowning.

Room 3: The nature

(room created by drawing a mountain using p5js)

I want to capture the serenity and calm of nature. My initial idea is to create a simplistic drawing of nature using p5js which looks mountainous and pristine. There is a small snowfall, and the user is given a specific set of input keys to make a fire. After the fire is set by the user, the snowfall seems to get faster and faster, covering every part of the “vision”, hence the screen.

Assignment 4 – Oh! Annabel Lee

In this assignment, I knew that I wanted to combine the process of creating a poem and going through a huge data chunk. Moreover, I was repeating Edgar Allan Poe’s poem Annabel Lee, for some time before making this poem. That’s why I decided to make a alt version of the original poem. In order to find what kind of data to incorporate into the data, I have went through data sites, and found a data set for a range of colors (1500+) with their rgb values. Thus I have decided to choose 2 colors from this set randomly and put it inside the first and third line of the 4 lines I chose from the main poem.

However for me it was important to have a type of data visualization in, so I wanted to do that by mapping the two colors of each poem on the screen like a gradient where the bottom of the screen would have one of the colors and slowly as it went up the screen it would transition to the other color. I achieved this by using lerpcolor and mapping the height of the y position in comparison to the bottom color, and drawing that color on screen line by line.

It was fun to try out different ways of having the colors on the screen, with huge bands, with gradient, in response to the speed of the mouse in the y-direction.

I feel that the main challenge was having also the poem written on the screen. I got the feeling that commanding the text, in terms of font, and coloring and filling, was hard to navigate and hard to preserve in response to the mouse’s position. I feel that understanding the dynamics of text function in relation to rest of the drawing functions that are available in p5js will be my challenge.

Link to p5js:

https://editor.p5js.org/iremnaz/sketches/xrBpShmUv

Assignment 3 – the sun and her flowers

For this piece which had to incorporate arrays and objects, I was inspired by the poetry book called “the sun and her flowers” by rupi kaur. While I was looking around at my desk, in order to get inspired on what to work on, my eyes got fixated on the cover and at that moment I decided that I wanted to do something that incorporated the book into my code, as my life has been entangled with the book up to that point.

Hence I first started by designing the sunflower class. The hardest part for me in this was making small circles that would form a silhouette of a circle altogether in the middle of the sunflower. The math to figure out to make sure that the final shape was also a circle took some time as well as trial and error, as even when I incorporated the right math, sometimes my results would be different due to misusing other commands (such as int()). After being able to make the middle of the sunflower, the petals were similar to drawing as it was an iteration of the ellipses in an angle around the middle of the flower. For an artistic choice, I decided to make them a range of yellow with also a range of transparency, so that it would give a feeling for the range of differences between flowers, hence adding to each one of the flowers’ uniqueness.

After finishing up the flower object, I worked on the sun and moon which share the same class, and this was pretty straightforward to make by making the constructor pass on the starting location of the sun and moon as well as their color, the rest of qualities for the two were common.

One thing I decided later on was making the flowers move downwards as the sun went out of the frame and the moon came, while the background darkened. This was particularly hard, as the making of the petals, center, and stem for each flower was unique, and while going down they should not be changing in each frame. Trying to figure out the mechanics of this, defining its most central variables in the constructor while the actual drawing happening was in the draw function of the sunflower took some time to perfect, but in the end, I was able to print each flower going down while keeping the same composition for petals and stem, while the middle would be dynamic, giving in a way more life to the flowers.

Link to p5js:

https://editor.p5js.org/iremnaz/sketches/YpKfMJJaH

Assignment 2 – Shapes of Picasso

For this assignment, we had to use loops for and while to create or create an artwork. As I did not have any specific artwork that I wanted to make and go for, I experimented with three different shapes (circles, rectangles, and lines) in order to get more comfortable with how to construct them and what to expect. Therefore, I randomized which shape would be printed, and in what size and in what color in order to get different compositions each time the mouse was clicked.

I really enjoyed the making process of the piece, as I realized I was not so sure what would come out in the end either due to my unfamiliarity up to this point. So, I was able to play around with some parameters to see what kind of output I would receive by tinkering with them. After printing more and more patterns after altering another parameter and another, the pattern I was seeing was reminding the cubism form that marks Picasso’s art style. Since I enjoyed connecting it to reality like that, I decided to keep the artwork as it is.

The biggest challenge for me, in this case, was not what to print but how to print. I was struggling on figuring out how to achieve multiple patterns. In the draw function, the patterns would move very fast that it was staggering. On the other hand, the setup would have to be run repeatedly. Therefore I have finally decided to incorporate the mouse-clicked function to loop the pattern code that resides under the draw function. This way I was able to receive multiple patterns in a way more accessible manner.

Link to p5js:

https://editor.p5js.org/iremnaz/sketches/BLhDgFAOm

Assignment 1 – Self Portrait

In this assignment, I tried to incorporate the basic shapes we covered in the first week of the classes. One of the things that captured my attention in the class was how the location of the mouse was integrated into the pieces for the exercises as well as other self-portrait projects I have seen on this blog! So I knew that I really wanted to do that.

In terms of the creative incentive I knew that I didn’t want to make my self-portrait not too human but also not so little. A highlighted experience for me while making this portrait was the fog that would cloud my effort and mind, most of the time, and would require serious and conscious effort to pass that over. Therefore I have made cloud shapes with a combination of multiple ellipses that hovers around the head in the darkness and move to the side when the mouse hovers into the middle.

The biggest challenge for me here was actually finding an idea. I felt that it was hard to choose an idea but also after finding it, it was hard to implement. I could feel while drawing the ellipses that I was uncomfortable with producing the desired shapes with shape functions that were available and for me, it was a big struggle to make the lines meet, and align each time.

The integration of the location of the mouse to the brightening of the background and dispersing of the clouds was a creative choice and compared to the actual drawing of the shapes was not that complicated. I feel that after experiencing these initial struggles with p5js I will be comfortable with creating the art pieces I desire.

Link to p5js:

https://editor.p5js.org/iremnaz/sketches/oxRGnv701

Midterm Progress -Yerkebulan Imanbayev

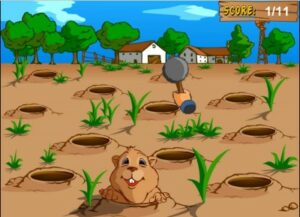
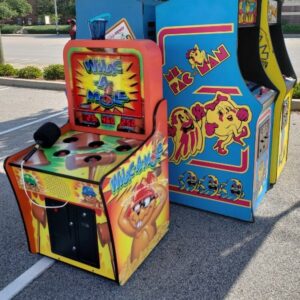
For the midterm project, I was inspired by a famous game that appears in all arcades – “Hit the Beaver”.


For this project, a user would be shown a window where they can start the game. When they start the game, they can pick two levels of difficulty. Once they pick their preferred level of difficulty, they are redirected to a new page. On this page, there are nine ellipses and periodically, beavers appear from the ellipses and the user has to click on the as soon as possible before they disappear. There will be a certain amount of beavers that will appear in the short period of time and if the user is able to catch all of them during the given time, they win. However, if they are not, they lose the game. Then they are given a chance to restart the game. The reason why there is two levels of difficulty is twofold: if the user picks a more difficult level, more beavers will appear in the same span of time AND they will be appearing and disappearing at a higher speed. 

Week 5: Midterm Progress – Crack The Egg

Concept:

For my final project in “Introduction to Computer Science,” I spent nearly two weeks brainstorming ideas before deciding between two games: “Crack the Egg” (a new game) and “BrickBreaker,” which I used to play on my father’s BlackBerry phone. I ultimately chose to make “BrickBreaker,” but promised myself that I would someday create “Crack the Egg” as well. When I learned about the opportunity to make a game for “Introduction to Interactive Media,” I knew immediately that I wanted to create “Crack the Egg.” The inspiration for this game came from another childhood game I used to play called Piano Tiles.

In “Crack the Egg,” the player takes on the role of a worker in a factory that heavily relies on eggs for production. The worker’s job is to stand next to three conveyor belts and manually inspect the eggs to ensure quality. There are three types of eggs in the game: “normal,” “somewhat bad,” and “rotten.” The player must avoid cracking the “normal” eggs while single tapping to crack the “somewhat bad” eggs and double tapping to crack the “rotten” eggs. As the game progresses, the conveyor belts will increase in speed, making it increasingly difficult for the player to inspect the eggs. Every “normal” egg that passes through uncracked adds to the player’s score. However, if the player cracks a “normal” egg or fails to crack a “bad” or “rotten” egg, they will lose one of their three lives. The player will tap the eggs using their mouse.

Code & Progress:

Once I had determined the game I wanted to create and the functionalities it required, I established a task sequence. First, I had to design a start page for the game, then develop a “Game” class and integrate the start page. I, then planned on adding interactive buttons and verifying their functionality. Next, I wanted to progress to the conveyer belt and the “Egg” class, and finally incorporating them into the “Game” class. Currently, I have constructed the background, launched the game class, and implemented a few initial features for user interactivity. While I have created placeholders for some items, such as buttons, I have verified that they all operate correctly. The progress looks somewhat like this as of now:

//game class will contain everything from user interactivity to the score keeping and life lost etc. Will (probably) be the super class to the egg class
class Game
{
  constructor()
  {
    //canvas dimensions 
    this.canvas_width = 300;
    this.canvas_height = 600;
    
    //start button on menu - coordinates
    this.start_button_x = this.canvas_width/6;
    this.start_button_y = 4.5 * (this.canvas_height/6);
    
    //instruction button on menu - coordinates
    this.instruction_button_x = this.canvas_width/6;
    this.instruction_button_y = 5* (this.canvas_height/6);
    
    //dimensions for the start and instruction buttons to be used for mouseClicked interactivity
    this.button_width = 2*300/3;
    this.button_height = 30;
    this.button_arc = 20;
    
    
    this.score = 0; //will keep the score of all the good eggs that have successfully passed
    this.player_lives = 3; //will keep track of the lives for the player and will be displayes as well
    this.speed = 10; //will control the speed with which 
    this.egg_array = []; //this array will contains objects of egg class using new Egg() and the .push method
    
    //controls what is shown to the user at a given time
    this.menu_screen = true;
    this.start_screen = false;
    this.instruction_screen = false;
    
    //will be removed for the start window but will stay for instructions window
    this.back_button_x = 10;
    this.back_button_y = 10;
    this.back_button_width = 75;
    this.back_button_height = 50;
    
  }
  
  //displays different types of screens to the user
  screenDisplay()
  {
    if (this.menu_screen == true)
    {
      image(startmenu_display_picture, 0,0);
      fill("#541675");
      noStroke();
      //boxes for the start and instruction buttons
      rect(this.start_button_x, this.start_button_y, this.button_width, this.button_height, this.button_arc);
      rect(this.instruction_button_x, this.instruction_button_y, this.button_width, this.button_height, this.button_arc);
      //if the mouse hovers over the start button
      if (mouseX >= this.start_button_x && mouseX <= this.start_button_x + this.button_width && mouseY >= this.start_button_y && mouseY <= this.start_button_y + this.button_height)
      {
        fill("green"); //turn the text green
      }
      else
      {
        fill("gold"); //otherwise the text will be gold
      }
      //write START in the button
      textSize(20);
      text("START", this.start_button_x + ((this.button_width)/3), this.start_button_y + (this.button_height/1.3));
      //mouse hovering feature for the instruction button
    if (mouseX >= this.instruction_button_x && mouseX <= this.instruction_button_x + this.button_width && mouseY >= this.instruction_button_y && mouseY <= this.instruction_button_y + this.button_height)
    {
      fill("green");
    }
    else
    {
      fill("gold");
    }
      text("INSTRUCTIONS", this.instruction_button_x + ((this.button_width)/8), this.instruction_button_y + (this.button_height/1.3));
   }
    //if the start button is clicked
    else if (this.start_screen == true)
    {
      //change the background and show under construction text but will call other functions when game is implemented
        background("gold");
        textSize(18);
        fill(255, 255, 255);
        text("UNDER CONSTRUCTION", this.canvas_width/6.5, this.canvas_height/2);
      
      //place holder for the back button that will be used to come back to the menu screen but will probably be removed in the start screen
      back_button.resize(this.back_button_width, this.back_button_height); //resize image to fit the screen size
      image(back_button, this.back_button_x, this.back_button_y);
    }
    //if the instruction button is clicked then this if statement would run to show the instruction screen
    else if (this.instruction_screen == true)
    {
      //changes background for now but is basically a placeholder for an image with all the instructions
      background("gold");
      textSize(18);
      fill(255, 255, 255);
      text("UNDER CONSTRUCTION", this.canvas_width/6.5, this.canvas_height/2);
      
      //placeholder for back button. Image is resized to fit the desired dimensions. the picture will change for a better/formal picture of the back button
      back_button.resize(this.back_button_width, this.back_button_height);
      image(back_button, this.back_button_x, this.back_button_y);
    }
  }
}

This is all that I could have done without first creating an “Egg” class. Creating an “Egg” class will ensure that the eggs move from bottom of the canvas to the top on the three conveyer belts, change color/get cracked when tapped, and respawn at the bottom of the canvas. Apart from this, the restart button after game ends and the audios for game background and egg cracking will also be added.

Challenging Parts:

Incorporating the “Egg” class into the “Game” class is proving to be a significant challenge for me. While I am aware that I must use an array in the “Game” class to store the objects of the “Egg” class, I am struggling with egg positioning. I am uncertain how to create a loop for the eggs to appear one after the other without overlapping each other. I aim to ensure that the distance between each egg is identical. Additionally, I am unclear on how the eggs that move beyond the canvas will return to their starting position behind the canvas and at what y-coordinate. Similarly, my concerns apply to the dividers I wish to employ between the conveyer belts, as they will also loop around. I am hopeful that if I can solve one problem, the solution may help me with the other. At present, I am narrowing my focus to resolving the issue with the eggs alone. Instead of three conveyer belts, I will use one conveyer belt (one array) and see if I can find a solution for one belt first. Finding it for one belt will help solve it for the other two belts and the dividers. I plan to devote two days to this issue, and if I cannot find a solution, I will turn to Youtube tutorials for guidance and inspiration.