Assigment 2

My concept

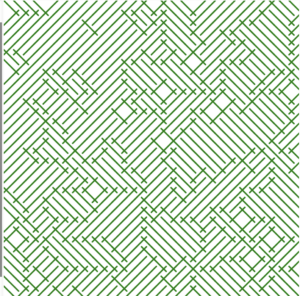
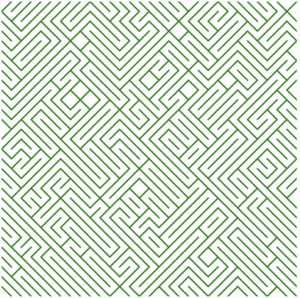
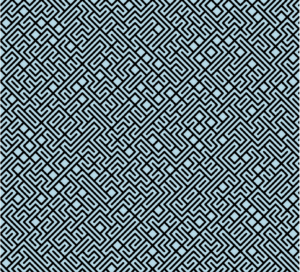
The concept for my artwork came from an experiment in which I created different shapes by generating random codes. The primary goal of this technique was to discover the possible outputs of coding without having a predetermined goal, therefore it was informal and exploratory. The speech by Casey Reas “Eyeo2012” talked about the need to discover novel ideas without overanalyzing, this served as my motivation.

The series’ first drawing is intended to represent a maze. It is a metaphor for the hardships that come with life, suggesting that despite obstacles and complex paths, perseverance will ultimately lead to the finding of the right route. The journey through life’s complexity and the eventual triumph in finding direction is intended to be represented by this sketch.

The second sketch, however, shows a substantial change. It shows the maze’s walls falling down to reveal an open, direct, and clear path. This exemplifies overcoming the difficulties and barriers encountered earlier. This drawing is meant to evoke feelings of freedom and clarity, representing those times in life when challenges are overcome and the path ahead becomes easy and uncomplicated.

Embedded sketch


Code that you’re particularly proud of

strokeWeight(1); // Sets the thickness of the lines
  frameRate(3); // 
}

function draw() {
  background("lightblue"); // background color for each frame

  // Nested loops to iterate over each cell in the grid
  for (let x = 0; x < width; x += size) {
    for (let y = 0; y < height; y += size) {
      let E = random(9); // Generates a random number between 0 and 9

      if (E < 1) {
        // Draws a line from top left to bottom right of the cell
        // line(x, y, E + size, y + size);
      } else {
        // Draws a line from top right to bottom left of the cell
        line(x, y + E, x + size, x);
      }
    }
  }
}

Ideas for future work or improvements

Ideas for the future that I would want to implement are some kind of visual effect. Effects that make you dizzy and hypnotize you. I think that would be very cool.


Reading 1 – week 2 – Eyeo2012 – Casey Reas

My eyes were awakened to the ways in which art and technology collide when I watched Casey Reas’s presentation at Eyeo2012. The way that Reas discusses randomness in digital art is very innovative and fascinating.

It occurred to me that, because humans are accustomed to following rules and procedures, computers are able to produce patterns and randomness in ways that humans simply cannot. This entire concept gets me thinking about how our society is set up; everything is really rigid and organized.

Reas’s words, “Make your own reality, your own world,” truly resonated with me. We all need to hear that, in my opinion, especially in this day and age. Reas suggests that in order to break up the monotony and repetition of life, we need unpredictability.

I consider myself a very rigid person and in recent years I’ve found out that some randomness and flow in life is necessary and it makes you live happier and less worried.

Moreover, this reading made me reflect on this question: do gods create order out of chaos? It is, after all, a large topic that connects to the idea of having a balance between order and randomness in all that we do, not just in art.

Assignment1- Self Portrait

When I first heard about creating a self-portrait, my mind immediately gravitated towards something that truly defines me – cricket. As someone deeply passionate about the sport, I couldn’t think of a better way to portray myself than through a project that encapsulates the essence of my love for cricket.

In this self-portrait, I envisioned a scene where a girl, embodying my presence, stands proudly with a cricket bat in her hands. The cricket ball, symbolizing the constant motion and dynamism of the game, is placed on the ground, perpetually moving. To add an interactive element, I incorporated the ability for the ball to jump when the user presses the mouse. The subtle details matter, and in this digital representation of myself, the girl periodically opens and closes her eyes every two seconds.

Code:

// Initializing the variables

let ballX = 220;
let ballY = 525;
let ballSpeedX = 1; 
let ballSpeedY = 0; 
let isJumping = false;
let jumpHeight = 100; 
let eyeColor = '#FFFFFF'; 
let pupilcolour = '#E4DDDD';

function setup() {
  createCanvas(600, 550);
}


function draw(){
  background(200);
// sky
  fill("#E5F7FA");
// gorund
  rect(0,0,599,450);
  fill("rgb(21,144,21)");

  rect(0,442,599,600);
  noStroke();
  fill("#C3ECF1")
// clouds
  circle(70,70,50);
  circle(90,60,50);
  circle(110,55,50);
  circle(130,70,50);
  
  circle(300,100,50);
  circle(320,90,50);
  circle(340,85,50);
  circle(360,100,50);
  
  //   Thumbs of both the hands
  
  fill('#E8BEAC')
  ellipse(263,255,8,20);
  ellipse(504,231,8,15);
  
  
//   bat
  fill('#C29C65')
  ellipse(157,266,10,25);
  // cylinder(20, 50);
  rect(160,255,180,22);
  quad(317,256,326,241,326,288,317,276);
  rect(326,241,250,46);
  ellipse(575,260,20,55)
  stroke('#D5B78B')
  strokeWeight(3);
  quad(327,234,326,241,575,243,573,234)
  
//   face 
  noStroke();
  fill('#252423')
  ellipse(390,200,100,110);
  ellipse(410,200,100,110);
  
  fill('#E8BEAC')
  ellipse(400,200,95,105);
  
  // print(mouseX+ ","+ mouseY);
//   halmet
  rect(389,245,25,40)
  
// hair and head
  fill('#252423')
  arc(400, 190, 100, 100, PI, 0);
  
//   hair
  stroke(50);
  strokeWeight(2);
  line(360,166,360,189);
  line(366,166,366,189);
  line(372,166,372,189);
  line(380,166,380,189);
  line(386,166,386,189);
  line(392,166,392,189);
  line(400,166,400,189);
  line(406,166,406,189);
  line(412,166,412,189);
  line(418,166,418,189);
  line(424,166,424,189);
  line(430,166,430,189);
  line(436,166,436,189);
  line(442,166,442,189);
  
  // eyes
  if (frameCount % 120 == 0) { 
    eyeColor = (eyeColor === '#FFFFFF') ? '#000000' : '#FFFFFF'; 
   
  }
  if (frameCount % 120 == 0) { 

    pupilcolour=(pupilcolour === '#E4DDDD') ? '#000000' : '#E4DDDDF'; 
  }
  fill(eyeColor);
  circle(377, 195, 15); 
  circle(422, 195, 15); 
  fill(pupilcolour); 
  circle(377, 195, 5); 
  circle(422, 195, 5); 
//   lips
  noStroke(197,55,80);
  fill('rgb(228,10,48)')
  arc(400,223,30,15,0,PI)
  
//   body
  // rect(348,270,110,150);
  
  quad(388,270,344,276,458,276,415,270);
  rect(350,276,105,120);
//   left arm
  
  quad(350,274,350,309,287,330,287,300);
  quad(287,300,287,330, 232,279,260,278);
  
//   right aarm
  quad(455,277,455,308,515,330,510,302);
  quad(505,302,512,286,534,286,515,331);
  
//   skirt
  fill('#721781')
  quad(350,396,350,506,455,506,455,396);
  
  // fill('black')
  // arc(350, 396, 50, 200, 0, PI + QUARTER_PI, CHORD);
  // arc(350, 396,50, 100,  0, PI + QUARTER_PI, PIE);
  ellipse(350, 450,30,110);
  ellipse(454, 450,30,110);
  // ellipse(403, 490,115,30);
  ellipse(403, 400,115,30);
  fill('#E8BEAC')
  quad(359,505,368,550,397,550,390,505);
  quad(415,505,415,550,444,550,445,505);
  
//   fingers
  quad(264,282,269,277,224,277,239,286);
  // ellipse(263,255,8,20);
  quad(262,245,251,254,253,261,262,253);
  ellipse(252,257,7,7);
  rect(244,246,7,20);
  ellipse(247.5,266,7,7);
  ellipse(247.5,245,7,7);
  quad(247,241,260,247,253,253,249,248);
  rect(236,248,7,20);
  ellipse(239.5,249,7,7);
  ellipse(239.5,269,7,7);
  rect(228,249,7,18);
  ellipse(231.5,251,7,7);
  ellipse(231.5,267,7,7);
  rect(220,251,6,15);
  ellipse(223,254,7,7);
  ellipse(223,264,7,7);
  
  // right hand fingers
  rect(532,228,6,15);
  ellipse(535,228,6,6);
  ellipse(535,242,6,6);
  rect(524,227,6,20);
  ellipse(527,229,7,7);
  ellipse(527,247,7,7);
  rect(516,224,6,25);
  ellipse(519,225,7,7);
  ellipse(519,247,7,7);
  
  rect(509,220,6,25);
  ellipse(512,223,7,7);
  ellipse(512,246,7,7);
  
  quad(221,259,221,249,248,249,248,241);
  
  quad(536,226,535,235,512,230,512,220);
  
 // Check if mouse is pressed
  if (mouseIsPressed && !isJumping) {
    isJumping = true;
    ballSpeedY = -5; 
  }

  // Move the ball
  ballX += ballSpeedX;
  ballY += ballSpeedY;

  // apply gravity if not jumping
  if (!mouseIsPressed && ballY < 525) {
    ballSpeedY += 0.5; 
  } else if (ballY >= 525) {
    ballY = 525; 
    ballSpeedY = 0;
    isJumping = false;
  }

 
  if (ballX + 25 >= width || ballX - 25 <= 0) { 
    ballSpeedX *= -1; 
  }

  // Ball
  fill('#FFEB3B');
  circle(constrain(ballX, 25, width - 25), ballY, 50); 
  fill('#E91E63');
  ellipse(constrain(ballX, 25, width - 25), ballY, 20, 50);
  ellipse(constrain(ballX, 25, width - 25), ballY, 50, 20);
  
}

Reflection:

Despite my numerous attempts, the eye pupil stubbornly refuses to close along with the eyelids, leaving the eyes in a perpetual state of openness. I’m determined to address this issue and make the portrait more interactive by achieving a natural blink.

As I work through these challenges, I’ve developed a deep fondness for the project. The blend of my love for cricket and the creative process has made it a personal journey. Honestly, I find myself reluctant to see this assignment come to an end. The joy of refining and perfecting this interactive self-portrait has made it a labor of love, and I’m eager to continue the journey beyond the assigned timeframe.

Assignment 1- Self-Portrait (Recursive Card)

For this assignment, we had to create a self-portrait. As I did not hope to realistically picture myself using p5, I I went for a different approach to make the portrait relate to myself more. As I practice card magic, I decided to picture myself in a playing card, similarly how Jacks, Queens or Kings are illustrated. This meant the card has to have certain rectangular proportions, have a dividing line in the middle and have a mirror image of itself on the bottom and top halves of the card, reflecting by the axis of the dividing line. Similar to cards, the mirroring had to be done by the middle vertical axis, too. I simply had to create the individual elements of the body, such as the head, arms, eyes, mouth, then invert the x and y coordinates to mirror the elements on the opposite side of the card.

However, midway through the assignment I remembered that court cards normally hold some object in their hands, usually a royal artifact of some sort. As a magician, the most obvious thing I could hold in my self-portrait is a card itself! There began a long journey of trying to create a recursive image of me holding a card that depicts me holding a card… and so on. I had to take into account the right proportions, meaning instead of using numbers as coordinates and sizes for shapes, I had to use ratios of those numbers to the width and height of the card. I tried to make the recursion as flexible as possible, meaning that it will work on any canvas, with any number of recursions inside of the card. Currently, it works on any square canvas, where height and width are identical. I believe this can easily be fixed in future improvements, by setting the highest side of the canvas by cropping the canvas to use equal sides.

I truly enjoyed the project, partly because of the creative freedom it gives, but there are some important reflections and improvements left.
Firstly, I spent most of my time figuring out the recursion code. Even, then I only managed to create a partial recursion, where only the upper right and lower left extremes are being recursed. Moreover, the recursion effect is reached through a loop, so it is not truly a recursion yet, but I am working on perfecting it.Though, at this point, changing the loop max constraint gives a deeper recursion effect by creating more cards inside of cards.

Assignment 1 Self-portrait

The first assignment was different than any assignments I have done, it was a fun activity to me. I learned a lot from the past two classes and learned more by doing this task, using my skill of self learning and learning something new at the moment when i think of it.

The portrait itself, initially I tried to make a portrait of myself but I thought after that it would be cliche and everybody will do the same. I came up afterwards with the alien head which is an emoji that I always use and everyone knows me remembers me instantly, so it is me in another universe. I tried to make the same shape of the aliens head but It got challenging, and tried to shape the eyes with the big black pupils, with a tiny circle that shows the reflection of the light. Afterwards I got an idea of drawing some stars behind the head, I tried to draw the quad and shape it afterwards to look like a star but I found it hard fixing the dimensions and not the way I wanted it to be. I came up with an idea of making tiny points all over the canvas behind the head, going back to the reference page in P5 website, I created a starry universe by using the dots and with the command random() and made them infinite by using a loop function to create the starry effect.

Through this assignment I learnt a lot and loved the process of doing it. As a freshman I want to improve my self learning skills and this assignment is  helping me achieving this skill that will help me in my future courses throughout my four years at the university.


function drawAlien(x, y) {
  // Alien face
  fill(0, 200, 120, 50);
  ellipse(x, y, 100, 110); // Head

  // Eyes
  fill(0);
  ellipse(x - 20, y - 10, 30, 40); // Left eye
  ellipse(x + 20, y - 10, 30, 40); // Right eye

  // Pupils
  fill(255);
  ellipse(x - 29, y -17, 5, 10); // Left pupil
  ellipse(x + 29, y -17, 5, 10); // Right pupil

  // Smiling mouth
  noFill();
  stroke(0);
  strokeWeight(3);
  arc(x, y + 20, 10, 15, 0, PI);
}


Loss and Love- Self Portrait_Assignment #1

Concept: As a first time coder, I wanted to include as many shapes as possible in my self-portrait to get the know-how of how they work. During the ideation process, two things very relevant to my personality stood out to me: a) that I see the inherent good in the world, assuming positive intentions to people. I thought a good metaphor to represent this would be to show the character “seeing the world through rose colored glasses”. Secondly, I wanted to show that experiencing loss and love is a normal part of human life but what matters is having the spirit of acknowledging the loss, still smiling and moving forward. That’s why I coded a heart and incorporated motion into it giving the effect that it is shattering but my character’s smile remains undefeated. The rainbow color background just adds another happy go lucky element to the sketch. This sketch is aspirational in some ways too as it tells me to not take things too seriously and to remember to smile more often.

function setup() {
createCanvas(400, 400);
}
function draw() {
background(220);
//rainbow background
//violet: fill(148, 0, 211);
//indigo: fill(75, 0, 130);
//blue: fill(0, 0, 255);
//green: fill(0, 255, 0);
//yellow: fill(255, 255, 0);
//orange: fill(255, 127, 0)
//red: fill(255, 0 , 0);

fill(255, 0, 0);
rect(1, 0, 500, 30);
fill(255, 127, 0);
rect(1, 30, 500, 30);
fill(255, 255, 0);
rect(1, 60, 500, 30);
fill(0, 255, 0);
rect(1, 90, 500, 30);
fill(0, 0, 255);
rect(1, 120, 500, 30);
fill(75, 0, 130);
rect(1, 150, 500, 30);
fill(148, 0, 211);
rect(1, 180, 500, 30);
fill(255, 0, 0);
rect(1, 210, 500, 30);
fill(255, 127, 0);
rect(1, 240, 500, 30);
fill(255, 255, 0);
rect(1, 270, 500, 30);
fill(0, 255, 0);
rect(1, 300, 500, 30);
fill(0, 0, 255);
rect(1, 330, 500, 30);
fill(75, 0, 130);
rect(1, 360, 500, 30);
fill(75, 0, 130);
rect(1, 390, 500, 30);
fill("black");
stroke("green");
strokeWeight(2);
ellipse(200, 350, 250, 370);
fill("skyblue");
ellipse(200, 180, 155, 170);
fill("#F60959");
rect(160, 150, 30, 20);
rect(207, 150, 30, 20);
stroke("#FFEB3B");
strokeWeight(1);
line(191, 161, 207, 161);
line(160, 161, 134, 138);
line(238, 161, 268, 139);
fill("red");
strokeWeight(1);
stroke("red");
triangle(122, 306, 181, 307, 152, 351);

// Semi circles - Heart
arc(139, 307, 35, 50, PI, 0, OPEN);
arc(165, 307, 35, 50, PI, 0, OPEN);

//background

fill("rgb(248,71,102)");
// curve(176, 201, 176, 219, 237, 212, 248, 195);
arc(195, 220, 40, 40, 0, PI, CHORD);
fill("#A26B58");
strokeWeight(0);
ellipse(194, 98, 50, 30);
ellipse(159, 106, 50, 30);
ellipse(140, 125, 50, 30);
ellipse(226, 101, 50, 30);
ellipse(259, 110, 50, 30);
ellipse(271, 129, 50, 30);
ellipse(128, 145, 50, 30);
ellipse(121, 169, 50, 30);
ellipse(278, 150, 50, 30);
ellipse(281, 173, 50, 30);

let coordinates = "X:" + mouseX + " Y:" + mouseY;
text(coordinates, 10, 20);
}

A code that I am particularly proud of is using two arcs and a triangle to code the heart:
triangle(122, 306, 181, 307, 152, 351);

// Semi circles - Heart
arc(139, 307, 35, 50, PI, 0, OPEN);
arc(165, 307, 35, 50, PI, 0, OPEN);

My reflection from the self portrait is that I need to brush up on my geometry and revisit the PI system as I would just use trial and error for my arcs but knowing the radian system more precisely would have helped me code faster. Further, in the next iteration, I would like for the semi-circles of the heart and the triangle to come from opposite direction so that when the viewer sees the portrait first the heart is not visible but on interaction with the mouse, the elements come together and form the heart.

Assignment 1: Self-portrait

Self-Portrait

The aim was to draw a simple 2D portrait using basic shapes and solid colours. Since it was my first time experimenting with p5, I kept my design fairly simple and mainly worked on familiarising myself with the basic concepts. I would love to continue improvising my self-portrait as I learn new skills.

For the portrait, I used simple geometric shapes for the head, hair, eyes, nose and mouth. I used pre-defined constants like PI and QUARTER_PI to draw arcs and ellipses. I used the p5js reference library to learn how to rotate a shape.

In reflecting on this project, I realised there are many possibilities to make the portrait more creative and personalised. For example, I could add interactivity to have different facial expressions. I could also add more detail like ears, eyebrows, and hair texture. The background could be customisable with different colours or shapes.

I look forward to learning more complex p5js functionality. In my next projects, I plan to incorporate animation to bring more life into my artwork. I now feel more comfortable with the basic syntax of p5js. With more practice, I hope to make projects that are visually engaging and fun to interact with. I’m excited to continue growing my coding and creative skills.

arc(200, 300, 50, 20, 0, PI); 
// hair
strokeWeight(1);
stroke('rgb(53,30,30)');
fill('rgb(53,30,30)'); 
angleMode(RADIANS);
rotate(0.72);
ellipse(240, 35, 50, 130);
rotate(1.5);
ellipse(10, -300, 50, 130);


Yaakulya’s Assignment 1: Portrait using 2D Primitive Shapes

Concept: Since my childhood, I’ve been a big fan of Batman. Therefore, I decided that my concept for this assignment would be to create a stylized portrait of Batman using basic 2D shapes in P5.js. I aimed to capture the iconic features of Batman, such as his mask, ears, and expression, while keeping the overall design simple yet recognizable.

Highlight Code: One part of the code that I’m particularly proud of is the mouth drawing section where I depicted Batman’s calm neutral expression by simple Trapezoid shape instead of just putting some simple rectangle. This was achieved by using the beginShape() and endShape() functions to create a custom shape representing the mouth, emphasizing Batman’s facial expression. Moreover I’m also proud of the iconic text “I am BATMAN !” on the body, I achieved this by using textStyle()and textAlign() functions.

Here’s my Portrait:

Here’s my Code:

function setup() {
  createCanvas(800, 600);
  background('#81838C');
}

function draw() {
  // Mask
  fill('#262626');

  
  beginShape();
  vertex(220, 110);
  vertex(160, 320);
  vertex(210, 470);
  vertex(410, 508);
  vertex(390, 485);
  vertex(410, 508);
  vertex(610, 470);
  vertex(660, 320);
  vertex(600, 110);
  endShape(CLOSE);

  // Ears
  // Left
  beginShape();
  vertex(170, 235);
  vertex(220, 10);
  vertex(280, 100);
  endShape(CLOSE);

  // Right
  beginShape();
  vertex(650, 235);
  vertex(600, 10);
  vertex(540, 100);
  endShape(CLOSE);

  // Skin
  fill('#D3B296');
  beginShape();
  vertex(200, 380);
  vertex(230, 480);
  vertex(410, 508);
  vertex(590, 480);
  vertex(620, 380);
  endShape(CLOSE);

  // Mask
  fill('#262626');
  triangle(200, 380, 410, 400, 620, 380);

  // Eyes
  fill('#EFEFEF');
  ellipse(260, 320, 100);
  ellipse(560, 320, 100);

  // Nose
  fill('#333333');
  triangle(409, 340, 385, 392, 408, 395);
  triangle(411, 340, 435, 392, 413, 395);

  // Mouth (showing neutral expression)
  fill('#A85555');
  beginShape();
  vertex(300, 440);
  vertex(340, 470);
  vertex(480, 470);
  vertex(520, 440);
  endShape();

  // Shoulders
  fill('#262626');
  rect(200, 530, 400, 80);
  fill('#FFFF00'); // Yellow color
  textSize(18);
  textStyle(BOLD);
  textAlign(CENTER, CENTER);
  text("I AM BATMAN!", 400, 570);
}

Reflection and Ideas for Future Work or Improvements: Reflecting on this assignment, I’m proud of how I utilized basic shapes to create a recognizable portrait of Batman. However, there are areas for improvement and future exploration:

1. While the overall design captures the essence of Batman, refining the details such as adding more intricate features (Curves) to the mask and ears could enhance the likeness.

2. Exploring different color palettes and textures (batman logos and yellow emblem) could add depth and dimension to the portrait, making it more visually appealing.

3. Incorporating dynamic elements such as animations or interactive features (like cape flying behind) could bring the portrait to life and engage the viewer in a more immersive experience.

Overall, this assignment was a great opportunity to experiment with primitive 2D shapes and express creativity within the constraints of P5.js. Moving forward, I look forward to further refining my skills and exploring new techniques to create even more compelling artworks.

Self-Portrait: Bird by Bytes

Concept

My aim was to create any drawings using geometric shapes. I had previous experience drawing illustrations but had never coded them to visualize them. That’s why I decided to go through bunch of geometric pictures on the internet and came up with the idea of making a ‘toucan’. I chose to go with a ‘funky colours’ concept, so I separated the background into two triangles and painted them different colors. Then I decided to sketch  on paper to see how many shapes I needed.

I went through everything and chose to use two triangles, four semi-circles, two rectangles, two ellipses, one line, and one circle to represent the toucan’s body. The body is formed of ellipses, the head is made of two semi-circles, the beak is made of a rectangle and a semi-circle, and the feet are made of another semi-circle.
Here is the Sketch that I made

Image

Code

Being able to rotate the ellipse diagonally, because when I was dealing with other coordinates, it was difficult for me to get the shapes to form something that resembled what I was attempting to create. And after quite a bit of effort, I was able to arrange all of the shapes in their proper arrangement. My first plan was to have transparency in the colour of some shapes, but each time I changed the transparency, the colour changed, so I used this plugin  in Chrome to retrieve the colour codes, which was quite useful. Here are some code snippets that demonstrate how I created a diagonal oval shape and animated the eye movement.

function setup() {
  createCanvas(500, 600);
  background(225);
   }

function draw() {
  // for the left triangle of the background
  c = color('hsl(65,16%,54%)');
  fill(c);
  triangle(0, 0, 500, 0, 500, 600); 

  // for the right triangle of the background
  b = color('hsl(179,43%,22%)');
  fill(b);
  triangle(0, 0, 0, 600, 500, 600); 
  

  // beak semi-circle right side
  arc(355, 135, 175, 175, radians(270), 0);
  
  // beak rect
  b = color('hsl(37,75%,52%)');
  fill(b);
  rect(270, 48, 86, 87); 
  
  //feet
  fill('#212c3f')
  arc(340, 560, 240, 240, radians(180), 0);

  //below body
  noStroke();
  fill('hsl(30,81%,59%)');
  ellipse(150, 390, 245, 190) 
  
  // rect for feet
  fill('#c2bd48');
  rect(220, 440, 115, 170);


  // Draw a diagonal oval
  push(); // Start a new drawing state
  translate(250, 300); // Move to the desired position
  rotate(PI / 5); // Rotate by 45 degrees (PI/4 radians)
  fill('#060d30'); // White color for the oval
  ellipse(20, 15, 380, 250); // Draw the oval at the new origin
  pop(); // Restore original state

  //bigger one - head
  fill('#212c3f')
  arc(255, 180, 300, 270, radians(90), radians(270)); 
  
  //head smaller semi-circle
  fill('#e9e4b9')
  arc(255, 120, 180, 150, radians(90), radians(270)); 
  
  // Static line above the eye
  stroke(0); // Set line color
  line(240, 95, 180, 95); // Line for the eye
  
  // Dynamic eye that follows the mouse cursor horizontally
  let eyeX = constrain(mouseX, 190, 230); // Constrain the eye's horizontal movement
  let eyeY = 107; // Keep the eye's vertical position constant
  
  fill(0); // Set fill color for the eye
  noStroke(); // No border for the eye circle
  circle(eyeX, eyeY, 20); // Draw the eye circle
}


Embedded sketch

Reflection

I think having a dynamic image would be a great idea. And using other forms of shapes, such as curves and beziers, would help me create a better graphic. Because it is difficult to play with shapes in such a way that the coordinates coincide without leaving unnecessary gaps. Another thing I want to improve is my understanding of color theory, because even though I was able to obtain the color codes I desired, I know I fell short of obtaining the various transperacy levels of colors required for particular shapes.

Assignment 1: Self-portrait

I embarked on a fascinating journey to bring a digital character to life using p5.js, a powerful JavaScript library. The challenge was not just to create a drawing, but to infuse it with personality and style, all through the lens of code.

Concept: A Quirky Digital Companion

My concept revolved around creating a digital character that exuded both whimsy and sophistication. Picture a figure with a charming hat, expressive eyes, and a friendly smile – a character that could be a companion on the screen, blending simplicity with a touch of elegance.

🗒️ Starting with a Blank Canvas
I began with the basics – createCanvas(600, 600) – giving myself a broad canvas for my imagination. Centering my character was crucial, so I smartly positioned it using x = width/2; y = height/2;. It felt like setting the stage for a one-of-a-kind show.

🎩 Crafting the Face and a Dapper Hat
The face had to be inviting, so I opted for a friendly, round shape using an ellipse. Then came the hat – a symbol of sophistication. Crafting it with an arc and a rect felt like adding a crown to my character.

👀 Eyes That Speak Volumes
Ah, the eyes! They were my favorite part. Getting them right was like threading a needle – a delicate balance of size and expression. With careful placement of ellipses for the whites and irises, I managed to give them a sparkle of life.

👃 A Nose with Character and a Smile to Match
The nose, created with subtle arc functions, had its own story. Not too big, not too small – just right. The mouth was a simple arc, but it carried a gentle, inviting smile, as if ready to greet the world.

👂 Ears and Neck – Bringing It All Together
The ears, though a small detail, gave the face a sense of completeness. And the neck, a sturdy rectangular foundation, made everything look harmonious.

👔 Stylish Touches with a Tie and Shoulders
Adding the tie was like putting the final piece of a puzzle. It wasn’t just about color – it was about adding character. The broad shoulders, a simple rectangle, gave the figure a sense of strength and presence.

🎨 Coloring My Creation
Choosing the colors and stroke weights was like dressing up my character for a grand ball. Every shade added a new layer of personality, turning lines and shapes into a friend I’d just made.

Proud Coding Achievement: The Eyes

The part of the code I’m particularly proud of is how I brought the eyes to life. Using the ellipse function for the whites and irises, I managed to create a gaze that was both lively and expressive. It’s these eyes that give the character its soul, making it more than just a collection of shapes.

//eyes
strokeWeight(4);
fill(255);
ellipse(3*x/4, 4*y/5, x/3.5, y/8);
ellipse(5*x/4, 4*y/5, x/3.5, y/8);

//iris
strokeWeight(3);
fill(255);
ellipse(3*x/4, 4*y/5, x/7, y/9);
ellipse(5*x/4, 4*y/5, x/7, y/9);

//pupil
fill(0);
ellipse(3*x/4, 4*y/5, x/13, y/15);
ellipse(5*x/4, 4*y/5, x/13, y/15);

Embedded Sketch: A Digital Portrait

This code, when run in a p5.js environment, brings forth a character that stands out with its unique hat and tie, set against a simple background. The colors, strokes, and shapes work in harmony to present a figure that’s both inviting and intriguing.

The code:

let x;
let y;

function setup()
{
  createCanvas(600, 600);
  x = width/2;
  y = height/2;
}
function draw() {
background(200)

//neck
fill(241, 194, 125);
stroke(205, 133, 63);
rect(x - 43, y+173, 90, 70);
  
//Face
strokeWeight(3);
fill(241, 194, 125);
ellipse(x, y, 6.5*x/5, 7*y/6);

//Hat 
fill(0); 
stroke(0);
arc(x, y - (5 * y / 12), 5 * x / 5, 200, PI, TWO_PI);
rect(x - (6.5 * x / 10), y - (5 * y / 12) - 10, 6.5 * x / 5, 20);

//eyes
strokeWeight(4);
fill(255);
ellipse(3*x/4, 4*y/5, x/3.5, y/8);
ellipse(5*x/4, 4*y/5, x/3.5, y/8);

//iris
strokeWeight(3);
fill(255);
ellipse(3*x/4, 4*y/5, x/7, y/9);
ellipse(5*x/4, 4*y/5, x/7, y/9);

//pupil
fill(0);
ellipse(3*x/4, 4*y/5, x/13, y/15);
ellipse(5*x/4, 4*y/5, x/13, y/15);


//eyebrows
strokeWeight(6);
line(3*x/4-20,4*y/5-y/10,3*x/4+20,4*y/5-y/10);
line(5*x/4-20,4*y/5-y/10,5*x/4+20,4*y/5-y/10);


//nose
noFill();
stroke(205, 133, 63);
strokeWeight(4);
arc(x+12, 5*y/6 + 10, 7, y/2.5, 0, HALF_PI);
arc(x - 23, y+30, 21, 21, HALF_PI-QUARTER_PI/3, PI+2*QUARTER_PI);
arc(x+16, y+30, 21, 21,  -HALF_PI, HALF_PI+QUARTER_PI/2);
arc(x-3, y+40, 30, 21,  0, PI);

//mouth
noFill();
stroke(0);
arc(x, y+95, 95, 21,  0, PI);
strokeWeight(7);


//ears 
strokeWeight(3);
fill(241, 194, 125);
stroke(205, 133, 63);
arc(x/3.6 + 26, y - 10, x/4, y/3.5, HALF_PI, PI+HALF_PI );
arc(x/3.6 + 26, y - 10, x/8, y/7, HALF_PI, PI+HALF_PI );
arc(x+2.9*x/4 - 26, y - 10, x/4, y/3.5, -HALF_PI, PI-HALF_PI);
arc(x+2.9*x/4 - 26, y - 10, x/8, y/7, -HALF_PI, PI-HALF_PI);

// shoulders
fill(255);
stroke(0);
rect(100, 540, 400, 80);

//tie
fill(255, 0, 0); 
triangle(x - 10, y + 240, x + 5, y + 240, x, y + 270); 
triangle(x - 15, y + 270, x + 15, y + 270, x, y + 310);

  
fill(0);
rect(x - 125, y + 240, 25, 60); 
rect(x + 100, y + 240, 25, 60);
  
}


Reflection and Future Directions

Reflecting on this project, I realize that while I’ve created something delightful, there’s always room for growth and innovation.

  • Animation: Bringing motion to the character, like a nodding head or blinking eyes, could add a new layer of interaction.
  • Interactivity: Allowing users to change aspects like the hat’s color or the tie’s pattern could make the character more engaging.

This project was not just about coding a character; it was about weaving a narrative through digital art. It’s a reminder that code is not just functional; it’s a canvas for creativity. As I look forward to future projects, I’m excited to explore new ways to blend storytelling with technology, creating digital experiences that resonate and delight.