Conceptualization:
The central idea was to build a simple connection between physical and digital worlds.
Step 1: Single-Sensor and p5.js Movement
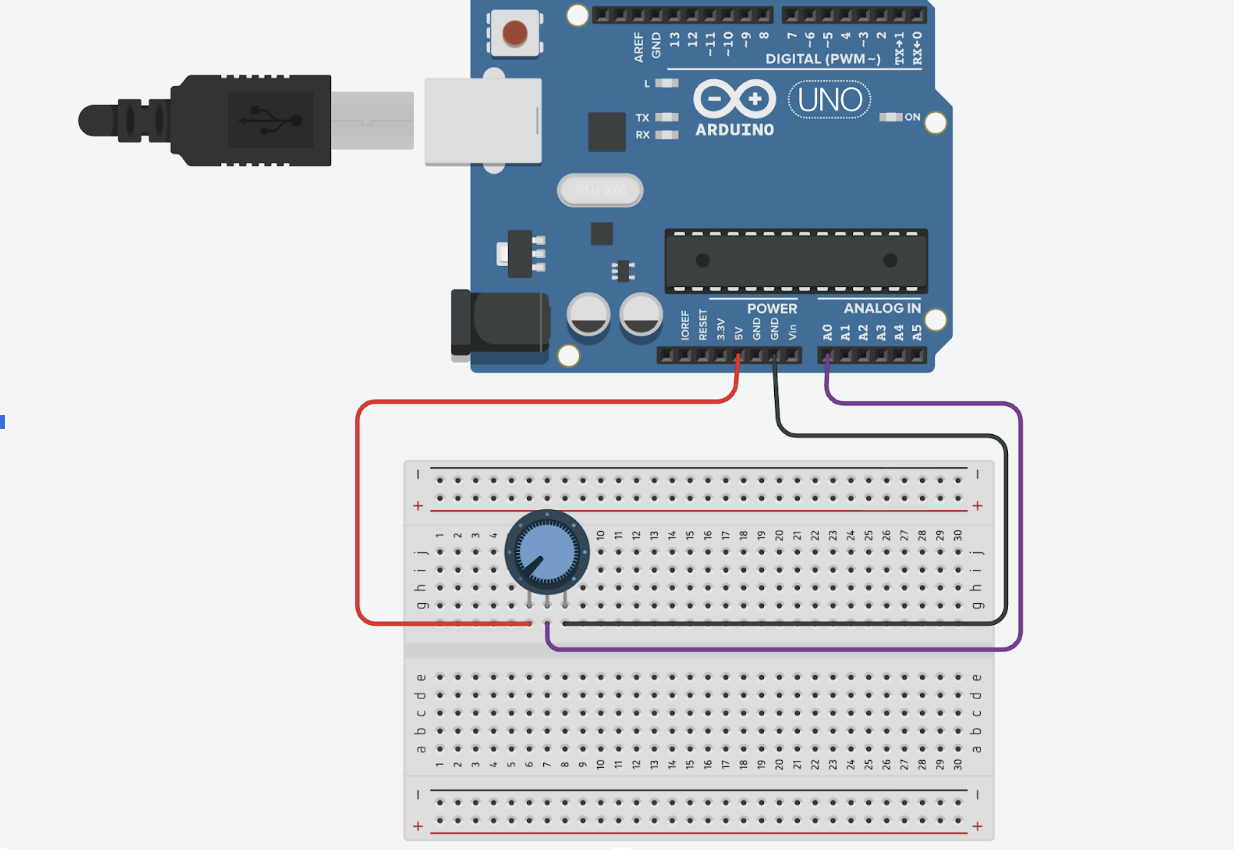
Using only one analog sensor (a potentiometer), the Arduino continuously reads values and streams them to p5.js over serial. p5.js interprets those readings and moves an ellipse along the horizontal axis, keeping it vertically centered.
Step 2: LED Brightness Controlled by p5.js
Next, I reversed the flow. Instead of only reading from Arduino, I sent numerical values from p5.js back to the board so it could adjust LED brightness using PWM.
Step 3: Gravity + Wind Integration
Finally, I modified the p5.js gravity wind sketch. Each time the ball hits the “ground,” p5 sends a signal to Arduino, turning an LED on briefly before switching back off. Meanwhile, an analog sensor feeds continuous data to p5.js to influence the wind force acting on the falling ball.
Video Demonstration:
https://drive.google.com/file/d/1Morf2y7cxIAgYLHKVnitsadjr813cX4Z/view?usp=sharing
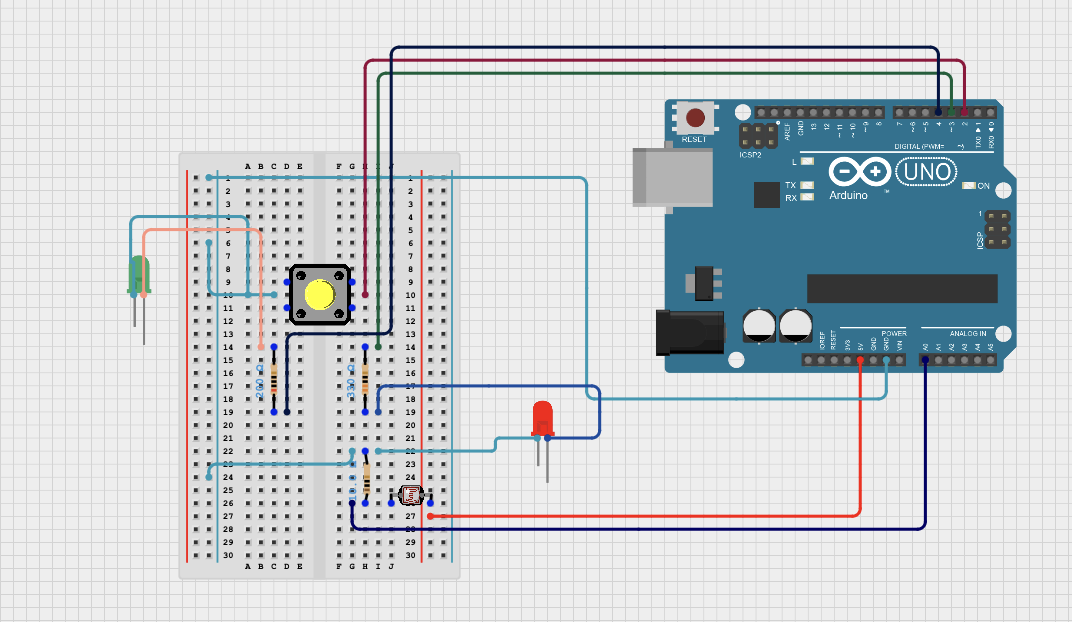
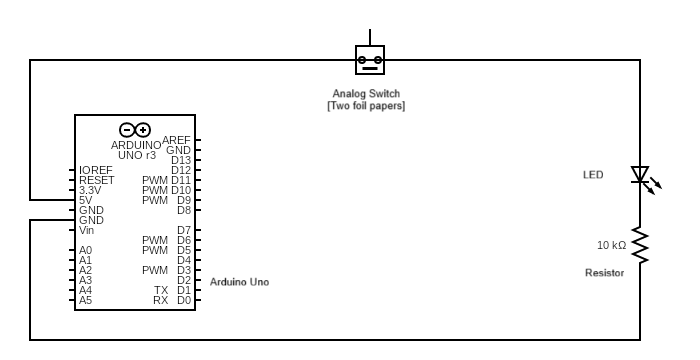
Schematic:
Code Highlight:
oid setup() {
 Serial.begin(9600);
  // wait for p5 to connect
 while (Serial.available() <= 0) {
   Serial.println("0,0");
   delay(300);
 }
}
void loop() {
 // wait for data from p5
 while (Serial.available()) {
   digitalWrite(LED_BUILTIN, HIGH);
    Serial.read();     // read incoming

   int sensorValue = analogRead(A0); // read sensor

   Serial.println(sensorValue);   // send sensor value
 }
 digitalWrite(LED_BUILTIN, LOW);
}
// serial variables
let port;
let connectBtn;
let sensorValue = 0;

function setup() {
  createCanvas(640, 360);

  port = createSerial();   // create serial connection

  // create connect button
  connectBtn = createButton("Connect to Arduino");
  connectBtn.position(10, 10);
  connectBtn.mousePressed(connectToArduino);
}

function draw() {
  background(220);

  // read from Arduino
  let str = port.readUntil("\n");
  if (str.length > 0) {
    sensorValue = int(str);
  }

  port.write("\n");   // send handshake to Arduino


  let xPos = map(sensorValue, 0, 1023, 0, width);   // map sensor to horizontal position

  // draw ellipse in middle vertically
  fill(0);
  ellipse(xPos, height/2, 50, 50);

  // show sensor value
  fill(0);
  noStroke();
  text("Sensor: " + sensorValue, 10, 50);
  text("Turn potentiometer to move circle", 10, 70);
}

// connect to Arduino
function connectToArduino() {
  if (!port.opened()) {
    port.open(9600);
  }
}
Reflection:
This project helped me practice the bidirectional serial communication between Arduino and p5.js.